This recipe for Chipotle corn salsa unlocks the secrets of Chipotle Corn Salsa and ensures you can have it whenever you want. This post will guide you through the steps to create this tantalizing side dish that can transform any meal into a festive occasion. Whether you’re a seasoned chef or a kitchen novice, our easy-to-follow instructions will help you whip up this crowd-pleaser in no time.
What is Chipotle?
Chipotle Mexican Grill is a renowned restaurant chain that has captivated food lovers across the United States and beyond with its commitment to fresh, high-quality ingredients and customizable Mexican-inspired cuisine. Founded in 1993, Chipotle emphasizes sustainable farming practices, often sourcing organic and locally-grown ingredients to create its flavorful dishes. The restaurant is best known for its burritos, tacos, and bowls, which can be personalized with a variety of meats, rice, beans, and toppings.
What Makes Chipotle’s Corn Salsa Recipe Special?
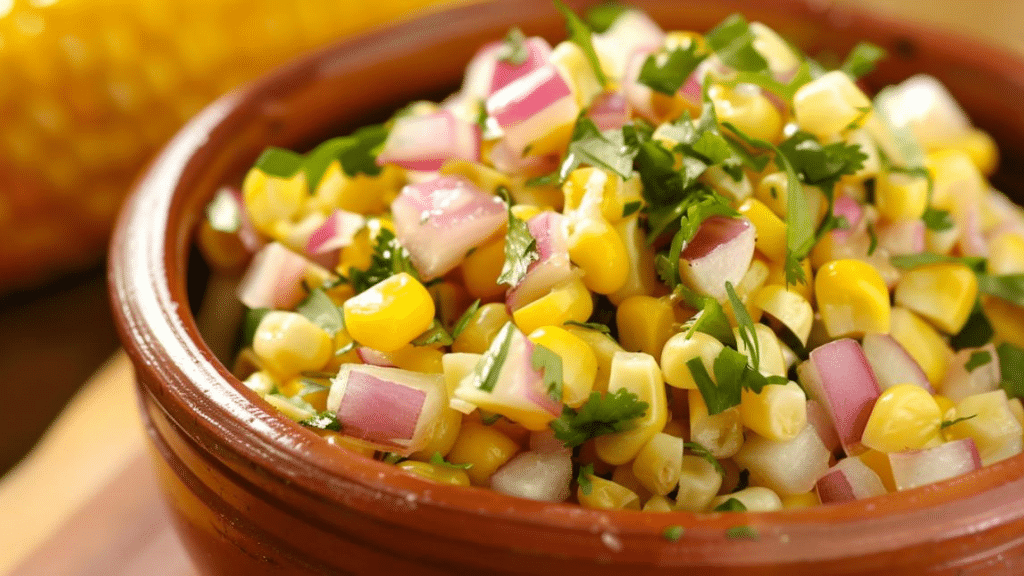
Chipotle’s corn salsa stands out among the array of fresh, vibrant toppings they offer. What makes it special is its perfect blend of sweet and spicy flavours. Made with sweet yellow corn, this salsa is jazzed up with red onion, jalapeño, and cilantro, adding layers of flavour that are both refreshing and slightly tangy. The addition of lime juice gives it a zesty finish, creating a delightful balance that enhances any meal. It’s this unique combination of simple ingredients and robust flavours that makes Chipotle’s corn salsa a memorable and popular choice for enhancing the flavour of any dish.
How to make this Recipe For Chipotle Corn Salsa
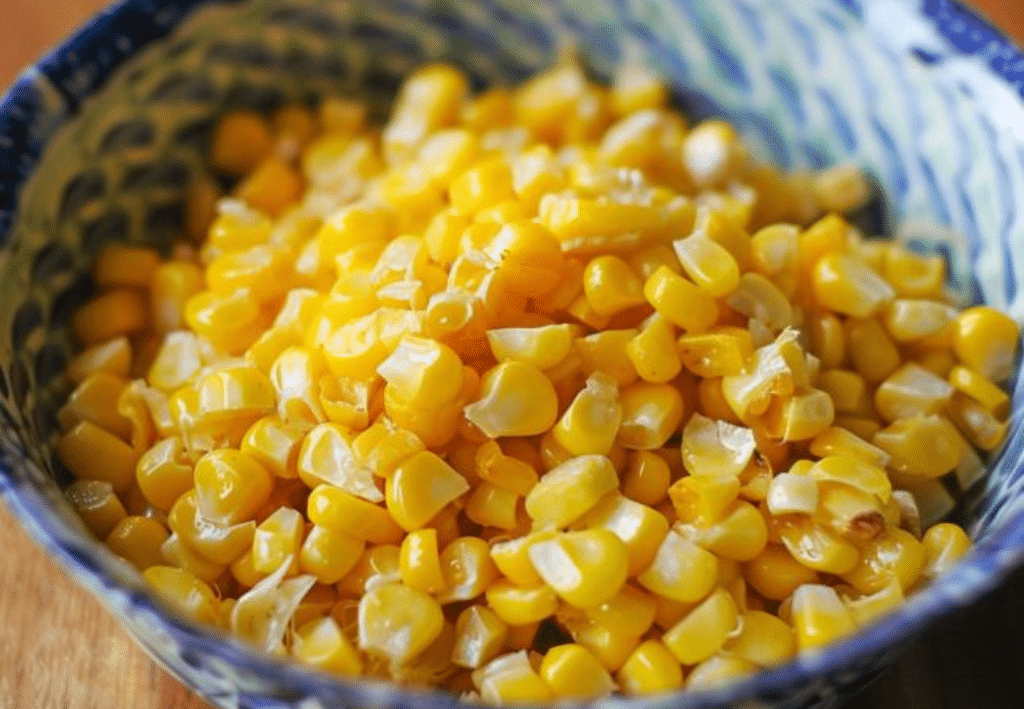
What is in Chipotle corn salsa? Well, one of the first Chipotle corn salsa ingredients is, of course, corn. Choosing the right type of corn is crucial to capturing the essence of Chipotle’s corn salsa. Canned corn niblets are not only convenient but also consistently sweet and crunchy. Their uniform size and year-round availability ensure that your salsa is perfect every time you make it, avoiding the variability that can come with fresh corn, which may not always be in season and frozen corn, which often has a chewy texture. Open the can, drain off the liquid, and you are ready to
The second Chipotle corn salsa ingredients
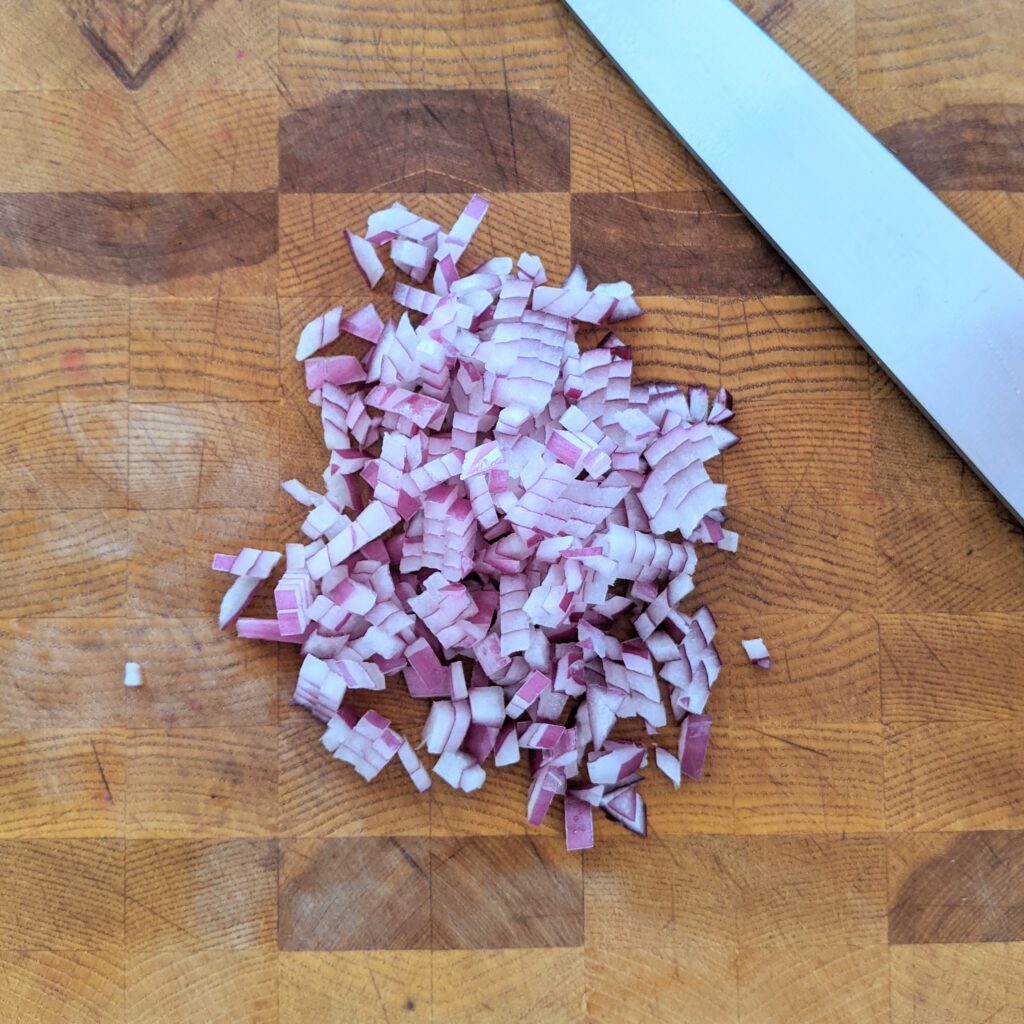
The second ingredient in Chipotle corn salsa is red onion. The onion should be minced as fine as you can manage. To mince a red onion, begin by slicing off the top of the onion and peeling away the outer layers. Cut the onion in half from top to bottom, and lay each half flat on your cutting board. Make a series of vertical slices, then horizontal cuts, being careful not to slice all the way through the back of the onion. Finally, chop down across the cuts to produce fine, even mince. This method minimizes tears and ensures your onion pieces distribute flavour more evenly throughout the salsa.
Is Chipotle corn salsa spicy?
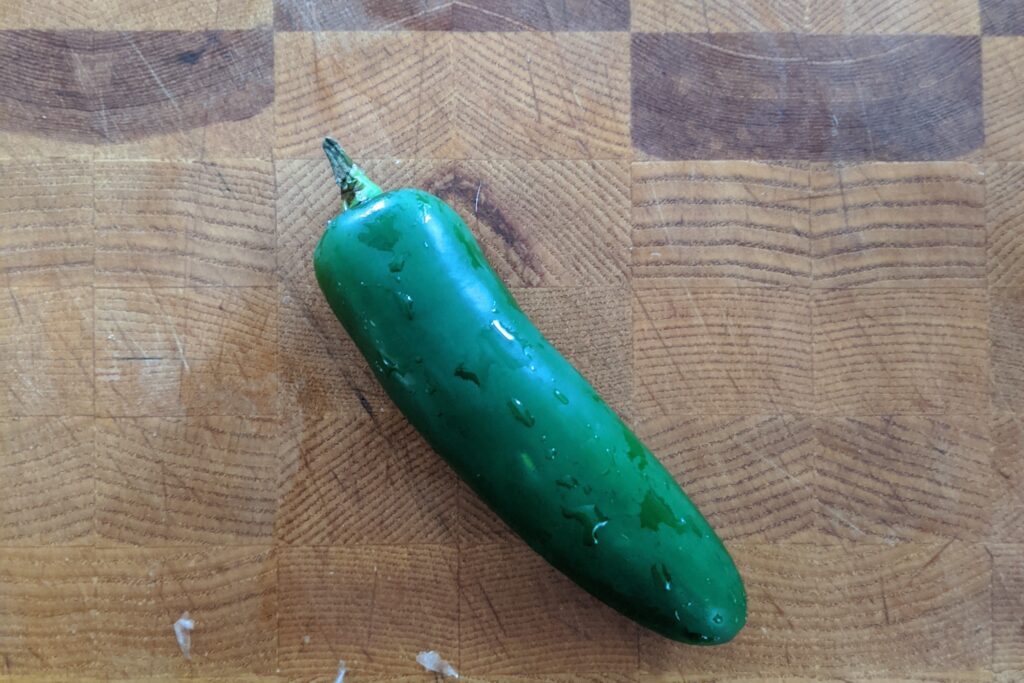
Although the third ingredient in Chipotle corn salsa recipe is jalapeño, the salsa isn’t spicy. The heat of the jalapeño is balanced by the sweetness of the corn, the sharpness of the onion, and the acidity of the lime juice. It helps that the seeds are removed from the jalapeño before dicing. Removing the seeds ensures that your copy cat Chipotle corn salsa isn’t spicy.
Handling jalapeños requires a bit of care to moderate their heat. Start by slicing the pepper in half lengthwise. Using a spoon, gently scrape out the seeds and the white membranes—the source of the pepper’s heat. Once deseeded, lay the jalapeño flat on the board and slice it into thin strips before turning your knife to mince these strips finely. This technique helps control the spiciness of your copycat Chipotle salsa, allowing the other flavours to shine through.
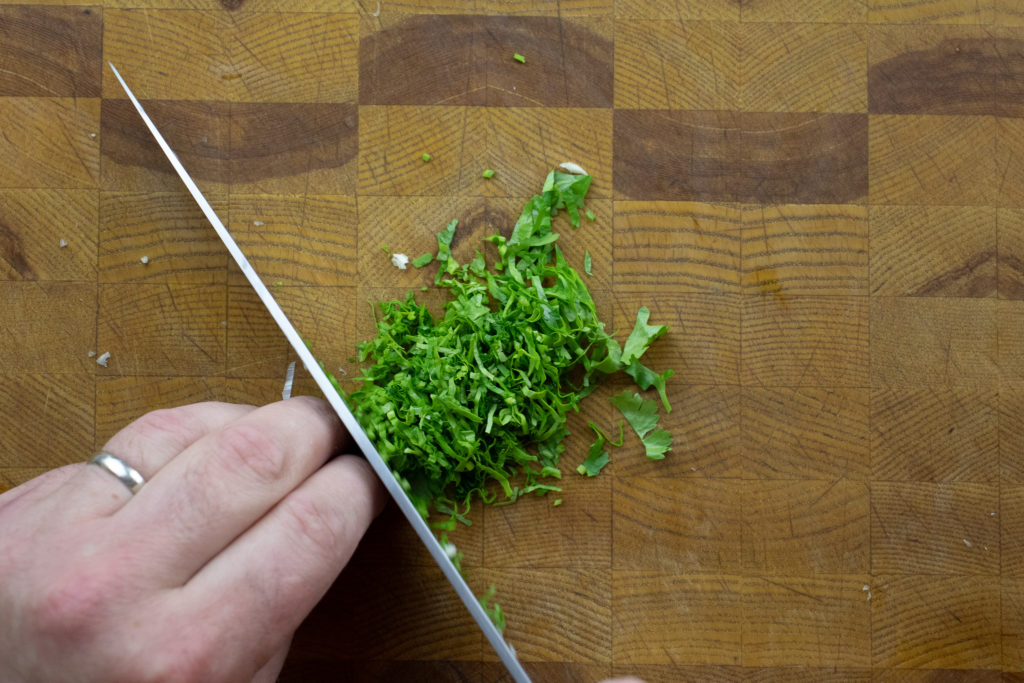
The third Chipotle corn salsa ingredient is Cilantro.
Fresh cilantro is the key to bringing all the different flavours of Chipotle corn salsa together. To chop cilantro, gather a bunch of cilantro and give it a good rinse under cold water, shaking off any excess moisture. Bunch the leaves together and, using a sharp knife, make clean, swift cuts through the leaves. Turn the bunch and continue chopping until the herb is finely diced. This method prevents bruising and keeps the cilantro vibrant and flavorful.
Is there lime juice in Chipotle corn salas?
Yes, there is lime juice in the corn salsa from Chipotle. Getting the maximum amount of juice from limes can be achieved by rolling the lime under your palm before cutting it open—this breaks down some of the fibres. Then, cut the lime in half and use either a hand juicer or ream it with a fork to extract the juice. If you’re in a pinch, or fresh limes aren’t available, substituting bottled lime juice is perfectly acceptable. Use one tablespoon of bottled lime juice to replace the juice of one medium lime.
What does seasoning to taste mean?
Seasoning to taste means that you taste your food, add a little seasoning (salt, pepper, acid, sugar, heat), then taste again. You continue this process until the flavour of your food is what you’d like.
The key to perfecting your Chipotle Corn Salsa lies in seasoning it to your taste. Start with a pinch of salt and pepper, then adjust according to your preference. Taste as you go, and remember that the flavours will meld and intensify over time, especially after the salsa has had a chance to chill in the fridge.
How to make Chipotle Corn Salsa
The process of making a copycat Chipotle corn salsa recipe couldn’t be simpler. Put the corn, onion, jalapeño, cilantro, and lime juice in a bowl—season lightly with salt and pepper. Mix well. Taste and add a little more salt and pepper as needed. Cover the bowl and put it in the fridge for 30 minutes to marinate, then serve.
Recipe for chipotle corn salsa
This recipe for corn salsa from Chipotle is exactly what your looking for if you want that same delicious vibrantly flavoured corn salsa you get at Chipotle.
1can 12 fl oz or 341 ml corn niblets, drained and rinsed
1/2cupred onion, finely chopped
1jalapeño, seeds removed and finely chopped(adjust based on heat preference)
2/3cupfresh cilantro, chopped
Juice of 2 limes
1/2teaspoonsalt, or to taste
1/4teaspoonpepper, or to taste
Instructions
Drain and rinse the canned corn to remove any excess liquid and starch. This step helps to freshen up the flavour of the canned corn, making it more similar to fresh corn in taste.
Combine the drained corn, finely chopped red onion, chopped jalapeño, and cilantro in a medium mixing bowl. Mix these ingredients well to ensure they are evenly distributed.
Next, squeeze the juice of two limes over the corn mixture. This step is crucial as the lime juice adds a bright, citrusy flavour that’s key to replicating the Chipotle-style salsa. Don’t forget to add salt and pepper, then stir everything together until well combined.
After preparing the salsa, it’s important to let it marinate in the refrigerator for at least 30 minutes to an hour before serving. This resting time is crucial as it allows the flavours to meld together, intensifying the overall taste and making the salsa more delicious.
Serve your salsa chilled as a side, or use it as a topping for tacos, nachos, burritos, or bowls. It’s also excellent as a standalone dip with tortilla chips.
You’re now all set to create Chipotle Corn Salsa whenever you want. Not only is this salsa delicious and simple, but it’s also a testament to the joy of making vibrant, fresh food at home. Enjoy your culinary creation with chips, over tacos, or as a vibrant side that brings a touch of Chipotle’s signature flair to your table. Happy cooking!
Sourdough baking has witnessed a remarkable resurgence, captivating the hearts of culinary enthusiasts worldwide. Amid the nurturing and feeding of sourdough starters, a common question arises: what to do with the discard? Fortunately, the versatility of sourdough discard opens up a world of culinary possibilities, especially for breakfast, transforming what might seem like waste into gastronomic treasures. Let’s dive into the sustainable and flavourful world of sourdough discard recipes, answering key questions along the way.
What to Make with Discarded Sourdough Starter?
The beauty of sourdough discard lies in its flexibility. Whether you’re a novice baker or a seasoned pro, incorporating sourdough discard into your recipes can add depth, flavour, and texture. From the tangy richness of English Muffins and the crisp, savoury delight of Crackers to the fluffy, comforting Pancakes, sourdough discard can be the star ingredient in a variety of dishes, proving its worth beyond traditional bread baking.
How to Add Sourdough Discard to Any Recipe
Incorporating sourdough discard into recipes is simpler than one might think. It can often be used as a substitute for some of the flour and water in a recipe, thanks to its composition. The key is to balance the liquid and dry ingredients. For every cup of discard used, reduce the recipe’s flour by half a cup and the liquid by a quarter cup. This guideline can help maintain the recipe’s original texture and consistency while imbuing it with the unique characteristics of sourdough.
Are Sourdough Discard Recipes Healthy?
Sourdough discard recipes not only reduce waste but also offer health benefits, making them a wonderful addition to a balanced diet. The fermentation process of the sourdough starter increases the availability of certain nutrients and can help improve digestion. Using the discard in various recipes can add a nutritional boost, especially when combined with whole grains and other healthful ingredients.
What Does Sourdough Discard Do in Recipes?
Sourdough discard introduces a mild tanginess and depth of flavour to recipes, distinguishing them from their non-sourdough counterparts. Its natural fermentation process can also contribute to a lighter, more tender texture in baked goods. Moreover, the lactic acid bacteria present in the discard act as a natural preservative, extending the shelf-life of the final product.
Featured Sourdough Discard Recipes
Sourdough Discard Pancakes
This recipe is a fantastic way to use up that extra sourdough starter discard. The pancakes come out incredibly fluffy and have a slight tang from the sourdough, making them irresistibly delicious.
These sourdough discard crackers are thin, crispy, and full of flavor. They are perfect for snacking, serving with cheese, or as a base for canapés. This recipe is an excellent way to put your discarded sourdough starter to good use.
These sourdough discard English muffins are wonderfully tangy and have that perfect nook-and-cranny texture. They're ideal for breakfast sandwiches or simply toasted with butter and jam.
In conclusion, sourdough discard is a versatile, flavourful, and healthy ingredient that can enhance a wide range of recipes. By incorporating it into your cooking, you not only reduce food waste but also elevate the taste and nutritional value of your meals. Whether you’re whipping up breakfast or snacks, sourdough discard recipes are a testament to the creativity and sustainability possible in modern baking and cooking.
Diving into the world of tacos, there’s one variation that stands out for its bold flavours and irresistible crunch: the crispy pork belly taco recipe. This dish is a game-changer for anyone looking to elevate their taco night. It marries the deep, savoury notes of crispy pork belly with the vibrant zing of pickled red onions and fresh cilantro, all tucked into a soft tortilla embrace. It’s not just a meal; it’s a sensory journey that balances richness with freshness, creating a taste profile that’s hard to forget.
The Star Ingredient: Crispy Pork Belly
Pork belly, with its perfect ratio of meat to fat, is the heart of this recipe. Seasoning it with a mix of sea salt, black pepper, and smoked paprika not only enhances its flavour but also sets the stage for that ultimate crispy finish we’re all after. The secret lies in slow-roasting it first to tender perfection, then giving it a high-heat blast to crisp up the skin. This process might test your patience, but the result is succulent pork with a crackling exterior that’s totally worth the wait.
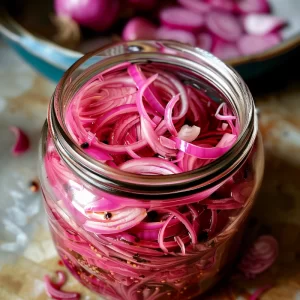
The Fresh Twist: Pickled Red Onions
What really brings these tacos to life is the pickled red onions. Their sharpness and slight sweetness cut through the richness of the pork belly, adding a layer of complexity to each bite. Making them is simple. Combine apple cider vinegar, sugar, salt, and warm water. Letting the onions sit in this pickling solution, whether for an hour or overnight, transforms them into a tangy condiment that you’ll want to add to everything.
Assembly: The Final Touch
With the pork belly perfectly roasted and the onions pickled, assembling the tacos is where the fun really begins. Lay down a warm tortilla, add a generous helping of pork belly cubes, and top them with vibrant onions and fresh cilantro leaves. A squeeze of lime juice over the top brings a bright pop of acidity that ties everything together beautifully.
Why It Works
This crispy pork belly taco recipe isn’t just about combining ingredients; it’s about creating a balance. The richness of the pork is offset by the acidity of the pickled onions, while the cilantro adds a burst of freshness that elevates the entire dish. The contrast of textures—from the crunch of the pork skin to the softness of the tortilla—makes every bite a delight.
In summary, crispy pork belly tacos are more than just a meal; they’re an experience. They bring together the best of what tacos have to offer: bold flavours, contrasting textures, and the joy of customization. Whether it’s a casual dinner or a special occasion, these tacos promise to be a hit, proving that with the right ingredients and a bit of patience, taco night can be nothing short of extraordinary.
Pork Taco Recipe
Pork Belly Tacos
These tacos combine the rich, savory flavor of crispy pork belly with the fresh punch of pickled red onions and cilantro, all nestled in a soft tortilla. It's a fusion of textures and tastes that'll give your taste buds a real fiesta.
Start by pickling the onions: In a jar, combine apple cider vinegar, sugar, salt, and warm water. Stir until the sugar and salt are dissolved. Add the red onions, ensuring they are fully submerged. Let sit for at least 1 hour or refrigerate overnight for best results.
Preheat the oven to 250°F (120°C). Season the pork belly on all sides with salt, pepper, and smoked paprika. Place on a wire rack over a baking sheet and cook for 2-3 hours until tender.
Increase oven temperature to 400°F (205°C) and roast the pork belly for an additional 20-30 minutes until the skin is crispy.
Remove the pork belly from the oven and let it rest for 10 minutes before cutting into bite-sized cubes.
To assemble the tacos, place a few pieces of crispy pork belly on each warmed tortilla.
Top with pickled red onions, fresh cilantro leaves, and a squeeze of lime juice.
Serve immediately with extra lime wedges on the side.
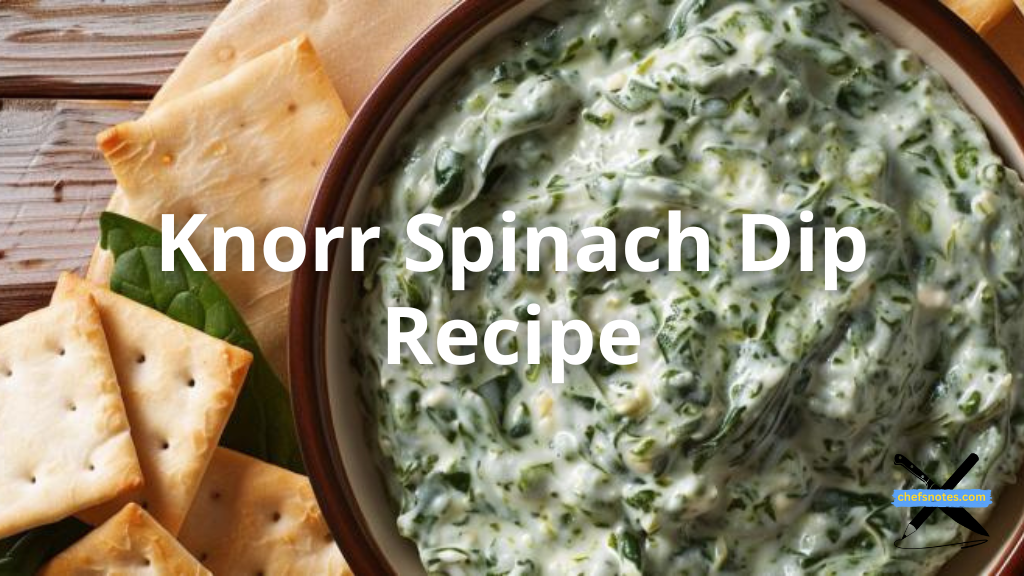
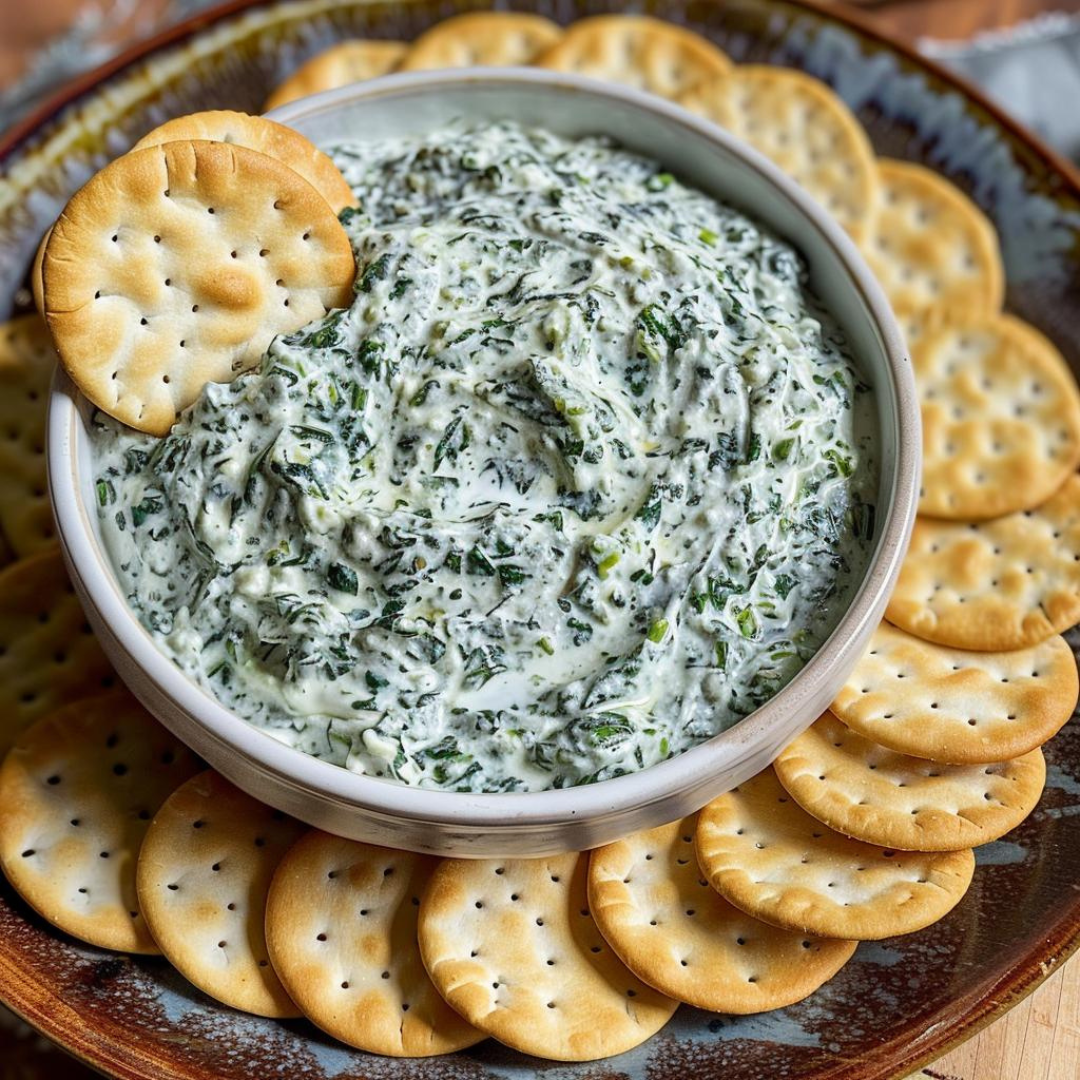
In the world of appetizers, where complexity often reigns supreme, there exists a timeless classic that champions the beauty of simplicity without compromising on flavour. The Knorr Spinach Dip Recipe is a testament to the culinary principle that sometimes, less truly is more. With its straightforward list of ingredients and minimal cooking requirements, this dip has secured its place as a go-to choice for hosts and hostesses aiming to impress without the stress.
The Magic in the Mix
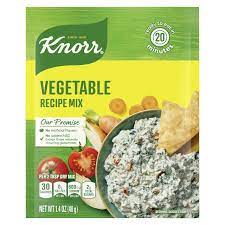
At the heart of this spinach dip recipe, Knorr Vegetable Recipe Mix, a blend of seasonings and dried vegetables that when combined with the right ingredients, transforms into something truly special. The mix serves as the backbone of the dip, providing depth and a burst of flavour that is both unique and comforting.
The Ensemble of Ingredients
The beauty of the Knorr Spinach Dip lies in its harmonious blend of ingredients. Frozen chopped spinach, once thawed and drained, brings a fresh and slightly earthy base to the dish. Sour cream and mayonnaise together create a rich, creamy texture that is irresistible, serving as the perfect canvas for the flavours to meld together. Water chestnuts add a delightful crunch, offering a contrast in texture that elevates the dip to new heights. Finally, chopped green onions sprinkle in a touch of sharpness and colour, rounding off the dish with a fresh burst.
Ease and Versatility
One of the best things about this dip is its quick and easy preparation. With no need for extensive cooking or complicated steps, it’s a recipe that invites even the most kitchen-shy individuals to try their hand at creating a delicious appetizer. This ease of preparation does not come at the cost of versatility. The Knorr Spinach Dip Recipe is a chameleon of sorts, pairing beautifully with an array of dippers. From the traditional crackers and bread chunks to a healthier array of veggie sticks, this dip accommodates all preferences, making it a perfect addition to any gathering.
A Crowd-Pleaser for All Occasions
There’s a reason why the Knorr Spinach Dip Recipe remains a favourite among hosts and guests alike. Its appeal lies not just in its flavour and simplicity but also in its ability to bring people together. It’s a dish that feels at home in a casual family gathering, a sophisticated cocktail party, or a festive holiday event. The dip’s versatility extends beyond its pairing options, adapting effortlessly to the mood and theme of any occasion.
In Conclusion
The Knorr Spinach Dip Recipe is more than just an appetizer; it’s a culinary experience that celebrates the joys of simple cooking. It reminds us that in the world of food, simplicity does not equate to blandness or monotony but opens the door to elegance and flavourful delights. As we gather around tables filled with conversation and laughter, this dip serves as a reminder of the beauty of sharing good food with good company. Whether you’re a seasoned chef or a novice in the kitchen, the Knorr Spinach Dip is a recipe that promises satisfaction in every bite, proving that sometimes, the simplest dishes leave the longest-lasting impressions.
In this post, we will look at how to make the best Caesar rimmer recipe, as well as some tips on how to craft your own Caesar rimmer recipe. Similar to a Bloody Mary but with a unique twist, the Caesar is a beloved beverage across Canada, known for its rich and savoury flavour profile. The secret to an outstanding Caesar often lies in the rimmer (and the clamato juice, yes clam and tomato juice) – that delightful blend of spices that coats the rim of your glass, tantalizing your taste buds even before the first sip. Let’s dive into the world of Caesar rimmers and craft a recipe that will elevate your cocktail experience.
What is a Caesar drink? Canada’s Cherished Cocktail
The Caesar is Canada’s most cherished cocktail. It’s as Canadian as maple syrup and hockey and was invented in 1969 by Walter Chell in Calgary, Alberta. Its distinctive flavour comes from Clamato juice – a blend of clam and tomato juices – seasoned with hot sauce, Worcestershire sauce, and other spices. The rimmer, a critical element, provides an extra layer of taste and texture.
Caesar drink vs Bloody Mary
The Caesar and the Bloody Mary are both iconic cocktails celebrated for their savoury, spicy flavours, which each bring their own unique charm to the cocktail scene. The base for both drinks, though similar, has one very key difference. While the Bloody Mary has a base of vodka and tomato juice, the Caesar drink uses vodka and a uniquely Canadian mixture of tomato and clam juice called clamato. The only other main difference is that a Bloody Mary typically has lemon juice in it, and Caesar often has lime juice.
The Art of the Perfect Caesar
Creating the perfect Caesar is about balance. The key is to complement the drink’s savoury depth without overpowering it. Our rimmer recipe achieves this with its blend of smoky, spicy, and herby notes. There is a trend now to garnish a Canadian Caesar drink with just everything up to and including burger sliders. But, I think it’s best to let the drink stand on its own two feet and stick with the traditional garnish of a celery stick and a lemon or lime wedge. Put a good amount of Worcestershire sauce and Tobassco in there, use our rimmer recipe, and obviously Clamato juice, and you’ve got a winning Caesar drink recipe. Also, note that you can make the Caesar drink gluten-free by using fish sauce rather than Worchestersire, and you can make a mock Caesar drink by leaving out the vodka.
Tips for a Standout Caesar:
Experiment with Spices: Feel free to adjust the spice levels to suit your taste. Love heat? Add more cayenne pepper. Adore garlic? Throw in an extra pinch.
Creative Garnishes (if you want): The Caesar is as much about the presentation as it is about the taste. Don’t be afraid to get creative with your garnishes. Again, I prefer a traditional garnish of celery.
Quality Ingredients: Use fresh, high-quality spices for the best flavour. Freshly ground pepper and high-grade sea salt can make a significant difference.
Chill Your Glass: For an extra refreshing drink, chill your glass before rimming and assembling your Caesar.
A Celebration in Every Sip
The Caesar is more than just a cocktail; it’s a celebration of flavours and textures. Whether you’re hosting a brunch, enjoying a lazy Sunday afternoon, or just looking for a special drink, this Caesar Rimmer recipe will surely add a zesty twist to your beverage. So, gather your ingredients, ready your glasses, and prepare to indulge in a Canadian classic that’s sure to impress.
“Deliciously yours!” Here’s to crafting the perfect Caesar, a drink that’s not just a cocktail but an experience. Cheers!
Crafting Your Caesar Rimmer
Crafting Your Caesar Rimmer
A great Caesar rimmer is more than just salt – it's a mix of savoury, spicy, and tangy elements that complement the drink. Our recipe is a symphony of flavors designed to make your Caesar truly memorable.
Combine the Ingredients: In a shallow bowl, mix together sea salt, celery salt, smoked paprika, garlic powder, onion powder, black pepper, cayenne pepper, and dried dill or parsley. Stir well to ensure an even blend.
Prepare Your Glass: To rim your glass, first wet the edge with a lemon or lime wedge, then dip it into the spice mixture. Make sure the rim is evenly coated.
Assemble Your Caesar: Fill your rimmed glass with ice, add your choice of vodka (optional), pour in Clamato juice, and add dashes of hot sauce and Worcestershire sauce to taste. Stir well.
Garnish Galore: The Caesar is famous for its creative garnishes. Go traditional with a celery stalk and lime wedge, or get inventive with pickled vegetables, crispy bacon, or even a shrimp!
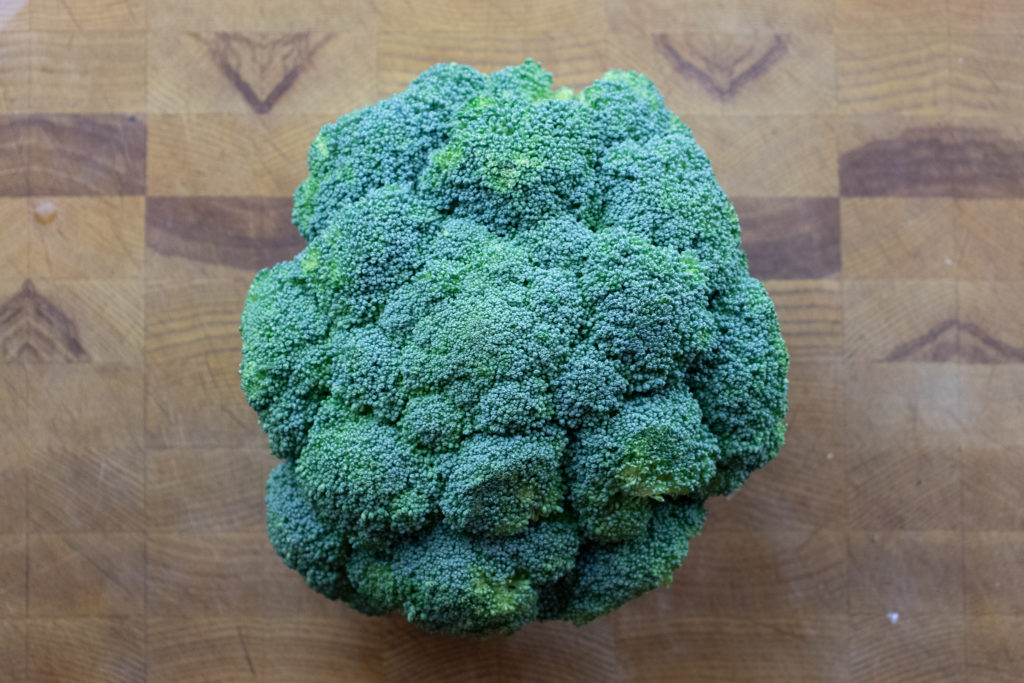
Pasta Con Broccoli is a simple pasta dish made with broccoli, lemon, crushed red pepper, garlic, and parmesan. As with most pasta dishes, it’s the simple ones, the ones with a handful of ingredients, that are the best. And this recipe for Pasta Con Broccoli is no exception. The pop of flavour from the lemon and red pepper brings the broccoli to life and makes this the kind of dish you’ll return to. So, what are we waiting for? Let’s get to it!
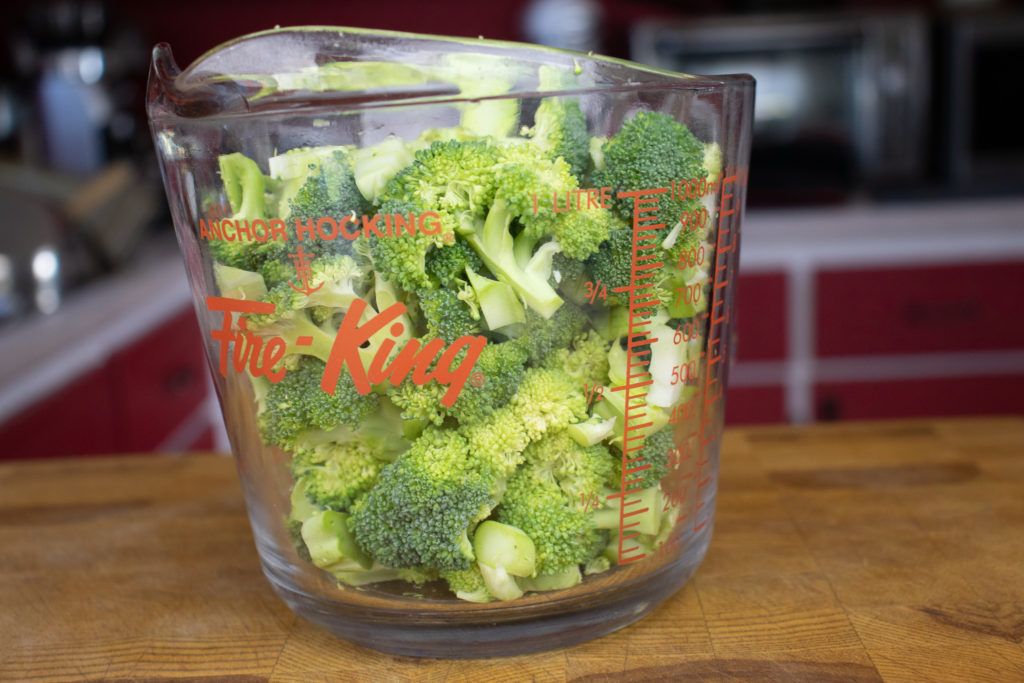
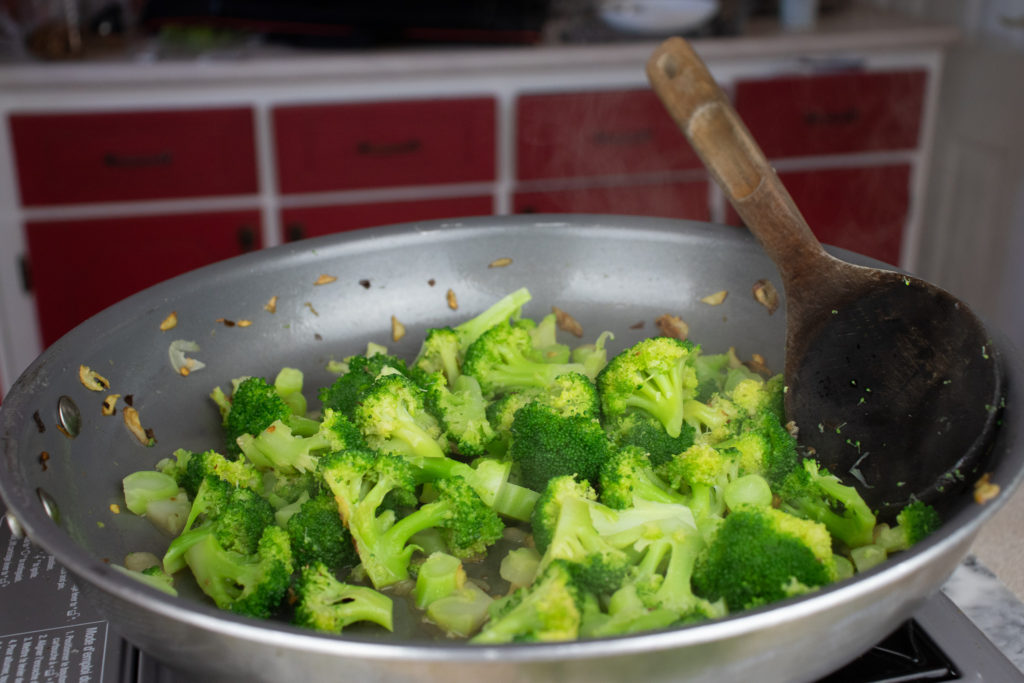
Preparing The Broccoli
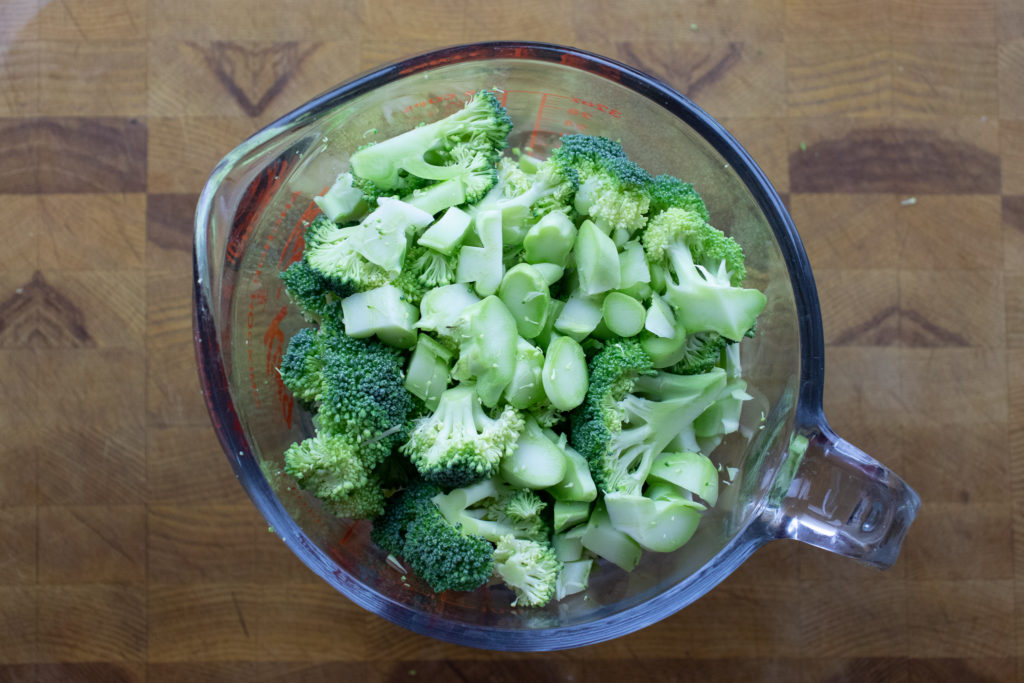
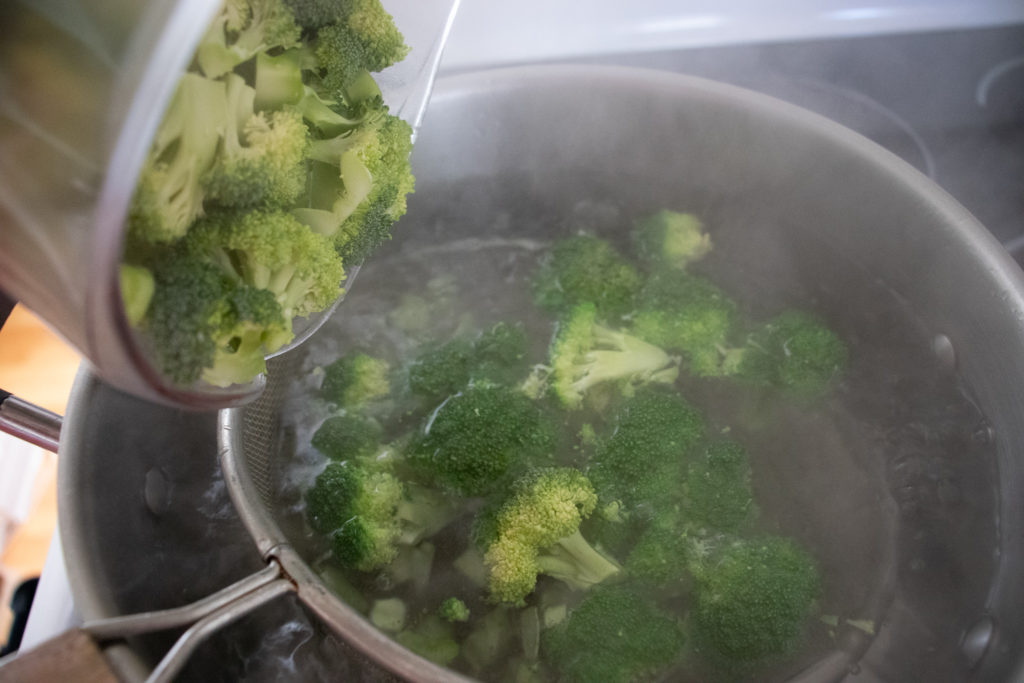
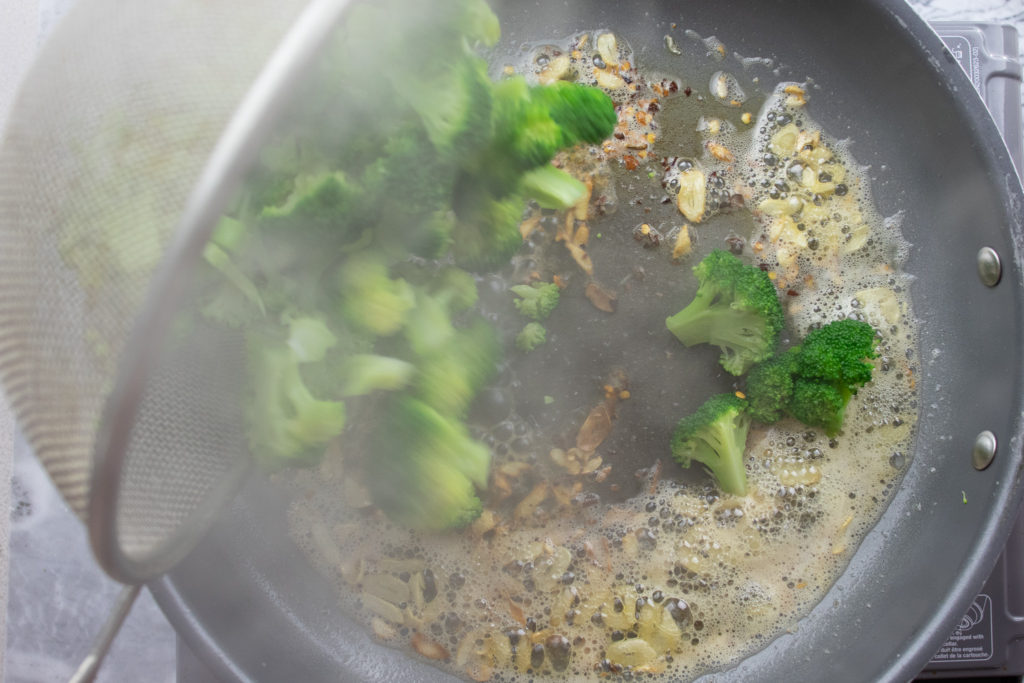
In total, you want four cups of broccoli florets. I’m sure you could use frozen broccoli for this, but I opted for fresh as it is the middle of summer, and this stuff is everywhere. When cutting broccoli or cauliflower, cut from the bottom. Only cut through the stem to prevent a big mess and keep your florets intact. Cut the broccoli into bite-sized pieces. Bring a large pot of salted water to a boil, add the broccoli and cook for four minutes. Scoop the broccoli out of the water and set it aside. Save the water and use it for cooking your pasta for a little extra flavour.
Additional Pasta Con Broccoli Ingredients
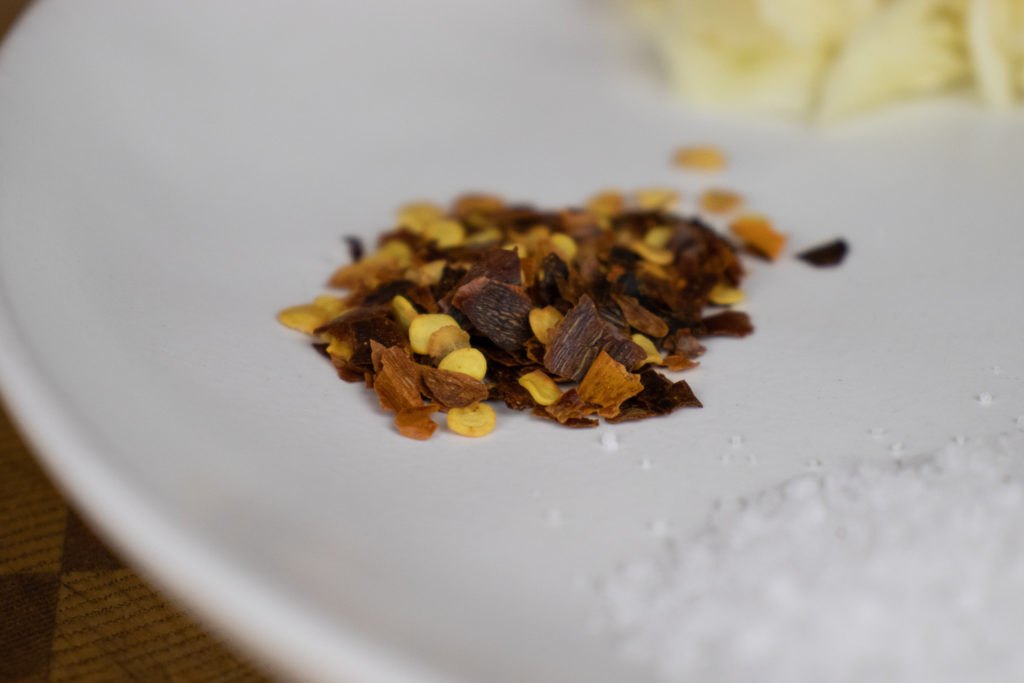
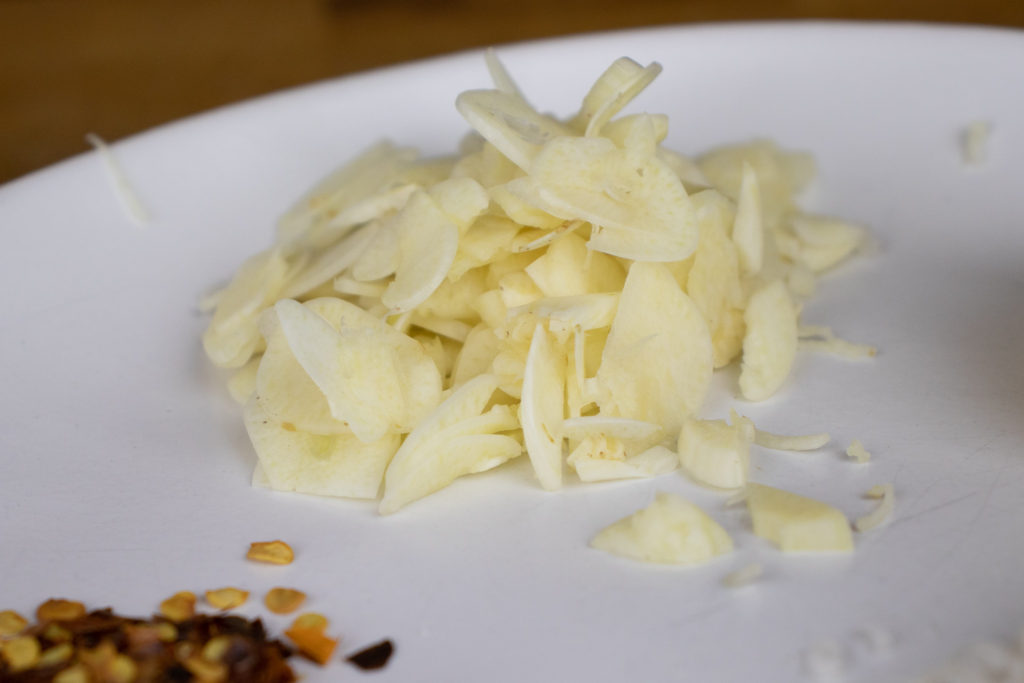
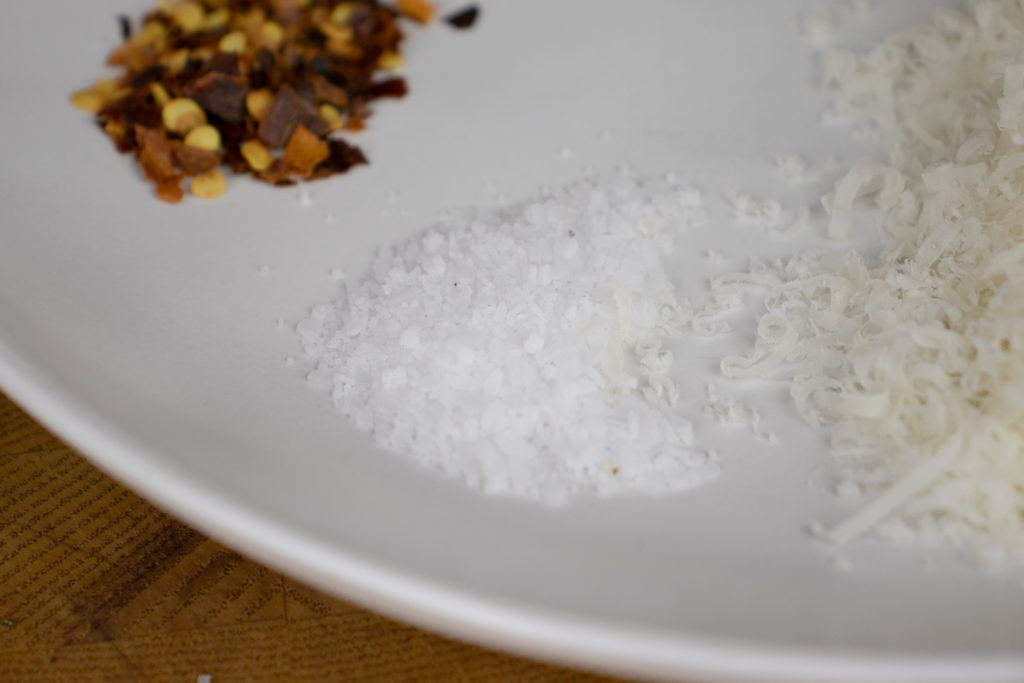
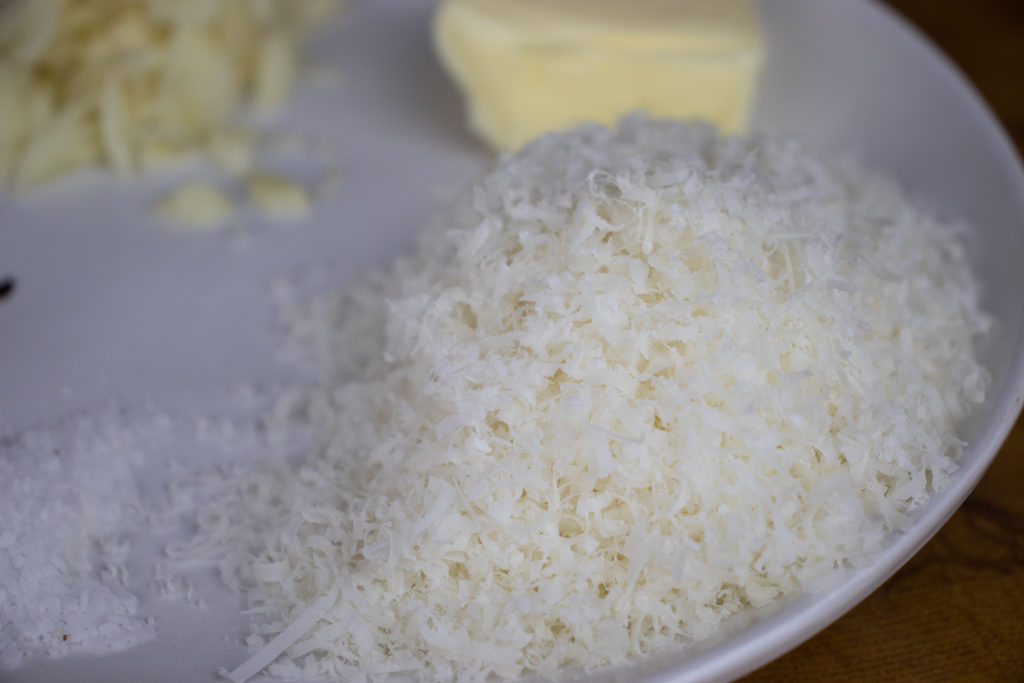
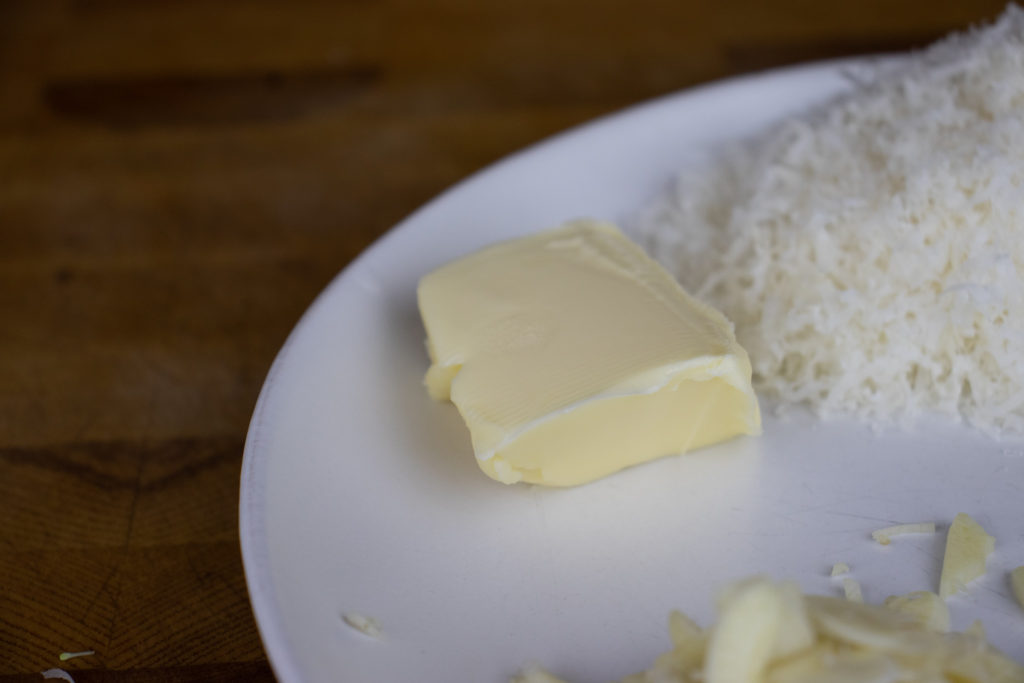
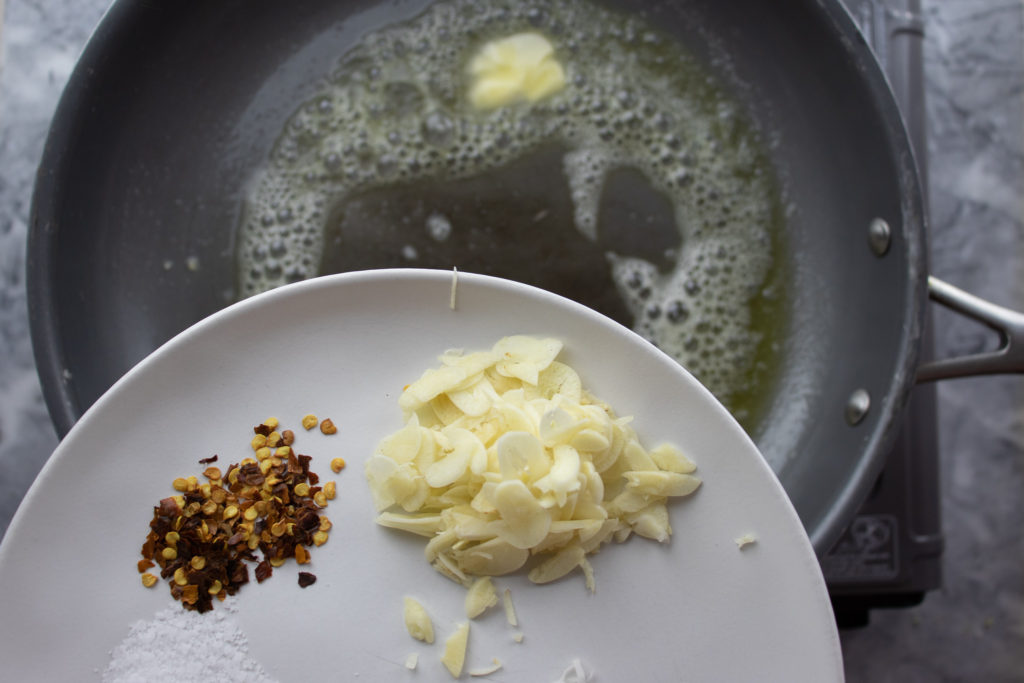
Other than the broccoli and pasta, the ingredients for this recipe are crushed red pepper flakes, thinly sliced garlic, salt, parmesan cheese, butter, and olive oil. See the recipe at the end of this post for the measurements. Organize the ingredients before making the pasta because things will happen quickly once you get going.
Cooking The Pasta Con Broccoli
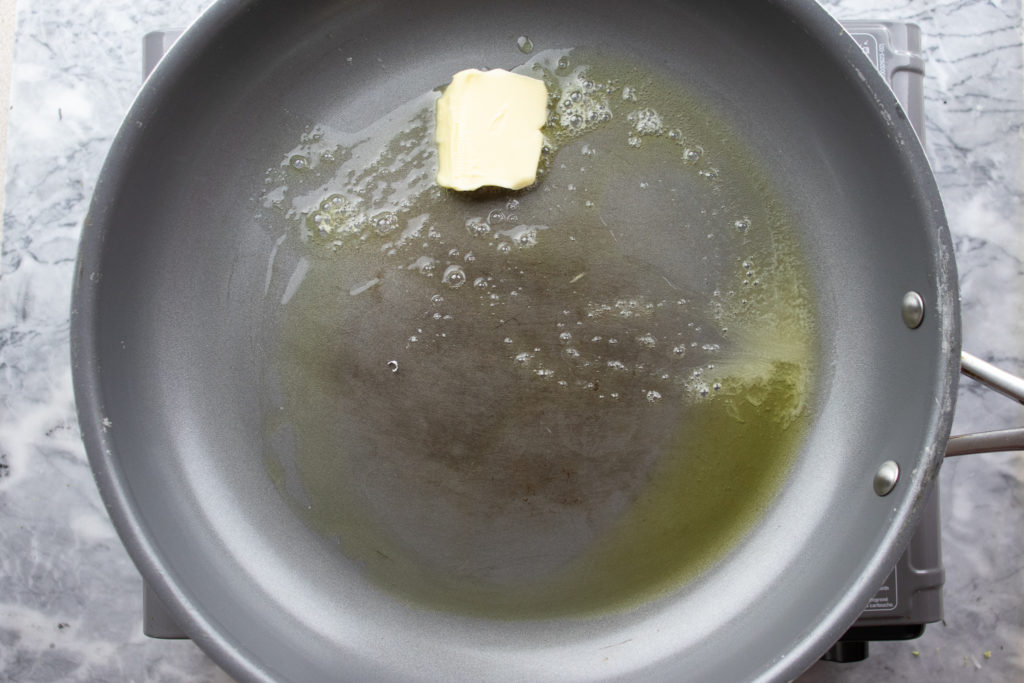
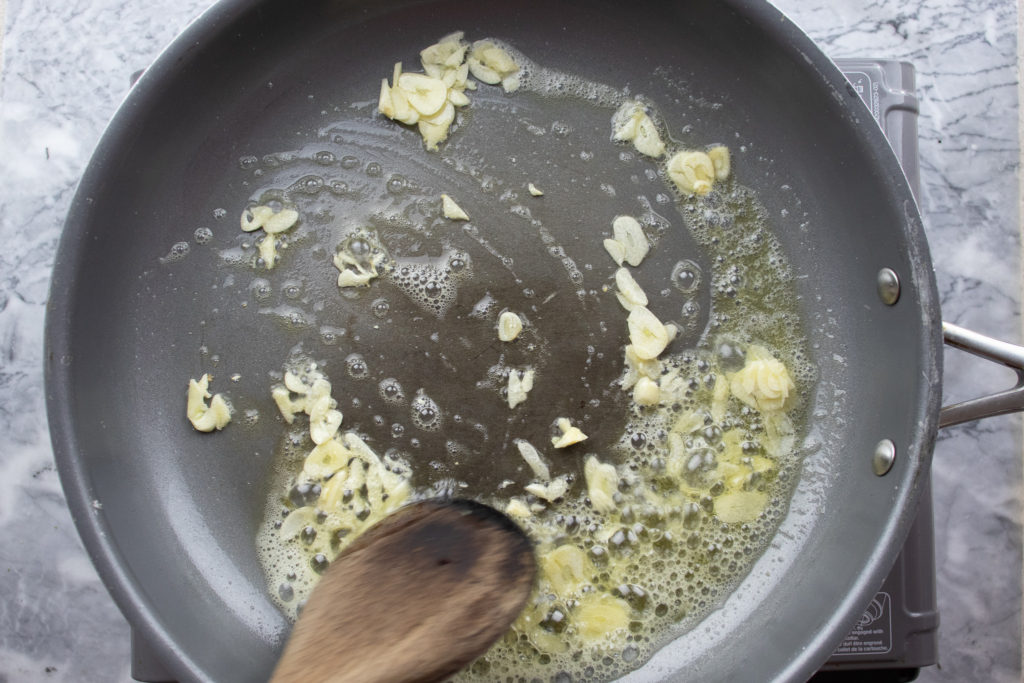
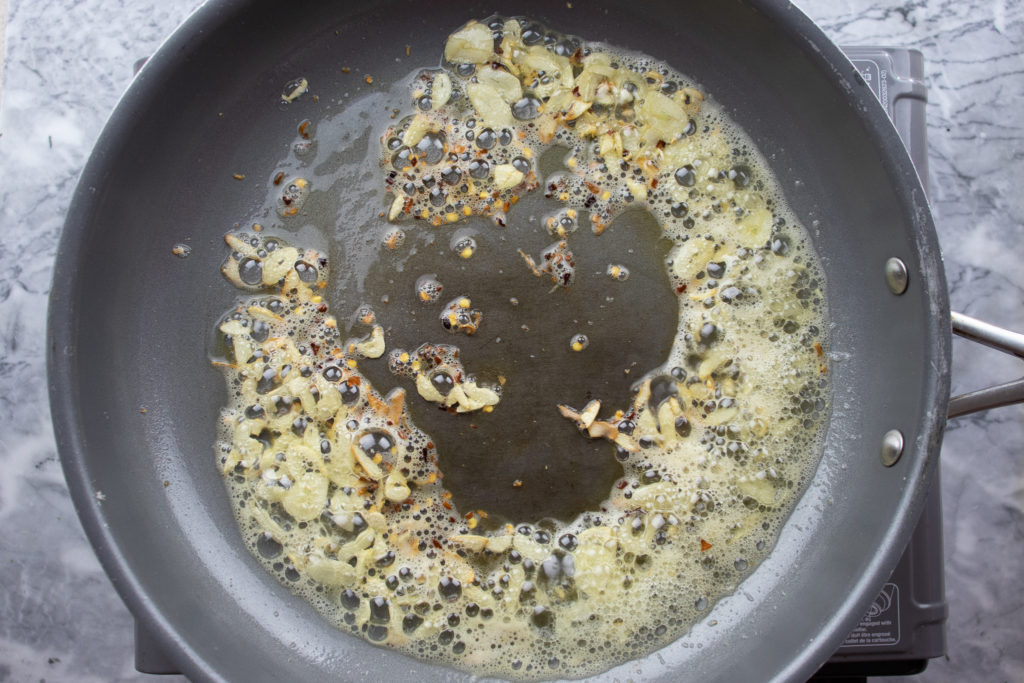
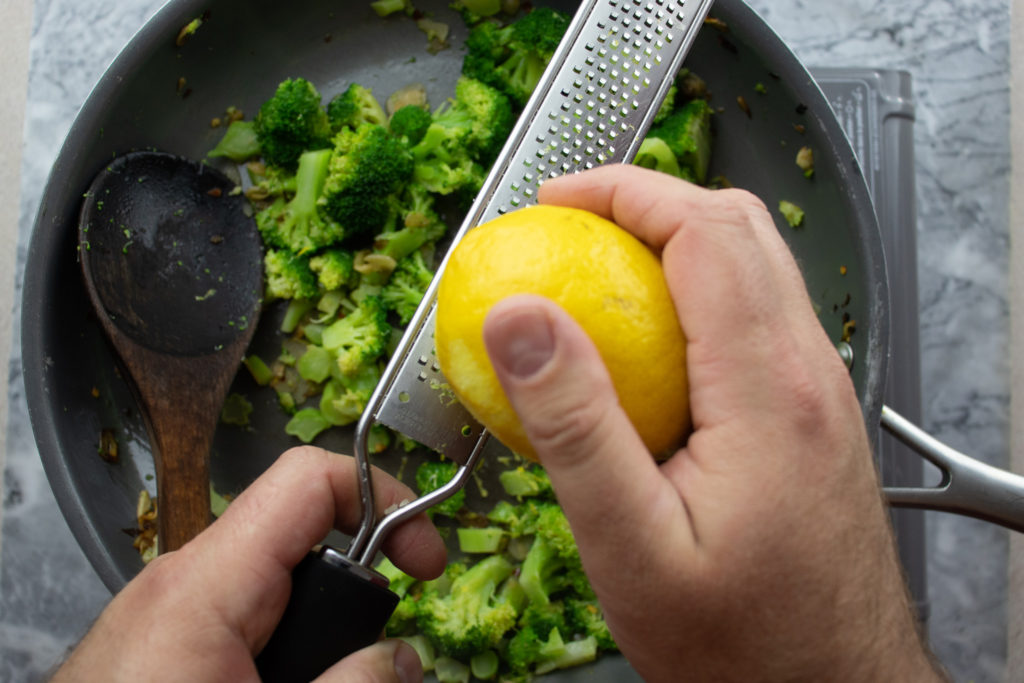
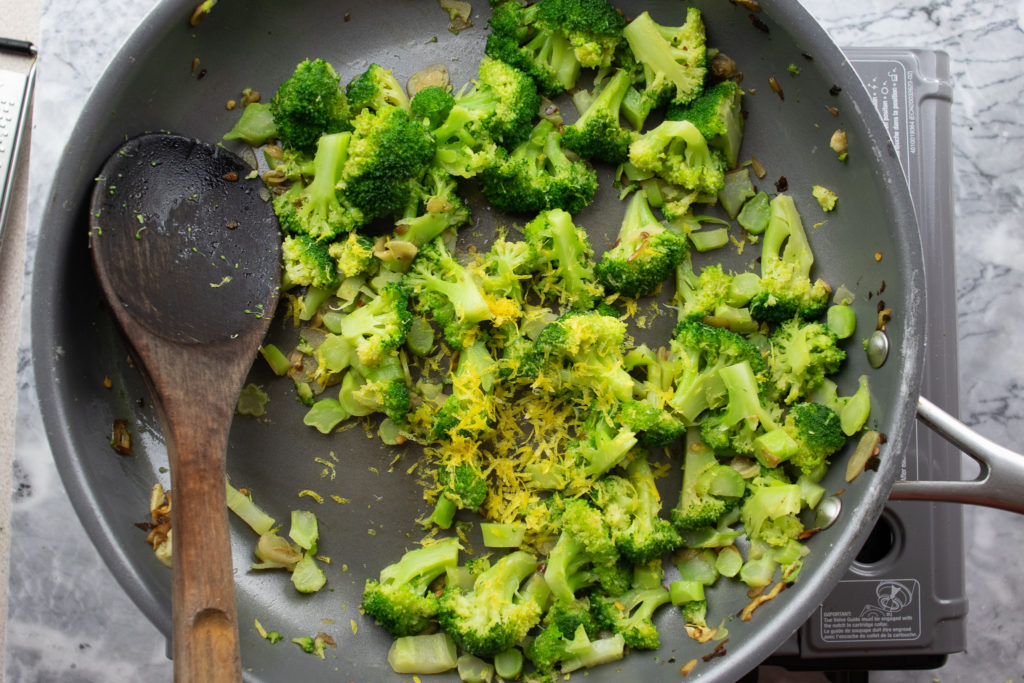
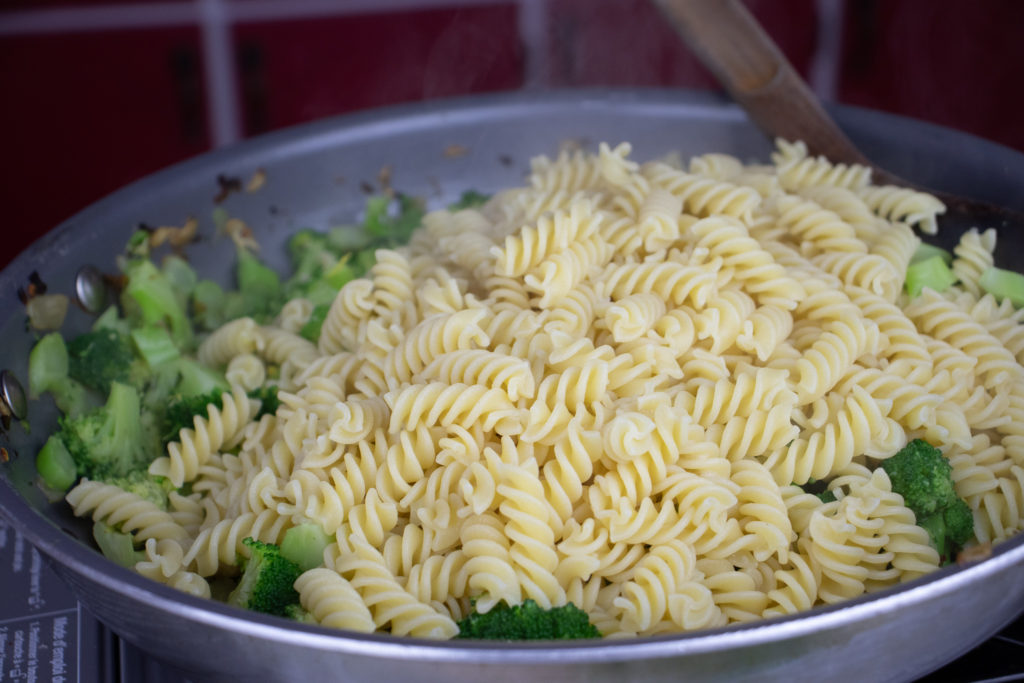
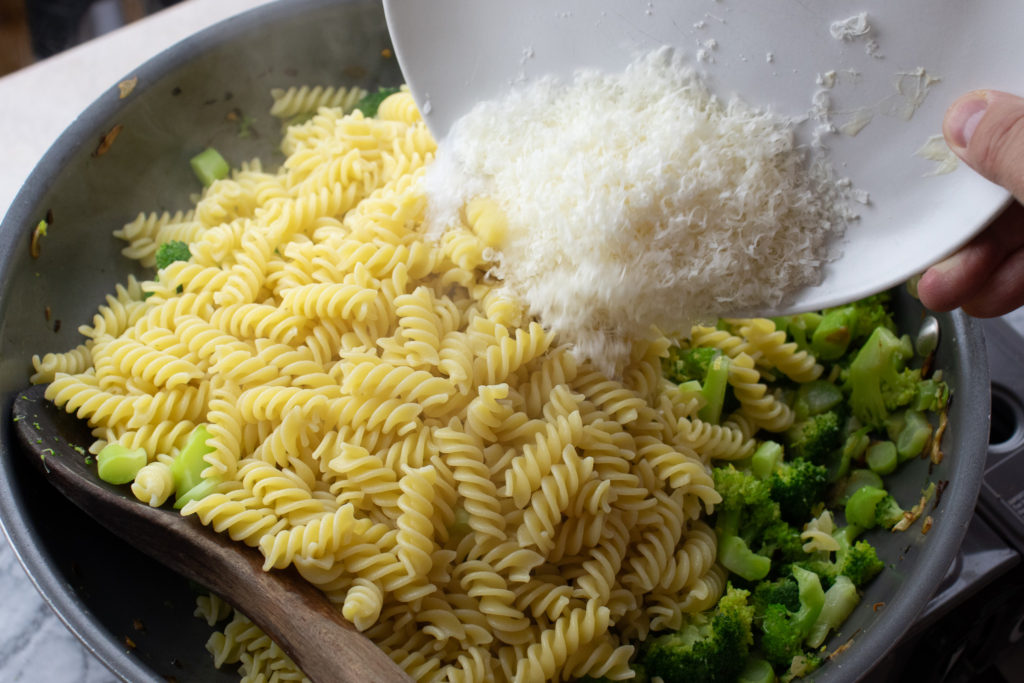
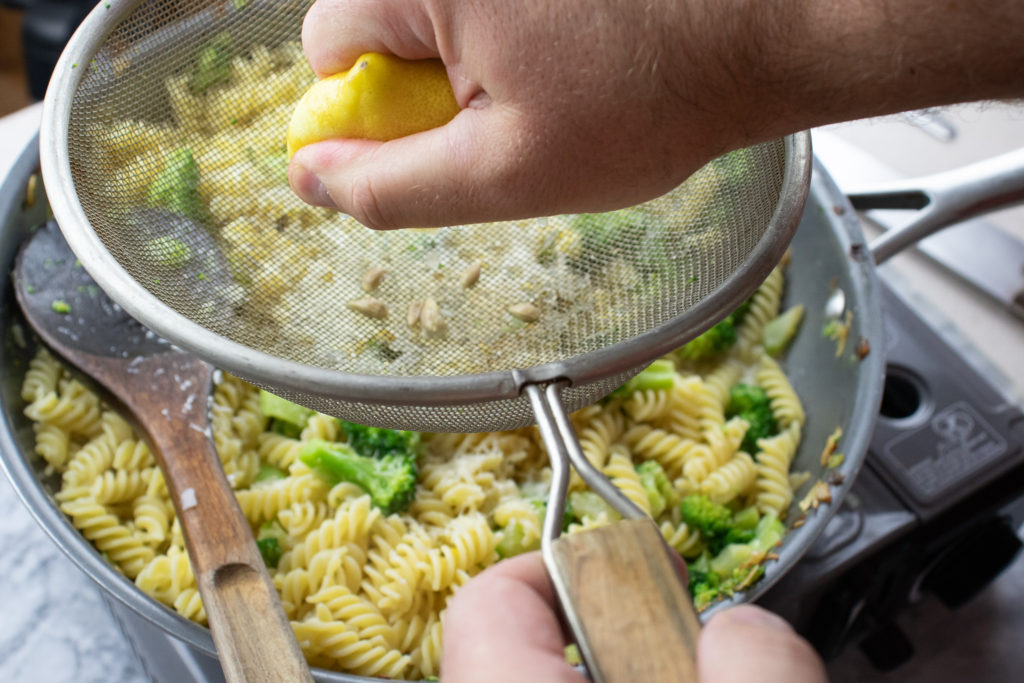
Bring the large pot of water back to a boil and set a timer according to the instructions on the package. Once the timer hits five minutes, put a large skillet on medium-high heat. Let it heat up, then add the olive oil and butter. Once the butter starts to foam, add the garlic. Cook for one minute, add the crushed red pepper flakes and cook for another thirty seconds. Put the broccoli in the pan, and sauté for two minutes. Add a cup of the pasta water and the lemon zest to the pan, put it back on the heat and bring it to a boil and reduce it by half its volume. Drain the pasta, and add it to the pan. Toss in the parmesan cheese and salt. Mix well. Take the pan off the heat again, add the lemon juice, toss, taste and adjust the seasoning with salt and pepper as needed.
Wrap-Up
Pasta Con Broccoli should be a little creamy, a little lemony, a little spicy, and a lot flavourful. This is the perfect weeknight pasta dish because it comes together so quickly. You can also add some shredded chicken, cooked salmon, or tuna to the dish to bulk it up. This is definitely worth a try. Broccoli done in a similar fashion to this pasta dish makes a great side dish. You can find my recipe for Roasted Lemon & Parmesan Broccoli here.
Thank you for coming to Chef’s Notes. I hope you’ve enjoyed this post. The mission of Chef’s Notes is to share over twenty years of professional cooking experience. If you’d like to be a part of that mission, you can share this post on Facebook or Pinterest or leave a comment below and rate the recipe. You can also subscribe to the Chef’s Notes Patreon by clicking here. You’ll get access to exclusive content, including live streams, monthly cooking videos and more. And remember to subscribe to the Chef’s Notes newsletter.
Pasta Con Broccoli
Pasta Con Broccoli is a perfect weeknight pasta dish. Serve it as it is, or add cooked chicken, salmon or tuna.
Bring a large pot of salted water to a boil. Add the broccoli and cook for four minutes. Remove the broccoli from the pot reserving the water.
Add the pasta to the water and set a timer according to the package instructions.
Once the pasta timer reaches five minutes, put a large skillet on medium-high heat.
Add the olive oil and butter to the skillet. Once the butter starts to foam, add the garlic and cook for one minute. Add the red pepper flakes and cook for thirty seconds. Add the broccoli to the pan and sauté for two minutes.
Add one cup of pasta water to the skillet along with the zest of one lemon. Bring the pasta water to a boil and cook until it has reduced by half its volume.
Drain the pasta and add it to the skillet along with the parmesan cheese and salt. Toss the pasta to mix. Add the lemon juice, toss the pasta again and taste. Adjust the seasoning as needed with salt and pepper. Serve.
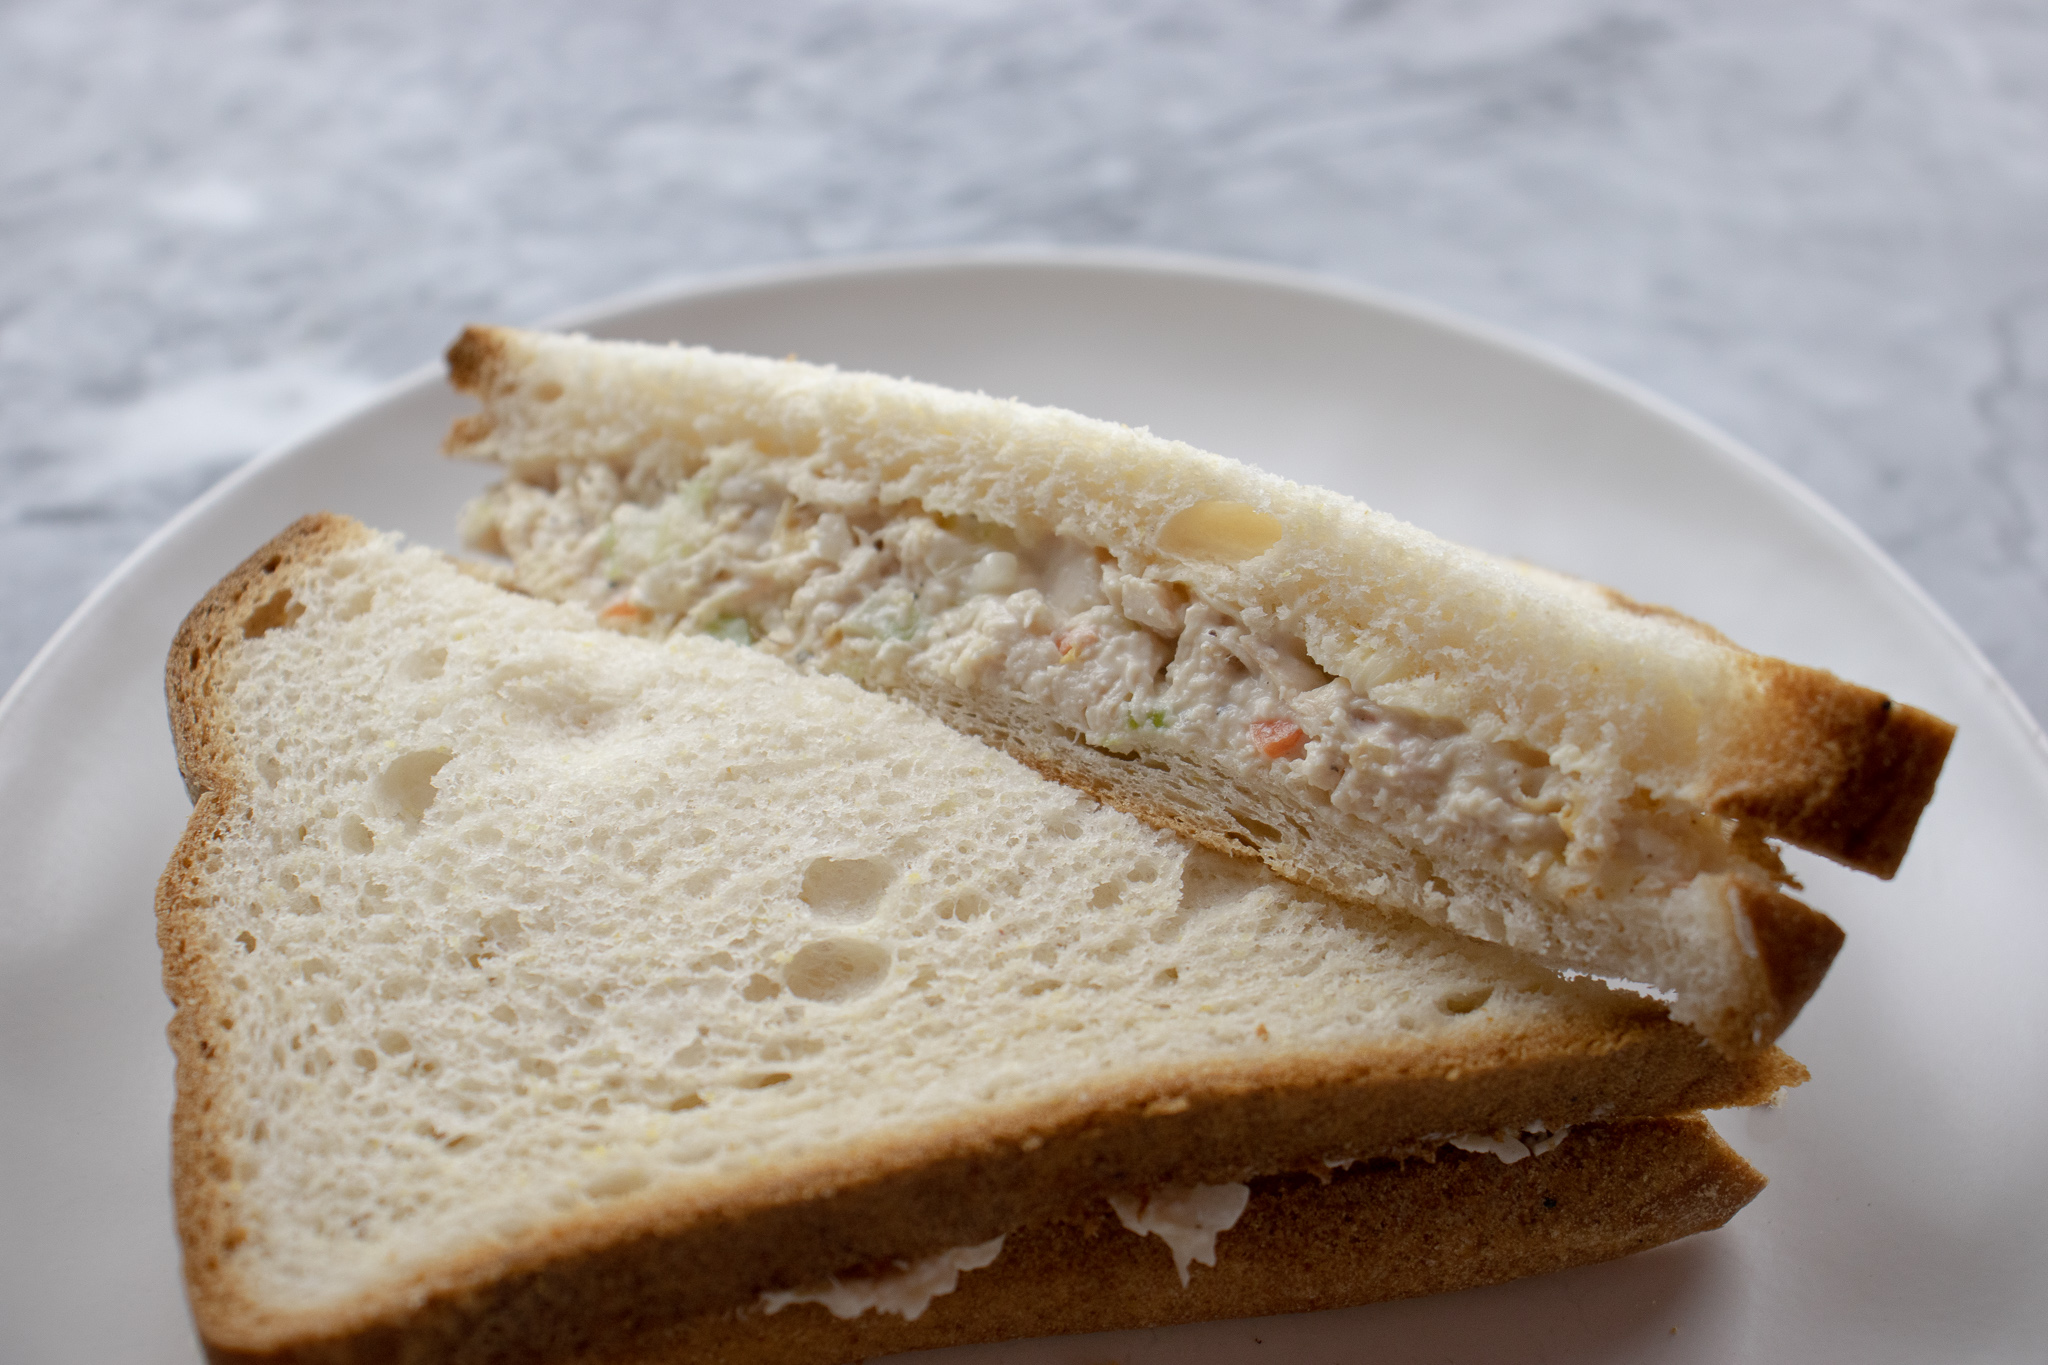
It’s bold to claim that this is the Best 4 ingredient Chicken Salad Sandwich recipe*. But, in my opinion, it is. This deli style chicken salad sandwich is uncomplicated, only having a few ingredients. It is that simplicity that really makes it so great. Making chicken salad with minimal ingredients is all well and good, but if it doesn’t taste great, it’s all pointless. Luckily, this sandwich does tick all the taste boxes. It has a little bite, a pop of sweetness, a touch of celery-ness, and of course, it’s a little creamy. I think you’ll love this Chicken Salad Sandwich, and I am so excited to share it with you.
*four ingredients excluding mayonnaise, salt, pepper, and bread.
Chicken Salad Vegetables
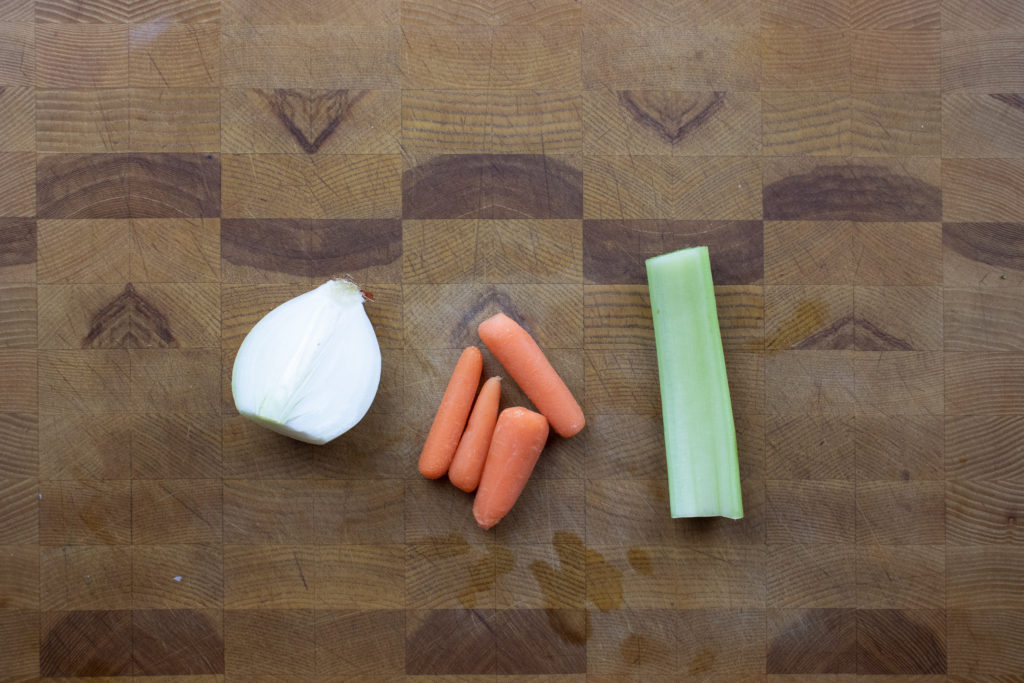
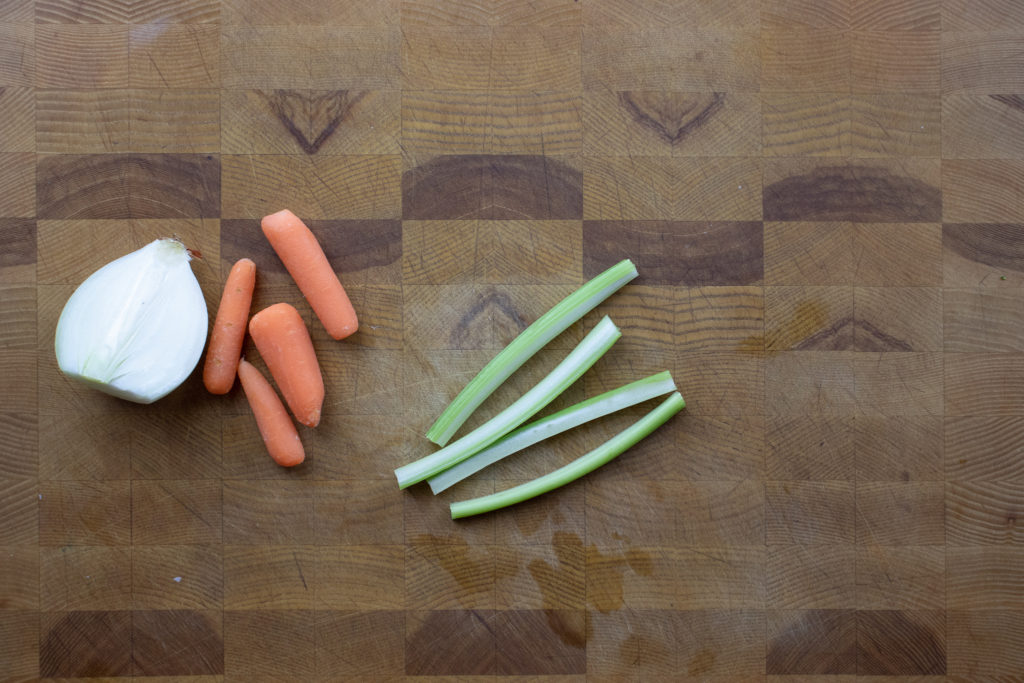
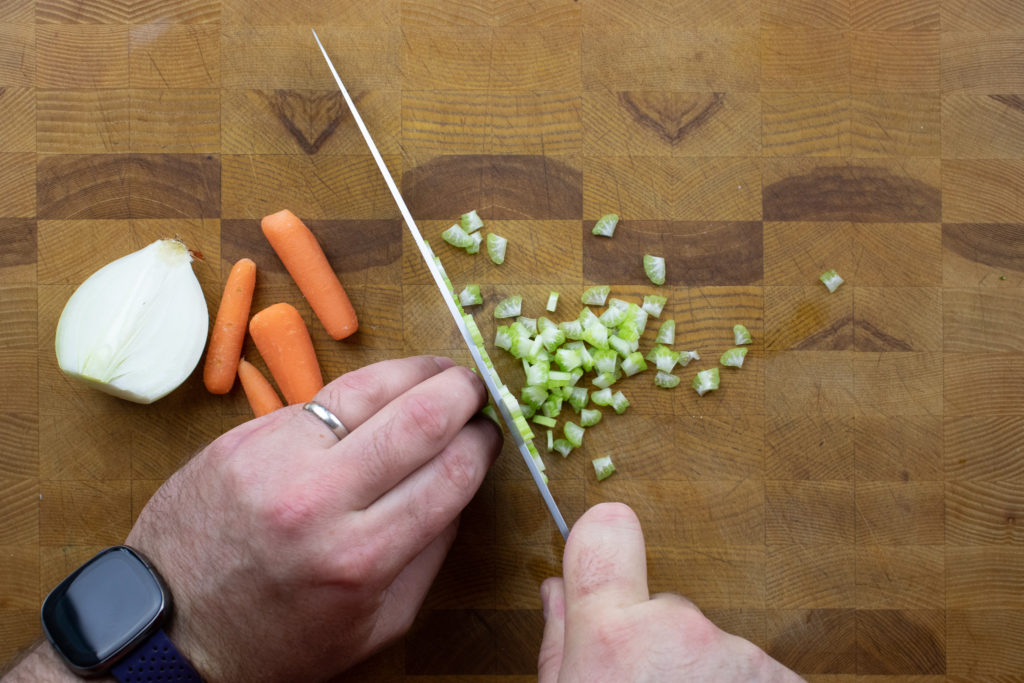
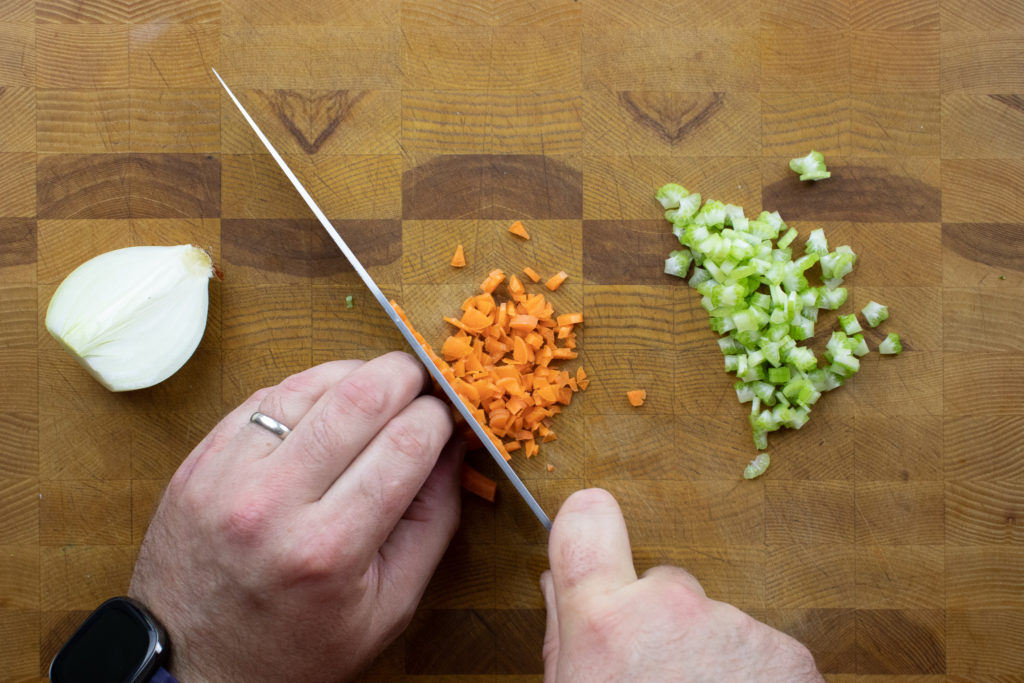
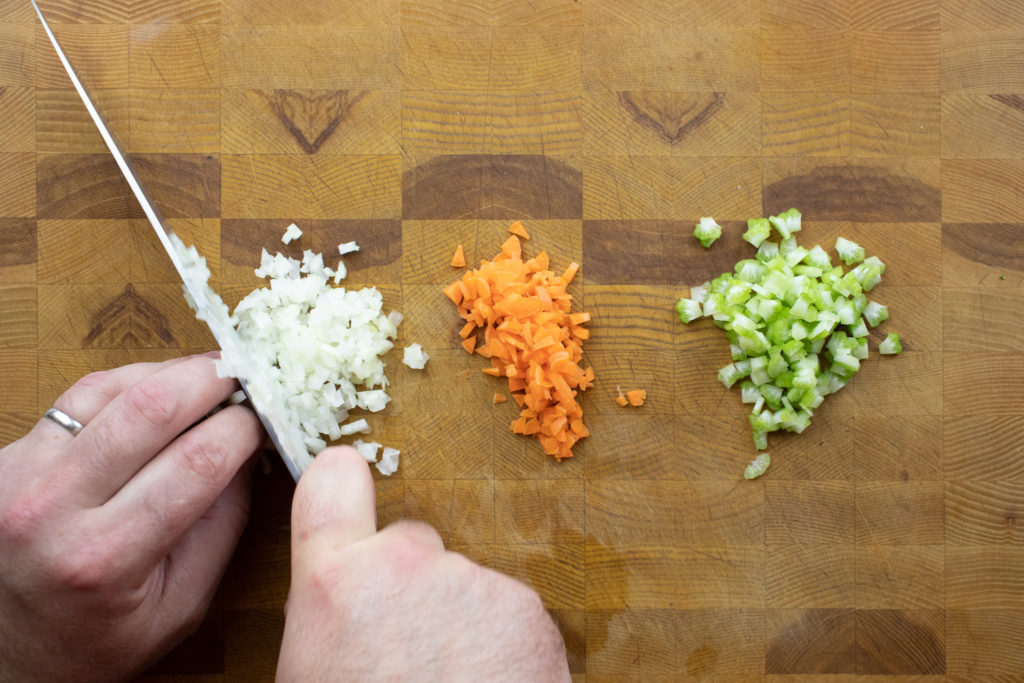
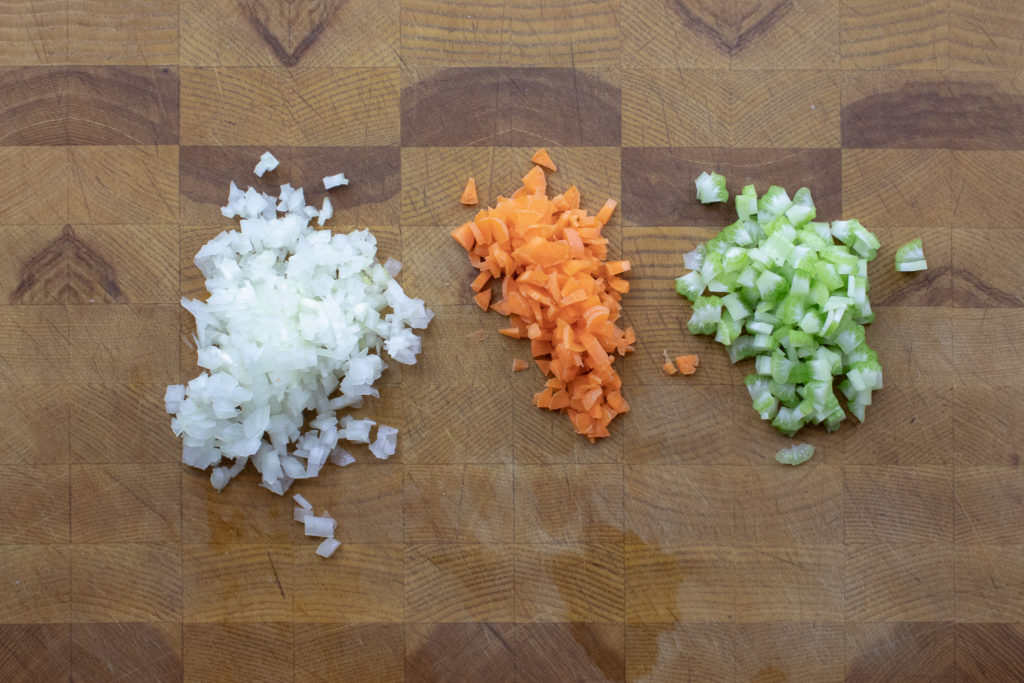
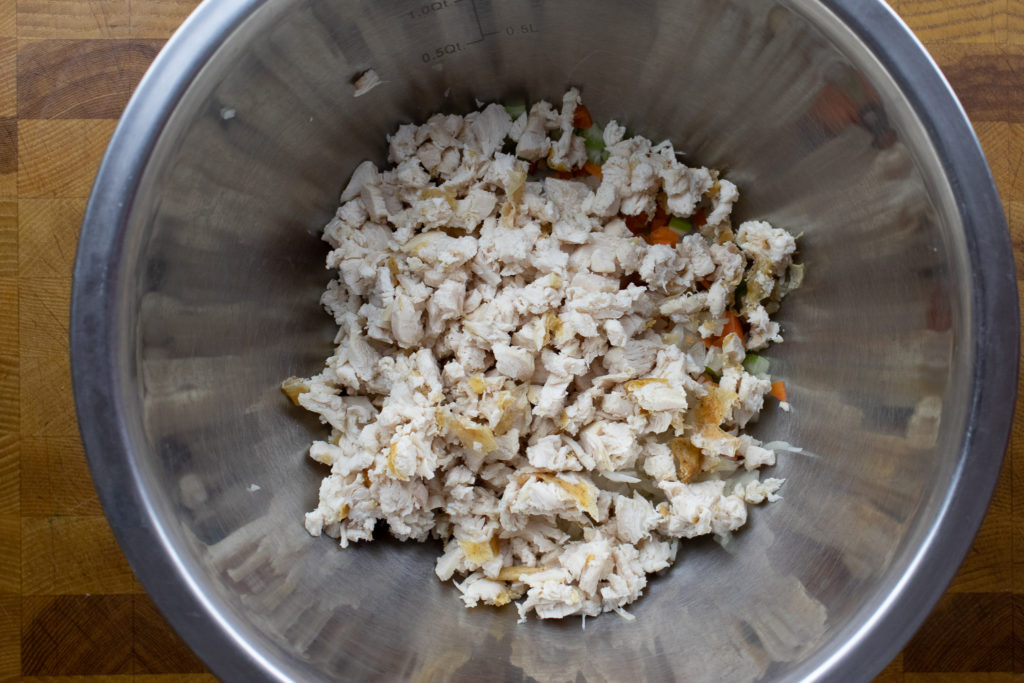
The real secret to making this chicken salad is the garnish that goes in the chicken salad mix. I’ve had chicken salad with various ingredients like avocado, grapes, apple, bacon, pickles, and so on. And honestly, I’ve loved them all. However, as you’ll know if you’ve been reading this blog for any amount of time, I like simple, uncomplicated food. So, for me, a 4-ingredient chicken salad is best. I don’t count the mayo, salt or pepper as ingredinets as they are more seasonings. The best chicken salad has onion for sharpness, carrot for sweetness, and celery for celery-ness. (If you can think of a better way to describe the flavour of celery, please tell me in the comments below.) Of course, you can make a basic chkcen salad no celery if you’d prefer. You can leave any ingredient out, but I think the combination of all the ingredients is what makes this loaded chicken salad so good. The key is to cut the vegetables into the smallest pieces you can. You can grate the vegetables on a cheese grater if you’d like, as I demonstrated in my Deviled Egg Salad Sandwich post. In total, you need three tablespoons of onion and two tablespoons of both carrot and celery.
Chicken For Chicken Salad
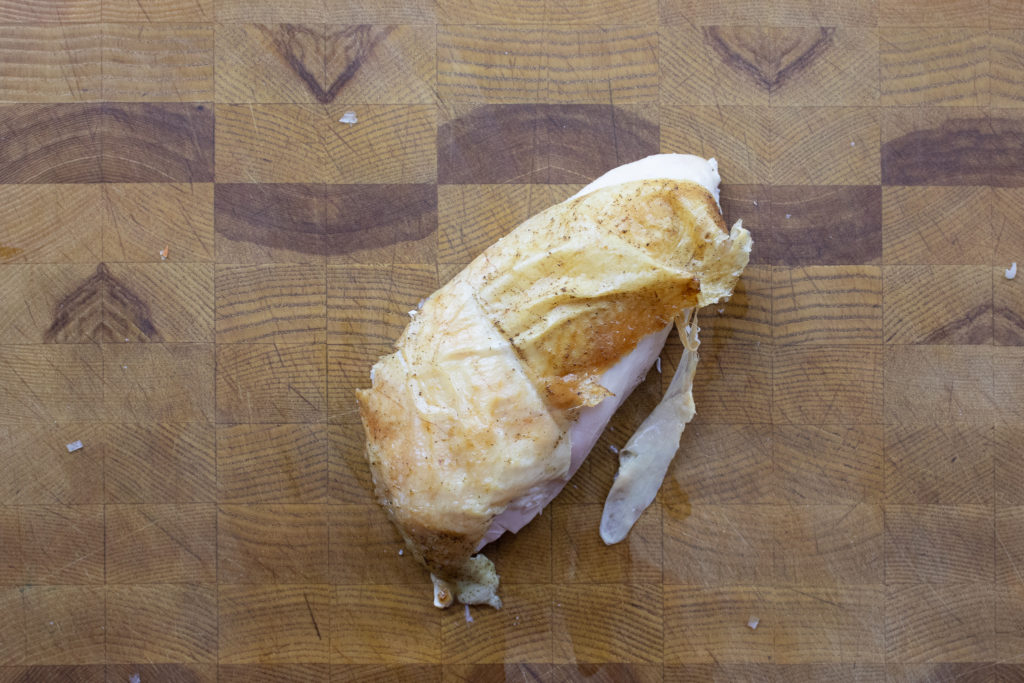
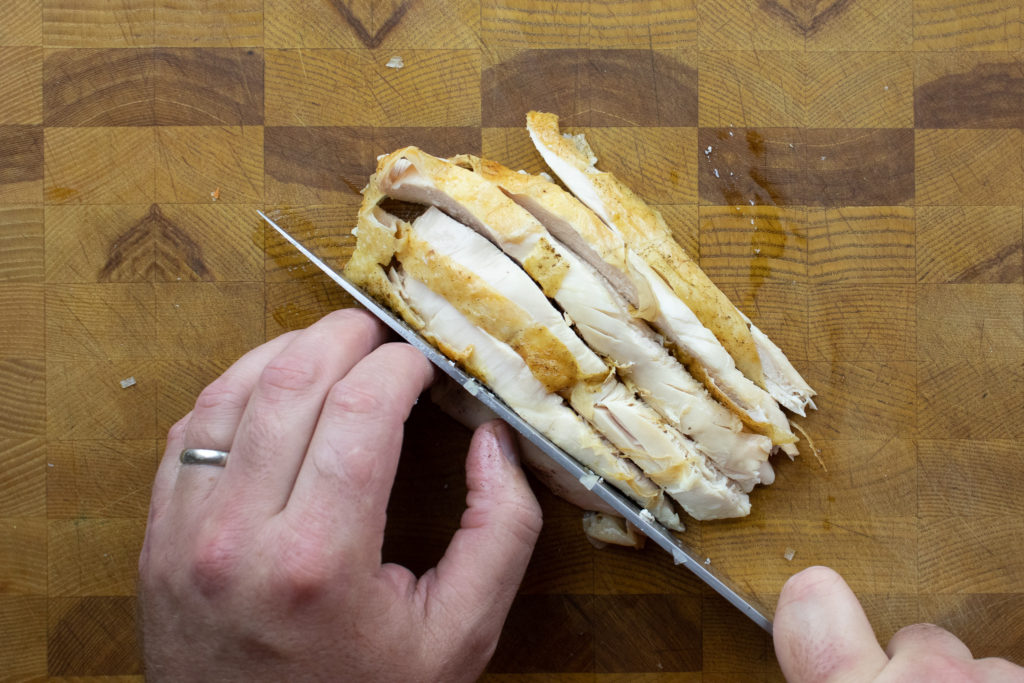
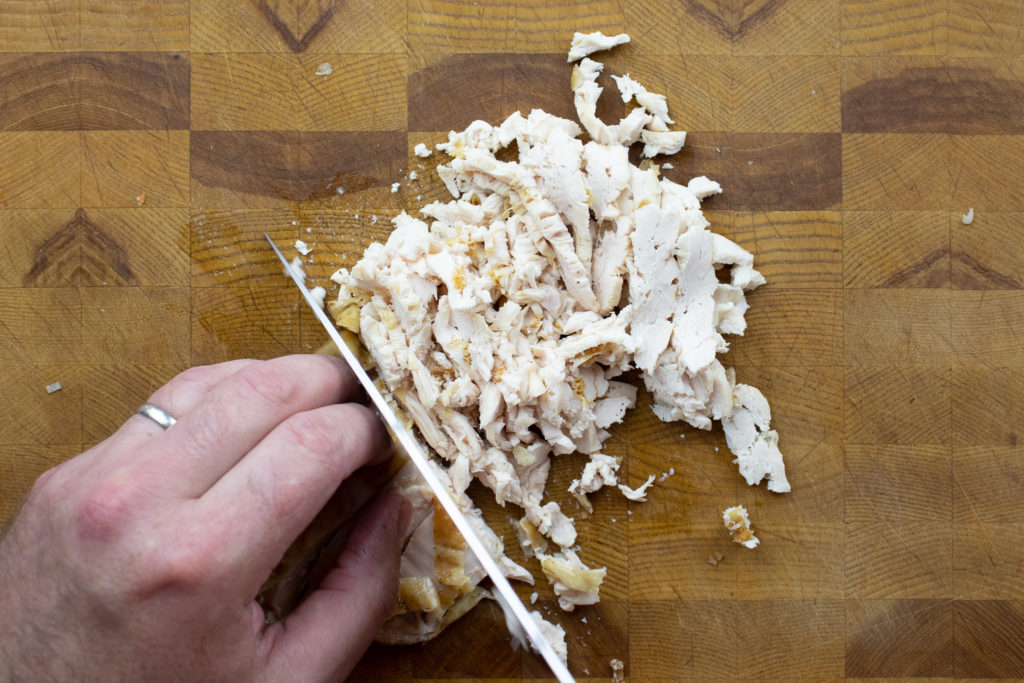
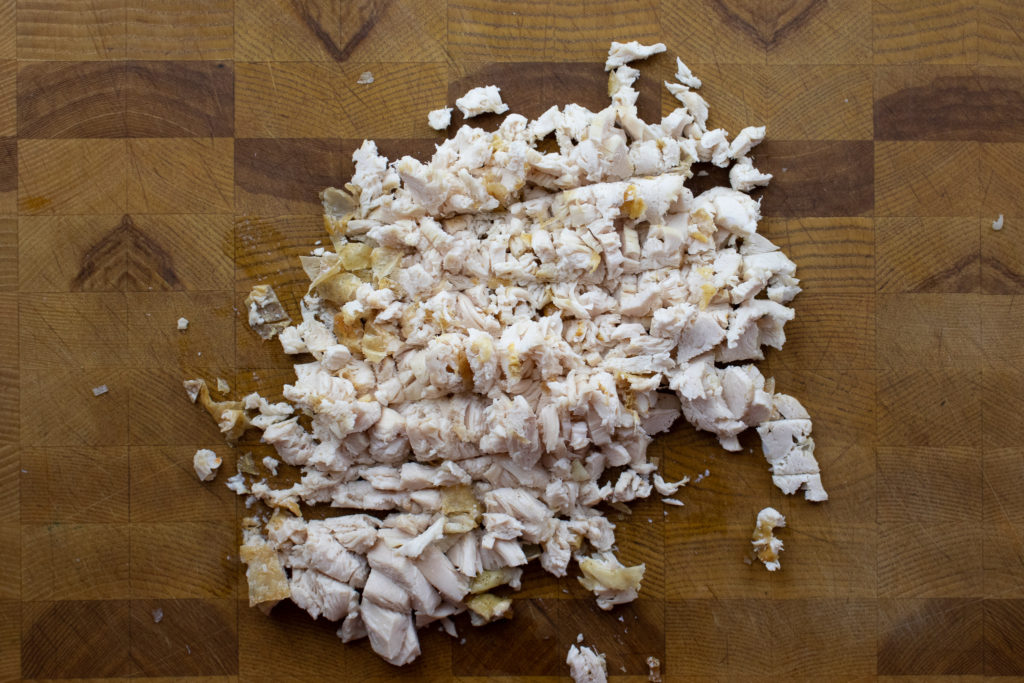
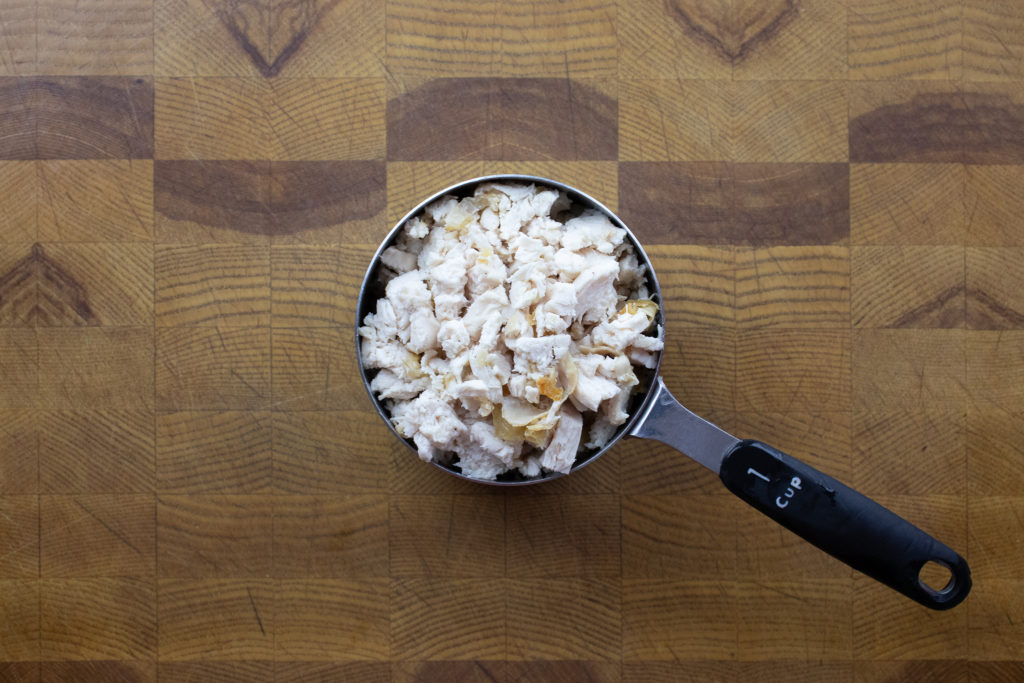
I think that the best chicken salad sandwiches are those that are made with leftover whole roasted chicken. Chickens that are roasted whole have more flavour and moisture than boneless, skinless chicken breast. So, I took the breast off a roasted chicken and cut it up with the skin. You can leave the skin out if you’d prefer, but it does add a lot of flavour. As with the vegetables, cut the chicken as small as you can. You’ll need one cup of cut chicken in total.
Optional Chicken Salad Ingredients
In my opinion, the best cheese for chicken salad, is no cheese at all. But, if you really want cheese on chicken salad sandwich, cheddar, swiss, or even pepper jack cheese are great options. Lot’s of people prefer an easy chickne salad recipe without celey, but you can add grapes or apples instead to provide that crunch. If you’re wondering what goes good with chicken salad sandwiches, I suggest some veggie sticks or even a bag a potato chips. Either dill pickle, salt and vinegar or plain would be best.
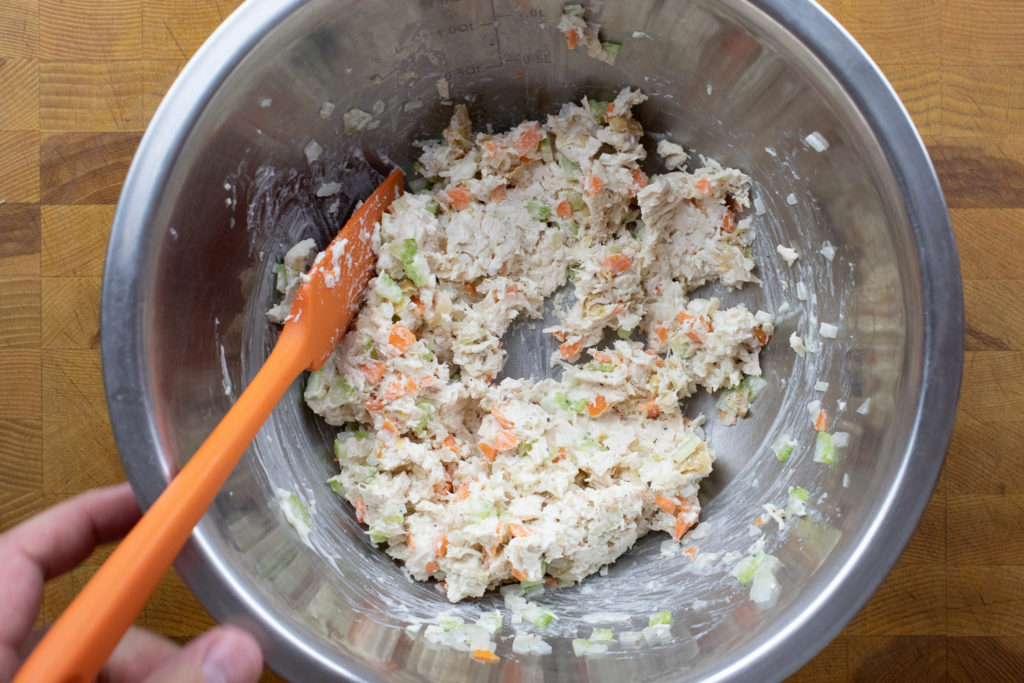
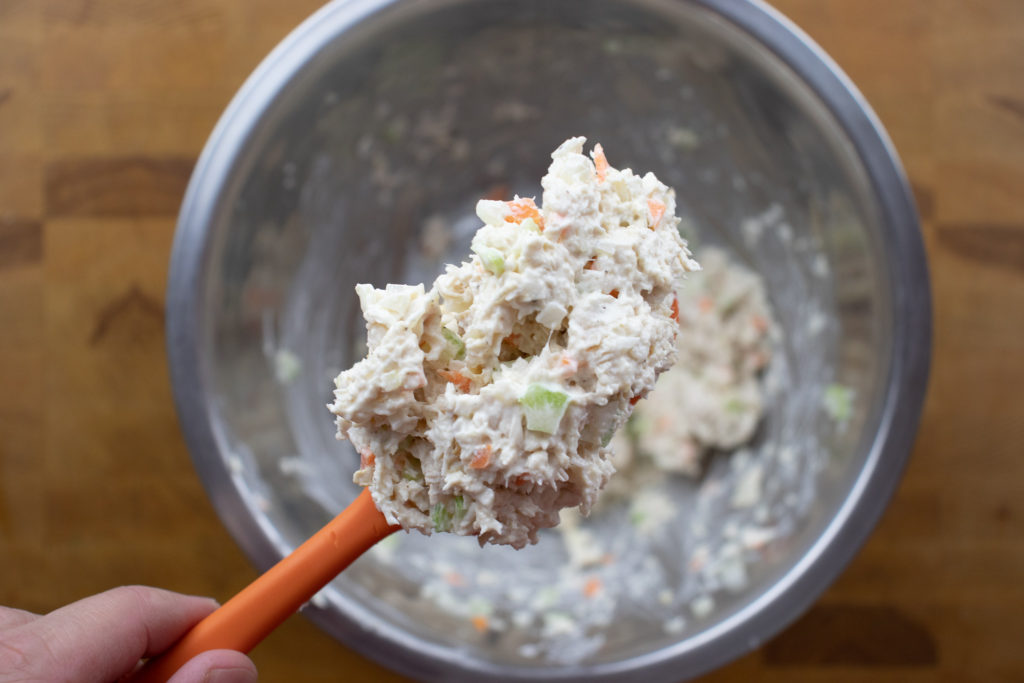
How to make the Best Chicken Salad Recipe
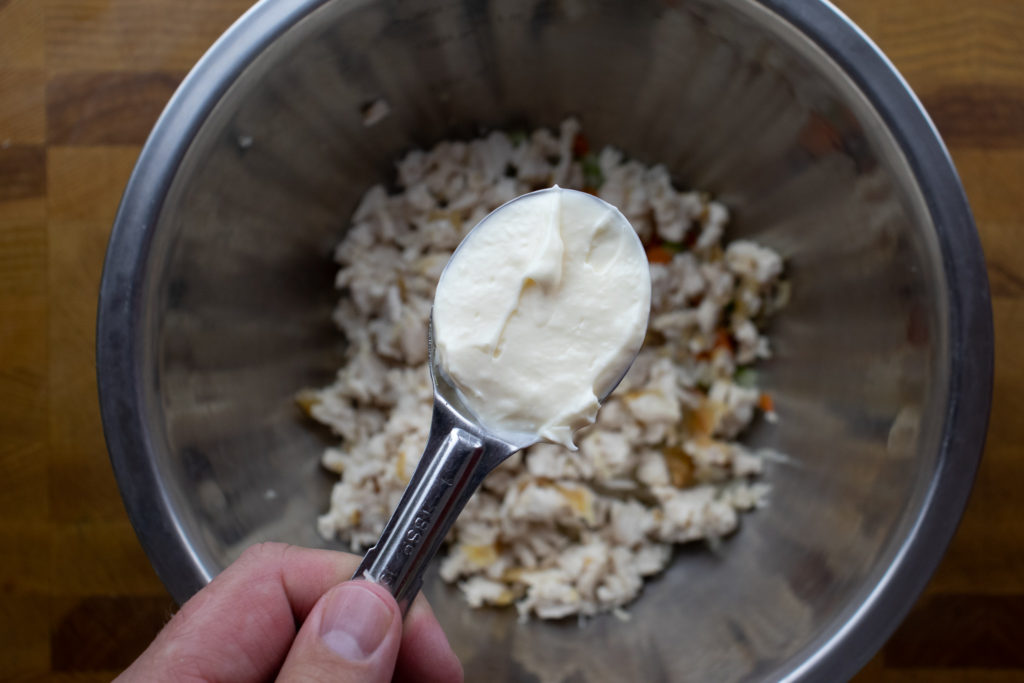
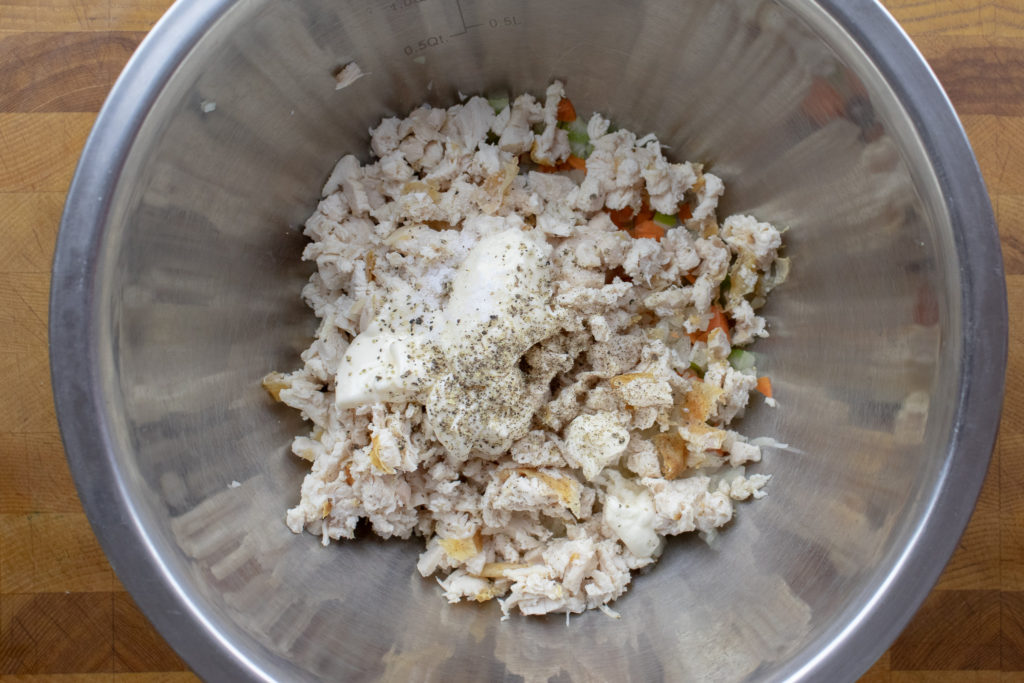
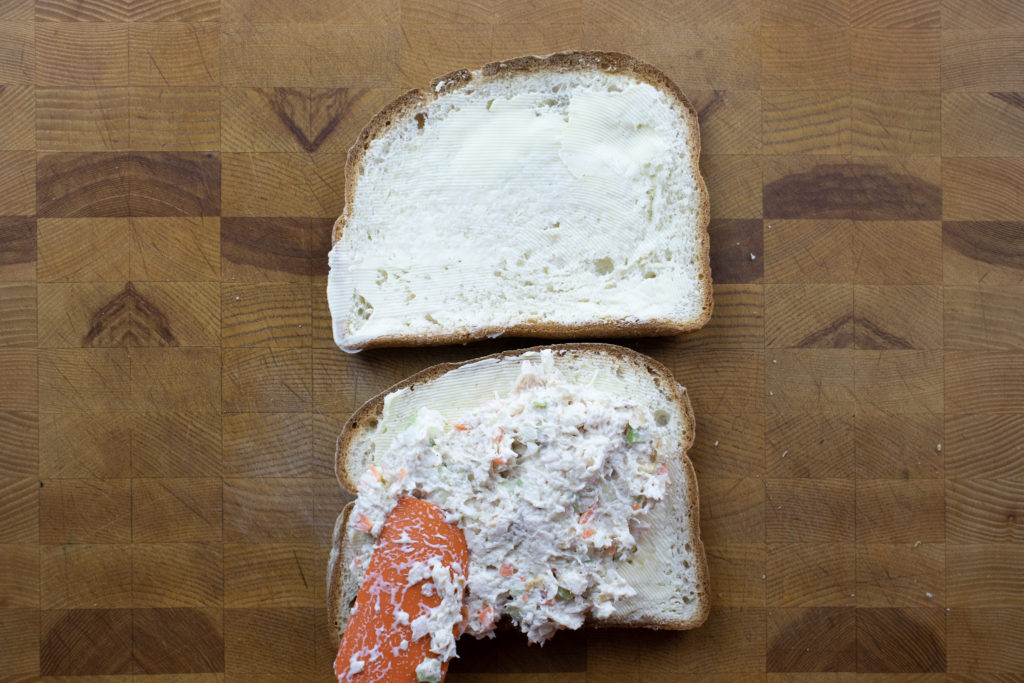
Put the chicken and vegetables in a medium mixing bowl. Add three tablespoons of mayonnaise, a quarter teaspoon of kosher salt, and a pinch of black pepper. Mix the chicken salad, taste it and season with a little more salt and pepper as needed. The finished mixture should be creamy but not wet.
Best Bread For Chicken Salad Sandwiches
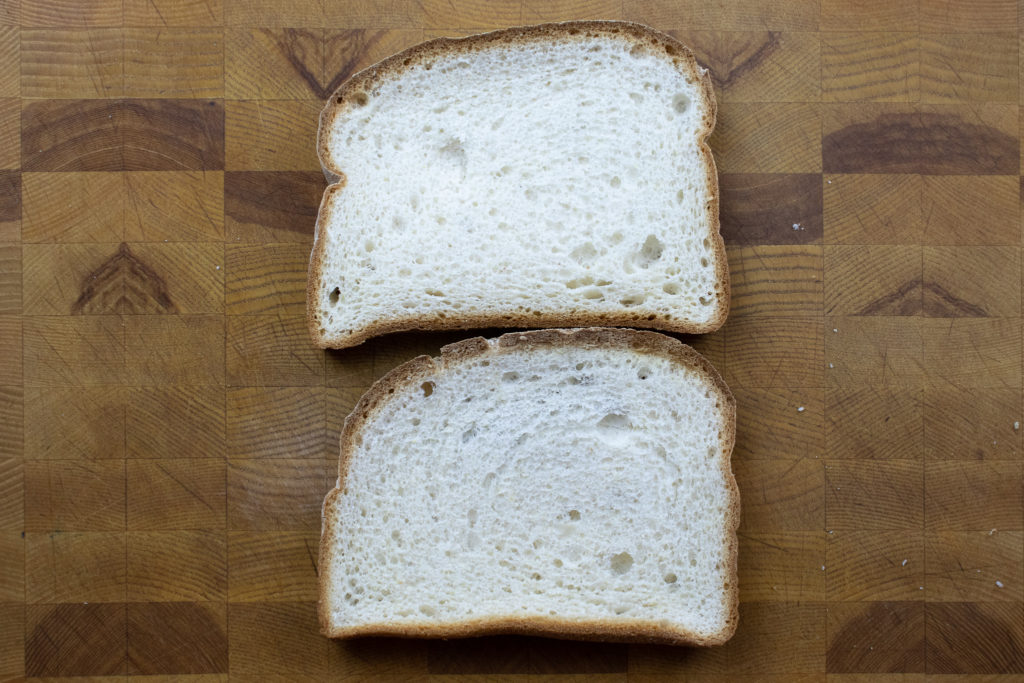
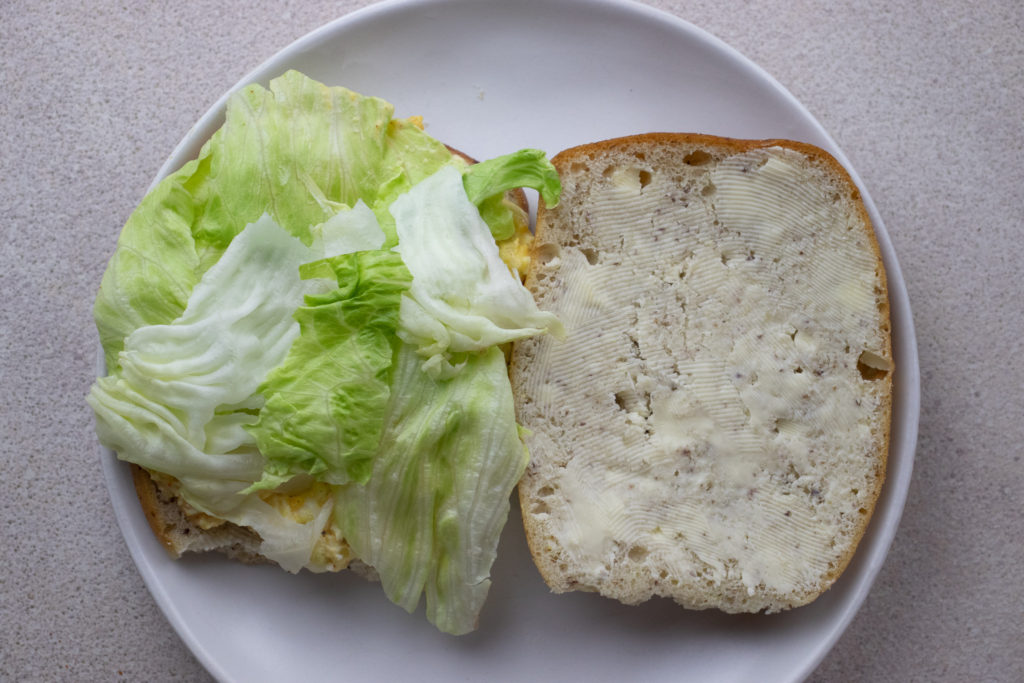
When it comes to choosing the right bread for your chicken salad, there are a few things to keep in mind. First, you want the bread to be soft. If the bread is too hard, when you bite into it, the chicken salad will come out the other side. Second, you want bread that doesn’t have too strong a flavour. Chicken salad has a mild flavour so pairing it with a strong flavoured bread like Rye would be to much. I also wouldn’t serve chkcne salad on a bagel, just due to how dense the bagle is, and the pesky hole in the middle. All your filling will leak out the middle and the back when you bite in. Soft white or whole wheat bread, or even a crossiant are in my opinion, the best bread for chicken salad sandwiches.
Assembling The Sandwiches
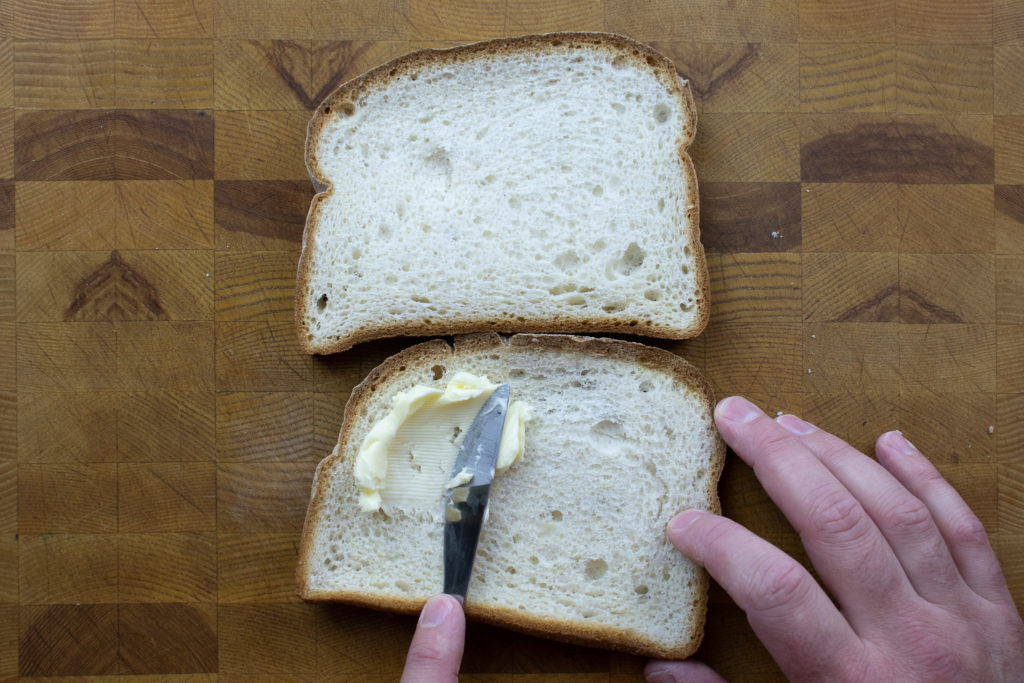
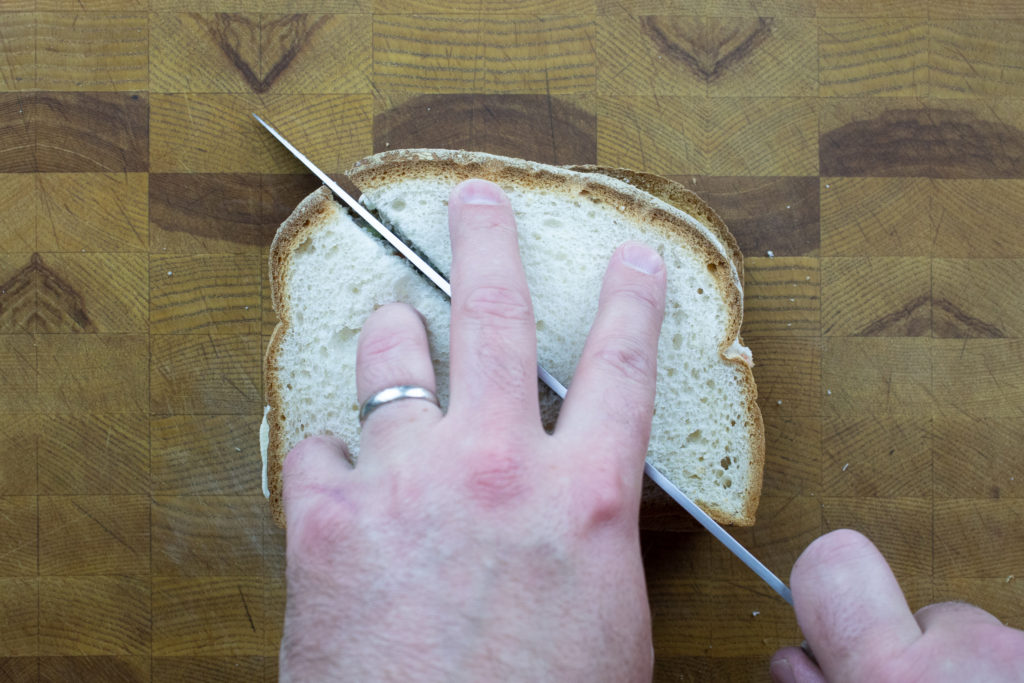
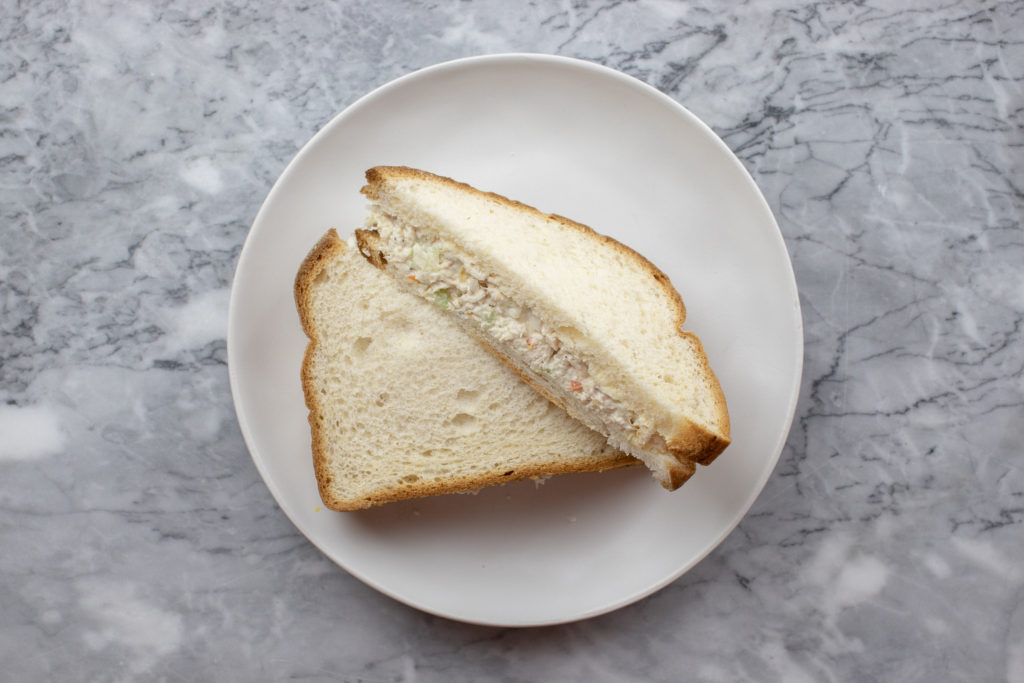
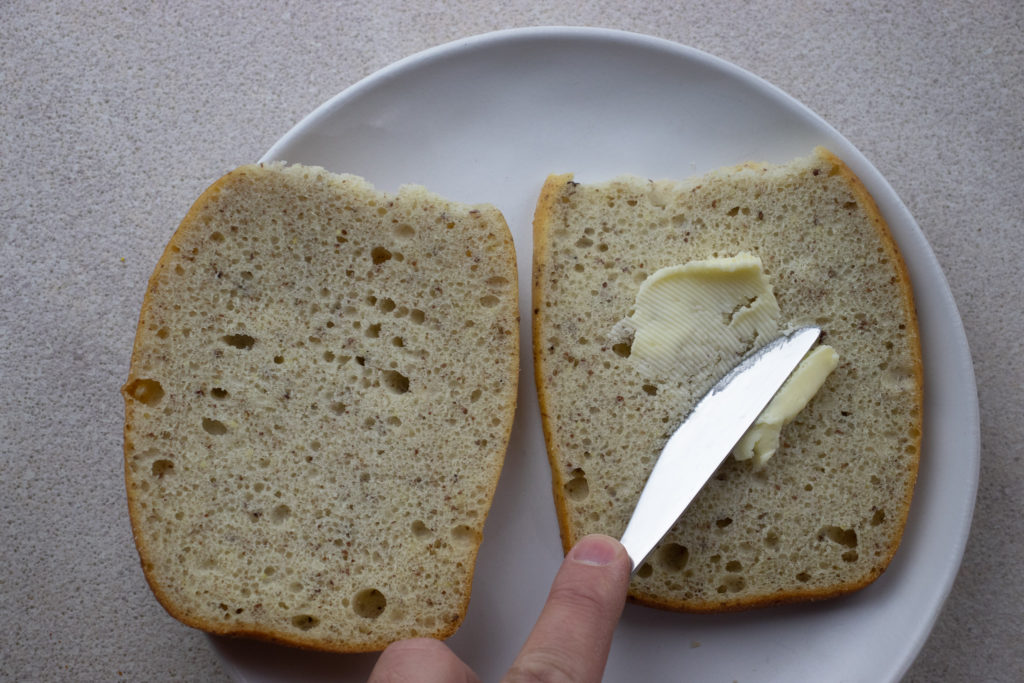
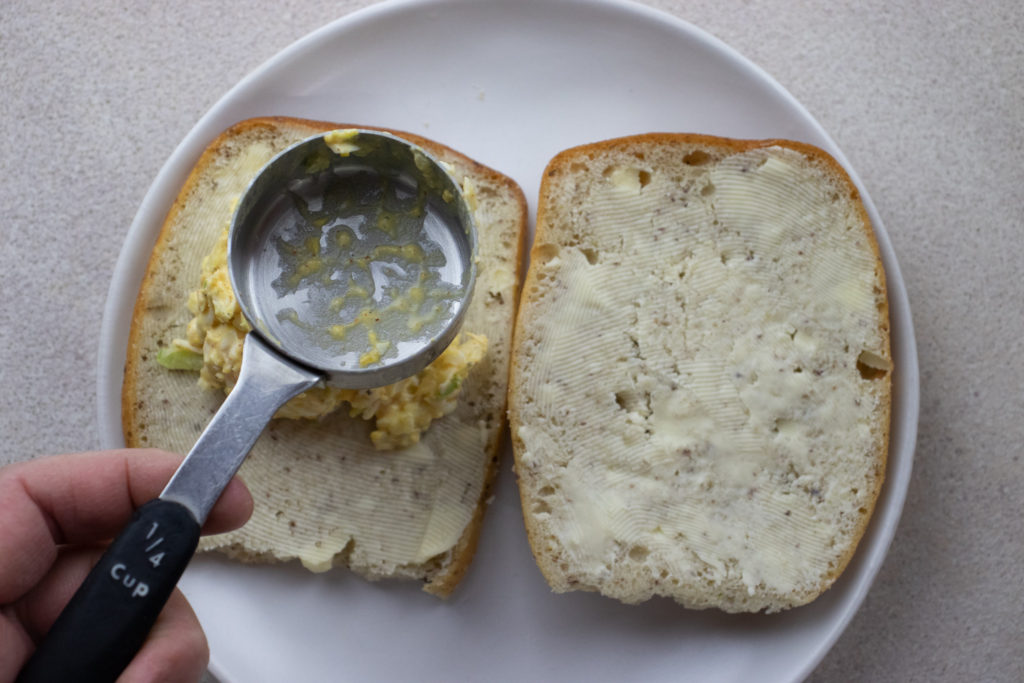
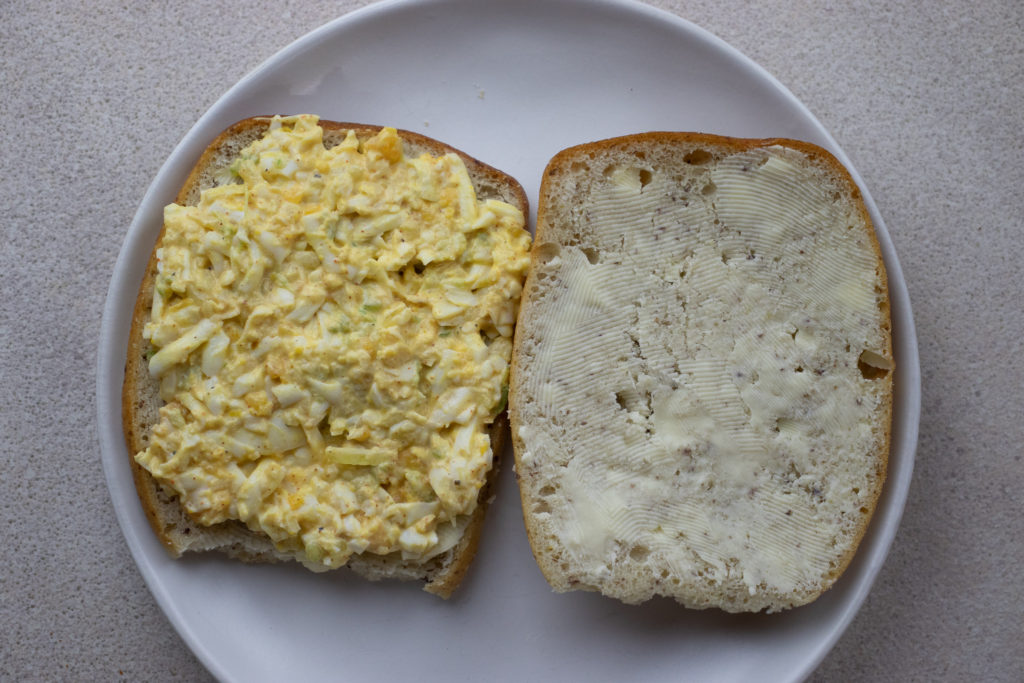
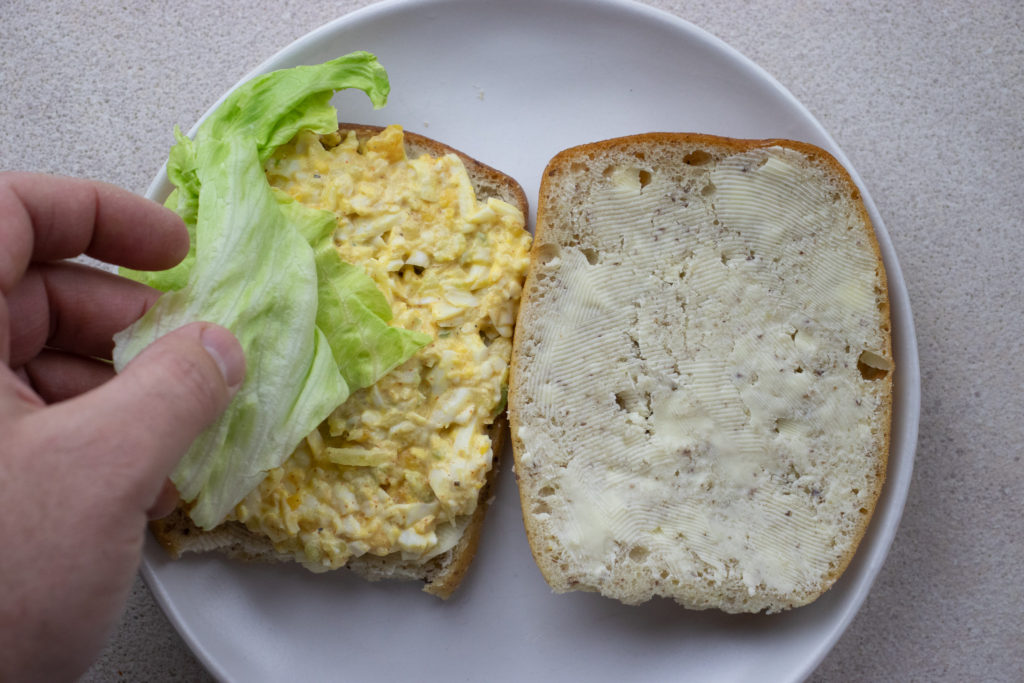
This amount of chicken salad should yield between two and four sandwiches depending on how much you load them up. To make the sandwiches lay out your bread and butter it making sure to push the butter right to the edge of the bread all the way around. Top the buttered bread with a quarter to a half cup of the chicken salad mixture. Top with the second slice of buttered bread, slice and serve. If you’d like, you can also add some lettuce to the sandwich.
Wrap-Up
For me, the best chicken salad sandwich is simple, and I think this recipe hammers that point home. Of course, you can take this recipe, change it and make it your own. However, I recommend you try it as written once because I think you’ll be amazed at just how good something with so few ingredients can truly be. Enjoy!
Thank you for coming to Chef’s Notes. I hope you’ve enjoyed this post. The mission of Chef’s Notes is to share over twenty years of professional cooking experience. If you’d like to be a part of that mission, you can share this post on Facebook or Pinterest or leave a comment below and rate the recipe. You can also subscribe to the Chef’s Notes Patreon by clicking here. You’ll get access to exclusive content, including live streams, monthly cooking videos and more. And remember to subscribe to the Chef’s Notes newsletter.
Best Chicken Salad Ever
The Best Chicken Salad Sandwich is made with a few quality ingredients that balance each other to create a simplistic yet delicious sandwich.
Mince or grate the onion, carrot and celery and add them to a medium mixing bowl.
Add the diced chicken, mayonnaise, salt and pepper. Mix well. Taste and adjust the seasoning with salt and pepper.
Spread the butter out onto eight slices of bread. Top four slices of bread with between a quarter and a half cup of the chicken salad. Top with the other pieces of bread, cut in half and serve.
Notes
Lettuce makes a great addition to this sandwich. Leftover chicken salad can be stored in an airtight container in the fridge for up to two days.
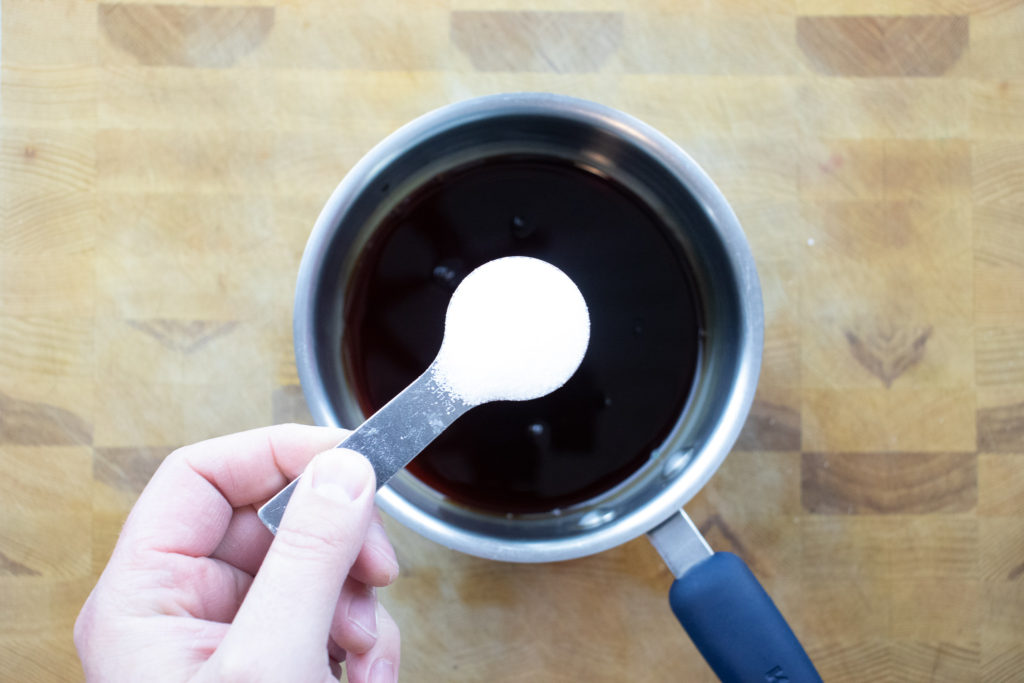
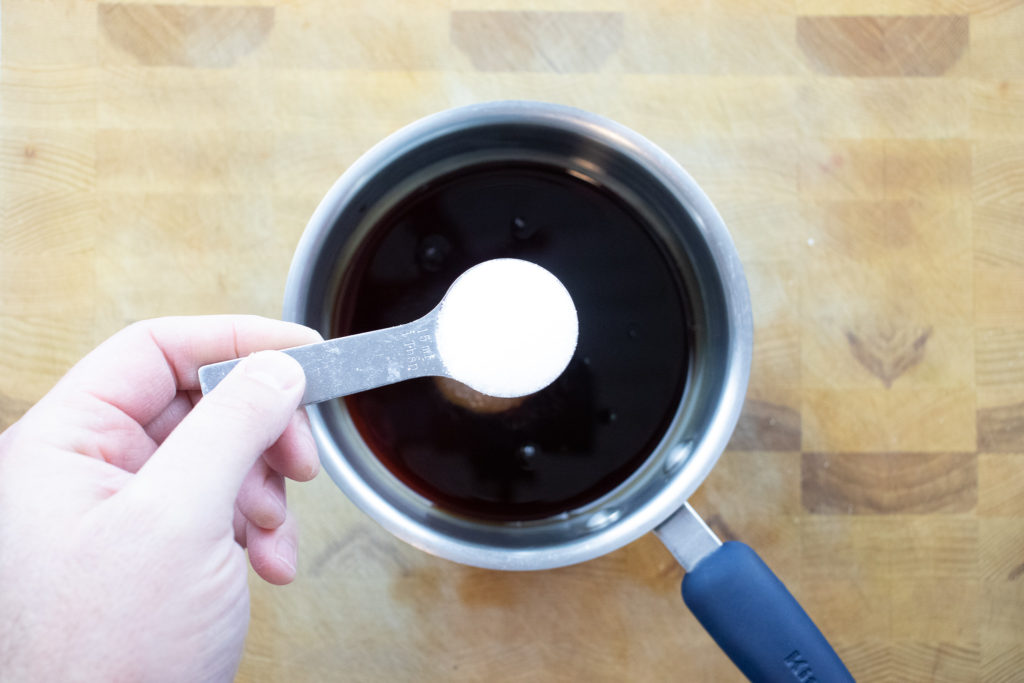
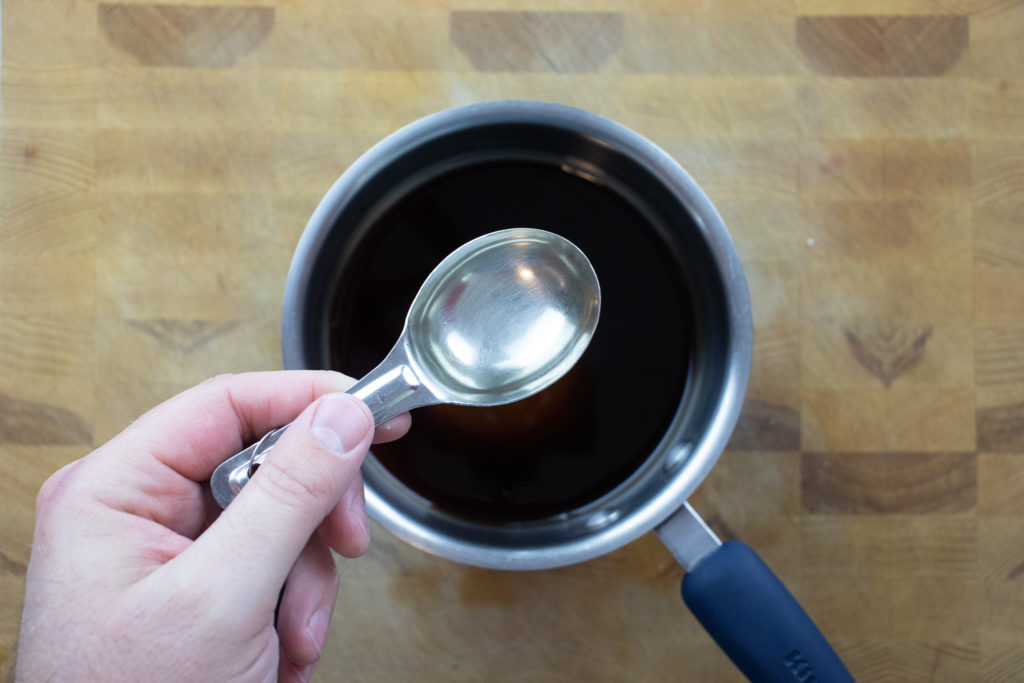
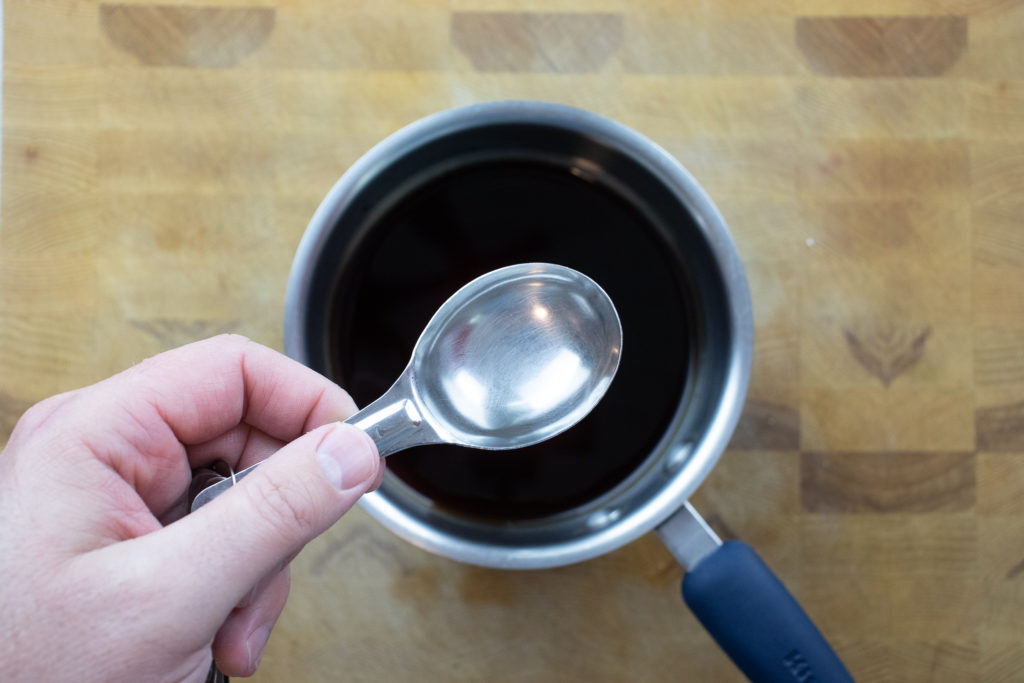
Looking for the ultimate snack to fuel your next adventure? Look no further than homemade teriyaki beef jerky! Not only is this savoury treat low in fat and high in protein, but it’s also free of preservatives and nitrates, making it a healthier choice than store-bought jerky. And the best part? It’s easy to make! Follow the step-by-step recipe for a mouthwatering, protein-packed snack that will satisfy your cravings and keep you going strong. This is my go-to recipe for homemade teriyaki beef jerky, and I’m sure it will be yours too.
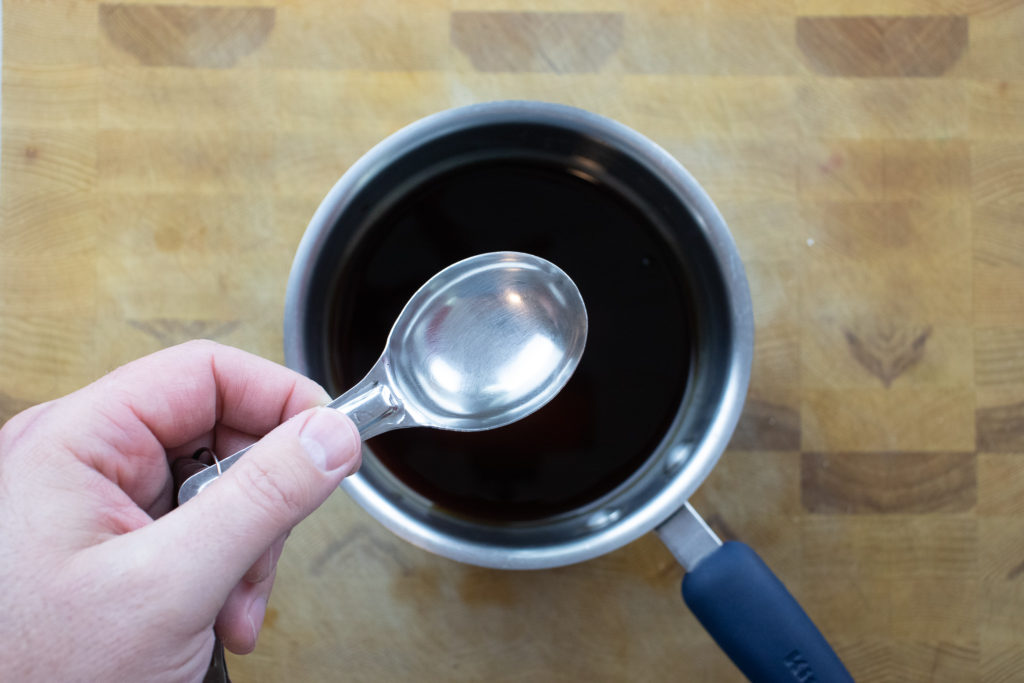
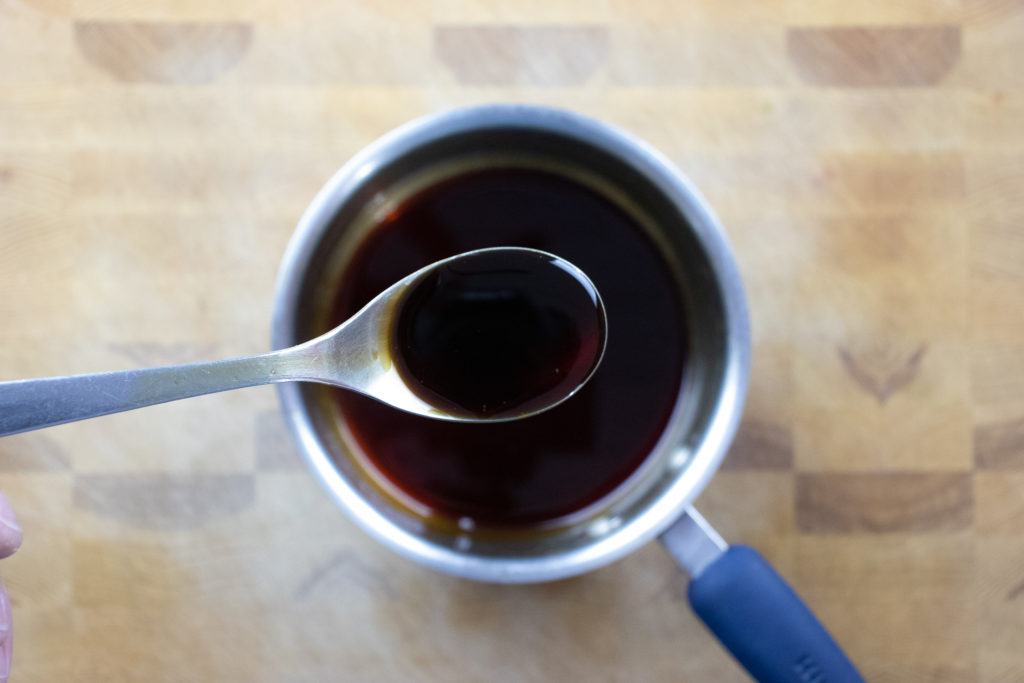
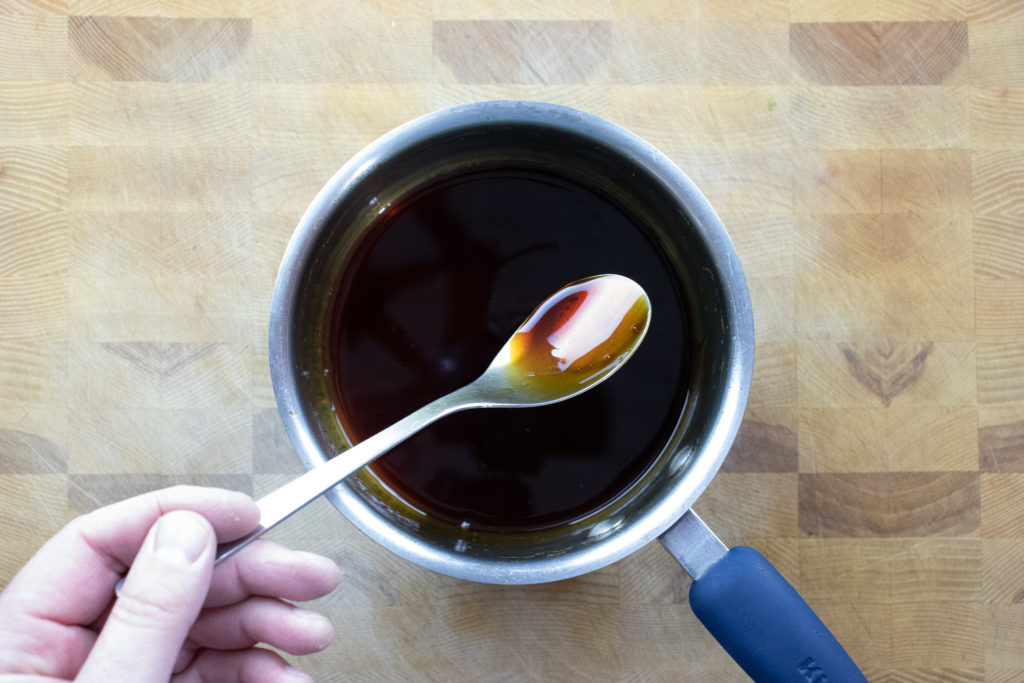
How To Make Teriyaki Beef Jerky Marinade
The first step in this Teriyaki Beef Jerky recipe is to make the Teriyaki marinade. Start with soy sauce or gluten-free tamari (that’s what I used), add some sugar, rice or white wine vinegar, and a bit of water. Bring all of that to a boil, and cook it for about two and a half minutes. Next, take the Teriyaki marinade off the heat and let it cool to room temperature. If you’d like, you can add one teaspoon each of puréed ginger and garlic to the marinade as it is cooking. The measurements are in the recipe at the bottom of the page.
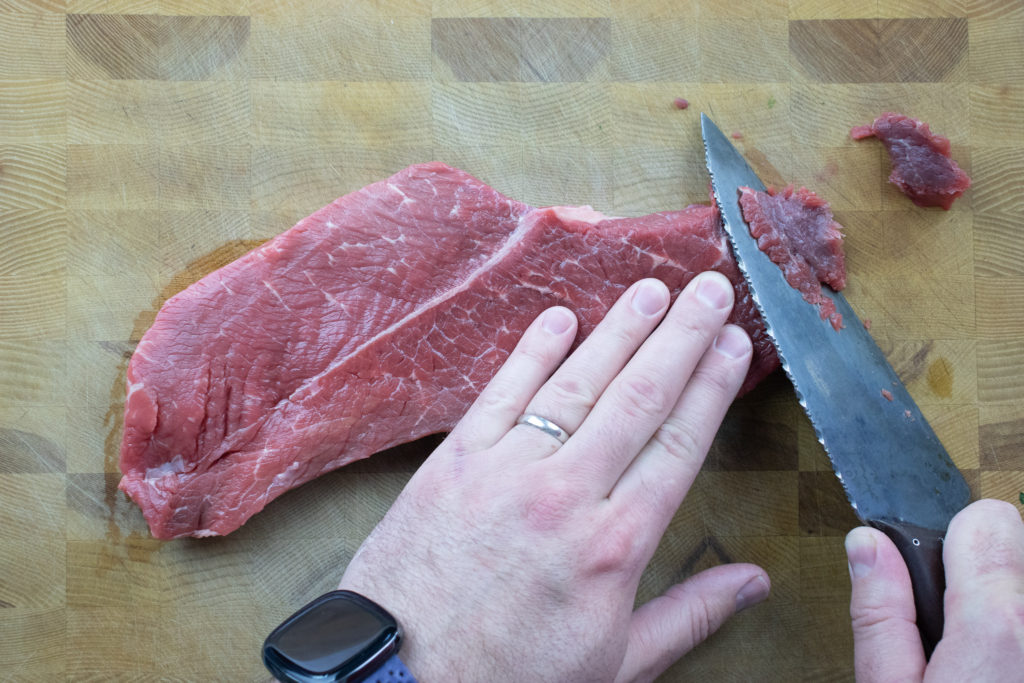
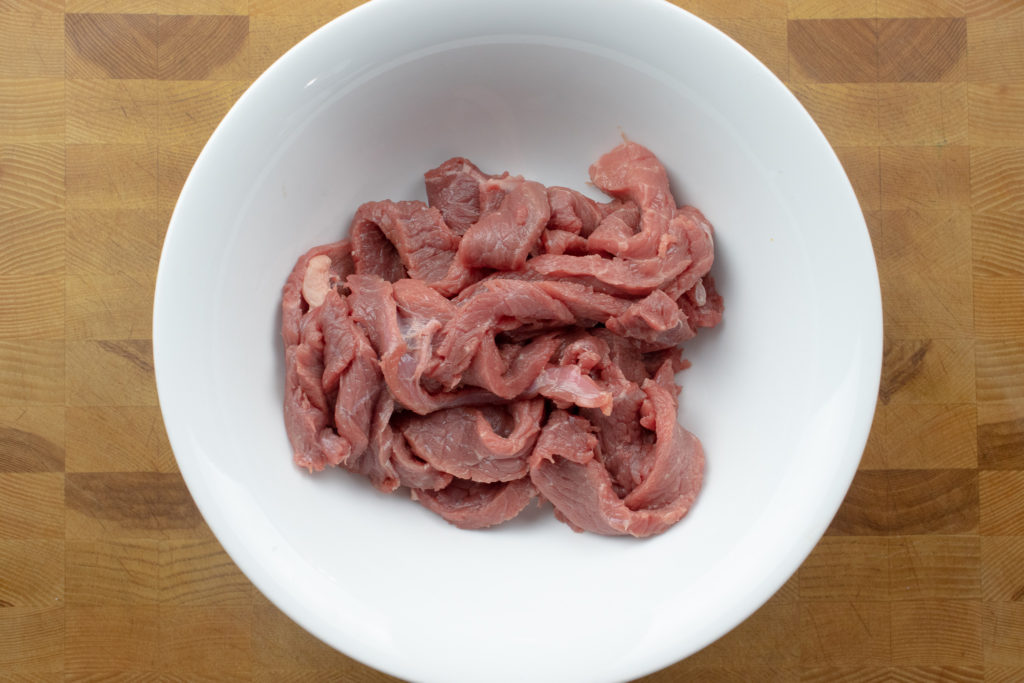
Preparing Beef For Jerky
In total, you want about one pound or 454g of beef. You can use sirloin or inside round. You want a lean cut of meat for jerky because the fat won’t dehydrate and will potentially go rancid. Slice the beef into thin strips (1/4 to 1/2 mm) across the grain to shorten the muscle fibres making the meat less tough. Once the beef is all sliced, put it in a medium bowl.
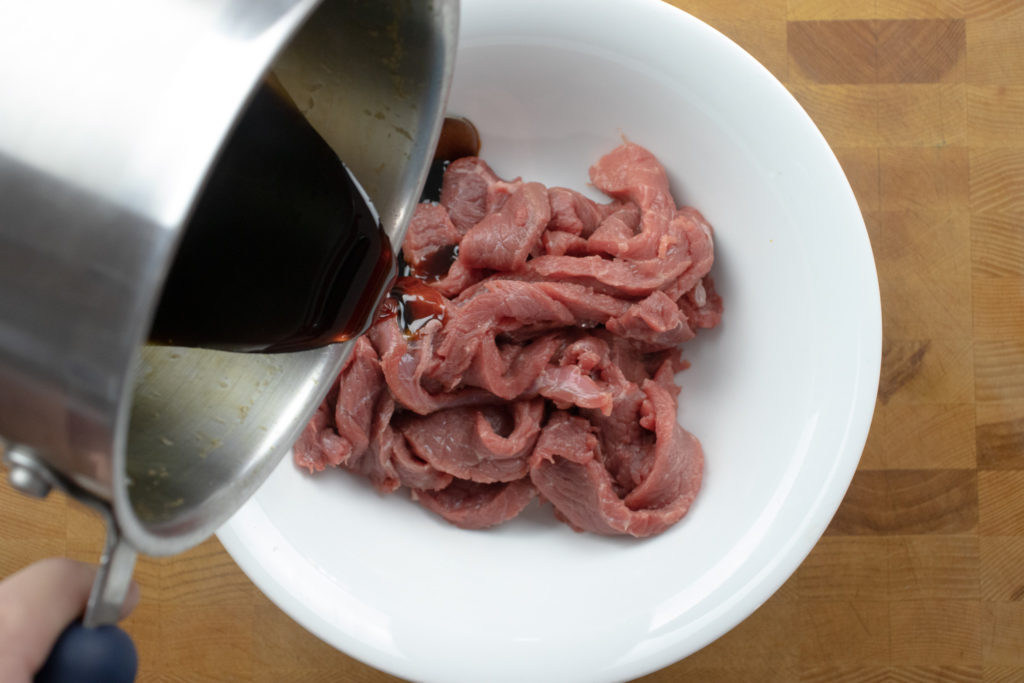
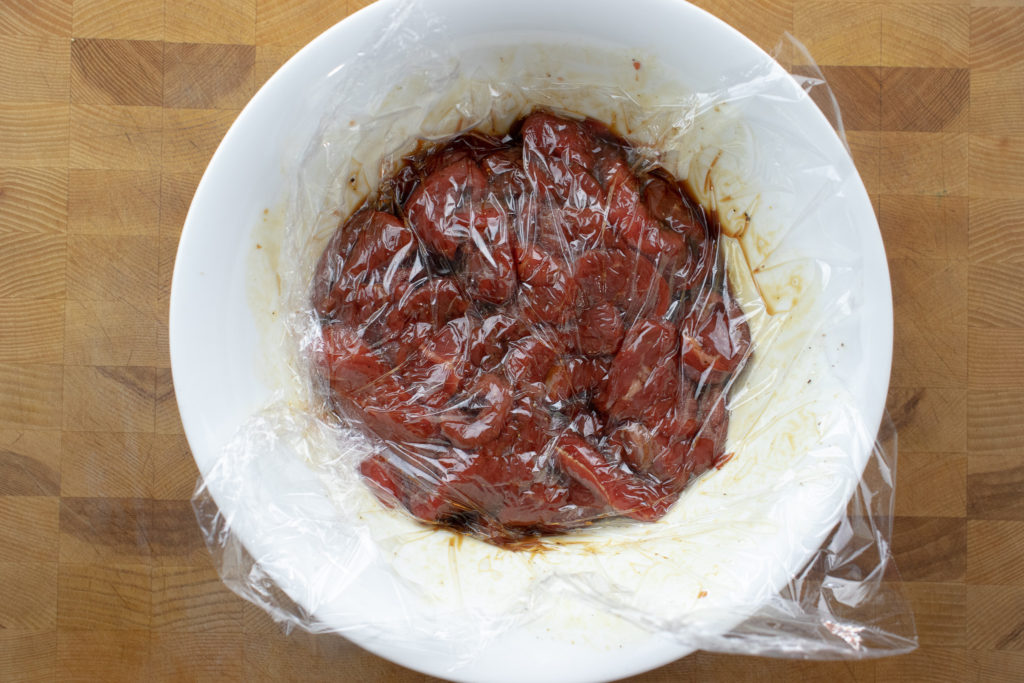
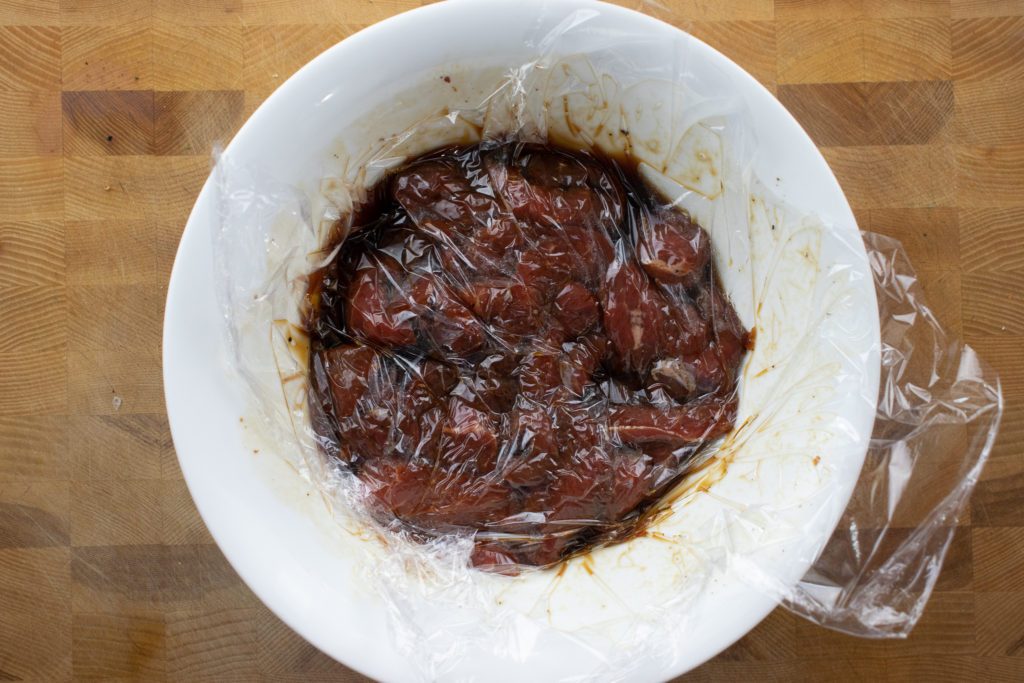
Marinating the Beef for Jerky
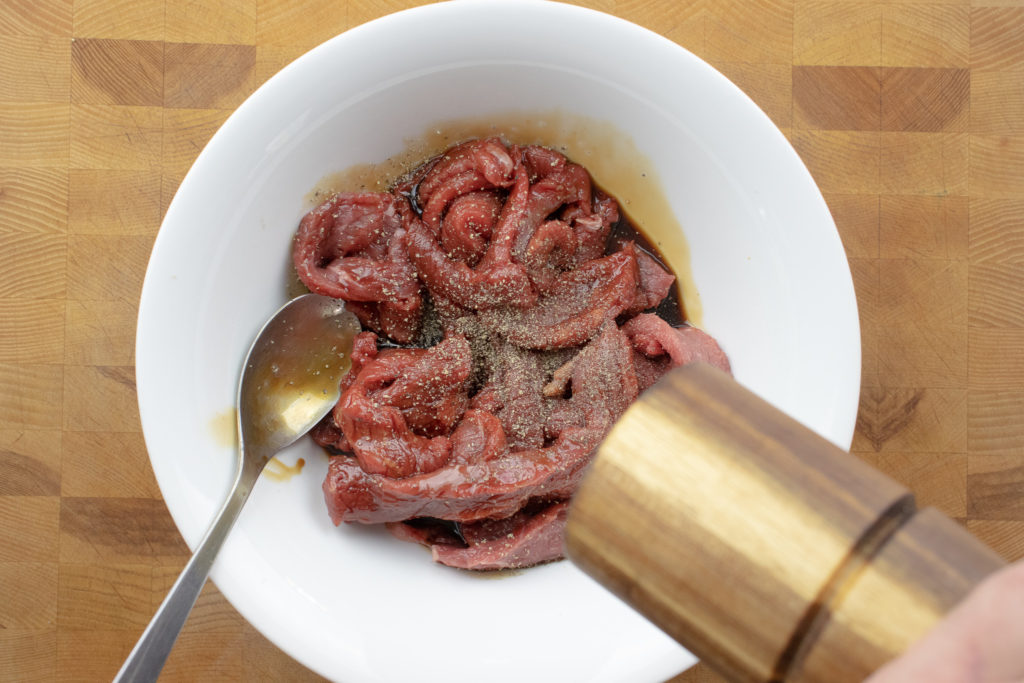
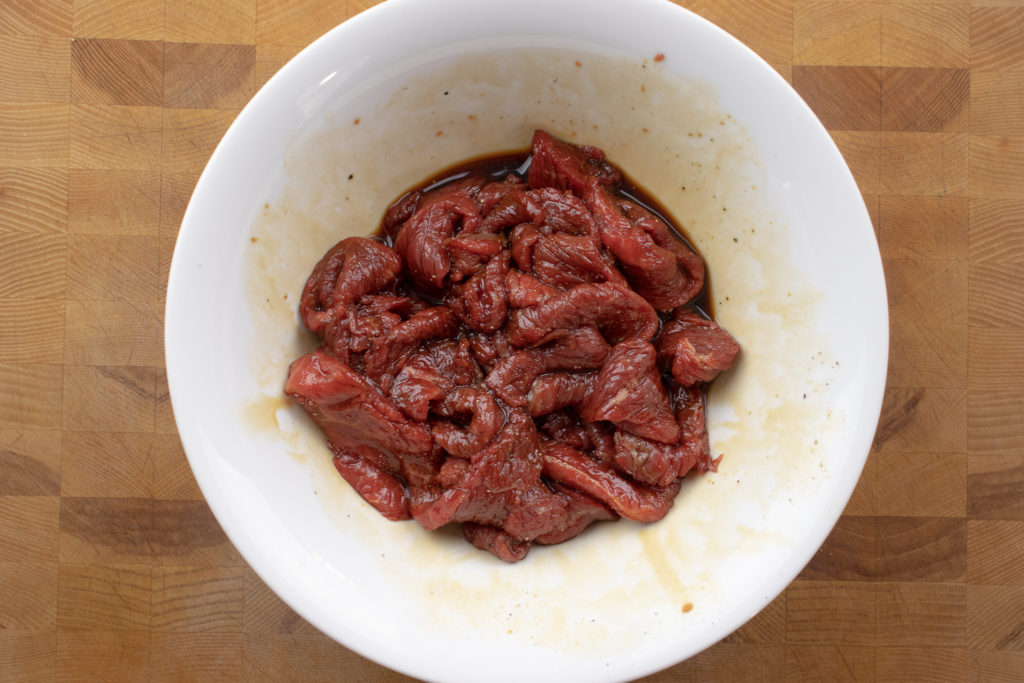
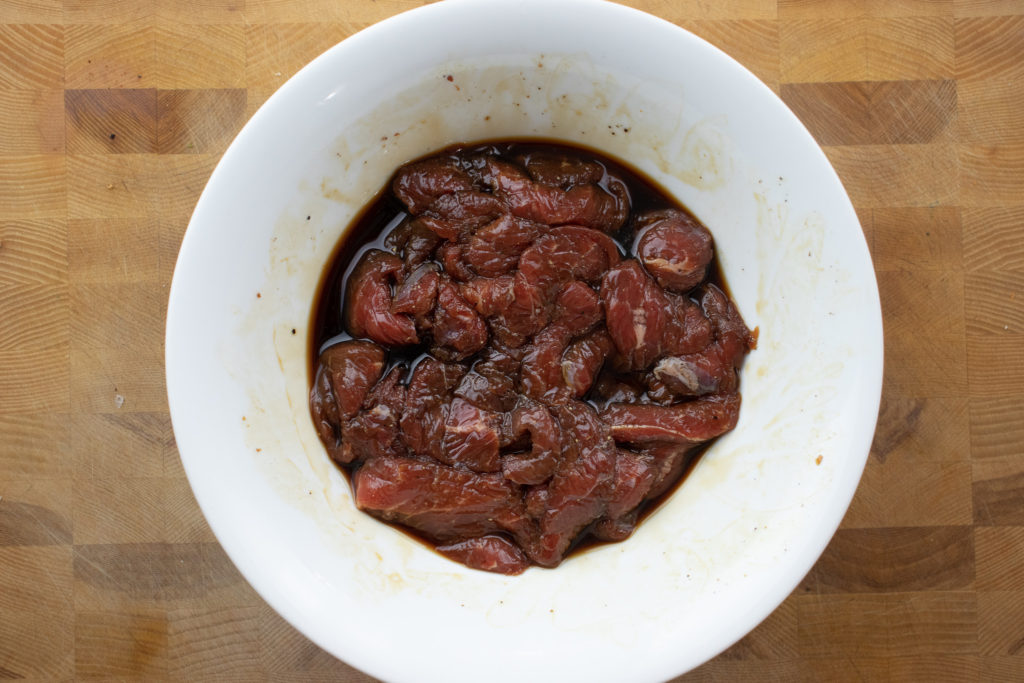
Pour the cooled Teriyaki Marinade over the beef and add about half a teaspoon of black pepper. Mix the meat and pepper into the marinade to ensure all the meat is coated. Cover the bowl with plastic wrap and put it in the fridge. The meat should marinate for a minimum of two hours, but it can go as long as twenty-four hours.
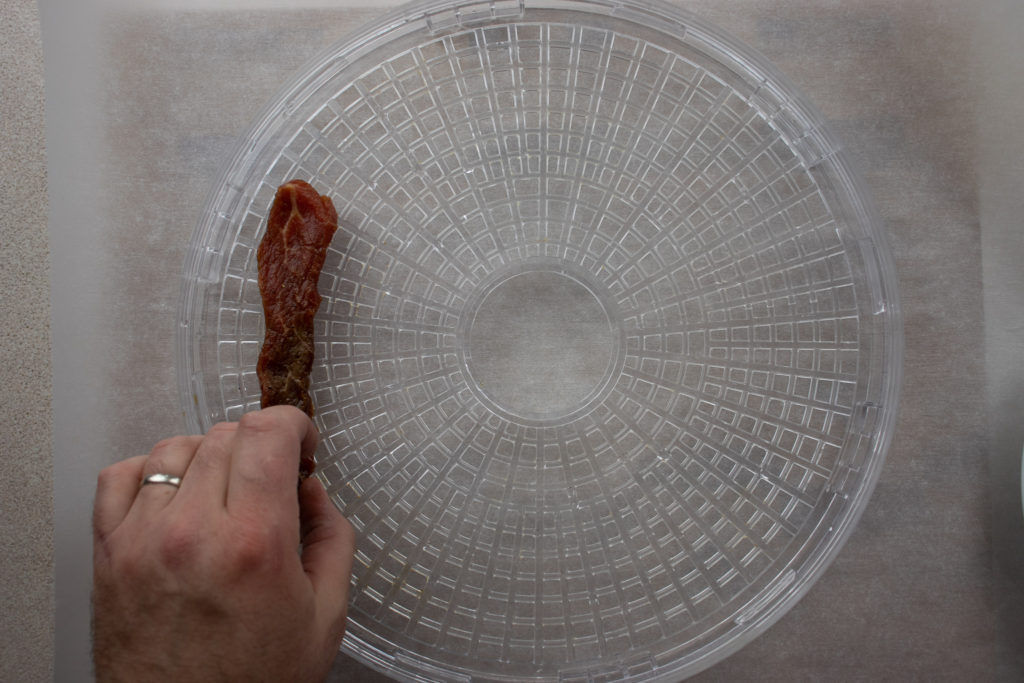
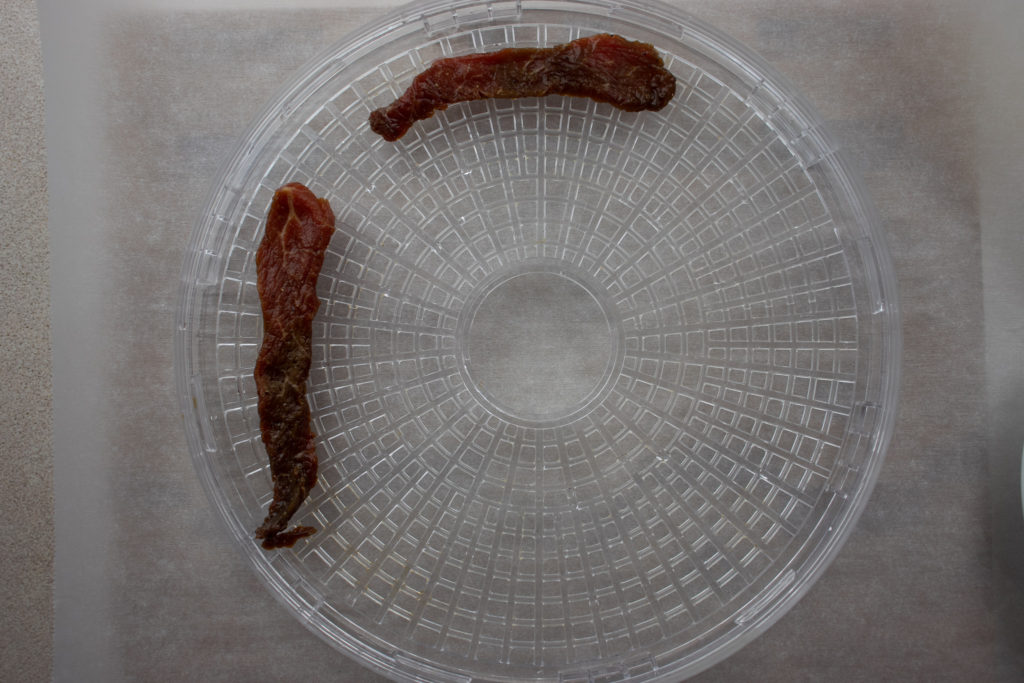
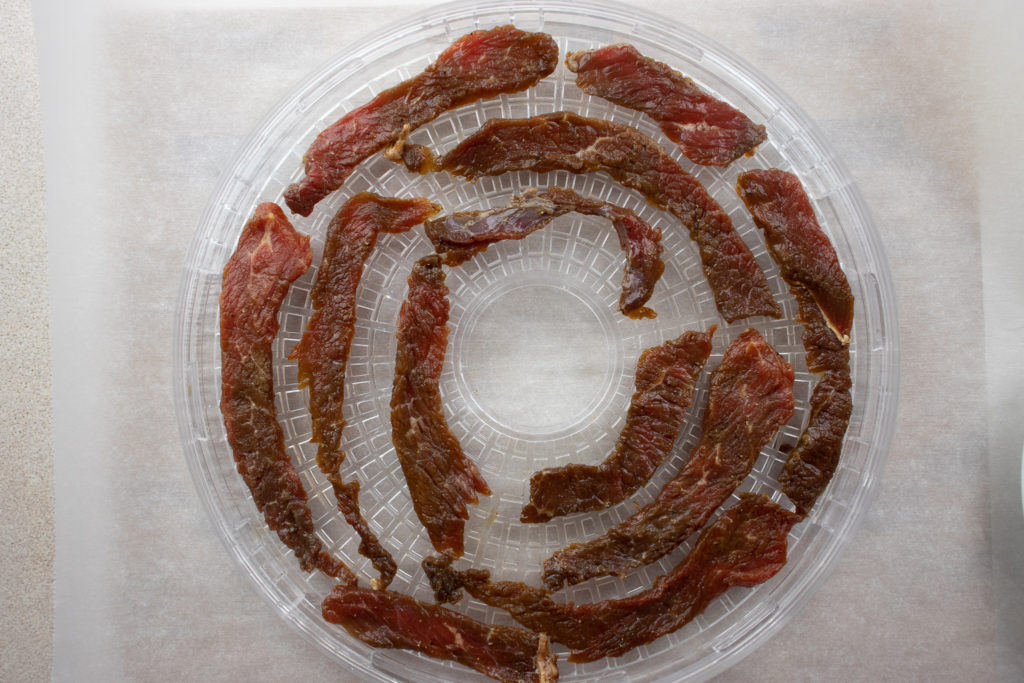
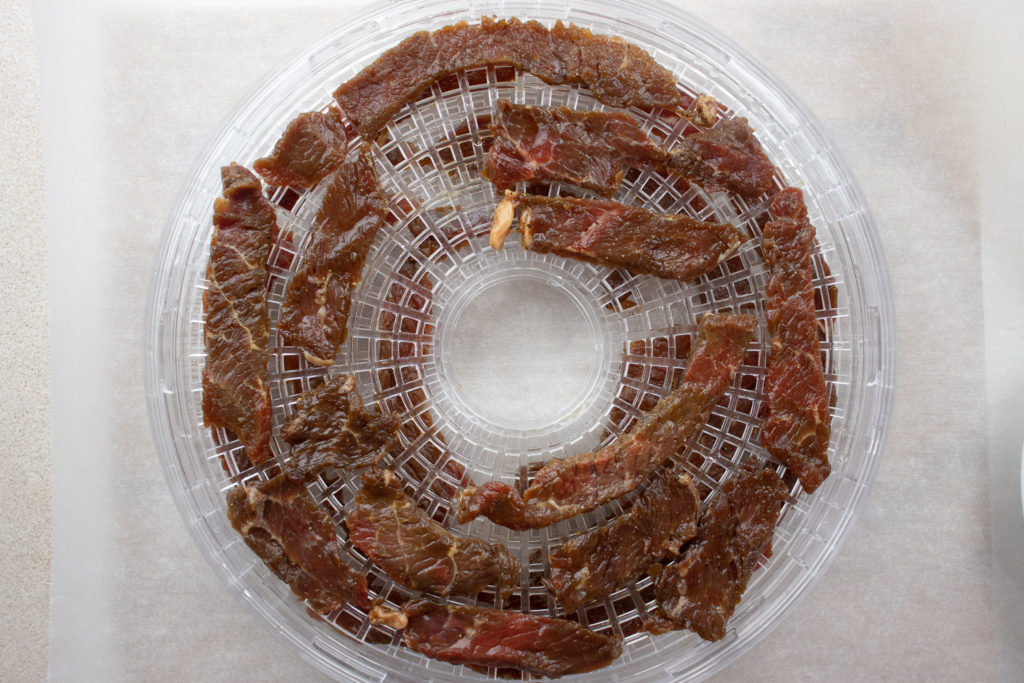
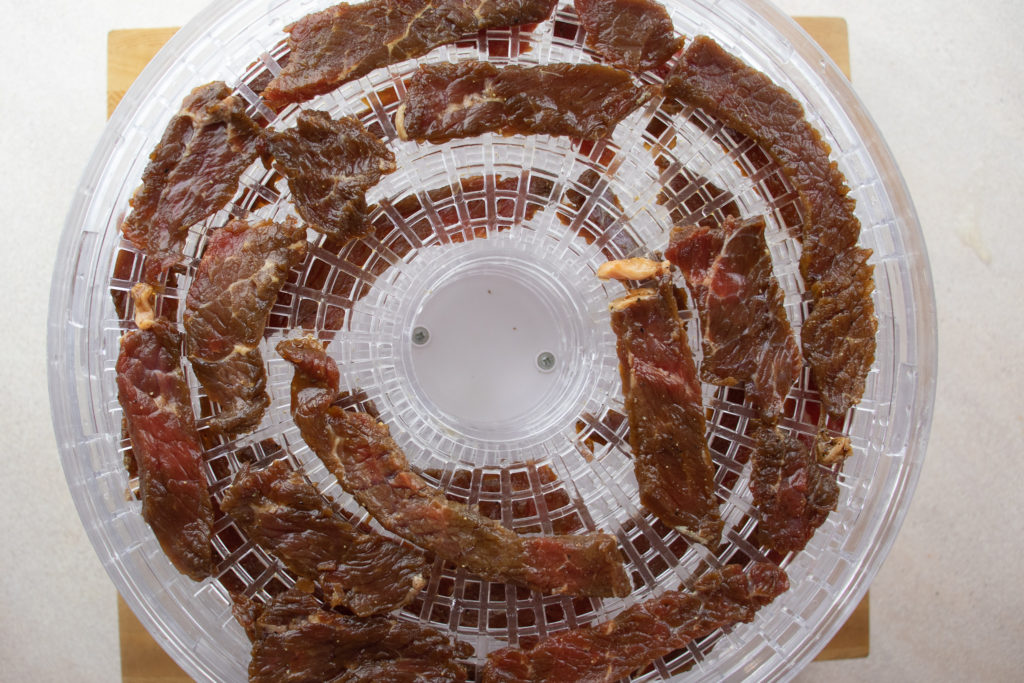
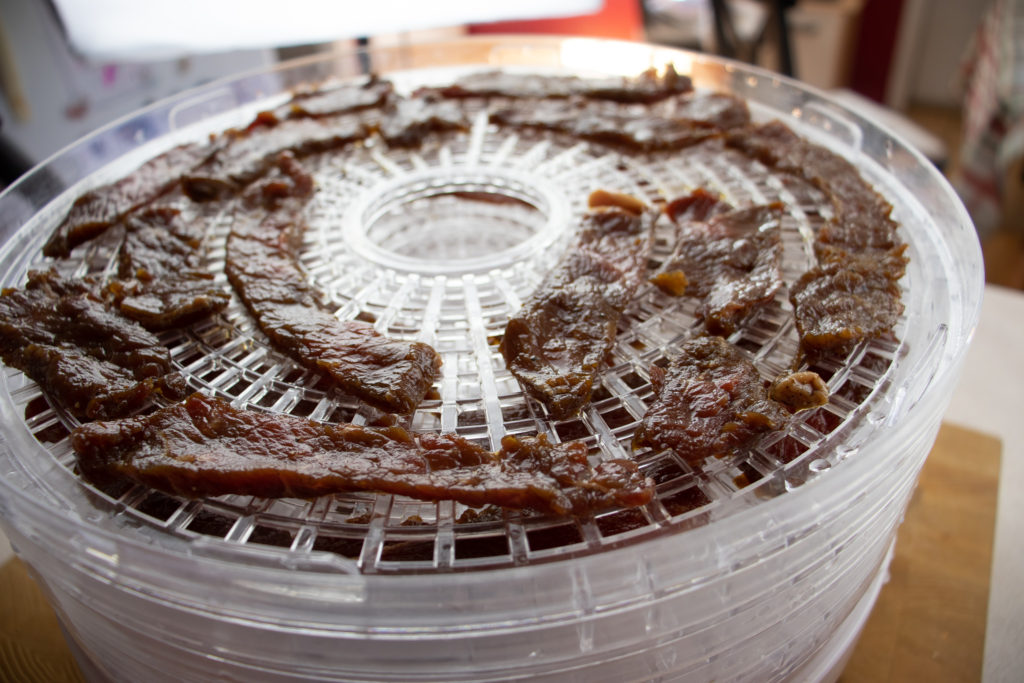
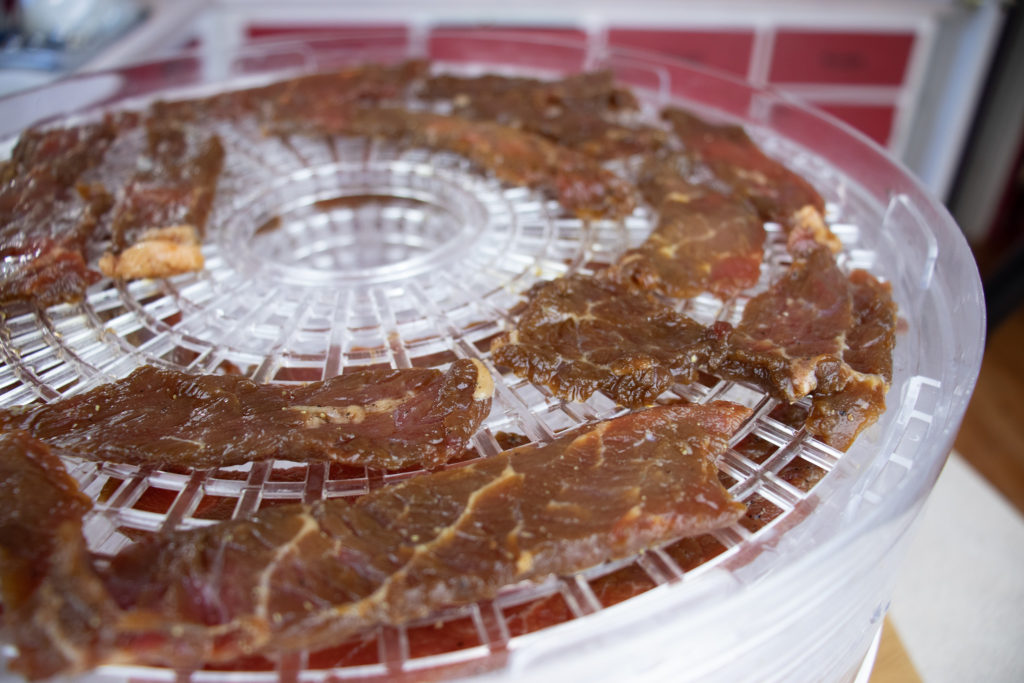
Dehydrating The Teriyaki Beef Jerky
Once the meat has had time to marinate, remove it from the marinade shaking off the excess. Place the marinated beef in a single layer onto the racks of a dehydrator. Turn the dehydrator to 150°f – 160°f. Assemble the dehydrator and dehydrate the beef for two to three hours or until the meat is dry and chewy but not brittle. Store the beef in the fridge in an airtight container or ziplock bag for up to a month. I’m sure you can dehydrate the jerky in your oven though I’ve never done that. But, I would imagine that if you turn your oven to the lowest possible setting, lay the jerky on wire racks and cook it for an hour or two, it should be fine. You can also dehydrate the Teriyaki Beef Jerky in a smoker, as I demonstrate in this post.
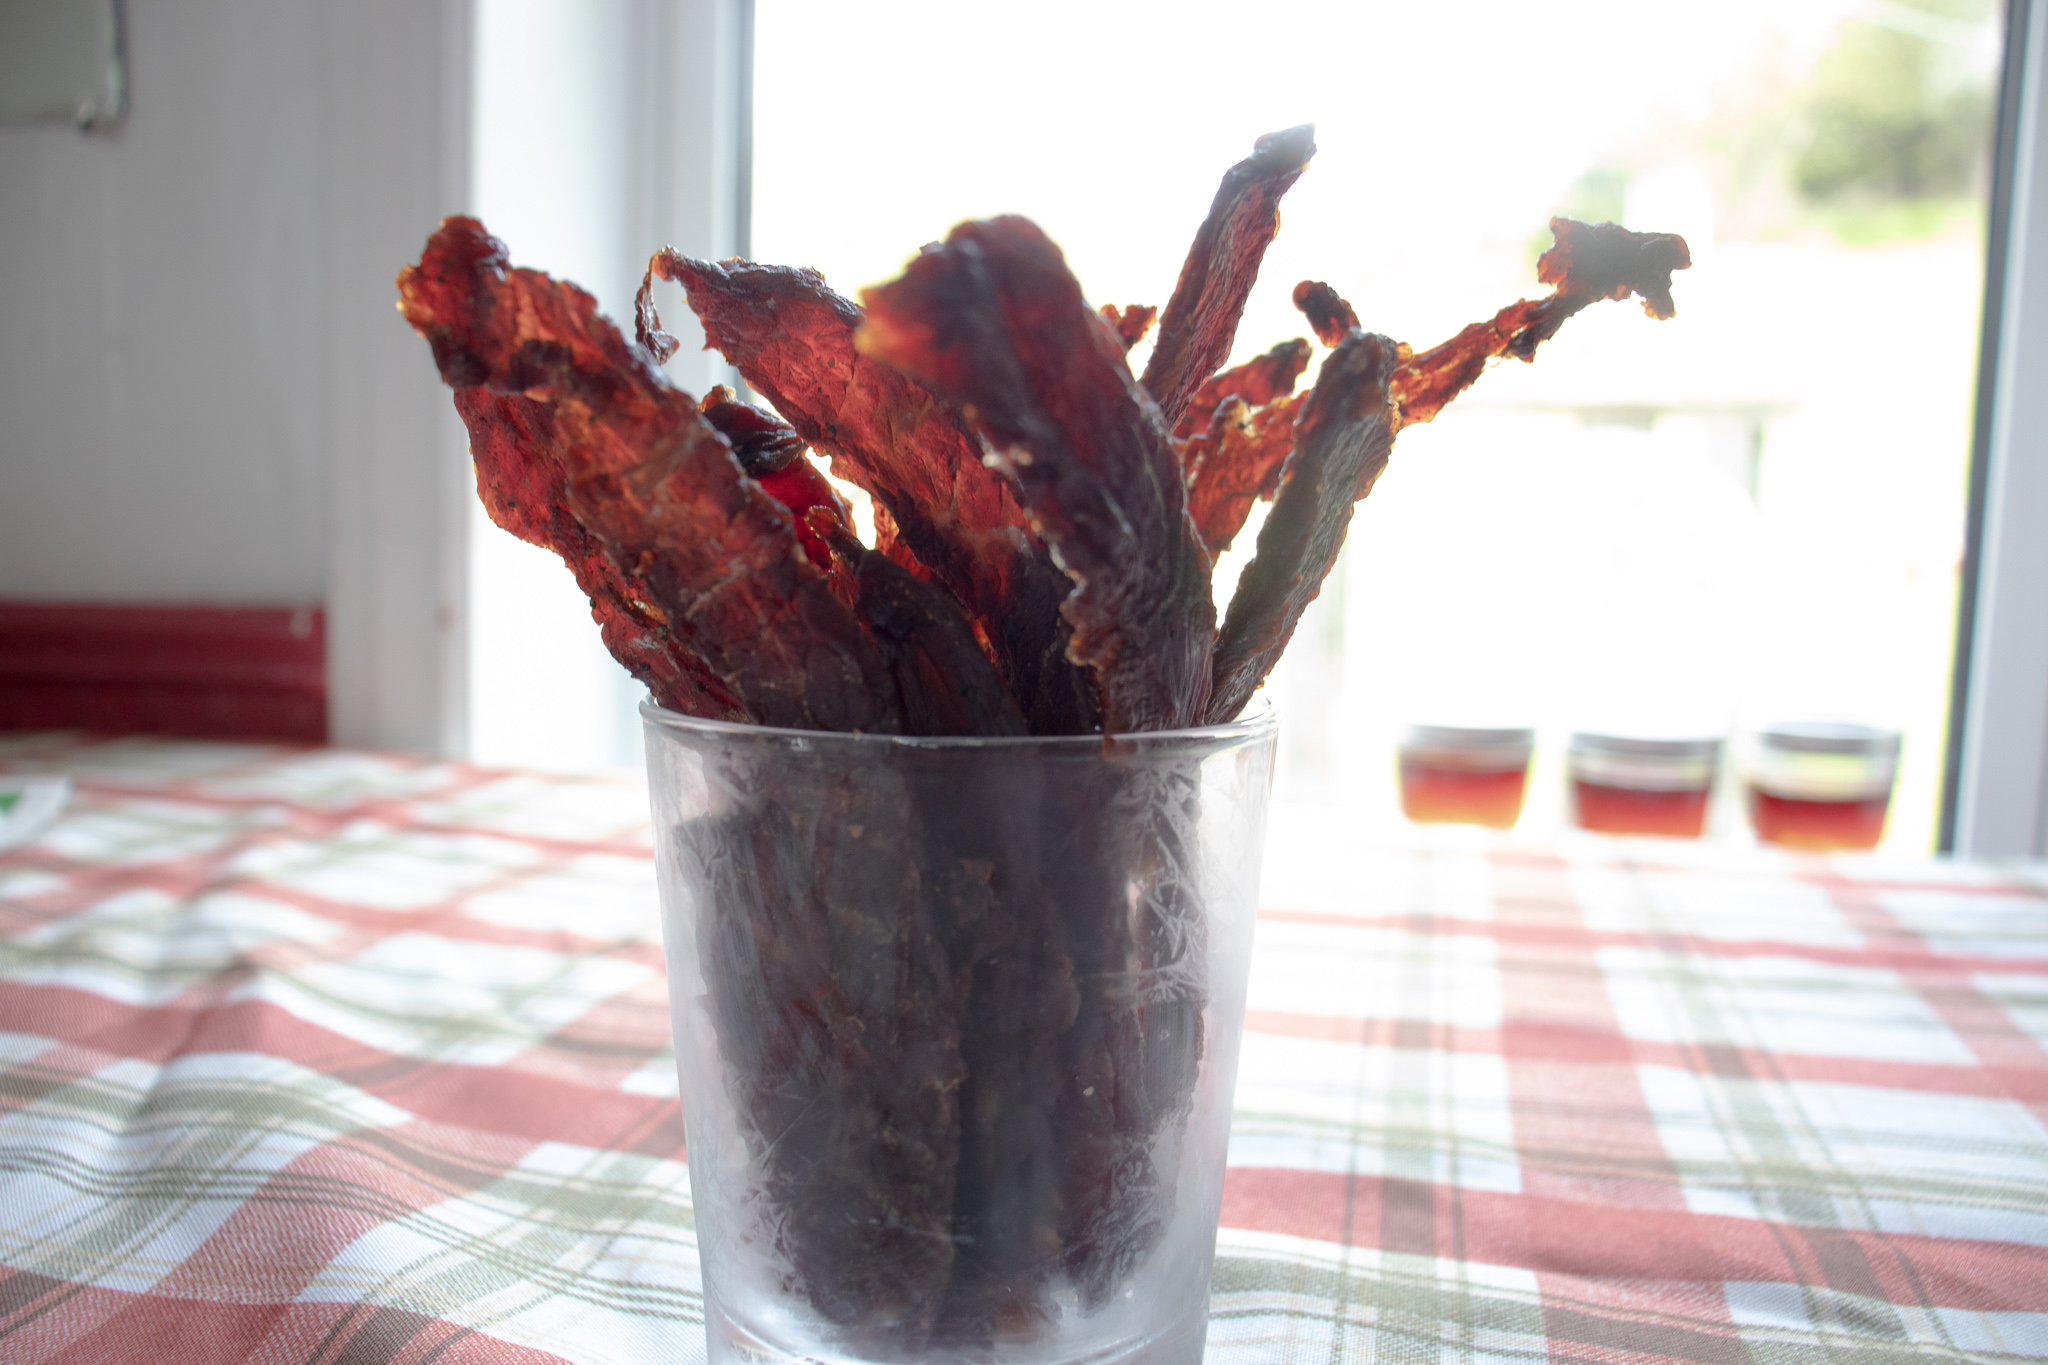
Wrap-Up
After trying this homemade teriyaki beef jerky, you may find it hard to resist the sweet, salty, and savoury flavours that make it so addictive. In fact, you may find yourself finishing the entire batch in just a few days! But if you can resist temptation, this jerky will last in the fridge for about a month. Not only is this recipe a delicious snack, but the teriyaki marinade is also perfect for grilling up salmon, pork, or chicken. And if you’re looking to make your own jerky at home, be sure to check out the dehydrator that I use and recommend. It’s a reliable and easy-to-use appliance that will help you create the perfect homemade teriyaki beef jerky every time.
Teriyaki Beef Jerky
Are you going for a hike in the woods? A long car ride? What's better for a trip like that than some homemade Teriyaki Beef Jerky? This recipe is easy to follow, and gives you a delicious treat at the end.
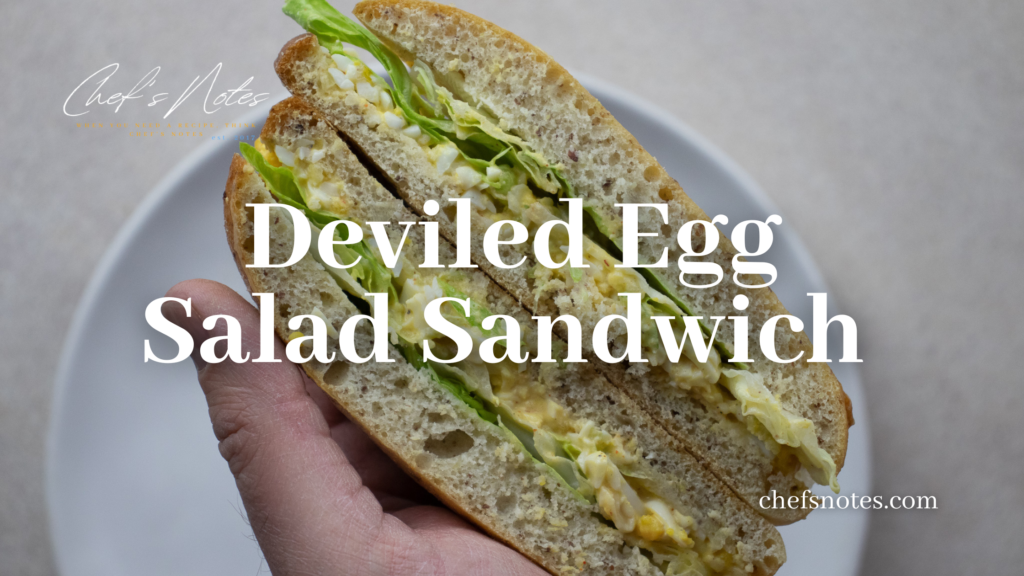
Imagine everything you love about Deviled Eggs but in an Egg Salad Sandwich. Is there a better way to up your egg salad sandwich game? If there is, I haven’t found it. This Deviled Egg Salad is creamy, a little spicy, and packed with flavour. It’s perfect for sharing with your friends and family, or if you want something special for yourself. If you, like me, love Deviled Eggs and Egg Salad Sandwiches, then keep reading for the recipe. Also, below you will find a fantastic tip for perfectly cooking and peeling hard-boiled eggs.
Best Hard-Boiled Eggs
Hard-boiled eggs are often overcooked, giving the yolks a greenish colour and sulphurous smell. Unfortunately, this is a surprisingly common problem. So, before we get into the recipe for the Deviled Egg Salad, I think we should look at how to cook and peel hard-boiled eggs perfectly every time.
How To Cook Hard-Boiled Eggs
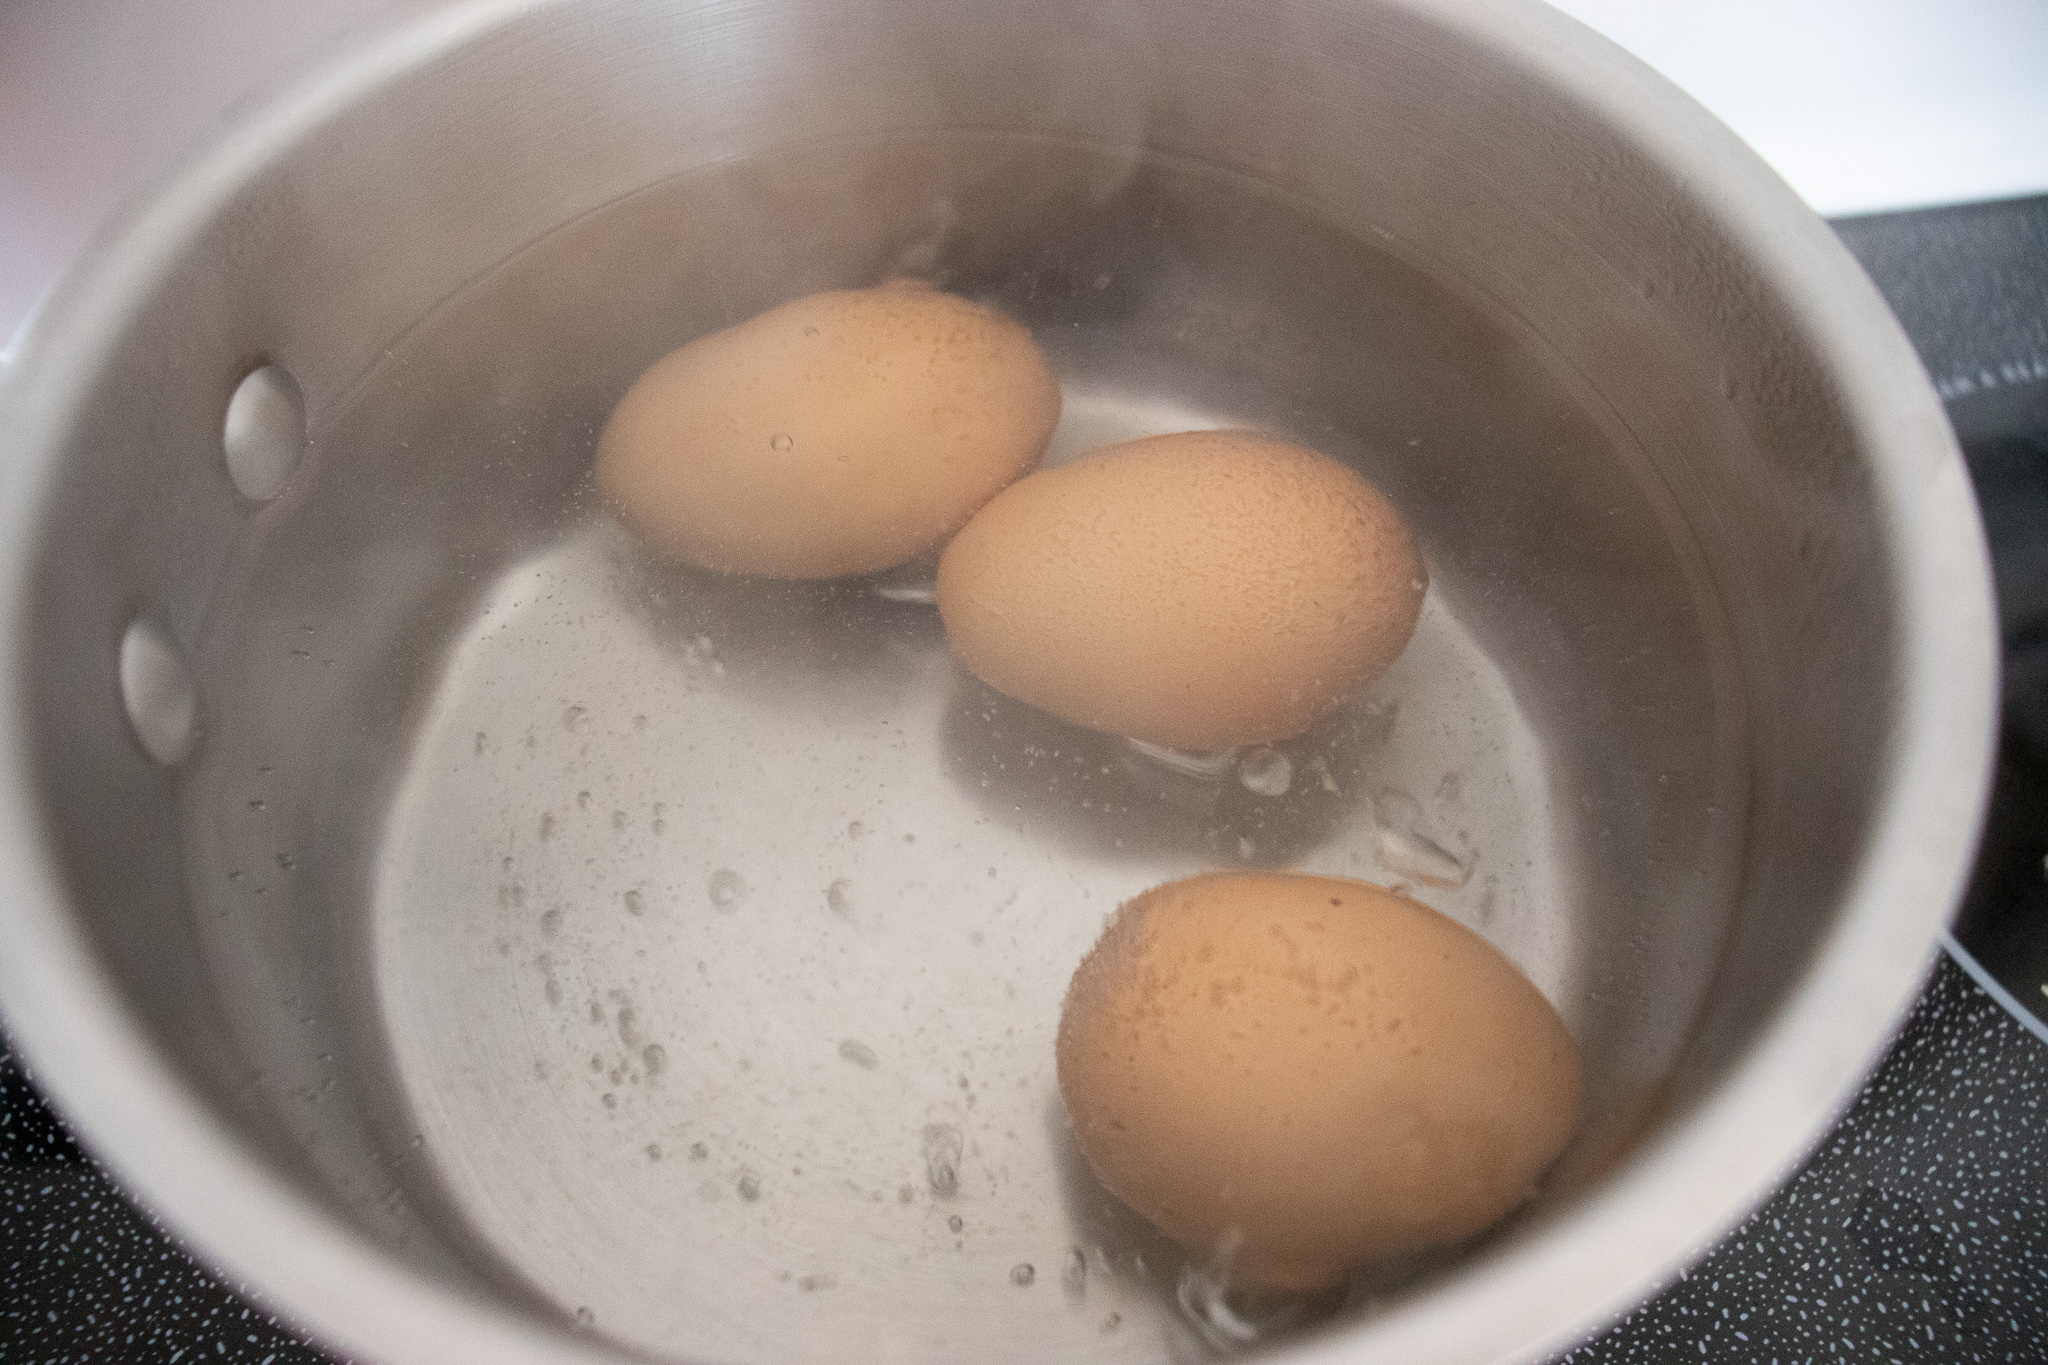
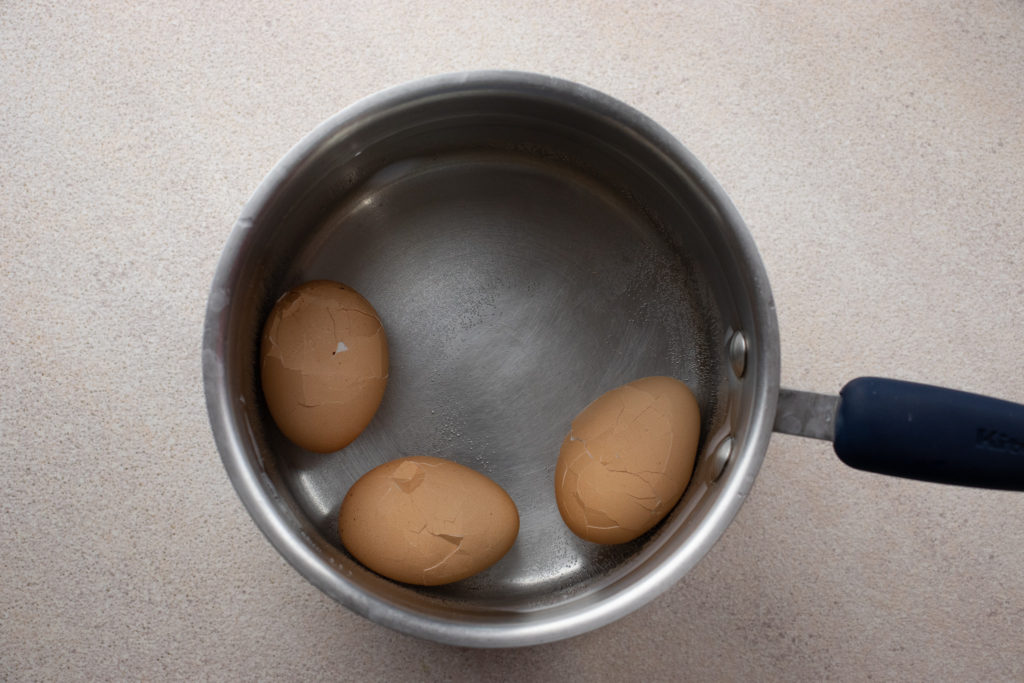
It doesn’t matter how many eggs you are cooking the process and timing are the same. However, the size of the eggs does matter. The cooking method I’m about to describe is for standard large store-bought eggs. First, put the eggs in a pot and cover them with cold water. Next, place the pot on the stove on high heat and bring it to a boil. As soon as the water starts to boil, set a five-minute timer.
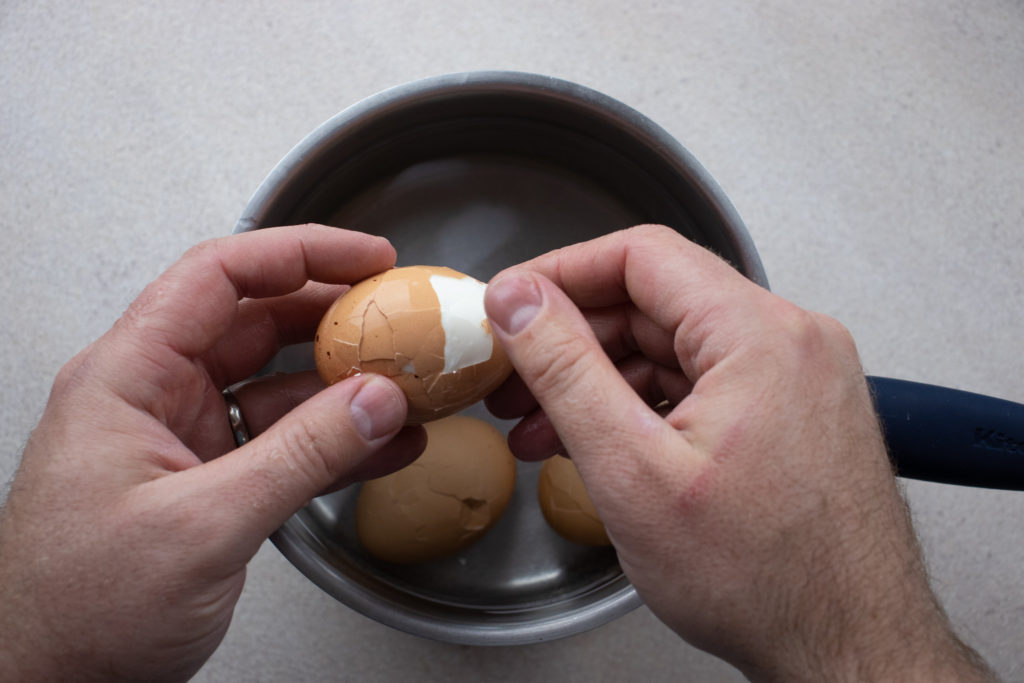
Peeling Hard-Boiled Eggs
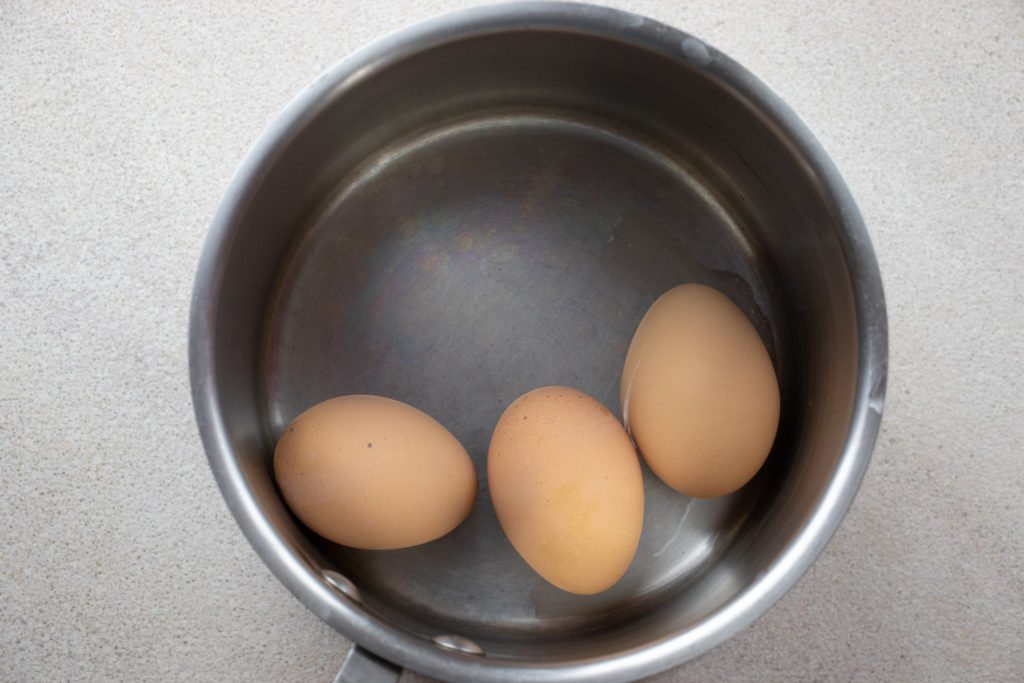
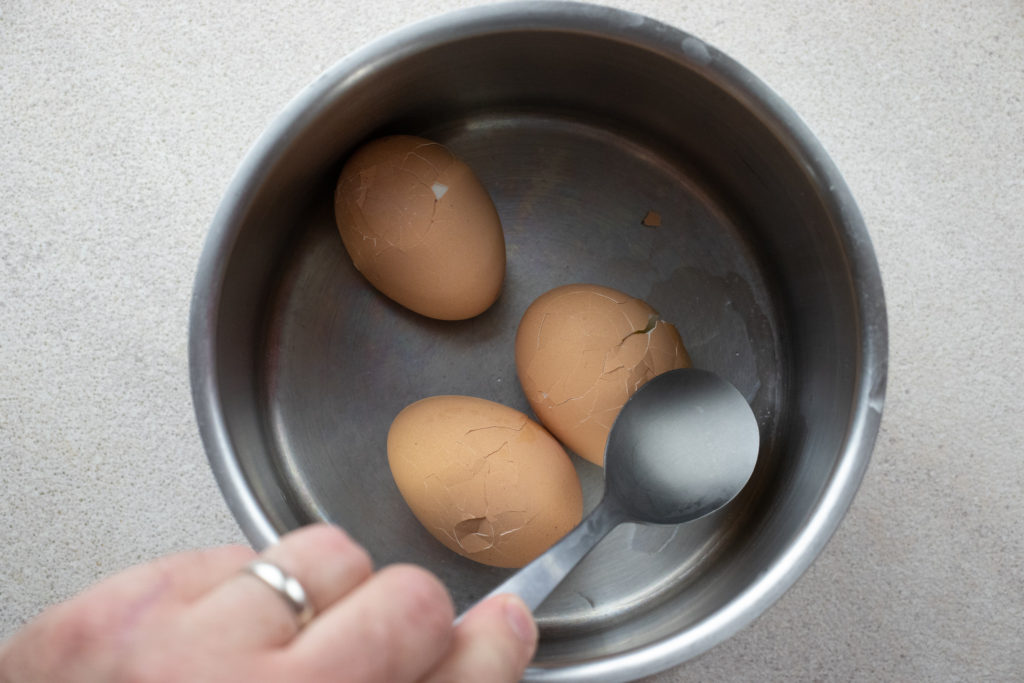
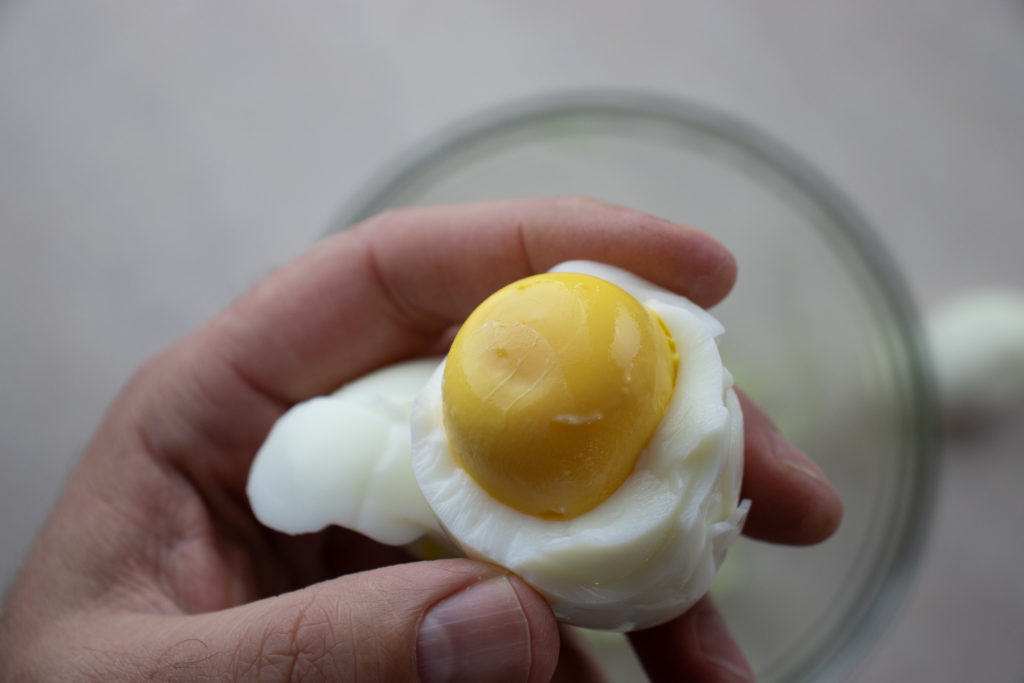
As soon as the five-minute timer goes off, drain the hot water out of the pot. Using the back of a spoon, gently tap the eggs a few times to crack the shells in a few different places. Put the pot in the sink and fill it with cold running water. Let the cold water run over the eggs for about five minutes or until the water in the pot is cold. Peel and rinse the eggs. You now have perfectly cooked and peeled hard-boiled eggs.
Why crack the egg shells?
Cracking the egg shells while the eggs are still hot allows the cold water to get between the shell and the egg, making the eggs much easier to peel. Cracking the eggs while they’re cold doesn’t have the same effect. So, you must crack the shells while the eggs are still hot. Also, running the eggs under cold water cools them quickly, so they don’t overcook and get that green colour and off smell.
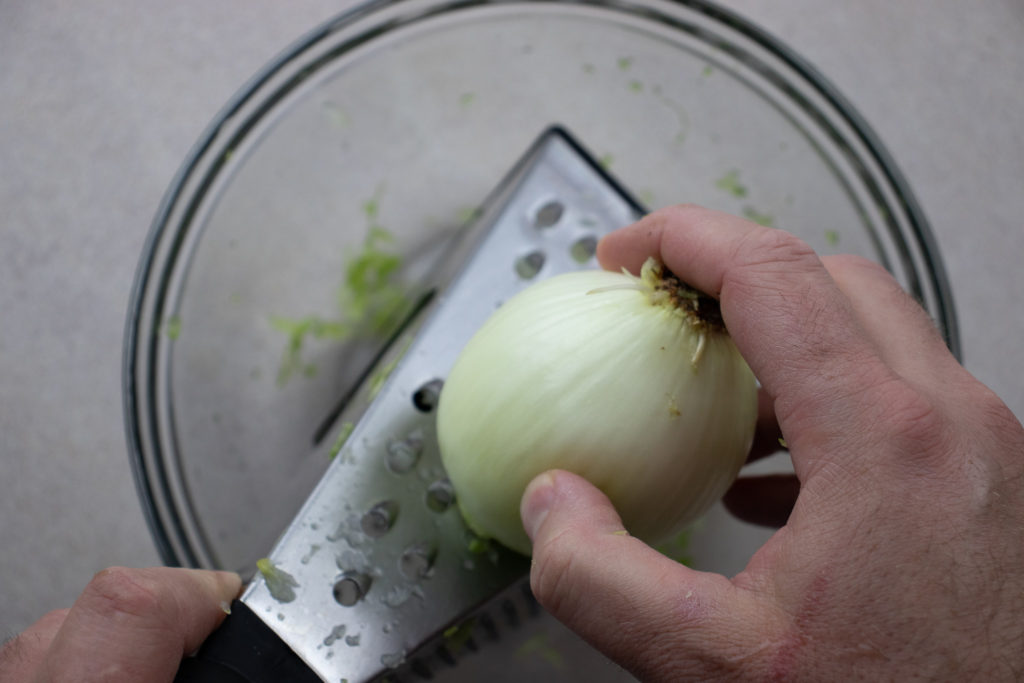
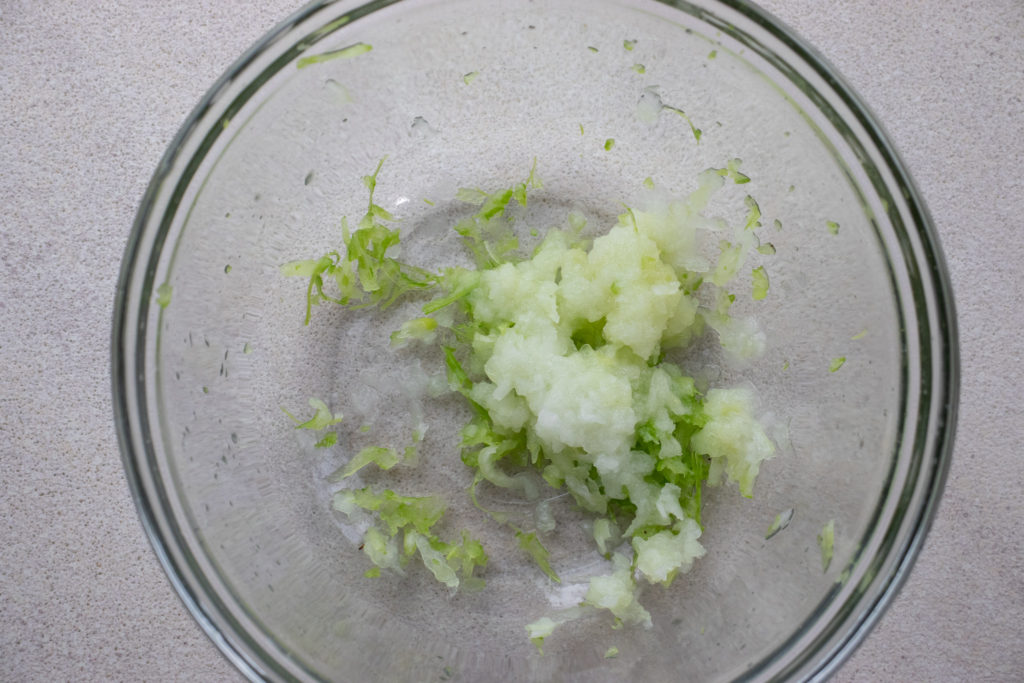
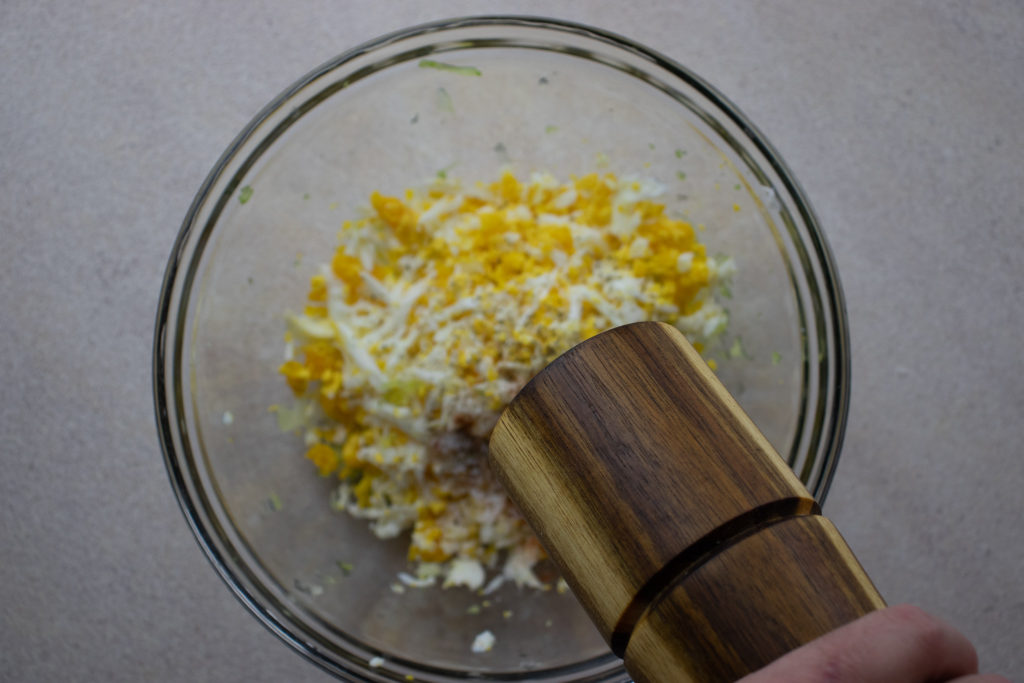
Grating The Ingredients
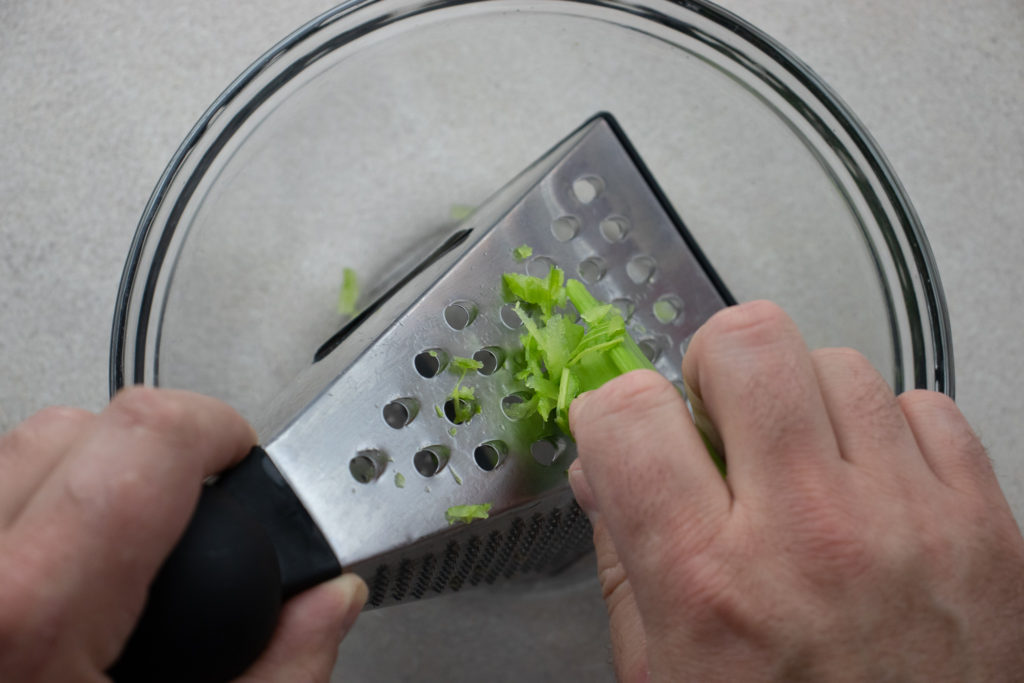
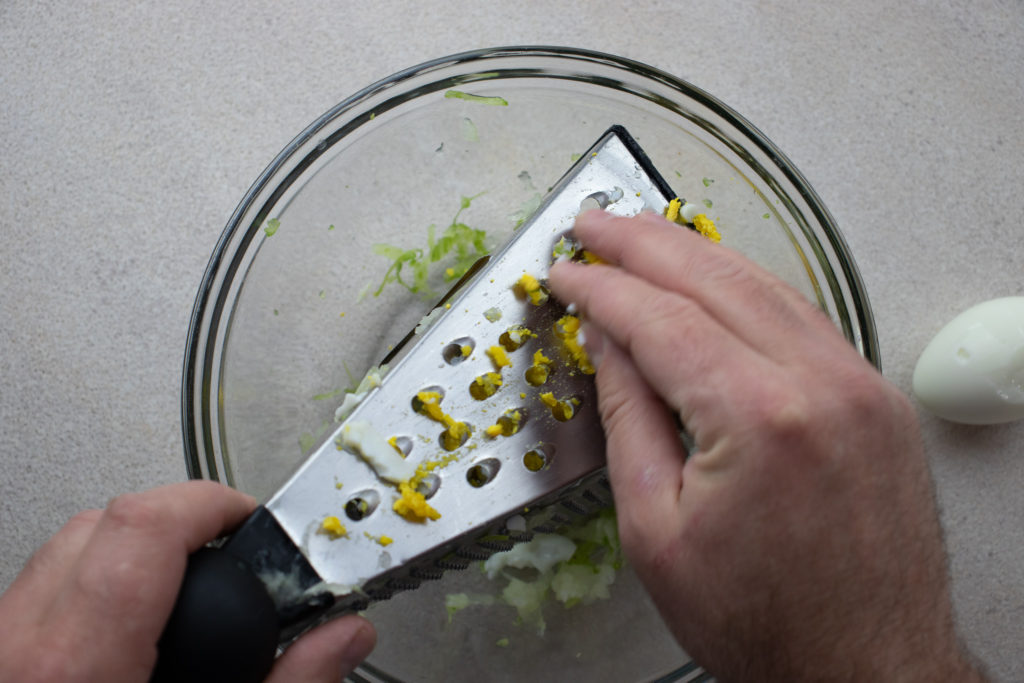
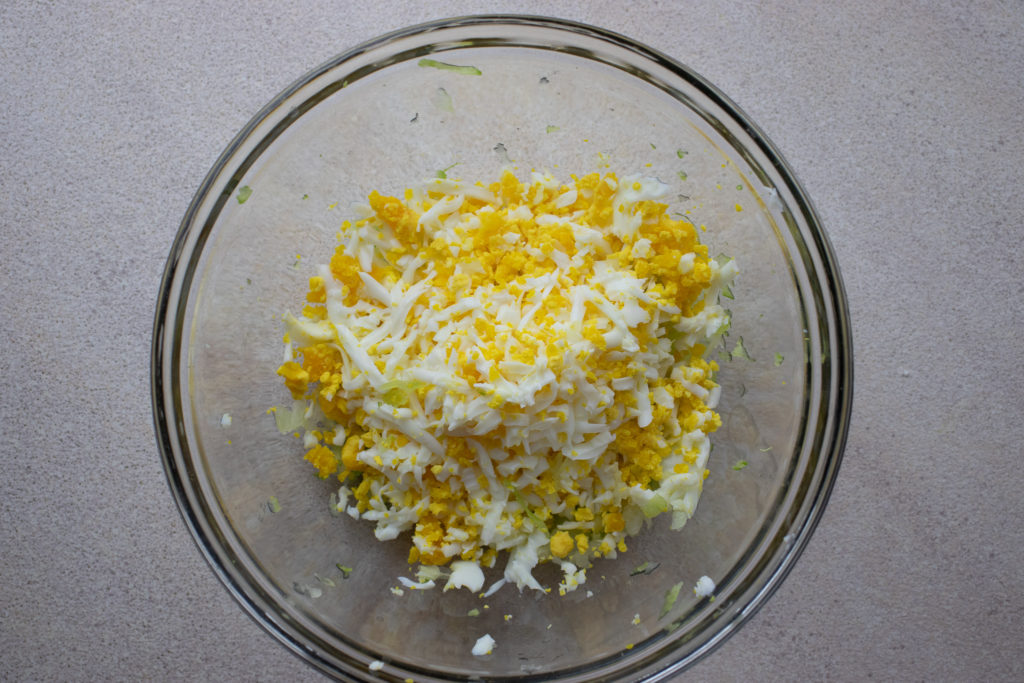
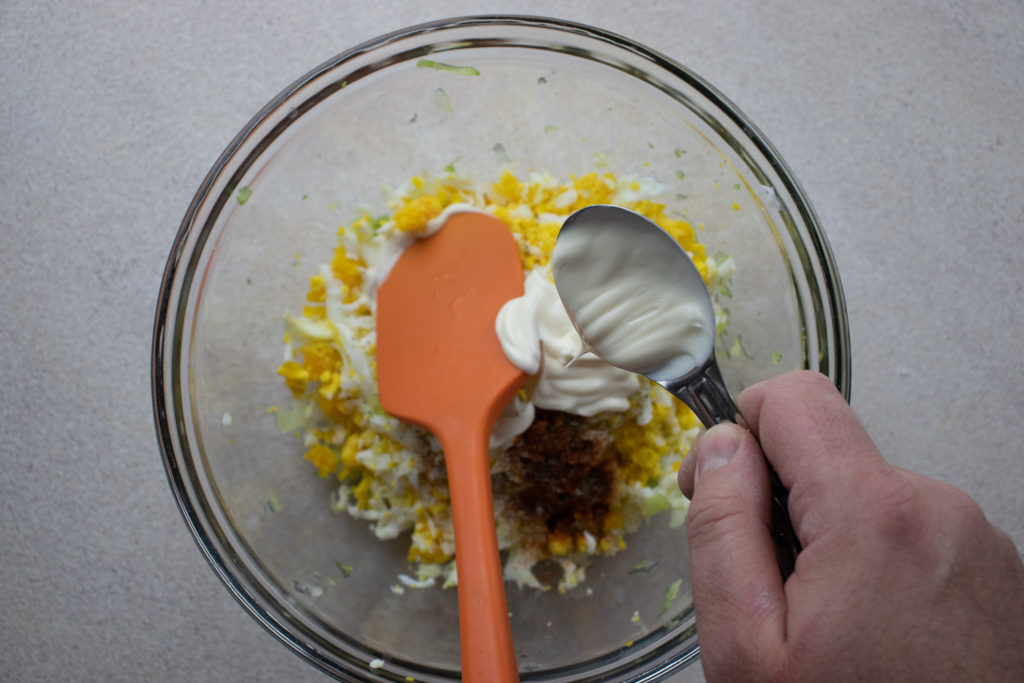
While the eggs are cooking, you can set up and prepare the other Deviled Egg Salad ingredients. You need a medium mixing bowl, a cheese grater, and a spatula. First, grate the celery and onion on the largest setting of the cheese grater. In total, you want about two tablespoons of each. If you end up with a little more or a little less, it won’t hurt anything. Then, once the eggs are cooled and peeled, grate those on the cheese grater.
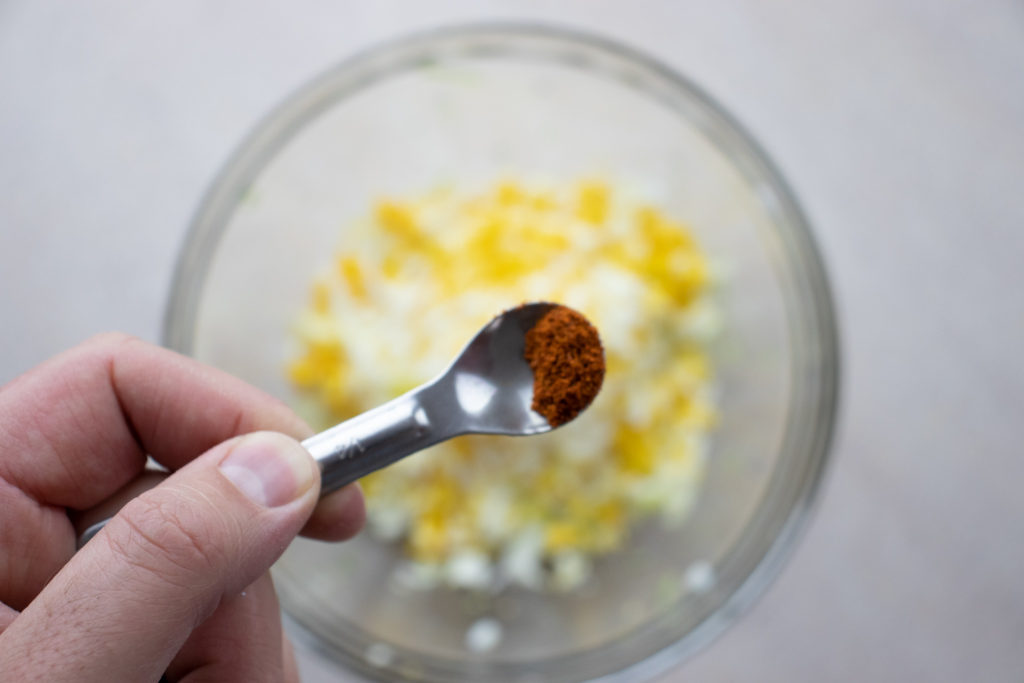
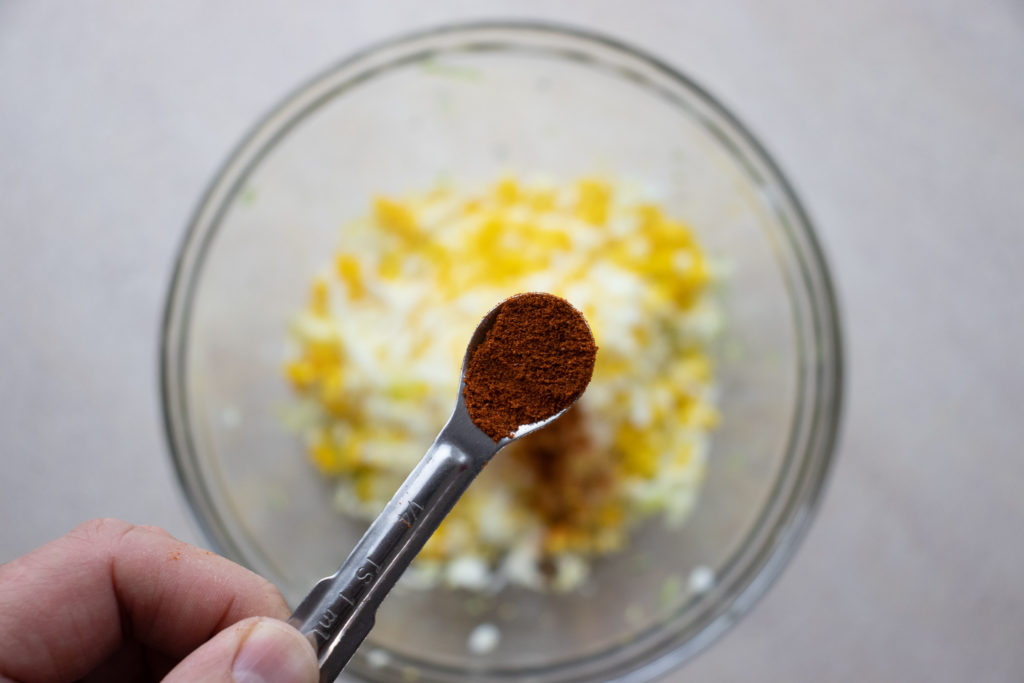
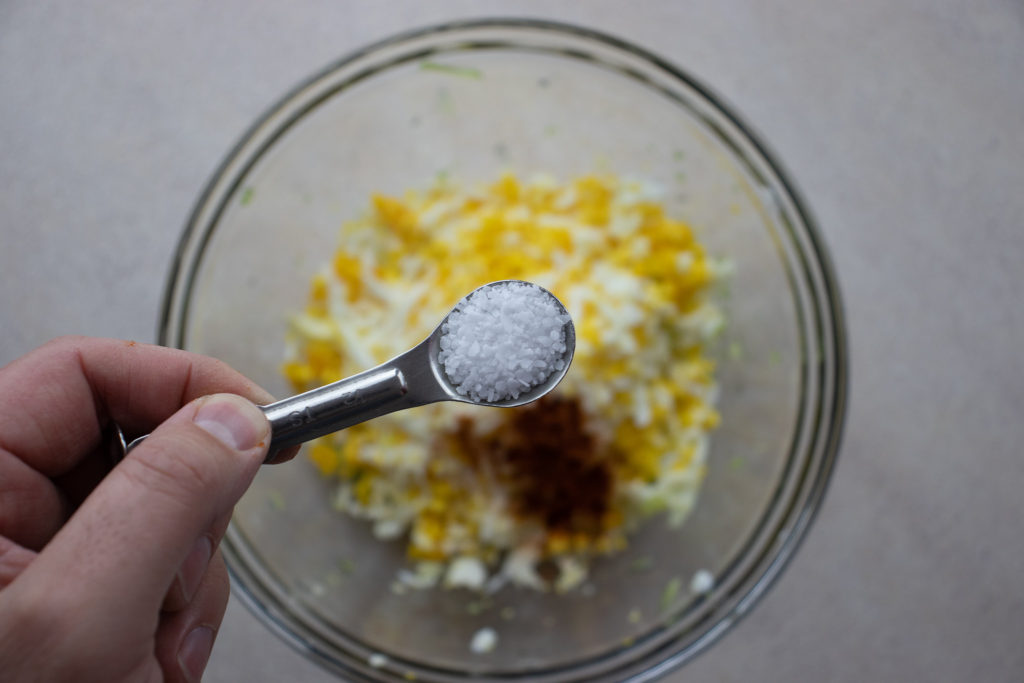
Seasonings and Spices
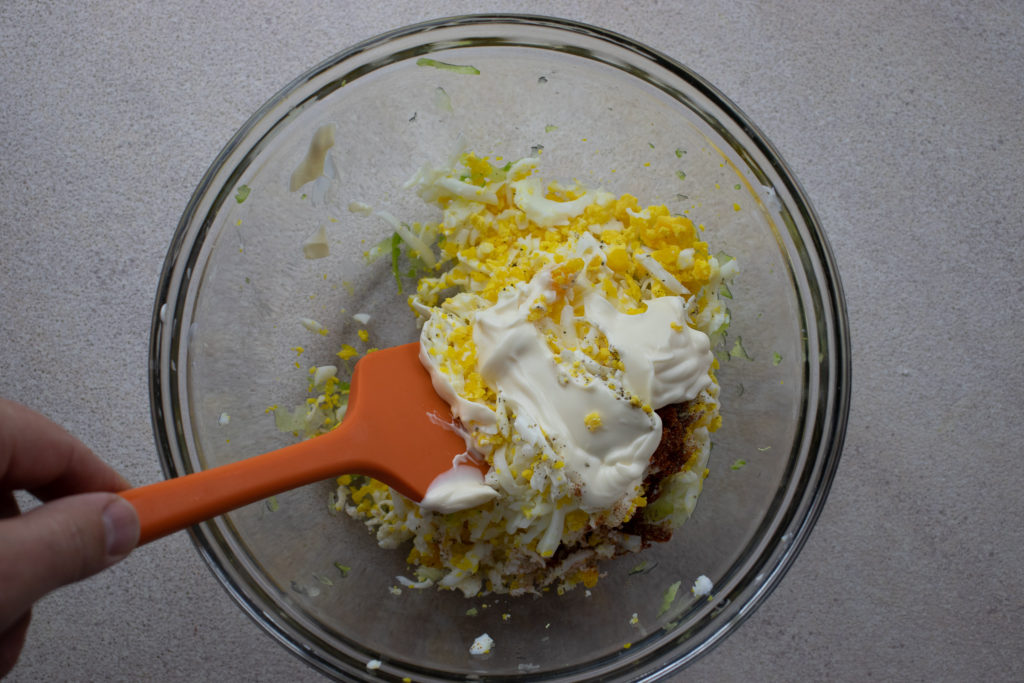
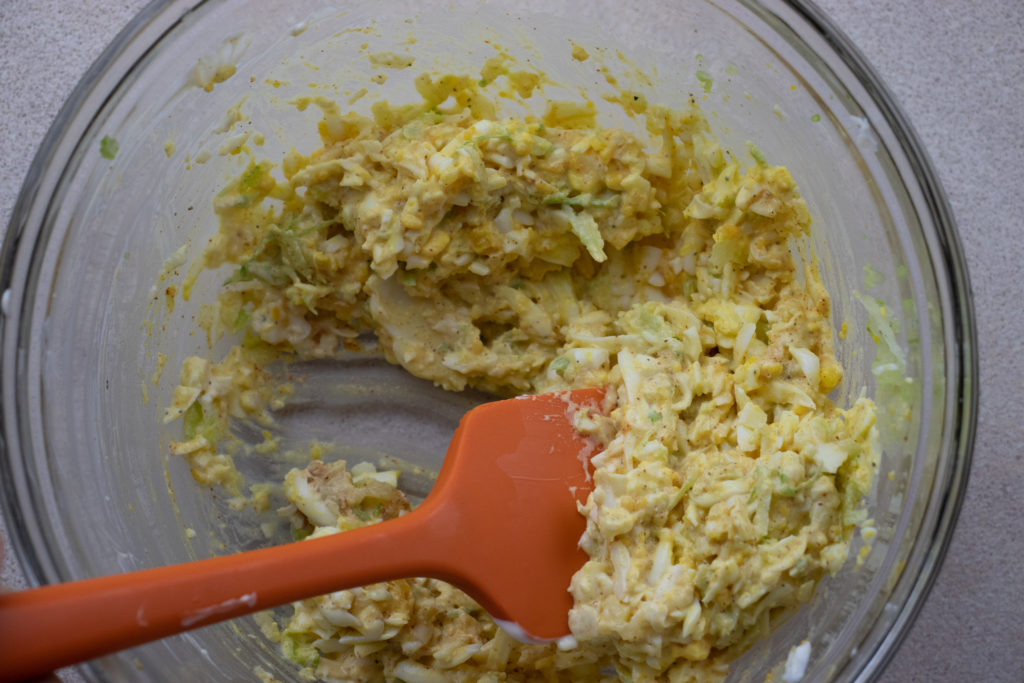
Next, measure the cayenne, smoked paprika, salt, pepper, and mayonnaise, then mix well with a spatula. Once everything is mixed, taste the Deviled Egg Salad, and adjust the seasoning with salt and pepper as needed. You can also add a few drops of hot sauce if you’d like.
Making Sandwiches
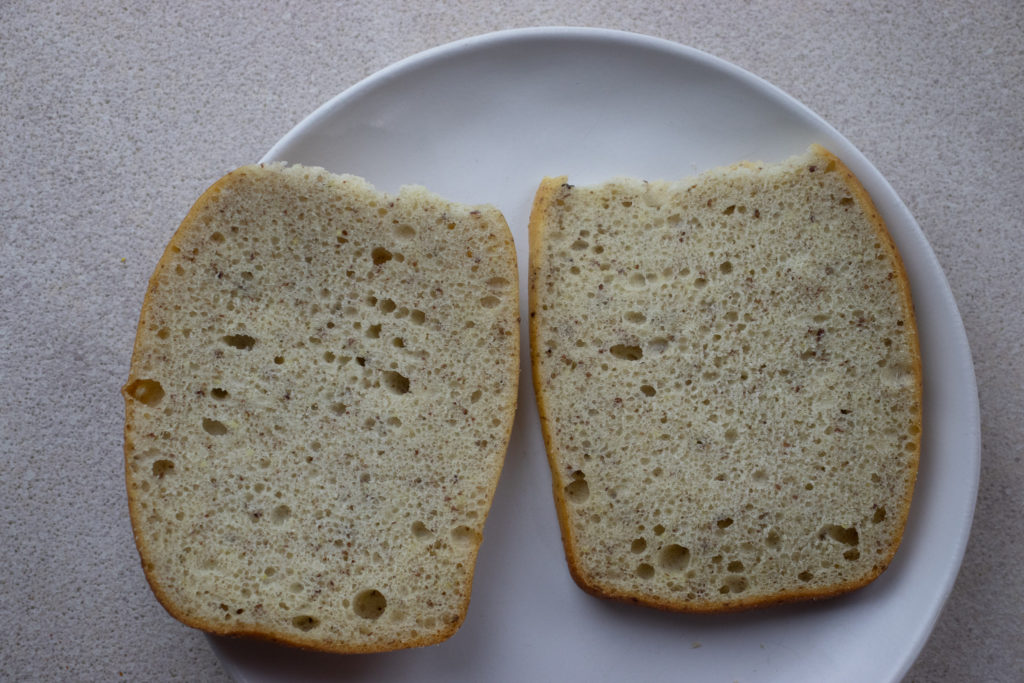
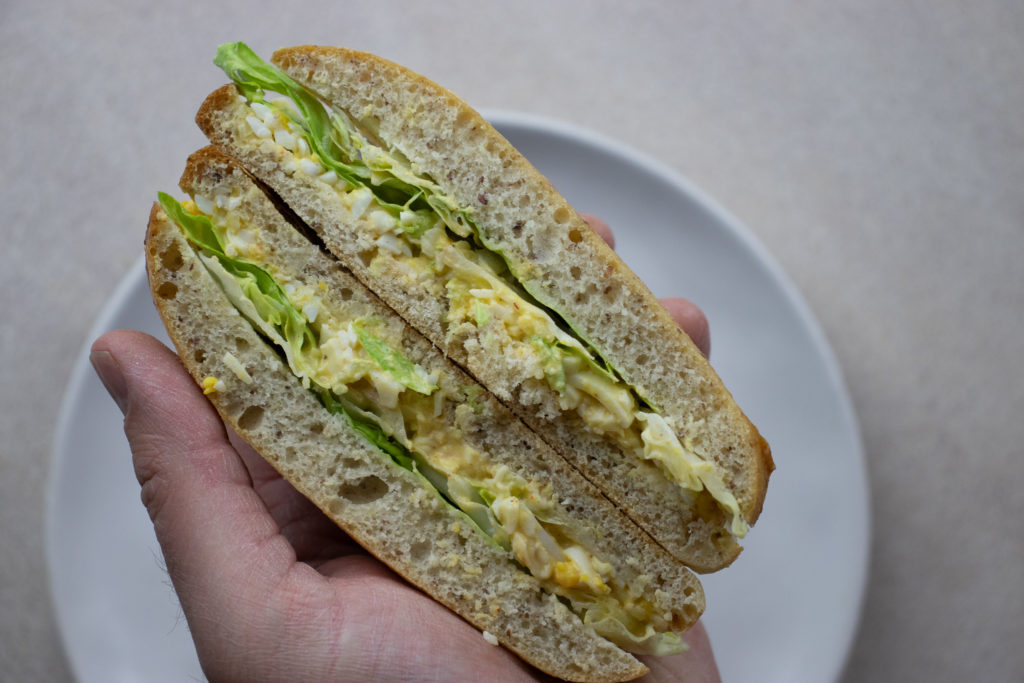
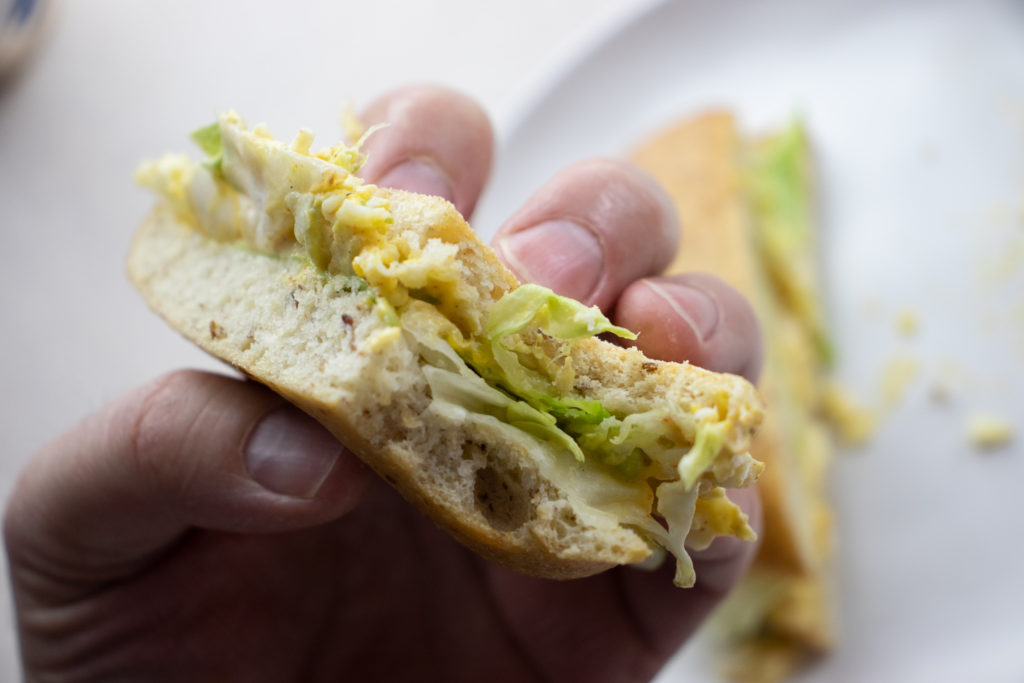
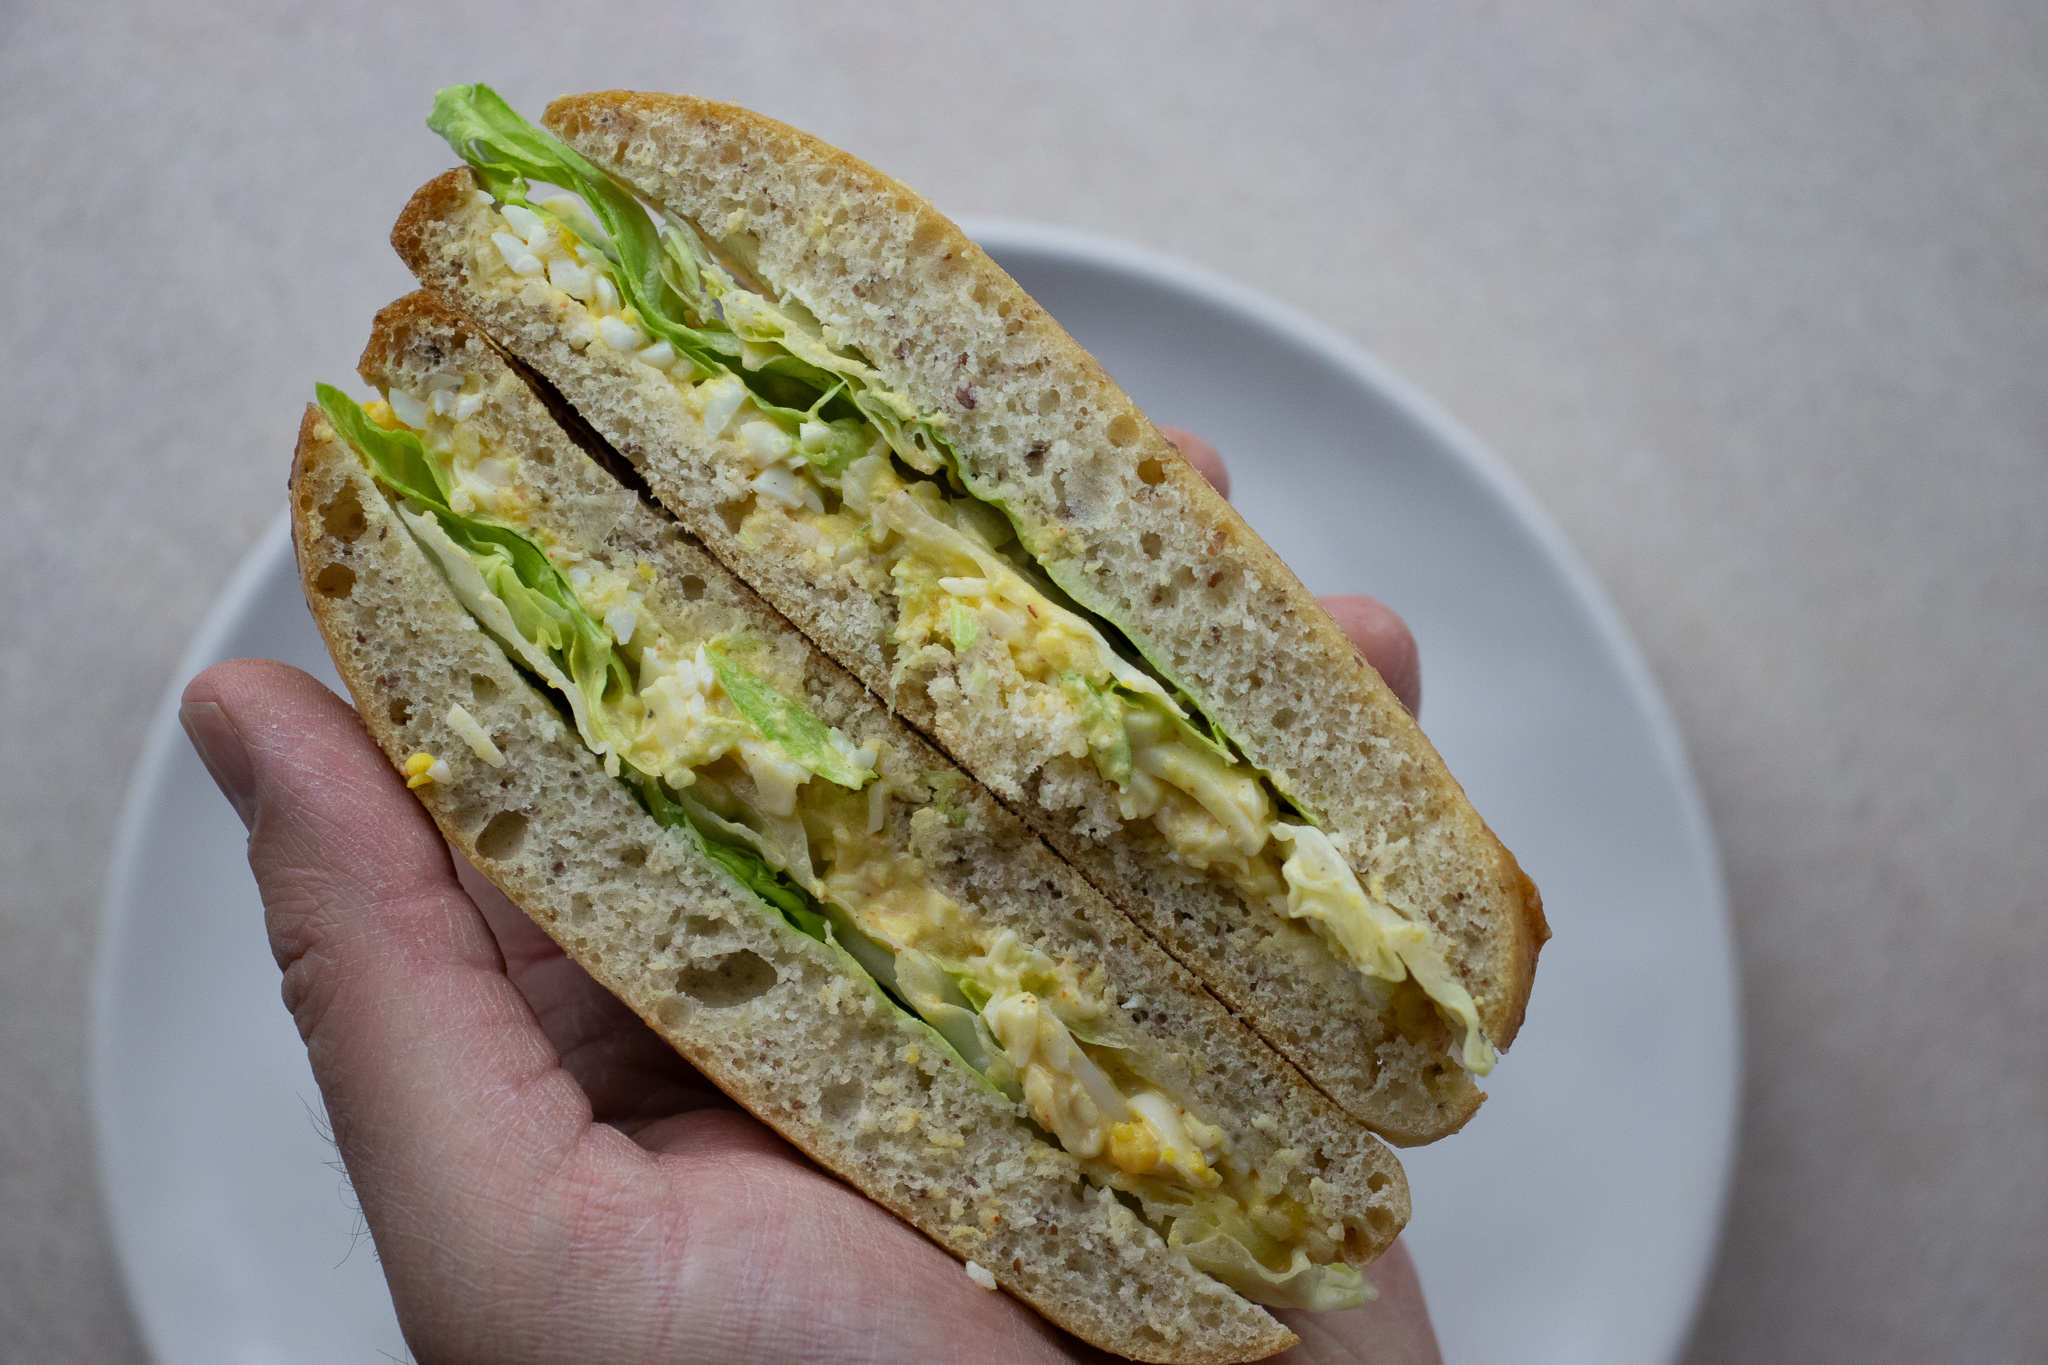
Now that the Deviled Egg Salad is ready, it’s time to make some sandwiches. You can get four sandwiches out of this amount of egg salad. To make the sandwiches, take eight slices of bread, and butter them with softened butter. When making sandwiches, it’s vital that any spread or filling be pushed right to the edges of the bread. You don’t want any bites of the sandwich to be dry or plain. So, take your time when spreading the butter and the filling to cover the bread completely. Next, take a quarter cup of the Deviled Egg Salad and put it on each sandwich. Again, spread it out to evenly coat the bread. Add a bit of lettuce to the sandwich. Top each with a second slice of buttered bread. Slice and serve.
Wrap-Up
I developed this Deviled Egg Salad Sandwich recipe thinking it would be good, but I didn’t expect it to be as good as it was. It’s my new favourite egg salad sandwich recipe, and that’s saying a lot because I love egg salad sandwiches. I’m excited for you to try this. When you make it, remember to come back and leave a rating on the recipe.
Thank you for coming to Chef’s Notes. I hope you’ve enjoyed this post. The mission of Chef’s Notes is to share over twenty years of professional cooking experience. If you’d like to be a part of that mission, you can share this post on Facebook or Pinterest or leave a comment below and rate the recipe. You can also subscribe to the Chef’s Notes Patreon by clicking here. You’ll get access to exclusive content, including live streams, monthly cooking videos and more. And remember to subscribe to the Chef’s Notes newsletter.
Deviled Egg Salad
Everything you love about a classic Deviled Egg but in a sandwich filling. It's creamy, a little spicy, and packed with flavour. The perfect way to take your egg sandwiches to the next level.
Put the eggs in a medium pot and cover with cold water.
Place the pot on the stove and bring to a boil on high heat.
Once the eggs start to boil, set a five-minute timer.
When the egg timer goes off, remove the pot from the heat, drain the hot water, and crack the egg shells with the back of a spoon. Put the pot under cold running water for five minutes or until the eggs are cool.
Peel and rinse the eggs. Pat the eggs dry and grate them on a cheese grater into a medium mixing bowl.
Add the grated onion and celery to the eggs. Mix in the mayo, cayenne, smoked paprika, salt and pepper. Mix well. Taste and adjust the seasoning as needed with salt and pepper.
To assemble the sandwiches, spread the butter on the eight slices of bread. Top four slices of bread with the egg salad mixture. Put the lettuce on the egg salad, then add the second piece of bread, slice and serve.
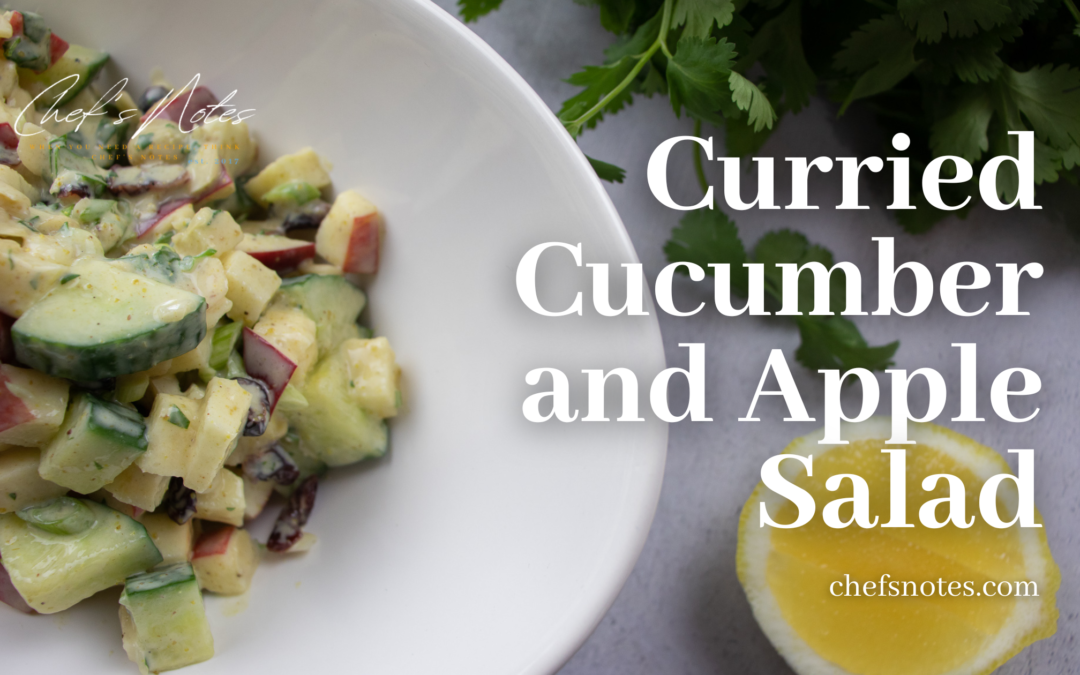
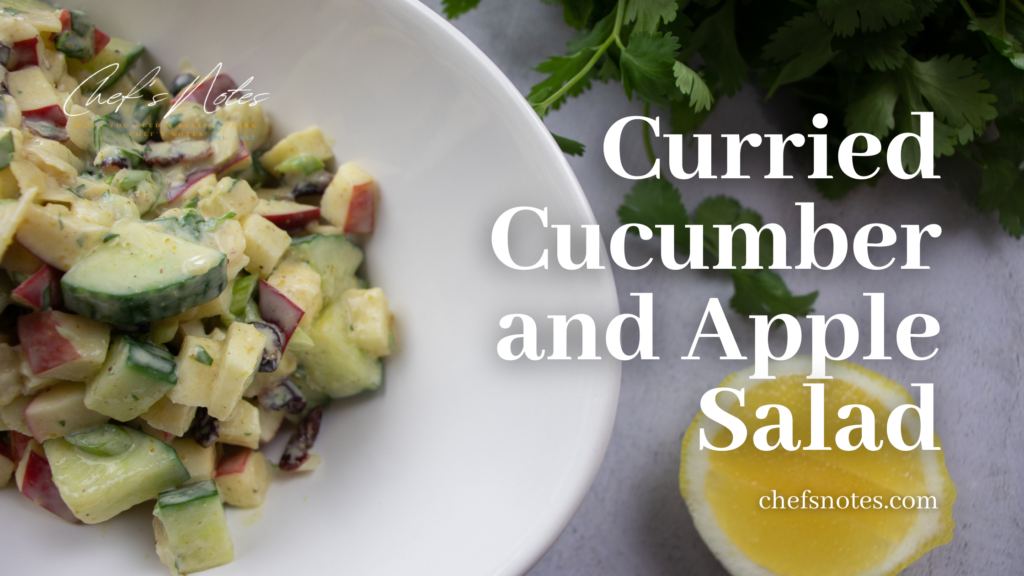
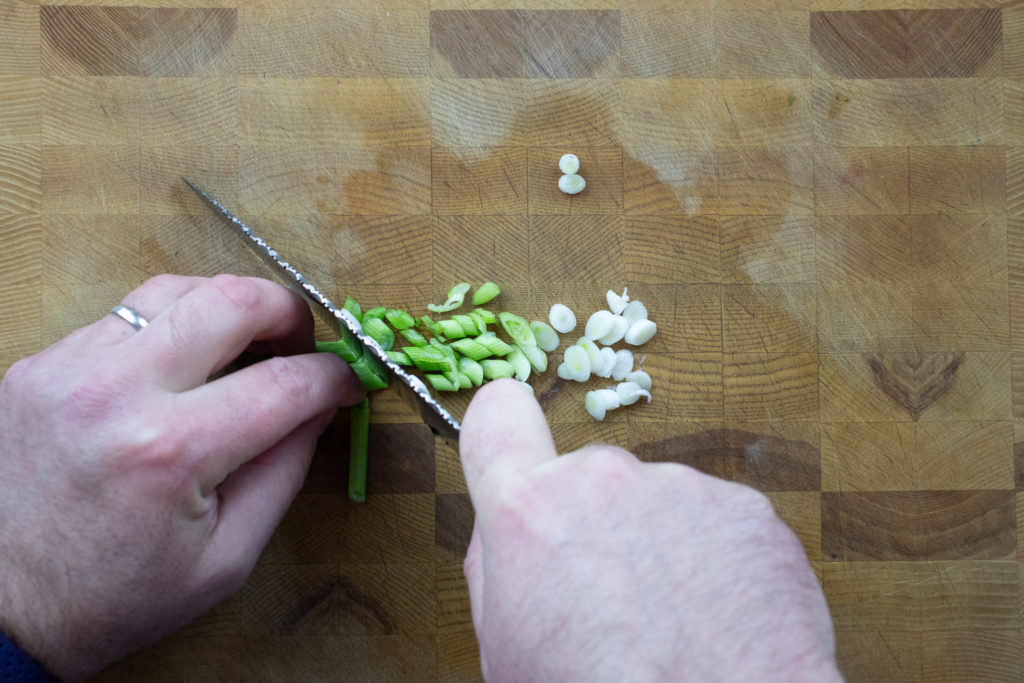
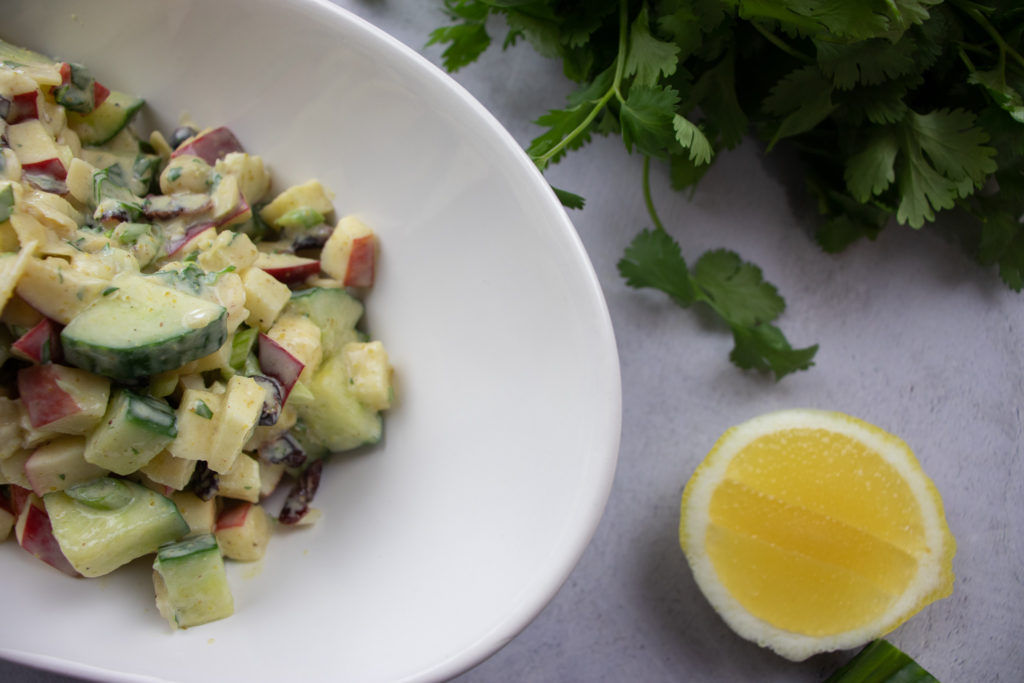
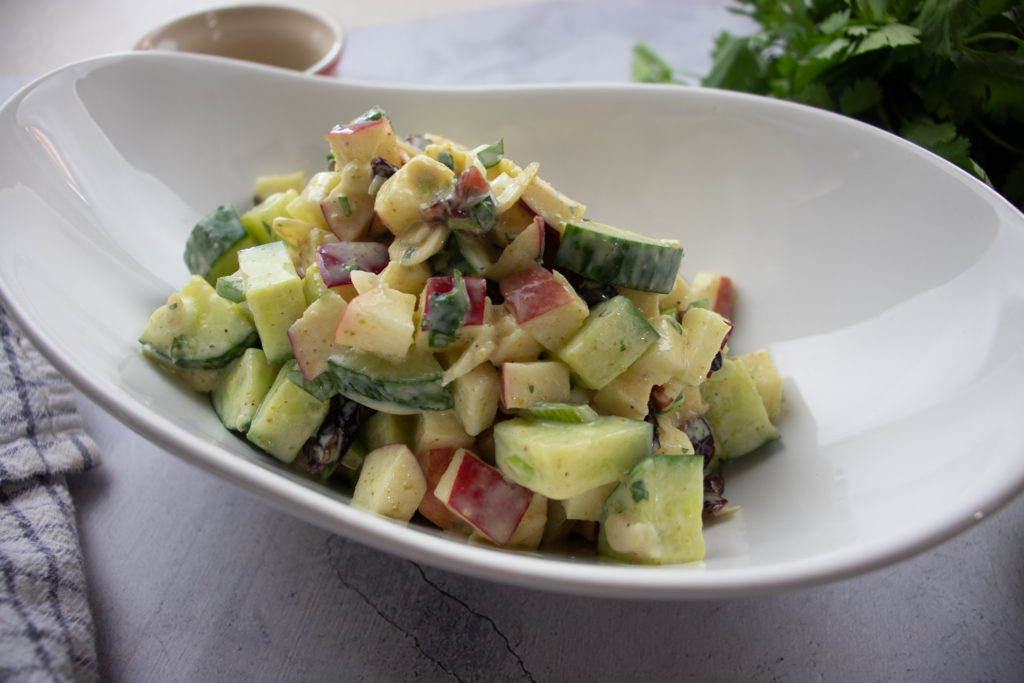
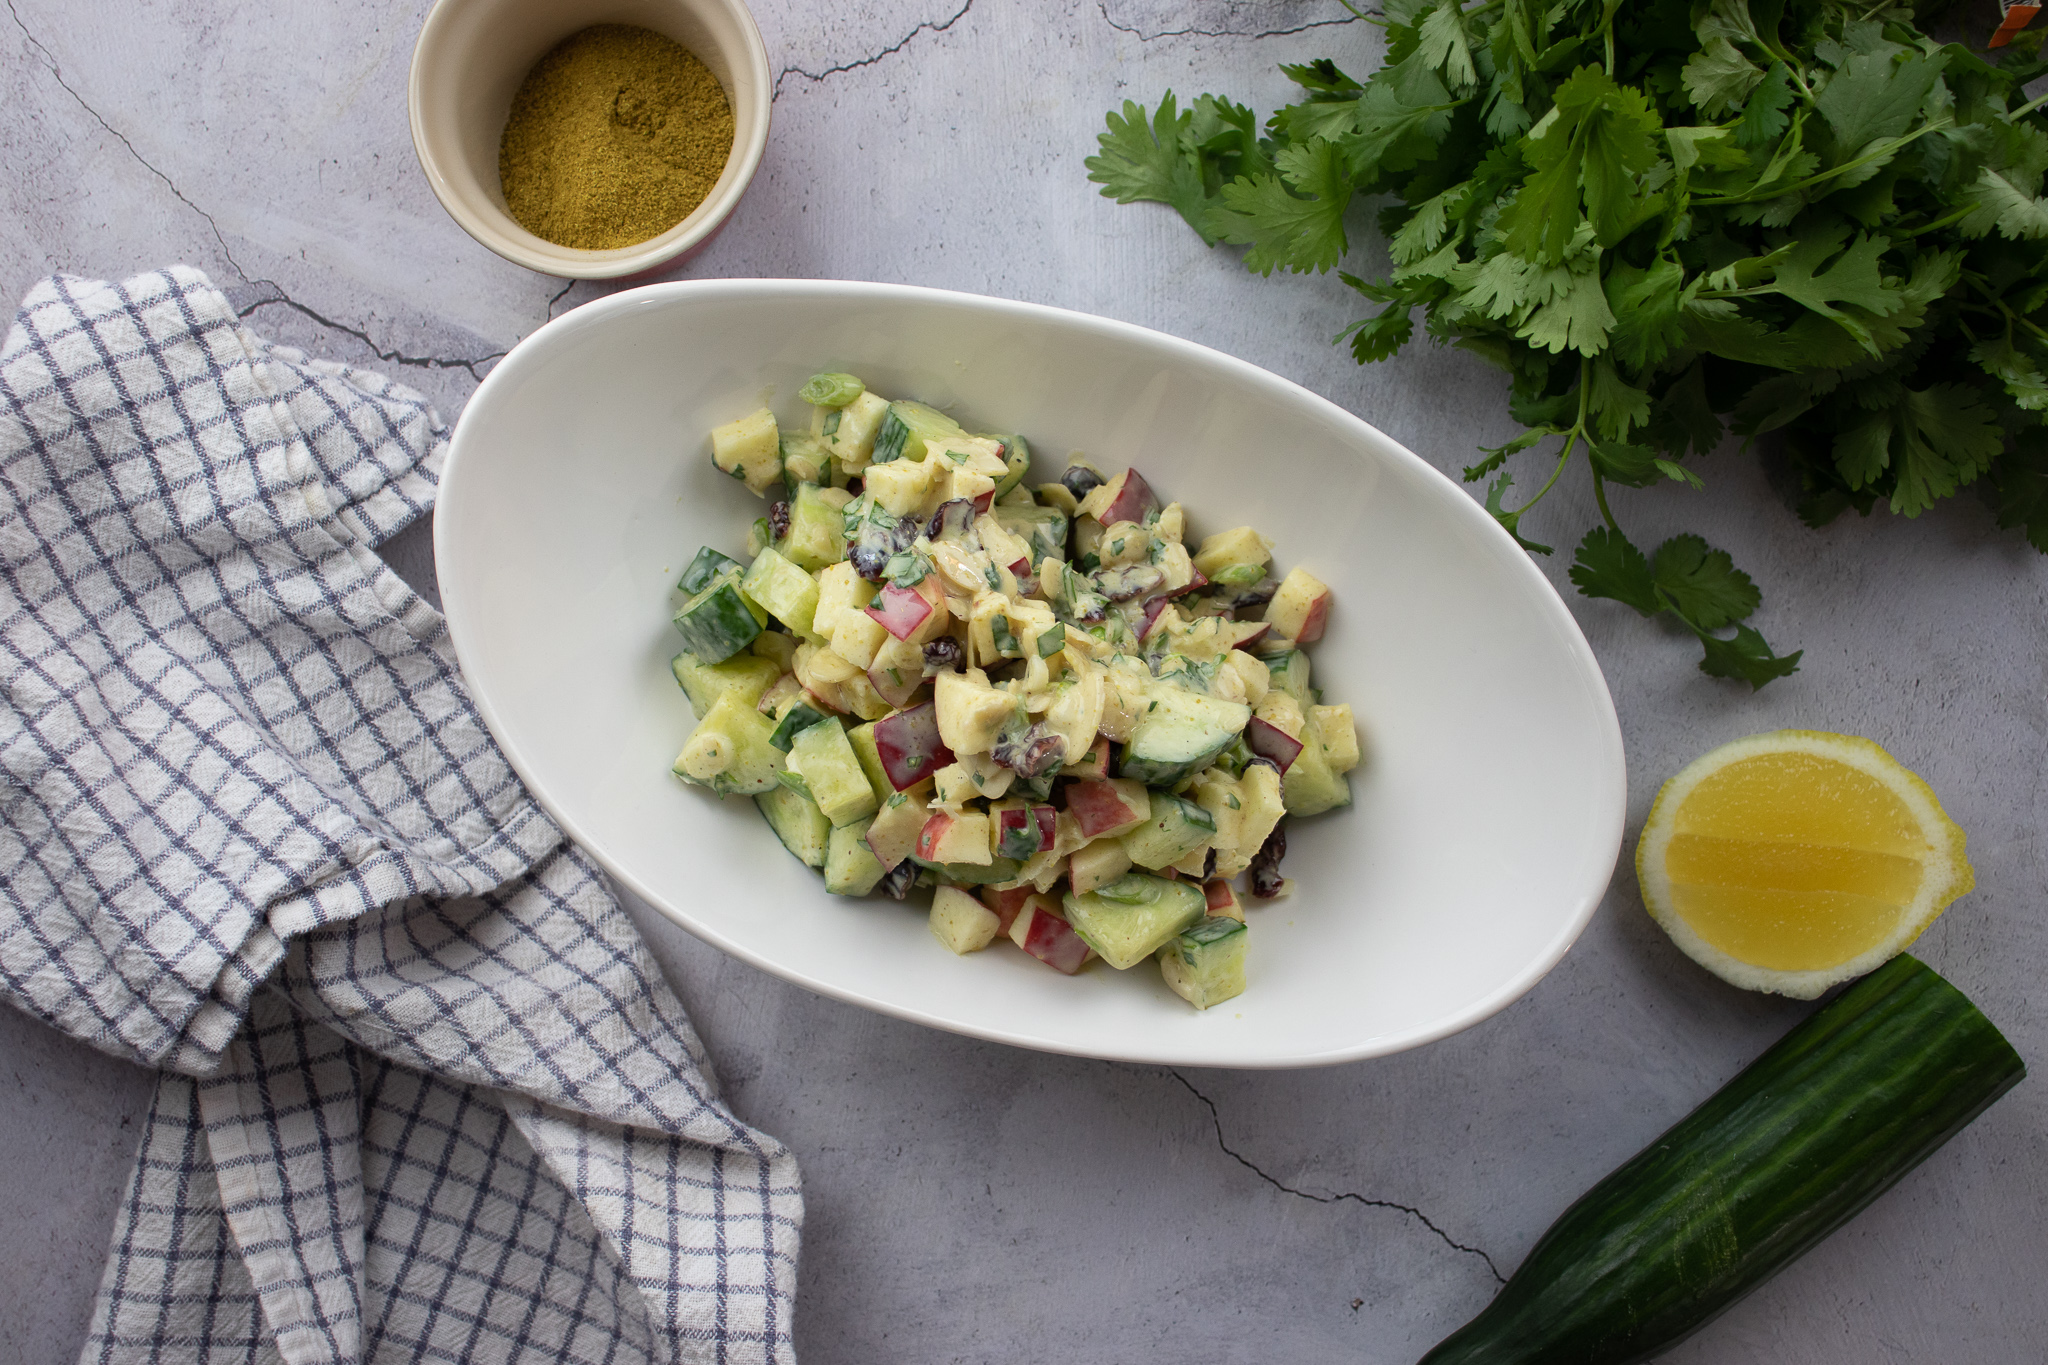
If you are looking for a delicious and refreshing summer salad that you’ll want to share with your friends, this Curried Cucumber and Apple Salad is just the thing. Its bright flavours and pops of sweetness make it the perfect accompaniment to grilled or roasted meat, chicken or fish. You can serve it as a side or bulk it up with some protein for a meal. Either way, this is a recipe worth trying.
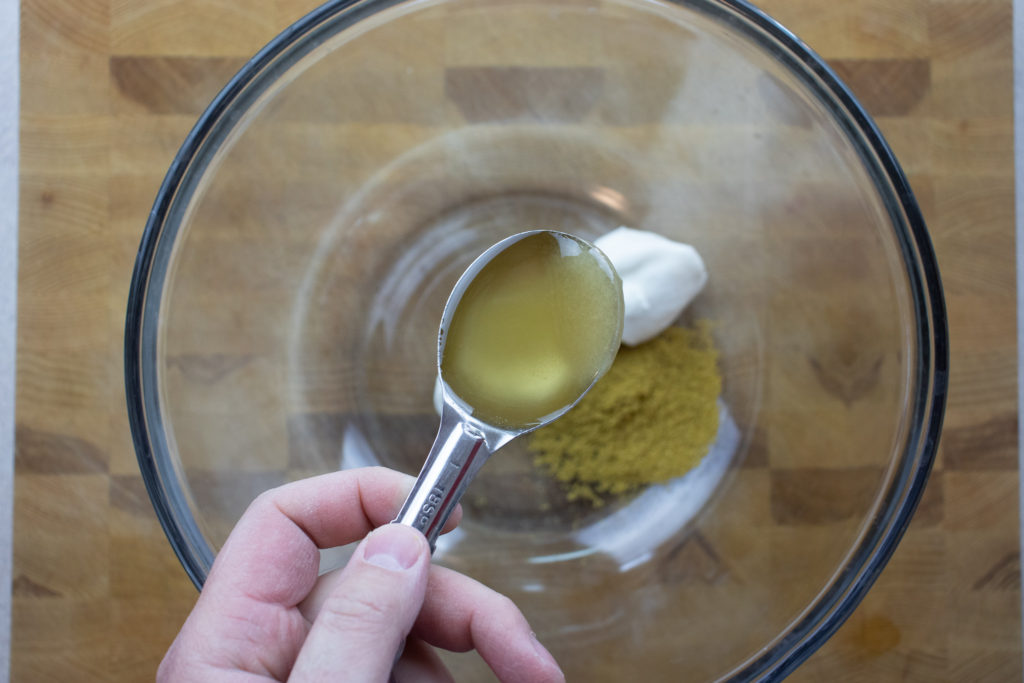
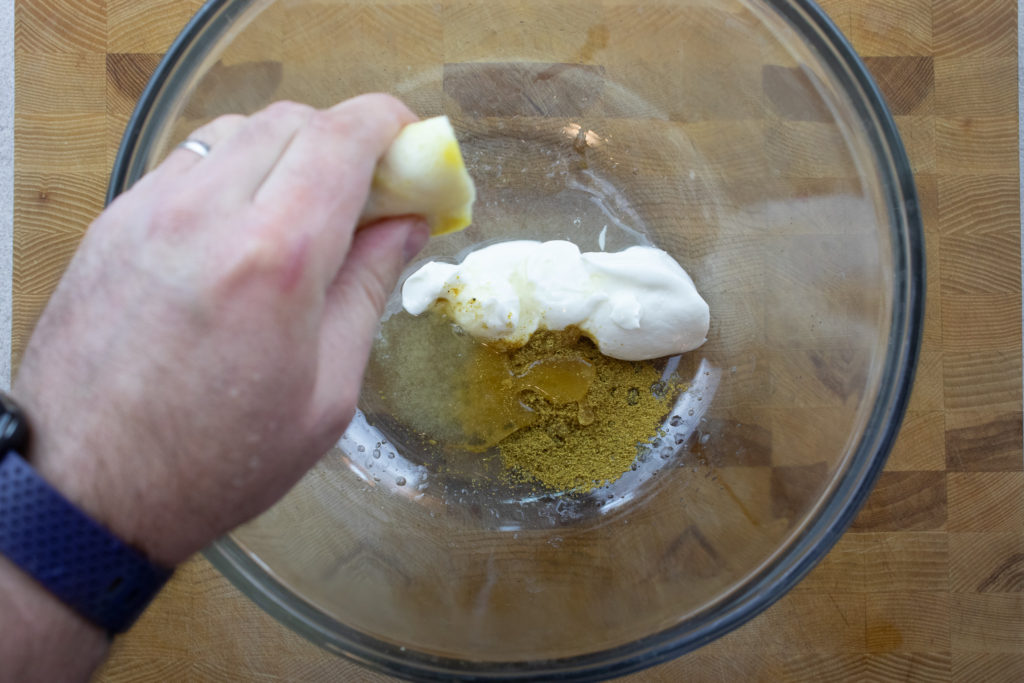
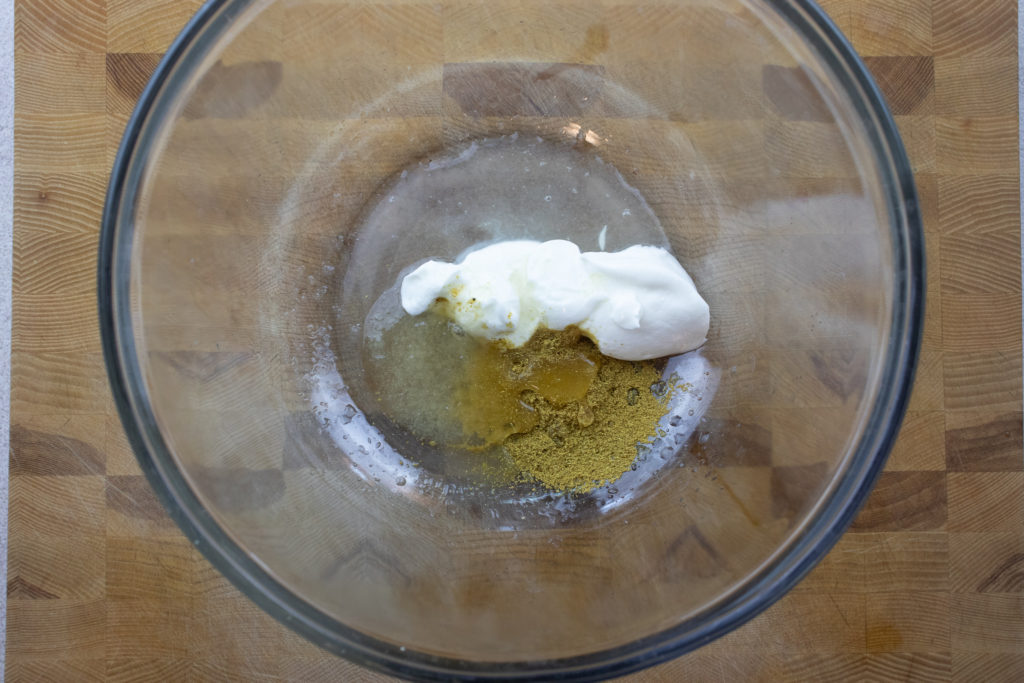
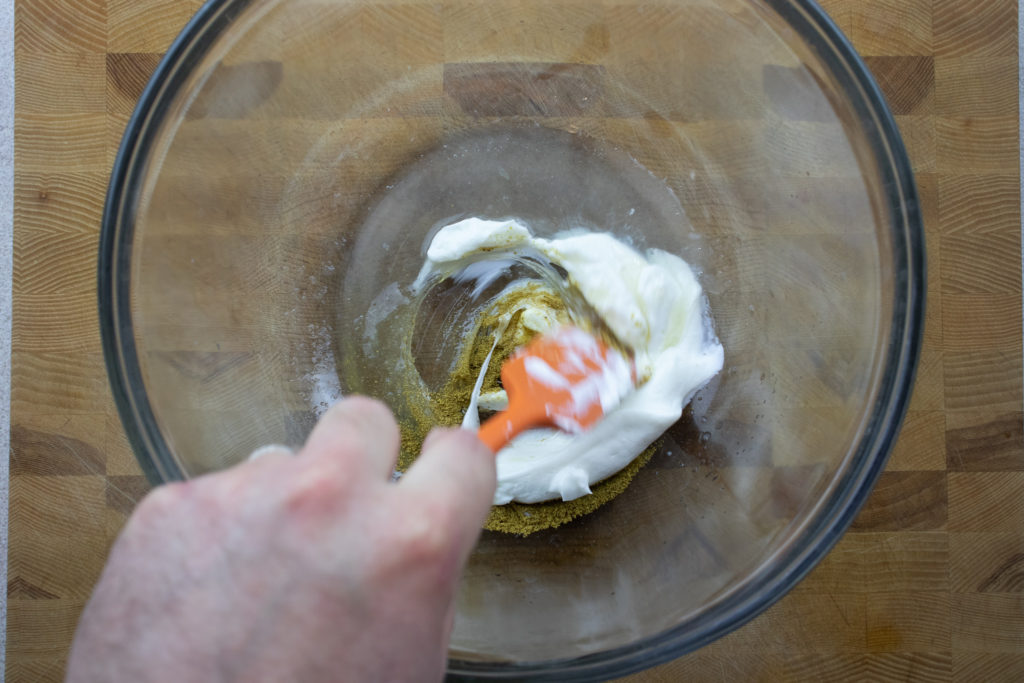
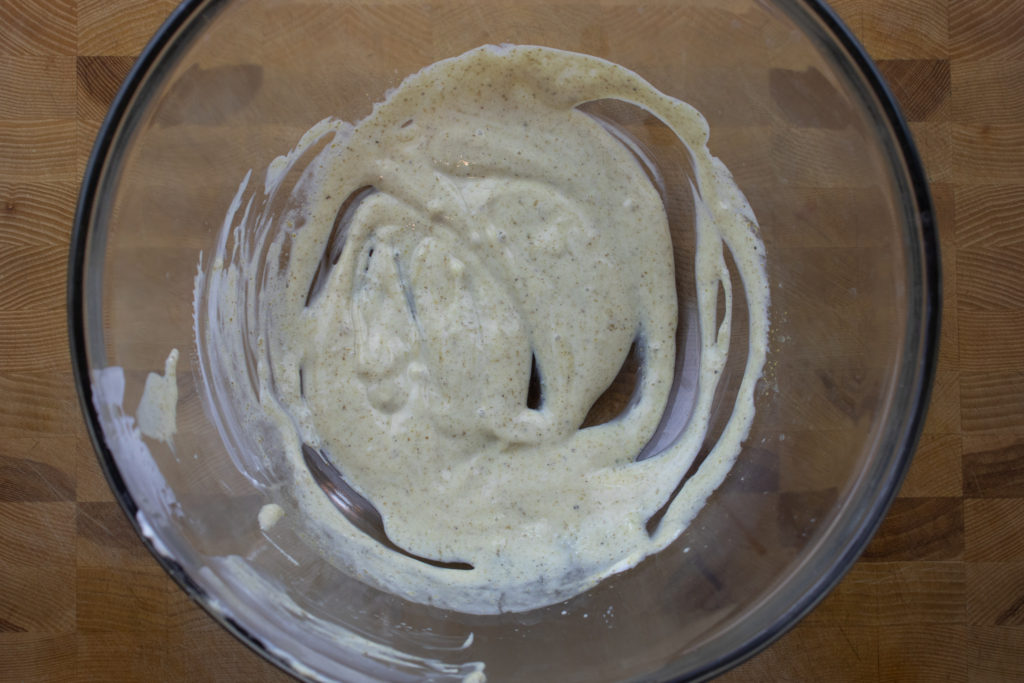
Curry Sauce
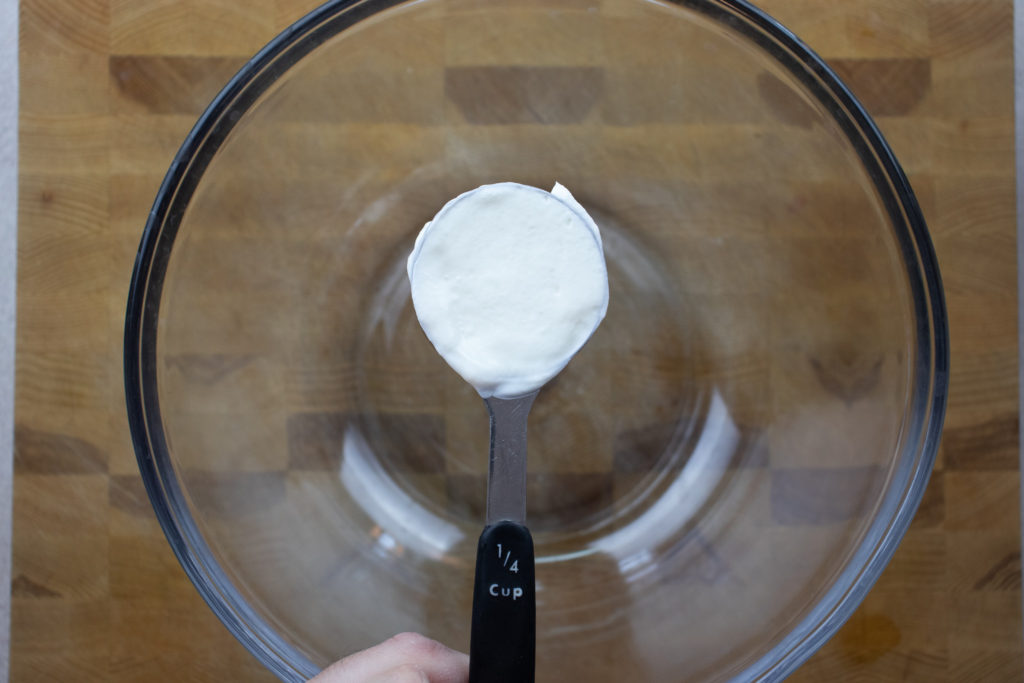
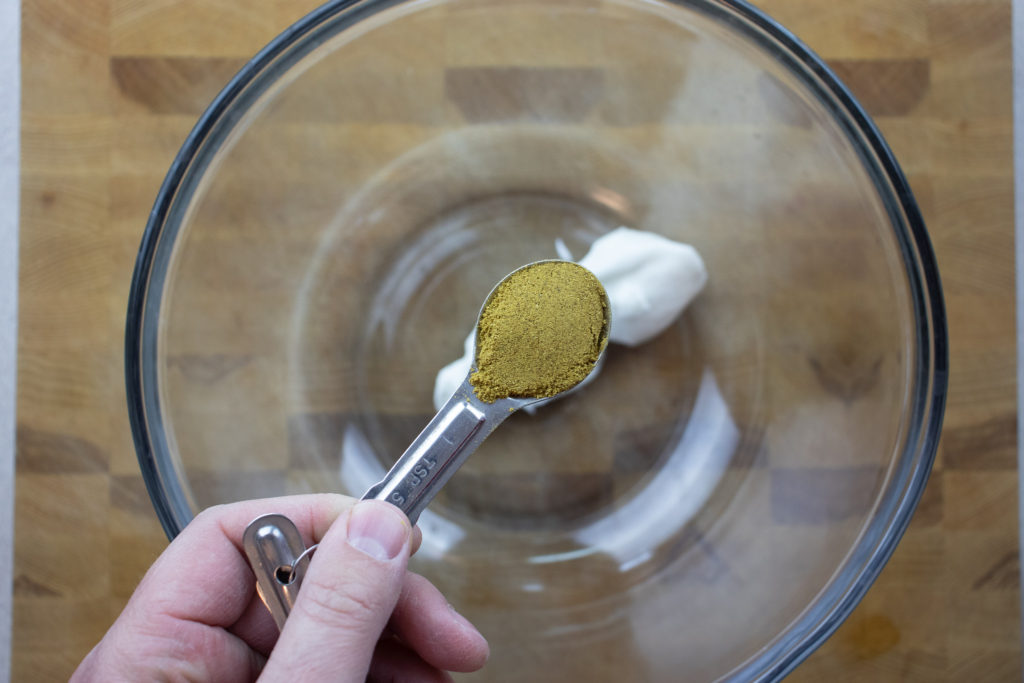
The curry sauce for this Curried Cucumber and Apple Salad combines yogurt, garam masala, honey, lemon juice, and a pinch of salt. You can switch the yogurt for mayonnaise and the garam masala for madras or yellow curry powder if you’d like. The mayonnaise-based version of this sauce makes an excellent dip for sweet potato fries. Combine the yogurt, garam masala, honey, and lemon juice in a medium mixing bowl to make the curry sauce. Once mixed, taste the sauce and season it as needed with salt. You can use the sauce right away or cover it and put it in the fridge for an hour to let the flavours blend a little more.
Curried Cucumber and Apple Salad
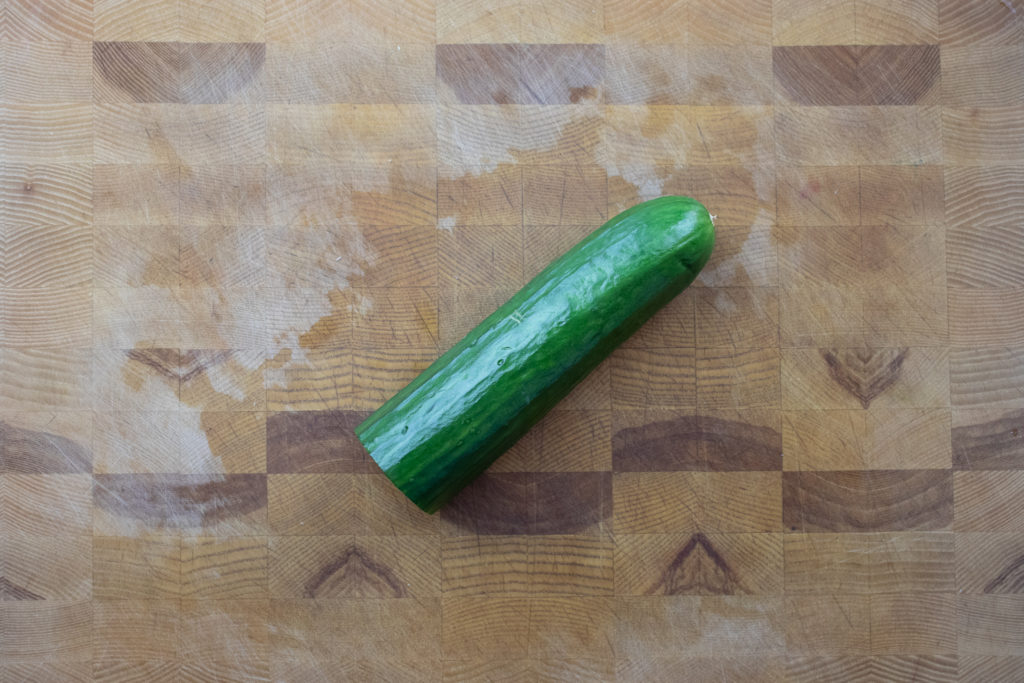
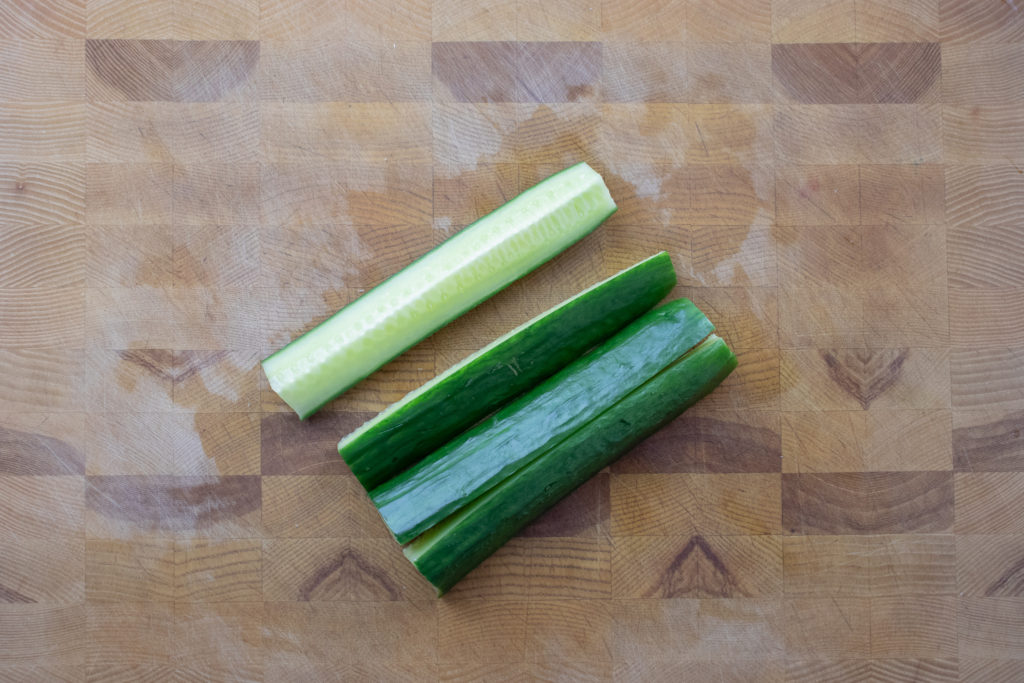
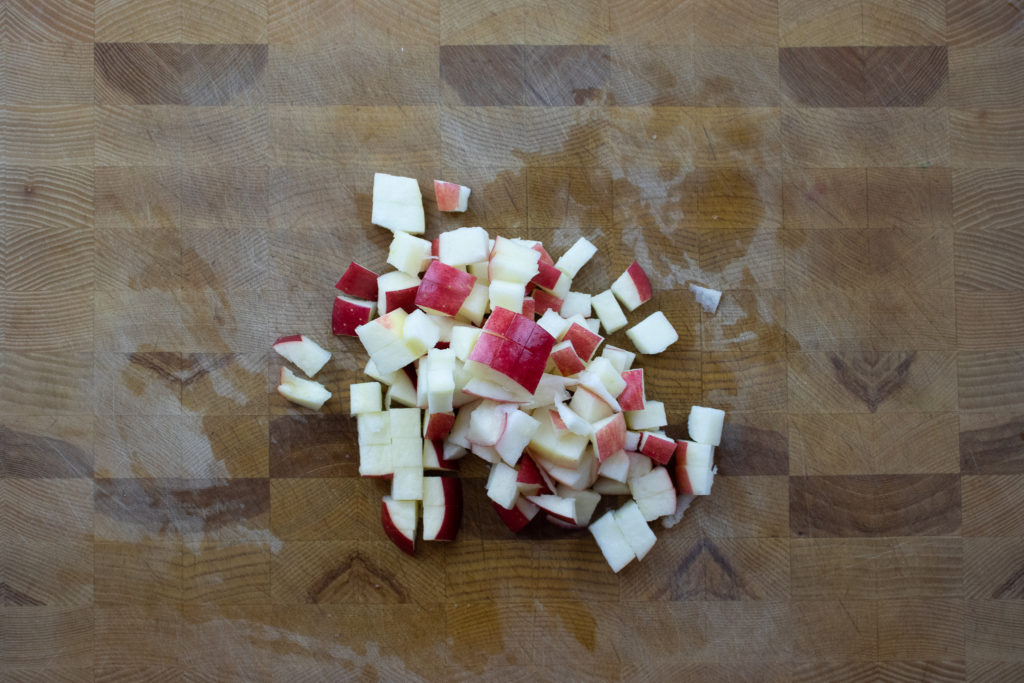
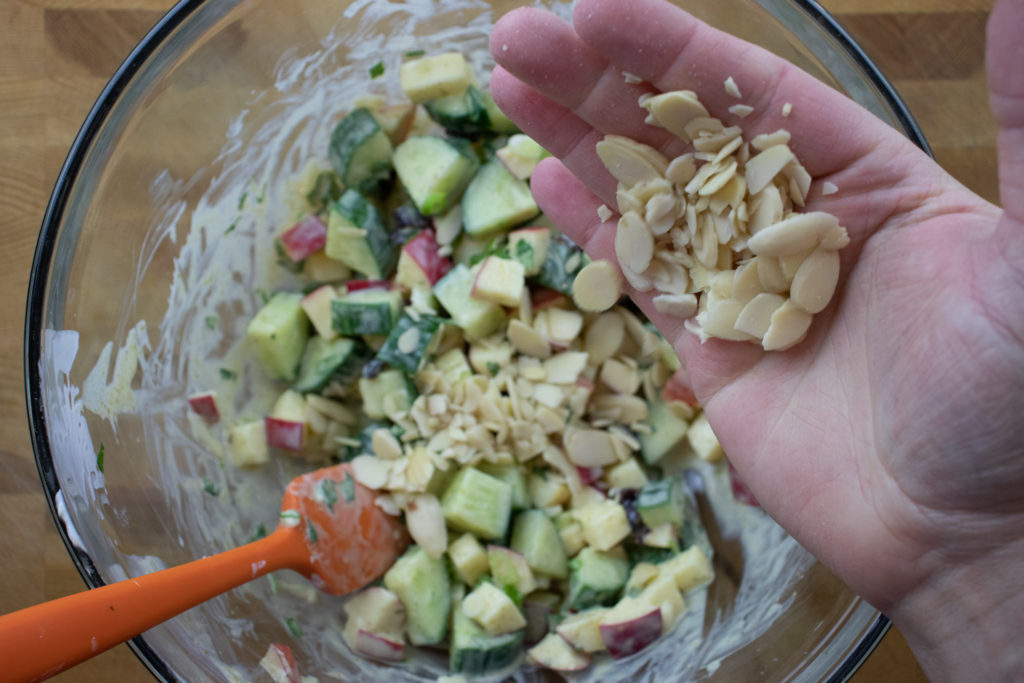
The salad ingredients are cucumber, apple, dried cranberries or raisins, cilantro, green onion, and slivered almonds. I made this salad with shaved cucumber, but I found that the cucumber became very soggy, and the salad was watery. So, I suggest dicing the cucumber. This salad is best when served right away, but you can make it ahead of time if you leave the cucumber out until the last minute. If you must make this Curried Cucumber and Apple Salad ahead of time with the cucumbers, remove the seeds from the cucumbers. The seeds contain a significant amount of the cucumber’s water content, so removing them will help prevent a watery salad. However, it removing the seeds will eliminate this problem entirely.
Making The Salad
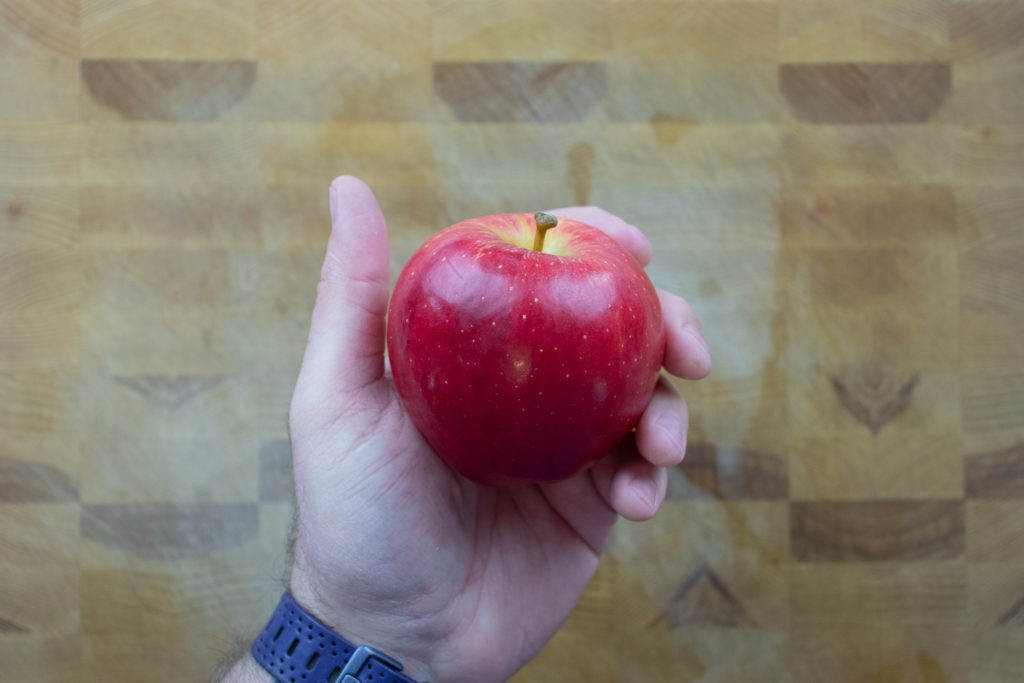
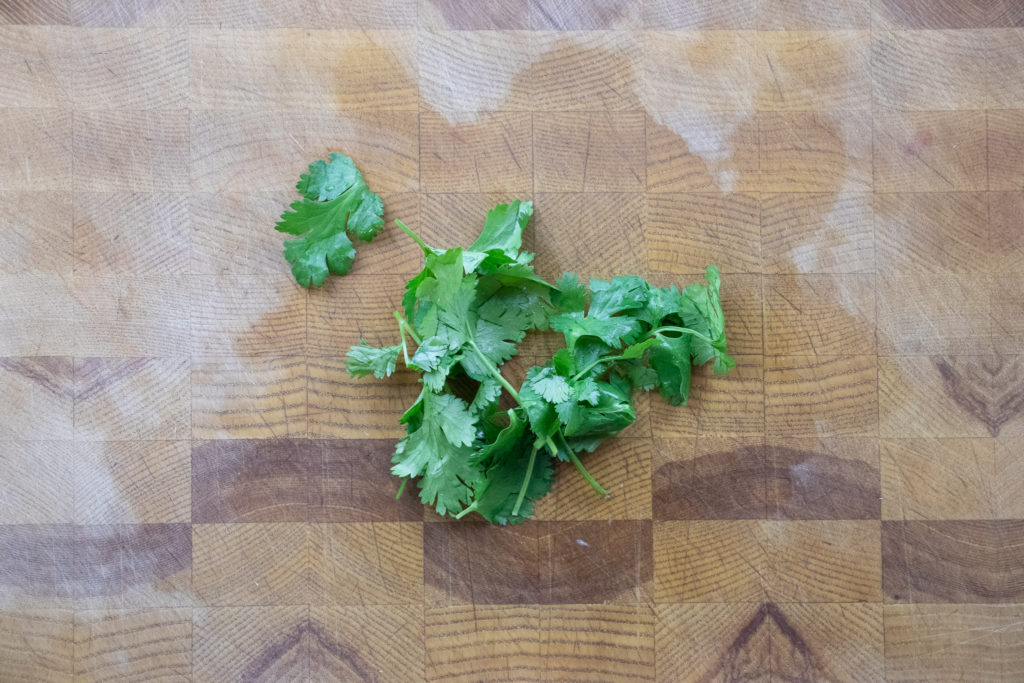
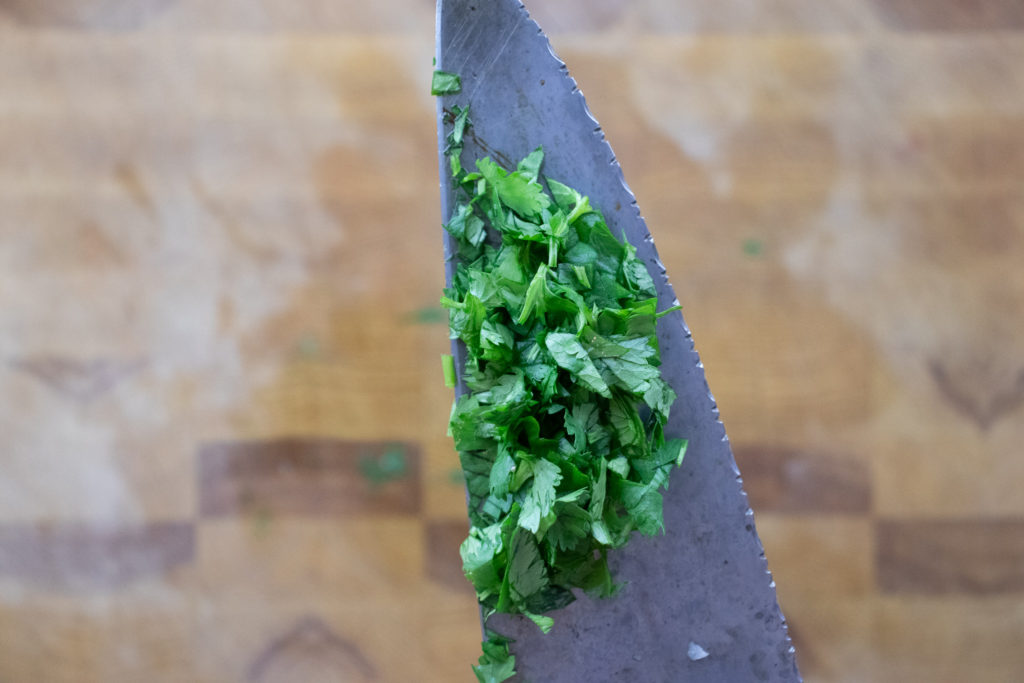
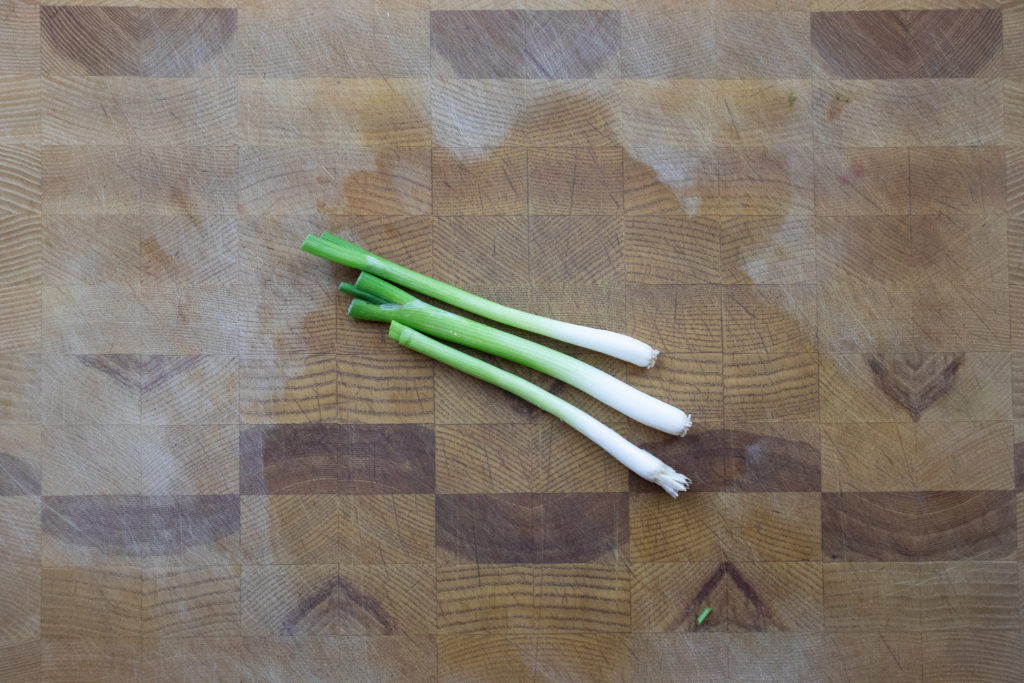
To make the salad, dice half a cucumber and one apple and add them to the curry sauce. Next, add the dried cranberries, then slice the cilantro and green onions and put those in the bowl too. Finally, add the almonds and mix. Serve immediately.
Wrap-Up
This Curried Cucumber and Apple Salad makes a great sidedish with kabobs or grilled meat. You can make it a meal by adding cooked chicken breast or even tuna. Other ingredients that would go well in this salad include bell pepper, pecans, chickpeas, red onion, mint, and tomato. So take this recipe, and make it your own.
Thank you so much for coming to my blog and reading this post. I hope you’ve enjoyed it and taken something useful from it. This blog aims to share the knowledge and skills that I’ve learned over my 20-plus year cooking career to help make cooking more enjoyable and more accessible for those who don’t find it easy and enjoyable. If you’d like to be a part of that mission, there are a few ways that you can help. The easiest way to help is to share this post on Facebook or Pinterest or even just leave a comment below and give the recipe a good rating. If you’d like to help financially, join my Patreon by clicking here. Patrons get access to exclusive content, including live streams, monthly cooking videos and more. And, if you want to always know what’s going on with Chef’s Notes, you can subscribe to my monthly newsletter below, so you never miss a post. You get all the behind-the-scenes information and lots more.
Curried Cucumber and Apple Salad
Curry Dressing, Diced Cucumber and Apple, Dried Cranberries, and Almonds make this salad something special. Enjoy it as a side dish or add cooked chicken to make it a meal.
We use cookies on our website to give you the most relevant experience by remembering your preferences and repeat visits. By clicking “Accept”, you consent to the use of ALL the cookies.
This website uses cookies to improve your experience while you navigate through the website. Out of these, the cookies that are categorized as necessary are stored on your browser as they are essential for the working of basic functionalities of the website. We also use third-party cookies that help us analyze and understand how you use this website. These cookies will be stored in your browser only with your consent. You also have the option to opt-out of these cookies. But opting out of some of these cookies may affect your browsing experience.
Necessary cookies are absolutely essential for the website to function properly. This category only includes cookies that ensures basic functionalities and security features of the website. These cookies do not store any personal information.
Any cookies that may not be particularly necessary for the website to function and is used specifically to collect user personal data via analytics, ads, other embedded contents are termed as non-necessary cookies. It is mandatory to procure user consent prior to running these cookies on your website.