
Last week I shared My Mom's Cheese Ball Recipe, and it got me thinking that it would probably be a good idea to share some other holiday or Christmas hors d'oeuvre recipes. So, for the next few Fridays until Christmas, I am going to do exactly that. This week I will share my recipe for Caramelized Pear and Blue Cheese Tarts. Don't let the name scare you. These are not complicated to make at all. I promise. I feature an item very similar to this on my hors d'oeuvres menu, and it is always popular, so I'm excited to share it with you. Obviously, most of us won't be getting together in big groups this Christmas, so I've cut back all the recipes in this mini-series to suit two to four people, which should be ideal. Let's get to it!

Tart Shells
When it comes to entertaining during the holidays, premade tart shells, puff pastry, and phyllo dough are your best friends. You can do so much with those three items as the base. I've never seen gluten-free puff pastry or phyllo here, but I did manage to get a hold of some gluten-free tart shells. I found them at Sobeys if anyone is looking for them.
To prepare the tart shells, I first defrosted them then poked them, or docked them, which is the technical term, with a fork and baked them at 375°f for fourteen minutes. The cooking time and temperature may vary depending on the tart shells you use, so always make sure to read the package's instructions.


Caramelizing the pears
While the tart shells are baking get to work on the caramelized pears. Peel, core, and dice (1 cm x 1 cm) three bosc pears. Set them aside.


Additional Ingredients
Next up, peel and mince two shallots. You want about half a cup of minced shallot in total. If you don't have or don't want to buy shallots, you can use an equal amount of yellow onion. Make sure to cut them as small as you can.
Also, chop about one teaspoon of fresh thyme. You can use dried thyme for this, but fresh is much better. If you use dried thyme, use half as much and add it into the pan with shallots right in the beginning. You will need one tablespoon of cider vinegar, two tablespoons of sugar, two tablespoons of hot water, and a pinch of salt, along with the shallots and thyme.


Buy an extra pear for this butternut squash and pear salad.
Cooking the pears
Heat a medium frying pan over medium heat. Put one tablespoon of butter in the pan and wait for it to melt and start to foam. Add the shallots and cook for two to three minutes or until they soften. If you are using dried thyme, add that in as well.
Once the shallots have softened, add in the diced pears and cook for another three minutes or until they start to soften. Add in the sugar, vinegar, water, salt, and fresh thyme if you are using it. Cook the mixture, stirring, until all the liquid has evaporated. Take the pan off the heat.


Making the Pear and Blue Cheese Tarts
Assemble the pear and blue cheese tarts by spooning the pear mixture into the cooked tart shells. Top each tart with a few crumbled blue cheese pieces. Serve with dry white wine, and enjoy. For lunch, you can also serve two of these tarts with a small green salad. These make a lovely addition to any holiday spread, and the combination of sweet caramelized pear with tangy blue cheese is hard to beat.
One of the best things about this recipe is that all the components can be prepared ahead of time and assembled at the last minute. That makes them ideal for entertaining, since you can spend time with your guests instead of being stuck in the kitchen. If you enjoy making sauces and reductions, try adding a small drizzle of balsamic reduction over the top for an extra layer of flavour.

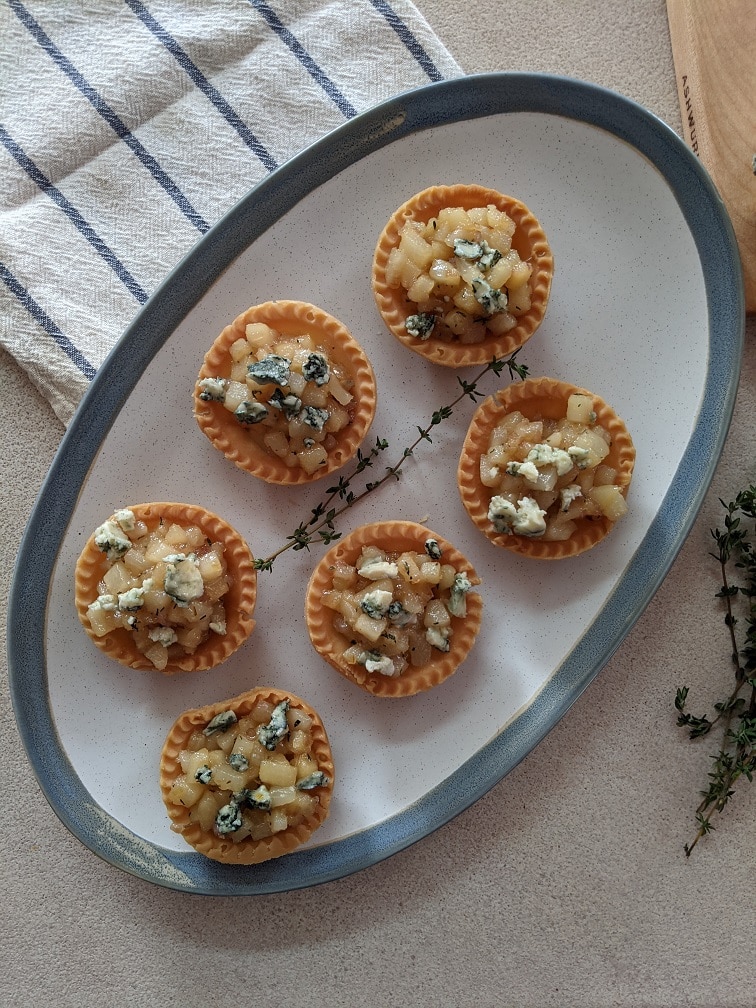

Leftover blue cheese goes on my steak salad. Steak and blue cheese is a classic for a reason.
Recipe
Pear and Blue Cheese Tarts
Ingredients
- 6 3- inch tart shells
- 1 tablespoon butter
- ½ cup minced shallot
- 2 cups diced pears
- 2 tablespoon sugar
- 1 tablespoon cider vinegar
- 2 tablespoon hot water
- 1 teaspoon fresh chopped thyme
- a pinch of salt
- ¼ cup crumbled blue cheese
Instructions
- Cook the tart shells according to the package instructions.
- Heat a medium skillet over medium-high heat. Add in the butter, wait for it to melt and foam, then add in the shallots and cook for two to three minutes or until they soften.
- Add the pears to the pan and cook for three more minutes or until the pears start to soften as well.
- Add the sugar, vinegar, and hot water. Cook for two minutes, then add in the thyme and a pinch of salt.
- Cook until all the moisture has evaporated.
- Remove the pan from the heat, spoon the pears into the pre-baked tart shells, and top with the crumbled blue cheese.
Final Thoughts
These tarts are one of my favourite things to make for guests because they look impressive but take almost no effort. The sweet caramelized pear and sharp blue cheese just work, and the fact that everything can be prepped ahead means I actually get to enjoy the party too.

Do you serve these warm or at room temperature?
They can be served warmed or at room temperature