I used to think black beans were boring. Open a can, heat them up, done. They were fine. Serviceable. The kind of thing you add to a burrito bowl without really thinking about it. Then I spent a week in Oaxaca and had a bowl of beans that made me question everything I thought I knew about legumes.
Jump to:
These weren't just beans. They were silky, deeply savoury, perfumed with garlic and onion and something smoky I couldn't quite place. The broth alone was worth drinking straight from the bowl (and I did, more than once). I came home determined to recreate that experience, and after a lot of trial and error, I finally cracked it.
The secret isn't complicated. It's dried beans cooked low and slow with aromatics, a little fat, and patience. No soaking required, no fancy equipment, just time and attention. What you get is a pot of beans so good you'll never look at the canned stuff the same way again.
What's So Special About Mexican Black Beans?
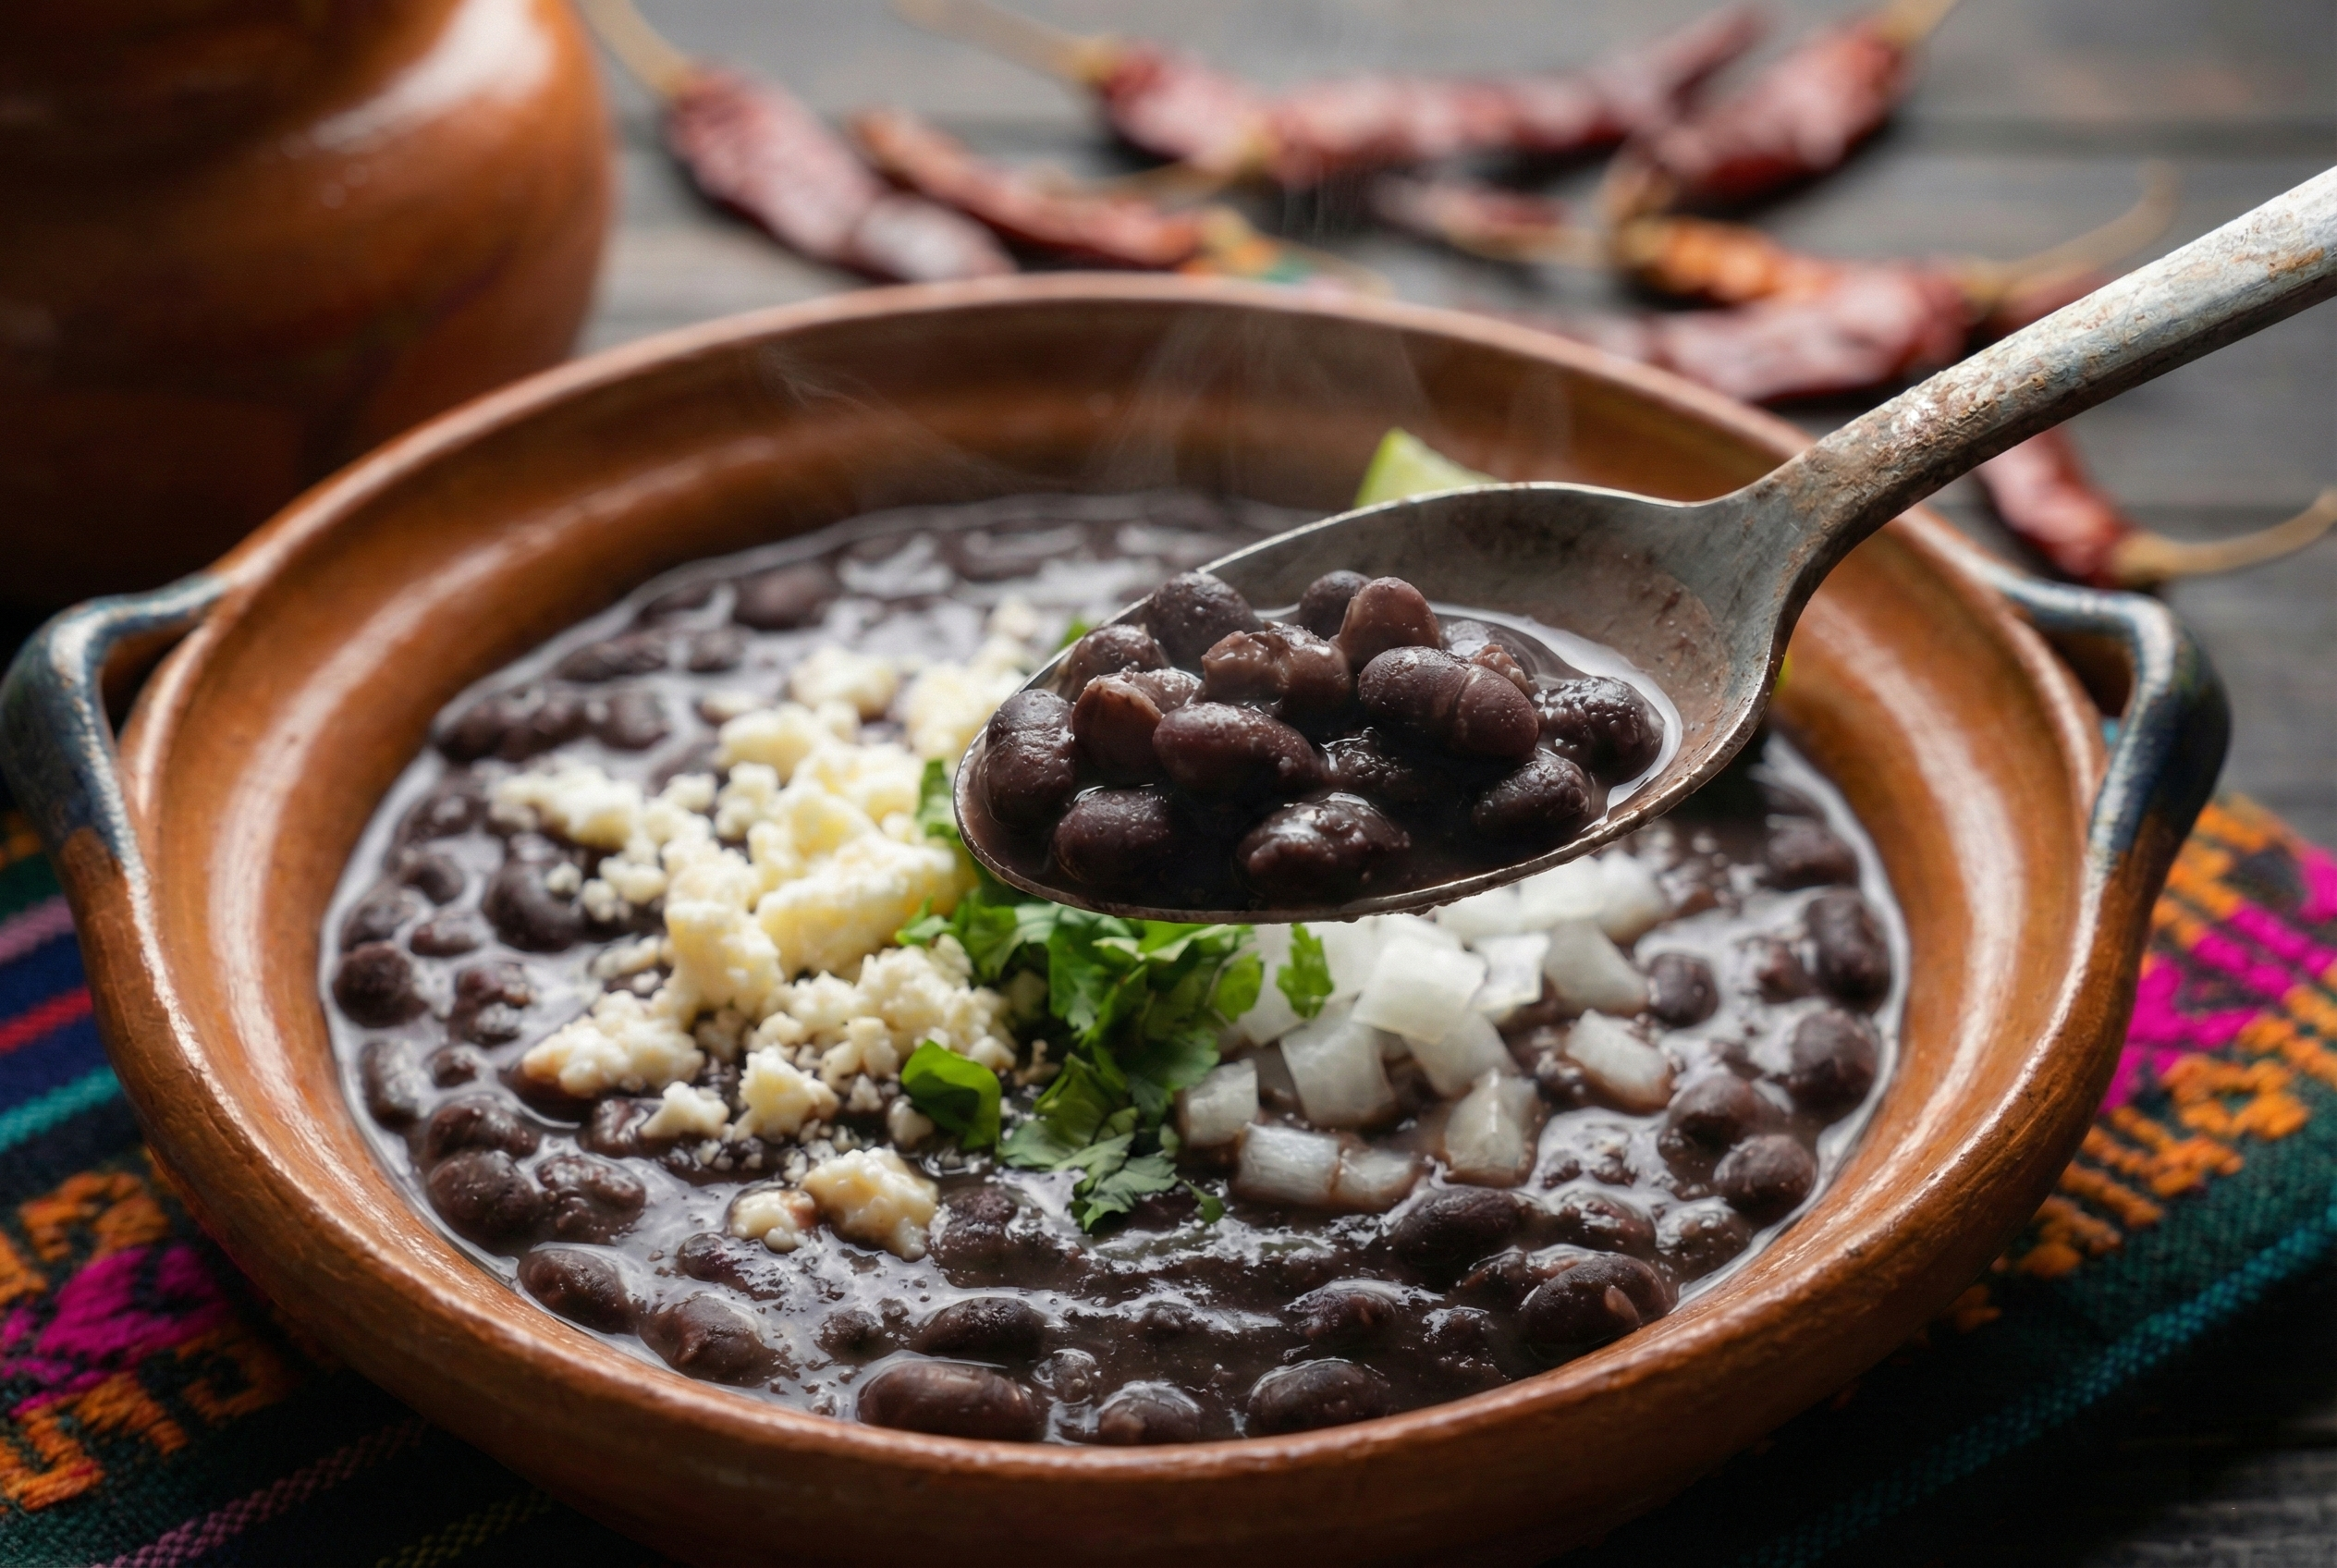
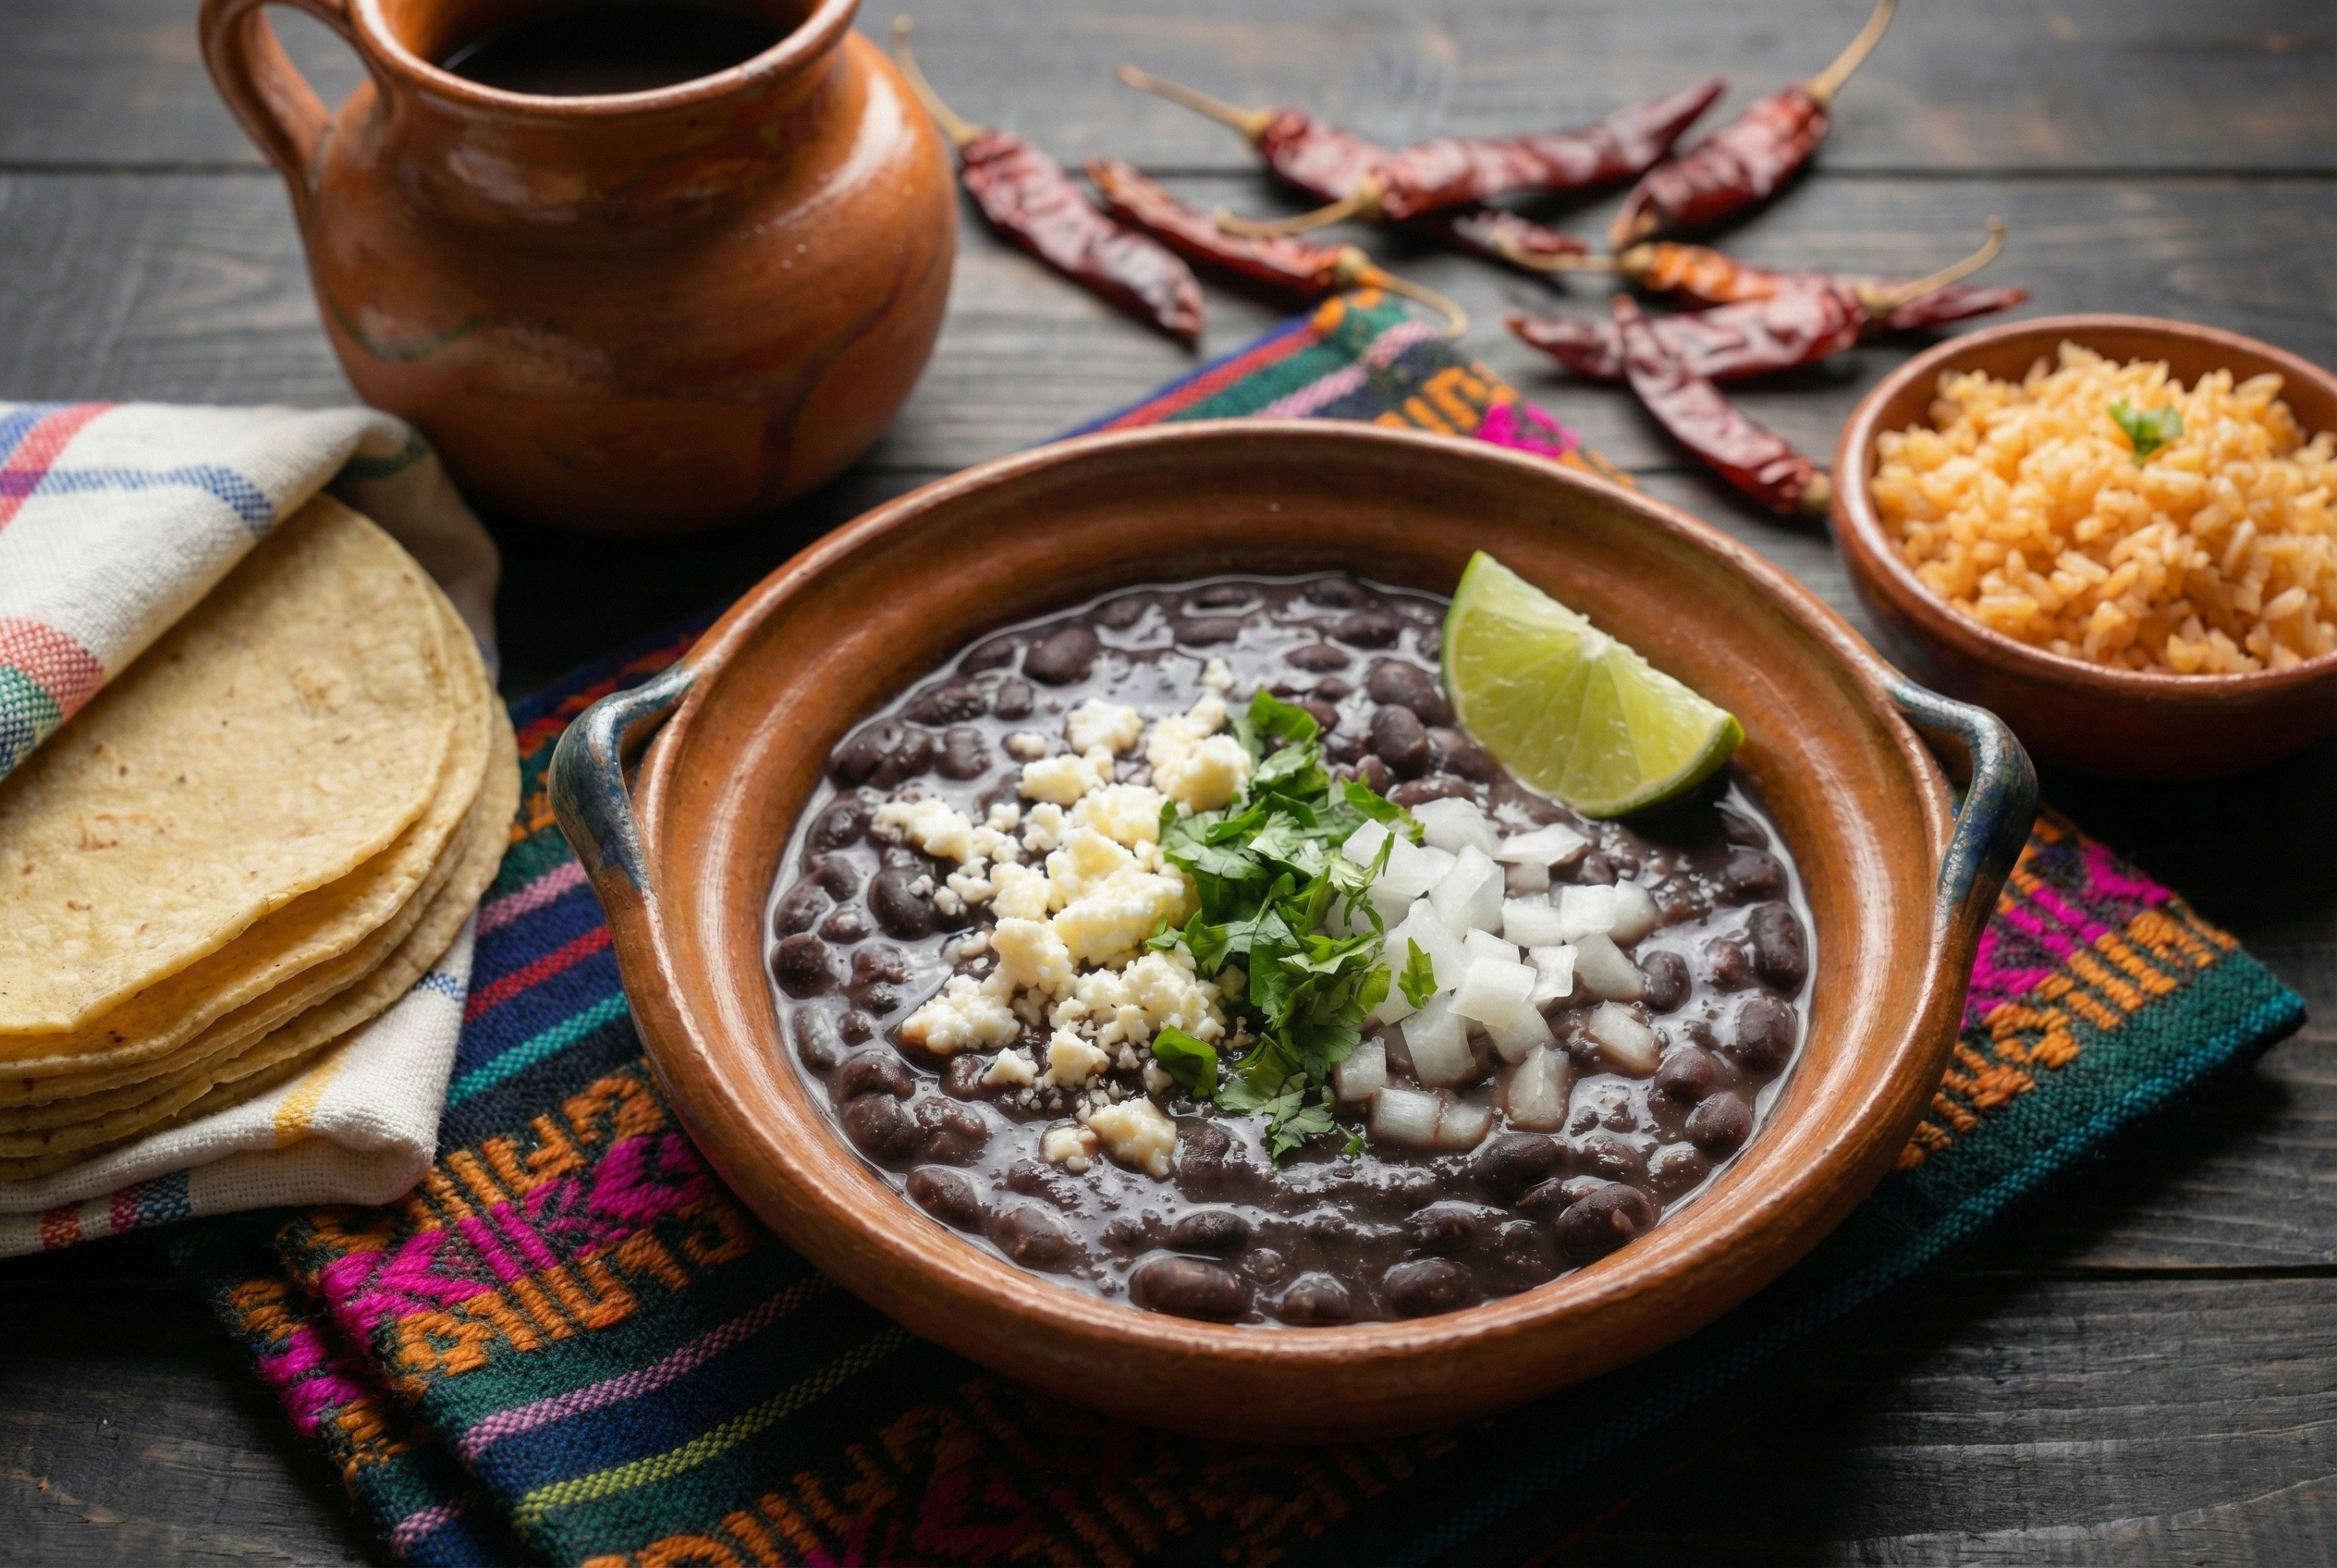
Real Mexican black beans, cooked from dried, have a depth of flavour that canned beans simply cannot touch. The texture is creamy and tender, with skins that are soft but intact. Each bean holds its shape while yielding completely to your teeth. The broth surrounding them is dark, glossy, and rich with the essence of everything that simmered alongside: sweet onion, sharp garlic, aromatic epazote, and a hint of smokiness from a dried chile or a piece of bacon.
What makes them special is the alchemy that happens over a few hours of gentle cooking. The starches release slowly into the liquid, creating a naturally thick, almost velvety sauce without any mashing or thickening agents. The beans absorb the flavours around them while contributing their own earthy sweetness to the pot.
These are the beans you want next to your carne asada. The ones you smear on a warm tortilla with a little crumbled queso fresco. The ones you eat straight from the pot at midnight because you can't stop thinking about them. Make a batch this weekend. You'll understand.
What Goes in Mexican Black Beans
The ingredient list is simple, but every element earns its place:
- Dried black beans - The foundation. Dried beans have better texture and flavour than canned, and they absorb the aromatics as they cook. Look for beans that are shiny and uniformly black, not dusty or cracked.
- White onion - Adds sweetness and depth. A whole or halved onion simmers with the beans and gets discarded at the end, leaving behind pure flavour without any chunky bits.
- Garlic - Smashed whole cloves that melt into the broth. Use more than you think you need.
- Epazote - A traditional Mexican herb with a pungent, almost medicinal flavour that's hard to describe but unmistakably "right" in black beans. It also helps reduce the, shall we say, musical side effects of eating beans. If you can't find it, the beans will still be delicious.
- Lard or bacon fat - This is what gives the beans that luxurious, savoury quality. Vegetable oil works for a vegetarian version, but the flavour won't be quite as rich.
- Dried chile - A single chile negro, pasilla, or guajillo adds subtle smokiness and warmth without making the beans spicy. Optional but recommended.
- Salt - Added at the end, once the beans are tender. Salting too early can toughen the skins.
How to Make Mexican Black Beans
This method requires minimal hands-on time but rewards you with maximum flavour. Here's exactly how to do it:
Step 1: Sort and Rinse the Beans
Pour your dried beans onto a baking sheet or large plate. Spread them out and pick through them carefully, removing any small stones, debris, or shriveled beans. This takes about two minutes and saves you from an unpleasant crunch later. Transfer the sorted beans to a colander and rinse under cold running water until the water runs clear.
Step 2: Add Beans and Water to the Pot
Place the rinsed beans in a large, heavy-bottomed pot or Dutch oven. Add enough cold water to cover the beans by about 3 inches. This sounds like a lot, but the beans will absorb a significant amount of liquid as they cook, and you want plenty of that flavourful broth at the end.
Step 3: Add the Aromatics
Cut your white onion in half (no need to peel it, the skin adds colour) and nestle both halves into the pot. Add the smashed garlic cloves, the sprig of epazote if using, and the dried chile. Drop in a generous tablespoon of lard or bacon fat. Give everything a gentle stir to distribute.
Step 4: Bring to a Boil, Then Reduce to a Simmer
Place the pot over high heat and bring to a rolling boil. You'll see some foam rise to the surface. Skim this off with a spoon and discard it. Once boiling, reduce the heat to low. You want the gentlest possible simmer, with just a few lazy bubbles breaking the surface every few seconds.
Step 5: Cook Low and Slow
Partially cover the pot, leaving the lid slightly ajar to allow some steam to escape. Let the beans simmer undisturbed for about 2 to 2.5 hours. Resist the urge to stir frequently, as this can break up the beans. Check occasionally to make sure the water level stays above the beans. If it drops too low, add hot water (not cold, which can shock the beans and toughen them).
Step 6: Test for Doneness
After 2 hours, start testing the beans. Take a few out with a spoon and press them gently. They should be completely tender and creamy inside, with no chalkiness at the centre. The skins should be soft but not falling off. If they're not ready, continue cooking and check every 15 minutes.
Step 7: Season and Finish
Once the beans are perfectly tender, add salt. Start with about 1.5 teaspoons of kosher salt, stir gently, and taste. The beans should be well-seasoned but not salty. Adjust as needed. Remove and discard the onion halves, garlic cloves, epazote, and dried chile. The broth should be dark and slightly thick. If it's too watery, simmer uncovered for another 10-15 minutes to concentrate the flavours.
Step 8: Rest Before Serving
Here's a trick many recipes skip: let the beans rest off the heat for 15-30 minutes before serving. This allows the flavours to meld and the broth to thicken slightly as it cools. Reheat gently if needed. The beans will be even better the next day.
What to Serve with Mexican Black Beans
These beans are incredibly versatile. Here's how to use them:
- As a side dish: Serve in small bowls alongside tacos, enchiladas, grilled meats, or rice
- In burritos or bowls: Spoon over rice with your choice of protein and toppings
- As refried beans: Mash a portion with extra lard in a hot skillet until thick and creamy. If you want a proper recipe for that, check out my homemade refried beans.
- For breakfast: Serve with fried eggs, tortillas, and salsa
- As soup: Blend half the beans and stir back in for a heartier, soup-like consistency
Traditional garnishes:
- Crumbled queso fresco or cotija
- Fresh cilantro
- Diced white onion
- A squeeze of lime
- Sliced jalapeno or serrano
- Mexican crema or sour cream
For dietary modifications:
- Vegan/vegetarian: Use vegetable oil or olive oil instead of lard. Skip the bacon fat.
- Lower fat: Reduce the lard to 1 teaspoon. Beans will be slightly less rich but still delicious.
- Instant Pot version: Combine everything and pressure cook on high for 25-30 minutes with natural release.
These beans also pair beautifully with huevos rancheros for a weekend brunch that feels like a proper Mexican feast. And if you want to take things further, try stirring a spoonful into my sausage and black bean chili for an extra layer of depth.
Frequently Asked Questions
Do I need to soak black beans before cooking?
No. Contrary to popular belief, soaking is not necessary and can actually wash away flavour. Unsoaked beans absorb the aromatics in the pot as they cook, resulting in a more flavourful final dish. They also tend to hold their shape better. Simply sort, rinse, and add them directly to the pot with plenty of water.
Why did my black beans turn out tough?
The most common causes are adding salt too early and cooking at too high a temperature. Salt added before the beans are tender can toughen the skins, so always season at the end. A rolling boil can also break beans apart on the outside while leaving the centres chalky. Keep the simmer as gentle as possible, with just a few lazy bubbles. Also, avoid adding cold water to the pot; if you need to top up, use hot water.
What is epazote and can I substitute it?
Epazote is a traditional Mexican herb with a pungent, slightly medicinal flavour that is considered essential in many bean dishes. It also helps reduce the gas-producing effects of beans. If you cannot find it, the beans will still be delicious without it. Some cooks substitute a bay leaf, though the flavour is quite different. Mexican grocery stores and online spice shops are your best bet for finding dried or fresh epazote.
How long do cooked black beans last in the fridge?
Stored in their broth in an airtight container, cooked black beans will keep in the refrigerator for up to 5 days. They actually improve in flavour after a day or two as the seasonings continue to meld. For longer storage, freeze them in portions with their broth for up to 3 months. Thaw overnight in the refrigerator and reheat gently on the stovetop.
Time to Make Some Beans
Most of that three-hour cook time is completely hands-off, which is what makes these beans such a brilliant weekend project. Start a pot on Sunday afternoon while you're doing laundry or watching a movie, and by dinner time you'll have enough beans for the whole week: tacos on Monday, rice bowls on Tuesday, refried beans for breakfast on Wednesday.
Once you've tasted the difference between these slow-simmered beans and anything from a can, there's truly no going back. This is one of those foundational recipes I come back to again and again, and I think you will too.
Recipe
Authentic Mexican Black Beans (Frijoles Negros de Olla)
Equipment
- Large pot or Dutch oven
- Colander
- Baking sheet (for sorting)
Ingredients
- 1 lb dried black beans
- 10 cups water
- 1 medium white onion halved
- 6 cloves garlic smashed
- 1 sprig fresh epazote optional
- 1 dried chile negro, pasilla, or guajillo optional
- 2 tablespoon lard or bacon fat
- 1 ½ teaspoon kosher salt plus more to taste
Instructions
Prep
- Sort through the dried beans on a baking sheet, removing any small stones, debris, or shriveled beans. Transfer to a colander and rinse under cold running water until the water runs clear.
Cook the Beans
- Place the rinsed beans in a large pot or Dutch oven. Add 10 cups of cold water, covering the beans by about 3 inches.
- Add the halved white onion (skin on for color), smashed garlic cloves, epazote sprig, dried chile, and lard or bacon fat. Stir gently to distribute.
- Bring to a rolling boil over high heat. Skim off any foam that rises to the surface and discard.
- Reduce heat to low and maintain the gentlest possible simmer, with just a few lazy bubbles breaking the surface. Partially cover the pot, leaving the lid slightly ajar.
- Cook for 2 to 2.5 hours until beans are completely tender and creamy inside with no chalkiness. Check occasionally and add hot water if the level drops below the beans. Avoid stirring too frequently.
Season and Finish
- Once the beans are tender, add 1 ½ teaspoons kosher salt. Stir gently and taste. Adjust seasoning as needed.
- Remove and discard the onion halves, garlic cloves, epazote sprig, and dried chile.
- If the broth is too watery, simmer uncovered for 10-15 minutes to concentrate the flavors.
- Let the beans rest off the heat for 15-30 minutes before serving. This allows the flavors to meld and the broth to thicken slightly. Reheat gently if needed.
Leave a Reply