Pinwheel cookies have a reputation for being fussy. The tight spiral, the clean lines, the way each slice looks like it came from a professional bakery. People assume they require special skills or equipment, the kind of recipe you attempt once and never again. This reputation is unearned.
The technique is simpler than it appears. You make two batches of sugar cookie dough, one vanilla and one chocolate. You roll them flat, stack them, roll again, then roll the whole thing into a log. Chill, slice, bake. The spiral happens automatically when you roll. No piping, no decorating, no steady hands required.
The result looks like you spent hours in the kitchen when the actual hands-on time is about 30 minutes. The rest is chilling, which the refrigerator handles without your involvement. These cookies earn compliments out of proportion to their difficulty. They work for holiday cookie exchanges, gifts, or any occasion where you want something that looks impressive without the stress of intricate decorating.
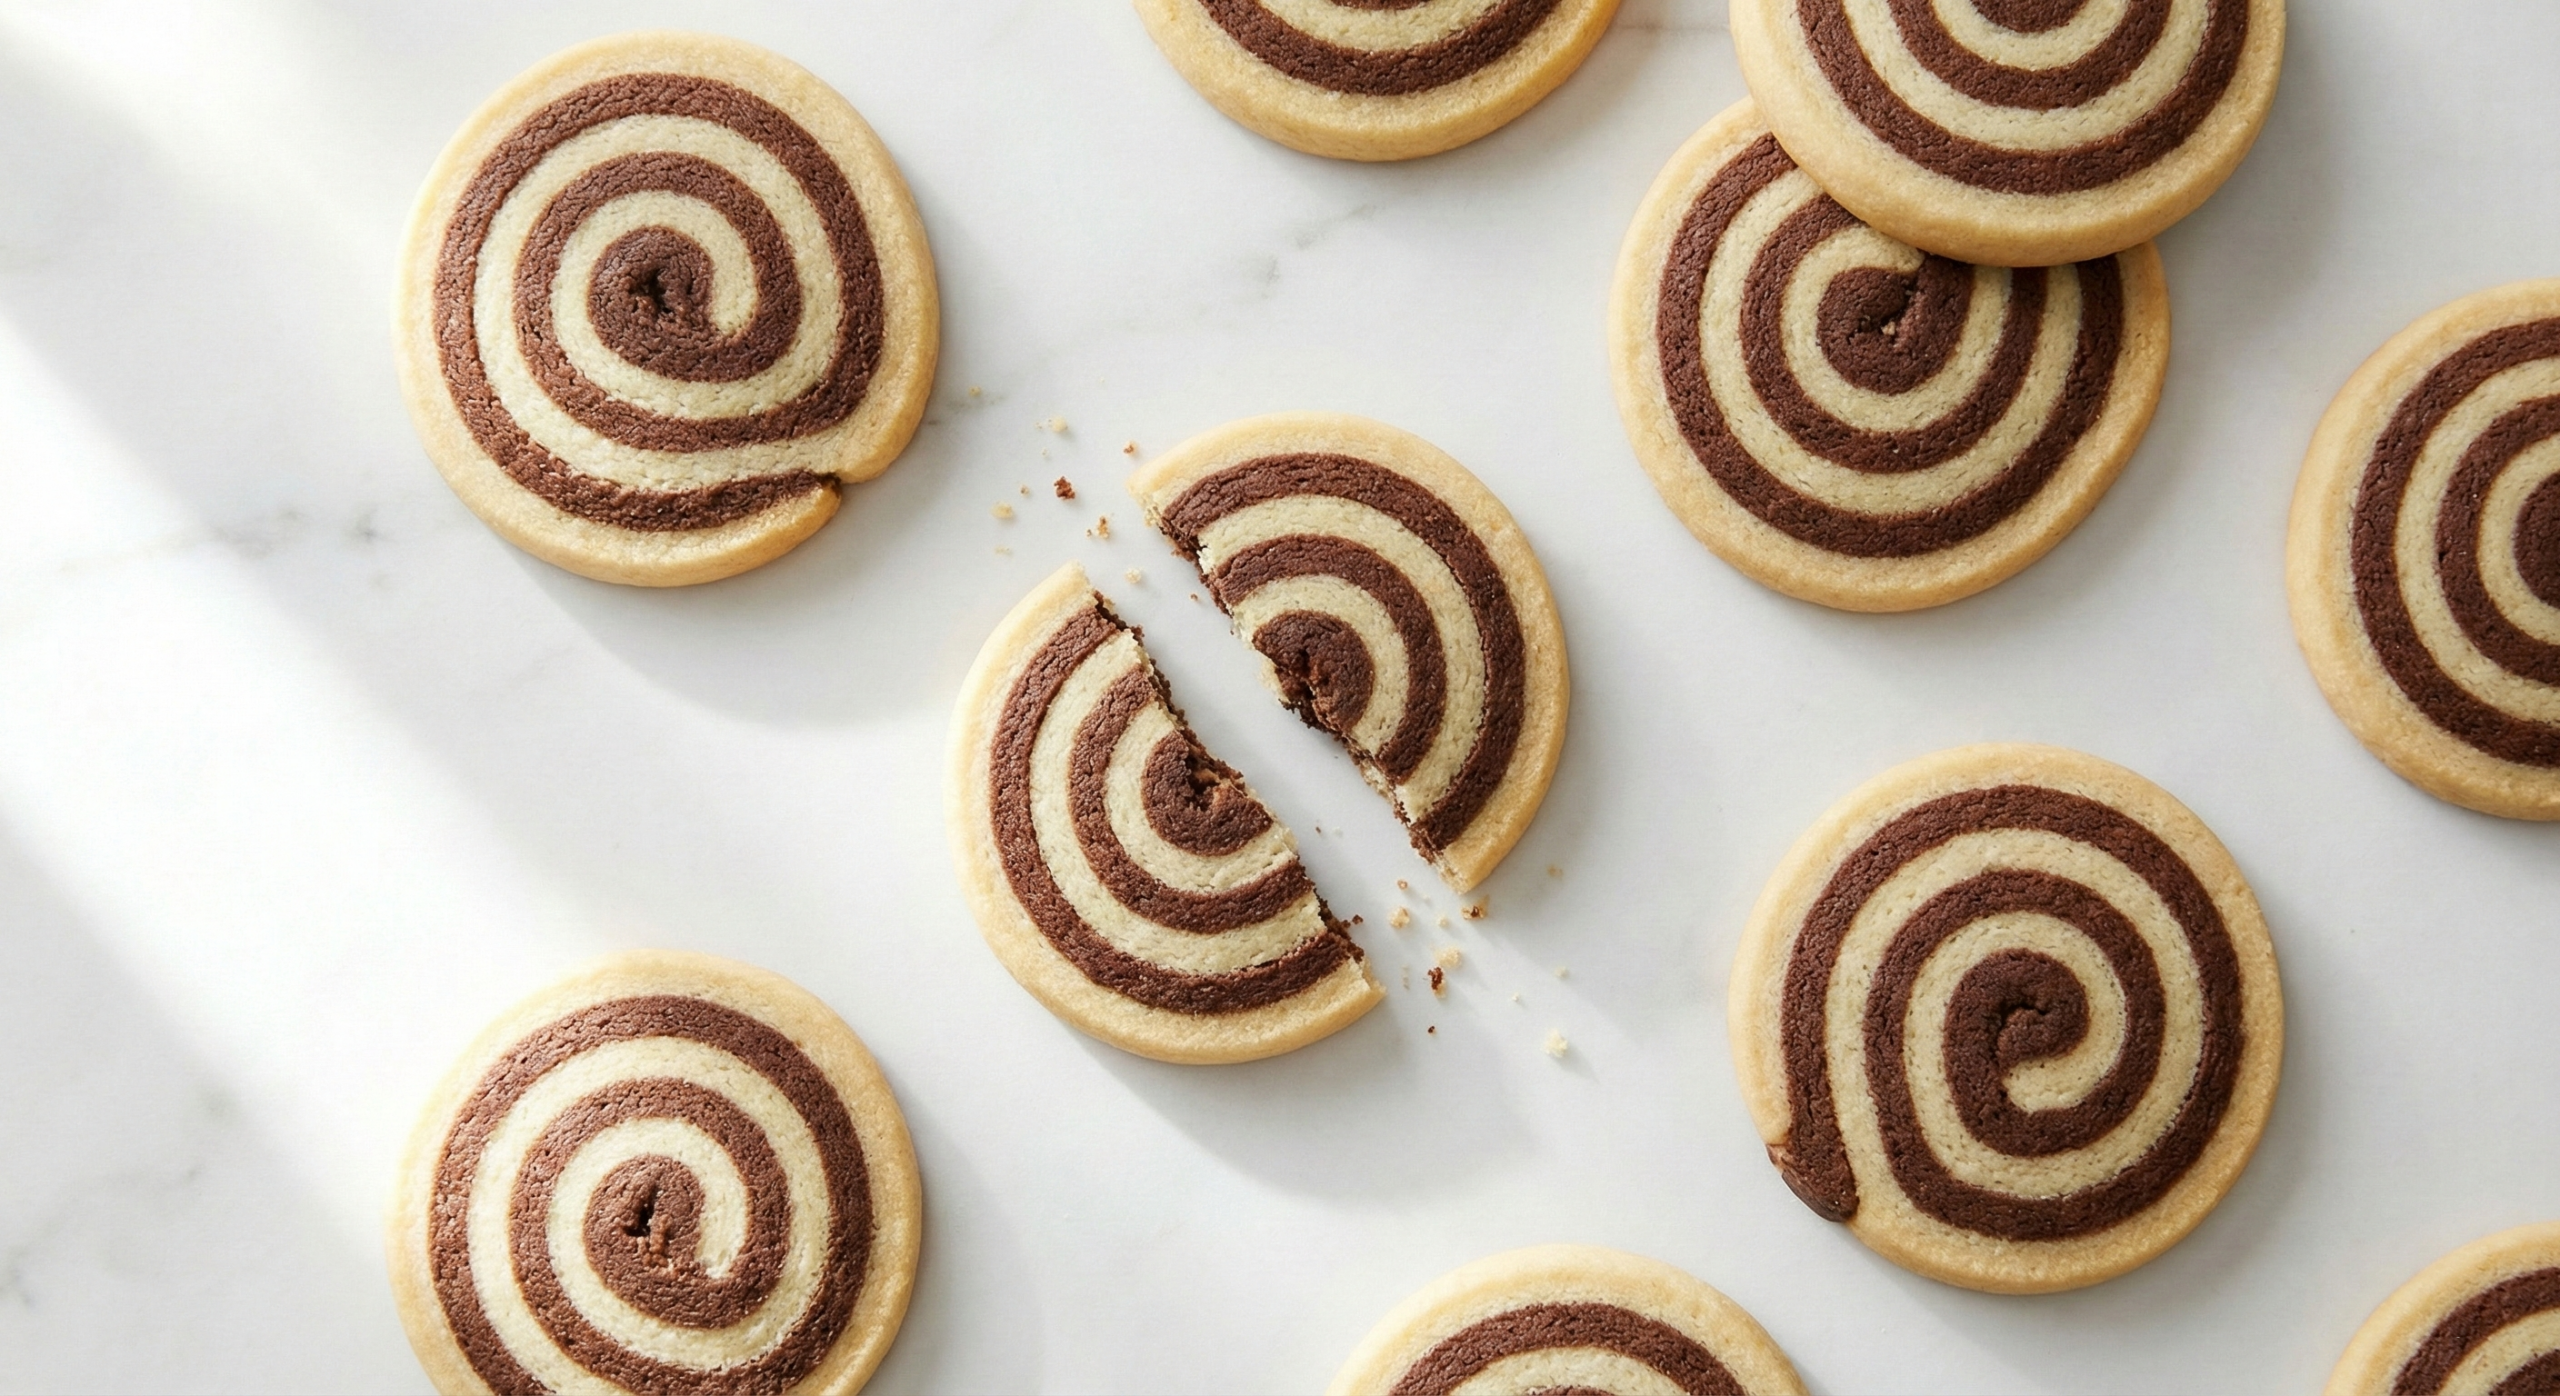
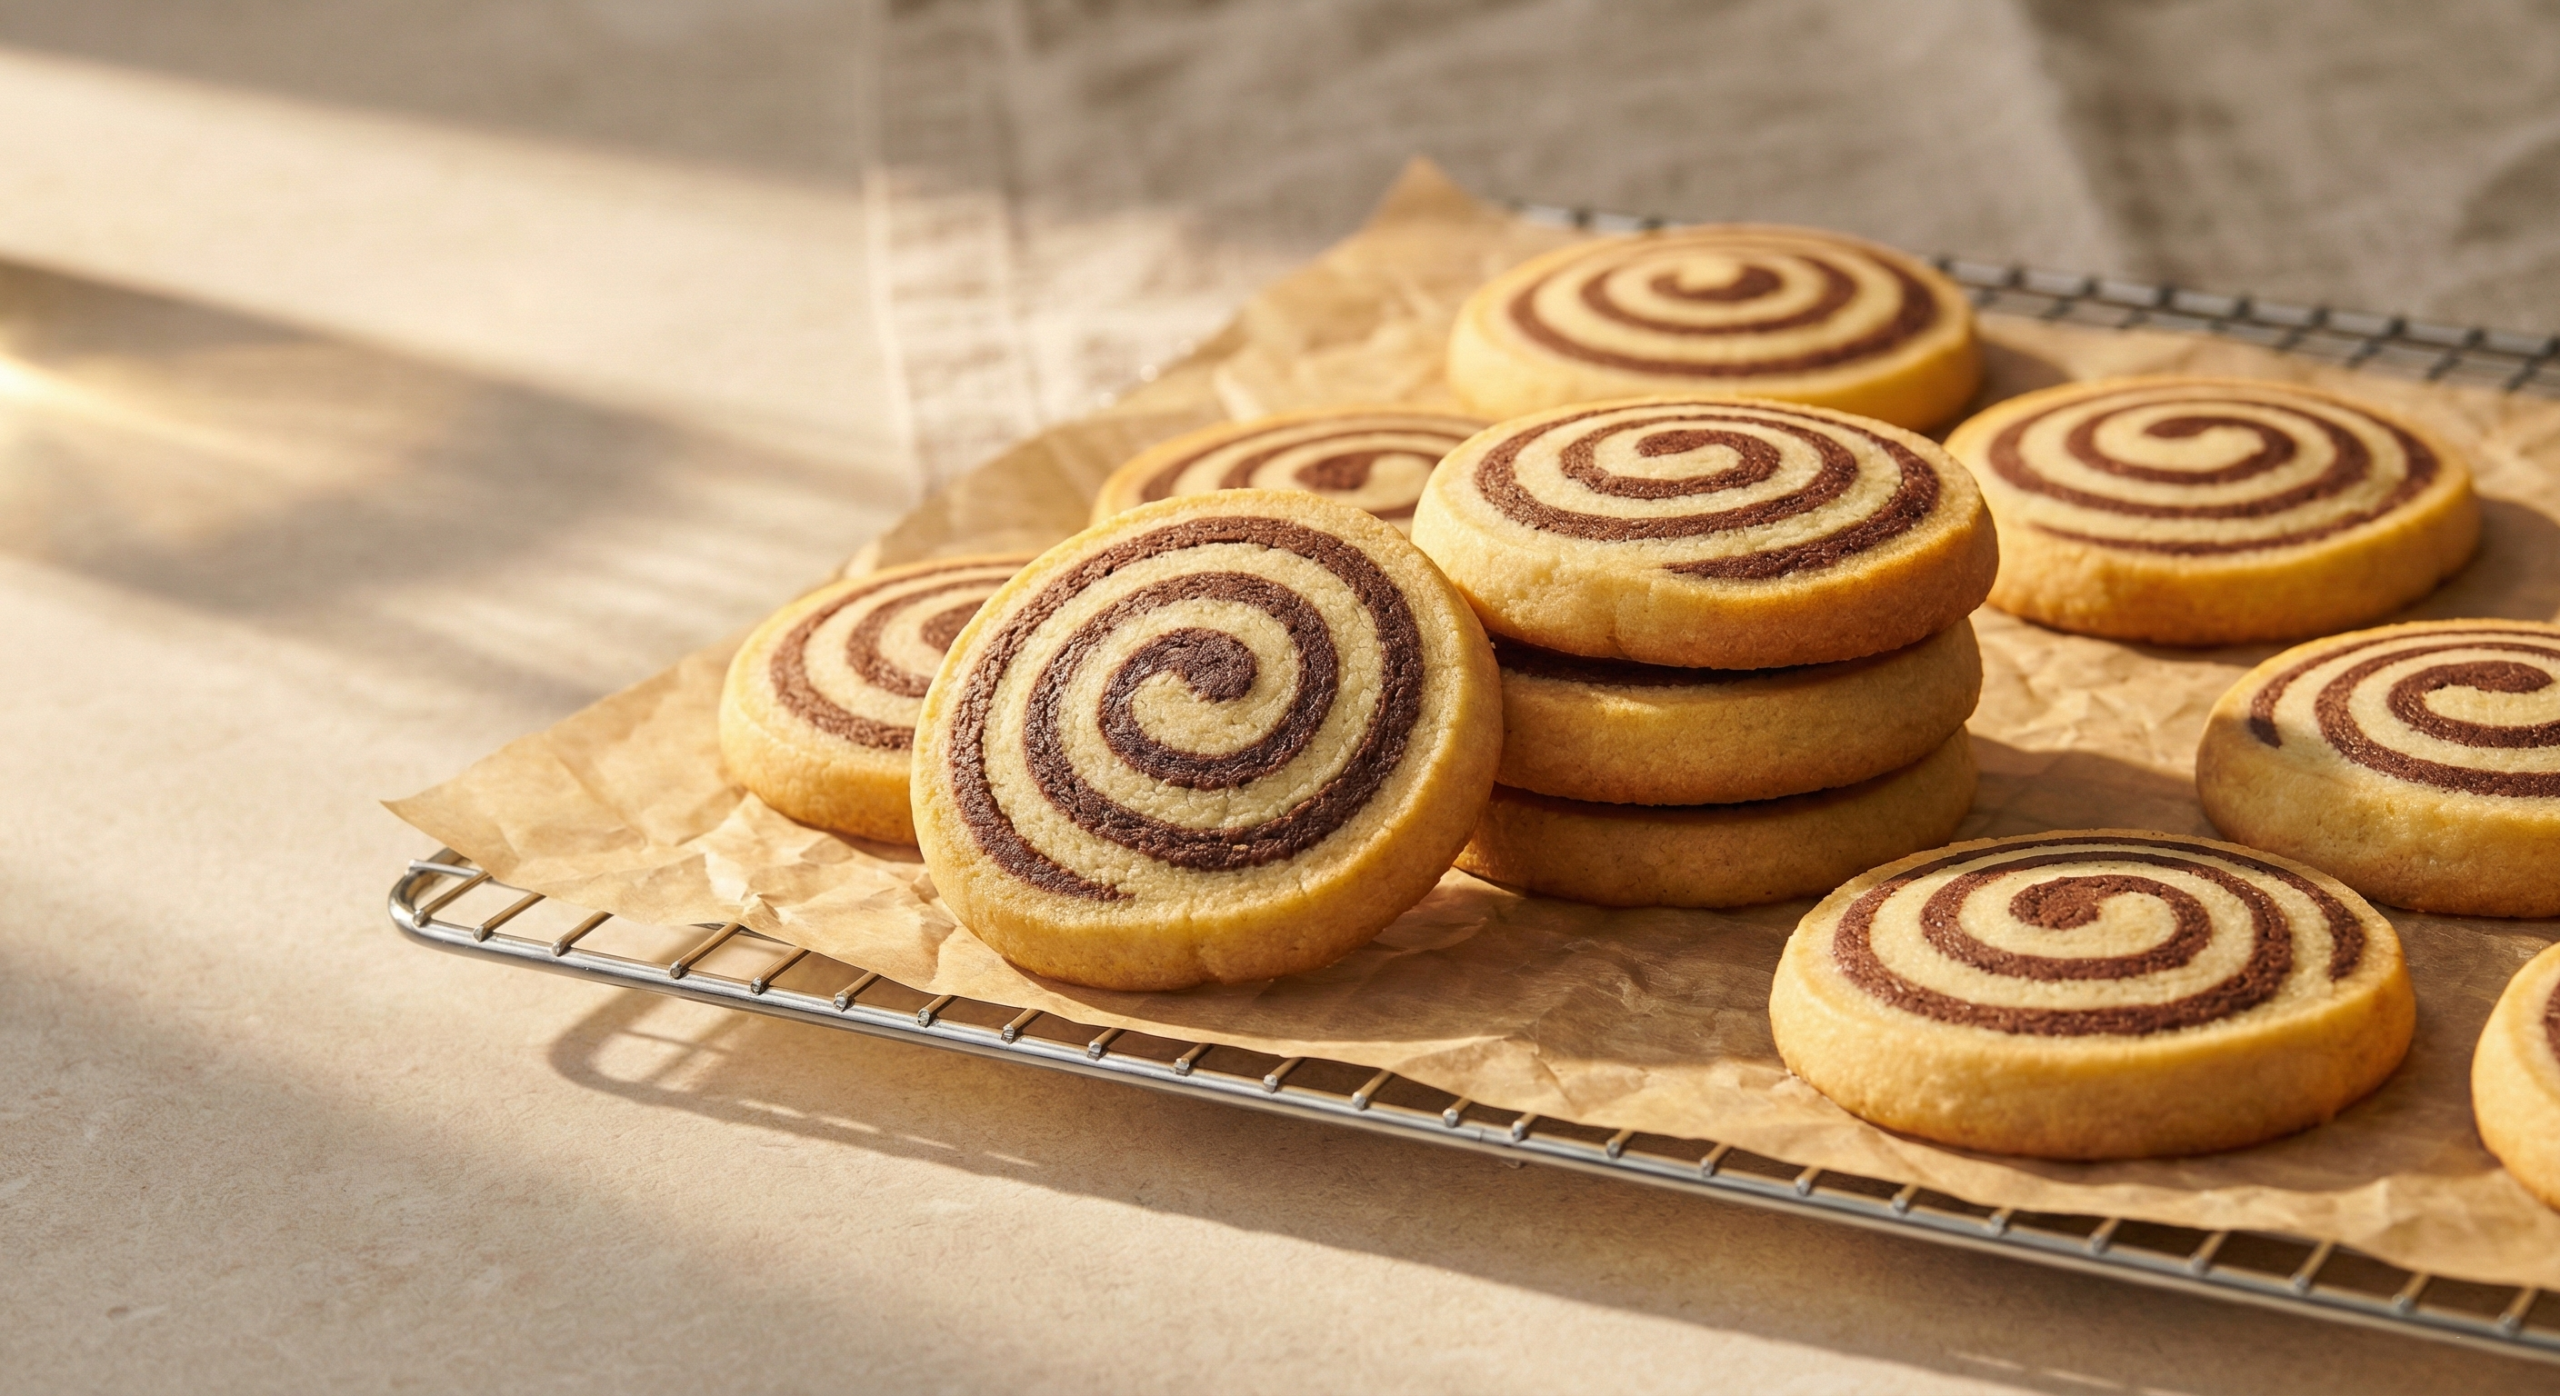
The visual impact comes first. Each cookie displays a tight spiral of alternating vanilla and chocolate, the kind of pattern that looks deliberate and precise. The contrast between the pale vanilla dough and the dark chocolate creates definition that holds even after baking. When arranged on a platter, the cookies look like they belong in a bakery case.
The texture is classic sugar cookie: tender, slightly crisp at the edges, soft in the center. The two doughs bake together seamlessly, so each bite includes both flavors. The vanilla is buttery and warm with a hint of pure vanilla extract. The chocolate adds depth without overpowering, more cocoa richness than intense chocolate.
The cookies hold their shape well after baking, maintaining the spiral definition rather than spreading into shapeless rounds. This makes them ideal for gifting or displaying. They look as good on day three as they did fresh from the oven, which is not something you can say about most decorated cookies.
What Goes in Pinwheel Sugar Cookies
Both doughs use the same base recipe with one modification for the chocolate version:
For the Base Dough (makes both layers):
- All-purpose flour provides structure. Too much makes the cookies tough; too little causes spreading. Measure carefully or use a kitchen scale.
- Butter should be softened to room temperature, not melted. Properly softened butter creams smoothly with sugar and creates a tender crumb. Cold butter does not incorporate well. Melted butter changes the texture entirely.
- Granulated sugar sweetens and contributes to the slightly crisp edges. These are not overly sweet cookies, which lets the vanilla and chocolate flavors come through.
- Egg binds the dough and adds richness. Use a large egg at room temperature for best results.
- Vanilla extract provides the signature flavor of the vanilla layer. Use pure vanilla extract, not imitation, for the best taste.
- Baking powder gives a slight lift so the cookies stay tender rather than dense.
- Salt enhances all the flavors and balances the sweetness.
For the Chocolate Layer:
- Cocoa powder transforms half the dough into the chocolate layer. Use Dutch-process cocoa for a darker color and mellower flavor, or natural cocoa for a slightly more intense chocolate taste. Either works.
How to Make Pinwheel Sugar Cookies
The process involves making one dough, dividing it, flavoring half with cocoa, then assembling the pinwheel. Chilling is essential at multiple stages.
Step 1: Make the Base Dough
Beat softened butter and sugar together in a large bowl using an electric mixer on medium speed. Continue for 2-3 minutes until the mixture is light and fluffy, scraping down the sides as needed.
Add the egg and vanilla extract. Beat until combined, about 30 seconds. The mixture may look slightly curdled; this is normal.
In a separate bowl, whisk together flour, baking powder, and salt. Add the dry ingredients to the butter mixture in two additions, mixing on low speed until just combined. Do not overmix or the cookies will be tough.
Step 2: Divide and Flavor
Divide the dough in half. Weigh each portion if you have a scale; equal halves produce even spirals. Leave one half plain (vanilla). Add cocoa powder to the other half and mix until the cocoa is fully incorporated and the color is uniform.
The chocolate dough will feel slightly drier than the vanilla. This is normal because cocoa absorbs moisture. If it feels too crumbly to work with, add milk one teaspoon at a time until it comes together.
Step 3: Roll Each Dough
Place the vanilla dough between two sheets of parchment paper. Roll into a rectangle approximately 10x12 inches and about ¼ inch thick. The edges do not need to be perfect; you will trim them later. Transfer the rolled dough (still between parchment) to a baking sheet and refrigerate.
Repeat with the chocolate dough, rolling to the same dimensions. Keeping both doughs the same size ensures an even spiral.
Chill both rolled doughs for at least 20 minutes until firm but still pliable. If the dough becomes too cold and cracks when bent, let it sit at room temperature for a few minutes.
Step 4: Stack and Trim
Remove both doughs from the refrigerator. Peel the top parchment from each. Flip the chocolate dough onto the vanilla dough, aligning the edges as closely as possible. Press gently to adhere. Peel off the remaining parchment from the chocolate layer.
Using a sharp knife or pizza cutter, trim the edges to create a clean rectangle. The scraps can be pressed together, re-rolled, and used for plain cookies or discarded.
Step 5: Roll Into a Log
Starting from one long edge, roll the stacked doughs into a tight log. Use the parchment underneath to help lift and roll. Apply gentle, even pressure to keep the spiral tight without squeezing the dough.
Once rolled, wrap the log tightly in plastic wrap. If the log has flattened on one side, gently reshape it into a round cylinder. Refrigerate for at least 2 hours or overnight. The dough must be firm enough to slice cleanly.
Step 6: Slice
Preheat the oven to 350°F. Line baking sheets with parchment paper.
Unwrap the chilled log. Using a sharp knife, slice the log into rounds about ¼ inch thick. A gentle sawing motion works better than pressing straight down, which can flatten the spiral. Rotate the log slightly after each cut to prevent one side from flattening.
Arrange the slices on prepared baking sheets with about 1.5 inches between them. These cookies spread slightly but not dramatically.
Step 7: Bake
Bake for 10-12 minutes until the edges are just set and the vanilla portions are barely beginning to turn golden. The cookies will look slightly underdone in the center; they firm up as they cool.
Let the cookies cool on the baking sheet for 5 minutes before transferring to a wire rack. Cooling on the hot pan continues the baking process slightly and helps the cookies set without becoming too crisp.
The Rolling Technique
The spiral quality depends on rolling technique. A few details make the difference between a tight, defined spiral and a loose, uneven one.
Roll both doughs to the same thickness. Uneven layers produce a lopsided spiral where one color dominates. Use parchment paper as guides and flip the dough occasionally while rolling to check for consistency.
Chill the doughs before stacking. Warm, soft dough sticks together unevenly and stretches when rolled. Firm dough handles cleanly and maintains its shape.
Roll tightly from the start. The first turn sets the center of the spiral. A loose first turn creates a gap in the middle of each cookie. Use the parchment to lift and roll, keeping consistent pressure throughout.
Chill the log thoroughly before slicing. A soft log squishes when cut, distorting the spiral. Two hours minimum in the refrigerator produces clean slices. Overnight is even better.
What to Serve with Pinwheel Cookies
Pinwheel cookies work in many contexts:
- As part of a holiday cookie platter or exchange
- Packaged in cellophane bags for gifts
- With coffee or tea as an afternoon treat
- On a dessert table alongside other sweets
- As a lunchbox or after-school snack
- Crumbled over vanilla ice cream
Beverage pairings:
- Cold milk (the classic)
- Hot cocoa or coffee
- Chai tea
- Espresso
For dietary modifications:
- Dairy-free: Substitute vegan butter (stick form works best). Results may vary slightly in texture.
- Gluten-free: Use a 1:1 gluten-free flour blend. The dough may be slightly more crumbly.
- Egg-free: Replace the egg with 3 tablespoons unsweetened applesauce or a flax egg. Texture will be slightly different.
Tips for Success
- Soften butter properly. It should dent when pressed but not be squishy or melted. Leave it at room temperature for 30-45 minutes before starting.
- Measure flour correctly. Spoon flour into the measuring cup and level off. Scooping directly from the bag packs the flour and adds too much.
- Chill at every stage. Cold dough rolls better, stacks better, and slices better. Do not skip the chilling steps.
- Use a sharp knife. A dull knife drags through the dough and distorts the spiral. A thin, sharp blade cuts cleanly.
- Rotate while slicing. Give the log a quarter turn after every few slices to prevent flat spots from developing.
- Do not overbake. The cookies should look slightly underdone when removed from the oven. They continue baking on the hot pan and firm up as they cool.
Substitutions
- Dutch-process cocoa: Natural cocoa powder works but produces a lighter color and slightly different flavor.
- Butter: Vegan butter (stick form) can substitute for dairy-free cookies. Do not use margarine or tub spreads.
- Vanilla extract: Almond extract can replace half the vanilla for a different flavor profile.
- All-purpose flour: A 1:1 gluten-free blend works with slightly altered texture.
- Granulated sugar: Superfine sugar produces a slightly more tender cookie but is not essential.
- Egg: Flax egg or 3 tablespoons applesauce can substitute. The dough may need slightly more flour.
Variations
- Peppermint pinwheels: Add ½ teaspoon peppermint extract to the vanilla dough. Perfect for the holidays.
- Citrus pinwheels: Add 1 tablespoon orange or lemon zest to the vanilla dough.
- Espresso pinwheels: Add 1 teaspoon instant espresso powder to the chocolate dough for mocha flavor.
- Red velvet pinwheels: Add red food coloring to the vanilla dough instead of leaving it plain. Pair with the chocolate layer.
- Cinnamon pinwheels: Replace cocoa with 2 teaspoons cinnamon and ¼ teaspoon nutmeg for a snickerdoodle-style swirl.
- Triple swirl: Make three colors (vanilla, chocolate, and strawberry or matcha) for a more complex pattern. Requires careful layering.
Make Ahead and Storage
- Dough logs: The rolled and shaped log can be refrigerated for up to 3 days or frozen for up to 2 months. Slice and bake directly from frozen, adding 1-2 minutes to baking time.
- Make ahead for events: Prepare logs in advance and freeze. Slice and bake the day of your event for fresh-baked cookies with minimal effort.
- Baked cookies (room temperature): Store in an airtight container at room temperature for up to 1 week. Layer with parchment paper to prevent sticking.
- Baked cookies (freezer): Freeze baked cookies in a single layer, then transfer to a freezer bag. Store up to 2 months. Thaw at room temperature for 15-20 minutes.
- Dough scraps: Press scraps together, re-roll, and chill. Use for plain sugar cookies or chop for cookie pieces in ice cream.
Impress Without the Stress
Pinwheel cookies look complicated, which is exactly why they impress. The gap between perceived difficulty and actual difficulty is wide. These cookies take patience (all that chilling) but not skill beyond basic dough-making and rolling.
Make them for a cookie exchange, a gift, or just to prove to yourself that bakery-style results are achievable at home. The first time someone asks how you made the spiral, you get to smile and say it was easier than it looks.
Recipe
Pinwheel Sugar Cookies
Equipment
- Electric mixer
- Rolling Pin
- parchment paper
- Sharp knife
- Baking sheets
- Wire cooling rack
Ingredients
For the Base Dough
- 2 ½ cups all-purpose flour
- 1 cup unsalted butter 2 sticks, softened
- ¾ cup granulated sugar
- 1 large egg
- 2 teaspoon vanilla extract
- ½ teaspoon baking powder
- ¼ teaspoon salt
For the Chocolate Layer
- 3 tablespoon cocoa powder Dutch-process or natural
- 1-2 teaspoon milk if needed
Instructions
Make the Dough
- Beat softened butter and sugar with an electric mixer on medium speed for 2-3 minutes until light and fluffy. Scrape down the sides as needed.
- Add the egg and vanilla extract. Beat until combined, about 30 seconds.
- Whisk together flour, baking powder, and salt in a separate bowl. Add to butter mixture in two additions, mixing on low until just combined.
- Divide dough in half. Leave one half plain (vanilla). Add cocoa powder to the other half and mix until uniform. Add milk one teaspoon at a time if chocolate dough is too crumbly.
Roll and Assemble
- Roll each dough half between parchment paper into a 10x12 inch rectangle, about ¼ inch thick. Refrigerate both for at least 20 minutes until firm but pliable.
- Remove doughs from refrigerator. Peel top parchment from each. Flip chocolate dough onto vanilla dough, aligning edges. Press gently to adhere. Remove remaining parchment.
- Trim edges with a sharp knife or pizza cutter. Starting from one long edge, roll tightly into a log using the parchment to help lift and roll.
- Wrap log tightly in plastic wrap. Reshape into a round cylinder if needed. Refrigerate for at least 2 hours or overnight until very firm.
Slice and Bake
- Preheat oven to 350°F (175°C). Line baking sheets with parchment paper.
- Unwrap chilled log. Using a sharp knife, slice into ¼-inch rounds using a gentle sawing motion. Rotate log after each cut to prevent flattening.
- Arrange slices on prepared baking sheets with 1.5 inches between them. Bake for 10-12 minutes until edges are just set and vanilla portions are barely golden.
- Cool on baking sheet for 5 minutes before transferring to a wire rack to cool completely.
Leave a Reply