I kept buying those little mochi bites from the Asian grocery store and thinking "there's got to be a way to make these at home." Every recipe I found online looked intimidating though. Pounding rice with wooden mallets, steaming for an hour, the whole production.
Then I found out you can make it in a microwave with four ingredients. I tried it once, fully expecting to fail, and pulled out the softest, chewiest, most ridiculous little dough balls I've ever eaten. I just stood in my kitchen eating pieces straight off the cutting board.
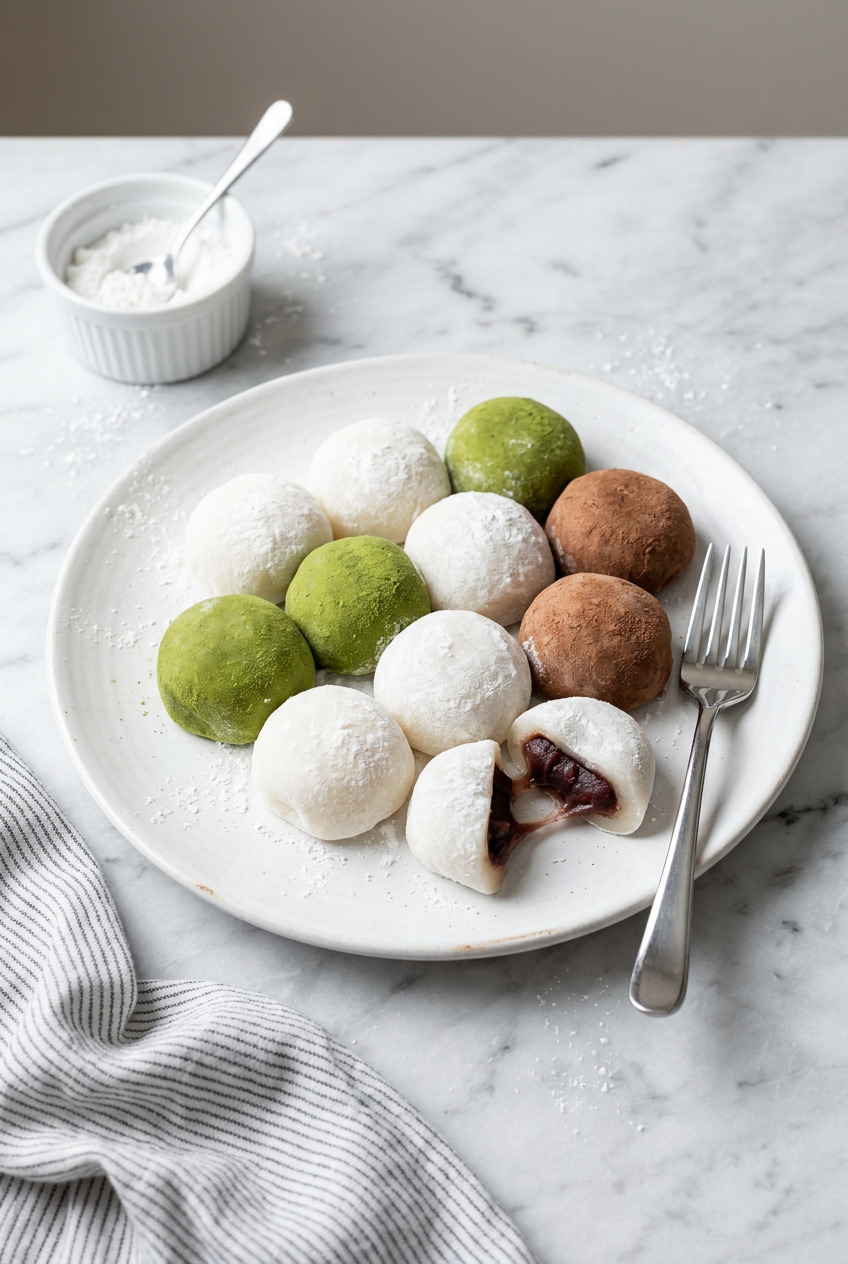
This is my base recipe now. I use it for everything, from plain mochi dusted in cornstarch to stuffed daifuku to ice cream mochi. Once you have this down, you can go anywhere with it.
What Is Mochi?
Mochi (moh-chee) is a traditional Japanese rice cake made from mochigome, a short-grain glutinous rice. The word "glutinous" throws people off, but it has nothing to do with gluten. It just means sticky.
Traditionally, mochi is made by steaming the rice and pounding it with wooden mallets in a large mortar called an usu. It's a beautiful, rhythmic process that families have practiced for centuries, especially during New Year celebrations. But the modern microwave method gives you that same soft, elastic, bouncy texture without the arm workout.
What makes mochi special is that texture. Nothing else in the dessert world feels quite like it. It's chewy without being tough, soft without falling apart, and stretchy in a way that makes every bite feel almost playful.
Why You'll Love This Recipe
- Just 4 ingredients. Glutinous rice flour, sugar, liquid, and cornstarch for dusting. That's your entire shopping list.
- Ready in under 10 minutes. From mixing bowl to finished mochi, this is one of the fastest desserts I make.
- No special equipment needed. A microwave-safe bowl, a spatula, and your hands. You probably have everything already.
- Endlessly customizable. Flavor the dough, stuff it with fillings, roll it in different coatings. Think of this as your blank canvas.
- So much better than store-bought. Fresh mochi is softer, chewier, and has no preservatives. Once you make it yourself, those packaged ones just won't compare.
Ingredients
- Glutinous rice flour / mochiko (¾ cup / 100g). This is non-negotiable. Regular rice flour will not work. You need the glutinous variety, sometimes labeled "sweet rice flour" or "mochiko." It's what gives mochi that signature stretch and chew. I use Koda Farms or Mochiko brand, both easy to find at Asian grocery stores or online.
- Granulated sugar (3 tablespoons / 40g). Just enough sweetness to make this a treat without being cloying. You can adjust up or down depending on how sweet you like things.
- Milk (⅔ cup / 160ml). This is what I use, and I love the result. Milk gives the mochi a slightly creamier, richer texture and helps it stay soft longer. For a more traditional version, you can use plain water instead, which produces a chewier, more neutral dough. Both are great. It depends on what you're going for.
- Cornstarch (about ¼ cup). This is for dusting only, not for the dough itself. It keeps everything from sticking to your hands, your counter, and each other. Be generous with it.

Milk vs. Water: Which Should You Use? I've made this both ways dozens of times. Milk produces a mochi that's slightly softer, creamier, and stays pliable a bit longer. Water gives you a bouncier, chewier bite that's closer to what you'd find at a traditional Japanese sweet shop. My preference is milk for plain mochi and water when I'm adding bold fillings that already bring richness.
Substitutions
- Milk. Swap for oat milk, coconut milk, almond milk, or plain water. Coconut milk adds a subtle tropical sweetness I really enjoy. Any of these make the recipe completely vegan.
- Granulated sugar. Powdered sugar works and dissolves even more smoothly. Coconut sugar is fine too, though it will give your mochi a light caramel color.
- Cornstarch. Potato starch or tapioca starch both work for dusting. You can also use extra mochiko flour, though cornstarch feels silkier.
- Sugar amount. If you're wrapping the mochi around a sweet filling like red bean paste or candy, you can cut the sugar to 1-2 tablespoons since the filling brings its own sweetness.
How to Make Sweet Mochi
Step 1: Prepare the Dough
Combine ¾ cup glutinous rice flour and 3 tablespoons sugar in a microwave-safe bowl. Whisk them together so the sugar is evenly distributed.
Gradually pour in ⅔ cup milk (or water) while stirring continuously. Keep stirring until the mixture is completely smooth and free of lumps. It should look like a thin, pourable batter at this stage.
Cover the bowl loosely with plastic wrap or a microwave-safe plate. Microwave on high for 1 minute.
Remove the bowl carefully (it'll be hot) and fold the mixture with a wet spatula. It will look partially cooked and lumpy. That's normal. Don't panic.
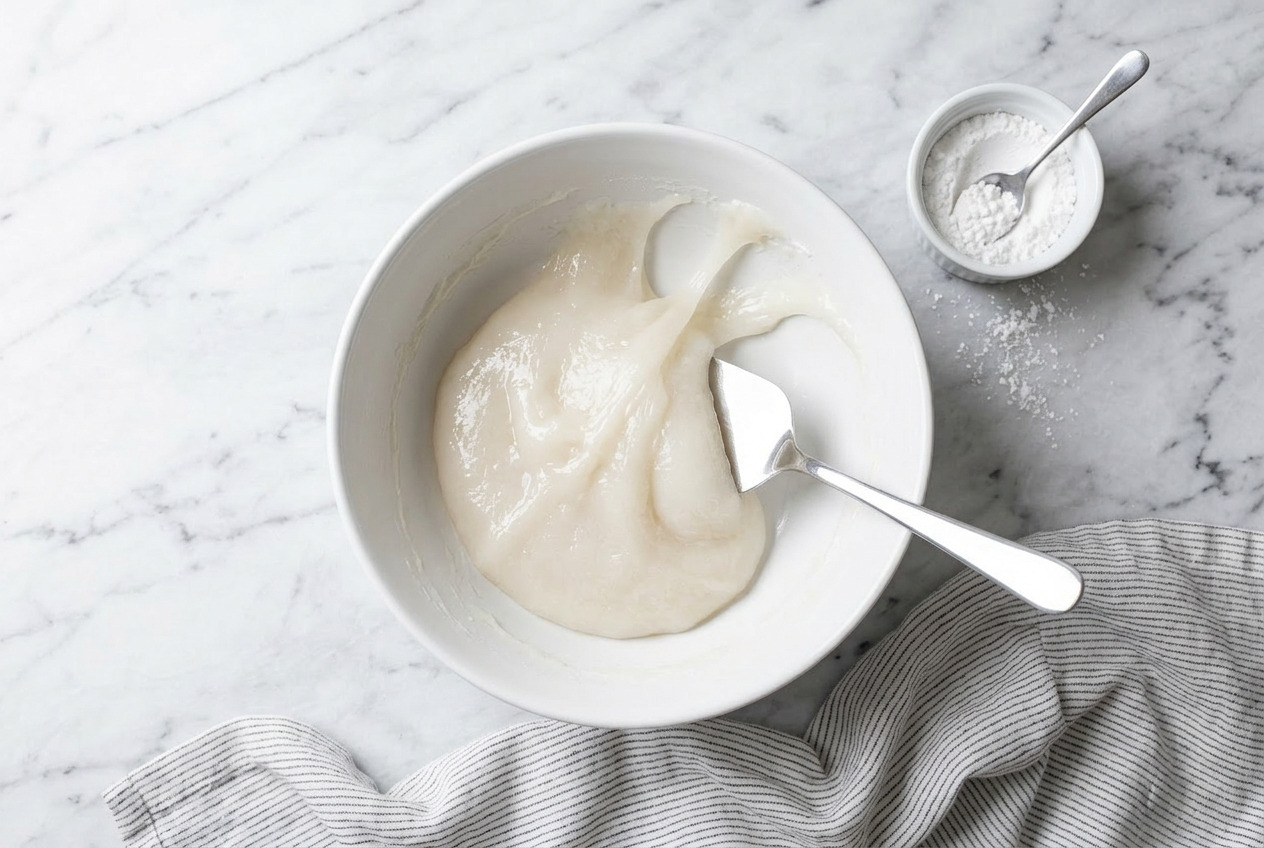
Cover again and microwave for another 1 minute. Fold again. The dough should now be thick, sticky, and slightly translucent. If it still looks raw in spots, give it one more 15-second burst and fold.
You'll know it's done when the dough pulls away from the sides of the bowl and has a glossy, elastic quality. It should stretch when you pull it. That stretch is everything.
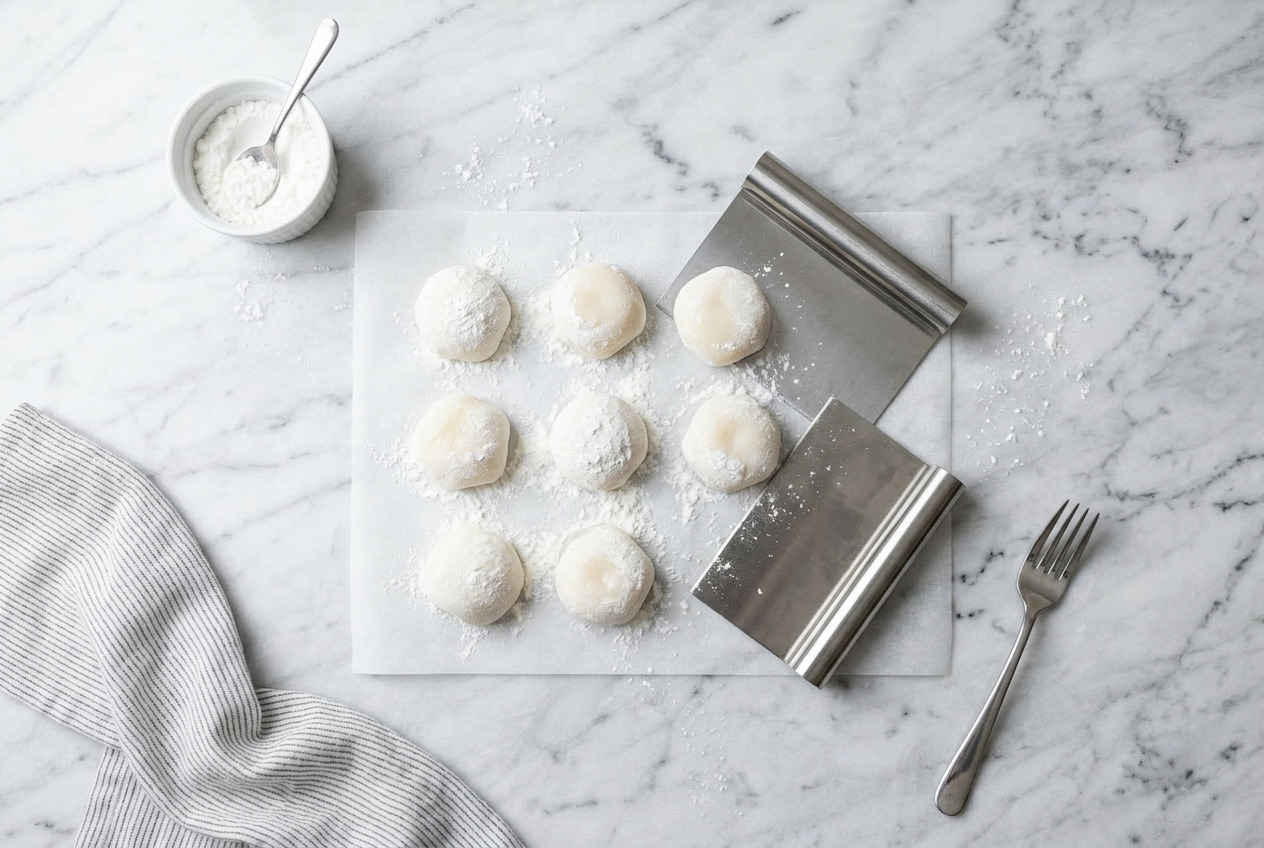
Step 2: Shape the Mochi
Dust your work surface generously with cornstarch. And I mean generously. Mochi is sticky. It will cling to anything that isn't dusted.
Dust your hands too. This tip changed my mochi-making life. Don't just dust the counter. Coat your palms and fingers with cornstarch before you touch the dough.
Scoop the warm dough onto the dusted surface. Using a spatula or your hands, divide it into 10-12 equal pieces. A kitchen scale helps here if you want consistency, but eyeballing works fine.
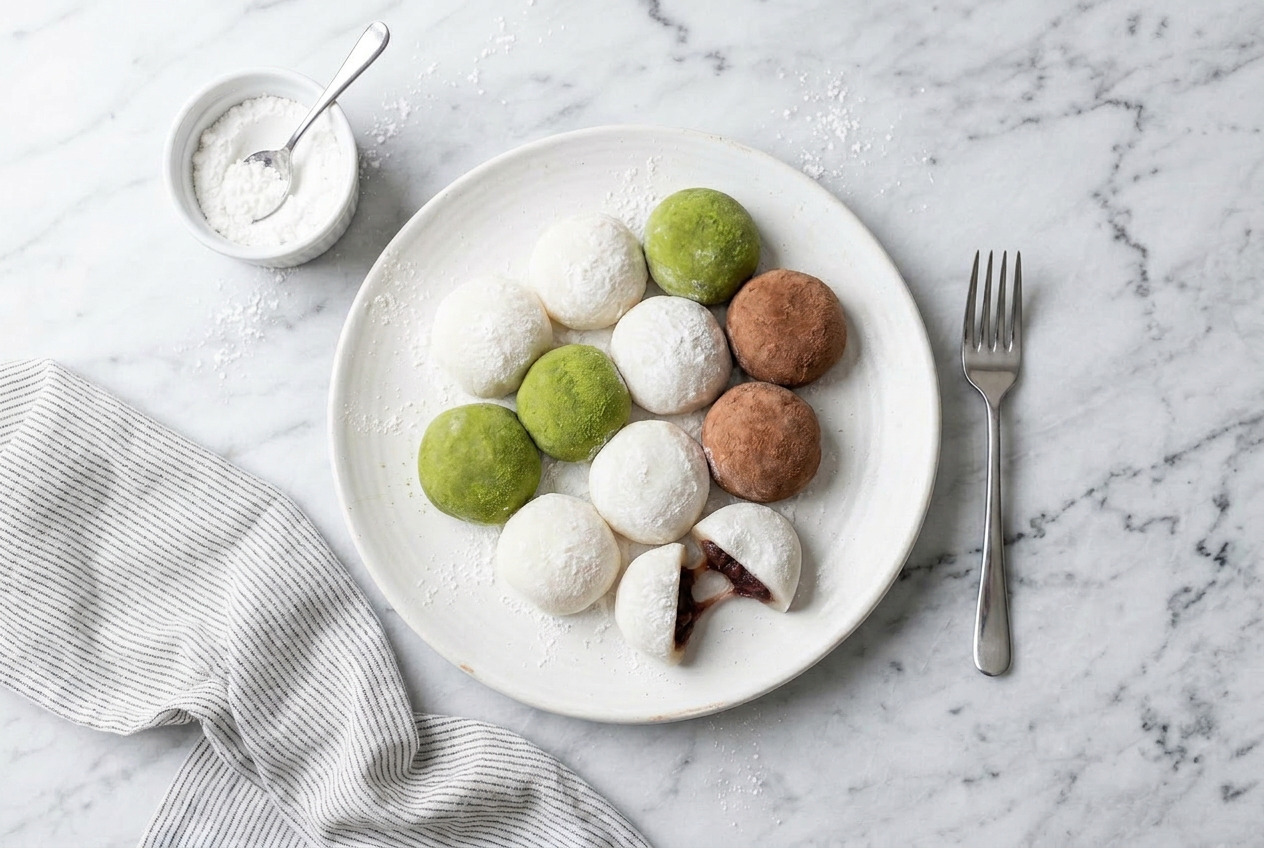
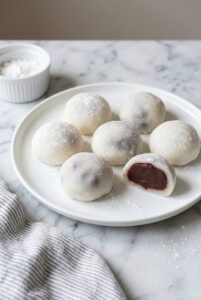
Roll each piece into a ball. If you're keeping them plain (no filling), that's it. Dust them lightly with more cornstarch and set them on a plate. Seriously, it's that easy!
If you're adding filling, flatten each piece into a 3-inch circle, place about 1 teaspoon of filling in the center, then gather the edges up and pinch them together to seal. Roll it gently between your palms to smooth it out, seam side down.
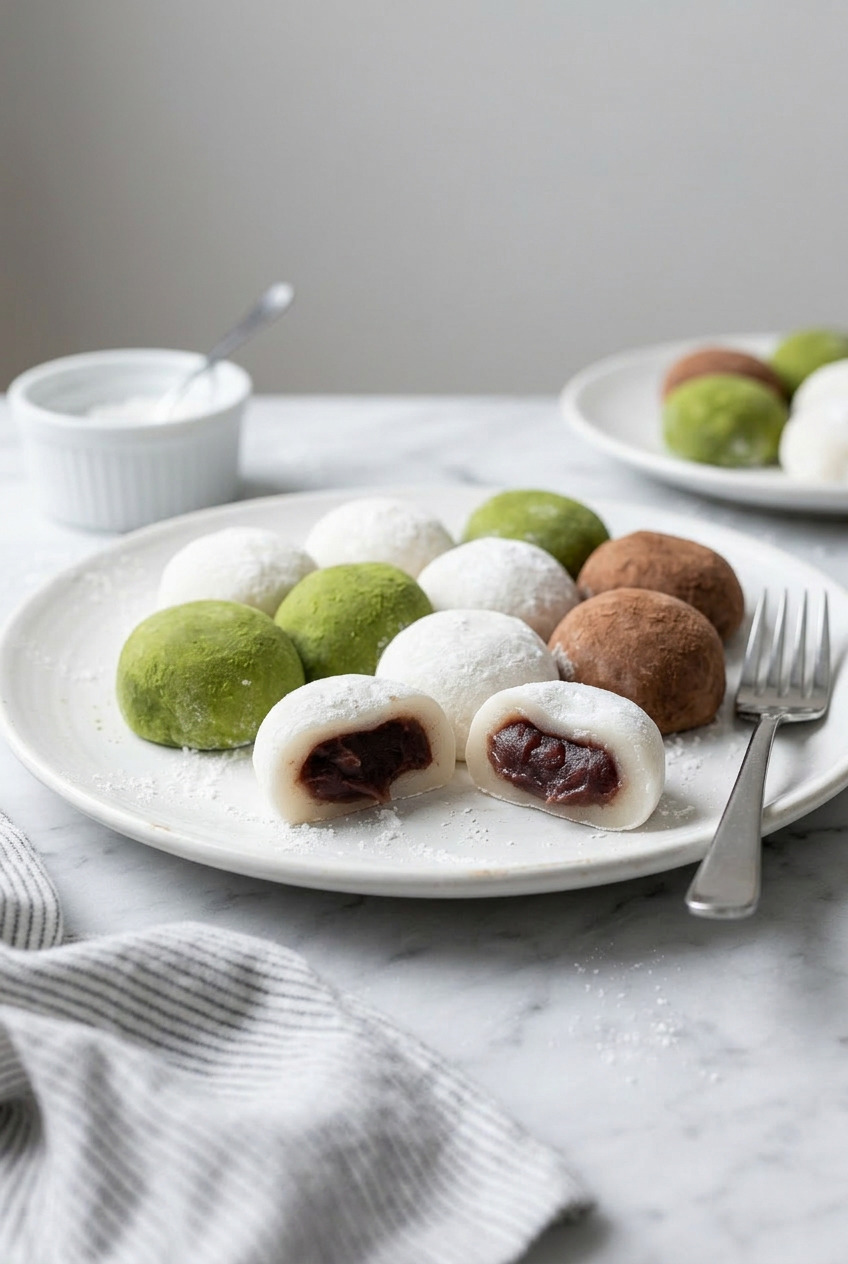
Step 3: Filling Options
This is where you get to play. Here are my favorite ways to fill sweet mochi:
- Plain (no filling). Serve with a dipping sauce like melted Biscoff spread, Nutella, or sweetened condensed milk. I do this most often because it's fast and fun.
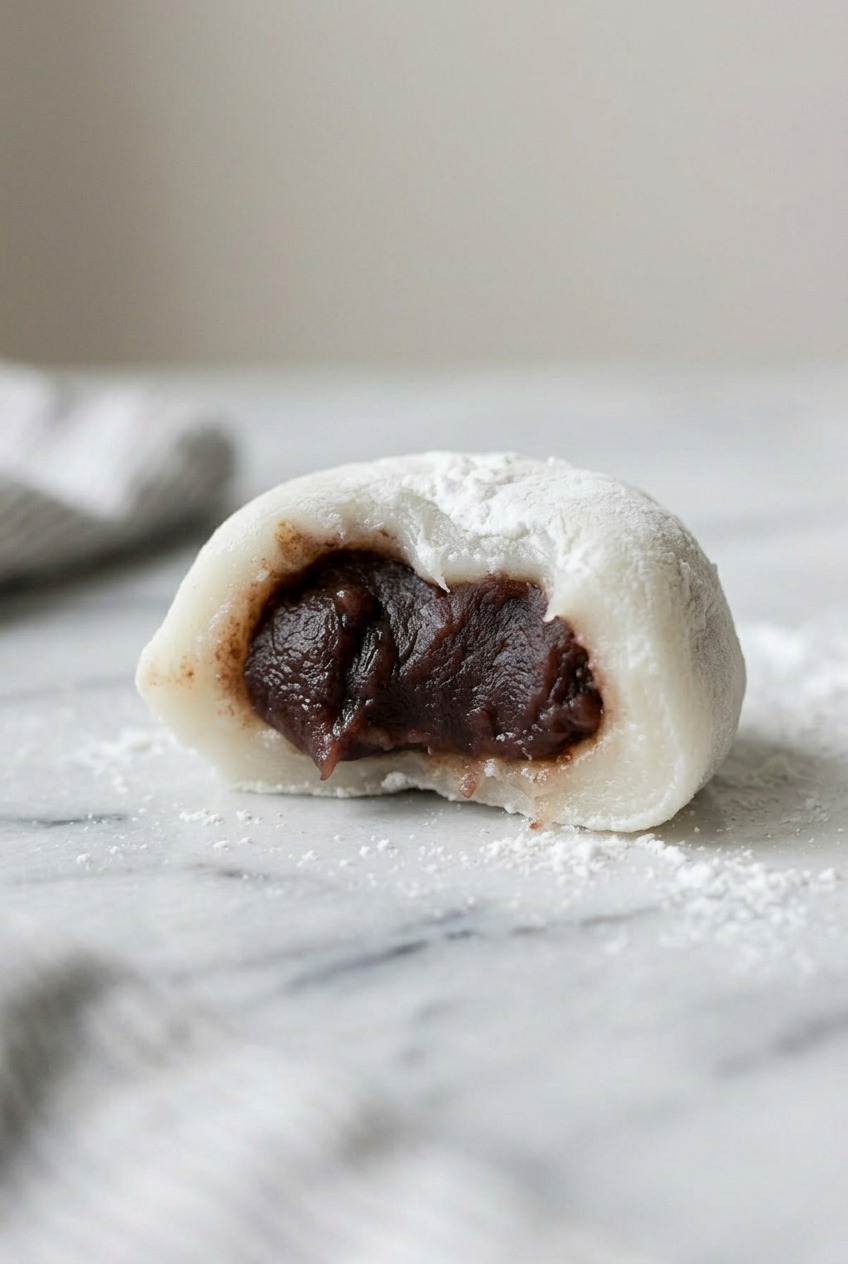
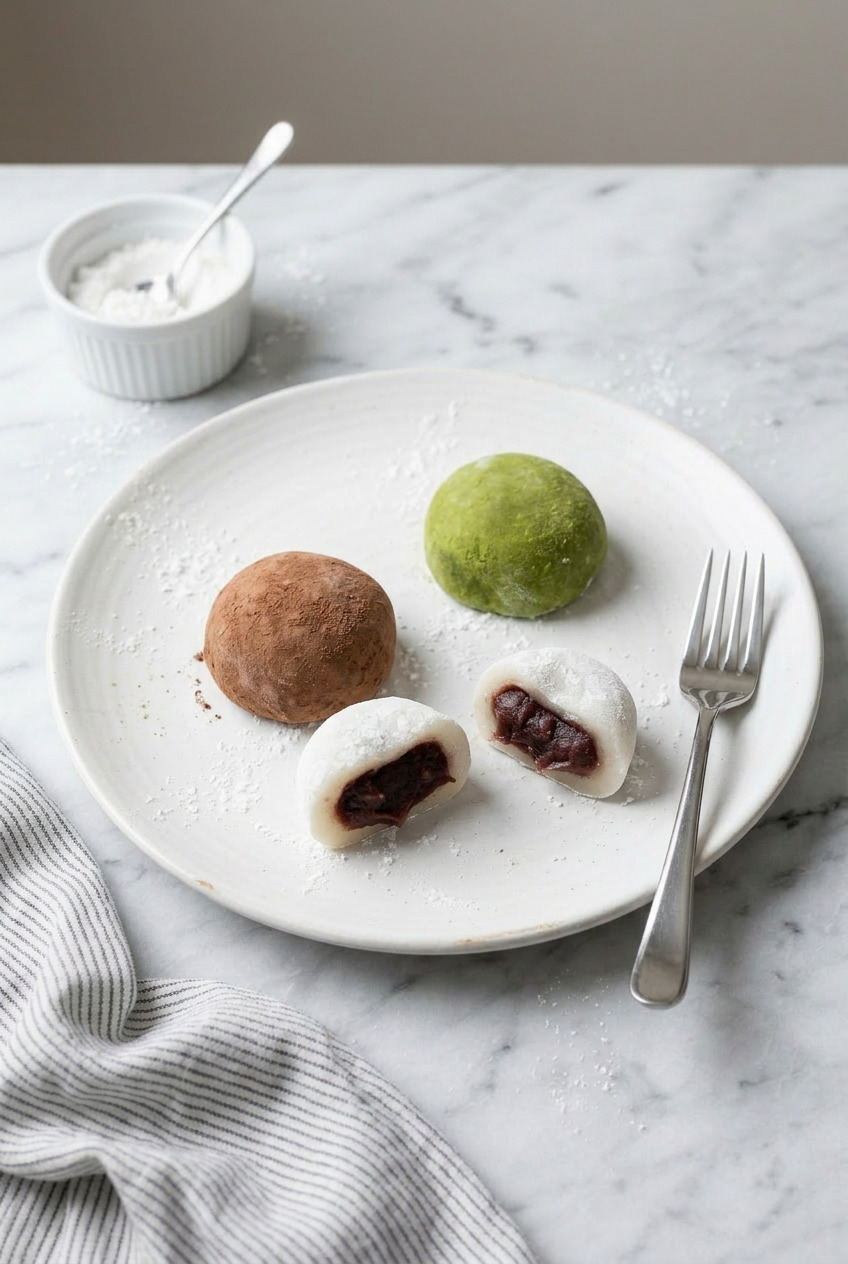
- Red bean paste (anko). The classic Japanese filling. Rich, earthy, subtly sweet. You can buy it pre-made or make your own. Chill the paste before wrapping so it holds its shape.
- Ice cream. Scoop small balls of ice cream onto a parchment-lined tray, freeze them solid, then wrap them quickly. Work fast because mochi and melting ice cream are a race against the clock.
- Fresh strawberries. A whole small strawberry wrapped with a thin layer of sweetened whipped cream inside the mochi. This is ichigo daifuku, and it's one of the prettiest desserts you'll ever make.
- Chocolate or candy. A piece of chocolate, a truffle, or even half an Almond Joy. The warmth of the mochi softens the chocolate slightly, and that gooey, melty center is unreal.
Tips for Perfect Mochi
- Work quickly. Mochi firms up as it cools. The warmer the dough, the easier it is to shape and fill. If it starts getting stiff, pop it back in the microwave for 10-15 seconds to soften it up.
- Wet your spatula. When folding the dough between microwave rounds, a wet spatula prevents sticking far better than a dry one.
- Don't over-microwave. Check at 1 minute, fold, then add time in 15-second increments. Overcooked mochi turns rubbery and tough. You want soft and stretchy, not bouncy like a rubber ball.
- Cornstarch is your best friend. Dust everything. Your hands, the counter, the plate you're setting the mochi on. You really cannot overdo it.
- Try a drop of white vinegar. Adding 2 drops of white vinegar to the dough before microwaving helps keep the mochi pliable longer. It won't affect the flavor. I picked up this trick and I've never looked back.
Variations
- Matcha mochi. Add 1-2 teaspoons of matcha powder to the dry ingredients before mixing. You'll get a gorgeous green color and a subtle, earthy, slightly bitter flavor that balances the sweetness perfectly.
- Chocolate mochi. Stir 1-2 teaspoons of cocoa powder into the flour and sugar. The dough turns a warm brown and tastes like a fudgy, chewy truffle.
- Sesame mochi. Roll your shaped mochi in toasted sesame seeds instead of cornstarch. The nutty, toasty crunch against that soft interior is a symphony of textures.
- Strawberry mochi. Use a tablespoon of strawberry puree in place of some of the liquid, or add a drop of strawberry extract. Pair with a fresh berry inside for double the fruit flavor.
- Flavored dust coatings. Instead of plain cornstarch, roll your mochi in matcha powder, cocoa powder, cinnamon sugar, or crushed freeze-dried fruit. It's an easy way to add color and an extra layer of flavor.
How to Store Mochi
- Room temperature (best within 1-2 days). Keep mochi in an airtight container, pieces separated by parchment paper. It stays softest at room temperature, but the texture starts to firm up after a day or two.
- Refrigerator (up to 3-4 days). Wrap each piece individually in plastic wrap and store in an airtight container. The mochi will be firmer when cold, but a quick 5-10 seconds in the microwave brings it right back to life.
- Freezer (up to 1 month). Wrap each piece tightly in plastic wrap, place in a freezer-safe bag or container. Thaw at room temperature for 15-20 minutes or microwave for 10 seconds. I love making a big batch and freezing them for whenever a craving hits.
- Pro tip: eat it fresh. I'm being honest with you. Mochi is at its absolute best the moment it's made. Warm, soft, pillowy, impossibly stretchy. If you can, eat at least a few pieces right away. You will love how they taste straight from the kitchen.
Troubleshooting Common Mistakes
- Mochi is too sticky to handle. You need more cornstarch. Dust your hands, your surface, and the dough itself. If it's still unmanageable, the dough may need another 15-30 seconds in the microwave. Slightly undercooked mochi is stickier than properly cooked mochi.
- Mochi is too hard or rubbery. This usually means it was overcooked. Next time, reduce the microwave time by 15-30 seconds. It could also mean not enough liquid was used. Make sure you measure carefully.
- Filling keeps leaking out. Your seal wasn't tight enough, or the filling was too wet. Make sure to pinch the edges together completely with no gaps. For wet fillings like ice cream, freeze them solid before wrapping.
- Dough is lumpy. This happens when the flour and sugar aren't mixed well before adding liquid, or the liquid is poured in too fast. Whisk the dry ingredients first, then add liquid gradually while stirring. For the next batch, make sure to stir until completely smooth before microwaving.
- Mochi hardens too quickly. Try adding 2 drops of white vinegar to the dough. Keep shaped mochi covered with plastic wrap while you work on the rest. Don't leave them exposed to air.
Recipe
Sweet Mochi Recipe
Ingredients
For the Mochi Dough
- ¾ cup glutinous rice flour (mochiko) 100g
- 3 tablespoons granulated sugar 40g; adjust to taste
- ⅔ cup milk 160ml; or water for traditional version, or non-dairy milk for vegan
- 2 drops white vinegar optional; keeps mochi pliable longer
For Dusting
- ¼ cup cornstarch or potato starch; for dusting hands and work surface
Optional Fillings
- ½ cup sweet red bean paste (anko) chilled; or other filling of choice
- ice cream pre-scooped into small balls and frozen solid
- fresh strawberries small; for ichigo daifuku
Optional Flavor Additions
- 1-2 teaspoons matcha powder for matcha mochi
- 1-2 teaspoons cocoa powder for chocolate mochi
Instructions
Prepare the Dough
- In a microwave-safe bowl, combine the glutinous rice flour and granulated sugar. Whisk together until evenly distributed. If adding matcha or cocoa powder, whisk it in now.
- Gradually pour in the milk (or water) while stirring continuously. Add the white vinegar if using. Stir until the mixture is completely smooth and free of lumps.
- Cover the bowl loosely with plastic wrap or a microwave-safe plate. Microwave on high for 1 minute.
- Remove the bowl carefully and fold the mixture with a wet spatula. It will look partially cooked and lumpy; that's normal. Cover again and microwave for another 1 minute.
- Fold again. The dough should now be thick, sticky, and slightly translucent. If it still looks raw in spots, microwave in 15-second increments, folding between each, until the dough is glossy, elastic, and pulls away from the sides of the bowl.
Shape the Mochi
- Generously dust a clean work surface and your hands with cornstarch.
- Scoop the warm dough onto the dusted surface. Divide into 10-12 equal pieces using a spatula or your hands.
- For plain mochi: Roll each piece into a ball, dust lightly with cornstarch, and place on a plate.
- For filled mochi: Flatten each piece into a 3-inch circle. Place about 1 teaspoon of filling in the center. Gather the edges up and pinch them together to seal completely. Roll gently between your palms to smooth, then place seam side down on a cornstarch-dusted plate.
Notes
- Work quickly: Mochi firms up as it cools. If it gets stiff, microwave for 10-15 seconds to soften.
- Don't over-microwave: Check at 1 minute, then add time in 15-second increments. Overcooked mochi becomes rubbery.
- Milk vs. water: Milk produces a creamier, softer mochi. Water gives a chewier, more traditional texture.
- Cornstarch everything: Dust your hands, counter, and plate generously. You cannot overdo it.
- For ice cream filling: Pre-scoop ice cream into small balls and freeze them solid before wrapping.
- Storage: Best eaten fresh. Room temperature in airtight container for 1-2 days, refrigerator for 3-4 days, or freeze individually wrapped for up to 1 month. Microwave 5-10 seconds to re-soften.
Frequently Asked Questions
Can I use regular rice flour instead of glutinous rice flour?
No. Regular rice flour and glutinous rice flour are completely different products. Regular rice flour will give you a dry, crumbly result with no stretch or chew. You NEED glutinous rice flour (also called mochiko or sweet rice flour) for that signature soft, elastic, bouncy mochi texture. They look similar on the shelf, so check the label carefully.
Is mochi gluten-free?
Yes! Despite the confusing name, "glutinous" rice flour contains zero gluten. The word refers to the sticky, glue-like texture of the rice, not the protein found in wheat. Mochi made with pure glutinous rice flour, sugar, and water or milk is naturally gluten-free. Just double-check that your brand isn't processed in a facility with wheat if you have a severe allergy.
How long does homemade mochi last?
At room temperature in an airtight container, 1-2 days. In the refrigerator, 3-4 days (it will firm up but can be microwaved for 5-10 seconds to soften). In the freezer, up to 1 month. But honestly, fresh mochi on the day it's made is in a league of its own. I always recommend eating most of it the same day.
Can I freeze homemade mochi?
You can. Wrap each piece individually in plastic wrap, then store them in an airtight freezer bag. They'll keep for up to a month. To serve, thaw at room temperature for 15-20 minutes or give them a 10-second zap in the microwave. Freezing is my favorite way to always have mochi on hand for a quick treat.
How do I prevent mochi from sticking?
Cornstarch, cornstarch, cornstarch. Dust your work surface, dust your hands, and dust each piece of mochi as you shape it. You can also use potato starch or extra mochiko flour. When storing, separate pieces with parchment paper. And keep your spatula wet when folding the dough between microwave rounds.
Can I make mochi without a microwave?
Yes! You can steam the dough on the stovetop. Mix the ingredients the same way, pour into a heatproof dish, and steam over boiling water for 15-20 minutes, stirring every 5 minutes, until the dough is translucent and elastic. It takes longer but produces the same result. You can also cook it in a non-stick pan over low heat, stirring constantly for 8-10 minutes.
Can I use water instead of milk?
Fret not, my dears, both work wonderfully. Water gives you a more traditional, chewy mochi with a neutral flavor. Milk (dairy or non-dairy) adds a touch of creaminess and richness that keeps the mochi softer for longer. I use milk for plain mochi and water when I'm adding strongly flavored fillings. For a vegan version, oat milk or coconut milk are my top picks.
What are the best fillings for sweet mochi?
My favorites are anko (sweet red bean paste) for the classic route, ice cream for a fun modern twist, fresh strawberries with whipped cream for ichigo daifuku, and Nutella or chocolate ganache when I want something indulgent. Peanut butter is a crowd pleaser too. For the simplest version, skip the filling entirely and serve with a dipping sauce like melted Biscoff or sweetened condensed milk.


Leave a Reply