by Chef Ben Kelly | Mar 16, 2018 | Cooking Tips
We all love meat. Well, except for vegans. vegetarians, and people who don’t like meat…Some of us love meat. A good steak can make an okay day great, and I’m pretty sure that a perfectly cooked pork chop can solve all of life’s problems. But, what if I told you that you have been cooking meat wrong this entire time? Well, obviously I don’t know if you are or not, but what I do know is that I have put together a few things that I think will drastically improve the quality of your cooked meat. If you think you can cook meat better than you do now, keep reading. Otherwise, have a great day!
Dry Your Meat
The first thing you need to think about when cooking meat is surface moisture. I bet you didn’t see that coming. If the surface of your meat is wet, it won’t properly caramelize and you won’t get that nice brown surface colour. Instead you will be left with a grey, kind of gross looking piece of meat. Let your meat sit in the fridge on a cooling rack for a day or two uncovered. I know this seems counterintuitive but allowing the surface to fully dry prior to cooking will completely change the flavour, texture, and appearance of your meat. This works well for skin on chicken, or duck or anything like that as well. A dry surface is key.
Warm It Up
Think about cooking a steak. If you were to take it out of the fridge, and put it right in the pan and start cooking it, by the time the center was at the temperature you wanted, the outside would be over cooked. If instead you allow that same steak to sit out at room temperature for an hour you won’t have this issue. I know that a lot of you just immediately imagined yourself getting food poisoning, but you don’t really have to worry about it. An hour is kind of the safe point. Plus, any bacteria that has formed on the surface of your steak will be destroyed by the high heat of cooking. Doing this, allowing your steak to come to room temperature before cooking it, will allow for a more even and consistent cook. This can be done with roasts as well.
Carry Over Cooking
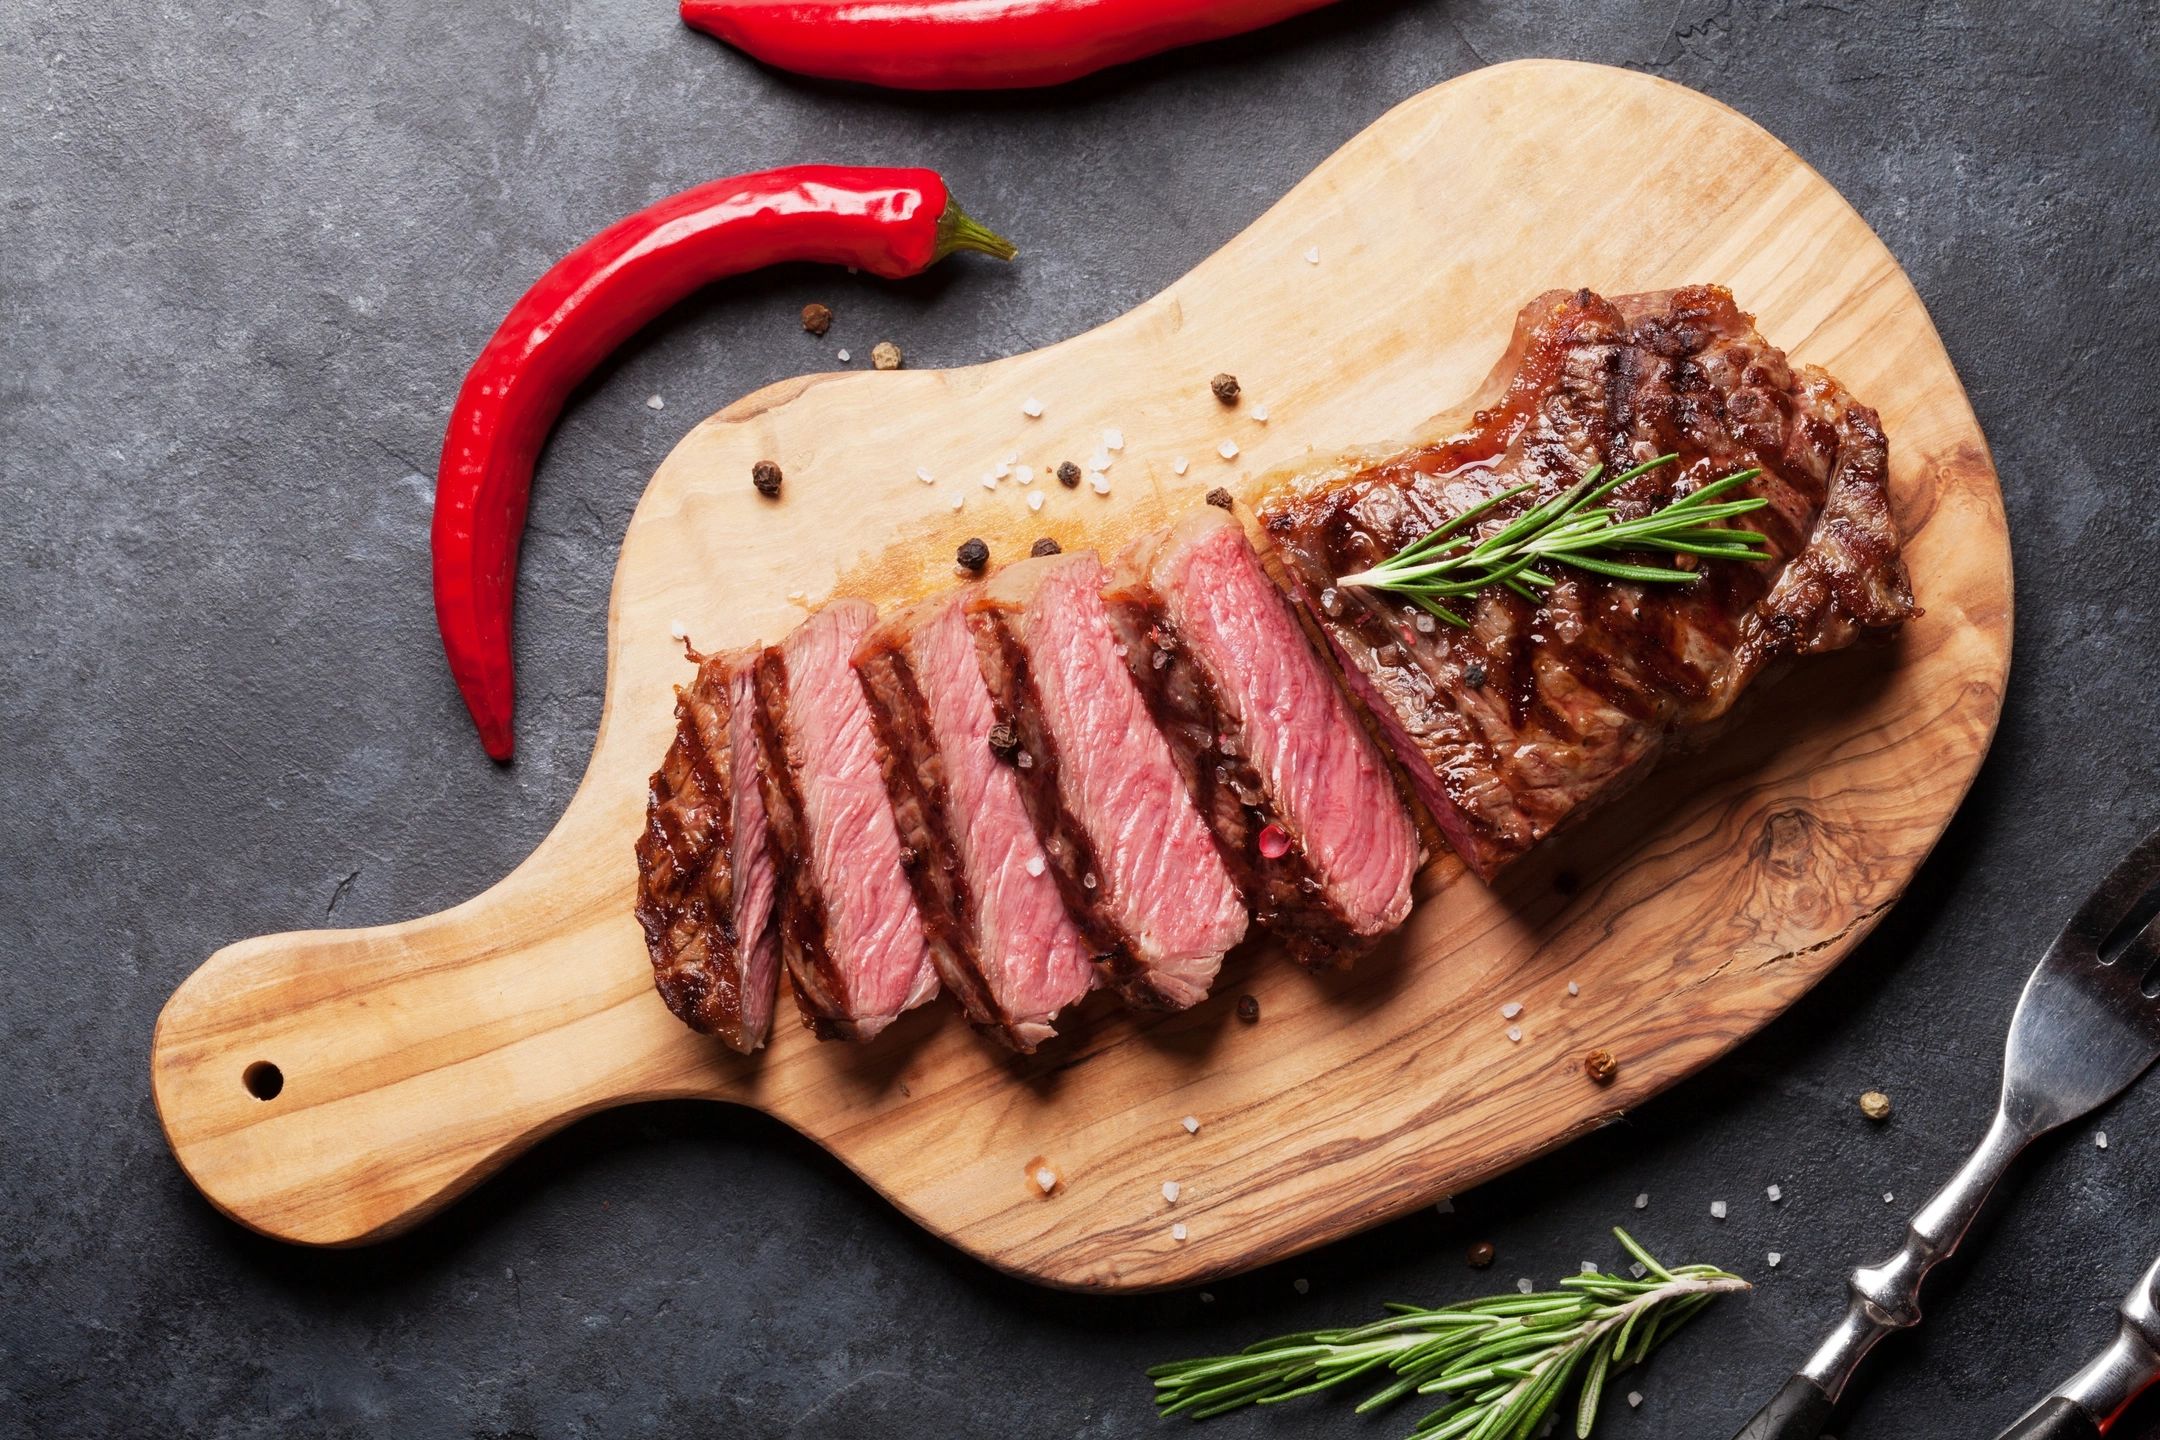
Things are very rarely immediate in cooking. For example, things don’t immediately stop cooking just because you take them out of the oven or out of the pan. Imagine a “magic bag”, you know, that bag of beans that you microwave and then put on your sore neck, knee, or nether region…I like alliteration. When the magic bag comes out of the oven it remains hot for a long time. It has stored the heat in it’s cells and releases it gradually. This happens with food too.
Imagine a steak if you will, let’s say a New York Strip Loin. Let’s say you cooked the steak in the pan to a perfect medium rare. The steak does not immediately turn cold once you take it out of the pan, and that residual heat will actually continue to cook that steak a little. This is called carry over cooking.
Now, in all honesty, carry over cooking really isn’t that big a deal for small pieces of meat like a strip loin. The temperature will only raise by 1 or 2°. However, when you start cooking roasts, or larger pieces of meat the carry over cooking effect can seriously change the quality of your meal. A four or five pound piece of meat cooked on 350°F will continue to cook by 5-10° after it is removed from the oven. This means that if you cooked a piece of beef to a perfect 140° which is medium rare, by the time it rests and you eat it, it will be closer to medium. Now, keep in mind that if you cook that same piece of meat to rare it will only raise by 2-3° because it isn’t going to have the same amount of residual heat. The opposite is true as well. If you cook that same piece of meat to a perfect medium well, there will be more residual heat than the rare roast and this will carry it over to well done, or over done.
The bigger the piece of meat, and the longer you cook it, the more it will carry over cook. I always imagine this process as a train speeding down the track. It’s going really fast but then slams on the breaks. The brakes squeal and it eventually comes to a stop but it took it a long distance to stop fully. The bigger the train the longer it takes it to stop.
Molecule Dance Party
Heat is essentially a bunch of excited molecules getting crazy at a dance party. I am not a physicist, but the seems right to me. What I mean is that when you heat something the molecules within it go crazy and start to move very fast. If you don’t allow time for the molecules to slow down and rest, it can have serious consequences on the quality of your meat. I am pretty much positive that everyone has cut into a piece of meat and witnessed a flood of juices escaping onto the cutting board or plate. This happens when we don’t let meat rest. Allowing meat to rest, allows time for meat juices to calm down and reabsorb into the muscle fibers. This way when you cut your meat, the majority of the juices stay in the meat, and you have juicey flavourful meat with every bite.
You have probably witnessed the dreaded bloody potato when someone has cut into a rare steak too early and the juices stained their potatoes red. If that same steak was given time to properly rest, this would not be an issue at all. So, how long should something rest? About 1/4 – 1/2 of its total cooking time. Generally, you can tell if a piece of meat has rested long enough by giving it a little poke with your finger. If a bunch of juice comes out, let it rest a bit more.
I know that this can seem like a lot to think about, but really it’s like 2-5 seconds of thought when actually cooking and it can completely change your finished meal. It’s these little things, the nuance that separates what chef’s do from what home cooks do. Even if you think I am totally full of shit, try it once. Just once and I guarantee that you will notice a drastic difference in the quality of your meat.
by Chef Ben Kelly | Mar 14, 2018 | Cooking Tips, Soups
There are few things in the world as comforting and enjoyable as a big bowl of well made soup. Soup can lift the spirit, warm the body, and can signify love, caring and thoughtfulness. Soup is a very basic thing to make and can be made well with little knowledge and skill. Even though soup is a seemingly simple preparation there are things to keep in mind that will transform your soup from good to great. How many of the seven things below do you already know?
1. Broth vs. stock.
What is the difference between a broth and a stock and why do you care? The only real difference is that stock is made from bones, broth is made from meat and bones. Other than that, they are made with pretty much the exact same process. Either the bones or the meat and bones, depending on whether you are making a stock or a broth, will be simmered, not boiled, for a length of time in order to extract the maximum amount of flavour. Other ingredients such as carrots, onion, celery, and herbs are usually added to build more flavour.
Broth is generally richer and more flavourful than stock as it can be eaten on its own, where stock is used as an ingredient. This distinction is important because a soup made with stock as the base will need a lot more flavourings added in order to intensify the flavour. A broth on the other hand should already have a fully developed flavour profile on its own. Vegetable stock and broth differ only really in name.
2. Choosing the right medium for your soup. Dairy based vs. broth based
Soup can be made with either a broth base or a dairy base. I am excluding plain water because you should always try and use some sort of broth. Soups like chicken noodle or beef and barley would be good examples of broth based soups, while cream of broccoli, or a chowder would be good examples of cream based ones.
Choosing whether to use a broth base or a dairy base really comes down to the type of soup you are making and the ingredients you have on hand. For example, you likely wouldn’t make a chicken noodle soup with a dairy base, right? But… you could easily make chicken and bacon chowder, or cream of chicken and broccoli. It really just comes down to the type of soup you want to make. If you are going to use dairy as the base use a full fat product. Generally, homogenized milk or cream is what you want to use. Anything that has a lower fat content will not stand up to the heat of cooking. You can also thicken, and stabilize your soup by adding a roux (equal parts butter and flour cooked together) this can be done with a dairy base but also with a broth based soup such as a veloute. Veloute is literally just broth that is thickened with a roux. If you are making a beef soup, use a beef broth, chicken for chicken, fish for fish.
3. Building the most flavour.
Building flavour into your soup is really a matter of how you handle your ingredients. For example, if you want a deeper roasted flavour in your soup you can roast the vegetables before adding them to the pot during broth production. You can roast any bones that are being added as well. If you would like a heavier onion flavour, which would be desirable with some beef soups, add a higher proportion of onions to when making the broth. Some of the onions may be roasted, and some may be raw. On top of this, herbs and other complementary flavourings can be added during either broth production, or during the actual production of the soup itself.
4. Extracting the most flavour.
Getting the most flavour out of your ingredients is really a matter of time. If you don’t cook your ingredients long enough, you are throwing away flavour. If you cook them too long, you are destroying flavour. You want to cook your ingredients only until they have released the maximum amount of flavour, any longer and you are actually cooking flavour out. Flavour is just volatile oils and chemicals interacting with receptors on your tongue. These oils and chemicals can be destroyed if cooked for too long, or on too high a heat. So, you want to be careful not to over cook your ingredients, which would cook the flavour out of your broth.
People used to say that you should simmer a stock or a broth for hours and hours, we know that this just is not true any more. Essentially, you want all meat to be full cooked, and you want all vegetables to be tender but not disintegrating. An hour or two should be plenty of time.
5. Choosing the right ingredients.
Choosing the right ingredients for your soup is very important. If you are hoping for a crystal clear broth you want to avoid adding carrots as they can cause cloudiness. But beyond that, things like meats with high percentage of fat generally are best kept out of the soup pot unless you want very fatty soup.
Use waxy potatoes rather than mealy ones as they will hold their structure better when cooked. Avoid ingredients that have very strong flavours which could over power the flavour of the broth and the other ingredients unless of course you want that to be the forward flavour. Flavours like ginger and garlic should be subtle if used.
Use fresh ingredients whenever possible. Some people think of a soup pot as a garbage pot, which it absolutely is not. Making a soup is a great way to use leftovers, and to use up excess produce you have around, but don’t use half rotten vegetables as this will cause your soup to taste half rotten.
6. Adding the ingredients at the right time.
When to add your ingredients is just as, if not more important than what ingredients to add. Generally, any ingredient that will continue to absorb liquid after the cooking process should be cooked separately, and added just before the soup is served. Ingredients like rice would fall into this category. Rice can be delicious in soup, but not if it has absorbed all of the broth and is now just a big mushy mess. Just like with adding flavour to the broth, you want to only cook the ingredients until they are done. So, ingredients that take longer to cook like onion and celery would be added nearer the beginning of the cooking process as opposed to peas or potatoes which will have a much shorter cooking time.
Fresh, green herbs, like parsley or cilantro should be added at the very end of cooking, while heartier herbs like thyme and rosemary can be added about halfway through. Dried herbs, should always be added near the start of cooking.
7. Pureed soups vs. Broth Soups.
It should fairly obvious what soups to puree and what soups to not puree. Obviously, you would not puree chicken noodle soup unless you are a psychopath. The types of soup that would normally be pureed are soups that focus on one or two vegetables such as butternut squash, or carrot and ginger. Some soups like potato and leek can be either pureed or left whole. It is pretty much up to you whether you puree a soup or not. If you do choose to pure your soup I recommend passing it through a mesh strainer. This will give you the smoothest possible consistency.
by Chef Ben Kelly | Mar 9, 2018 | Food and Culture
Every weekend millions of people make their weekly pilgrimage to the grocery store to get their food for the week. . They wander the alleys, pushing their carts with no real plan or consideration for what they are going to put in the squeeky wheeled metal basket that leads them down each ilse. There are the usual suspects like eggs and milk, but often the remainder of the space in the cart is reserved for things that are on sale, or impulse buys. This seems like a generalization, an oversimplification of how most people spend their time at the grocery store. I don’t believe that it is.
You may be saying “Well Ben, I plan my trip. I know exactly what’s going in my cart when I get there.” You my friend are in the minority. Don’t believe me? This weekend, while you strategically fill your cart with your nourishments for the week, notice what other people are doing. Take a look in other people’s carts. You will likely be surprised to see very little of anything substantial. You will see frozen pizzas and other frozen type meals. You will see large bags of chips. You will see canned chili, jarred pasta sauce, Kraft Dinner, and instant noodles. What you likely won’t see very much of is fruit and vegetables, and fresh meat unless something is on sale.
I’m willing to bet that right now you are in one of three camps. You either completely disagree with me and think that I am making it up. If you are a part of this group you very possibly buy your groceries in an affluent neighbourhood. You may agree with me because you have seen what people put in their carts, but you are of the minority that buys real food and that’s why you’re reading a food blog. Or, you are sitting there feeling slightly embarrassed because you are one of the ones with all the shit in your cart. Don’t be embarrassed. you’re part of the majority and it’s not your fault.
This is not about judgement. This is about understanding the state that we are all in. People, the majority of people, don’t cook. They don’t know how. This is not about not having time because if you know how to cook, you can cook something delicious in very little time. This is about education, and understanding. No matter what camp you fall into, when you are at the grocery store this weekend notice what’s in the carts that you pass by, or that you stand behind at the check out, or the one that you are pushing ahead of you. The first step to fixing a problem is seeing that there is one. Open your eyes to what people are actually eating, do not judge, but understand. We need to help each other. We need to improve together. We need to learn to cook.
by Chef Ben Kelly | Mar 7, 2018 | Food and Culture
It is entirely possible that you hate cooking. Maybe you don’t hate it, you just don’t really enjoy it that much. This could be because you see it as a never ending chore, or because you aren’t very good at it, or for some entirely different reason. The fact is that you pretty much have to cook. You don’t have to be great at it, but you have to be able to feed yourself. Because it’s something that you pretty much have to do, why not try and enjoy it? Cooking is much easier and much more fun if you actually enjoy doing it, and it’s much easier to enjoy when it’s easy and fun. How do you take something that you don’t enjoy but have to do, and make it fun?
There are three main tips that I can give you that might be able to help you enjoy cooking. These three tips will help make things easier, but really you need to reframe how you look at cooking. If you view it as a chore, it will remain a chore. If you view it as something you are terrible at, you will remain terrible at it. If you view it as something you hate, you will always hate it. See what I’m getting at? You need to remove all the negative connections you have with cooking and start fresh. I know that it’s easier said than done, but it really is the only way. I am very confident that if you wipe the slate clean, you can start to enjoy cooking.
The first, and by far the most important thing you can do to start enjoying cooking is to plan. Before you ever step foot in the kitchen know what your going to do when you get there. This doesn’t have to be written down point by point even though you can do that, but take a second and think about what you’re going to do. Think about what you need to do first. What do you need to get started before anything else? What can wait until later? What are you making? How is it going to look? How is it going to taste? These are all things that you should have a pretty good idea of before you step foot into your kitchen. Just having some kind of plan will make your life so much easier.
When you make your plan, think about clean up. Clean as you go, and you won’t be left with such a big mess at the end. This alone will make the whole process of cooking much more enjoyable. Nobody wants to spend time cooking and then be faced with a giant mess after they eat. Clean as you go. Keep the sink full of hot soapy water and whenever you have a second wash whatever dishes are there. Wipe your counter down as often as you can. Just keep everything as tidy and as clean as you can. It makes the experience of cooking so much better.
Something that people do, that I really don’t understand is that they cook things that they don’t want to eat. Why would you do it? I have not idea! Cooking things that you actually want to eat, makes the whole process exciting because there is a delicious reward at the end. You are giving yourself something to look forward to. If you are spending all this time cooking and cleaning, and you’re making something you don’t even want to eat, it’s no wonder you hate cooking. I know that things get complicated when you have to feed your spouse or your kids. I don’t have kids so I can’t speak to that. Generally, my wife loves when I cook so I can’t really speak to that either. But I have been a child, and I have been the husband of a wife who has cooked a dinner that I didn’t entirely love. And you know what, I ate it. As a kid, my mom always told me that if I didn’t like the food she made I could go somewhere else (there was nowhere else to go), so I ate it. When my wife makes something that I don’t love, I eat it because I love her and she put the effort in. If you are doing the cooking, you get to choose what you cook.
You really need to be able to cook. It is so important for so many reasons. Since you need to be doing it, why not put every effort into enjoying it? Read blogs like this, articles in magazines, or even books. Watch videos on youtube like these or cooking shows. Whatever you need to do to find some kind of enjoyment. The more you know about cooking, and how to do it, the better you will be at it, and the more you will enjoy it. It is a chore that we all have to do, but that doesn’t mean we have to treat it like one.
by Chef Ben Kelly | Mar 5, 2018 | Cooking Tips
Cooking terms are a shorthand used in written recipes and conversation. Just like most professions cooking has its own language. The difference with cooking is that the language is not specific to professionals. You find culinary language in every recipe you will ever read. If you don’t know the language it is difficult to read and understand the recipe. So, I thought it might be helpful to do a post all about culinary terms that you will encounter on a daily basis. The following list is not definitive by any means, but may act as a kind of rosetta stone of cooking terms. Refer back to this list any time you need to, and share it with anyone you know who might benefit from it.
I’m sure that a lot of you reading this will know most if not all of these terms, but if this helps even one person, than it’s worth writing it.
Let’s start with measurements.
- 1 Cup – maybe written as “cup” or “c”, a cup is generally considered 250 ml. It may be broken down into 1/2 c, 1/3 c, or 1/4 c
- 1 L – a litre is 1000 ml, or 4 cups and is typically used as a liquid measurement
- 1 pt – a pint is just under half a L
- 1 qt – a quart is just under 1 litre and is generally an only used by Americans
- 1 gal – a gallon is just under four litre and is also generally only used by Americans
- 1 tbsp – a tablespoon is about 14 ml (about 16 tbsp in a cup)
- 1 tsp – a teaspoon is about 5 ml ( about 3 in a tbsp)
- 1 ml – milliliter is one thousandth of a litre
- g – a gram is one thousandth of a kilogram
- kg – (kilo) a kilogram is 1000 g. or 2.2 lbs
- lb(s) – a pound is an imperial measurement converted to 454 g
- oz – an ounce is an imperial measurement converted to about 28 g
Cutting Terms
- Slice – More of an action than a type of cut but also the portion resulting from the action of slicing. Ie. Slice me off a slice of bread.
- Dice – Generally considered a 2 cm x 2 cm cube.
- Medium Dice – Generally considered a 1 cm x 1 cm cube
- Fine Dice – Generally considered a 5 mm x 5 mm cube
- Mince – Generally considered a 1 mm x 1 mm cube
- Julienne – a match stick
- Baton – a larger match stick.
Cooking terms
- Sauté – To cook something over moderately high heat in a small amount of oil while constantly keeping it moving.
- Sear – To brown the surface of something in a pan over moderately high heat. Generally done prior to braising.
- Brown – To impart colour to the surface of meat, seafood, or vegetables through prolonged cooking over moderate heat.
- Braise – To cooking something with liquid on a low temperature over a long period of time.
- Stew – A briase done with a thickened liquid. Usually thickened with a roux (flour and butter)
- Roast – To cook something, generally in an oven, over moderate heat.
- Pan Fry – To cook something in oil covering at least half the items depth.
- Deep Fry – To cook something fully submerged in oil.
by Chef Ben Kelly | Mar 2, 2018 | Cooking Tips
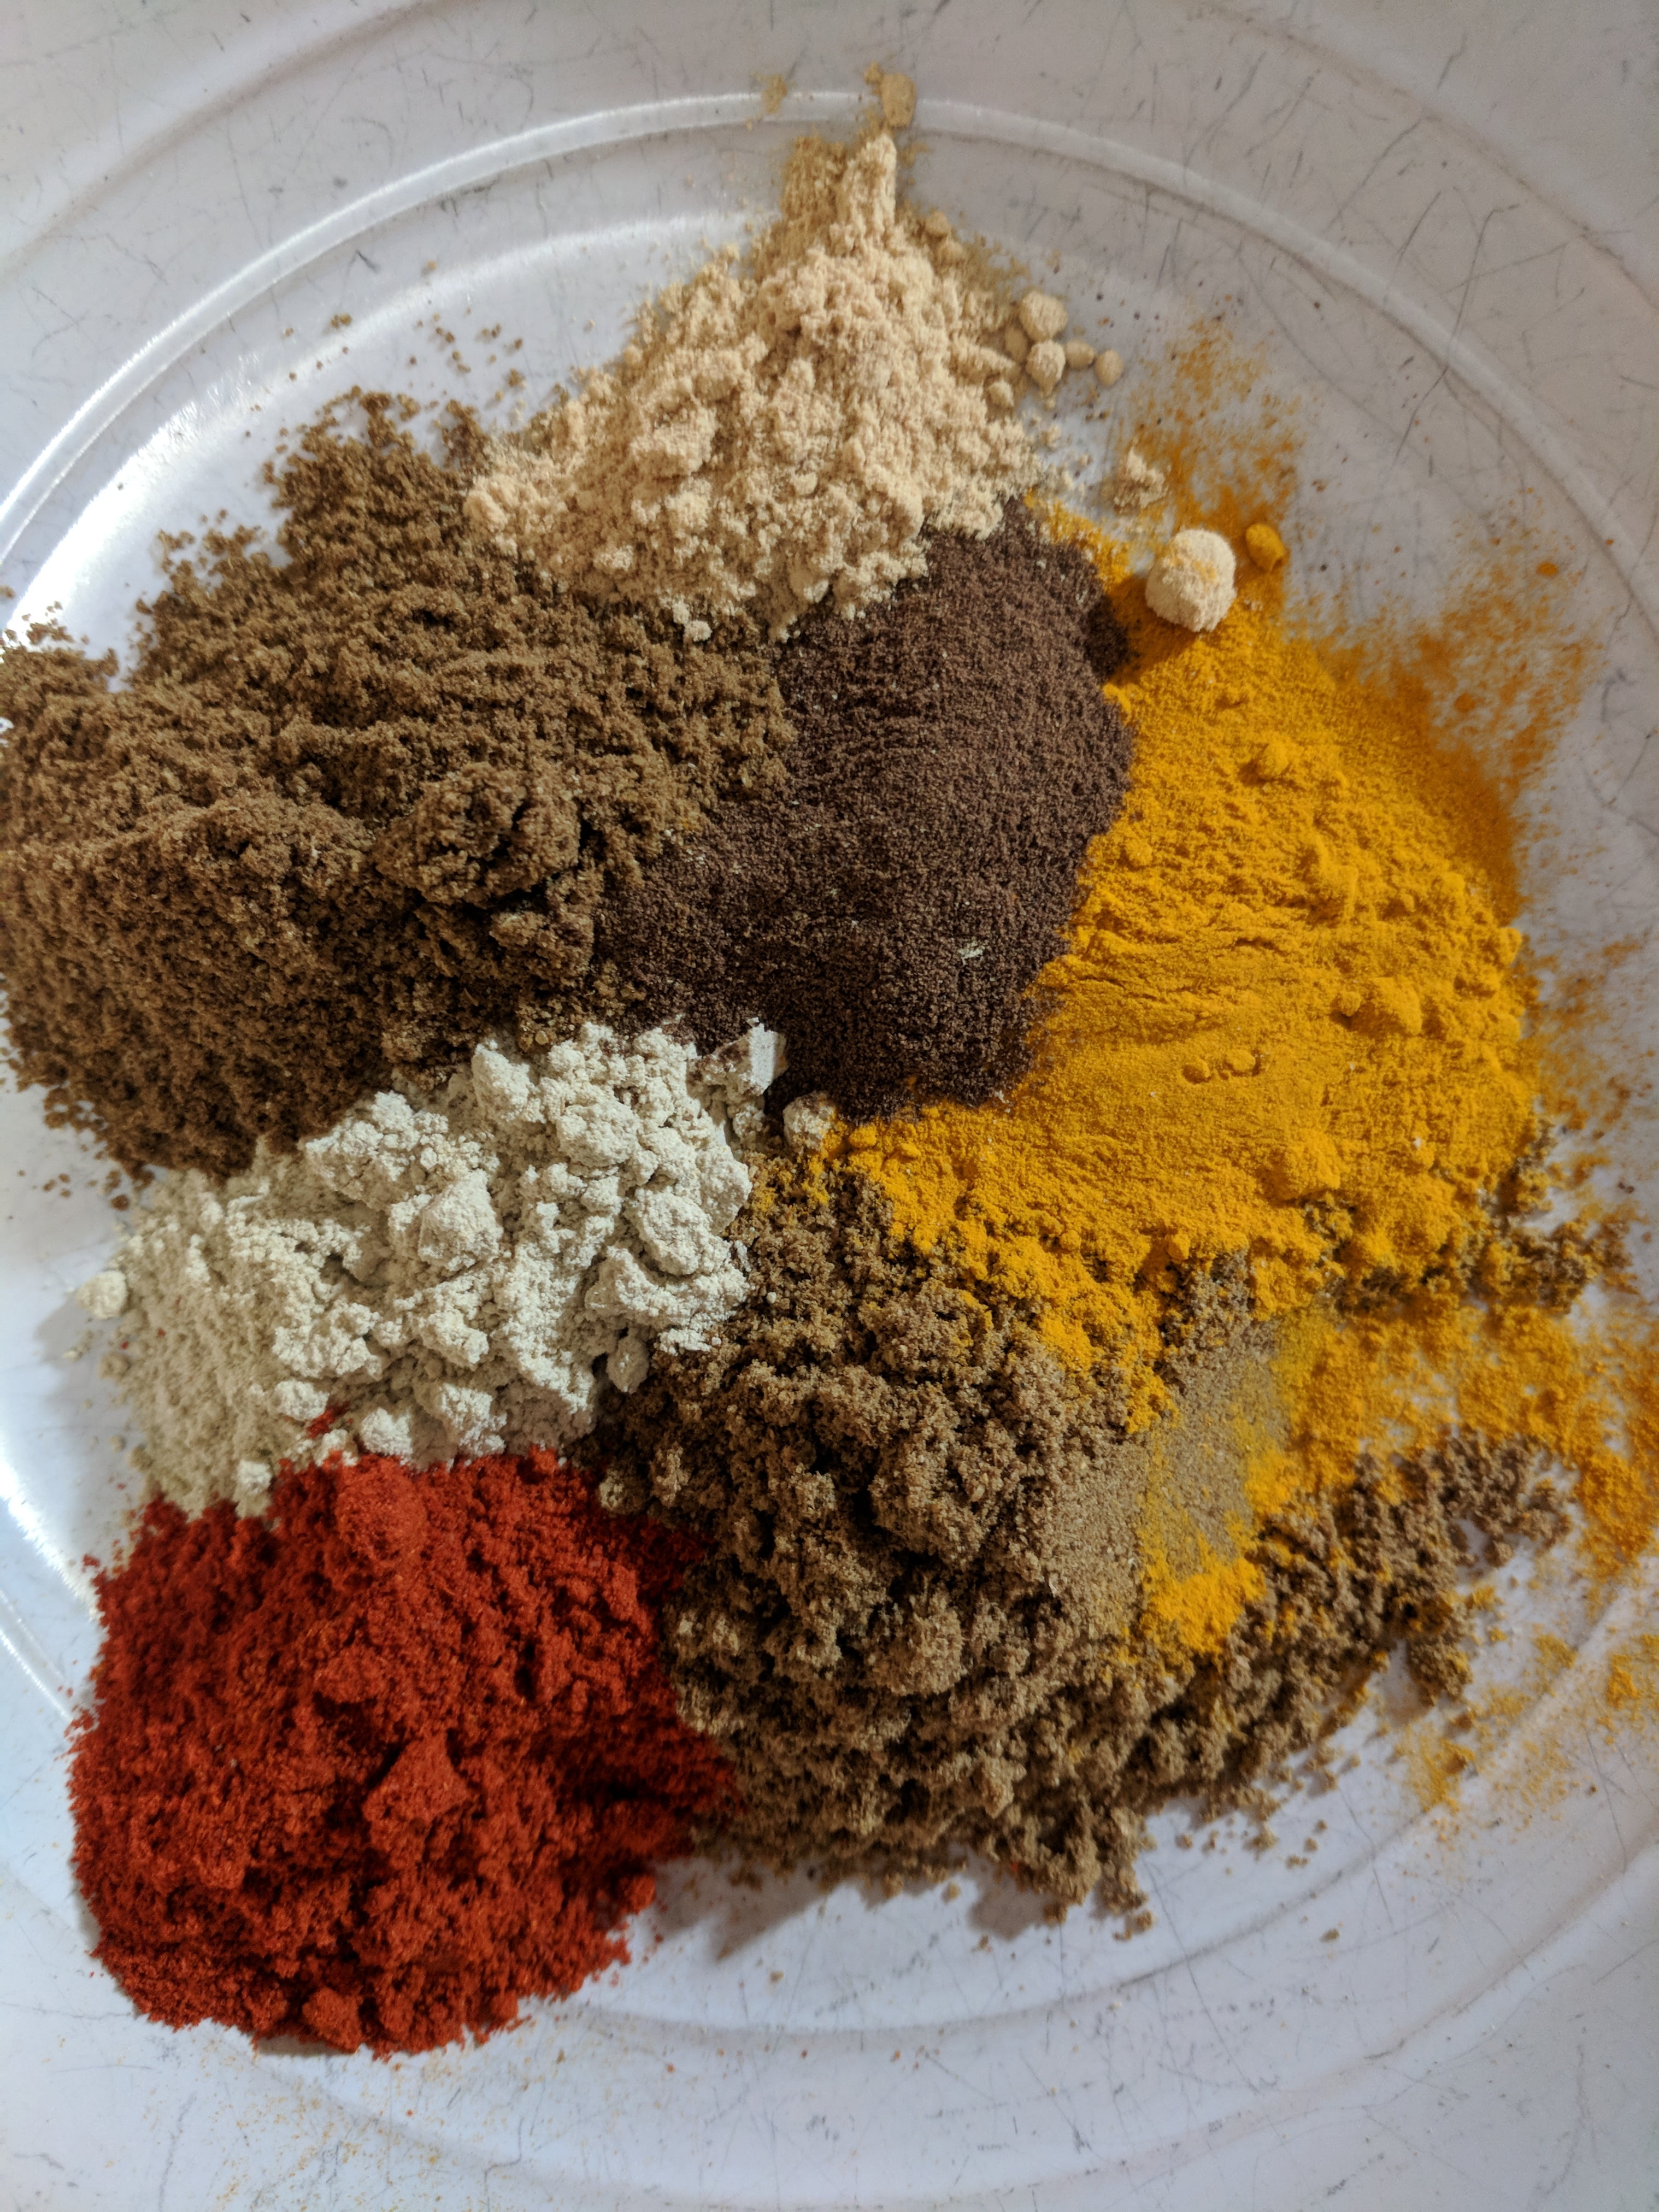
Knowing how to flavour foods with herbs and spices is an important skill to develop. There are so many varieties of seasonings out there that it can seem daunting. I can’t tell you every herb and spice combination, or every herb and spice that should go with every ingredient. What I can do is give you a kind of breakdown how to use spices, and fresh herbs and dry herbs to make the most flavourful food you can.
Knowing when to add ingredients is just as important as knowing what to add. Adding fresh herbs to a dish too early will destroy their flavour. Adding dry herbs to late, you won’t rehydrate them enough to draw the flavour out of them. There are exceptions to every rule, so I can’t give absolutes. I can however, give you a basic guideline of when and how you should add fresh or dried herbs, and spices to your dish.
First of all, let’s talk about the difference between soft and hard herbs. Hard herbs like rosemary, thyme, and oregano (herbs with a woody stem), can withstand a longer cooking time than soft herbs. Soft herbs are leafy green herbs like parsley, cilantro, and sage. The flavour of soft herbs is lost quickly when exposed to high heat for an extended period of time. Because of this, hard herbs may be add to a dish earlier in the cooking process than soft herbs. In fact, soft herbs are generally added to a dish after the cooking has been completed to add a fresh bright flavour. Hard herbs may be added to a dish relatively early in the cooking process, especially if the dish is being cooked on a low heat for a long period of time like a stew or braised meat.
Dried herbs, generally need a longer cooking time than fresh herbs and so are usually added to a dish in the first stages of cooking. This is because the herbs need to rehydrate fully before their flavour is released. Dry herbs have their own unique flavour which is sometimes desirable. People will often sprinkle dry oregano or basil over pasta or pizza. Dry herbs can be added later in the cooking process, but if you want a flavour closer to that of the fresh herbs, you will need to add them early.
Spices like cumin, coriander, cinnamon, and ground chilies should be added very early in the cooking process. They are their most flavourful when they are cooked in a bit of oil over a moderate heat. This would generally be done just prior to adding a liquid to a dish. For example, if I were making a chili, or curry, I would saute some onion, garlic, and likely ginger prior to adding any liquid ingredients like tomatoes. A minute or two before adding an any liquid ingredients I would add my spices. It is important that there be a generous amount of oil in your pan when you do this as your spices will burn quickly otherwise. Cook the spices with the onions and whatever else until you can really smell the spices, that’s how you know they have opened up and begun to release their oils. Now, add any liquid ingredients and continue your cooking.
The essential oils in spices, just like with herbs, are volatile. This means that if you cook them for too long they will lose their flavour. It is a myth that you should simmer chili for hours and hours. An hour is good two hours is pretty much the max, after that you are cooking flavour out rather than in.
Knowing what herbs and spices to use takes time and experience. I can’t give you a full guide of what goes with what. It’s just not practical. However, I call tell you to Toucan Sam it. Ie. follow your nose. Your sense of smell and your sense of taste are very closely related. Because of this relationship it is generally true that things that smell good together will taste good together. Smell, and taste as much as you can. Other than that, the only way to really gain an solid understanding of how flavours interact is through experience. You need to cook, and you need to cook things that are outside your usual comfort zone. You will use herbs, spices, and techniques you never knew about, and you will create new flavours you never dreamed about. Cooking is an experiential process. So, go experience.
by Chef Ben Kelly | Feb 28, 2018 | Cooking Tips
It is very easy for me to sit here and tell you how easy cooking is. How you just do this, this and this and it’s done. It is much more difficult for me to put myself in your shoes, to remove the years of accumulated knowledge I have in my head, and imagine I am a person who rarely cooks and doesn’t know all the tips and tricks that I do. Even though it’s difficult for me, I think it’s important that I try my best to put myself in your shoes so I can give you practical information that you can use right now. Otherwise, what’s the point?
Here are five practical things that if you keep in mind will help improve your cooking, and make you a more confident cook.
Garlic and Onions don’t cook at the same speed so stop adding them to the pan at the same time.
One thing I notice a lot while reading recipes is that they often say to “saute onions and garlic together until the onions are cooked”. If you saute onions and garlic together until the onions are cooked, your garlic is going to be burnt to shit. No one wants that! Instead, saute your onions then add your garlic when the onions are 90% cooked. This way, the onions and the garlic will both be cooked, but the garlic won’t be burnt and you won’t have burnt, bitter tasting food. The only time it would be okay to saute onions and garlic together is if they were pureed together, likely with ginger, and you were using a considerable amount of fat like in a curry. Otherwise, keep them separated until the last few minutes.
Preheating your pan means that food is less likely to stick.
When I first really started cooking, I often found myself impatiently waiting for pans to heat up. If I placed something in the pan before it was hot I would usually get yelled at and the food would usually stick in the pan. It is important to use a hot pan for most things, especially meat because the heat on the surface of the pan will sear the surface of the meat. This creates a chemical reaction on the surface of the meat (which we will get into in the next topic) which will let the meat (or what ever your cooking) release from the surface of the pan. Ie. It won’t stick. If you did preheat your pan, and you notice something is sticking anyway, it generally means that you are trying to flip it too early. Let it sit for another few seconds, or minutes, and it will likely release on its own allowing you to flip it without destroying your food.
There are a few things that are generally started in a cold pan such as bacon and duck breast but these are the exceptions to the rule.
Searing meat in hot pan in order to brown the surface will help develop flavour and will allow for more even cooking. No colour, no flavour.
There is something called the “Maillard Reaction” which Wikipedia describes as;
“…a chemical reaction between amino acids and reducing sugars that gives browned food its distinctive flavor.”
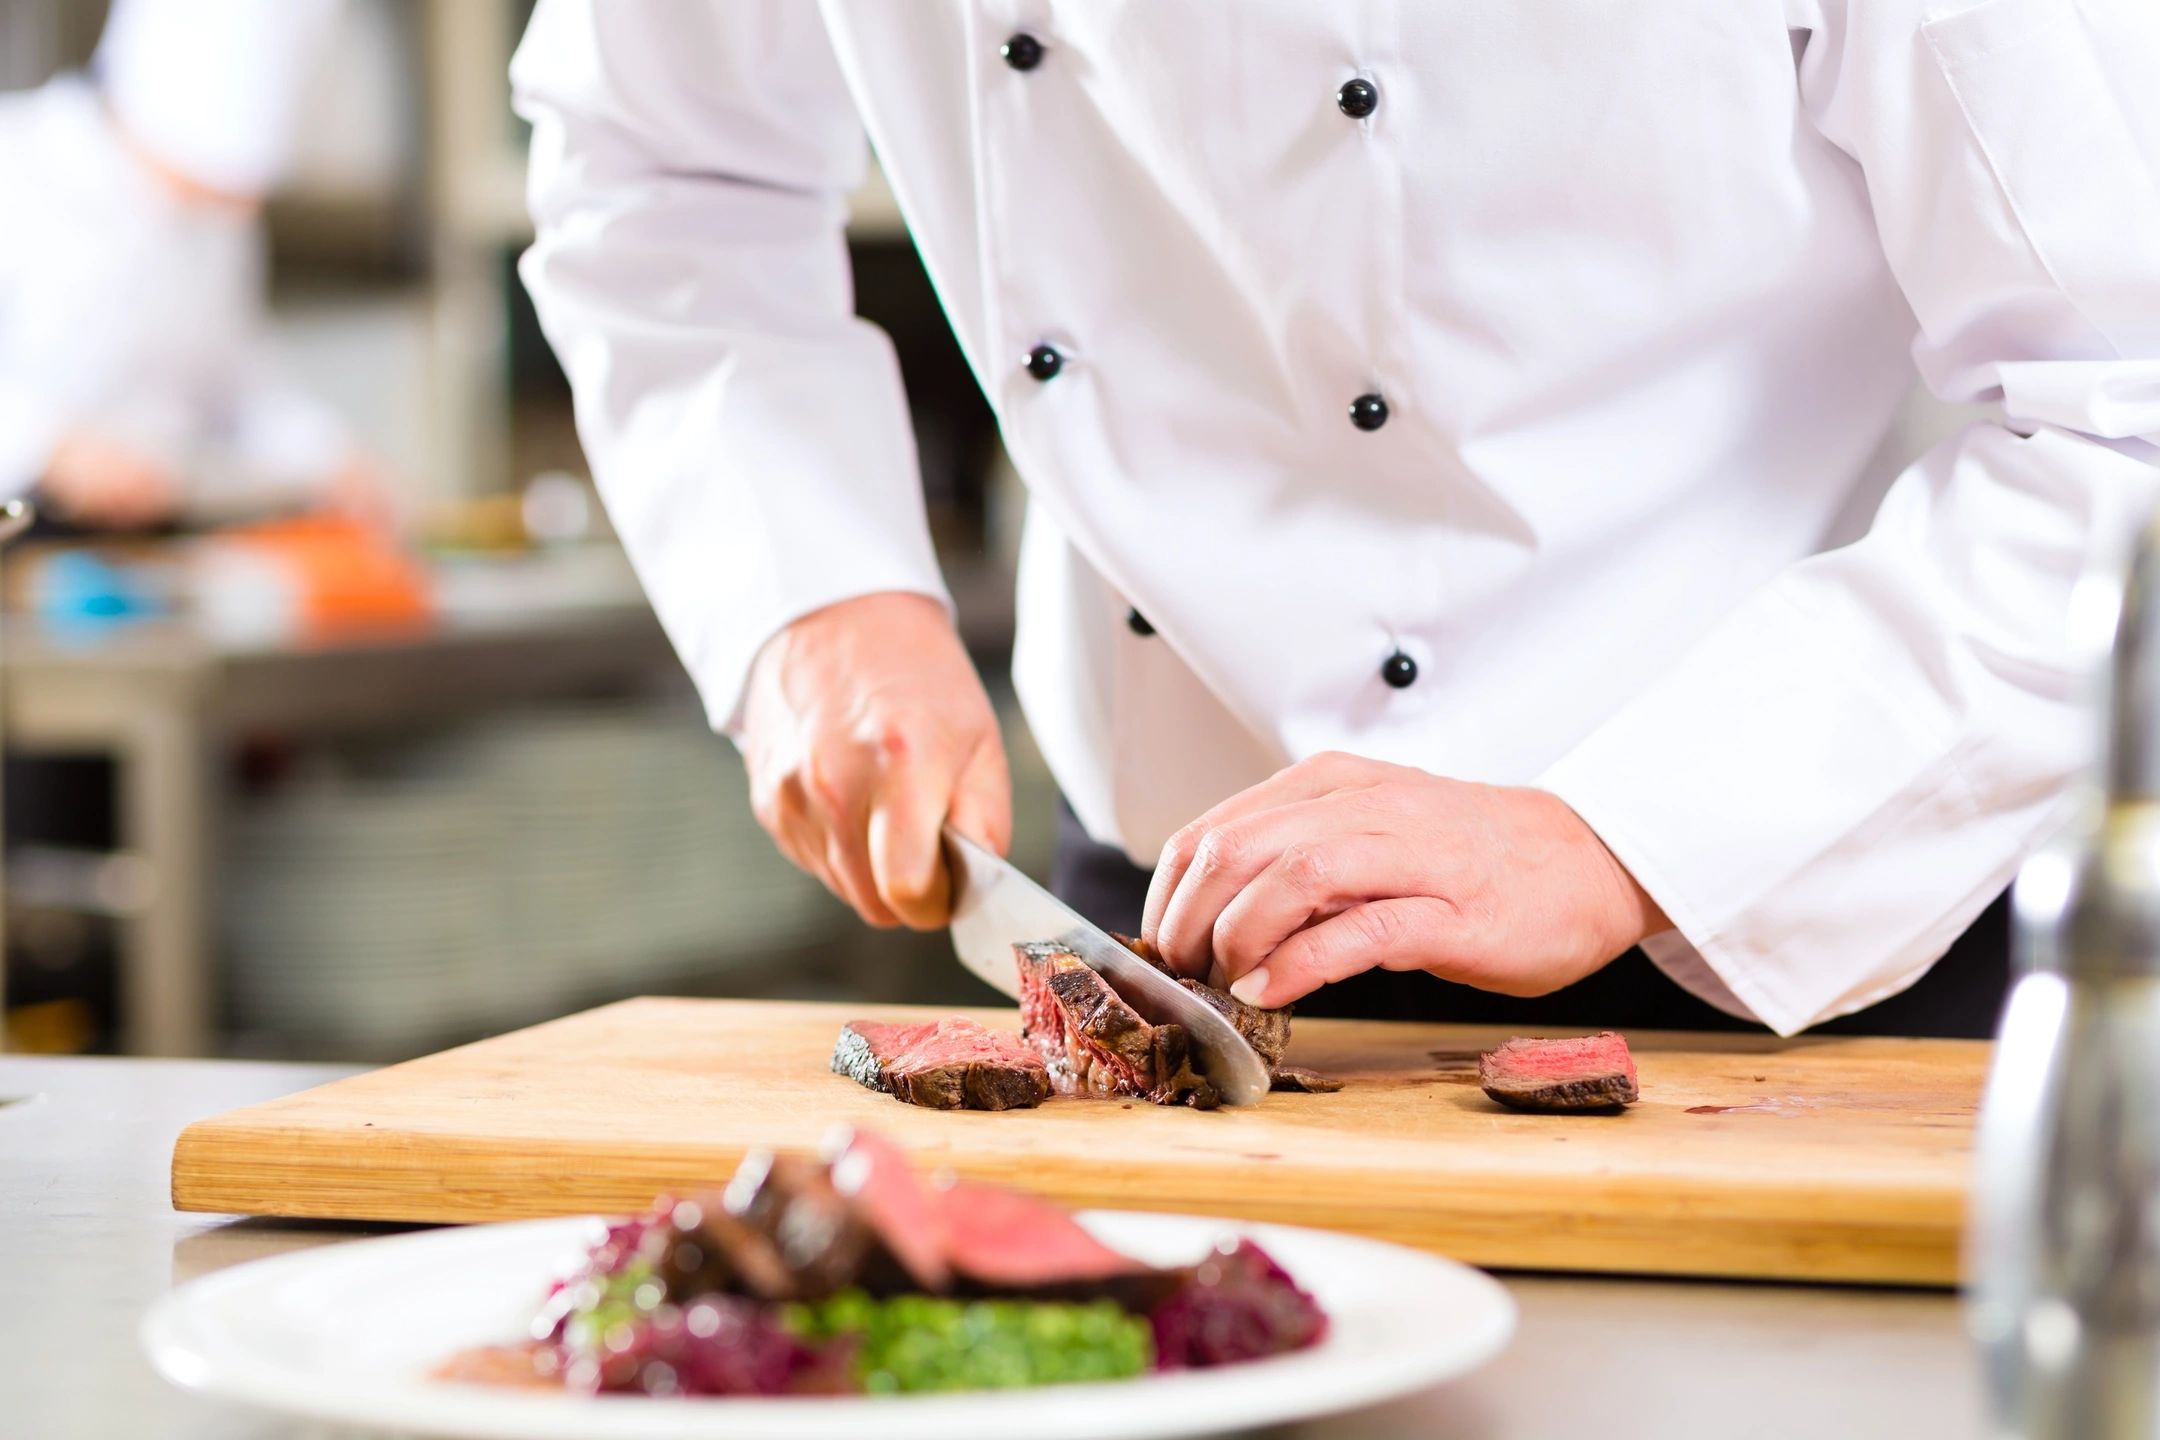
No colour no flavour. When you are cooking meat, no matter what you are doing with it you should brown it. If you are making a stew, brown your meat first. Making pulled pork, brown your meat first. Making pork chops, brown them! It is an important step in developing flavour. So, how do you do it? Well, it starts with a hot a pan. Preheat your pan, add a touch of oil, season your meat with salt and pepper, and place it in the pan. Let it sit for a minute or two. Flip it, and do the same thing. Do this on all sides. If you are searing a pile of diced meat or strips, do it in batches. If you put too much meat in your pan, you can cause the temperature to drop too drastically. When this happens the meat will let go of it’s juices and instead of searing your meat, you will end up boiling it. Nobody wants boiled, grey meat. If you are working with a larger piece of meat, you can sear it in the oven under the broiler for a short amount of time.
The only time your burner should be on high is when you are boiling water.
It is incredibly rare that you would want a burner on high unless you are boiling something. Imagining the dials on your stovetop go from 1 to 10, 6 would pretty much be the max you would generally want to go. Any higher and you are just going to burn whatever you’re cooking. As long as you let your pans preheat, and you don’t overcrowd them, you will not have any problems at all. Most things can be cooked at medium (5) or lower as long as your pan is preheated.
Almost everything that you cook in your oven can be cooked between 350°F – 450°F.
People often get way too caught up in what temperature their oven should be on. As long as you are paying attention, it doesn’t really matter that much. Bigger things are generally cooked on lower temperatures, while smaller things are generally cooked on higher temperatures. If you are braising something, or cooking a turkey or a full ham or something over 4.54 kgs (10 lbs) you might want to lower the temperature to 325°F or even as low as 300°F, other than that this 350°F – 450°F is fine. Don’t sweat it, just keep an eye on it.
These are simple things that really will improve your cooking. The key to all of it is really just mindfulness. You want to be present when you’re cooking, conscious of the things you are doing and why. This alone will improve your ability to cook.
by Chef Ben Kelly | Feb 26, 2018 | Cooking Tips
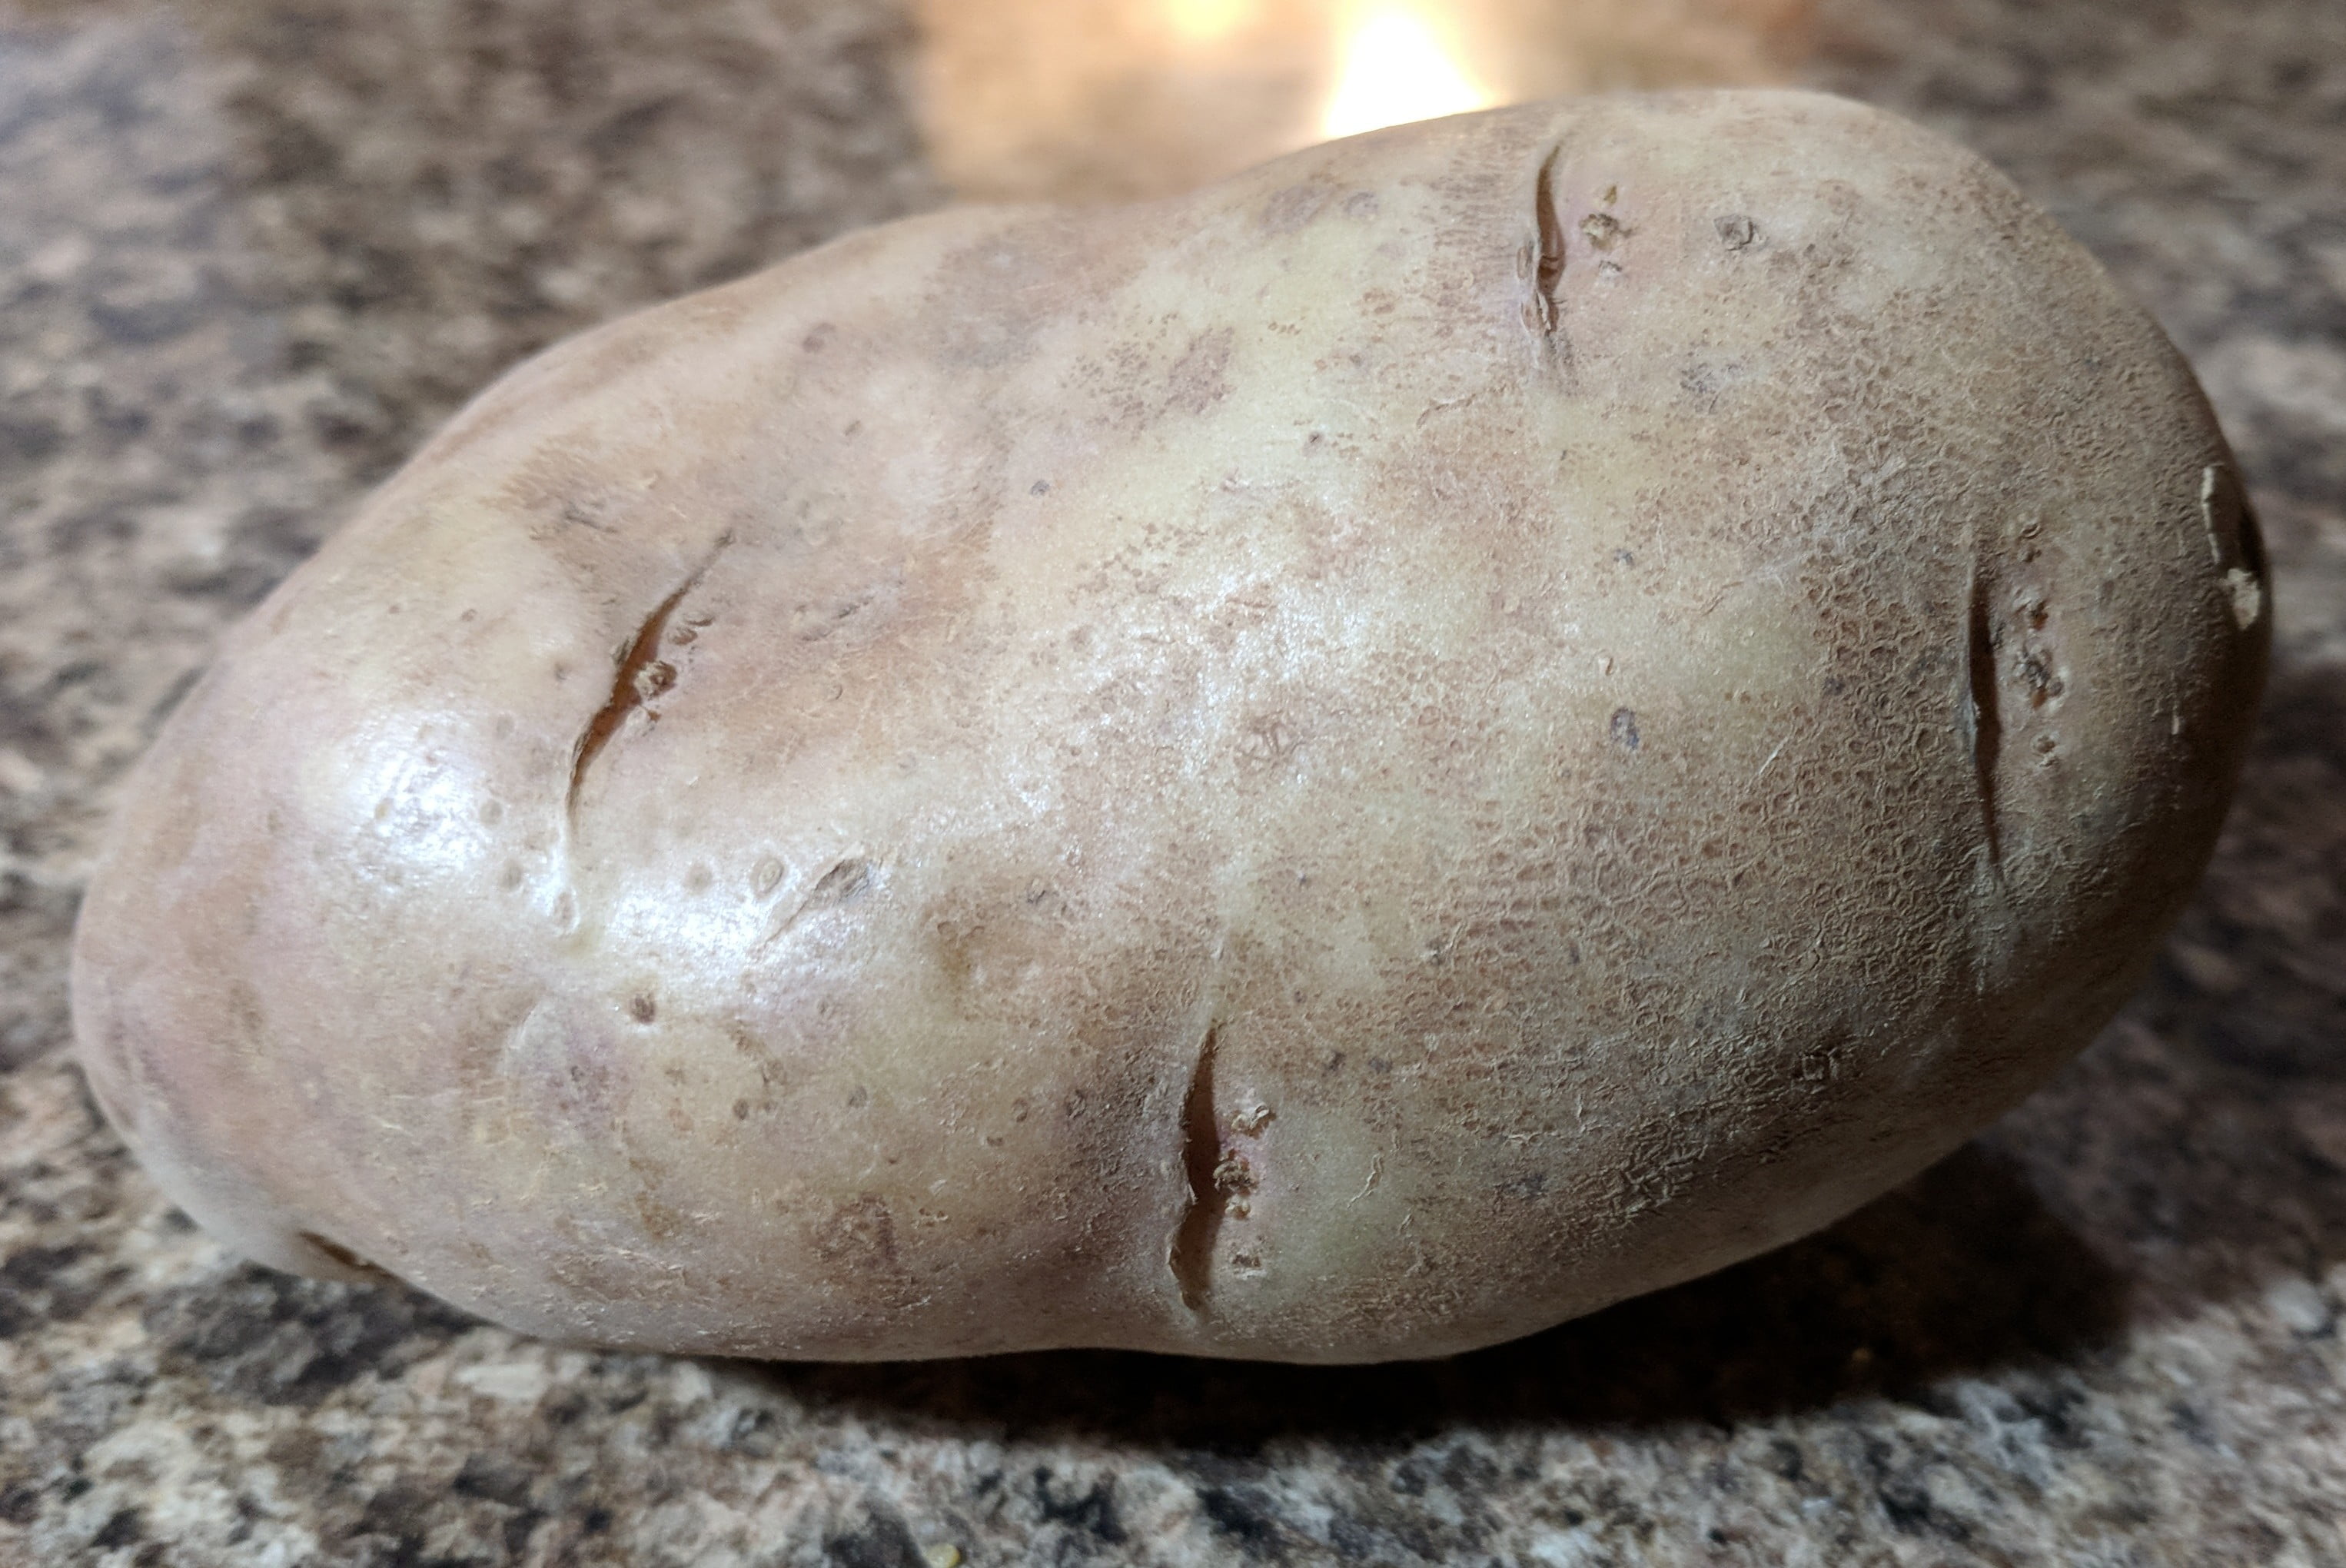
As I sit here and think about it, I’m sure that on a recent trip to the grocery store there were at least seven different types of potato in the produce area, probably more. That’s a lot a’potato! The thing is, every potato has a job for which it is best suited. Some potatoes are mealy in texture, some are waxy. There are potatoes that have a very high moisture content and some that are very dry. There are some with thick skins, and some with thin skins. Some are big, some are small. Some have white flesh, some yellow, some blue or purple. You see what I’m getting at here? So, how do you know which potato is the right potato for you?
I am going to preface this by saying that most of the time it doesn’t matter that much what potato you use. I am not about to tell you that you can’t do whatever you want. I’m not about to tell you anything absolute at all. What I am about to tell you is just a general guide to common potatoes, and which potato is best for the job. Just because something is the better option, does not mean it is the only option or, the option that you have to go with. Does that make sense? Essentially, don’t worry too much about what I am about to tell.
So, you’re at the grocery store staring down ten or more varieties of potato. Their eyes looking hopefully back at you. How do you decide which potato is the right one for your needs? Well, what potato needs do you have? What are you making? What is your intention with said potato? Do you plan on roasting it? Do you plan on boiling it? Do you plan on mashing it? Are you making potato salad? Scalloped potatoes? What do you want to do with the potato?
Let’s look at mashed potatoes first as that is probably one of the most common uses. When making mashed you generally want a potato that is low in moisture content and high in starch. Potatoes like russet, or Idaho (bakers or baking potatoes) fit the bill nicely. In fact, if you only ever want to buy one potato, these both make good general all purpose potatoes. They are also great for frying or baking.
Next you have potatoes that are good for things like whole boiling, potato salad, soups and stews, or roasting. These hold their shape well when cooked due to a moderate starch and moisture content. Potatoes like yellow waxy varieties, yukon golds, US #1, Chef’s, red skinned, and fingerling. The yukon golds, US #1, and Chef’s Potatoes are also best for things like scalloped potatoes.
Finally you have new potatoes and most small varieties. These have a low starch content and a high moisture content. This makes them ideal for simple things like roasting, steaming or boiling whole. They are not great in soups or stews ase they have too high a moisture content and can more easily get water logged leaving you with soggy potatoes. Potatoes in this variety generally don’t need to be peeled due to the skin being younger and softer than other types. Also, the peel holds the potato together when cooked as it might otherwise fall apart again due to the high moisture content.
So, that’s a lot of information about the common potato. Like I said just keep doing what you’re doing. Just keep all of this in the back of your mind somewhere so the next time your taking a potato salad, or scalloped potatoes to a potluck and you want to blow Sherri Johnson’s mind (or whatever your perfectly annoying neighbour, coworker, or friends name is) you know exactly what potato to use.
by Chef Ben Kelly | Feb 21, 2018 | Cooking Tips
It has become somewhat taboo to talk about failure in the world we live in today. Despite the fact that failure is a common fact of the human condition, it is linked to feelings of shame, disappointment, and regret. Failure can be frustrating, it can be embarrassing, and it can be expensive. There is a phrase in common use that states that “failure is not an option”. I am here to tell you that it absolutely is, and sometimes it is the better of two choices. You don’t always get to choose whether you fail or succeed, but you do get to choose whether you view failure are a negative or a positive.
Failure can be seen as either the end of a journey or the beginning of one. It can be used as a tool for growth or an excuse for stagnation. It can a driving force forward, or a wall that stops you in your tracks. Failure is all about perspective. Just because there is an 80 year old grandmother than can cook, and there is a 12 year old kid that can cook, and you can’t cook, you are not failure as long as you try, and you work towards getting better. The only failure that is unacceptable is the failure of not trying at all.
Cooking brings with it a unique and often detrimental universality. As it is such a common task, and one that is shared by everyone everywhere, it is often seen as binary. You can either do it, or you can’t. This is not true. I have yet to meet a person who cannot be taught to cook. As long as there is some level of interest, some level of desire, anyone can be taught. Not everyone is going to be Gordon Ramsay, and why would you want to be? However, everyone can learn to be a decent home cook. The secret of course, is failure.
Being afraid to fail is a failure unto itself. It is an easy trap to fall into, but one that is important to recognize for personal growth. In cooking, just like with anything else, you learn more from your failures than you do your successes. The specific issue with cooking is that universality I was talking about earlier. Due to the fact that cooking is such a common thing, people are terrified to fail at it. If you fail at something that literally anyone can do, what does that say about you? Does it say that you are an idiot? Does it say that you are incapable of learning? Does it say that you will never be able to cook? No! It doesn’t say any of those things. It says, that you have not taken the time to learn a common skill. That’s it. But you can!
In learning, failure must be an option. This is just as true for learning to cook as it is for learning to ride a bike. When you were taught to ride a bike without training wheels, I doubt you were expected to be perfect the instant you started pedaling. Right? You can’t get upset that you suck at cooking if you’ve never taken the time to learn. That mindset will lead to a vicious circle of self doubt and sabotage. You need to accept the fact that you are a failure just like everyone else. That 80 year old grandmother cooking up a storm in her kitchen was not born able to cook. She was taught, she failed, and she learned.
If you’re reading this, you’re probably further ahead than a lot of people. You’re might be just starting your culinary journey, or you may be a seasoned veteran looking for a hot new tip. Either way, I hope that you are able to take something from this post. And if you know someone who should really read this. Share it with them. People need to cook, but they also need to know that it’s okay to fail.
by Chef Ben Kelly | Feb 19, 2018 | Food and Culture
I have a theory which I have talked about a little bit here in the blog, and a bit more on the podcast. I believe that with the proper meal plan, you can feed yourself and your family, and only cook three times a week. Now, when I say theory, I mean it in the scientific way. My wife and I follow the principles that I am about lay out most weeks, and it works for us. Some weeks we fail, mostly due to poor planning rather than a failure in the system itself, but on the weeks that we follow the system it works out well for us.
The real secret to this system is planning for variety. I don’t want you to eat the same leftovers for two or three days because that is obviously incredibly boring and frankly I don’t think you would do it. I know I wouldn’t. Ideally, the way this works is that you make a big meal on Sunday. You make enough so that you are guaranteed leftovers. Now, maybe you only make enough vegetables for Sunday night’s dinner, but you make enough of the main protein to last a few days. On top of this you make a big batch of salad to go in the fridge, and maybe some rice and or barley and quinoa. Maybe, you even roast some sweet potato or squash. When you have all of these things in your fridge combined with a big piece of roast pork or beef, or a roasted chicken, you can mix and match and create different meals from the same components. Thus, you are planning for variety. If done correctly, this will last until Wednesday when you make a new dinner.
On Wednesday evening you follow the same principles except maybe you cook a big piece of salmon or a bunch of haddock. You then make a different kind of salad, and another side. This only needs to last until Friday when you cook one more meal that takes you to Sunday where you start again. Perhaps on Saturday you take a bit of time and make a big batch of pasta sauce or chili to throw in your freezer.
Planning your week out like this makes cooking and eating well much easier. It takes away the stress of wondering what you are going to cook when you get home and allows you to eat healthily while enjoying your down time. This meal plan is designed to work within a budget. Because you are planning for your week and have a pretty good idea of what and when you are going to cook, you are less likely to panic and order takeout or run to the grocery store and splurge on something you don’t need. Ideally, if you follow this system you will save money, eat healthier, and be less stressed about what you’re going to eat.
Try this for yourself. Just about every week your local grocery store will have something on sale. It maybe pork butt, blade roast, whole chickens, or a side of salmon. Take advantage of these sales and plan your week around them. I promise that this can work for you as it does for my wife and I. You just have to plan for variety, and get creative. It is easy to find yourself eating the same thing for three days. It is just as easy to find yourself eating an exciting variety of foods, saving money, and only cooking three times a week.