Indulge in the decadent and irresistible treat of a Chocolate Fondue with this easy recipe. As the third and final installment of the Chef’s Notes Fondue Series, the Chocolate Fondue is a fan favourite and the perfect sweet finish to a delicious Cheese Fondue or Oil Fondue. This recipe requires less than five minutes to prepare, making it an excellent option for impromptu gatherings or a cozy night in. Plus, any leftover fondue can be repurposed into delicious chocolate truffles. Don’t wait any longer. Follow along with this recipe and treat yourself to a rich and velvety chocolate experience.
What to Serve with Your Quick and Easy Chocolate Fondue
To truly savour the rich and creamy indulgence of a Chocolate Fondue, you’ll want to choose the perfect accompaniments. The most common and delicious options include fresh fruit like bananas, apples, oranges, pineapple, and berries, which complement the sweet flavour of the chocolate. You can also serve marshmallows, graham crackers, bits of sponge cake, brownies, or brioche bread for a contrasting texture. To ensure easy dipping, it’s best to cut the fruit and cakes into small, bite-sized pieces.
It’s important to strike a balance when providing accompaniments, as offering too much variety can lead to unnecessary waste. A good rule of thumb for a chocolate fondue is to plan for eight to ten bites per person, whereas oil or cheese fondues served as a meal would require 18 to 20 bites per guest. These estimates should ensure that everyone has plenty to enjoy without leaving too much leftover food to store away in the fridge.
Foolproof Chocolate Fondue Recipe
Get ready to indulge in a rich and velvety chocolate experience with this quick and easy Chocolate Fondue recipe. In a medium pot, bring one cup of whipping cream and a quarter cup of Baileys to a boil over high heat. Once the mixture reaches a boil, remove it from the heat and whisk in two cups of semi-sweet chocolate chips until the chocolate is completely melted and fully incorporated into the cream.
Transfer the chocolate mixture to your fondue pot and set it over medium heat. Stir the fondue frequently to keep it smooth and at the perfect consistency for dipping. That’s all there is to it. With just a few simple steps, you can create a delectable and indulgent chocolate fondue that is sure to impress your guests.
Quick and Easy Baileys Chocolate Fondue
Melted chocolate mixed with hot cream and Baileys Irish Cream, put in a fondue pot for dipping fruit, marshmallows, and bits of cake. It's quick. It's easy. It is delicious. And it is just the thing you need on a cold winter night.
Savouring the Moment: How to Best Enjoy Your Baileys Chocolate Fondue
As you savour the rich and velvety taste of your Chocolate Fondue, it’s essential to know the best way to enjoy it. A small tip to take your fondue experience to the next level is to let the food heat in the chocolate for a minute before savouring it. At the same time, it’s possible to quickly coat your food in the chocolate, allowing it to sit in the warm chocolate for 60 seconds or so will transform each bite into an exceptional delight.
Remember, the beauty of fondue lies in its unhurried pace. Don’t rush yourself while enjoying your fondue. Take your time to savour each and every bite to its fullest potential. So, light some candles, pour a glass of wine and enjoy the company of your loved ones while you savour the indulgent pleasure of a warm and luscious Chocolate Fondue.
Conclusion
Thank you for reading this post and discovering the ultimate quick and easy Baileys Chocolate Fondue recipe. Fondue meals are all about taking the time to savor each bite and enjoy the company of your loved ones. I hope that this recipe has inspired you to bring out your fondue pot and indulge in a rich and velvety chocolate experience.
Remember, it’s best to strike a balance when it comes to providing accompaniments for your fondue. To enhance the flavors of the fondue, allow the food to heat in the chocolate for a minute before savoring each bite.
If you enjoyed this recipe, don’t forget to share it with your friends and family on Facebook, Pinterest, or Twitter. Also, be sure to check out the 400+ other posts on Chefsnotes.com for more culinary tips and delicious recipes.
Thank you for reading, and I hope this Baileys Chocolate Fondue becomes a staple in your entertaining repertoire. Enjoy!
This week marks the end of my Simple Summer Dessert Series, and I thought I would go out with a bit of a bang. Today, I am going to show you how to make a Chocolate Mousse Cake. At first, it may seem like this is a complicated dessert that should have no place in my simple summer dessert series. However, when broken down into its three parts, this cake is anything but difficult.
This Chocolate Mousse Cake, as I said, has three parts. First, there is the chocolate cake. Because my cake has to be gluten-free and I have very little interest in making a gluten-free cake from scratch, I used a mix which you will see in a minute. If you want to make the cake, just use your favourite chocoalte sponge cake recipe. Nothing hard about this so far. The second part of this cake is the Chocolate Mousse. The mousse has five ingredients in it, two of those are coffee and brandy. The final piece of this cake is the mirror glaze. Easy enough, right? Let’s take a look at the full process.
The Cake
As I said, I used a gluten-free cake mix to make the base of my Chocolate Mousse Cake. The brand I used is called Kinnikinnick. I’ve used this mix previously in this series when I made the Chocolate Strawberry Shortcake. The mix comes together easy enough by mixing eggs, oil, and water, then the cake mix. Because I wanted my cake to be relatively thin (and because I couldn’t find my round cake pans), I baked my cake on a rectangle sheet pan. Bake the cake and let it cool completely before moving on to the next step.
Chocolate Mousse
Chocolate mousse is this super decadent thing, that people assume must be really hard to make. It isn’t. Just like with the Chocolate Mousse Cake as a whole, we are going to break the chocolate mousse down into four parts and simplify the process.
Part 1 – The Base
The base of the mousse is a combination of egg yolks and sugar that are heated over a water bath to thicken them. Beat together four egg yolks and half a cup of sugar in a heatproof bowl. Put the bowl over a pot of barely simmering water and continue to beat the mixture for about five minutes or until it is too hot to dip your finger into. Take the bowl off the heat and continue to beat it on medium for another five minutes to cool the egg mixture down. When finished, the mixture should be pale yellow. You can do all this whisking by hand, but it is much easier to use a handheld mixer. Set the yolks and sugar aside and move on to part two.
Part 2 – Chocolate
The second step in making the chocolate mousse is to melt the chocolate together with espresso and brandy (you can use rum, Irish cream, or no alcohol at all if you would prefer). Use one cup of semi-sweet chocolate chips, a quarter cup of espresso or strong coffee, and two tablespoons of brandy. Put all three ingredients in a heatproof bowl, put the bowl over barely simmering water, and let it sit until the chocolate is melted. Stir the chocolate to make sure everything is combined.
Part 3 – The Egg Whites
While the chocolate is melting, put the egg whites in the bowl of a mixer with a pinch of salt, or use your handheld mixer. Beat the egg whites to firm peaks. This should take about four to five minutes on high speed.
Part 4 – Putting it all together
The final step to making the mousse is to mix the yolks and the chocolate. Then, to fold in the egg whites. The purpose of the egg whites is to give the mousse its characteristic airiness, for them to do that, they have to be folded into the mix rather than stirred in. Folding is a process where a spatula cuts through the center of the mix, scoops down and out towards the edges of the bowl. Repeat this until all of the egg whites have been folded into the chocolate. The best way to incorporate the whites into the chocolate is to do it one third at a time. Take a third of the whites, and fold them into the chocolate. Take another third and do the same thing, then take that final third and fold it in.
You have now made chocolate mousse. It can be chilled and eaten as-is with a few raspberries and some whipped cream, or you can use it to layer a cake as we are going to do.
Combine the egg yolks and sugar. Beat well then set over a simmering pot of water and continue to beat until the mixture is too hot to dip your finger into. Remove from the heat and continue to beat for another five minutes.
In a separate heat-proof bowl combine the chocolate, espresso, and brandy. Set over the simmering water until the chocolate has melted. Mix the chocoalte, coffee, and brandy until they are smooth then mix into the egg yolk and sugar mixture.
Beat the egg whites on high with a pinch of salt for five minutes or until they reach stiff peaks. Fold the whites into the yolk and chocolate mixture.
Spoon the mousse into ramekins, cover with plastic, and cool in the fridge for two hours before serving or use to make a chocolate mouse layer cake.
With the mousse ready, it is now time to layer the cake. I used an eight-inch springform pan as my mould. To cut the cake into rounds the correct size of the pan, push the pan into the cake like a giant cookie cutter. Line the base of the pan with parchment paper, and snap the ring in place. Put the first piece of the cake in the pan, cover with half the mousse, top with the second piece of cake, then the rest of the mousse. Cover the cake with plastic wrap and put it in the freezer overnight.
The Mirror Glaze
The absolute final step in making this Chocolate Mousse Cakes is to make the mirror glaze and pour it over the cake. Before you start making the glaze, take the mousse cake out of the freezer and put it in the fridge. To make the glaze, I followed this recipe from MarthaStewart.com. The glaze is a combination of cream, sugar, cocoa, water, and gelatin, which is what gives it the mirror finish. I should have cooked my glaze a minute or two longer because it was a little thin, but all in all, it worked well.
Make the glaze and let it cool to room temperature. Take the cake out of the springform pan and set it on a cooling rack set over a large bowl. Pour the glaze over the cake then, put the cake on a plate, pop it in the fridge for an hour or two to finish defrosting, and for the glaze to set, then serve.
Conclusion
This Chocolate Mousse Cake is incredible, but it is also very rich. Serve it in small pieces with a little dollop of whipped cream. It goes great with a cup of coffee or a glass of milk. Now, I know that there are a bunch of steps to making this cake, but are any of them overly tricky? I honestly don’t think so. Do you? If you have any questions or comments, let me know in the comments section below.
Thank you for reading the post. If you liked it, remember to share it on Facebook, Pinterest, or Twitter by clicking the icon to the left of the right of the page. Did you know that Chefsnotes.com has almost 400 posts just like this one? Imagine all the great tips, tricks, and recipes you’ve missed. Don’t miss any more! Subscribe to Chef’s Notes by putting your email address in the subscription box below. You will be notified of every new post. And if you would like to know more about me, click the link below to read my story.
Last week I finished my Basic cooking course and in that final post I said that I was going to be taking a bit of a break from doing a series, but then I had an idea. I thought it would be fun to do something I really haven’t touched on here on the blog; desserts. For the next ten weeks I will be dedicating every Wednesday’s post to Simple Summer Desserts.
I will be covering a variety of desserts in this series. Some will be new twists on old favourites some may be ones you’ve never seen, and some may be desserts that you have always wanted to try (or wanted to make) but you just never got around to it. I hope that you are looking forward to this as much as I am.
Today, we are going to look at how to make Chocolate Pot De Créme. Let’s get to it!
This is how to make…
Chocolate Pot De Créme
What is pot de créme?
A pot de créme is French custard dessert. Generally, pot de créme is made in the same way as other custards starting with beaten eggs to which hot cream and flavourings are added. This mixture is then baked in a water bath until the eggs set.
The version that we are going to look at today is not a true pot de créme. Our version is made as a loose ganache. Meaning hot, flavoured cream is poured over chocolate which is then cooled to set. The key to this is the ratio of chocolate to cream. The more cream, the looser the ganache will be. For a more traditional pot de créme recipe check out this one from Epicurious.
The reason our pot de créme is made differently than traditional versions is for simplicity. The recipe we are going to look at today takes about ten minutes to make, plus time to cool. The traditional version takes much longer. Also, when making traditional custard there is always the chance that the custard may split if the heat is too high or something isn’t mixed well enough. That will not happen with our ganache version.
Okay, let’s take a look.
Making the pot de créme
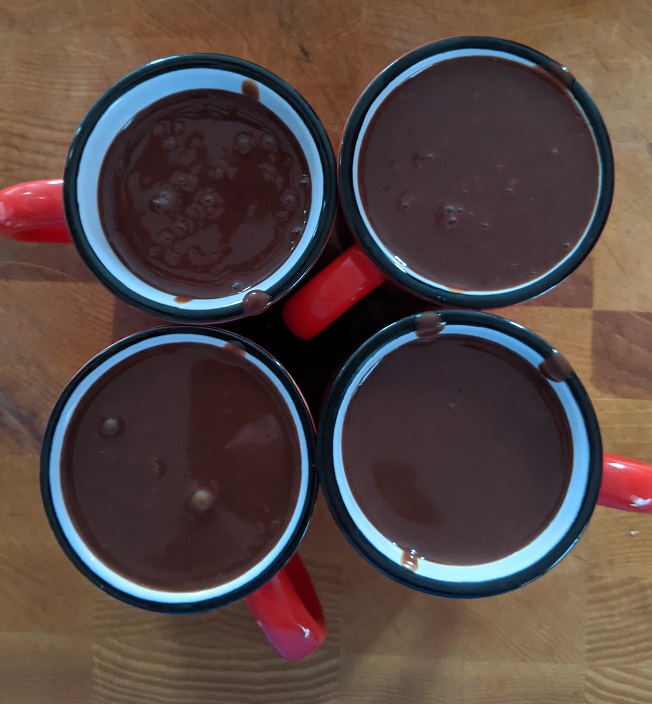
The first step in this recipe is to combine some cream with sugar, instant espresso powder, vanilla, and a pinch of salt and bring it to a boil. While the cream is heating, break up some semi-sweet chocolate and put it in a heatproof bowl. Once the cream comes to a boil, pour it over the chocolate and let it sit for about three minutes then whisk until all the chocolate is melted and the mixture is smooth. The final step is to pour the chocolate mixture into some dishes and let it cool in the fridge.
Instant espresso powder can be found in coffee section of the grocery store. It is fantastic for things like this or flavouring butter cream. It is a great baking ingredients to have around.
There is not much to this recipe. However, top it with a little whipped cream and a chocolate covered coffee bean and you have something truly decidant. Give it a shot for yourself. The full recipe is below. Enjoy!
P.S. This also makes a great frozen dessert.
Chocolate Pot De Créme
A simple and delicious ganache based pot de créme recipe.
We use cookies on our website to give you the most relevant experience by remembering your preferences and repeat visits. By clicking “Accept”, you consent to the use of ALL the cookies.
This website uses cookies to improve your experience while you navigate through the website. Out of these, the cookies that are categorized as necessary are stored on your browser as they are essential for the working of basic functionalities of the website. We also use third-party cookies that help us analyze and understand how you use this website. These cookies will be stored in your browser only with your consent. You also have the option to opt-out of these cookies. But opting out of some of these cookies may affect your browsing experience.
Necessary cookies are absolutely essential for the website to function properly. This category only includes cookies that ensures basic functionalities and security features of the website. These cookies do not store any personal information.
Any cookies that may not be particularly necessary for the website to function and is used specifically to collect user personal data via analytics, ads, other embedded contents are termed as non-necessary cookies. It is mandatory to procure user consent prior to running these cookies on your website.