Sushi is something that is both incredibly complex yet, at its core, very simplistic. Think about it; most sushi is a bit of fish or vegetables wrapped in rice and dried seaweed. That’s it. When you lay it out like that, it seems pretty basic. But then, you can say it is hand-rolled line-caught tuna belly from the seas off the coast of Portugal. The tuna is dotted with fresh ground wasabi, rice grown in the Yamagata prefecture in Japan, wrapped in hand toasted nori, and topped with sea urchin roe and caviar. Very complex.
The point I’m trying to make here is that sushi can be very difficult to make. It takes years and years to master. Sushi apprentices usually aren’t even allowed to make rice for the first year or two. Once they do move up to rice, that is their primary focus for 2-7 years, depending on their master. Does this mean that you can’t make delicious, satisfying sushi at home? Of course not!
Today we are going to take a look at how you can make sushi at home. We are going to break it down into its individual parts so you can see that delicious homemade sushi doesn’t have to be really hard to make.
Homemade Sushi – Yes you can!
Sushi Rice
Sushi rice has this kind of mythical fog around it. We hear stories like the one I mentioned above about people taking years to master it. This can instill a sense of nervousness in the home cook, getting ready to roll their first roll. But don’t let that deter you. If you want to get a Michelin star in making sushi, then yes, take that time. Otherwise, I wouldn’t worry about it too much.
Before we talk about making sushi rice or sushi, in general, I think that it is important to understand the history of sushi a little. So, let’s take a look at that first.
The History Of Sushi
Though sushi, as we know it, is a relatively modern invention only dating back to about the 18th century, earlier versions date back as far as the 2nd century. The later versions and the ones we enjoy today are based on a concept developed out of necessity in South East Asia.
The original version of sushi isn’t something that we would recognize as sushi today. It was actually a way to preserve fish. The fish would be salted then packed in fermented rice. This would allow the fish to be kept for long periods of time without spoiling. When people were ready to eat the fish, they would actually discard the rice.
As this technique found its way to Japan around the 8th century, the rice began to be eaten. The Japanese culture at the time believed that rice was sacred, and throwing it away was unheard of. So, they began to eat the fermented rice that the salted fish was packed in, along with the fish. This developed into a dish known in Japan as namanari, which means semi-fermented. Namanari is half cooked or half salted fish wrapped in fermented rice and eaten. The big difference in this dish and the original version is that the fish isn’t fermented at all, and it can be made instantly if you have some fermented rice and lightly salted fish.
Somewhere between the 16th-18th century, someone realized that if they took freshly cooked rice and added rice vinegar with a bit of seasoning, they could recreate the fermented rice flavour in minutes. This soured rice was served with fish, vegetables, and dried ingredients pressed into cubes in a mould. This gave way to modern nigiri sushi, which is fish placed on top of a mound of rice.
One other piece of the sushi puzzle fell in place around 1750 with the invention of dried nori sheets. With that invention, someone had the brilliant idea of wrapping it around their soured rice, fish and vegetables. Just like that, maki rolls were born.
Why am I telling you all of this?
I find that understanding the history of any dish takes away some of the mysticism that surrounds it. To me, knowing that sushi was born out of a need to preserve fish and then as a way to recreate the flavours that came from that preservation makes it a lot easier to wrap my head around. When I think of sushi as soured rice wrapped around fish and vegetables in dried seaweed, it makes me feel like, “Oh, hey, I can do that.”. I hope it has done the same for you.
Making Sushi Rice
Sushi rice is made with a short-grain rice variety that has a fairly high starch content. Most grocery stores will sell it as sushi rice. Despite the fact that it will probably be sold to you as sushi rice, in Japan and many other cultures, it is the type of rice eaten with every meal. It only really becomes sushi rice when seasoned with vinegar.
To make sushi rice, follow the instructions on the rice package. At the same time, the rice is cooking combine 2 parts each rice vinegar and sugar then 1 part salt. For 2 cups of uncooked rice, use 2 tbsp vinegar and sugar, and 1 tbsp salt. Boil this mixture for 1 minute then gently fold it into the cooked rice. Loosely cover the cooked and seasoned rice and let it come to room temperature.
Rolling Sushi
Sticky rice is sticky. Duh! That means that it sticks to just about everything. When making sushi, keep a bowl of room temperature water close by to dip your hands into. The rice won’t stick to your hands if they’re wet. I also always wrap my sushi mat in plastic wrap to keep it clean and tidy. And, keep a damp cloth around to wipe the counter and the sushi mat after each roll.
To roll the sushi, lay the mat flat on the counter and place a sheet of nori on it. For a full sheet of nori (large rolls), use about 1/2 a cup of cooked rice. For half sheets (small rolls), use about 1/4 cup. Using your hands spread the rice in an even layer across the nori. Make sure to leave a lip at the top of the nori sheet (the bottom is closest to you). Add whatever fillings you would like (fish, vegetables, etc.) If you don’t like raw fish, smoked fish makes a great alternative. Put the fillings in a narrow line on the back third of the sushi sheet. Now, using the mat, roll the back of the rice and nori up and over the filling gently but firmly pulling backward to tighten the roll. At this point, pull the bottom of the sushi mat over the top of the mat using one hand to pull and one hand to maintain even pressure on the sushi.
Just like with your hands, wet your knife before cutting the sushi. This will help keep the roll together.
Sushi Filling
I find it challenging to find sushi-grade fish; because of this, I generally use smoked fish like cold smoked salmon or hot smoked mackerel. I will pair these with cucumbers and wasabi, just roll them on their own or top them with spicy mayo.
One of my favourite rolls is sweet potato and avocado. The sweet potato is best when tempura battered and fried but steamed, or roasted sweet potato works well. I also like rolls with carrots, cucumber, radish, and spicy mayo. The point here is that you roll whatever you want into your sushi. You can follow tradition or go crazy and make a really unique roll.
Conclusion
What I hope you take away from this is that you can make sushi. Yes, YOU can make sushi at home. I don’t care what your skill level, age, or whatever, you can do it. It may take you a few times to get the hang of how exactly to roll the sushi, but once you nail that down, you are set. If you like sushi but have never made it at home, you are seriously missing out. You can have all you can eat sushi for a fraction of the cost of buying it at a restaurant, and it’s a lot of fun to make.
Please, give it a shot. And if you are wondering where to buy the ingredients I put together a list of the base tools and ingredients on my amazon store which you can check out here.
Thank you for reading the post. If you liked it, remember to share it on Facebook, Pinterest, or Twitter by clicking the icon to the left of the right of the page. Did you know that Chefsnotes.com has almost 400 posts just like this one? Imagine all the great tips, tricks, and recipes you’ve missed. Don’t miss any more! Subscribe to Chef’s Notes by putting your email address in the subscription box at the top right of the sidebar. You will be notified of every new post. And if you would like to know more about me, click the link below to read my story.
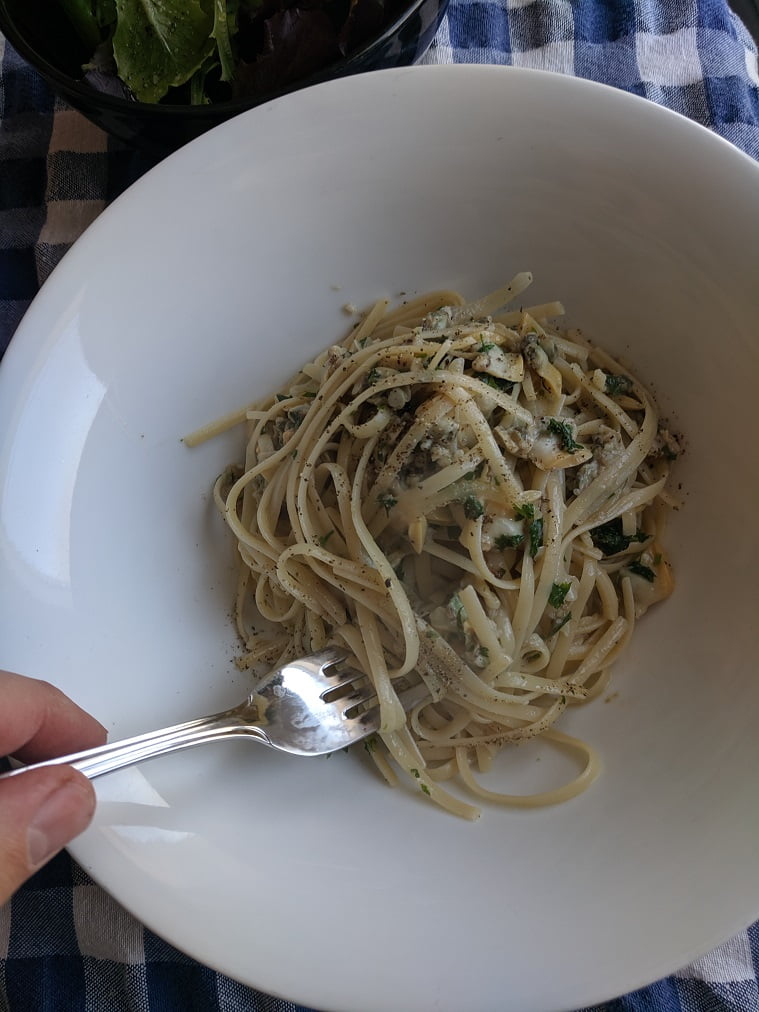
Linguine and Clams is such a classic pasta. Featured in more movies than I can count, it is almost the quintessential Italian-American pasta dish. There is for good reason for this; it’s absolutely delicious!
I’ve been craving Linguine and Clams for a while now and thought it would make a great dish for 30 minutes or less. In fact, it took me only about 20 minutes to put this all together from start to finish. I served the pasta with a light salad of mixed greens drizzled with olive oil, white wine vinegar, and a little salt and pepper.
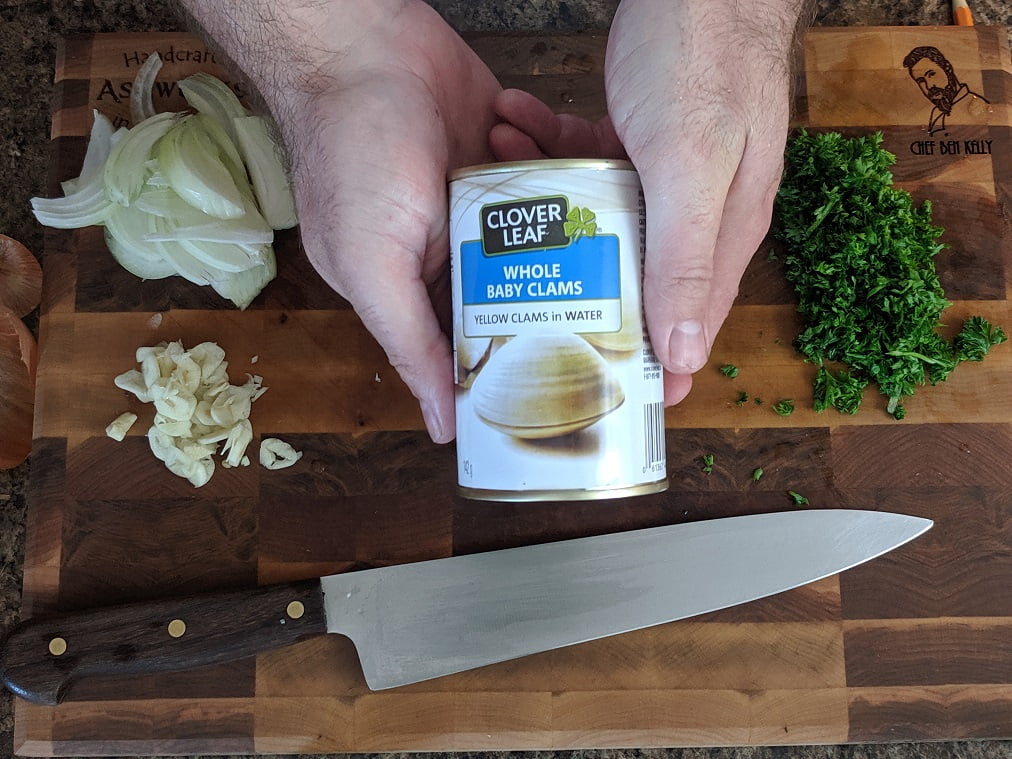
I used canned clams for this for two simple reasons. The first being that whole clams need to be soaked for at least a few hours, then cleaned prior to using. That can’t be done in under 30 minutes. The second reason is because I actually prefer canned clams in this. The juice from the clams makes a delicious sauce and the clams are tender and flavour without being sandy.
Okay, enough chit chat, let’s get to it. This is
Linguine and Clams in 30 Minutes or Less
12:20 – Getting Started
I actually made this for lunch, but it works just as well for dinner.
To start I filled a large pot with hot salted water, put it on the stove on high, and put a lid on it. Covered pots boil about 30% quicker than pots that aren’t covered.
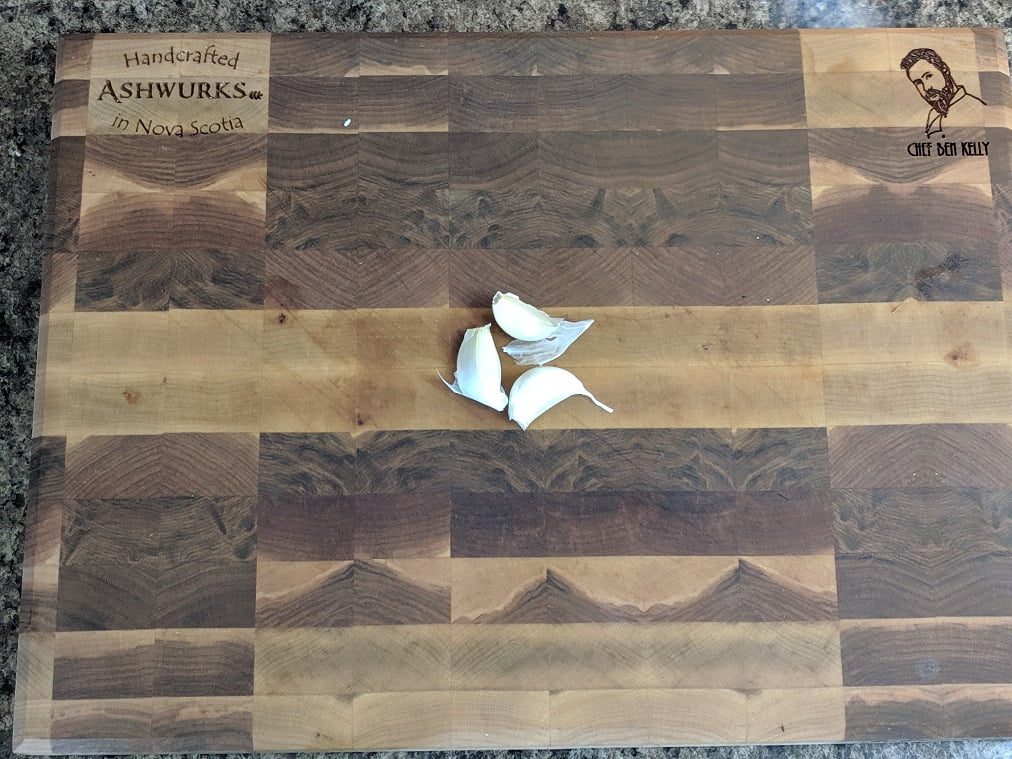
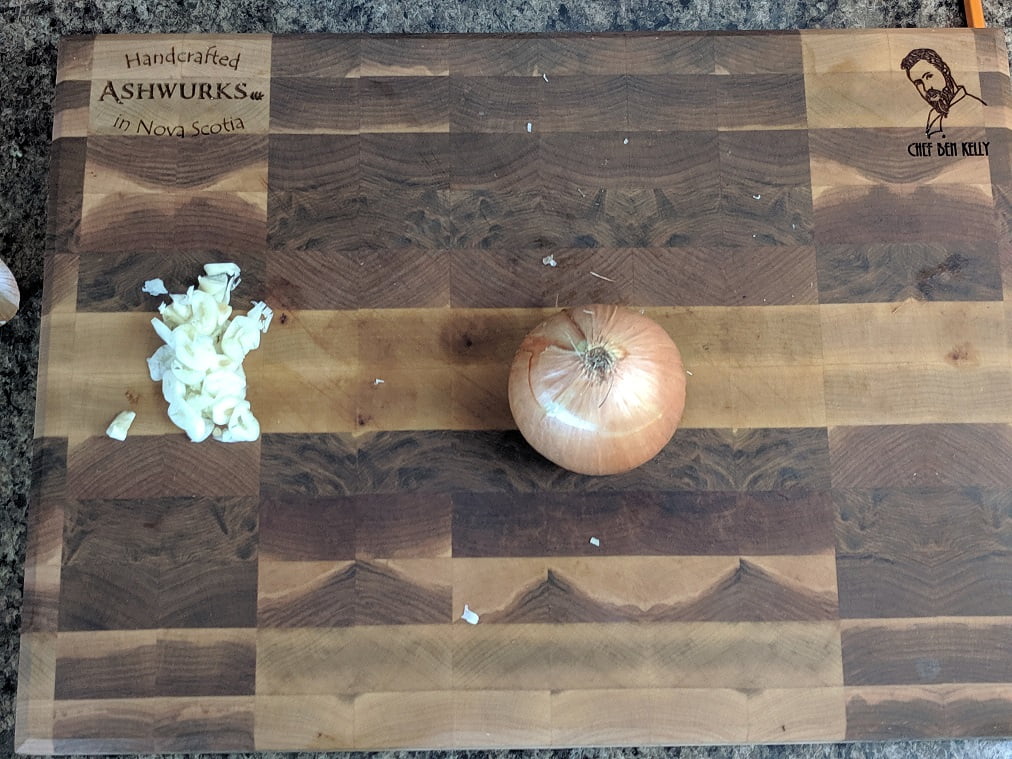
12:21 – Garlic
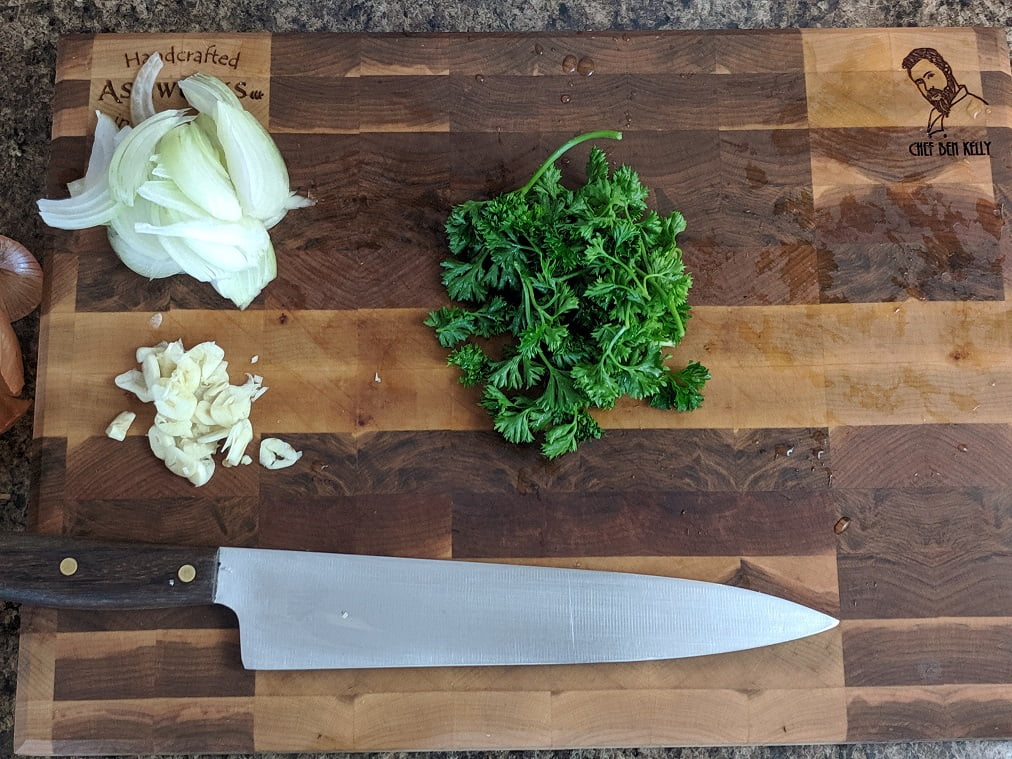
With the pot on and starting to heat up, I got down to business prepping my ingredients. The first was a few cloves of garlic.
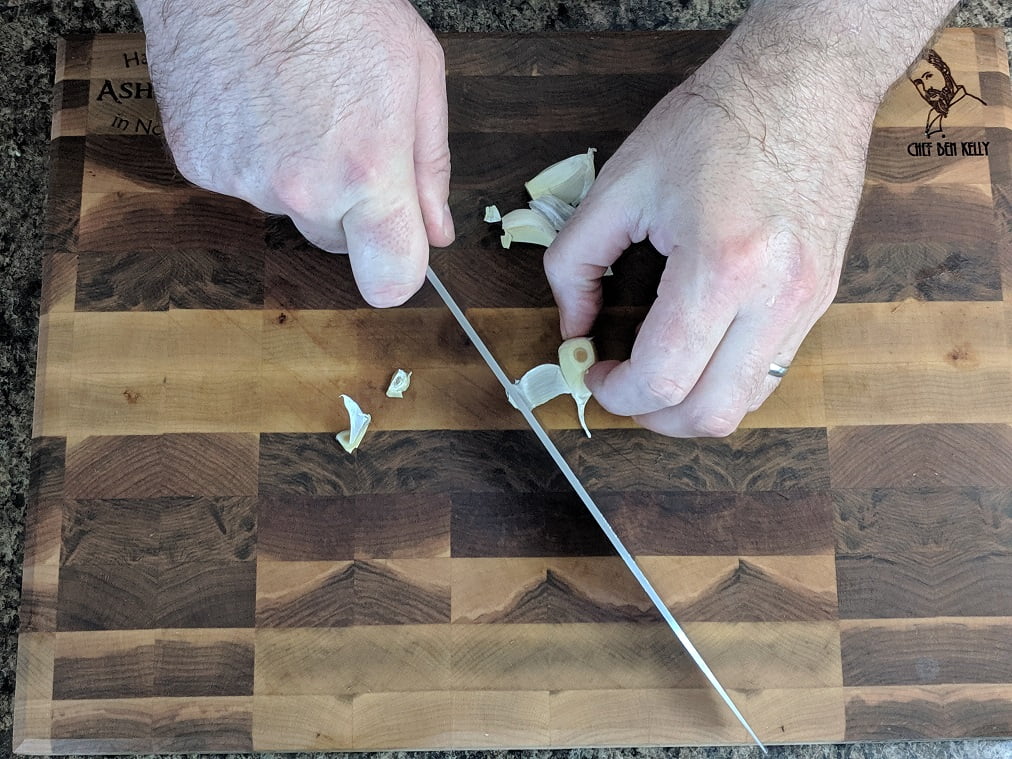
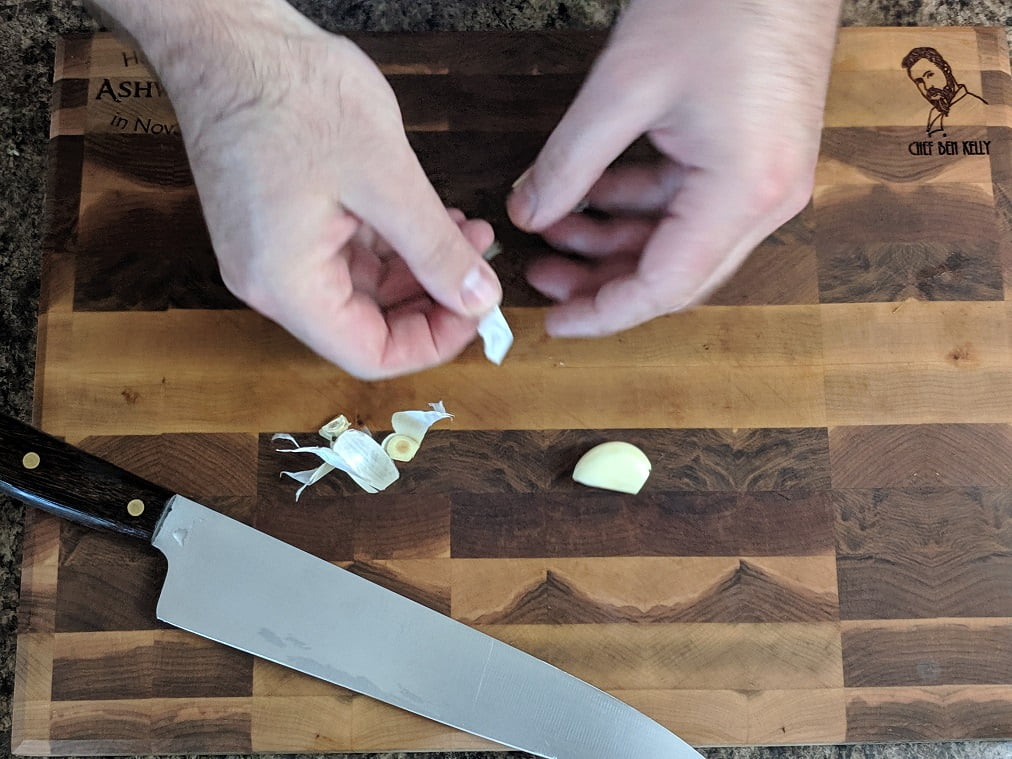
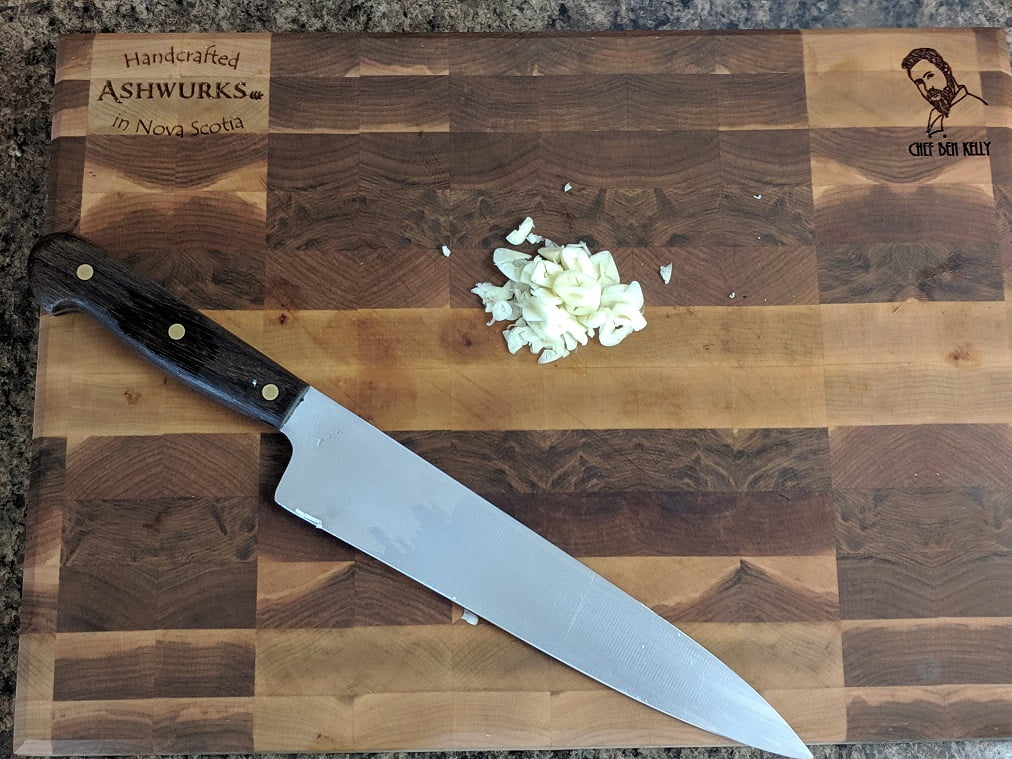
I cut the ends off the garlic, crushed them a little, pulled the peel off and then thinly sliced it. I set it aside.
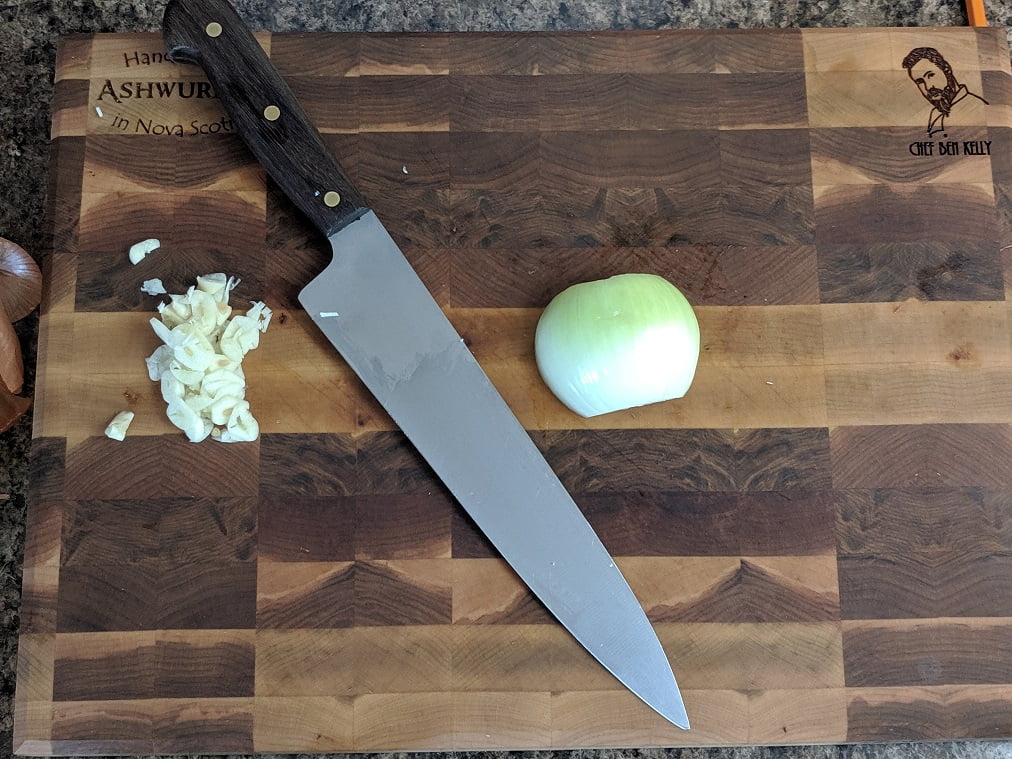
12:23 – Onion
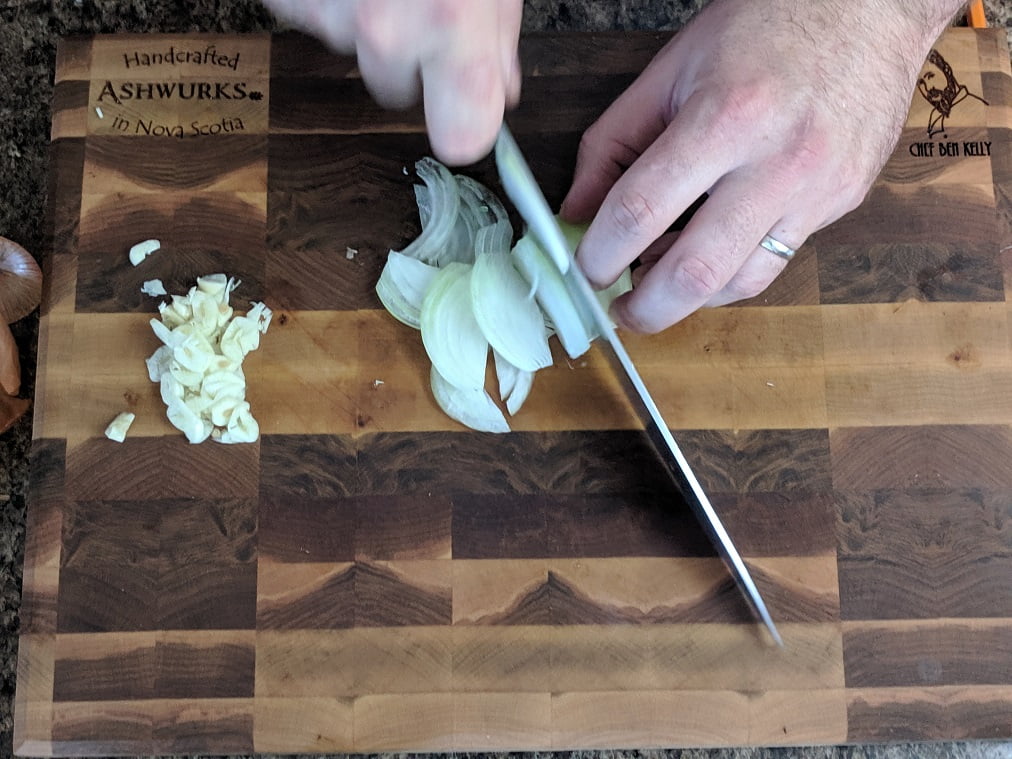
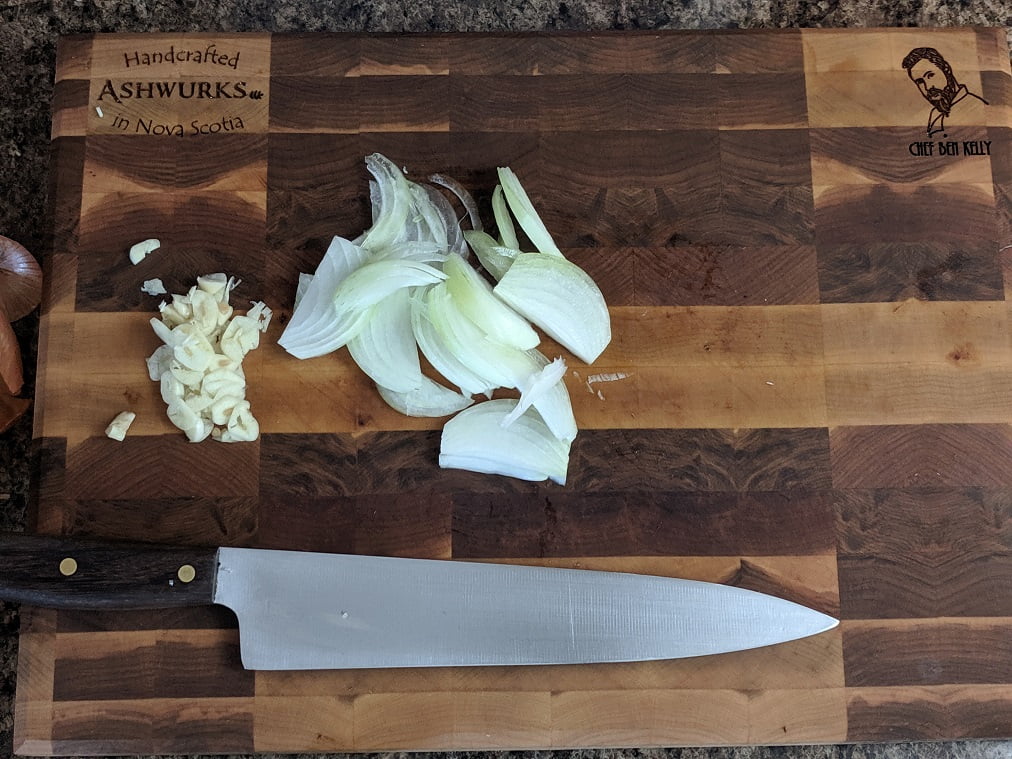
With the garlic done and out of the way I went about slicing an onion. First I cut the top and bottom off, then I cut the onion in half down through the middle. I set aside half the onion for another time and removed the peel from the half I kept. With the onion peeled all that was left was to slice it.
I always suggest slicing onions with the grain as opposed to across them. They cook better and less onion juice ends up spraying into the air. So, you cry less.
12:25 – Parsley
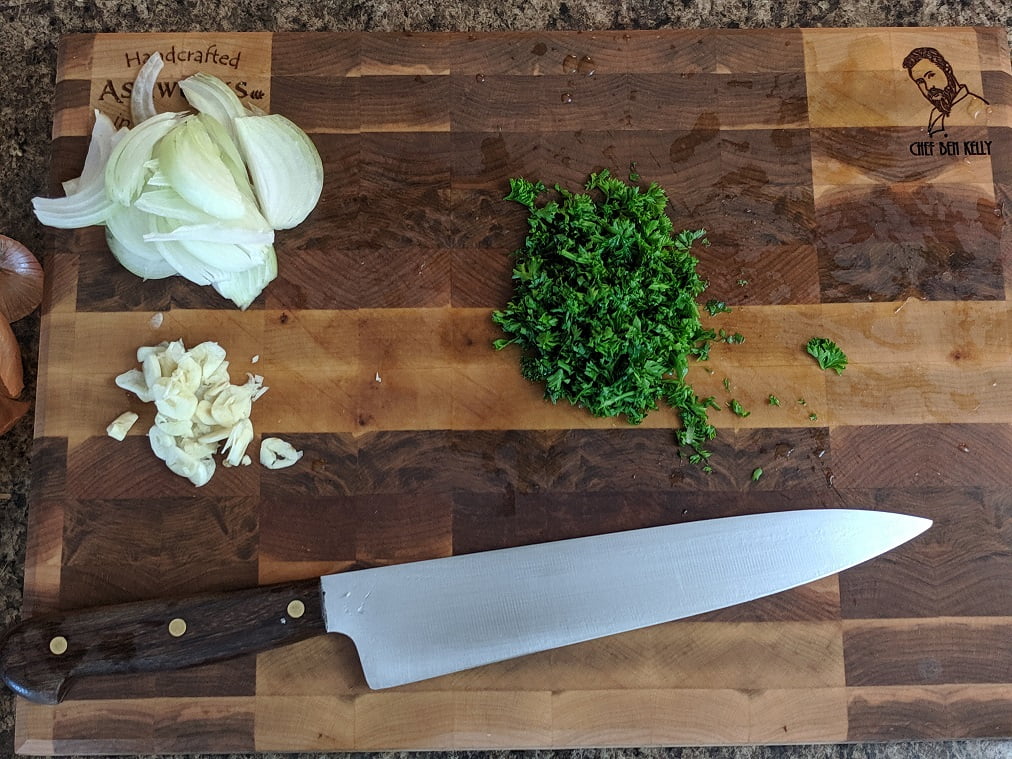
The last bit of chopping I had to do was the parsley. I took about 1/4 cup of curly parsley that had already been washed and chopped it up until it was fairly fine.
The trick for chopping parsley is to bunch it up into a tight ball and slice it as thin as you can. Then go over one or two more times with your knife.
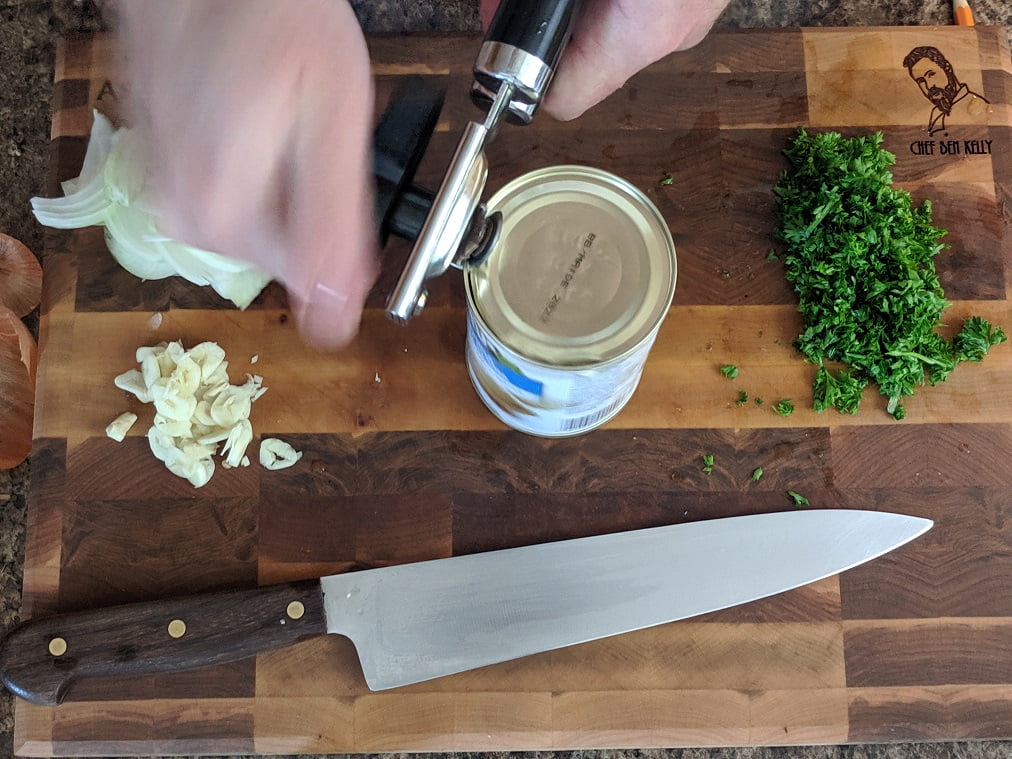
12:26 pm – Clams
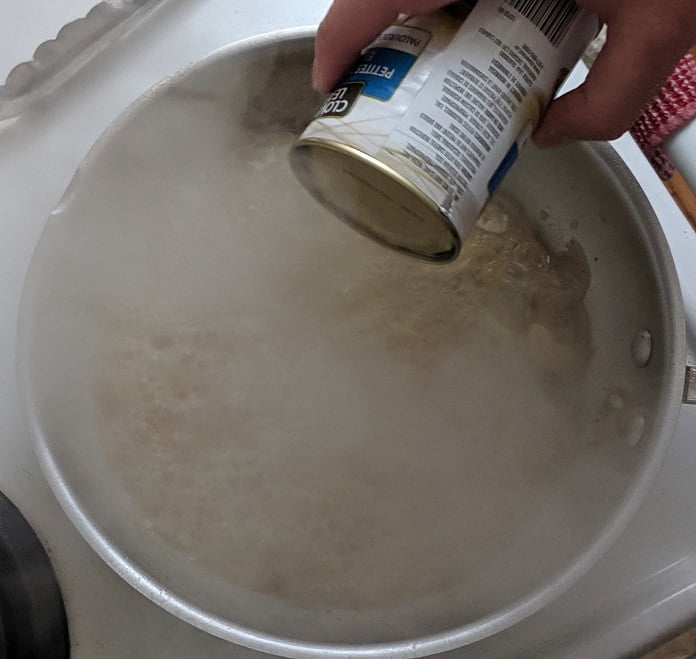
At this point I was pretty much just waiting for the pasta water to boil so I opened up my clams and set them aside. I left the lid slightly attached because I wanted to be able to easily strain the liquid from the clams. This liquid will go into our sauce, but if the clams get added at the same time they will become rubbery, which is not what we want.
12:30 pm – Boiling
Okay, so I had to wait another 4 minutes for the pasta water to boil. Once it did start boiling, I turned the pan on for the sauce to medium then added the linguine to the water.
12:31 pm – Sauce
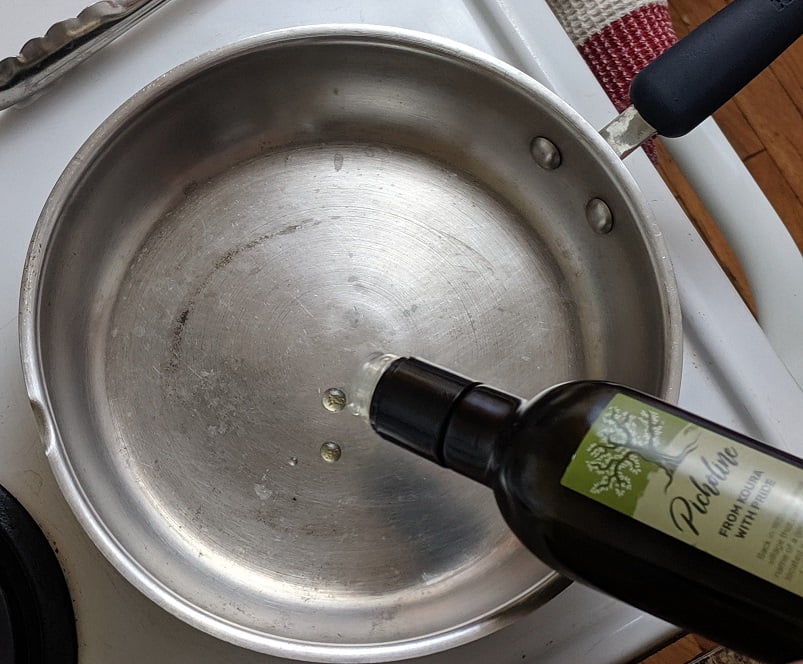
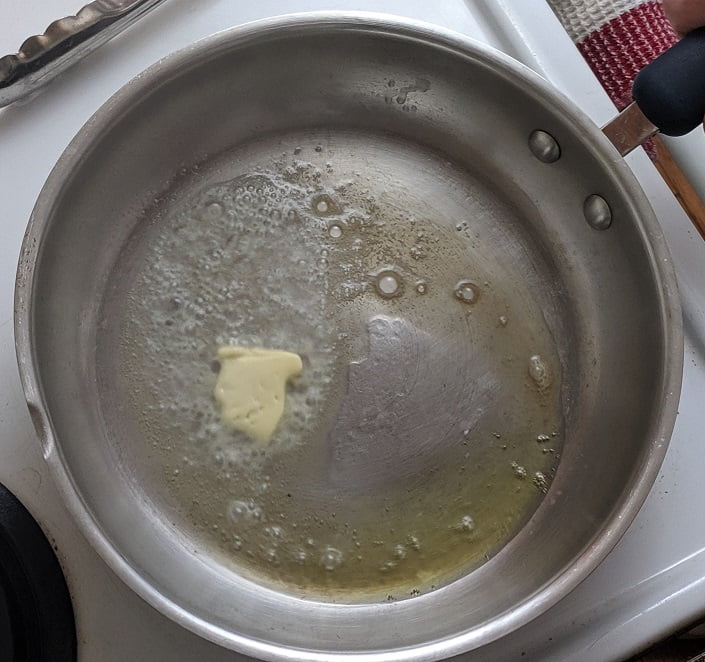
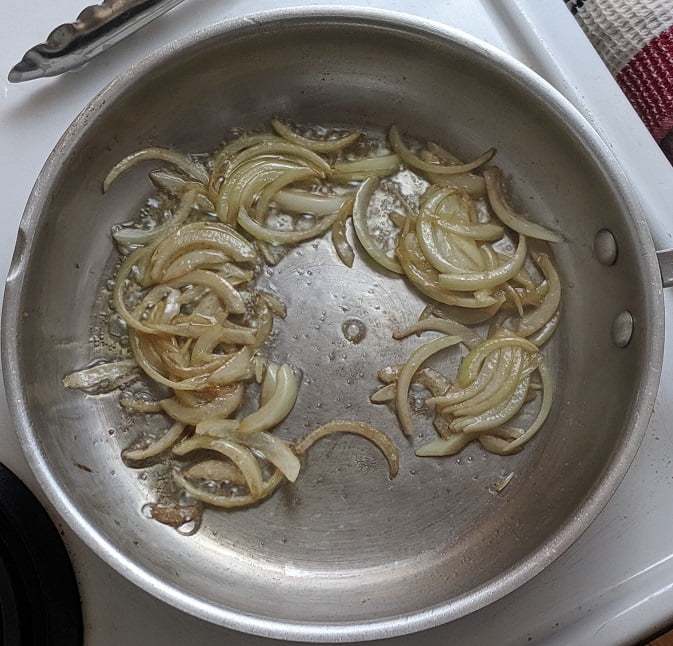
I let the pan heat up for about a minute then added in olive oil and butter. Once the butter melted the onions went in.
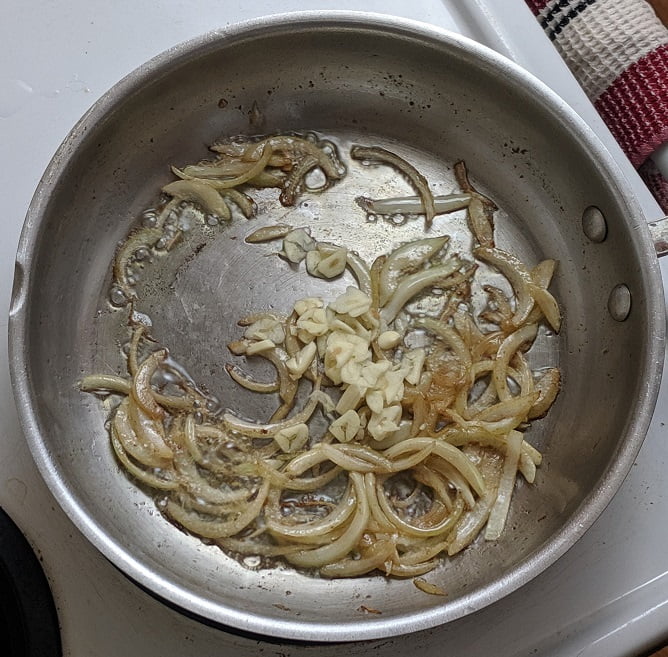
12:33 pm – Garlic
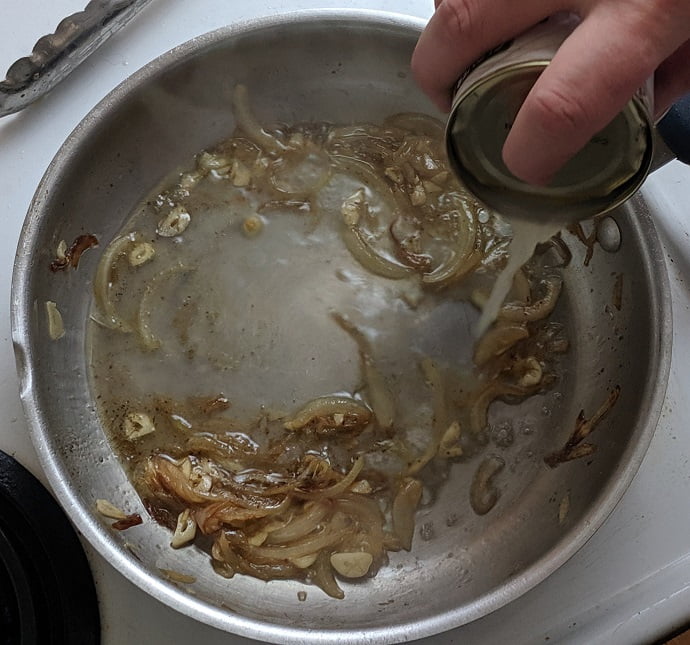
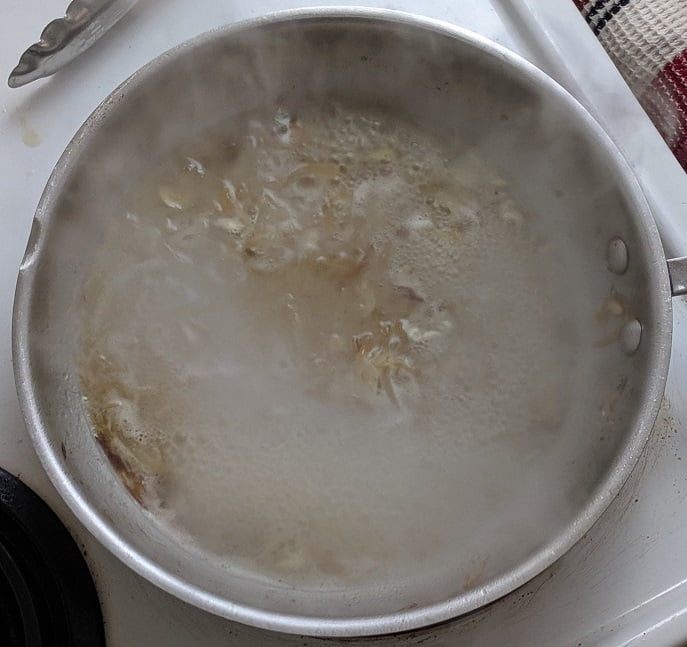
I cooked the onions for about two minutes then added the garlic. I cooked this for another two minutes then added in the white wine and reduced it until it was almost completely evaporated, then I added some pepper and the juice from the clams. I turned the heat up and cooked this for 3 or 4 minutes.
12:37 pm – Pasta
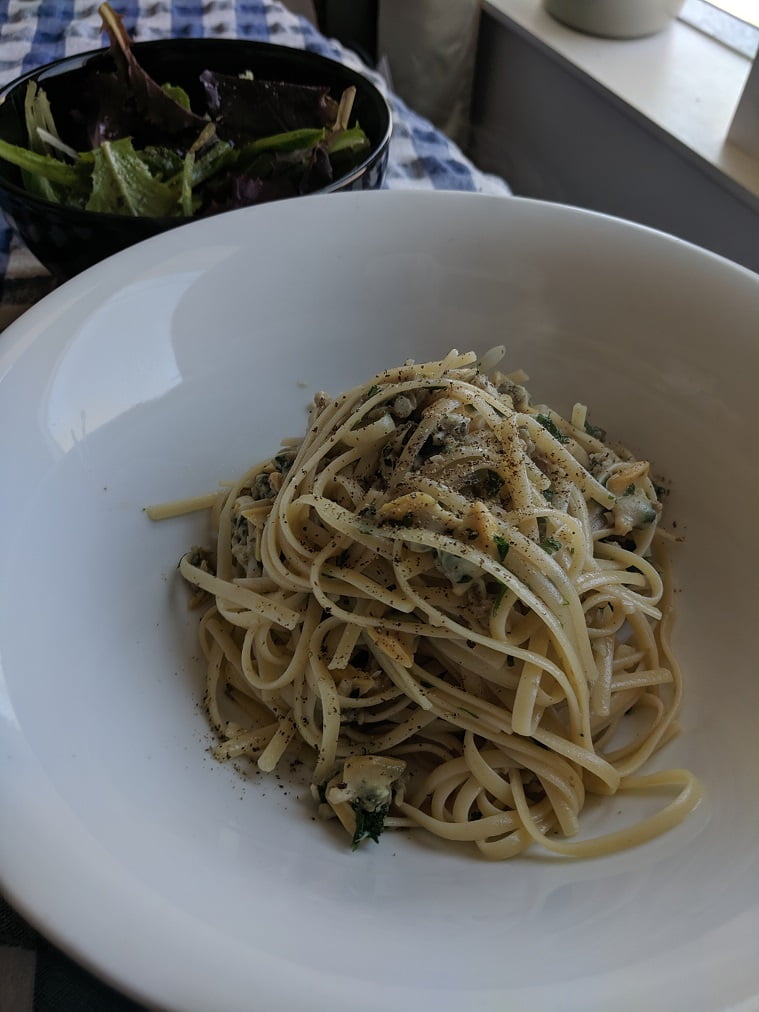
At 12:37 I drained the pasta and then added the remaining ingredients into the sauce. That was the clams, parsley, a bit of butter, a bit of salt and the drained pasta.
The extra bit of butter at the end helps to thicken and enrich the sauce. Don’t leave it out. It’s really important.
12:39 pm – Finished
At 12:39 I plated the pasta, put some washed mixed greens in a bowl and drizzled them with a bit of olive oil, white wine vinegar, and salt and pepper. Just like that dinner was done!
Conclusion
I don’t think I can say enough how much I love this pasta. It is light, quick and super delicious. I strongly advise you to give this a shot. It’s worth it.
I don’t eat enough fish. It’s not intentional, and it’s not that I don’t like fish. It just isn’t something I often think about. Also, I am wary of buying fish in the supermarket because of a few bad experiences. But, yesterday I decided to go for a drive to the fish market and I bought some fresh cod.
In all honesty, I wasn’t sure what I was going to do with it until I got home. What I decided to do was cook the cod in a bit of white wine with shallots, garlic, heirloom tomatoes, and herbs. This dish came together perfectly. The fish was tender and flaky and had loads of flavour.
I served the cod with boiled new potatoes tossed with parsley, butter, salt, and pepper. These potatoes are a simple and delicious side dish that I have really fallen in love with over the last year or so. They can be served with almost anything and they look just as good as they taste.
All right, let’s look at how I made…
Cod with White Wine and Parsleyed Potatoes In 30 Minutes or Less
2:25 pm – Potatoes
I made this meal as a late Sunday lunch. So, I started cooking much earlier than I usually do.
The first thing I had to do was get the potatoes going as they take the longest to cook. At 2:25 I started by putting eight small new potatoes in a pot with hot tap water, to which I added salt. I put the pot over high heat with a lid and brought it to a boil. Once the pot started to boil I removed the lid.
I cooked the potatoes until they were fork tender. This took about 25 minutes start to finish.
2:26 pm – Shallots
While the potatoes were cooking, I took care of everything else. First, the vegetables.
The first vegetable I cut was the shallots.
Just like when slicing an onion, I cut the top and bottom off, peeled it, and then thinly sliced it with the grain. That’s it.
What is a shallot?
A shallot is kind of like a small onion. It is a member of the onion family but is more closely related to garlic and leeks than white or red onions. Having said that, it tastes more like an onion than garlic. It just has a milder flavour. It does grow in clusters like garlic. Generally, within the shallot bulb, there will be two to three shallot cloves. For more information take a look at this Wikipedia article.
2:29 pm – Garlic
Once the shallots were cut I got down to business on the garlic. I crushed and peeled two cloves and then thinly sliced them.
2:30 pm – Tomatoes
With the shallots and garlic out of the way I went to work on the tomato.
I had thought about using cherry or grape tomatoes in this dish which would have been delicious. But, when I saw these heirloom tomatoes I knew that these were what I wanted.
I only ended up using half of one of the tomatoes, which I diced, but the rest will not go to waste.
What is an heirloom tomato?
An heirloom tomato is an old variety of tomato. These are not touched by modern-day breeding and selection methods. Where modern tomatoes are mostly bred for shelf life, travel stability, and disease resistance, heirlooms are bred for flavour and appearance.
First up was some basil. I took four or five large leaves, rolled them into the cigar shape and sliced them very thinly into what is known as a chiffonade.
It is important not to chop the basil too vigorously as they will bruise and become bitter. Slice, with a sharp knife, only as much is as necessary.
2:34 pm – Spinach
At this point I took a big hand full of spinach, picked the stems off, and cut it into large chunks.
2:36 pm – Parsley
The only other thing to do other than the actual cooking was to cut up some parsley. To do this I rolled the parsley into a tight ball and ran my knife over it once. That was all.
Right before I started chopping the parsley I turned my skillet on to medium high heat.
2:39 pm – Olive Oil in pan
With all the slicing and dicing done it was time to move over to the stove.
Because my pan was heating while I was chopping the parsley it was ready to go. I added a good amount of olive oil, the shallots, and the garlic. I let this cook until the shallots and garlic started to soften. This took about three minutes.
2:42 pm – Tomatoes
With the shallots and garlic softened I added the tomatoes into the pan along with three sprigs of thyme. I cooked the tomatoes out for about two minutes.
2:44 pm – The Cod
With the tomatoes cooked it was time for the fish to go into the pan. I put the cod in the pan presentation side down first. The goal isn’t to sear or get colour on the fish as there will be way too much moisture in the pan already. The goal is just to cook it.
2:46 pm – Wine
After two minutes of the fish being in the pan, I added about one cup of white wine. As soon as the wine started to boil I flipped the fish.
2:47 pm – Smaller Pieces
Not all of the pieces of cod were the same size. At this point, the smaller pieces were cooked so I started taking them out of the pan. Within about two minutes all the fish was cooked and out on a warmed platter.
I warmed up the platter by running it under very hot tap water and then quickly drying it off. Putting the fish on a warm platter helps it to keep its temperature while I was finishing the sauce.
2:49 pm – Fish out spinach in
With the cod out of the pan, I added the spinach, basil, and two tablespoons of butter to the sauce and turned off the heat. I mixed the butter into the sauce which helped to thicken it. Then, I tasted and adjusted the seasoning with salt and pepper.
2:51 pm – Potatoes
The sauce was almost done, the fish was done, now it was time to finish the potatoes. At this point, they had just finished cooking. I drained them, added a pinch of salt and pepper along with a tablespoon of butter and half the parsley I cut up. Potatoes finished and added to the platter with the fish.
2:53 pm – Finish
I finished the sauce with the remaining parsley and then poured it over the fish.
Done and done.
2:54 pm – Plate
I plated myself up a serving and lunch was set with one minute to spare.
Conclusion
This meal was delicious! It was a beautiful lunch but would make an equally beautiful dinner. I can easily see this dish being on the menu at a trendy bistro for $24, but as you’ve just seen you can make it at home in less than 30 minutes.
For the vast majority of my life, I have lived less than a ten-minute walk from the Atlantic Ocean. That great blue expanse, teeming with more life than I can imagine. Despite the abundance and proximity of the ocean, it was more common to see pork chops or ground beef on the dinner table than fish. It wasn’t that often that I would see my mom cooking fish. When we did eat fish, it was limited to salmon or haddock.
My family is not unique in our limited exposure to fish. Even in restaurants in Nova Scotia, it is much easier to sell salmon or haddock than any other type of fish. Halibut would be up there too. And with cod becoming more and more available that is also being sold more. But nothing sells better than salmon and haddock.
The truth is, I know more people who grew up on the ocean who don’t like fish, than ones that do. How is that possible?
Why, when the ocean is right there, do we limit ourselves to such a small selection? And how is it possible that so many people don’t even like fish? I’m sure that there is a complicated socio-economic explanation that can be traced back generations, but there is also a simple answer.
Whenever I ask someone why they don’t like fish, the answer is almost always the same. Their mother always overcooked it, and it turned them off of it forever. I’m serious. That is the answer I get time and time again.
As to why we limit ourselves mostly to salmon and haddock, I honestly don’t know. It could be familiarity. It’s all we know. It could be the price. I remember my mother buying the whole salmon for four or five dollars. It could be availability. Our grocery stores aren’t exactly stocked to the gills with varieties of fish. Who knows?
Whatever the reason, the only solution is knowledge. When you know how to better cook fish, you are more likely to eat it. When you know what you are looking for, you are more likely to buy. And, when you are confident in your ability to purchase and cook familiar fish, you are more likely to branch out and try something new.
And so today, in hopes that we all expand our horizons a bit, I present to you …
Everything I Know About Cooking Fish
Buying Fish
Buying Pieces of fish
Today, it is most common to buy fish in pieces. It could be whole fillets or individual portions, and it could be fresh or frozen. No matter how you purchase it, there are some things to keep in mind.
Where to buy fish?
First of all, I highly suggest that if you have access to a store or market that specializes in selling fish that you buy it there rather than at the supermarket. In all honesty, where I’m from, it is common to buy fish right from the fisherman from the back of their truck in a hardware store parking lot. It doesn’t get much fresher than that.
I have found that anytime I have had problems with the freshness or quality of fish, it has come from the grocery store. Having said that, there is a convenience element to buying your fish where you purchase all of your other groceries. I get it, and I still do it too.
Buying pieces of fresh fish.
When buying pieces of fish, there are three main things to look for: the smell, the colour, and the texture. Fresh fish doesn’t smell bad. It doesn’t smell like much at all. Maybe mildly like the ocean. That’s it. If it smells, don’t buy it. The colour should be bright and crisp. Salmon, trout, and arctic char should be bright pink or red. Whitefish should be white, not grey. Finally, the fish should not be slimy except for arctic char that still has the skin on it. It is perfectly normal for the char skin to be slimy.
It is perfectly acceptable for you to step up to the fish counter, point to a piece of fish and ask for a closer look. They likely won’t let you hold it, but you should be able to get close enough to tell if it smells or to see if it looks odd in any way.
Also, when buying fresh fish, it is always best to eat it that day or at the latest the next day. You don’t want it sitting around for longer than that. And always ask if it has been previously frozen or not. If it has been, it’s shelf life is limited, and you really shouldn’t freeze it again.
I hope this goes without saying, but when buying fish, stay away from the discount bin. It isn’t worth the few dollars you are going to save.
Buying pieces of frozen fish.
Modern fishing trawlers are very advanced. It is not uncommon for fish these days to be processed and flash-frozen right on board the trawler within hours of it being hauled in. So, buying frozen fish isn’t too much of a worry, with a few exceptions.
I always look for where the fish is from. I typically stay away from farmed fish from Asia like tilapia as their health standards and regulations are a lot different than ours.
I also generally don’t buy fish that was frozen in-store. You know it when you see it. It is packaged on those blue Styrofoam boards. That is typically fish that was nearing the end of its life in the fresh display and so got frozen to be sold another day.
Buying Whole Fish
When buying whole fish, the same principles apply as with pieces of fish. It shouldn’t smell, and it shouldn’t look slimy. You also want to look at the eyes of the fish. They should not be cloudy. The clearer they are, the fresher the fish.
I would also typically ask the fishmonger to scale the fish if it isn’t already done, as you don’t want to do that. You can even ask them to fillet it for you if you would like. I will say that in grocery stores, the person working behind the fish counter likely knows less about fish than you do. Go to a fishmonger.
Wild Fish vs. Farmed Fish
There is a lot of talk about farmed fish these days, and so I thought it was important to talk about it a little. Fish farming is an ancient practice that dates back at least as far as ancient Rome. It was common for the wealthy to have tilapia ponds so they could always have fresh fish.
Today, fish farming is becoming increasingly more important. Our demand for fish continues to grow, and we are fishing the oceans dry. Before too long, farmed fish will likely be more common than wild-caught. It’s an inevitability. Having said that, there have been issues with farmed fish. But the technology is improving, and it is becoming more friendly to the environment and the fish. I would suggest doing a little research on the topic.
Cooking Fish
The key to cooking fish is not to overcook it. I know, I know, that is the most obvious statement in the world, but it’s true. Fish is not chicken. It doesn’t need to have the crap cooked out of it to be safe. For the record, neither does chicken. When fish is prepared correctly, it should tender and moist. It should not leave your mouth feeling dry.
Let’s take a look at some common fish and how to cook them.
Cooking Haddock Fillets
Let’s say you want to bake some haddock. You lay it on a baking sheet and season it with a little lemon, salt and pepper, and fresh herbs. Sounds delicious. You turn the oven on to 400°F, how long does it take to cook that fish through? 45 minutes? 30 minutes? No. Probably 10-12 minutes depending on the size of the fillets. Big fillets may take 15 minutes.
Haddock, should easily flake when cooked, but not fall apart. It should be firm to the touch but not springy. It shouldn’t feel rubbery. When you do cut into it, the flakes should look shiny. Not translucent, that’s undercooked. Not dry, that’s overcooked.
Cooking Salmon Fillets
The exact same principles apply to cooking salmon, whether it is portions or whole fillets that apply to haddock. There are only really two differences, A salmon fillet, so half a salmon will take longer to cook than haddock. Likely, 18-22 minutes. A portion of salmon will take about 10-12 minutes. Less if you sear it in a pan first.
Just like with the haddock, it should flake easily but not fall apart. It should be firm but not springy. When you cut into it, it should look shiny, not dull. It shouldn’t look dry. And it shouldn’t look translucent.
Basic principles for cooking fish
These basic principles for cooking fish are pretty much universal. There are, of course, exceptions, like with tuna. You want a tuna steak to be rare in the middle. Honestly, if your salmon or haddock is slightly undercooked, it isn’t going to hurt you. You’ve probably had salmon sushi before. The key is really, really just don’t overcook it.
Cooking times are based on the thickness of the fish, just like with anything else. But what I can say is that typically, the cooking time is much less than you think it is. It’s okay to check the fish and then keep cooking it if it isn’t ready yet. So, aim to undercook it a little and then pop it back in.
Cooking Fish In A Pan
The key to cooking fish in a pan is to start with a hot pan, don’t overcrowd it, use a bit of oil and butter, and again, don’t overcook it.
Fish that you cook in a pan is generally going to be thin fillets which cook quickly. Typically, 3-5 minutes per side is more than enough. Obviously, the thicker the fish, the longer it will need to cook.
Start with the presentation side down. That’s just the more attractive side of the fish. Leave it alone for 3-4 minutes, flip it and leave it alone again. Only flip it the one time. Check it for doneness (again, firm but not springy) and either take it out of the pan or keep cooking it.
For pan-frying fish that still has the skin on, you want to get the pan nice and hot. Add some oil and butter and place the fish skin side up. Only cook it for 2 minutes or so. Flip and cook it the rest of the way. You want to cook it 60-70% of the way through the skin side down. This should give you a nice crisp skin as long as the pan stays hot.
Flavours
When cooking fish, use mild flavours. There is no point in burying the taste of the fish. A little seasoning, a few fresh herbs, and a little acid like lemon or wine will go a long way.
Conslusion
I hope that this had helped in some way guide you towards eating a bit more fish. I know that I have to. The key is just not to be afraid of it. If you have any questions about this post leave them in the comments. And, if you have any questions about cooking fish or anything else hit me up on social media Facebook, Instagram, Twitter.
Thank you for reading the post. If you liked it, remember to share it on Facebook, Pinterest, or Twitter by clicking the icon to the left of the right of the page. Did you know that Chefsnotes.com has almost 400 posts just like this one? Imagine all the great tips, tricks, and recipes you’ve missed. Don’t miss any more! Subscribe to Chef’s Notes by putting your email address in the subscription box at the top right of the sidebar. You will be notified of every new post. And if you would like to know more about me, click the link below to read my story.
This week on 30 minutes or less we make one of my top five favourite salmon dishes, miso salmon.
What is miso?
The key ingredient here is the miso paste which is made of fermented soy beans. Because of the nature of how it’s made, miso on it’s own is really salty. Tamari, also known as gluten-free soy sauce, is the liquid extruded from miso during the fermentation process.
Miso is a fairly common ingredient these days and most large grocery stores carry it. If you can’t find it, check out an Asian grocery store as they will absolutely have it.
Because of the strong flavour of miso, we combine it with honey and mayonnaise to make the glaze for the salmon. The miso on it’s own would just be way to over powering. This glaze goes very well on other seafood as well from haddock, to scallops, to oysters.
As we aren’t using much of the miso paste you may be reluctant to buy it. I understand that. Luckily, miso paste lasts almost indefinitely in the fridge and can be used for a number of different things including soups, and other sauces even for beef. The point is, it’s likely a new ingredient to you and I understand any reluctance. However, I suggest spending the $3 or $4 or whatever it is if only so you can try this dish.
The Dish
This dish we are making today consists of the salmon baked with the miso glaze, brown rice and quinoa with spinach, and steamed carrots. This is a really delicious and fairly straight-forward meal. And honestly, for the the first time in 30 minute or less history almost half the 30 minutes was spent waiting for the food to cook.
Let’s get into it.
6:35 pm
I started cooking fairly late this evening so I was really happy to be cooking a meal that was going to take less than half an hour. Here’s what I did.
At 6:35 pm I turned the oven on to 400°F, rinsed my brown rice, covered it by 2 inches with hot water, salted the water, and put it on a burner on high.
I am cooking the rice with the pasta method which I’m not sure if we have covered or not. Essentially, the pasta method is exactly what it sounds like. Rather than worrying about exact measurements, we just cover the rice with water and boil it until it’s cooked. I find this works much better for brown rice than it does for white rice which has a more fine line between cooked and over cooked. We know the rice is cooked by tasting it for texture.
6:36 pm
At 6:36 I started making the miso glaze for the salmon.
For the glaze I used about 2 tbsp of miso paste along with about 2 tbsp of mayo, and 2 tbsp of honey. I also added a few drops of fish sauce and a squeeze of lime juice. This all got mixed together and set aside.
6:39 pm
At 6:39 I was done making the glaze and jumped into peeling carrots. Once the carrots were peeled I sliced them thinly on a bias (angle). Once they were cut, I put them in a small pot, covered them with hot salted water, and set them aside.
This took about 3 minutes.
6:42 pm
Once the carrots were done and set aside, I took the salmon out of it’s package, and put in on a parchment lined baking sheet. I should note that this salmon was skin on, and was a half of one whole salmon fillet. So, about one quarter of a salmon. Not a small piece.
I glazed the salmon with a generous amount of the miso paste and put it in the top third of my oven and set a 12 minute timer.
The oven wasn’t fully up to temperature yet, but that’s okay. It actually worked out really well.
6:45 pm
The salmon is in the oven. The rice is boiling so I add 1/4 c of quinoa to it. I should say that I used about 1 cup of brown rice as well. I also turned the carrots on high at this point.
6:47 pm – 6:55 pm
At this point, I actually had a bunch of time to wait so I tidied up, I drank some water. I just kind of hung out for a few minutes.
I should say the carrots started to boil at 6:51 pm.
6:55 pm
At 6:55 the carrots were cooked so I drained the water off of them, put them back in the pot and seasoned them with salt, pepper, and a bit of olive oil.
6:57 pm
At 6:57 the timer went off for my salmon. I took it out of the oven and checked it for doneness by gently poking it to check firmness. It was firm, and done.
Because of the honey in the miso paste there were dark edges around the salmon. This is perfectly fine and had no effect of the taste of the salmon.
7:00 pm
At 7:00 the rice and quinoa was done so I drained it in a mesh sieve. While the rice and the quinoa were draining I put the empty pot back on the stove and let any residual water dry out over the burner. I then added 1 tsp butter and 1 tsp olive oil along with 2 cups of raw baby spinach. I cooked the spinach for about 45 seconds, stirring, and then added the rice and quinoa back in along with some salt and pepper.
7:03 pm
At 7:03 I was done plating, pictures were taken, and we were eating.
Conclusion
This meal was really quick to come together and was really tasty. I highly recommend giving this one a go. Feel free to change up the vegetables or even the starches but keep the miso salmon.
It was nice it make something in less than 30 minutes that actually gave me time to just kind of chill out. That was a nice change of pace.
I hope that you enjoyed this post and if you have any questions about the recipe feel free to leave it in the comments or hit me up on social media.
With their sweet, rich flavour and soft, pillow like texture, scallops are amazing. That is, if you don’t over cook them. If you do, they end up as tasteless little pieces of rubber that are about as enjoyable to eat as a bike tire.
Now, because I like you guys, I’m going share some tips on how to cook these little sea marshmallows to make them exceptionally delicious. These are tips that I have picked up cooking thousands, literally thousands, of these little s.o.b.’s.
Without further ado, here are my…
5 Tips To Cooking Perfect Scallops
Okay, I lied…we need to talk about buying scallops before we talk about cooking them. So let’s do that first.
Buying Scallops
There are two main types of scallops; bay scallops, and sea scallops. Bay scallops are the tiny little ones that you often find in chowder. Sea scallops are the big ones that we are going to focus on today.
Sea scallops are bought and sold as number ratings which would be represented as either two numbers with a forward slash between them like 20/30. Or, they will be sold as U10 or U15 or something like that.
These scallop numbers probably seem a little confusing right now. But don’t worry, once you know what they mean it makes buying the scallops you want really easy.
20/30
All 20/30 means, (and it doesn’t have to be those numbers it could be 10/20 or 30/40, etc.) is that there are 20 to 30 scallops in a pound. So, 20/30 scallops are fairly small. They aren’t as small as bay scallops, but they aren’t very big. So, 30/40 means there are 30 to 40 scallops in a pound. Get it?
U10
“U” numbers when buying scallops are similar to the slash (/) numbers. The only real difference is that instead of giving of range of 20 to 30 or 30 to 40, the “U” number tell you the maximum amount of scallops that are going to be in a pound.
U10 scallops, means that there are 10 or under scallops in a pound. The “U” obviously standing for under. So, U10 scallops are bigger than U15 scallops or 20/30 scallops. I guess the easiest way to look at it is, the bigger the numbers the smaller the scallops.
This is number system is also how shrimp are sold.
Alright, now that we have gone on this side quest to talk about how to buy scallops, let’s get to cooking them.
Scallop Tip 1
This may see pretty obvious to a lot of you, but to some it might be new information.
Scallops have joiner muscles that attach the scallop to the shell. For whatever reason, they are always left on the scallops. Take them off before cooking. They are very chewy and not enjoyable to eat at all.
You can see in the picture below how the person who cooked these scallops left it on. Tisk Tisk.
Scallop Tip 2
The key to delicious scallops is getting that nice sear on the surface. That sear is a type of caramelization which enhances the natural sweetness of the scallop.
As you may remember from the steak post dry surfaces sear better than wet surfaces. So, dry the surface of the scallops well with a paper towel before searing.
I should say to that scallops are like little sponges. If they are left in water they will absorb it and hold it until they are cooked. If you buy frozen scallops, defrost them on a rack or in a colander so the excess liquid drains off.
Scallop Tip 3
As we now know, the key to a delicious scallop is the sear, and dry surfaces are important to getting that nice sear. The key however, to that beautiful sear is a very hot pan.
When cooking scallops a very hot pan is necessary. You want the pan to be pretty much smoking before the scallops go in.
If your pan isn’t hot enough when the scallops go in a few things are going to happen.
First of all any liquid coming out of the scallops isn’t going to evaporate. It is going to pool in the pan, cool it down further and then you are going to end up with boiled scallops, which nobody wants.
The second thing that is going to happen if your pan isn’t hot enough is that you aren’t going to get that oh-so important sear. Which is an important contrasting flavour to the scallops.
So, make sure your pan is very, very hot before you put your scallops in it.
Also, make sure you don’t crowed the pan. Too many scallops will cool the pan down as well and then you will have the same problem as you would if you didn’t heat your pan up enough. Only cover a maximum of 75% of the surface of the pan with scallops.
Scallop Tip 4
Okay, you have your U10 scallops. The surface of them is dry, you seasoned them with a little salt and pepper, and your pan is nice and hot. You add a touch of oil to the pan…just a touch, and then you dump the scallops in, stir them around and delicious! WRONG!!
It’s really important that you gently place the scallops in the pan, flat-side down. This is how you get that nice sear.
Once the scallops are in the pan, don’t touch them! This is really important. If your fiddling with them and tossing them around they aren’t going to be able to sear.
So, you put your scallops in the hot pan one at a time. You haven’t covered more than 75% of the surface of the pan, so it is still hot. Now what? Now you wait.
Watch the scallops. What you will notice is that around the base of the scallops will start to go brown. You want this to become a deep, rich brown colour. Once that happens, use a set of tongs or a spoon and flip the scallops one at a time starting with the first scallop that went in the pan.
This initial sear on the first side should take 2-3 minutes, no more. Once the scallops are flipped over you are only going to cook them for another 2-3 minutes.
You know the scallops are done when they have a nice deep brown sear on both ends and they are firm but not rubbery when gently squeezed. Again, this should only take 4-6 minutes depending on the size of the scallops.
Once they are cooked, remove them from the pan in the order they went in, and pat them dry on a paper towel.
Perfectly cooked scallops should be seared on both sides and warm in the middle but ever so slightly translucent in the very center. That is a perfect scallop.
Scallop Tip 5
Scallops are sweet and rich. Because of this, pairing them with something that will cut through that is always a good idea. That is one of the reasons bacon and scallops go so well together. The saltiness of the bacon, balances the sweetness of the scallops.
Two classic combinations that go really well with scallops are pea and prosciutto, and corn and bacon.
Also, pairing scallops with anything sweet and acidic works very well. Things like balsamic reduction or aged balsamic vinegar. Or equal parts vinegar and sugar cooked together until thick and drizzled over the scallops is delicious too.
Conclusion
Now that you know how to cook a scallop like a pro, experiment with different pairings. Come up with your own recipes or stick with the classics like garlic butter or bacon wrapped.
Either way, just enjoy them. They are delicious little ocean treats that we are fortunate enough to have in abundance. And now…I’m craving them.
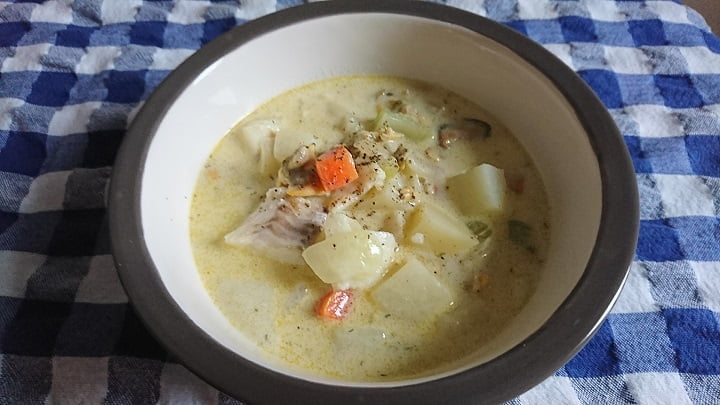
When I was a kid, most years at Christmas we would go to my Dad’s work party at the Bedford Institue Of Oceanography. There’s really only two things I remember about those parties. I remember the touch tanks, and how weird sea cucumbers and starfish felt. And I remember the chowder. For whatever reason, every year, there was seafood chowder. It was loaded with seafood, potatoes, and onions, and it was so smooth and so creamy. I loved it. I honestly, even at a young age, looked forward to it all year.
I’m telling you this because this afternoon I’m competing in a chowder cook-off. It’s not high stakes by any means. It’s really just a fun thing to do and a way to get my name out there some more. However, last year at this same competition I won peoples choice. And so, I want to win again. If I don’t it’s not the end of the world, but I would really like too. Anyway, that’s all beside the point. What I really want to talk about today is all the things I have learned about making a really good seafood chowder over the years. From that little boy dreaming all year of a small bowl of chowder at a work Christmas party, to the man hoping to win a chowder cook-off for the second year in a row. Here is everything I know about making a kick-ass seafood chowder.
The Foundation of a good Seafood Chowder
Like anything in life, a good chowder starts with a good foundation. You can just throw everything in a pot and hope for the best, but there’s a better way to do things. Why not make the best chowder you can.
Start with onions and celery (carrots are optional). Sweat those in a bit of butter, oil, or bacon fat over a medium-low heat. You are trying to draw moisture out of the vegetables which will start to build the first level of your foundation. After ten or fifteen minutes or so of sweating the vegetables turn the heat up to medium add a bit of wine, brandy, or sherry. Cook this until the liquid has almost completely evaporated.
When I make seafood chowder I usually cook the mussels separately. Then I add the liquid to the chowder. If you were to do this, add the liquid after the booze has reduced. Now, reduce the mussel liquid until it has almost completely evaporated as well. I also usually buy a bottle of clam juice which I add in the same way as the mussel liquid and then reduce it.
By reducing the liquid you are concentrating the flavour. The more times you do this, the more layers of concentrated flavour you have.
To roux or not to roux?
A roux is equal parts flour and butter by weight, combined and added to liquids to act as a thickener. There are lots of great chowders that contain a roux, and there are a lot of great chowders that don’t have a roux in them. It comes down to the consistency of the chowder you want.
I find using a roux allows for a lighter, creamier chowder. What I mean is that if I wasn’t going to use a roux to thicken my chowder I would use 35% cream as my liquid. When using a roux I can get away with using whole milk. So, it’s a bit lighter than a chowder made completely of heavy cream.
If you are going to use a roux, add it after all of your initial liquids have been reduced.
Dairy
For the purpose of this post, we are talking solely about dairy based chowders. There are some absolutely delicious tomato-based chowders out there but we’re not going there today.
You really only have three choices when it comes to dairy for your chowder. You can use whole milk (homo milk), you can use heavy cream, or you can use a combination of the two. Any milk with a fat content lower than 3.25% is likely to split when heat, salt, acid, or even the seafood is added. I mean you can take the risk, but I prefer not to ruin my chowder with split milk.
Generally, I thicken my chowder with a roux and then use a combination of whole milk and cream. Usually a three to one ratio. I find that this gives me a nice richness, a creamy texture, and I don’t want to die afterwards.
Vegetables
Other than onions, celery, and carrots, I am of the opinion that potato is the only other vegetable that has any place in seafood chowder. That’s all I have to say about that.
Seafood
Arguably, this is the most important part of any chowder. What seafood should you use?
Really, this comes down to personal preference. For example, I don’t use shrimp, lobster, or crab in my chowder because I’m allergic to it, but I’m not going to begrudge you if you want to use it. I prefer not to add salmon to my chowder because I find the flavour and texture unappealing. I generally stay with white fish like haddock, cod, or halibut. To this, I generally, add mussels, scallops and clams. That’s really my go-to chowder mix.
When to add the seafood?
Oddly enough, the seafood is the last thing that should be added to seafood chowder. Seafood is delicate and overcooks quickly which gives it a shitty texture and flavour. Generally, I actually cook my seafood separately. I’ll cook the haddock either baked in the oven or poached in milk. I sear the scallops. Steam the mussels and clams. Really, what I’m trying to do is get the best out of my seafood. By just throwing it all in the pot and essentially boiling it, I’d be destroying those subtle flavours that make seafood so great.
Other flavourings
There are some surprising flavours that go really well with seafood. For example, I like adding a bit of tarragon to my chowder. Not too much. Just enough so you get a hint of tarragon flavour. I actually used tarragon in my winning chowder last year.
Obviously, parsley is always a good addition to seafood chowder, but thyme and dill can be as well. I also really like adding a mild smokey element. It could be bacon or smoked seafood. That little bit of smoke does something really magical to the chowder.
Really, just try thinking outside the box a bit. If you’re unsure whether or not an ingredient is going to work try it in a little sample portion of the chowder. Spoon a little out into a dish, add some of the mystery ingredient and taste. If it works, add it to the rest of the batch. If it doesn’t, don’t use it.
Conclusion
I can’t stress enough that you are the person eating your chowder. Do what you like. This post is really about what I like and what I’ve learned over the years. You may know something I don’t, or you may love your chowder the way it is. That’s perfectly okay. Taste is a completely subjective experience. Do what tastes good to you.
We use cookies on our website to give you the most relevant experience by remembering your preferences and repeat visits. By clicking “Accept”, you consent to the use of ALL the cookies.
This website uses cookies to improve your experience while you navigate through the website. Out of these, the cookies that are categorized as necessary are stored on your browser as they are essential for the working of basic functionalities of the website. We also use third-party cookies that help us analyze and understand how you use this website. These cookies will be stored in your browser only with your consent. You also have the option to opt-out of these cookies. But opting out of some of these cookies may affect your browsing experience.
Necessary cookies are absolutely essential for the website to function properly. This category only includes cookies that ensures basic functionalities and security features of the website. These cookies do not store any personal information.
Any cookies that may not be particularly necessary for the website to function and is used specifically to collect user personal data via analytics, ads, other embedded contents are termed as non-necessary cookies. It is mandatory to procure user consent prior to running these cookies on your website.