Salt cod fish cakes are a versatile and delicious dish that can be enjoyed for both light lunches and filling brunches. This recipe is my personal best, and I am excited to share it with you. The flaky salt cod is paired with a perfect blend of lemon, thyme, parsley, and pepper, which provides a complementing flavour without overpowering the taste of the fish. Whether you’re an experienced home cook or a beginner, this recipe is easy to follow and guarantees great results. In this blog post, you’ll find detailed instructions and helpful tips to guide you through making the best salt cod fish cakes ever. So, let’s jump right in and get started on this delicious and satisfying dish.
What is Salt Cod?
Salt cod, also known as bacalao or bacalhau, is a traditional form of preserved fish used for centuries. The preservation process involves covering the fish in salt, which draws out the moisture and dries it, allowing it to be stored indefinitely. This method of preservation was commonly used during the days of long sea voyages before the advent of refrigeration or canning. Salt cod has a rich history and is a staple ingredient in many traditional cuisines, mainly Portuguese, Spanish, and Eastern Canadian cuisine.
Salt cod is available in various forms, including bits, fillets, or whole fish. For today’s recipe, we suggest using bits, which are readily available in most grocery stores. Additionally, salt cod is a versatile ingredient that can be used in many dishes, such as fish cakes, stews, soups, and more. It’s a great source of protein and packed with essential vitamins and minerals, which is why it has been a staple in the Mediterranean diet for centuries.
Preparing The Salt Cod
Soak The Cod
Salt cod, by definition, is salty, which is a result of the preservation process. However, to make it edible and to bring out its full flavour, it is important to remove some of the salt and rehydrate the fish. This process is known as soaking, and it is a crucial step when preparing salt cod.
To properly soak salt cod, start by rinsing the fish under cold running water to remove any excess salt on the exterior. Then, place the fish in a container and cover it with cold water. It is important to use cold water as it helps to keep the fish firm and preserve its texture. Next, place the container in the refrigerator and let it soak overnight. For best results, it is recommended to change the water at least once while the fish is soaking. This will help to remove any remaining salt and ensure that the fish is properly rehydrated.
Soaking salt cod not only helps to remove the excess salt but also helps to enhance the fish’s natural flavours and makes it more tender and moist. It’s also a critical step to follow when preparing any dish that calls for salt cod, whether it’s fish cakes, stews, soups, or any other traditional dishes.
Cooking Salt Cod
After the fish has been soaked, it’s time to cook it. Boiling the cod is an effective method to remove any remaining salt and also to infuse it with extra flavour. To begin, drain the soaking water from the cod and rinse it once again.
Place the cod in a pot, cover it with cold water and add a couple of bay leaves and a big sprig of thyme. The bay leaves and thyme impart a subtle and delicious flavour to the cod and help remove any remaining salt. Bring the contents of the pot to a boil over high heat, then turn the heat to low and simmer for about 5 minutes.
Once the cod is cooked, strain it and remove the thyme and bay leaves. The fish is now ready to be used for the fish cakes.
Making Salt Cod Fish Cakes
Onions
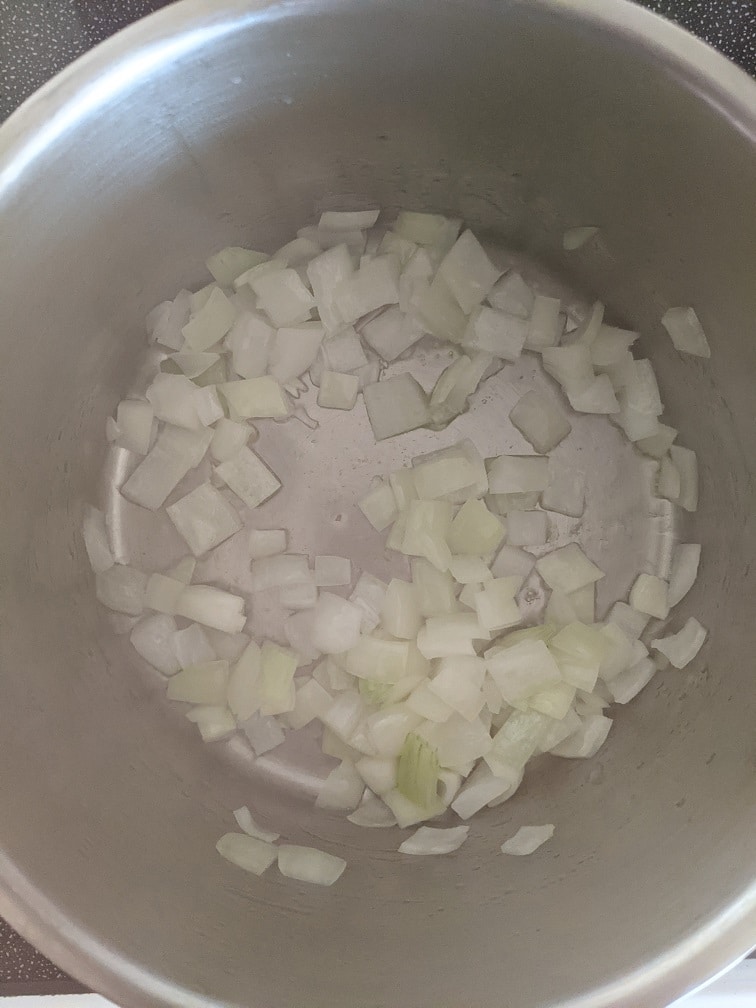
While the cod is cooking, prepare the onion. You’ll need about a cup of diced onion in total. Start by finely dicing one medium-sized onion. Also, chop up some thyme, about two teaspoons in total. This will add a subtle and delicious flavour to the fish cakes.
Put a small pot or pan on the stove on medium heat. Add a tablespoon of butter and a tablespoon of olive oil. Once the butter starts to foam, add the onions and thyme. Cook the onions for about three to four minutes or until they soften, turn translucent and start to slightly brown. Slightly browning the onions brings out the natural sweetness and enhances their flavour.
As you cook the onions, occasionally stir them to prevent burning. Slightly browned onions are a key ingredient in many dishes, and adding them to fish cakes will give your dish a unique and delicious flavour.
Assembling Salt Cod Fish Cakes
To make the fish cakes, start by putting the cooked cod and cooked onions in a medium mixing bowl. Add two cups of leftover mashed potatoes, two tablespoons of chopped parsley, a quarter teaspoon of black pepper, and the zest of one lemon. Parsley adds a fresh and herby note, the lemon zest provides a bright and tangy flavour, and the black pepper gives a nice kick of heat. These ingredients help to balance out the flavours of the fish and onions and provide a well-rounded taste.
With your hands or a wooden spoon, mix everything until it just comes together. The goal is to just combine the ingredients. It’s important not to over-mix the ingredients as it will cause the fish cakes to lose their delicate, flaky texture. Over-mixing causes the fish to release its moisture and bind together with the other ingredients, creating a gummy paste instead of a light and flaky fish cake. Additionally, over-mixing may lead to the fish cakes falling apart when they are cooked, so it’s important to handle the ingredients gently and mix them until they’re just combined.
You may also consider adding some additional ingredients like garlic, diced red pepper, or chopped olives to give the fish cakes more depth of flavour and make them more unique. Also, you can experiment with other herbs like dill or cilantro to give the fish cakes a different twist.
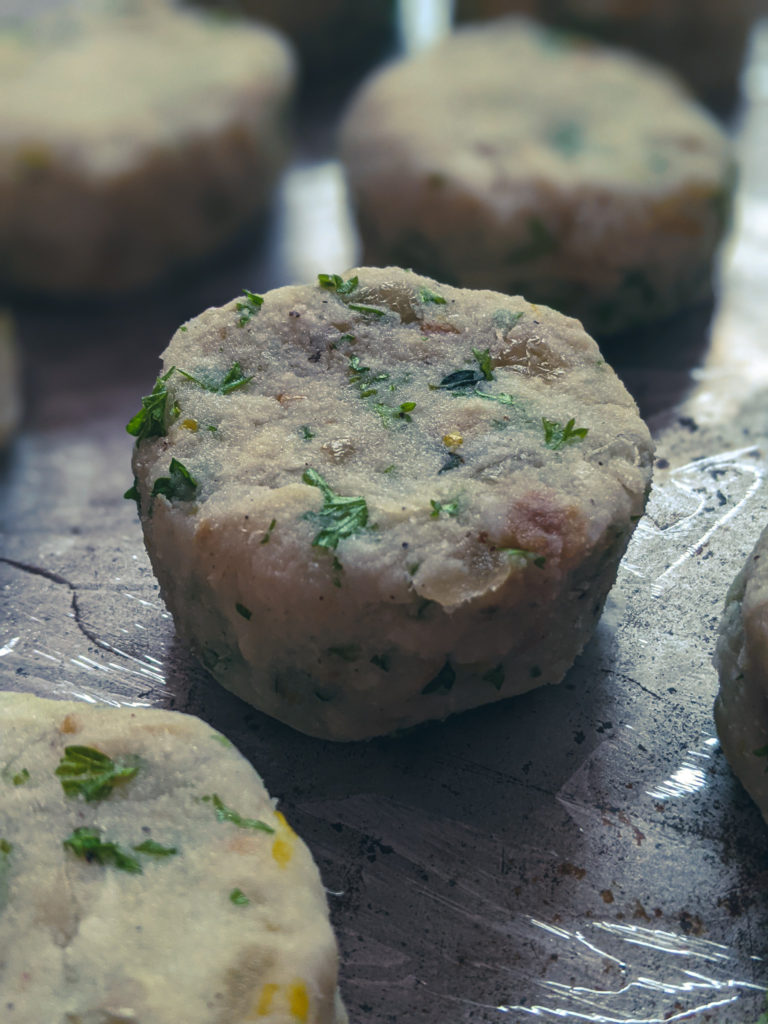
Forming The Fish Cakes
When forming the fish cakes, you can make them in different sizes depending on your preference. I prefer smaller fish cakes, so I measured mine with a quarter cup measure. However, if you prefer larger ones, you can use a half-cup measure or, for even bigger fish cakes, a full-cup measure. Ice cream scoops work well for this.
Simply measure out the mixture and form it into patties. You can cook the fish cakes right away or store them for later. They will last in the refrigerator for up to three days, and they can also be frozen for up to three months. Before cooking, chill the fish cakes in the fridge for 30 minutes to give them time to firm, making cooking easier. This is optional but highly recommended.
Cooking and Serving The Salt Cod Fish Cakes
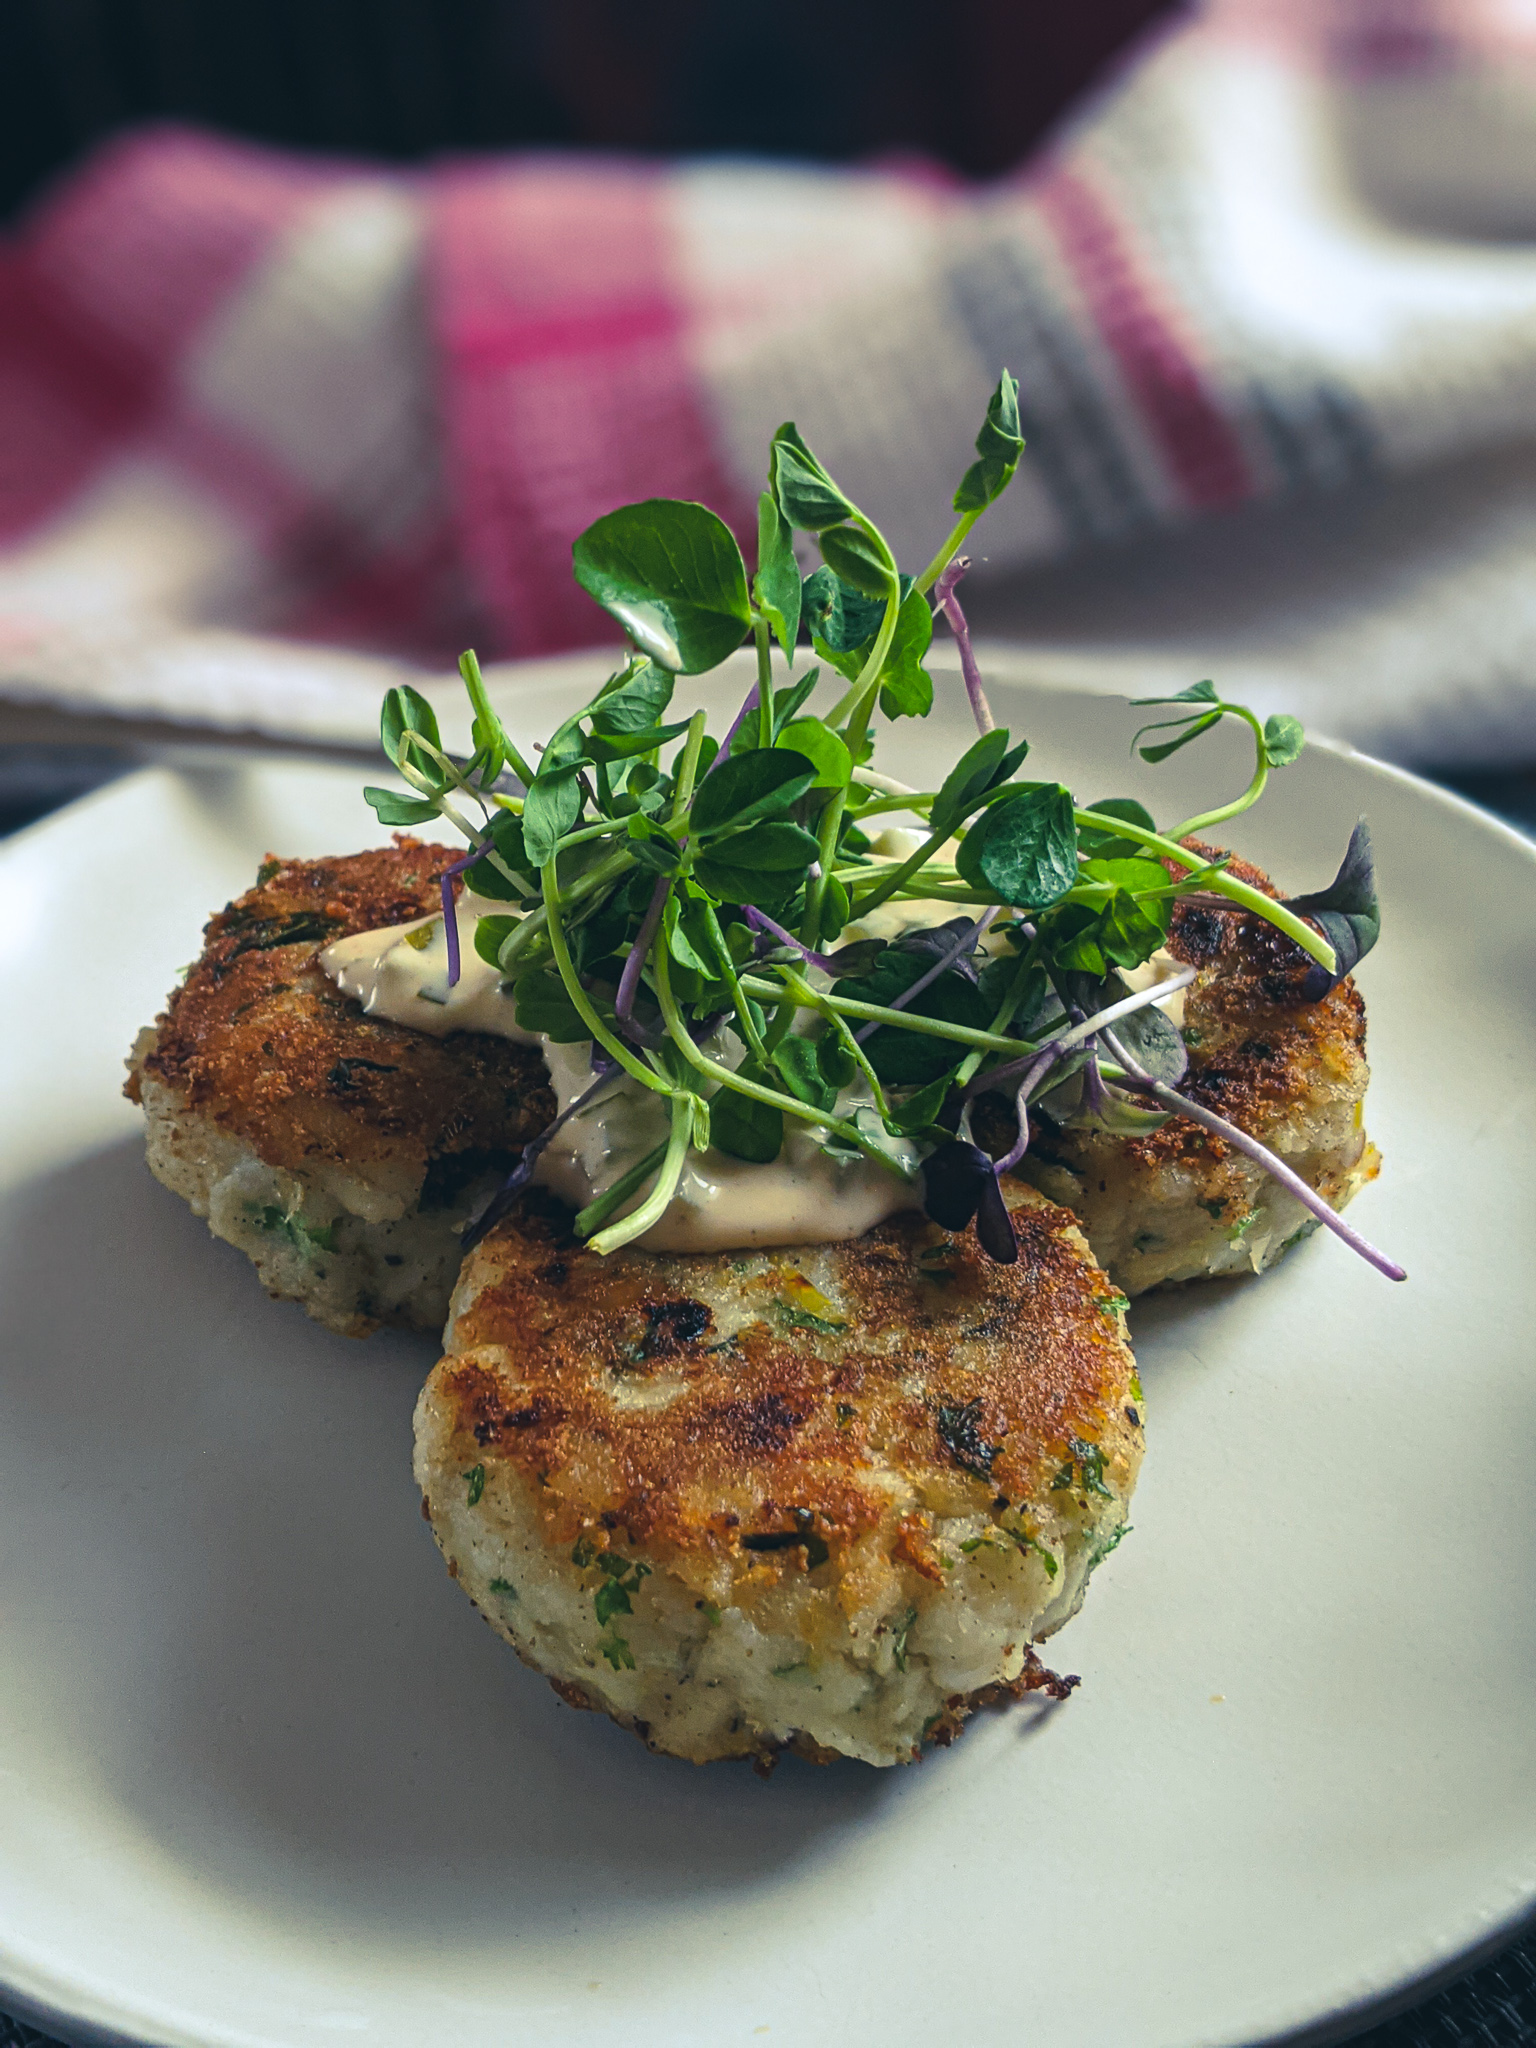
To cook the fish cakes, heat a medium skillet over medium heat. Add a tablespoon of butter and a tablespoon of olive oil. Once the butter starts to foam, add the desired number of salt cod fish cakes to the pan. Cook the fish cakes for about three to four minutes per side or until golden brown and warm in the middle. Serve the fish cakes with a bit of salad and some tartar sauce or poached eggs.
The Wrap-Up
Cooking the fish cakes is a simple process that results in a delicious and crispy golden brown exterior and a warm and flaky interior. To cook the fish cakes, heat a medium skillet over medium heat. Add a tablespoon of butter and a tablespoon of olive oil. The combination of butter and oil creates a flavorful and rich base for the fish cakes to cook in and helps prevent sticking.
Once the butter starts to foam, add the desired number of salt cod fish cakes to the pan. Cook the fish cakes for about three to four minutes per side or until golden brown and warm in the middle. The fish cakes should be cooked through, and the internal temperature should reach at least 74°C (165°F) to ensure they are safe to eat.
When the fish cakes are ready, remove them from the pan and let them rest for a couple of minutes before serving. This will allow them to firm up and retain their shape.
Serve the fish cakes with a bit of salad and some tartar sauce or poached eggs. The salad provides a fresh and crunchy contrast to the fish cakes, while the tartar sauce or poached eggs adds a rich and creamy element to the dish. You can also serve the fish cakes with a side of roasted vegetables, mashed potatoes or even with a side of pasta or rice.
Subscribe now and never miss a delicious recipe! Put your email in the box below.
Best Ever Salt Cod Fish Cakes
Indulge in the ultimate fishcake experience with our "Best ever salt cod fishcakes" recipe. Made with succulent salt cod and infused with lemon, thyme, parsley and pepper, these fishcakes are a deliciously satisfying twist on a traditional favorite. Soak, cook, mix, shape and fry to perfection, these fishcakes are perfect for a light lunch or a filling brunch. Get the recipe now and taste the difference!
Rinse the excess salt off the cod under cold running water.
Put the fish in a container, cover it with cold water, and put it in the fridge for at least 12 hours or up to 24. For best results, change the water at least once.
Drain the water off the fish and rinse it once again.
Put the fish in a pot, cover it with cold water, and add 2 bay leaves and a big sprig of thyme.
Bring the pot to a boil on high heat. Once it comes to a boil, turn the heat to low and simmer for 5 minutes.
Drain the fish, and remove the bay leaves and thyme.
Onions
Put the butter and olive oil in a small pot or pan on medium heat.
Once the butter melts and starts to foam, add the onions and thyme.
Cook the onions, stirring, for 3 to 5 minutes or until the onions soften, turn translucent and just start to brown.
Fish Cakes
In a large mixing bowl, combine the cooked cod, cooked onions, mashed potatoes, lemon zest, parsley, and pepper. Mix just enough to bring everything together. You don't want to break the fish up too much.
Measure the mixture into 1/4 cup portions for small cakes or 1/2 cup portions for larger ones. Form into fish cakes.
Store the fishcakes in the fridge for up to three days or freeze them for up to three months.
To cook the fishcakes, heat a medium frying pan over medium heat. Add 1 tbsp of butter and 1 tbsp of olive oil. Once the butter starts to foam, add 3 to 4 fishcakes to the pan. Cook for about 3 minutes per side or until golden brown and warm in the middle. Serve.
Eating gluten-free can be very frustrating. I crave lots of foods but rarely do the gluten-free versions live up to their gluten-containing cousins. I find this to be especially true in restaurants. All too often, restaurants treat gluten-free food like health food. There is a place for that, no doubt. But, just because I have to eat gluten-free doesn’t mean I don’t also want junk food. Luckily, I’m a chef, and I can make whatever I want. What’s more, is that I can then share that with you. And boy, am I excited to share this gluten-free fish and chips recipe with you!
What’s great about this gluten-free fish and chips recipe is that whether you eat gluten or not, I am willing to bet that this will be one of the best fish and chips you’ve ever had. I know. That’s a bold statement. But I stand behind it. If you do eat gluten, substitute the gluten-free flour for regular all-purpose flour. Are you ready for this? I know I am. Let’s get to it!
You can always find the recipes directly below but keep reading for more information and a more detailed walkthrough.
Gluten-Free Fish and Chips Recipe
Gluten-Free Fish and Chips
Whether you eat gluten-free or not, this will probably be one of the best fish and chips you've ever eaten. I know that's a bold statement, but I stand behind it. The Fries are extra crispy but fluffy inside. The fish is tender with a light and crispy, flavourful batter. Oh, and did I mention that it's gluten-free?
Keyword: Fish and Chips, Fish and Seafood, Fries, Gluten Free, Potatoes
Servings: 3servings
Author: Chef Ben Kelly
Ingredients
Fish
2 largecod filletscut into two to three pieces each
1 1/2cupsgluten-free all-purpose baking flour, separatedI used Bob's Redmill
1tspbaking powder
1/2tspdried dill
zest of 1 lemon
1/2tspkosher salt
1/4tspblack pepper
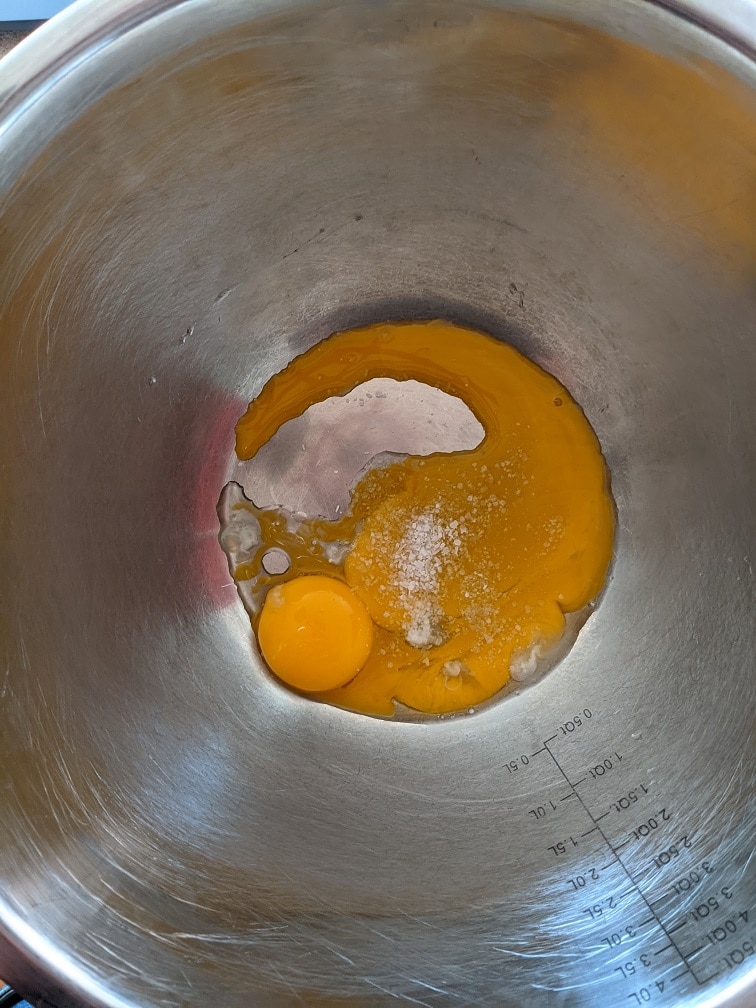
1egg
1cup soda water
oil for frying
Fries (chips)
2largerusset potatoes
oil for frying
salt
Instructions
Fish
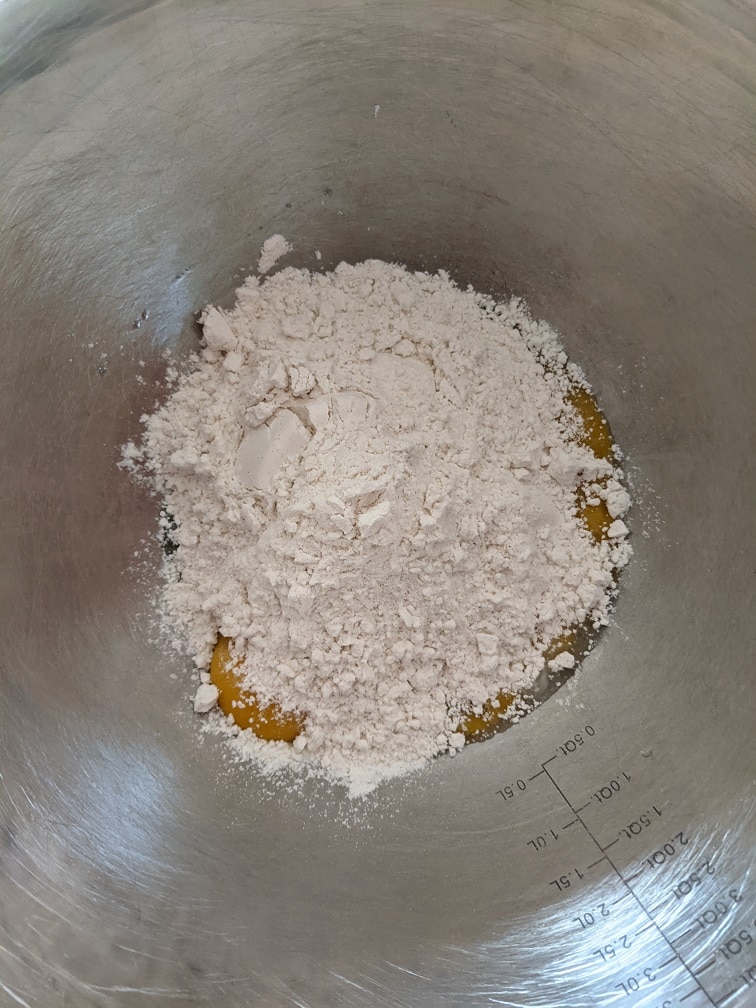
In a large mixing bowl, combine 1 cup of flour, the baking powder, dill, salt, pepper and lemon zest. Mix well.
Add the egg and soda water. Mix until fully incorporated.
Put the batter in the fridge for 20 minutes before using it.
Dredge the cut fish in the remaining flour, shake off any excess.
Dip the fish in the batter, and fry two to three pieces at a time in a deep fryer or high-sided pot at 365°f. Fry for about 7 minutes, flipping halfway through.
Serve right away.
Fries (chips)
Wash the potatoes with a brush under cold running water.
Cut the potatoes into rectangles about 2 cm (3/4 of an inch) wide and the length of the potato.
Put the cut potatoes in a pot, and rinse with cold water until the water runs clear. Fill the pot with water, add a big pinch of salt, and bring to a boil on high heat.
Cook the potatoes until they just start to break when poked with a fork.
Drain the potatoes and spread them out onto a cooling rack. Let the potatoes sit for about 10 minutes.
Fry the potatoes in batches on 325°f until they just start to turn golden brown. This will take between 5 to 7 minutes. Shake the excess oil off the fries and return them to the cooling rack. Allow the potatoes to cool to room temperature before frying again.
Turn the heat up on the oil until it reaches 165°f.
Fry the fries again for about 5 minutes or until a deep golden brown. Drain, and toss in a medium mixing bowl with a big pinch of kosher salt. Serve immediately.
So, what makes good fish and chips? Well, let’s start with the fish. The fish should be tender and flaky and not overcooked. The batter should be cooked all the way through, crisp, golden brown, and flavourful. It shouldn’t be greasy or soggy at all. The fries should crunch when you bite into them, but the inside should be soft and fluffy. Sound good? Well, that’s exactly what we are going to make.
The Fries (Chips)
Let’s start with the fries. Now, these are no ordinary fries. These are thick hand-cut fries that are the crispiest on the outside, fluffiest on the inside fries you will probably ever have. There is a secret technique that I first learned from Heston Blumenthal that we would look at. Let’s take a look.
Hand Cutting Fries
Often when you see “Hand-cut fries” on a menu, they mean that the fries are cut in-house using a fry cutter. Here, when I say “hand-cut,” I mean hand-cut. I really wanted to make these fries extra crispy and do that properly the fries need some body. That’s why I went with thick-cut fries. The fact that they are much easier to cut never even crossed my mind.
First, wash the potatoes with a brush or cloth under cold running water. Pat them dry and cut the potato, lengthwise, into thumb-width sticks. Put the fries in a pot and rinse them with few changes of cold water. Do this until the water runs clear.
Boiling The Fries
Put the fries on the stove on high heat and bring them to a boil. Cook the potatoes until they are soft enough to break when poked with a fork, but not so much they are complete mush. This should take about 10 minutes of boiling, maybe a little longer. Once the potatoes are cooked, drain off the water and put the fries on a cooling rack. As the potatoes sit on the rack, all the excess moisture in the potato will evaporate, and the potatoes will dry. They will also change from a yellow-ish colour to white. Let the potatoes sit for at least 20 minutes.
Why boil the potatoes?
Boiling the potatoes obviously softens them, but it also adds texture to the potato’s surface. This texture is vital to getting that really crispy outer shell on the finished fries.
Blanching The Fries
The next step to making these ridiculously crispy fries is to blanch them in oil. If you’ve ever made fries before you are probably familiar with this step. Usually, this first cook in oil is done at a lower temperature than the final fry. The purpose is to cook the potato all the way through. But, our potatoes are already cooked, so why bother to do this? That’s a good question. This first fry is going to do two things. First of all, it is going to help remove any residual moisture hiding out within the fries. Secondly, it is going to start building up that crispy outer layer. Generally, this first fry would be done at 300°f. But, for our purposes, we will fry the potatoes at 345°f for about 5 to 7 minutes or until the potatoes start to turn golden brown.
Cooling the fries
Once the fries have been blanched in the oil, they will need to cool to room temperature before being fried again. It’s actually best if you cool them in the fridge, but it isn’t strictly necessary. Cooling the potatoes will help them get really crispy. Cool the fries on a cooling rack rather than on a flat surface. This will help prevent the fries from becoming greasy. Also, keep in mind not to overload your fryer. Fry the potatoes in two to three batches, giving the fryer time to come back to temperature after each fry.
Frying The Fries
Okay, you’ve washed, hand-cut, boiled, dried, fried, and cooled your potatoes. All that’s left is to fry them once more, add a pinch of salt and enjoy. For this final fry, turn your fryer up to 365°f. Put the fries in. You can do more per batch than when blanching. Fry for 5 to 7 minutes or until the fries are deep golden brown and very crisp. Take the fries out of the oil, drain, and then toss in a mixing bowl with a large pinch of kosher salt. Serve immediately.
Do you need a deep-fryer to make this?
You don’t absolutely need a deep-fryer to make this, but it is the safest option. Your other choice is to fry the fish and potatoes in a pot or wok full of oil. If you go this route, make sure to leave at least 2 to 3 inches of headroom in the pot, so the oil doesn’t overflow. Also, put the pot or wok on the back burner, so it is less likely to be bumped or knocked. If using a pot or wok, you will also need a candy or a deep-frying thermometer to know the temperature of the oil. If you do this, please be careful. Hot oil is hazardous, and you do not want to spill it on yourself or someone else. Also, if the oil overheats, it can catch on fire. If that happens, cover the pot with a lid and call 911. DO NOT PUT WATER ON A GREASE FIRE!!
What type of oil should you use?
Typically, canola oil is used for frying. It is fairly cheap and has a high smoke point. However, for a cleaner flavour and to possibly be a little healthier, use peanut oil. It is more expensive, but I prefer it for frying. And, you can strain it, put it in a sealed jar and keep it in the fridge for months. Just pull it out anytime you want to fry something.
Gluten-Free Battered Fish
How-To Make Gluten-Free Fish Batter
Okay, we’ve made the fries now. Let’s move on to the fish. The fish batter is actually the same as the gluten-free sweet and sour chicken ball recipe I made a while back. The only difference is that I add dill, lemon zest, and black pepper for the fish batter. This battered is made gluten-free not by adding a bunch of crazy ingredients but rather by using gluten-free all-purpose or baking flour. To make it not gluten-free, use normal all-purpose flour. The other ingredients in the batter are baking powder, salt, an egg, soda water, and, as I said, dill, lemon zest, and black pepper. Mix the batter and put it in the fridge for 20 minutes to chill. The colder the batter, the crisper it will be.
Prepping The Fish
You can use any flakey white fish for this recipe. Haddock and catfish are good options, but I was lucky enough to get some cod, so that’s what I went with. I had two huge cod fillets so I cut each into three pieces. Pat, the fish, dry, then toss it in half a cup of gluten-free flour (or regular all-purpose).
Batter and Fry The Fish
Shake the excess flour off the fish and dip it in the batter. Lift the fish out of the batter, letting any excess drip off and place it in the fryer. When you do this, have the fryer basket down. If you put the fish on the basket then put it in the oil, the fish will cook onto the basket. Use a fork and make sure the piece of fish the fork is through isn’t going to break off. Dip the fish in the hot oil about halfway, then gently swirl it around for a few seconds before letting it gently slip off the fork and into the oil. This will help start the crust formation, which will help prevent the fish from sticking—Fry the fish at 365°f for about 6 to 7 minutes. If you want to serve it right away, fry it for 10 to 12 minutes. Either way, flip it halfway through.
Double Fry The Fish
You can single fry this fish, and it will be great. But, I find a double fry is a better option. Double frying allows you to have all the fish cooked and ready to go, then you can finish it in the fryer right before serving to get it really crispy. This is best if you are cooking for a group of people because you can fry more fish at a time on the second fry. You can also batter the fish and do the first fry a day ahead, store it in the fridge on a cooling rack uncovered, then fry it when you want. The second fry should be done at 365°f and will take about 5 minutes.
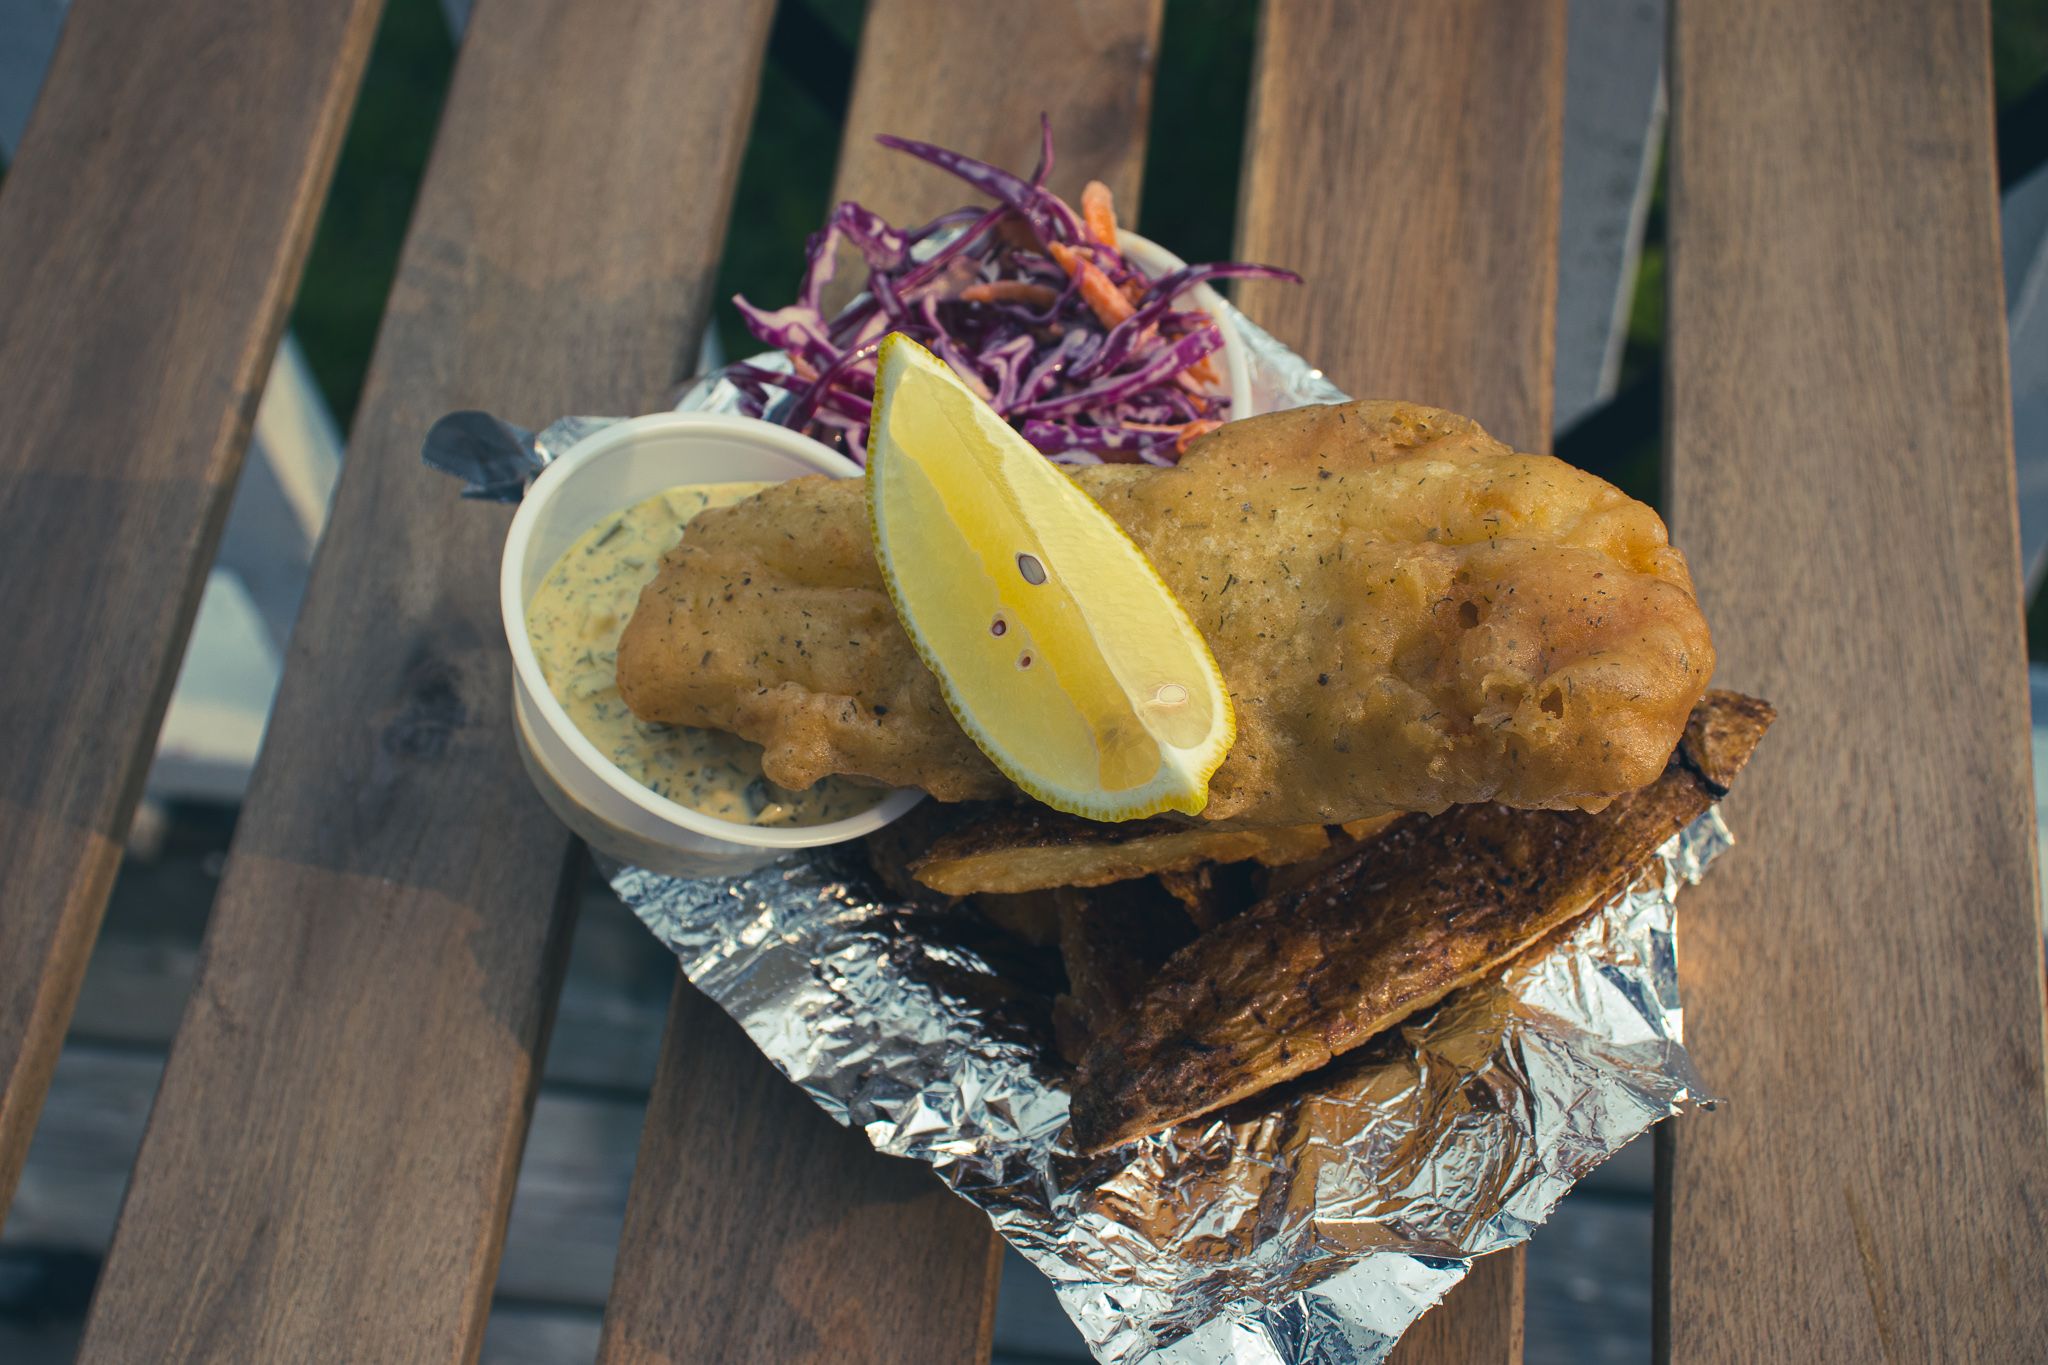
I can’t believe it’s gluten-free fish and chips
That little bit of lemon and dill really comes through and compliments the flavour of the fish perfectly. Serve the gluten-free fish and chips with tartar sauce and coleslaw. If you have the option, eat the fish and chips by the water to really make the whole experience special.
The Wrap-Up
I am so excited for you to try this recipe. I cannot express enough how delicious it is. I’d been craving fish and chips for a while, and this really hit the spot for me. Yes, I know it takes a while to make, but make a Sunday of it. Invite some friends over, have a few drinks (not too many around the hot oil) and enjoy yourself. That’s what food like this is for. Happy cooking and even happier eating, everyone!
Thanks for reading, and remember to check out my brand new cookbook, “The How-To Cookbook For Men” It comes out on August 10th and is available for preorder here.
Never miss a post again. Put your email address in the box below and receive chef’s notes in your inbox.
When my wife tells me that something is “My favourite thing you’ve ever made.” I know it must be good. First of all, my wife is my second harshest critic, and I wouldn’t have it any other way. Second of all, I trust her opinion over anyone else’s. So, I say with absolute confidence that these pulled beef enchiladas are good, like really, really good. Imagine beef, rubbed with spices and slow-roasted, then shredded like pulled pork. Now imagine that beef is wrapped in a corn tortilla with homemade refried beans and some salsa, covered in a jalapeno cheese sauce and baked to perfection. Doesn’t that sound good? Want to learn how to make it? Good. Let’s get to it.
Prepping and Cooking The Beef
The first thing to do is cook the beef. I used a blade roast, which was a pound and a half. Season the roast with cumin, coriander, salt, pepper, and oregano. And rub the meat down with a few tablespoons of chipotle in adobo. (You can find all the measurements in the recipe below.) Put the beef in a small roasting pan with half a cup of water, cover with parchment paper, then wrap tightly in foil. Cook the beef at 300°f for three hours. Remove it from the oven and allow it to rest for twenty minutes.
Homemade Refried Beans
While the beef is cooking, make a batch of homemade refried beans. Start the beans by sautéing half a cup of diced onion in some olive oil over medium-high heat. Once the onions soften, add two cloves of minced garlic and cook for another minute. Add chili powder, cumin, and oregano. Cook the spices for about a minute, then add half a cup of water and a can of drained and rinsed pinto beans. Let the mixture cook for about five minutes, stirring, then mash the beans using a potato masher. Season them to taste with salt and pepper. Continue to cook the beans until they form a thick paste.
Jalapeno Monterey Jack Cheese Sauce
For the cheese sauce, I used a jalapeno Monterey Jack cheese. If you can find this, great. If not, use cheddar instead and sauté half a diced jalapeno in the butter before adding the flour. To make the sauce melt two tablespoons of butter in a medium pot over medium-high heat. Once the butter is melted, add two tablespoons of flour (I used all-purpose gluten-free flour). Cook the mixture, whisking, for two minutes, then add in two cups of whole milk. Cook the sauce, whisking gently, for about ten minutes or until the sauce is thick enough to coat a spoon and no longer tastes of raw flour. Whisk in one cup of the grated jalapeno Monterey Jack cheese, then taste the sauce and season with salt and white pepper as needed (you can use black pepper if you’d prefer.).
Pulling The Beef
Now that the beef is cooked and rested take two forks and shred it like pulled pork. Make sure to discard any large pieces of fat or gristle. Once the meat is shredded, add three-quarters of the liquid from the bottom of the roasting pan back into it, mix, and season with salt as needed.
Assembling The Pulled Beef Enchiladas
Everything is ready. The beef is cooked and pulled, the refried beans are smooth and tasty, and the sauce is creamy and gooey—time to put it all together. Put a ladle full of the sauce in the bottom of a 9 x 13 oven-safe dish. Set a tortilla on your work surface. For the tortillas, I bought a pack of ten blue corn tortillas. You can use small flour tortillas or corn tortillas, store-bought or homemade. If you’ve never made tortillas, check out this post I did all about making them. Spread a serving spoon full of refried beans on the tortilla, top with some of the beef and a bit of your favourite salsa. Roll the tortilla and place it in the dish. Repeat until all of the tortillas, and meat and beans have been used. Cover the rolled tortillas with the remaining sauce and half a cup more of grated Monterey Jack cheese.
Cooking The Enchiladas
Cover the enchilada dish with parchment and foil and bake on 350°f for twenty minutes. Take the pan out of the oven, turn on your broiler, and remove the foil and parchment from the pan. Put the enchiladas under the broiler only long enough to brown the cheese. Make sure to watch closely, as browning will happen quickly, and you really don’t want to burn these. Once the cheese is browned, take the enchiladas out of the oven and let them rest for five minutes before serving them.
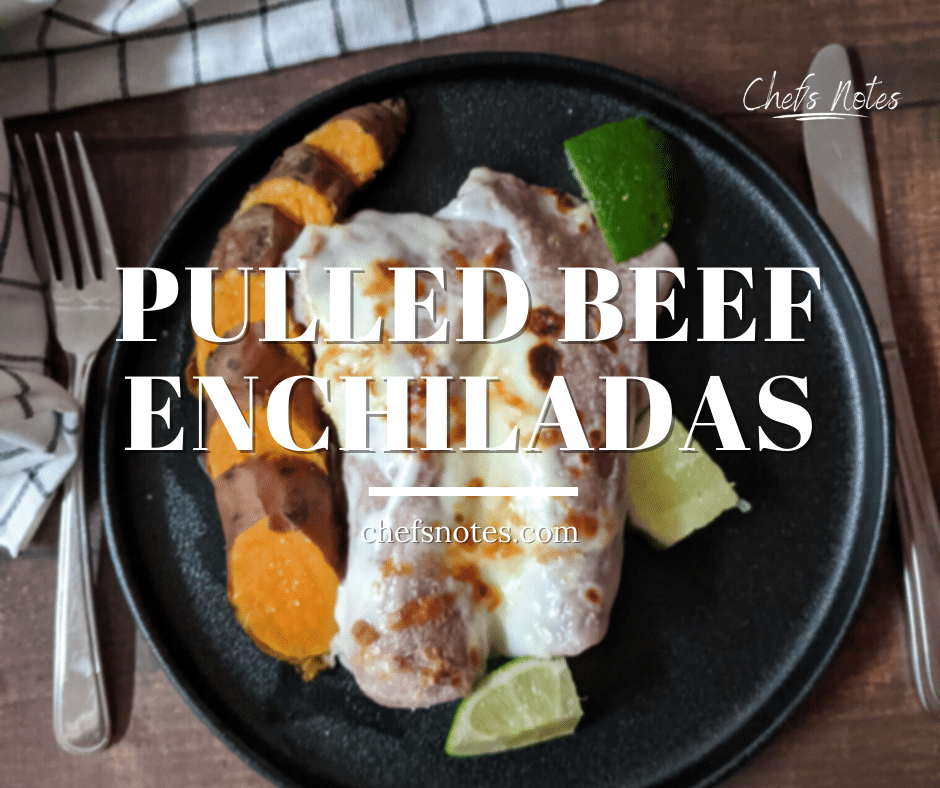
Serving The Pulled Beef Enchiladas
To round out the meal, I served my enchiladas with whole boiled sweet potatoes and rice. You can do the same or serve them with whatever you’d like. Alternatively, you can boil and mash the sweet potato and put it right in the enchilada along with the beans, meat and salsa. And as with everything Mexican, serve with a bit of lime.
Pulled Beef Enchiladas
Braised and shredded beef, wrapped in corn tortillas with homemade refried beans and salsa, then covered in a jalapeno jack cheese sauce and baked to perfection.
1canpinto beans (ramano beans), drained and rinsed398 ml can
1/2cupwater
Juice from half a lime
Salt and pepper to taste
1tbspolive oil
Jalapeno Cheese Sauce
2tbspbutter
2tbspflour all-purpose gluten-free flour will work
2cupswhole milk
1cupgrated jalapeno monterey jack cheese
Other Ingredients
10corn tortillas
1/2cupgrated jalapeno Monterey Jack cheese
1lime cut into quarters for garnish
1 1/4cup of your favourite salsa
Instructions
Pulled Beef
Season the beef on both sides with salt, pepper, cumin, coriander, and oregano then rub with the chipotle.
Put the beef in a small roasting pan along with the water, cover tightly with parchment and foil, and bake at 300°f for three hours.
Remove the beef from the oven and let it rest for twenty minutes, then pull it apart using two forks, just as you would for pulled pork. Make sure to remove any large pieces of fat or gristle. Add 3/4 of the liquid from the bottom of the roasting pan back into the pulled beef. Taste and season with salt as needed.
Refried Beans
Heat a medium frying pan over medium-high heat. Add in the olive oil and onion. Cook until the onion starts to soften, about three to four minutes.
Add in the garlic and cook for one more minute then add in the chili powder, cumin and oregano and cook, stirring for another minute.
Add the water and beans to the pan, stir to lift the spices off the bottom of the pan, then cook for five minutes, stirring.
Mash the beans using a potato masher, then keep cooking them, stirring for another three to four minutes or until the beans form a thick paste. Taste the beans and season with salt and pepper as needed. Finish with a squeeze of fresh lime juice.
Jalapeno Cheese Sauce
Melt the butter in a medium pot over medium-high heat. Add in the flour, and cook, stirring for two minutes.
Add in the milk, turn the heat down to medium, and cook, for ten minutes stirring the whole time.
Whisk in the cheese, taste the sauce and season with salt and pepper as needed.
Making the Enchiladas
Put a ladle full of the jalapeno sauce in the bottom of a 9×13 casserole dish. Place one tortilla down on your work surface and spread it with 2-3 tablespoons of the refried beans. Add a 1/4 cup of the pulled beef and 1-2 tablespoons of the salsa. Roll the tortilla and put it in the casserole dish. Repeat until all of the tortillas have been rolled.
Top the enchiladas with the remaining sauce and the 1/2 cup of cheese. Cover the dish with parchment and foil and bake for twenty minutes on 350°f.
Remove the dish from the oven and turn on your broiler. Take the foil and parchment off the enchiladas and return them to the oven only long enough to brown the cheese. Watch closely as they will burn fast.
Remove the enchiladas from the oven and let the rest for five minutes before serving. Serve them with rice and boiled sweet potato.
There’s a lot of components to these pulled beef enchiladas. They are not something you’re just going to throw together on Tuesday evening after work. Of course, none of this is overly difficult. It just takes effort. But they are with it. Plan to make these. I cannot adequately express to you just how good they are. You’ll have to try them for yourself.
Thank you for reading this post. Share it on Facebook, Pinterest, or Twitter to help Chef’s Notes grow. Subscribe to Chef’s Notes below, and you will never miss a post again.
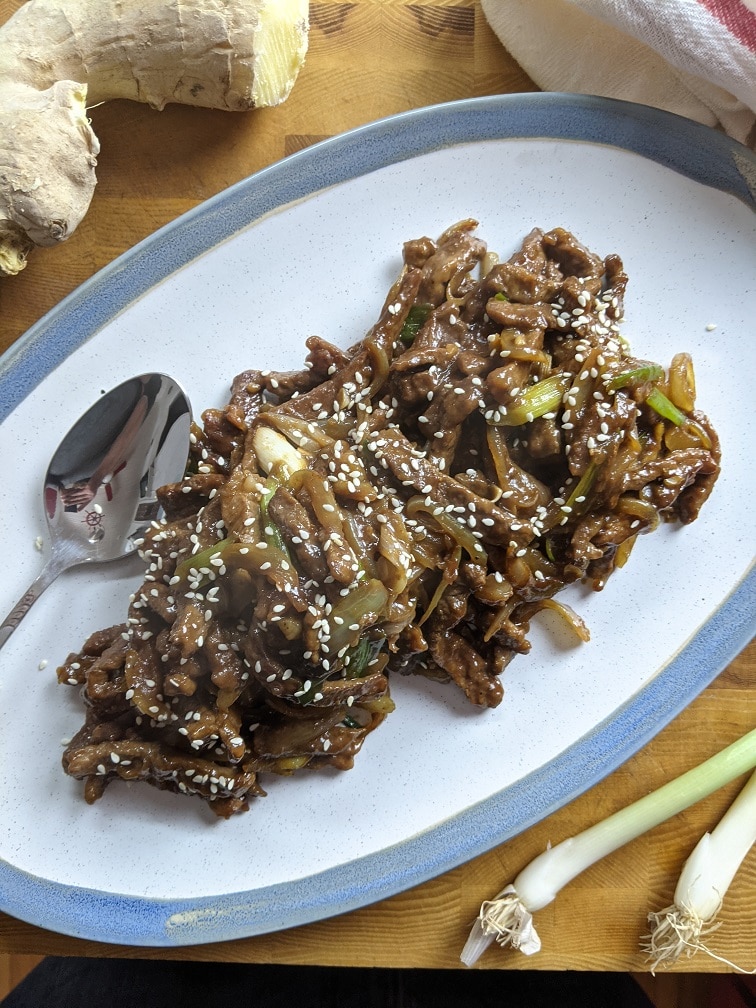
Experience the mouth-watering flavour of Gluten-Free Mongolian Beef in the comfort of your own home. The final recipe in my Gluten-Free Chinese Food Series will show you how to make a delicious and gluten-free version of this dish in minutes. Featuring tender beef cooked with ginger, garlic, and onions and finished with a sticky, sweet, and salty sauce, it’s easy to make and perfect for a weeknight meal. Trust me, once you try it, it’ll become a new favourite in your recipe collection.
Mongolian Beef
Traditionally, flank steak is used for this Mongolian Beef as it is a flavourful and affordable cut of meat that becomes tender when sliced thinly across the grain and quickly cooked. But don’t limit yourself to just flank steak, as any cut of beef can be used in this recipe, like a cross-rib roast, as in the case of this recipe. Also, you can also experiment with other meats, such as thin strips of pork butt, chicken breast, or even ground meat to make a different variation of the dish.
I used about one pound of cross-rib roast for this recipe, cut into thin strips (1/2 cm wide) across the grain. The cross-rib roast worked perfectly, providing a tender and delicious final product.
Why cut meat across the grain?
When it comes to cutting meat, the direction in which you slice it can have a big impact on its texture and tenderness. The “grain” that is referred to in the context of meat refers to the direction in which the muscle fibres run. Cutting meat across the grain means that you’re slicing it perpendicular to the direction of these fibres, while cutting with the grain means you’re slicing in the same direction as the fibres.
Cutting meat across the grain is important for a few reasons. Firstly, it helps to shorten the muscle fibres, which in turn makes the meat more tender. When the fibres are shorter, they are not as tightly wound and don’t require as much chewing to break down. This makes for a more enjoyable eating experience and can make a big difference when it comes to tougher cuts of meat.
Additionally, cutting across the grain also helps to redistribute the marinade and coating evenly across the meat, ensuring that each bite will have the perfect balance of flavours.
Prepping The Mongolian Beef
Once the meat has been cut and sliced thinly across the grain, it’s time to prepare it for cooking.
In a medium mixing bowl, beat one egg and season it with salt and pepper. Once the egg is seasoned, add the thinly sliced meat to the bowl, and stir the meat so that each piece is evenly coated.
The next step is to add two tablespoons of cornstarch to the bowl. The cornstarch will help to create a crispy and slightly thickened coating on the meat as it cooks and will also help to thicken the sauce. Mix well until all the meat is coated evenly with the egg and cornstarch mixture.
Once the meat is fully coated, set it aside in the refrigerator until you are ready to cook it. This will allow the coating mixture to bind to the meat and create a crispy texture when cooking.
By following these simple steps, you’ll be on your way to making a delicious and gluten-free version of Mongolian beef that is sure to please even the pickiest of eaters. Remember, thinly slicing meat and cutting it across the grain, and using cornstarch to thicken the sauce are crucial steps to making this quick and easy Mongolian beef.
Flavourings
The flavour for this Mongolian Beef recipe includes ginger, garlic, onions, and green onions. These ingredients provide a balance of flavour, sweetness from the brown sugar, savoriness from soy sauce, and a hint of spiciness from ginger and garlic.
Ginger, in particular, is a key ingredient that adds a warm, spicy and slightly sweet flavour to the dish. Garlic, on the other hand, provides a strong and pungent flavour that complements the ginger perfectly.
Onions are used in this recipe, adding sweetness and depth of flavour to balance out the savoury and spicy flavours. They provide a nice contrast in colour to the dish. And lastly, green onions are added to the recipe to give a bit of freshness to the dish and also a pop of green as a garnish.
All these ingredients work together to create a delicious, savoury, and slightly sweet and spicy Mongolian beef dish that is sure to please.
Gluten-Free Mongolian Beef Sauce
The Mongolian Beef sauce is a quarter cup gluten-free tamari, you can use Soy Sauce if you don’t need it to be gluten-free just please don’t use VH soy sauce for this or any of the recipes in this series. Splurge and get a bottle of Kikkoman or something like that. It is going to have a much better taste and less harsh saltiness. To the soy sauce, add two tablespoons of brown sugar and one teaspoon of rice vinegar or white wine vinegar. Mix the soy sauce, sugar, and vinegar and set aside.
Cooking Mongolian Beef
To make the Mongolian beef, start by heating a large skillet or wok over medium-high heat. Once the pan is hot, add one tablespoon of canola or sesame oil. Then, add the beef and cook it until brown, about four minutes. Next, add the onions and continue cooking for another three minutes or until they start to soften.
After that, add the ginger, garlic, and green onions to the pan and cook for one to two minutes or until the ginger and garlic become fragrant.
Stir in the soy sauce mixture and add it to the pan. If there is any sugar left in the container, you may need to rinse it with two tablespoons of hot water and pour it into the pan as well. Stir the mixture and cook for four to five minutes or until there is no liquid left in the bottom of the pan.
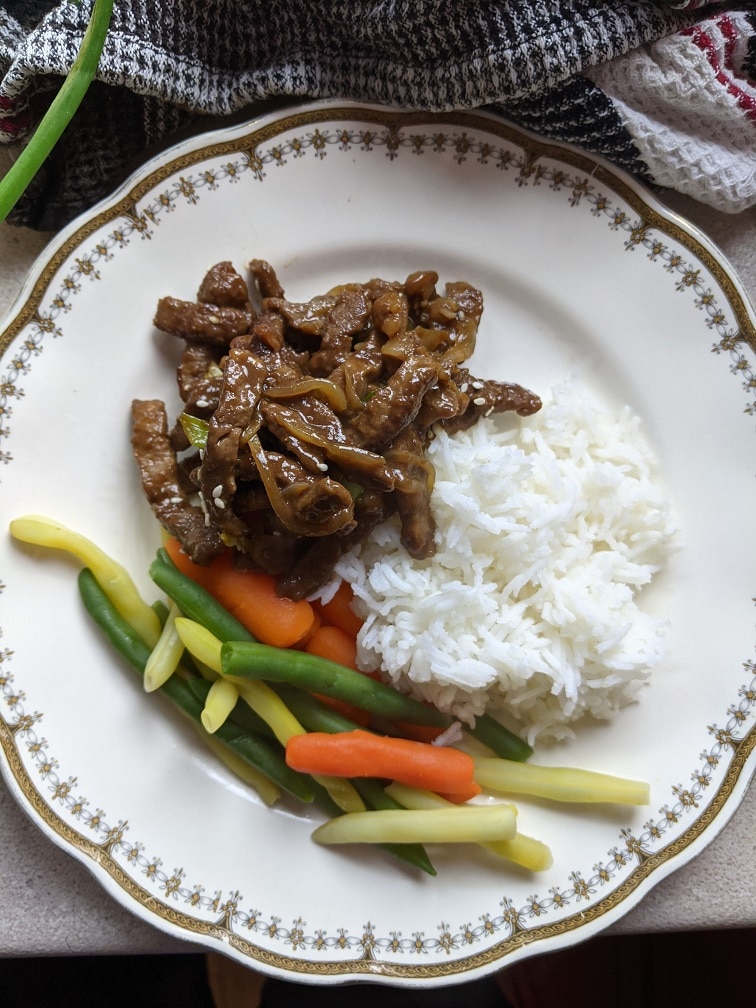
When it’s done, transfer the Mongolian beef to a platter and garnish it with sesame seeds. Serve it with steamed rice and vegetables.
Keyword: Beef Recipes, Chinese Food, Chinese Food Series, Chinese Take-Out, Quick Meals
Servings: 4servings
Author: Chef’s Notes
Ingredients
1lbthinly sliced steak strips (1/2 cm) flank, or rib
1cupthinly sliced onion
3green onionssliced into 2 cm pieces
1tbspsliced garlic
1tbspgrated ginger
1/4cupTamarior soy sauce for non-gluten-free
2tbspbrown sugar
1tsprice vinegar
1/8tspfreshly ground black pepper
1eggbeaten
2tbspcornstarch
1tbspcanola oil
Instructions
Season the beaten egg with salt and pepper, then stir in the beef. Once the beef is coated in the egg, add the cornstarch and stir until each piece of beef is coated.
In a small container mix together the soy sauce, sugar, and vinegar.
Heat a large skillet or wok over medium-high heat until very hot. Add the canola oil and the beef. Cook until the beef is browned, about four minutes.
Add the yellow onion into the pan and cook for another three minutes or until the onion starts to soften.
Add the garlic, ginger, and green onions and cook for a minute or two or until the garlic and ginger become aromatic (you can smell them).
Stir the soy sauce mixture well, then pour it into the pan. Rinse the container out with two tablespoons of hot water and add that to the pan as well.
Cook Mongolian Beef for four to five minutes or until there is no more liquid pooling in the bottom of the pan.
Transfer the Mongolian Beef to a platter and garnish with sesame seeds. Serve with steamed rice and vegetables.
It is not often that I surprise myself, but I was pleasantly surprised by how delicious this Gluten-Free Mongolian Beef was. I am honestly very excited for you to try it because I think you will love it. What I love about it, besides how delicious it is, is how quickly and how easily the whole dish came together. There were not many dishes in this series that I would consider weeknight dishes for most people. This one, however, most certainly is. If you liked this, you might also like my Chinese Lemon Chicken Recipe.
I hope you have enjoyed this Homemade Chinese Take-Out series as much as I have. This has been one of my favourite things that I’ve done on the blog to date. It has been my absolute pleasure to eat these dishes and to share the recipes with you. As the year is quickly coming to an end, and I’ll be taking a break from the blog for Christmas, I’ve decided not to start a new series until the new year. I do have some really exciting posts and recipes coming up between now and then and some series in the new year that I am looking forward to. I can tell you now that 2021 is going to kick off with an eight-week soup series and a five-week Sunday Roast series. But there is a lot more to come before we get there. Have a great day, everyone. I’ll see you soon.
Thank you for reading the post. If you liked it, remember to share it on Facebook, Pinterest, or Twitter. Did you know that Chefsnotes.com has over 400 posts just like this one? Subscribe to the blog below, and you will be notified of every new post so you will never a helpful tip or recipe again. And if you would like to know more about me, read my story “Life on the line.”
I miss many things from back when I could eat gluten or didn’t know that I couldn’t be more accurate. Egg Rolls are near the top of that list. Crisp pastry wrapped around a delicious filling, deep-fried and dipped in plum sauce. What’s better than that? In all honesty, it never even occurred to me to try and make my own gluten-free egg roll wrappers. But, you can’t do an entire series on Chinese Take-Out Food and not make egg rolls. You just can’t. So I figured it out.
Today, I’m going to share my recipe for Homemade Gluten-Free Egg Rolls and Homemade Plum Sauce. You can make these with regular flour. They don’t have to be gluten-free. But if you’re like me and have to avoid gluten at all costs, this is probably something you’ve been waiting for for a long time. And that’s just about enough chit chat. Let’s get to it.
How To Make Plum Sauce
This plum sauce recipe does not taste like bottled plum sauce. I would argue that it tastes much better, but when you know something as one thing, it’s hard to wrap your head around it being different. So, if you can eat gluten and want to use regular plum sauce, that’s perfectly fine. However, if you want to try something different or need it to be gluten-free, try this.
Plum Sauce Ingredients
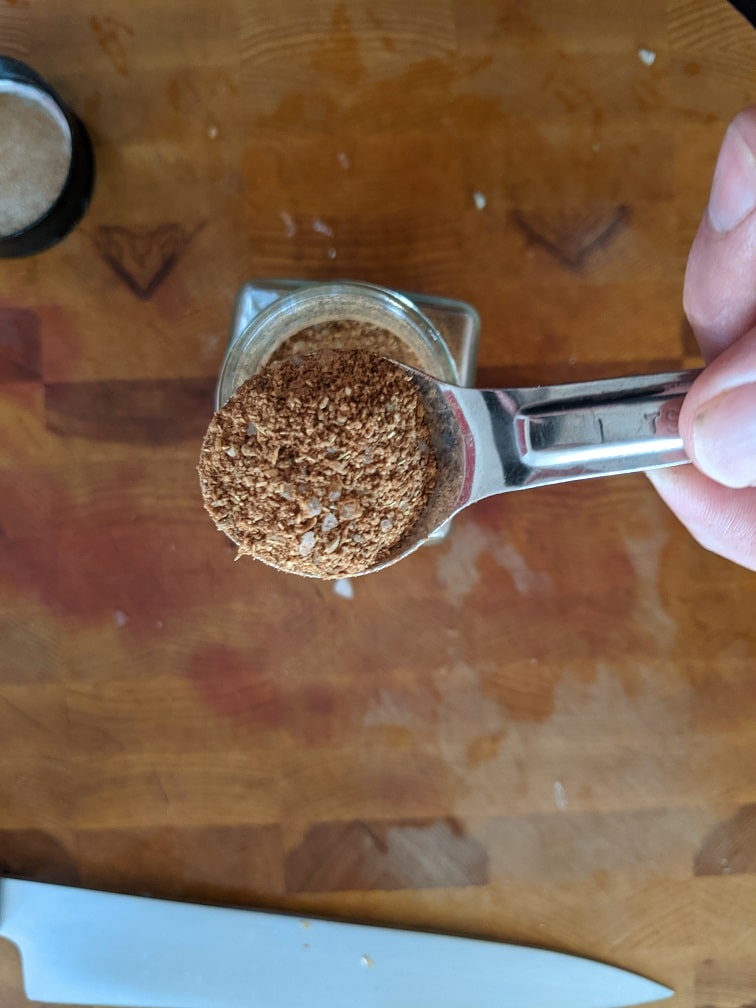
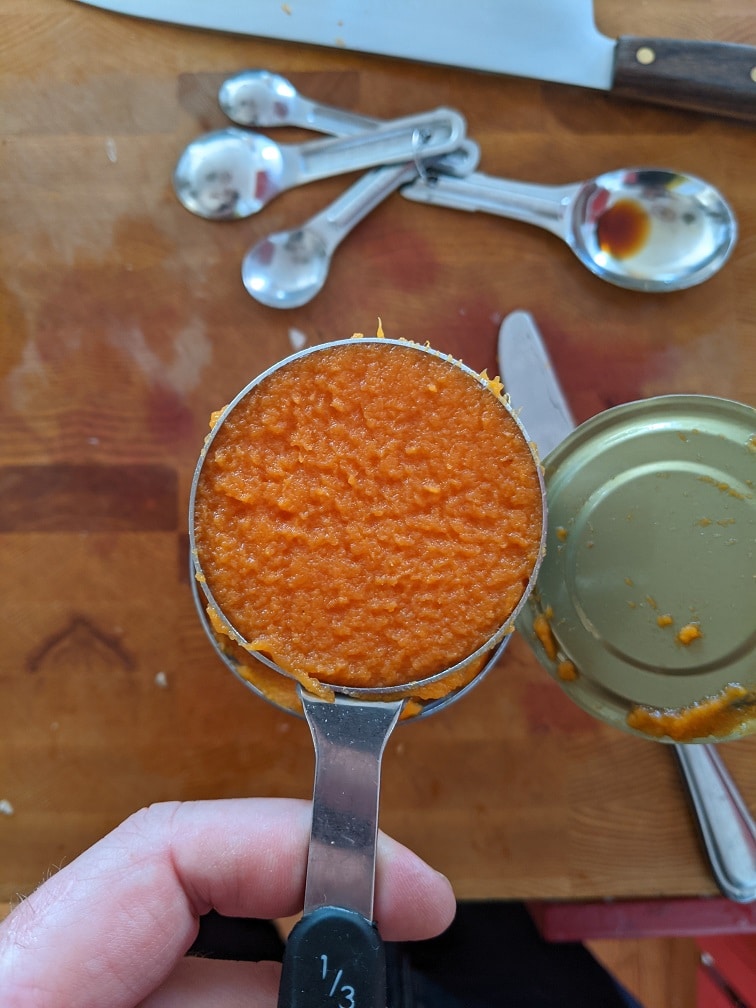
My plum sauce ingredients are onion, garlic, ginger, plums, Chinese 5 Spice (recipe at the end of the blog or you can use store-bought), pumpkin purée, sugar, salt, Tamari (gluten-free soy sauce), vinegar, and water. You can find the full measurement in the recipe at the end of this section.
Directions
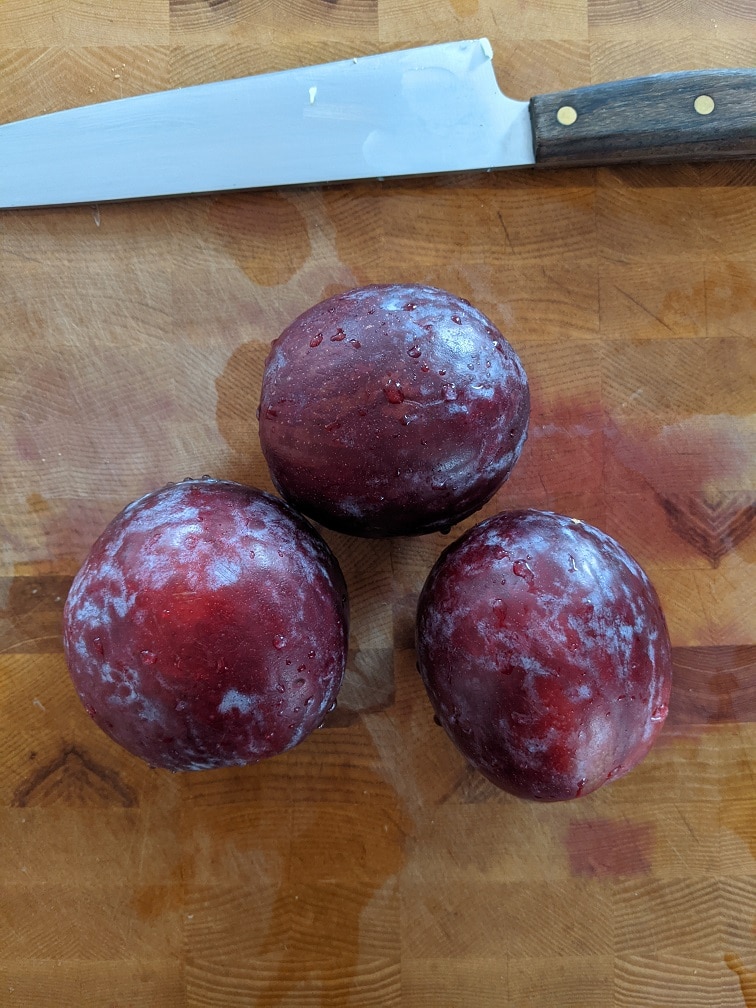
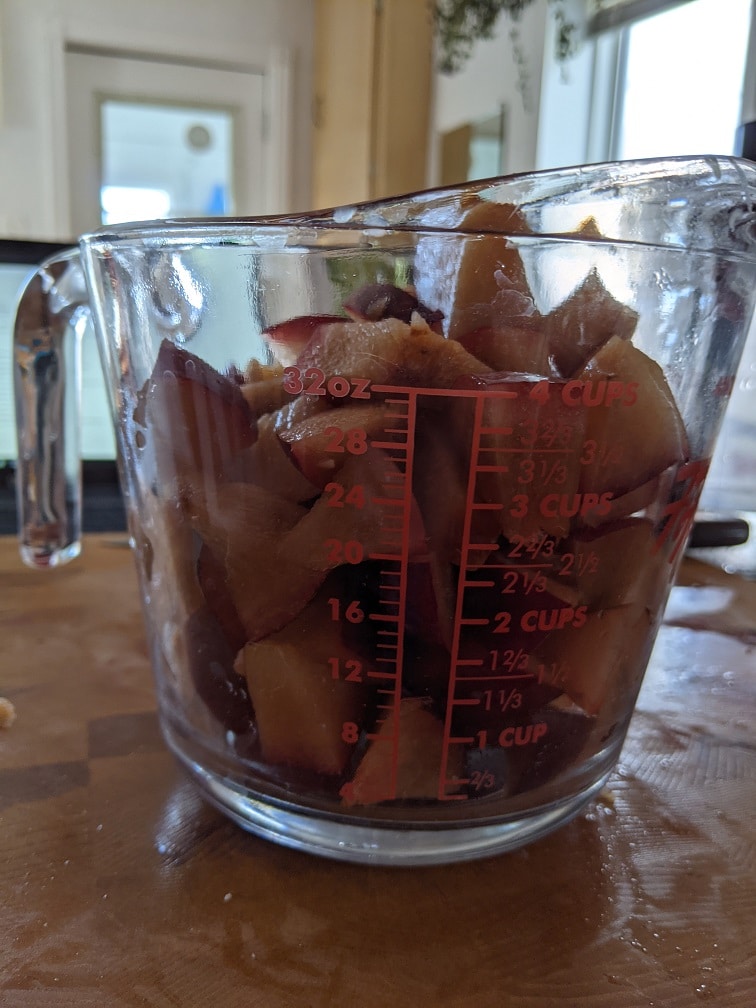
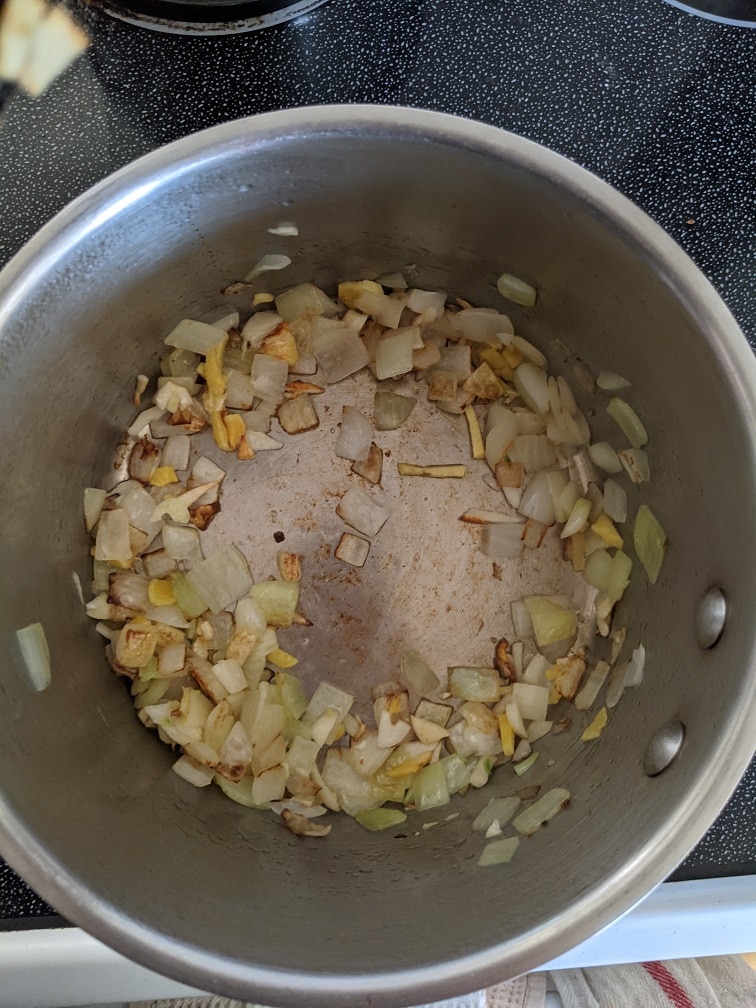
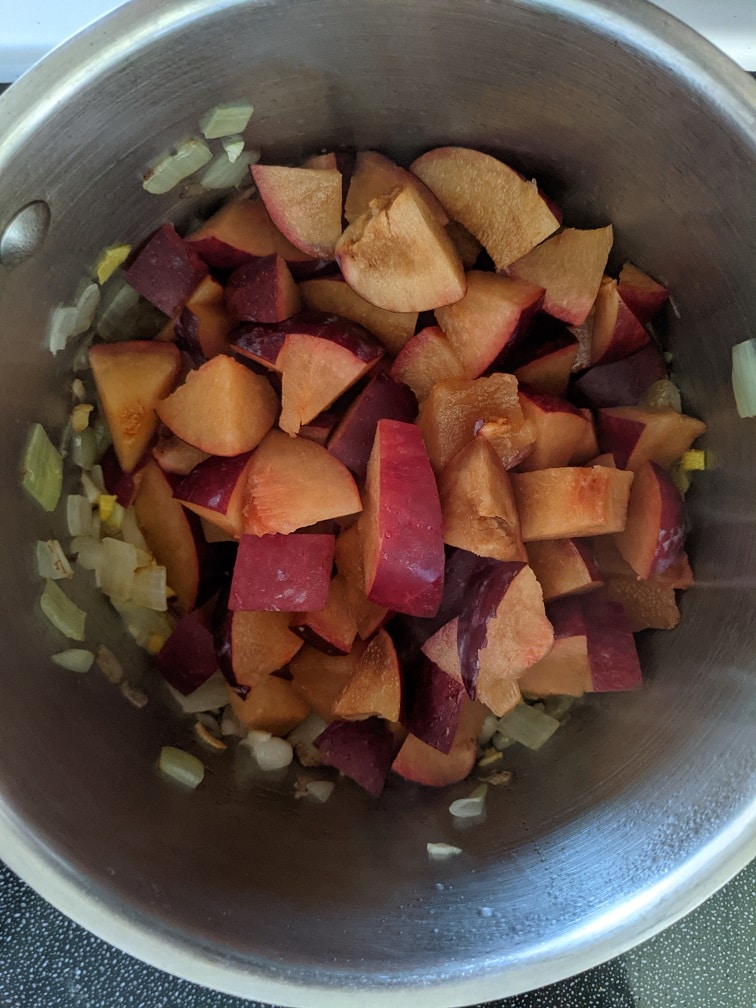
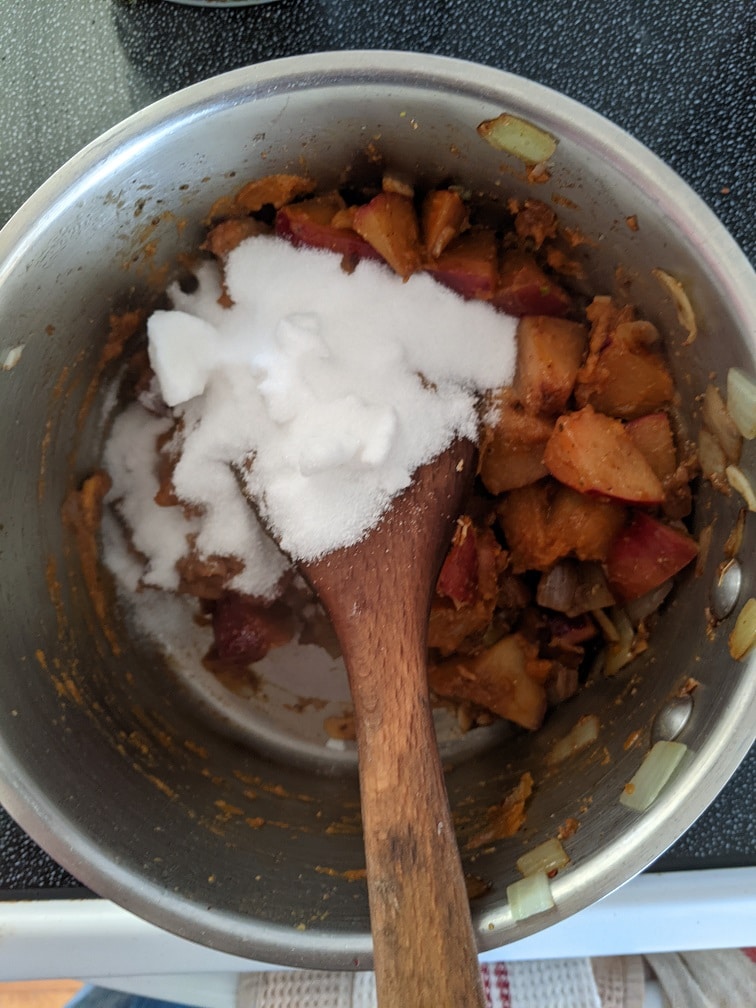
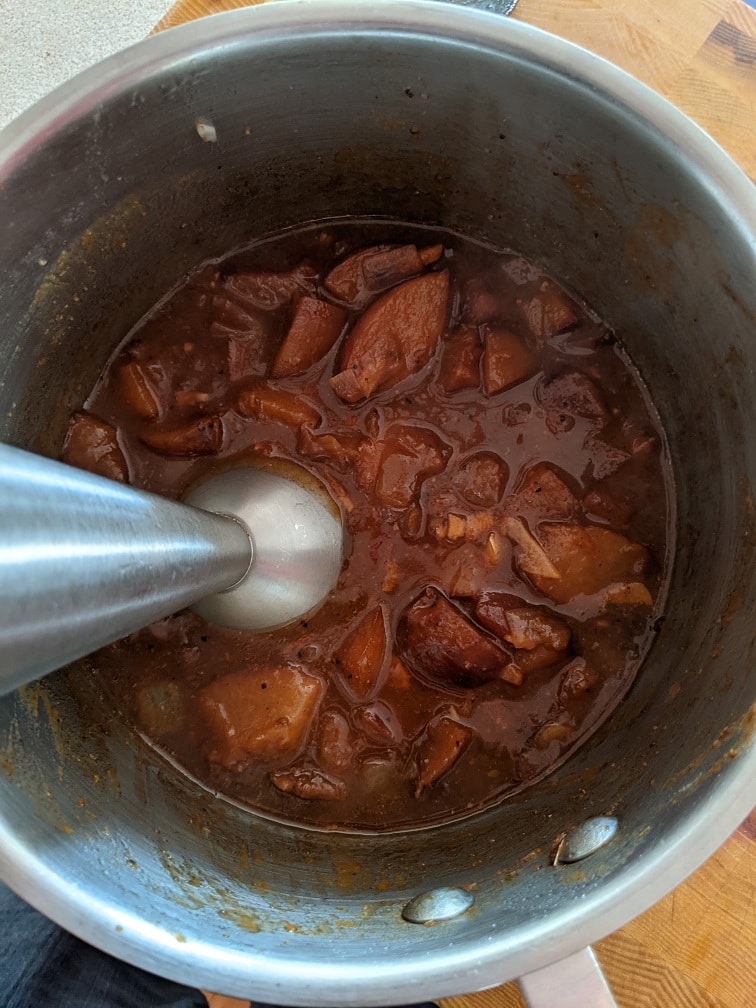
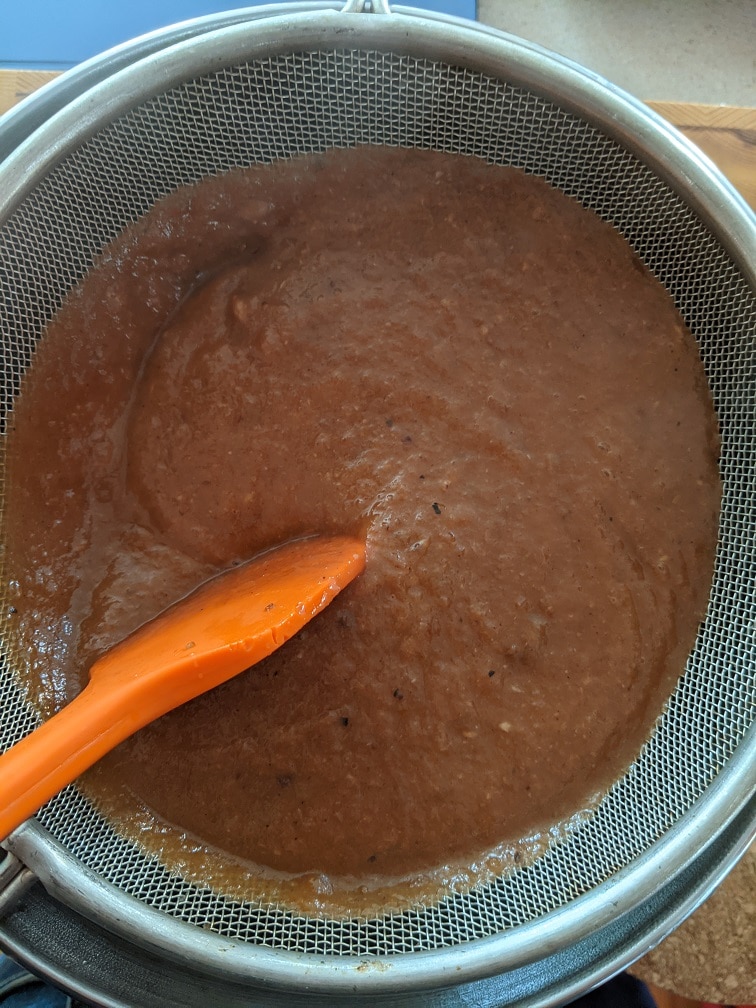
To make the plum sauce, start by dicing and sauteéing the onions in a bit of oil on medium-high heat. After about three minutes or when the onions turn translucent, add in the garlic and ginger, then cook for another minute or two or until slightly browned. Remove the pit from the plums, dice them, and then add them along with the five-spice to the pot. Cook for four to five minutes, then add in the remaining ingredients. Bring the pot to a boil, turn the heat to low, and simmer the sauce for twenty minutes. Let the sauce cool slightly, then purée it with an immersion blender and pass it through a fine-mesh sieve for a smooth sauce.
DIY Plum Sauce
This plum sauce isn't going to taste exactly like the stuff you get in a jar, but that may be a good thing. It is delicious
Heat a medium pot over medium-high heat. Add in the canola oil and the onion. Cook the onion for 3 to 4 minutes or until the onions start to turn translucent.
Add the ginger and garlic and cook for another 1 to 2 minutes or just until they start to brown.
Add the plums and Chinese 5 Spice into the pot and cook, stirring until the plums start to break down, about 5 minutes.
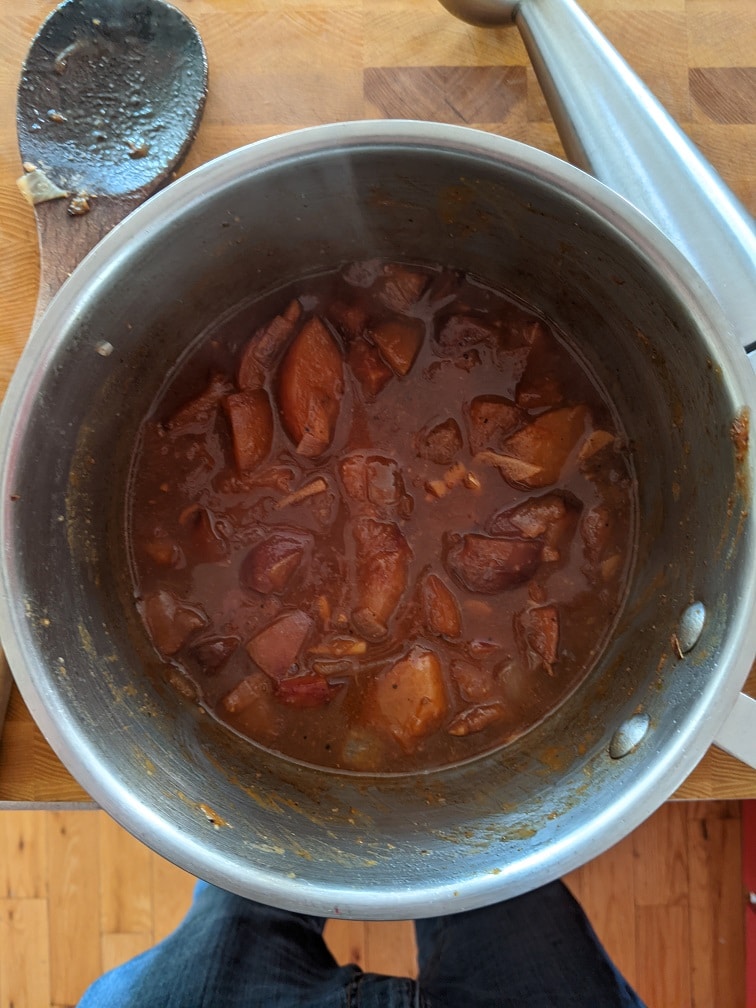
Add the remaining ingredients into the pot, bring to a boil, turn the heat down to low and simmer the sauce for 20 miuntes.
Let the sauce cool for 10 minutes, then purée using a blender or immersion blender.
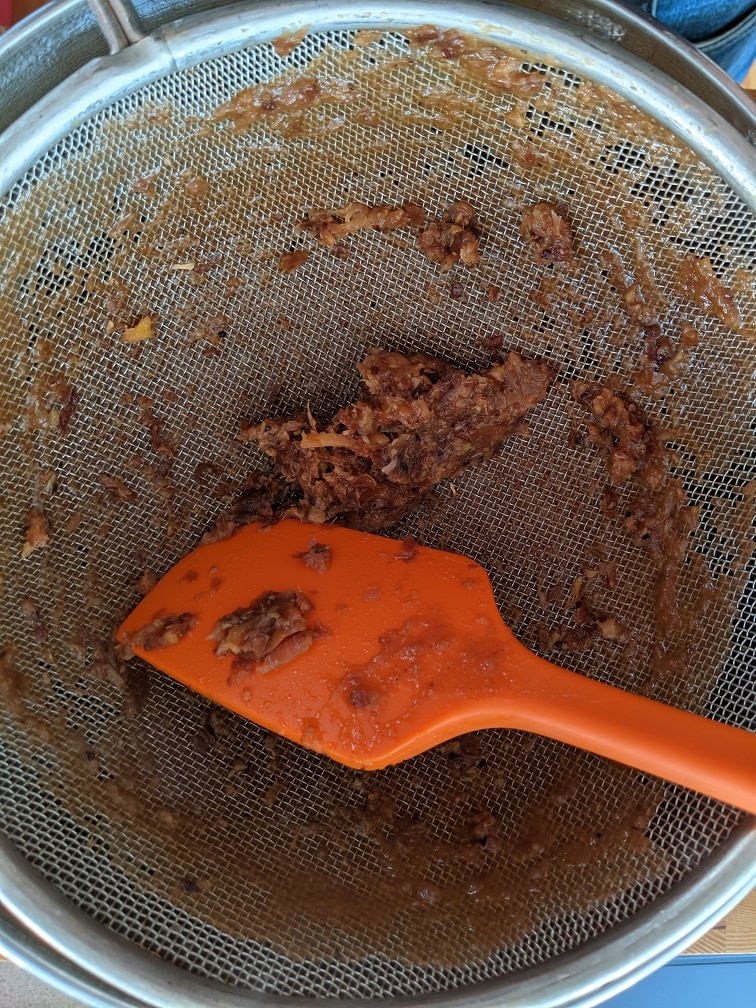
For a very smooth sauce, pass the puréed sauce through a fine mesh sieve. Cool the plum sauce and serve or keep in the fridge in an airtight container for up to two weeks.
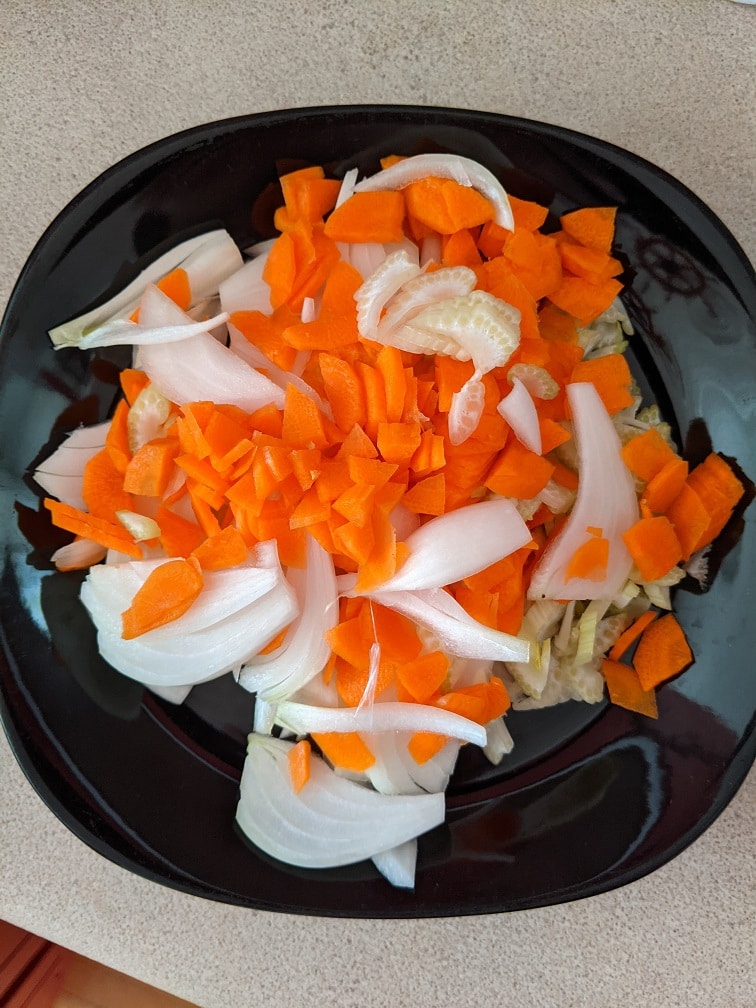
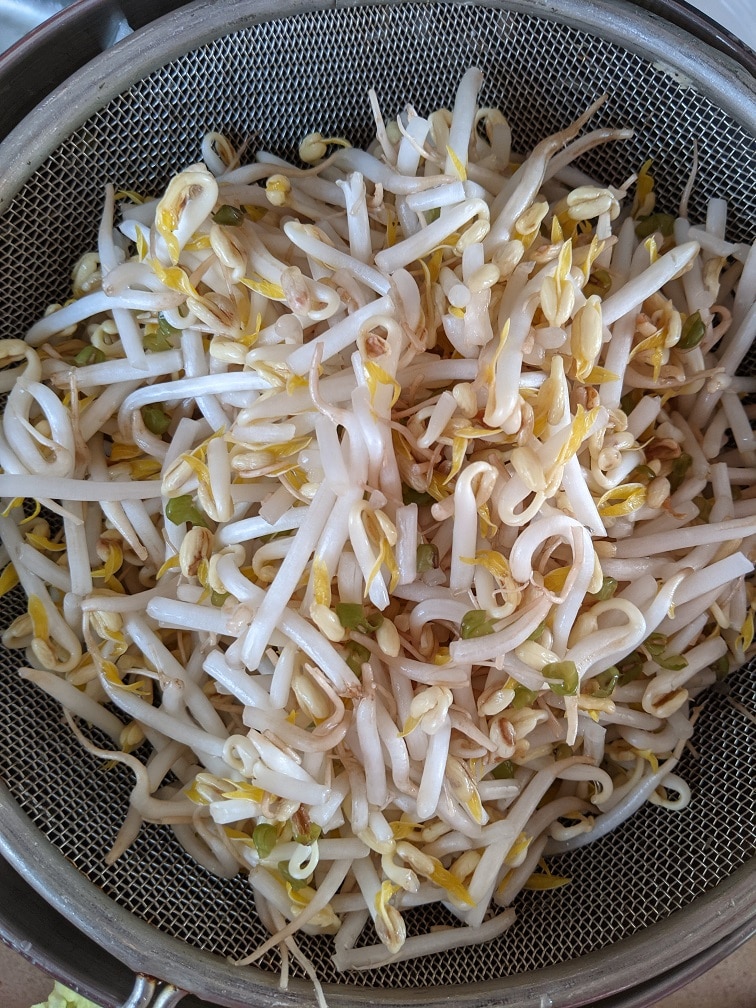
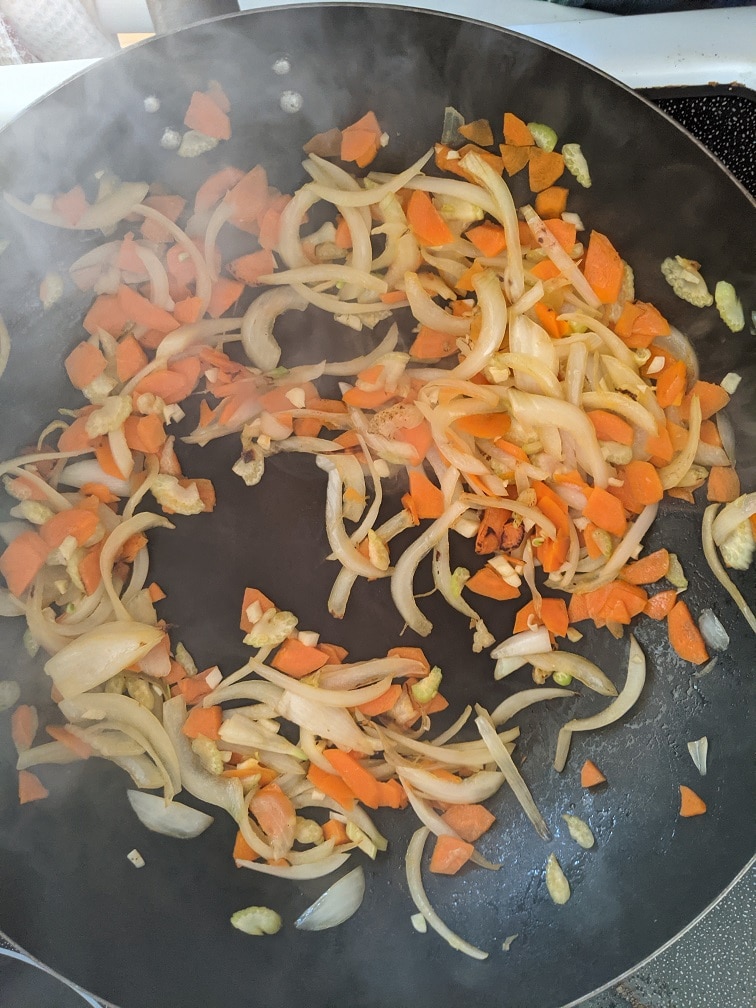
I like to keep my Egg Roll filling pretty basic, opting for onion, carrot, celery, cabbage, bean sprouts, garlic, soy sauce, and salt. You can add a bit of ginger, chilli, chicken, pork, beef, shrimp, or just about anything else you want. These are your Egg Rolls, after all. Do with them what you will.
Cooking The Filling
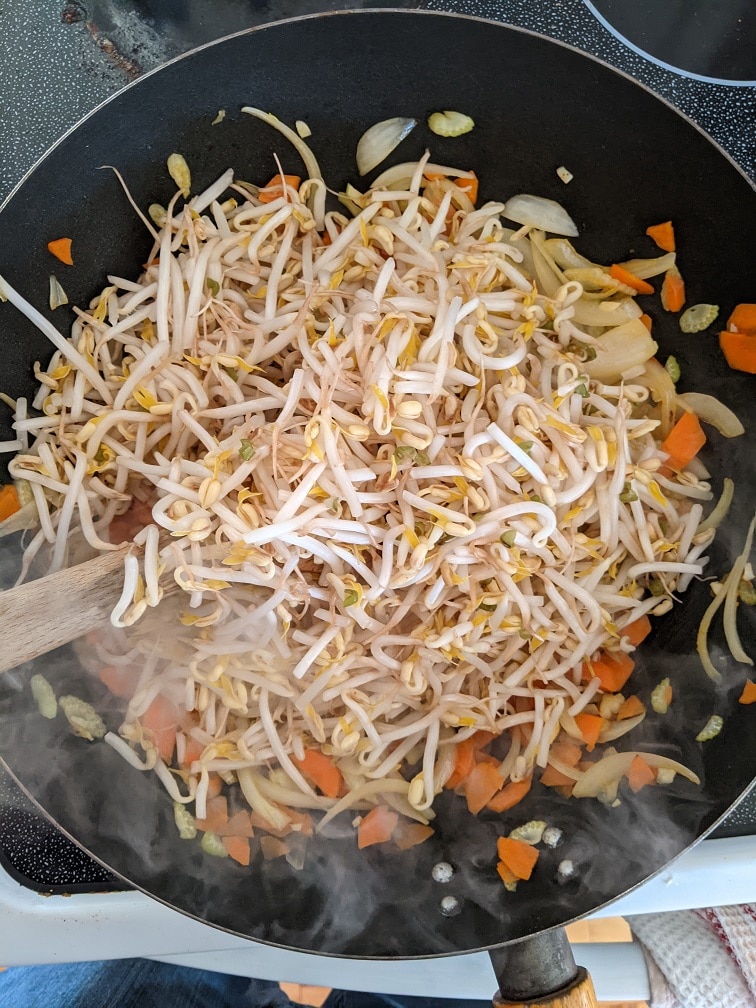
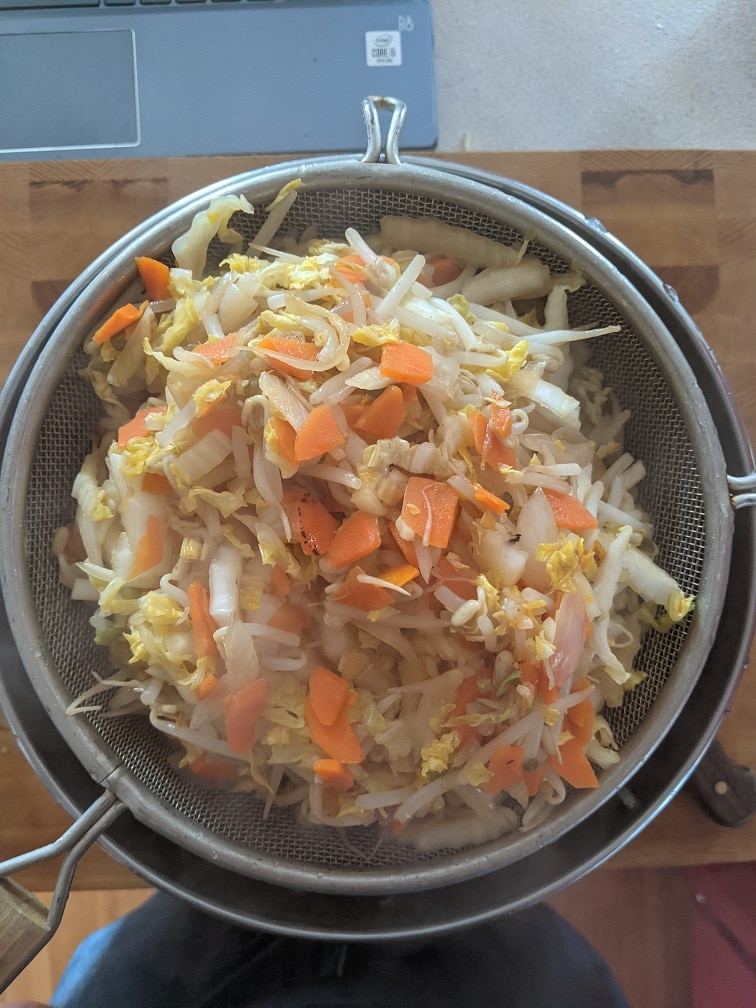
To cook the Egg Roll filling, heat a wok or large skillet over high heat. Add in a tablespoon of oil, then the carrot, onion and celery. Cook for four to five minutes or until the vegetables start to brown. Add in the garlic, and cook for one minute, then the washed and drained bean sprouts. Cook for one to two minutes before adding the cabbage. Cook until the cabbage has wilted, then season with soy sauce and salt. Transfer the cooked vegetables from the wok to the strainer set over a large bowl and let the mixture sit for twenty minutes. This will help prevent the Egg Rolls from becoming soggy and exploding.
Making Egg Roll Wrappers
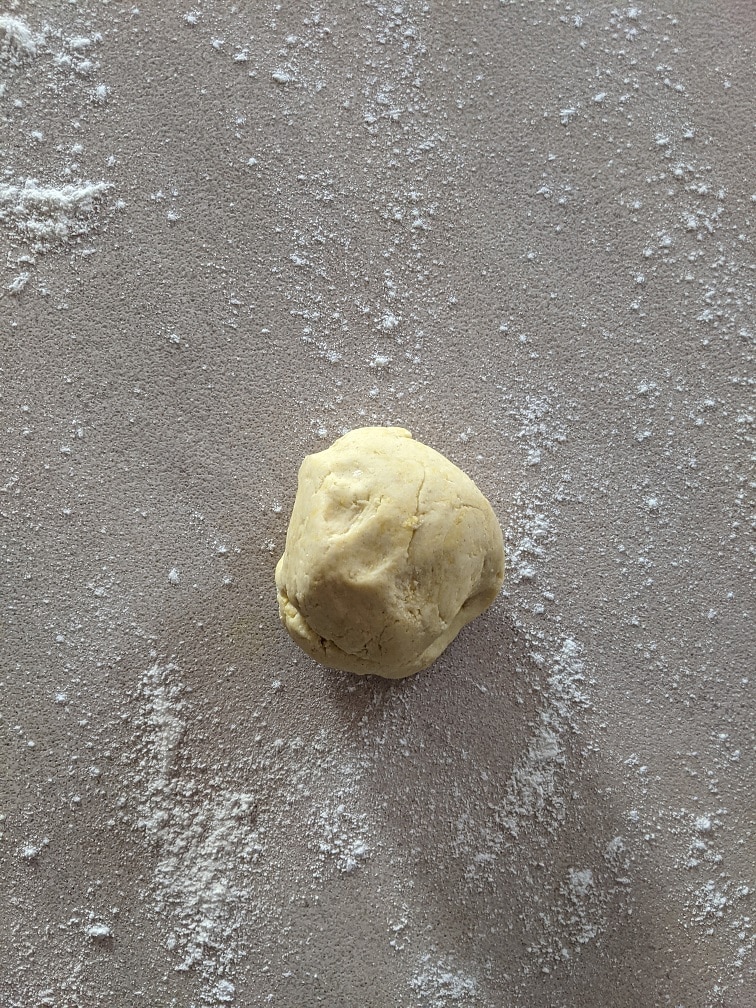
Egg Roll wrappers are essentially pasta dough. And they are made the same way. To make the dough combine egg yolks with flour and salt, add just enough water to bring the dough together. If you are using regular flour, knead the dough for ten minutes. Kneading for more than a minute or two isn’t needed if you are using gluten-free flour.
*Note: My batch of dough is half of what is written in the recipe below. I ended up having a bunch of leftover filling, so I doubled the recipe for you. So, if you are looking at my picture and wondering why it looks like I have less dough than you do, that is why.
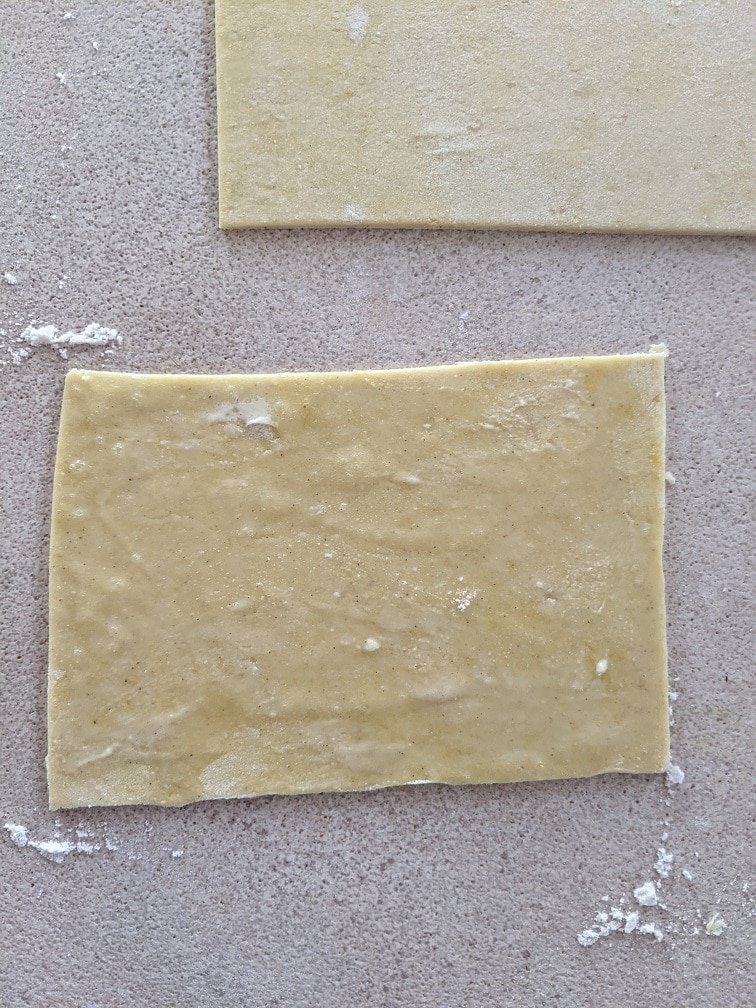
Rolling The Dough
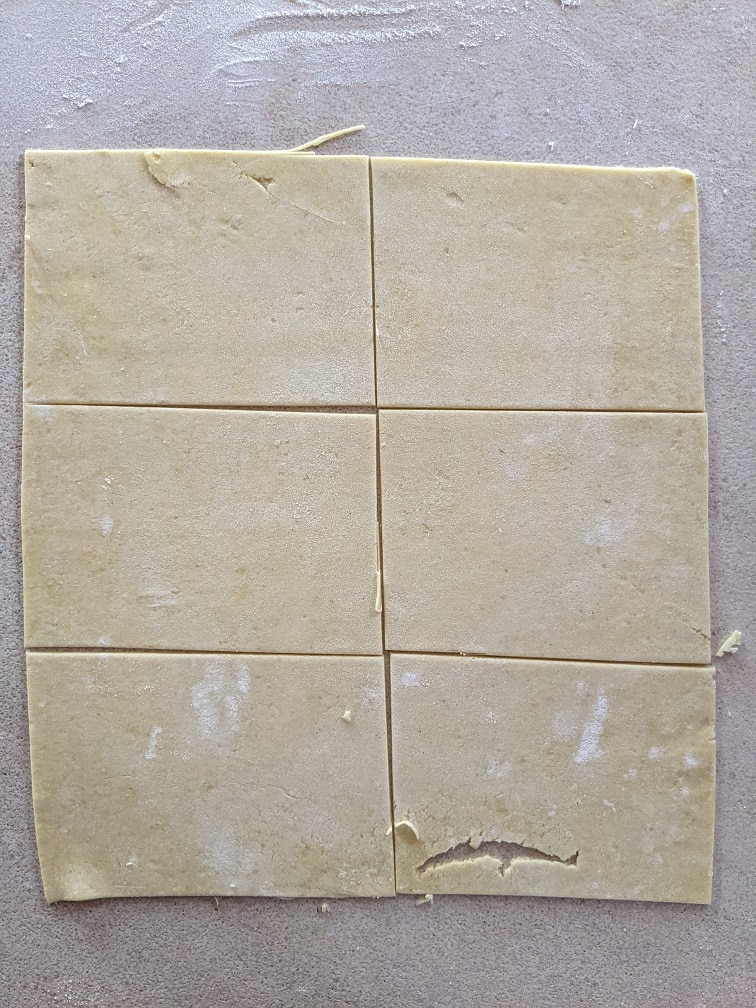
Put the dough on a floured work surface and roll it with a rolling pin to one to two milimeters thick. Trim the edges of the dough to make a large rectangle, then cut the dough into eight centimeter by ten centimeter rectangles. If you are using gluten-free flour, the excess dough can be re-rolled. I’m not sure how it will hold up to re-rolling if you are using regular flour.
*Note: When using regular flour, it is best to make the dough a day before you want to use it, then store it in the fridge overnight. Take the dough out of the fridge an hour before you want to start rolling it. If you try and make the dough using regular flour, it will be way too tough and springy to roll by hand without allowing it that day to rest.
Hand Rolling Egg Rolls
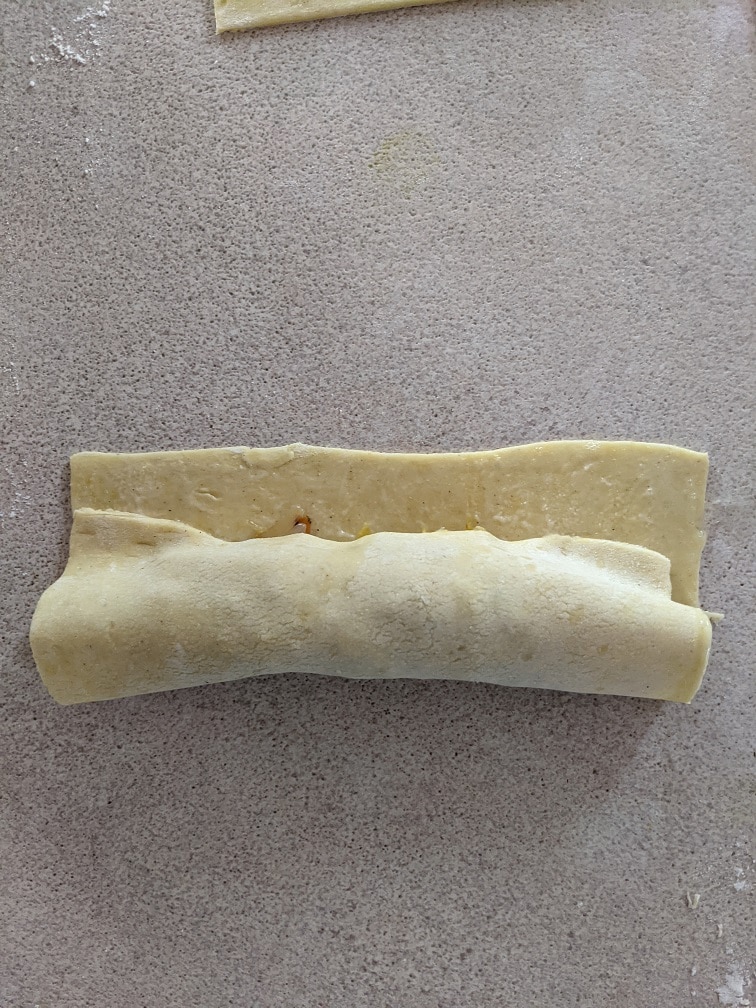
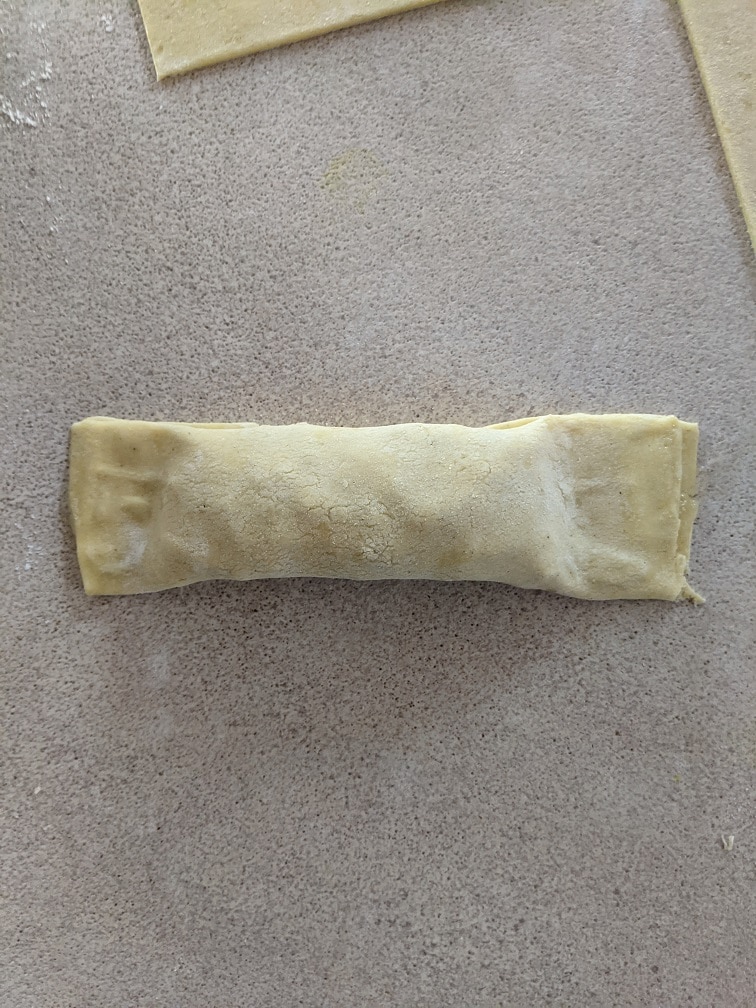
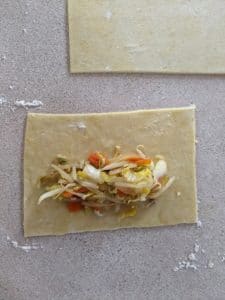
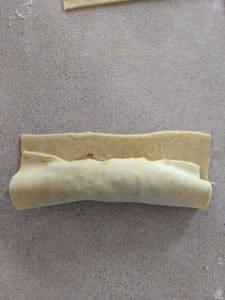
Take one of the dough rectangles and brush the edges with beaten egg white. Place two heaping tablespoons of the filling in the wrapper’s center, then spread it out, leaving a two-centimetre lip on both ends. Roll the wrapper’s bottom up and over the filling, pulling back to tighten, then roll forward to seal. Pinch the ends shut. Repeat until all of the egg rolls are made.
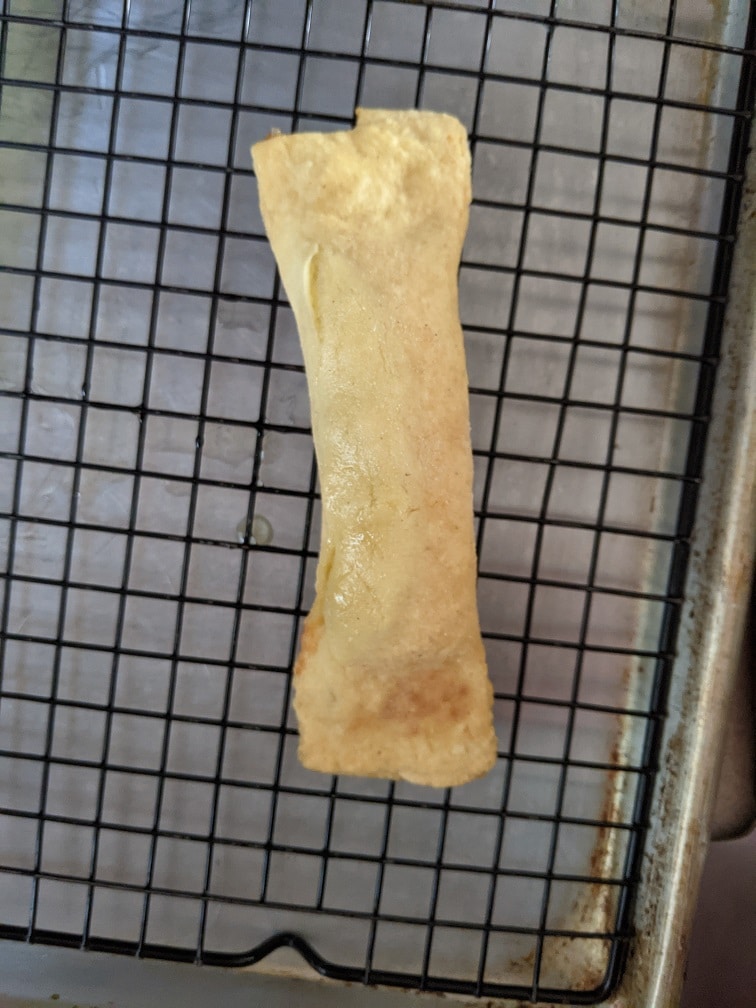
Deep-fry the Egg Rolls in 365°f oil for about five to six minutes or until they turn golden brown. Before you ask, I don’t know how these would stand up to an air fryer or to being baked. I only made them once, and I deep-fried them. Drain the fried egg rolls on a wire rack and serve with homemade plum sauce.
*Note: I did notice that when deep-fried a second time, after cooling, the egg rolls became much crispier. After the initial fry, you can cool the egg rolls and store them in the fridge for up to two days or freeze them.
Homemade Egg Rolls
This is how to make egg rolls from scratch. I used gluten-free all-purpose flour in this recipe, but you can substitute regular ap flour instead.
Heat a large wok or skillet over high heat. Add in the oil and swirl it around the pan. Put the carrot, onion, and celery in the wok and cook for 3 to 4 minutes or until the vegetables are slightly browned.
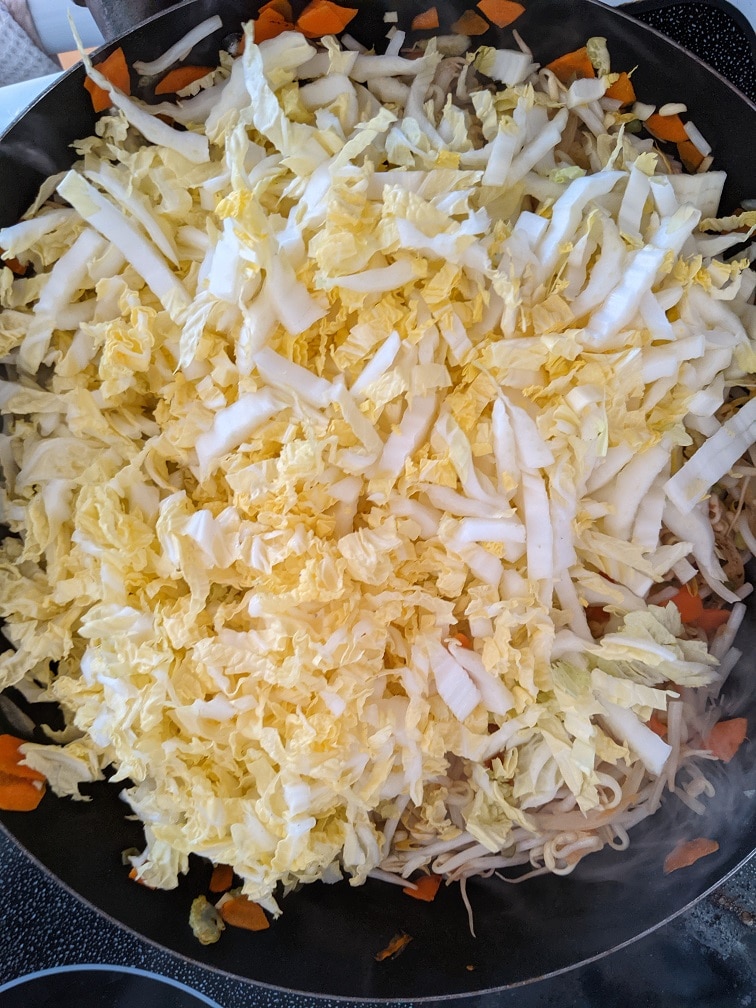
Add the garlic, and cook for 1 minute. Then add in the bean sprouts, cook for another two minutes, then the cabbage, cook for another 2-3 minutes, season with the soy sauce and salt, toss the vegetables and cook for 1-2 more minutes.
Transfer the vegetables from the wok to a strainer set over a large mixing bowl. Let the vegetables sit and drain for about 20 minutes.
Egg Roll Wrappers
Put the egg yolks into a large bowl along with the salt and flour. Mix well. Then add just enough water to bring the dough together. Transfer the dough from the bowl to a lightly floured counter. Flatten the dough with your hands then use a rolling pin to roll the dough to 2 to 3 mm thick.
Cut the dough into 8 cm x 10 cm rectangle. Any excess dough can be re-rolled and formed.
Making The Egg Rolls
Brush the edges of one egg roll wrapper with beaten egg white.
Place two tablespoons of the egg roll filling in the centre of the wrapper and spread the filling the length of the dough, leaving a 2 cm lip on both ends.
Roll the edge closest to you up and over the filling. Pull back gently to tighten then roll forward to seal.
Pinch the ends togehter to finish.
Place the rolled egg rolls on a lightly floured tea towel until all of the egg rolls have been rolled.
Deep Fry the egg rolls at 365°f for five minutes or until the egg rolls are crisp and golden brown. Serve with homemade plum sauce.
It was really something special for me to have Egg Rolls, let alone homemade ones. Of all the items I have made in this series so far, I think these are my favourite if for no other reason becasue I never thought I would ever eat an egg roll again. Whether you have to eat gluten-free or not, I suggest you make this. It is a great project for a rainy Sunday afternoon, and it is well worth the effort.
Thank you for reading the post. If you liked it, remember to share it on Facebook, Pinterest, or Twitter. Did you know that Chefsnotes.com has over 400 posts just like this one? Subscribe to the blog below, and you will be notified of every new post so you will never a helpful tip or recipe again. And if you would like to know more about me, click the picture of me below to read my story “Life on the line.”
Szechuan Beef is a dish that is often considered very spicy and comes in many different forms. Today I will share a Gluten-Free Szechuan Beef recipe that is guaranteed to please anyone and everyone. Okay, maybe not everyone. It is the internet, after all. But I digress. Are you ready to make homemade Szechuan Beef that is better than take-out? Good! Let’s get to it.
What is Szechuan?
In most Chinese Restaurants, the name Szechuan denotes a spicy dish laced with chilli peppers. And in truth, the Szechuan province of China is known for its spicy food. However, up until chilli peppers were introduced to the area in the 15th or 16th century, and even to this day, much of the spiciness in Szechuan food comes not from chillies but the Szechuan peppercorn.
Despite the name, Szechuan peppercorns aren’t actually pepper. They aren’t related to pepper or chillies at all. They do, however, look similar to peppercorns and produce a warming of the mouth. The main difference in flavour between a Szechuan peppercorn, and either regular pepper or chilli pepper, can not be overstated. Where peppercorns and chillis burn or even sting the mouth, Szechuan peppercorns warm, tingle and slightly numb the mouth in an enjoyable way. You can find Szechuan peppercorns in most bulk food stores or specialty Asian or Chinese groceries in the spice aisles. To the best of my knowledge, there is no equal substitute for Szechuan peppercorns. Szechuan peppercorns are one of the spices in the spice blend, Chinese Five Spice.
The Beef
For my Szechuan beef recipe, I used about half a pound (224g) of sirloin tip. You can use just about any cut of beef you want for this. The meat is cut so thin and marinated that it will be tender no matter what. But keep in mind that you must cut across the grain.
The grain of the meat is the direction in which the muscle fibers grow, similar to the grain of a piece of wood. This will change from muscle to muscle. The idea is that you want to shorten those muscle fibers by cutting across them rather than with them. This makes the meat more tender and easier to chew. With the sirloin that I used, I had to cut it into three separate pieces because the grain was going in three separate directions. Then I cut those three pieces across the grain. This extra step makes a world of difference to the finished product. Cut the beef no more than 5 mm thick.
Marinating The Beef
The beef for our Szechuan beef needs to be marinated for at least an hour. Two hours is better. The marinade for the beef is a teaspoon each of chopped ginger and garlic. Two tablespoons of tamari, a quarter teaspoon of fresh cracked black pepper, one egg white, and one tablespoon of cornstarch. Mix all of this up in a bowl with the sliced beef, cover it with plastic, and put it in the fridge for an hour or two.
Vegetables
Szechuan Beef isn’t just beef. That would be a little boring. So, we need a few vegetables. Take the seeds and white ribs out of a red bell pepper and slice half of it as thin as you can. Save the other half to use for something else. Peel and thinly slice an onion, about the size of a small orange. Wash well, and thinly slice two green onions. And, chop as finely as you can about a tablespoon each of garlic and ginger.
The Sauce
The Szechuan Beef also needs a sauce. To make the sauce combine one tablespoon of sugar with two tablespoons of tamari, one tablespoon rice vinegar, one teaspoon Sambal Oelek (can be found at most grocery stores or can be substituted with Sriracha), two tablespoons of water, and a pinch of salt. Stir the sauce together and set aside until your ready for it.
Other Flavours
It’s almost time to start cooking the Szechuan Beef, but we need our two key ingredients before we get going on that. They are Szechuan peppercorns and dried red chilli. If you can’t find Szechuan peppercorns, use a teaspoon of Chinese five-spice. It will slightly change the flavour of the dish, but not in a bad way. Use one tablespoon of Szechuan peppercorns and grind them in a spice grinder or a mortar and pestles. This should give you about a teaspoon of ground Szechuan pepper. Mix the ground Szechuan peppercorns with a teaspoon of dried red chilli flakes.
Cooking The Szechuan Beef
Before we get cooking, let’s talk about what I’m cooking with. I opted to use a large non-stick pan rather than a work for this for two reasons. The first reason is that most people probably have a large non-stick pan, where they don’t have a wok. Second of all, because of the egg white and cornstarch coating on the meat, it tends to stick to a wok’s surface unless it is non-stick. I thought that using the non-stick pan would be better for the demonstration and for cooking this dish. Of course, if you prefer to use a wok, go for it.
Cooking The Beef
The way to prepare this so that the beef remains tender and doesn’t become overcooked is to cook in stages. Stage one is to cook the beef. To do that, heat a pan or wok over medium-high heat. My stove goes to nine. I had the dial set to eight. Let the pan heat thoroughly. When you splash a little water on it, it should sizzle and roll away. Add one tablespoon of cooking oil to the pan (ensure there is no water in the pan before adding the oil). I used canola oil, but any oil will do. Spread the oil around the pan and add the beef. Let the beef sit for at least one minute before stirring or tossing it. Move it around and let it sit for another minute. Cook the beef only until it is golden brown, then take it out of the pan. It should only take three to four minutes. Don’t worry about cooking the beef all the way through. Just get a little colour on it.
Building The Flavour
Put the pan back on the heat, and add in another tablespoon of oil along with the ginger and garlic. Cook the ginger and garlic for about a minute, then add in the ground Szechuan peppercorns and chilli. Cook for forty-five seconds to a minute.
Vegetables
After the Szechuan pepper and chilli have been in the pan for about a minute, add all of the vegetables. Normally, I would suggest doing this in stages (if you are making a double batch of the recipe, add the onions and green onions first, cook for three minutes, then add in the red peppers) to maintain the heat of the pan. However, because the amount of vegetables we are using does not cover the pan’s whole surface, it won’t cool down too much. We actually want the pan’s temperature to drop slightly so the garlic, ginger, pepper, and chilli don’t burn.
Throughout this whole cooking process, I do not turn the temperature down. You must not either. If you feel like your pan is getting too hot or your food is burning, keep stirring the food, lift the pan off the heat for thirty seconds, and then put it back down. The pan needs to retain the majority of its heat. If the pan cools down too much, moisture coming off the vegetables will hit the surface and pool rather than evaporate. If this happens, our stir-fry will become a stir-boil, which no one wants.
Adding The Beef Back In and The Sauce
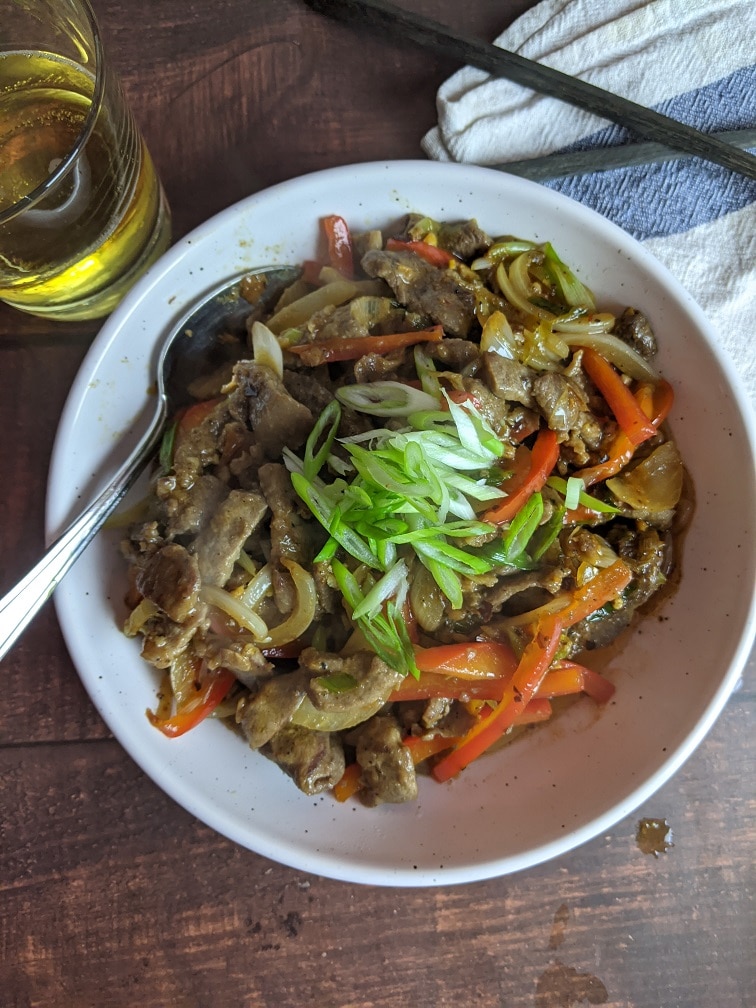
The final step to making this Szechuan Beef is to add the partially cooked beef back into the pan, let it heat back up for a minute or so, then add in the sauce. The cornstarch on the beef will help to thicken the sauce, so there is no need for an additional thickener. Continue to cook for about two minutes or until the sauce thickens. Remove the Szechuan Beef from the pan to a serving dish, garnish with green onion, and serve with rice.
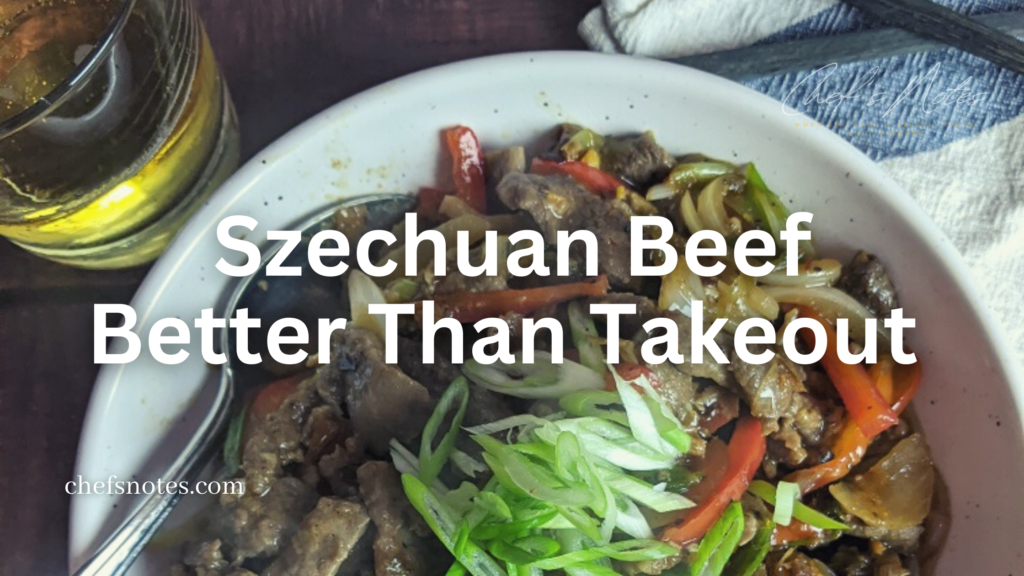
Gluten-Free Szechuan Beef, Better than take-out
This Szechuan Beef is tender, flavourful and gluten-free. It warms and slightly numbs your mouth without being too hot. It is a delicious must make that everyone will love.
Keyword: Beef Soup, Chinese 5 Spice, Chinese Food Series, Chinese Take-Out, Gluten Free, Stir-Fry
Servings: 4servings
Author: Chef’s Notes
Ingredients
Steak Marinade
1/2lbsirloin steakthinly sliced
1Egg White
1tbspCornstarch
1tspGarlicchopped
1tspGingerchopped
1/4tspFresh Ground Pepper
Sauce
2tbspTamari
1tbspsugar
1tbspVinegar
1tspSambal
2tbspwater
A pinch of salt
Flavourings
1teaspoonGround Szechuan Pepper Corns
1teaspoondried red chillicrushed red pepper flakes
Vegetables
2green onionssliced
1small Onionsliced
1/2Red Bell Pepperseeds and ribs removed, sliced
1tbspGarlicminced
1tbspGingerminced
2tbspcooking oil
Garnish
Green Onions Tops
Instructions
Slice the beef, half a centimetre thick, across the grain.
Make a marinade of tamari, vinegar, ginger, garlic, pepper, cornstarch and egg white. Mix well, then stir in the beef, cover and put in the fridge for two hours.
In a small bowl, combine the sugar, soy sauce, sambal, water and salt to make the sauce. Set aside until you are ready to use it.
Heat a large non-stick frying pan over medium-high heat and add in 1 tbsp of vegetable oil. Add the beef to the pan and cook for three to four minutes or until golden brown. Take the beef out of the pan and set aside.
Return the pan to the heat and add another tablespoon of oil along with the second amount of ginger and garlic. Cook for one to two minutes, then add in the ground Szechuan pepper and chilli. Cook for forty-five seconds, then add the vegetables into the pan.
Stir-fry the vegetables for three to four minutes, then add the beef back into the pan along with the sauce. Cook for two to three minutes or until the sauce is thick.
Put the Szechuan beef in a serving bowl, garnish with green onions and serve.
This Szechuan Beef recipe may be slightly different than you are used to, but it is excellent and similar to what you will find in higher-end Chinese restaurants. It isn’t nearly as spicy (hot) as you think it would be. Because of the Szechuan peppercorns, it warms you up, slightly numbs your mouth, and gives you a sense of heat without burning your face off. In my opinion, this is a must-make for sure.
This recipe marks the halfway point of my Homemade Chinese Food Series, which I think might be my favourite series so far. You can check out the other recipes in the series here. If you liked this post, you’ll probably really like this Gluten-Free Sweet and Sour Chicken Ball Recipe. And if you have a favourite Chinese Take-Out dish that you’d like to see in the series, tell me about in the comments below or on social media.
Thank you for reading the post. If you liked it, remember to share it on Facebook, Pinterest, or Twitter by clicking the icon to the left of the page. Did you know that Chefsnotes.com has almost 400 posts just like this one? Don’t ever miss a post again. Become a Chef’s Notes member right here. You will be notified of every new post. And if you would like to know more about me, click the link below to read my story.
This gluten-free sweet and sour chicken balls recipe with classic red sauce will make you forget that you’re eating gluten-free. It tastes just like what you’d find in an American-style Chinese Food Restaurant. More importantly, you don’t need a culinary degree to make this. The basic recipe is to make flavourful chicken meatballs, batter and fry them and toss them with the homemade red sweet and sour sauce. Anyone, no matter their skill level, can make this recipe.
Mixing The Chicken
Ingredients
In the meat mix itself, there are only five ingredients. This recipe will seem too simple for how delicious it is, but it works very well. The ingredients are two pounds of ground chicken, one teaspoon of salt, a quarter teaspoon of black pepper, one tablespoon of puréed garlic, and one tablespoon of grated ginger. Put all of those ingredients together in a bowl and mix.
Forming Chicken Balls
To form the balls, divide the meat into sixteen even pieces. If you’d like more petite chicken balls, you can get as many as 24 out of this recipe. Wet your hands with cold water when rolling the balls to prevent the chicken from sticking. Put the formed chicken balls on a greased baking sheet and cook at 400°f for twenty minutes. If you make twenty-four balls, it will only take seventeen minutes to cook them.
Why precook the chicken balls?
Precooking the chicken balls does three things. It makes them easier to batter. It makes them quicker to fry, giving them a lighter and crisper batter. And it makes them safer because they are fully cooked before they go in the fryer.
Gluten-Free Batter
While the chicken balls are cooking in the oven, make the batter and the sauce. Start with the batter because it needs to chill before being used. I’ve made this batter with two gluten-free flour brands, and both have come out very differently. This recipe would work the same with non-gluten-free flour as well. Depending on your flour, you may need to add more water than the recipe calls for. One of the gluten-free flour brands only required one cup of water, while the second brand needed two cups. The vital thing to note isn’t the exact quantity of water you add but the consistency of the batter. It should have the same consistency as melted ice cream.
Batter ingredients
The batter ingredients are one cup of all-purpose gluten-free flour, one teaspoon of baking powder, half a teaspoon of salt, one egg, and one to two cups of soda water (or sparkling water). Mix the dry ingredients first, then add the egg and soda water and mix. Again, add more water as needed to get the batter to the correct consistency. Once the batter is made, put it in the fridge for about fifteen minutes or until ready to use. The batter should be as cold as possible when it hits the hot oil to ensure a crisp texture.
Why Soda Water?
The reason the recipe calls for soda water over plain water is for the bubbles. The bubbles in the soda water will make the batter light and crisp. It is the reason why beer is used to batter fish. It’s all for the bubbles.
Sweet and Sour Sauce
The Red Colour
The red colour in some sweet and sour sauce recipes comes from either food colouring or ketchup. To get the red colour and that perfect sweet and sour flavour, this recipe uses the juice from a jar of Maraschino Cherries. If you’d like, you could use food colouring; cherry juice is a much better option because of the flavour although it obviously has food colouring in it.
Sweet and Sour Sauce Ingredients
The sweet and sour sauce ingredients are one cup of white vinegar, one cup of sugar, a quarter teaspoon of salt, half a cup of Maraschino Cherry juice, and a quarter cup of water mixed with a quarter cup of cornstarch.
Making Sweet and Sour Sauce
To make the sweet and sour sauce put the vinegar, sugar, salt and cherry juice in a medium-sized pot. Bring the pot to a boil over medium-high heat, stirring every minute or so. Once the sauce starts to boil, add the cornstarch and water mixture (stir the cornstarch and water before pouring it into the sauce). Whisk the sauce until it is thick and completely translucent. Take it off the heat until you are ready to serve.
Storing Sweet and Sour Sauce for later
You can store the sweet and sour sauce in the fridge in an airtight container for up to three weeks. To use it, heat it in a pot over medium heat with a tablespoon or two of water.
Finishing The Gluten-Free Sweet and Sour Chicken Balls
All that is left to do is to batter and fry the chicken balls. To do that, dredge the cooked balls in about half a cup of gluten-free flour first, dip them in the batter, then into a fryer set to 365°f and fry for five minutes. You can do this without a fryer, but it’s not recommended unless you know what you are doing. Deep-frying can be very dangerous. If you don’t have a deep-fryer, maybe you can borrow one from a friend. They would be glad to let you use their fryer in exchange for some chicken balls.
Once the chicken balls have cooked for five minutes, take them out of the oil and place them on a cooling rack set over a sheet pan. Continue until all of the balls have been cooked. At this point, the chicken balls can be cooled and frozen. They can be cooled and reheated in the oven or the fryer. Or, you can fry them again to brown them and eat them right away. If you want to eat the chicken balls immediately, keep the fryer’s temperature at 365°f and cook them for another four minutes or until they are browned. Once browned, take the balls out of the fryer, let them drain a little on a rack, then plate them and top them with the sweet and sour sauce.
Gluten-Free Sweet and Sour Chicken Ball Recipe
Make classic Chinese Take-Out Sweet and Sour Chciken Balls at home. You won't even know they are gluten-free.
Keyword: Chicken, Chinese Food, Chinese Food Series, Sweet and Sour, Take-out
Servings: 4people
Author: Chef’s Notes
Ingredients
Chicken Ball Mix
2lbsGround Chicken
1tbspPuréed Garlic
1tbspGrated Ginger
1tspSalt
1/4tspBlack Pepper
1tbspVegetables Oil
Batter
1cupAll-Purpose Flour(Gluten-Free)
1tspBaking Powder
1/2tspSalt
1Egg
1cupSoda WaterPlus More As Needed
Sweet and Sour Sauce
1cupWhite Vinegar
1cupSugar
1/2cupMaraschino Cherries Juice
3tbspWater
3tbpsCornstarch
Instructions
Chicken Ball Mix
Mix together the chicken, ginger, garlic, salt, and pepper.
Form the mix into 16 – 24 evenly-sized balls depending on the size chicken balls you'd prefer.
Place the balls on a greased sheet pan and bake them at 400°f for 17-20 minutes.
Batter
In a medium mixing bowl combine the flour, baking powder and salt.
Break the egg into the flour mixture and add 1 cup of soda water. Whisk until a smooth batter forms. Whisk in more water as needed. The batter should be the consistency of melted ice cream.
Put the batter in the fridge to chill for about 15 minutes before using.
Sweet and Sour Sauce
Put the vinegar, sugar, and cherry juice in a medium pot and bring to a boil.
Separately, combine the cornstarch and water then whisk it into the vinegar, sugar mix.
Boil and whisk the sauce until it is thick. Take it off the heat and let it sit until you're ready to serve.
Frying The Chicken Balls
Toss the chicken balls in a 1/2 cup of flour, dip them in the cold batter, and fry on 365°f for 5 minutes.
Let the balls cools on a rack then refry on 350°f until golden brown.
Serve with the sauce over them.
Notes
The last time I made these I used a different brand of gluten-free flour than I normally do and had to add about double the amount of water. Start with 1 cup of soda water then whisk in more as needed. The batter should be the consistency of melted ice cream.
It’s a good idea to take an afternoon and make a double or even triple batch of this recipe because once you taste these Gluten-Free Sweet and Sour Chicken Balls, you’re going to wish you had made more. The sauce works very well on all sorts of things from beef meatballs, to chicken legs. And it lasts a long tie in the fridge.
This week marks the end of my Simple Summer Dessert Series, and I thought I would go out with a bit of a bang. Today, I am going to show you how to make a Chocolate Mousse Cake. At first, it may seem like this is a complicated dessert that should have no place in my simple summer dessert series. However, when broken down into its three parts, this cake is anything but difficult.
This Chocolate Mousse Cake, as I said, has three parts. First, there is the chocolate cake. Because my cake has to be gluten-free and I have very little interest in making a gluten-free cake from scratch, I used a mix which you will see in a minute. If you want to make the cake, just use your favourite chocoalte sponge cake recipe. Nothing hard about this so far. The second part of this cake is the Chocolate Mousse. The mousse has five ingredients in it, two of those are coffee and brandy. The final piece of this cake is the mirror glaze. Easy enough, right? Let’s take a look at the full process.
The Cake
As I said, I used a gluten-free cake mix to make the base of my Chocolate Mousse Cake. The brand I used is called Kinnikinnick. I’ve used this mix previously in this series when I made the Chocolate Strawberry Shortcake. The mix comes together easy enough by mixing eggs, oil, and water, then the cake mix. Because I wanted my cake to be relatively thin (and because I couldn’t find my round cake pans), I baked my cake on a rectangle sheet pan. Bake the cake and let it cool completely before moving on to the next step.
Chocolate Mousse
Chocolate mousse is this super decadent thing, that people assume must be really hard to make. It isn’t. Just like with the Chocolate Mousse Cake as a whole, we are going to break the chocolate mousse down into four parts and simplify the process.
Part 1 – The Base
The base of the mousse is a combination of egg yolks and sugar that are heated over a water bath to thicken them. Beat together four egg yolks and half a cup of sugar in a heatproof bowl. Put the bowl over a pot of barely simmering water and continue to beat the mixture for about five minutes or until it is too hot to dip your finger into. Take the bowl off the heat and continue to beat it on medium for another five minutes to cool the egg mixture down. When finished, the mixture should be pale yellow. You can do all this whisking by hand, but it is much easier to use a handheld mixer. Set the yolks and sugar aside and move on to part two.
Part 2 – Chocolate
The second step in making the chocolate mousse is to melt the chocolate together with espresso and brandy (you can use rum, Irish cream, or no alcohol at all if you would prefer). Use one cup of semi-sweet chocolate chips, a quarter cup of espresso or strong coffee, and two tablespoons of brandy. Put all three ingredients in a heatproof bowl, put the bowl over barely simmering water, and let it sit until the chocolate is melted. Stir the chocolate to make sure everything is combined.
Part 3 – The Egg Whites
While the chocolate is melting, put the egg whites in the bowl of a mixer with a pinch of salt, or use your handheld mixer. Beat the egg whites to firm peaks. This should take about four to five minutes on high speed.
Part 4 – Putting it all together
The final step to making the mousse is to mix the yolks and the chocolate. Then, to fold in the egg whites. The purpose of the egg whites is to give the mousse its characteristic airiness, for them to do that, they have to be folded into the mix rather than stirred in. Folding is a process where a spatula cuts through the center of the mix, scoops down and out towards the edges of the bowl. Repeat this until all of the egg whites have been folded into the chocolate. The best way to incorporate the whites into the chocolate is to do it one third at a time. Take a third of the whites, and fold them into the chocolate. Take another third and do the same thing, then take that final third and fold it in.
You have now made chocolate mousse. It can be chilled and eaten as-is with a few raspberries and some whipped cream, or you can use it to layer a cake as we are going to do.
Combine the egg yolks and sugar. Beat well then set over a simmering pot of water and continue to beat until the mixture is too hot to dip your finger into. Remove from the heat and continue to beat for another five minutes.
In a separate heat-proof bowl combine the chocolate, espresso, and brandy. Set over the simmering water until the chocolate has melted. Mix the chocoalte, coffee, and brandy until they are smooth then mix into the egg yolk and sugar mixture.
Beat the egg whites on high with a pinch of salt for five minutes or until they reach stiff peaks. Fold the whites into the yolk and chocolate mixture.
Spoon the mousse into ramekins, cover with plastic, and cool in the fridge for two hours before serving or use to make a chocolate mouse layer cake.
With the mousse ready, it is now time to layer the cake. I used an eight-inch springform pan as my mould. To cut the cake into rounds the correct size of the pan, push the pan into the cake like a giant cookie cutter. Line the base of the pan with parchment paper, and snap the ring in place. Put the first piece of the cake in the pan, cover with half the mousse, top with the second piece of cake, then the rest of the mousse. Cover the cake with plastic wrap and put it in the freezer overnight.
The Mirror Glaze
The absolute final step in making this Chocolate Mousse Cakes is to make the mirror glaze and pour it over the cake. Before you start making the glaze, take the mousse cake out of the freezer and put it in the fridge. To make the glaze, I followed this recipe from MarthaStewart.com. The glaze is a combination of cream, sugar, cocoa, water, and gelatin, which is what gives it the mirror finish. I should have cooked my glaze a minute or two longer because it was a little thin, but all in all, it worked well.
Make the glaze and let it cool to room temperature. Take the cake out of the springform pan and set it on a cooling rack set over a large bowl. Pour the glaze over the cake then, put the cake on a plate, pop it in the fridge for an hour or two to finish defrosting, and for the glaze to set, then serve.
Conclusion
This Chocolate Mousse Cake is incredible, but it is also very rich. Serve it in small pieces with a little dollop of whipped cream. It goes great with a cup of coffee or a glass of milk. Now, I know that there are a bunch of steps to making this cake, but are any of them overly tricky? I honestly don’t think so. Do you? If you have any questions or comments, let me know in the comments section below.
Thank you for reading the post. If you liked it, remember to share it on Facebook, Pinterest, or Twitter by clicking the icon to the left of the right of the page. Did you know that Chefsnotes.com has almost 400 posts just like this one? Imagine all the great tips, tricks, and recipes you’ve missed. Don’t miss any more! Subscribe to Chef’s Notes by putting your email address in the subscription box below. You will be notified of every new post. And if you would like to know more about me, click the link below to read my story.
It is entirely forgivable if you think of bread pudding as a winter dessert. It can be dense and rich. But I’m here to tell you that it also makes a fantastic summer dessert. This Strawberry White Chocolate Bread Pudding is the perfect dessert for a beautiful summer day. The combination of strawberries and white chocolate tastes like pure sunshine. Now, don’t you want to eat sunshine? I know I do. Alright, enough chit chat, let’s take a look at the recipe.
The Base
The base of this Strawberry White Chocolate Bread Pudding is a perfect base for any bread pudding. You could substitute the strawberries in this recipe for blueberries, or replace the strawberries and white chocolate for bananas and dark chocolate. The point is that when you master this recipe, you are learning to make bread pudding period. So, you can use this recipe to create your own by adding new combinations of ingredients. The base is four eggs, a half-cup each whole milk, and whipping cream then three-quarters of a cup of sugar. Mix this all together.
The Bread
You can’t have bread pudding without bread. Shocker, I know. Ideally, a lovely brioche is a perfect bread for bread pudding. However, I am using a basic gluten-free bread. You can use whatever bread you would like. The only recommendation I will make is to not to use a bread with too strong a crust as the crust won’t soften that much. Use four cups of bread in total.
It is best to use either stale bread or to toast the bread before adding it into the egg mixture. Toasting the bread or using stale bread will help the bread keep its structure. So, rather than just being one solid mass of soggy bread, the bread pudding will have texture. You don’t have to toast the bread or use stale bread, but I do recommend it.
Add the bread to the egg mixture, press it down and let it sit for about five minutes. You want the bread to absorb as much of the egg mixture as possible. As the bread pudding cooks, all that egg mixture in the bread will turn into a custard. Sounds good, doesn’t it?
The Strawberries and White Chocolate
In total, use one cup of sliced strawberries. Keep that ratio in mind. If you are adding fruit to a bread pudding, go for a four to one ratio of bread to fruit. If you add more fruit than that, the juices that escape when cooking may water down the custard, ruining your bread pudding. Along with the strawberries, add in three ounces of chopped up white chocolate. You can add more chocolate if you’d like, but I found that three ounces to be the perfect amount.
Mix it and Bake It
With all of the ingredients in the bowl, and the bread finished soaking, mix it all up and pour it into a parchment-lined nine-inch pan. I used a little roasting pan from IKEA. You can use a nine-inch cake pan, or even put this in a lined muffin tin. I’ll leave that up to you. Bake the bread pudding on 350°f for twenty-five minutes. If you make this in muffin tins, it will take about twenty minutes to bake.
Some people swear by baking their bread pudding in a water bath, but I don’t find it needs it. I’ve had no issues baking this bread pudding without a water bath. If you do want to cook it that way, go ahead, it won’t hurt anything, but it may extend the baking time by ten minutes or so.
Check the doneness of the bread pudding by giving the pan a little shake. If the whole thing wobbles a bit, it is probably done. If the center kind of waves, it’s not done. You can also check it by sticking a knife in the center, like a cake it should come out clean. Once the bread pudding is baked, let it cool for five to ten minutes before digging in.
Serving The Strawberry White Chocolate Bread Pudding
You can serve your Strawberry White Chocolate Bread Pudding however you’d like, but I found it didn’t really need anything. To make the plate pretty, I grated some white chocolate onto it before putting the bread pudding down, and I garnished it with a fresh strawberry, that was it. I don’t think this needs a sauce, whipped cream, or ice cream. It is excellent on its own.
Conclusion
Even though I think that you should make this recipe (see the full recipe below), I think it is more valuable as a base recipe. I’d love to see what kind of unusual combinations you come up with. Tell me about them in the comments below.
Thank you for reading the post. If you liked it, remember to share it on Facebook, Pinterest, or Twitter by clicking the icon to the left of the right of the page. Did you know that Chefsnotes.com has almost 400 posts just like this one? Imagine all the great tips, tricks, and recipes you’ve missed. Don’t miss any more! Subscribe to Chef’s Notes by putting your email address in the subscription box at the top right of the sidebar. You will be notified of every new post. And if you would like to know more about me, click the link below to read my story.
Strawberry White Chocolate Bread Pudding
The taste of summer in a bread pudding. What more do I need to say?
Today on Chef’s Notes, we are going to take a look at how to make delicious Italian Almond Meringue Cookies. I first had these cookies about ten years ago. They were made by an old Italian woman that used to do prep in a restaurant where I used to work. She told me that the secret to these cookies is to whip them for a very long time. According to this lovely Italian woman, the mixer should pretty much be smoking by the time it has finished mixing. I don’t recommend taking things so far that your mixer bursts into flames, but the cookies are best when mixed for about ten minutes on high. Of course, that’s only one part of the equation. Let’s take a look at the full process of making these meringue cookies.
Toasting the Almonds
Almond meringue cookies need almonds, so that is where we are going to start. Heat a frying pan over medium-high heat and add to it half a cup of almonds. Do not add oil to the pan. Keep the almonds moving as much as possible while they are toasting. Cook them for about 4-5 minutes or until they turn golden brown. You can do this in the oven at 350°f for about 10 minutes, for a more even roast. However, I prefer to toast nuts in a pan, rather than in the oven because I have more control, even if the toast isn’t as uniform. Once the nuts are toast, pour them out of the pan on to a plate and let them cool to room temperature.
How to make Meringue
The almonds are toasted and cooling. Now it’s time to make the meringue. Use four egg whites that have been sitting at room temperature for about half an hour. It is essential that there is no egg yolk at all in the whites. The fat from the egg yolk will prevent the whites from reaching the volume they need to make these cookies. It is also vital that the mixing bowl not have any oil or grease in it at all. I find it helps to rub the inside of the mixing bowl with lemon before making the meringue. The acid from the lemon will break down any small amounts of grease that are on the bowl. However, make sure not to rub the bowl with the lemon rind. Natural lemon oils will come out and cling to the sides of the bowl, ultimately defeating the purpose.
Put the four egg whites in the bowl of the mixer and mix on medium speed for 2-3 minutes or until the egg whites start to foam. At this point, add in the salt, lemon juice, and almond extract. Turn the speed of the mixer up to high and slowly add the sugar about a third of a cup at a time. When all the sugar is in the meringue, step back, leaving the mixer on high, and set a 10-minute timer. When the timer goes off, the meringue is ready.
A note about the amount of sugar.
There is 1 cup of sugar in this recipe, which may seem like a lot. Do not cut this back. If you do, the meringues won’t set properly. This recipe makes 24 cookies, minimum so, even though it seems like a lot of sugar, it is only half a teaspoon in each cookie.
When the meringue is ready, and the almonds have cooled, you can combine the two. Put the almonds in the bowl with the meringue, and using a spatula, gently fold them into the meringue to evenly spread them throughout. Put the meringue in a large piping bag with an opening big enough for the almonds to come out. I was out of piping bags, so I used a large ziplock bag with one corner cut out. This worked reasonably well.
Pipe the meringue cookies on to two parchment paper-lined baking sheets. I find it helpful to spray the sheet pan with cooking spray before putting the parchment down. This helps hold the paper in place and prevents it from rolling. You can also set a dab of meringue on each corner of the sheet pan before putting the parchment down. The meringue in the edges of the pan will have the same effect as the cooking spray, but it can be a bit more challenging to clean afterwards.
Bake the cookies at 225°F for two hours. Remove them from the oven and let them cool completely before putting in an airtight container. If the meringue cookies are left unsealed for too long, they will start to pull moisture from the air and get soggy and sad. These cookies will last in an airtight container for about a week before they begin to go stale.
Conclusion
Whether you have some company over, want something nice and light to have with your afternoon tea or coffee, or just feel like something sweet, these Italian Almond Meringue Cookies are the perfect thing. Yes, they take a while to bake, but there is very little active time involved. You can put a batch of these together in a few minutes, pop them in the oven then go about your day. I promise, two hours after these go in the oven, you will be dying for something sweet and past you will have delivered.
Thank you for reading. Remember to subscribe to Chef’s Notes at the top right of the sidebar, so you never miss a post. And if you enjoyed this post, share it on Facebook and Pinterest because that way, other people who may enjoy it can find it. Thanks for reading, and have a great day.
Italian Almond Meringue Cookies
A simple and delicious Almond Meringue Cookie recipe that also happens to be gluten-free.
Keyword: Almond Cookies, Cookies, Gluten Free, Meringue, Meringue Cookies
Servings: 24cookies
Author: Chef Ben Kelly
Ingredients
4Egg WhitesRoom Temp
1cupSugar
pinchof salt
1/4tspLemon Juice
1/4tspAlmond Extract
1/2cupSlivered Almonds
Instructions
Pour the slivered almonds into a hot, dry pan and toss to toast them until they are golden brown. Remove the almonds from the pan, and let cool to room temp.
Slowly whip the egg whites until they start to foam.
Add the salt, almond extract, and lemon juice and turn the mixer on to high.
Slowly pour in the sugar and whip on high for 10 minutes.
Fold the toasted almonds into the meringue and spoon into a piping bag with a wide opening.
Pipe the meringue into 2 tbsp mounds onto a parchment-lined sheet pan.
Bake in the oven at 225°F for two hours. Remove from the oven and let cool completely then put in an airtight container and eat within one week.
We use cookies on our website to give you the most relevant experience by remembering your preferences and repeat visits. By clicking “Accept”, you consent to the use of ALL the cookies.
This website uses cookies to improve your experience while you navigate through the website. Out of these, the cookies that are categorized as necessary are stored on your browser as they are essential for the working of basic functionalities of the website. We also use third-party cookies that help us analyze and understand how you use this website. These cookies will be stored in your browser only with your consent. You also have the option to opt-out of these cookies. But opting out of some of these cookies may affect your browsing experience.
Necessary cookies are absolutely essential for the website to function properly. This category only includes cookies that ensures basic functionalities and security features of the website. These cookies do not store any personal information.
Any cookies that may not be particularly necessary for the website to function and is used specifically to collect user personal data via analytics, ads, other embedded contents are termed as non-necessary cookies. It is mandatory to procure user consent prior to running these cookies on your website.