One of my first food memories, actually just one of my first memories, is of a small pizza place under the MacDonald bridge in Dartmouth. It was only about two or three blocks from my family home, and I have a memory of trying my first bite of donair from there. We moved from Dartmouth when I was almost four, so that first donair experience would have been when I was about three. I have loved them ever since. Over the years, I have done my fair share of experimenting with donair flavours. I even once put a donair-spiced scallop dish on a menu. And so, I wanted to make a donair, without making a donair. I wanted the same flavours but in a different package. To do that, I went back to the origins of the donair but kept the flavours that I’ve loved for my whole life. And so, I present to you my Halifax-Style Donair Kabobs with tomato salad and yogurt sauce.
The Recipes
Halifax-Style Donair Kabob
Donair Kabobs seasoned in the Halifax Style. The perfect dish to add to your barbecue menu.
Place all the ingredients in a medium mixing bowl and mix well. Knead the meat mixture for five minutes or until it develops a tacky texture and appearance.
Divide the meat in four and form each fourth of meat around a 12-inch skewer. If you are using wooden or bamboo skewers, soak them in water for 1 hour before skewering the meat.
Wrap the meat around the skewer and gently squeeze it to spread it out in an even layer around the length of the skewer.
Heat your grill to 400°f.
Grill the skewers on the hottest part of your grill for 10 to 12 minutes or until cooked through. Flip them every 2 to 3 minutes.
Take the skewers off the grill and serve immediately.
Notes
These Donair Kabobs are great with tomato and onion salad and garlicky yogurt sauce, but they also work very well in the traditional pita, with donair sauce, tomato and onion, or in a salad bowl with garlic mayo.
If you aren’t from Nova Scotia, you may be wondering to yourself, “What is a Halifax Donair?”. Let me enlighten you. A Halifax Donair is made from spiced beef that is cooked on a verticle spit. Thinly shaved and wrapped in a soft Lebanese-style pita with fresh diced white onion and tomato, and finished with a sweet and tangy sauce made of sweet and condensed milk, vinegar, garlic powder, and onion powder. It is the kind of thing you usually only eat after a long night of drinking, or on a Friday night in with friends. Every Pizza Place in the province, except for some of the big national chains, sells donairs. And just about every Nova Scotian, at least from a certain generation forward, has a deep-seated love for them. I happily include myself in this group.
Other places in the world have Donair, often spelled doner kebab, or gyros, which are similar. But none are quite like the Halifax Donair, which was introduced to the region by Greek immigrants in the 1970s. It was originally served as a lamb gyro with tzatziki sauce, but the recipe was changed to what it is now to suit local tastes. Since then, it has been a local favourite and has now begun to spread across the country. However, only one city can truly claim it as their own. It is, after all, the official food of Halifax.
Making The Donair Kabob Meat Mixture
Okay, let’s get cooking. Start with a pound of lean ground beef. Add some flour (I used gluten-free all-purpose flour), Italian seasoning, garlic powder, dried onion or onion powder, cayenne, oregano, salt, and pepper. See the recipe above for all the measurements.
Mixing and Tasting The Donair Meat
Mix the meat well. I mean really well. You want to knead it for about five minutes or until it develops a tacky look and texture. This will give the meat the right texture when cooked. Break off a little piece of the meat and cook it in a small frying pan over medium-high heat. Taste it, and adjust the seasoning as needed. This is a good habit to get into whenever making anything with ground meat like meatloaf or burger. Season the meat, cook off a little piece and taste it.
Making Donair Kabobs
The picture below shows six skewers, but the recipe above only makes four. I apologize for the confusion. I adjust the recipe because the salad and the sauce were only enough for four.
Divide the meat into four evenly sized balls. Wrap each ball around a metal or pre-soaked wooden or bamboo skewer. Gently squeeze the meat to spread it out the length of the skewer in an even layer.
Grilling The Donair Kabobs
Heat your grill to 400°f and let it sit for about 10 minutes to get the grates nice and hot. Cook the skewers for 10 to 12 minutes, rotating every 2 to 3 minutes until cooked. The meat should be firm to the touch with a little spring back when fully cooked. Take the Donair Kabobs off the grill and serve immediately.
Garlicky Yogurt Sauce
Traditional Donair Sauce is made with sweet and condensed milk, onion powder, and garlic powder. It is delicious but not great if you are trying to watch your waistline. So, I wanted to make a slightly healthier sauce. I made a version with non-fat Greek yogurt as the base. It is sweetened with honey, soured with lemon juice, has plenty of garlic, a bit of onion powder, and tastes delicious. Mix all the ingredients, cover the bowl and put it in the fridge for an hour to let the flavours develop. This sauce works with any spiced meat and goes great on salad bowls too.
Tomato and Onion Salad
I have to tell you, the surprise breakout star of this meal is by far this really simple tomato and onion salad. I loved the Donair Kabobs, the Garlicky Yogurt sauce was fantastic, but this salad was amazing! Fresh vine-ripened tomatoes with garlic, red onion, parsley, white wine vinegar, olive oil, sugar, salt and pepper. That’s all there is to it, and I wouldn’t be surprised if this becomes one of your new favourite summer side dishes. It has become one of mine. Just like with the sauce, mix all the salad ingredients, cover the bowl, and let it sit in the fridge for an hour before serving for best results.
Putting It All Together
All the components of this meal are good on their own, but when you take a bite with a bit of the meat, some of the salad, and a touch of the sauce, that is when the magic happens. The flavours come alive, and you really get that Halifax Donair experience. Minus the hangover and sauce dripping all over your hands, arms, and clothes.
The Warp Up
I’ve wanted to make this for a long time, and I am so happy that I finally got the opportunity. It was well worth the wait. I think you’ll be happy if you make any of the components of this meal, but I think if you make them all and serve it all together, you will be over the moon. Try it for yourself. You’ll be happy you did.
Thanks for reading, and remember to check out my brand new cookbook, “The How-To Cookbook For Men” It comes out on August 10th and is available for preorder here.
Never miss a post again. Put your email address in below and receive chef’s notes in your inbox.
Imagine all of your favourite vegetables cooked on the grill, tossed together with arugula, and maple balsamic vinaigrette, then topped with goat cheese. That sounds amazing, doesn’t it? Well, that is exactly what I am going to show you how to make today. This Grilled Vegetable Salad is the perfect accompaniment to grilled chicken, steak, pork, or even fish. It screams summer, and it tastes amazing. Are you ready to see how it’s made? I know I am! So, let’s get to it.
Grilled Vegetable Salad Recipe
Before we jump into things, there is something I want to mention. I recently took ads off Chef’s Notes because I found them annoying, and if I felt that way, I’m sure other people did too. One other thing that I find annoying about this blog and most others is that when you want a recipe, you have to scroll through so much text to find it. Well, luckily, I have the power to change that, at least on this site. So, moving forward, all new posts will have the recipe published after the introduction. That way, if all you want is the recipe, you can find it instantly. If you want more detailed instructions, tips, and fun anecdotes (I hope they’re fun at least), you can keep scrolling.
I am always trying to improve Chef’s Notes, and I think that publishing the recipe at the top of the article is an easy way to improve the reader experience drastically. If you can think of any other ways to improve the site, please let me know either in the comments section at the end of this post or on my contact page.
Grilled Vegetable Salad with Maple Balsamic Vinaigrette
Take all of your favourite vegetables, cook them on the grill, toss them with arugula and homemade maple balsamic vinaigrette and top it all with crumbled goat cheese. That's what this salad is and it tastes like pure summer.
In a medium mixing bowl combine the mustard powder, maple syrup, and balsamic vinegar.
Whisk a few drops of the oil into the mixture. Once the oil has been incorporated, whisk in a few more drops. Repeat this three to four more times, then add the remaining oil in a slow, steady stream while constantly whisking.
Once all of the oil has been incorporated, taste the dressing and season with salt and pepper as needed. Use the Vinaigrette right away or store it in the fridge in an airtight container for up to two weeks.
Prepping The Vegetables
Cut the top and bottom off of the red and green bell pepper. Make a slice down one side of each pepper, then using your knife, cut the seed pod away from the pepper and discard. Cut the peppers in two.
Cut the onion into 1/4-inch rings. Remove the peel and thread the onions onto 2 10-inch metal skewers. If you use wooden skewers, soak them in water for 30 minutes first.
Cut the zucchini in 4 lengthwise.
Peel the sweet potato and cut lengthwise into 1/4-inch strips.
Thread the cherry tomatoes onto 2 10-inch metal or wooden skewers. If you use wooden skewers, make sure to soak them for 30 minutes first.
Place all the preparred vegetables on a sheet pan and drizzle with the olive oil. Season on both sides with salt and pepper.
Grill the vegetables on a preheated grill on medium-high heat until cooked. It is hard to give an exact time, but some things like the tomatoes will take 4 to 5 minutes, and other things like the onions and sweet potato will take 10 to 15 minutes. As things cook, remove them from the grill.
Once the tomatoes are cooked, take them off the skewers and add them to the vinaigrette to cool. The other cooked vegetbles can be returned to the sheet pan until it is time to assemble the salad.
Assemble the salad
Place the arugula in a large mixing bowl.
Cut all the cooked vegetables into bite-sized pieces and add to the arugula.
Pour the dressing and tomatoes onto the salad and toss.
Plate the salad on one big platter or in 4 small salad bowls.
The vegetables I used for my salad are red and green bell pepper, red onion, zucchini, sweet potato, and cherry tomatoes. What’s great about this salad is that you can use anything fresh and in season. Other vegetables like squash, eggplant, and asparagus all work really well in this. So, use what you like.
Prepping The Vegetables For The Grill
Bell Peppers
First things first, the vegetables have to be prepared for grilling. We’ll start with the peppers. Cut off the top and bottom and set them aside. Stand the pepper up and make a slice down one side of it. Place the pepper on its side and put your knife inside the slice you just made. Keeping your knife tight against the inside of the pepper, cut and roll. The idea is that you are cutting the inside ribs to release the seed pod without making a big mess of seeds. When you’ve gone all around the pepper, the seed pod should be free, and you should have one long strip of pepper. Cut the pepper stirp in half and move on to the next vegetable.
Red Onions
Next up, red onion. The easiest way I’ve found to grill onions is to slice them into fairly thick rounds (about 1/4 of an inch) and put them on a skewer. So, that is exactly what we’ll do. Slice the onion into thick rounds, remove the peel and put the rounds on a skewer. To ensure that the onion holds together while grilling, the skewer must be threaded through the middle of the onion.
Cherry Tomatoes
As with the onion, the easiest way to grill cherry tomatoes is to put them on a skewer. There’s isn’t really a trick to this. Just skewer them. I’m using fancy metal skewers because I’m cool like that, but if you use wooden ones, soak them for at least 30 minutes before putting them near a fire.
Zucchini
The second to last vegetable to prep is the zucchini. Cut it into long thick strips (again, about a 1/4 of an inch thick). That’s all you have to do. I like to cut vegetables like zucchini and the sweet potato, as you’ll see in a minute, into strips rather than rounds when grilling because I find they are less likely to fall between the grate of my grill. If you want to risk it and cut them into rounds, go for it.
Sweet Potato
I had three tiny sweet potatoes, but you can obviously use one large one instead if you have it. Peel it, and cut the sweet potato into thin strips. Becasue the sweet potato will take longer to cook than anything else, you want to cut it thinner than everything else. This will help ensure that everything cooks in about the same amount of time.
Grilling The Vegetables
The vegetables are all cut up, some are on skewers, and now it’s time to get grilling. Wow! Wait a minute there speedy. We have to season and oil the vegetables first. Drizzle a few tablespoons of olive oil over the vegetables and season them on both sides with a little salt and pepper. Okay, now we can hit the grill.
Even though I didn’t mention it before, your grill should have been preheating on medium-high heat for the last 15 minutes. Throw the vegetables on the grill. Close the lid and let them cook. How long it takes to cook the vegetables will be largely determined by your grill, how windy it is outside, and what the outside temperature is. So, all I can really say is cook your vegetables until they are cooked. Make sense? You want them to have some bite still but not be hard. They should have a little char but not be burnt. Take a look at the pictures below for a little guidance.
Subscribe To Chef’s Notes and Get New Posts In Your Inbox Every Week
While the vegetables are grilling, or before you put them on the grill, you need to make the Maple Balsamic Vinaigrette. Don’t worry, it is super easy. To make the dressing get a medium mixing bowl and combine 1 teaspoon mustard powder, 1 tablespoon maple syrup, and a 1/4 cup balsamic vinegar. Whisk it all together, then whisk in a few drops of canola or grapeseed oil. Once those drops have all been incorporated, whisk in a few more. Then a few more. After three or four oil additions, you can start to add the remainder (1/2 cup in total) in a slow, steady stream whisking the whole time. Once all of the oil has been added and is whisked in, taste the dressing, and season with salt and pepper as needed.
You can use this Maple Balsamic Vinaigrette right away or store it in the fridge in an airtight container for up to two weeks.
Marinate The Tomatoes
Okay, back to the grill. Once the tomatoes start to pop (4 to 5 minutes flipping once), take them off the grill, remove them from the skewer and put them right in the dressing to marinate while the other vegetables finish cooking.
Grilled Vegetable Salad
Finishing The Grilled Vegetables
As the vegetables finish cooking, take them off the grill and set them aside. Once all the vegetables are finished, take them back to the house, and make the salad. Start by cutting all of the grilled vegetables into bite-sized pieces.
Making The Grilled Vegetable Salad
Put four to five cups of arugula in a large mixing bowl, spoon the dressing and the tomatoes over the arugula. Add the rest of the vegetables and toss. If you are only making a salad for one or two people, prepare it in a medium mixing bowl with half the vegetables and spoon some of the dressing over the greens.
Finish The Salad
To finish the salad, plate it in four small bowls or on one large platter. Top it with crumbled goat cheese and serve.
The Wrap Up
I love this salad because the sweetness from the grilled vegetables plays with the spiciness of the arugula and the tartness of the vinaigrette. Then, the creaminess of the goat cheese ties it all together to create something truly delicious and memorable. Give it a try for yourself. You won’t be disappointed.
Thank you for reading. Remember to subscribe below to get every Chef’s Notes post delivered to your inbox. And If you enjoyed this post, share it on Facebook or Pinterest.
What says summer more than ketchup, mustard, mayonnaise, and relish sitting on a table beside a couple of bags of hotdog and hamburger buns? Nothing at all. That is summer, and these are the quintessential summer condiments. Today, I’m going to show you how to make them for yourself. That’s right, by the end of this post, you might have to change your name to Heinze, Hellmann, or French because you are going to be a condiment master. Now let’s toast some buns, grill some burgers and fry some fries because you’re going to want something to put these delicious homemade condiments on. Let’s get to it!
How To Make Homemade Ketchup
What is ketchup?
When we think of ketchup, we think of tomato ketchup. It has dominated the ketchup scene for over a century. However, ketchup doesn’t have to be made with tomatoes. Say what? Yeah, I know. Crazy, eh? There are, in fact, lots of other types of ketchup, including mushroom ketchup, which is popular in the UK and banana ketchup, a classic Philippine condiment. What’s even crazier is that tomato ketchup didn’t come into existence until almost a full century after mushroom ketchup became popular in the UK. Ketchup has a long and interesting history that I encourage you to read about in this expansive article from History. For our purposes today, ketchup is tomato ketchup. And we are going to learn to make it at home. Let’s take a look.
Making Homemade Ketchup
Homemade ketchup really is just a slightly sweet and acidic sauce made using tomatoes as the base. Now, we could cook some tomatoes with vinegar and sugar, and I guess that would technically be ketchup, but it probably wouldn’t taste all that great. So, we need to add some extra flavour. To do that, we start by sautéing some onion and garlic. As usual, you can find the full measurements in the printable recipe below. Once the onions soften and the garlic starts to brown, brown sugar is added and left to cook for about a minute. Next up, cider vinegar and balsamic vinegar are added. The ketchup is seasoned with salt, pepper and cinnamon. Next, the tomatoes are added, and the whole thing gets puréed. The sauce cooks for a while, then ground clove and tomato paste are added. The ketchup is left to simmer before being passed through a fine-mesh sieve. That’s all there is to it.
Homemade Ketchup
This homemade ketchup recipe will make ketchup that is beyond what you ever thought ketchup could be. Start making some fries now becasue you are going to want something to dip in this masterpiece.
Mustard is not only great on hotdogs and burgers but also for dipping sausages into, for glazing ham, and as an addition or base for other sauces. It is also, by far, the easiest condiment on this list to make. Like ketchup, mustard has a pretty interesting history that you should check out here. In the meantime, here is how to make your own homemade mustard.
Homemade Mustard
In a medium mixing bowl, whisk together mustard powder, turmeric (for colour), salt, garlic powder, paprika, and cayenne (leave out if you don’t like hot mustard). Once the dried ingredients are combined, add vinegar and water. Whisk. You’ve just made mustard. You can eat it right away, but it is best if it sits in the fridge overnight.
Variations
You can use this homemade mustard recipe as is, or you can use it as a base to create your own mustards. You can add in a tablespoon or two of mustard seed to create grainy mustard. Use flavoured vinegar like raspberry or champagne to change the flavour. You can add honey to make honey mustard. You can use beer instead of water. I could go on all day becasue you really can make countless types of mustard with simple additions or alterations to this main recipe.
Homemade Mustard
You've never tasted mustard until you've tasted homemade mustard. This recipe makes a very spicy mustard, but if you'd prefer a more mild flavour, you can omit the cayenne from the recipe. Homemade mustard is so quick and easy to make you'll ask yourself why you don't make it all the time.
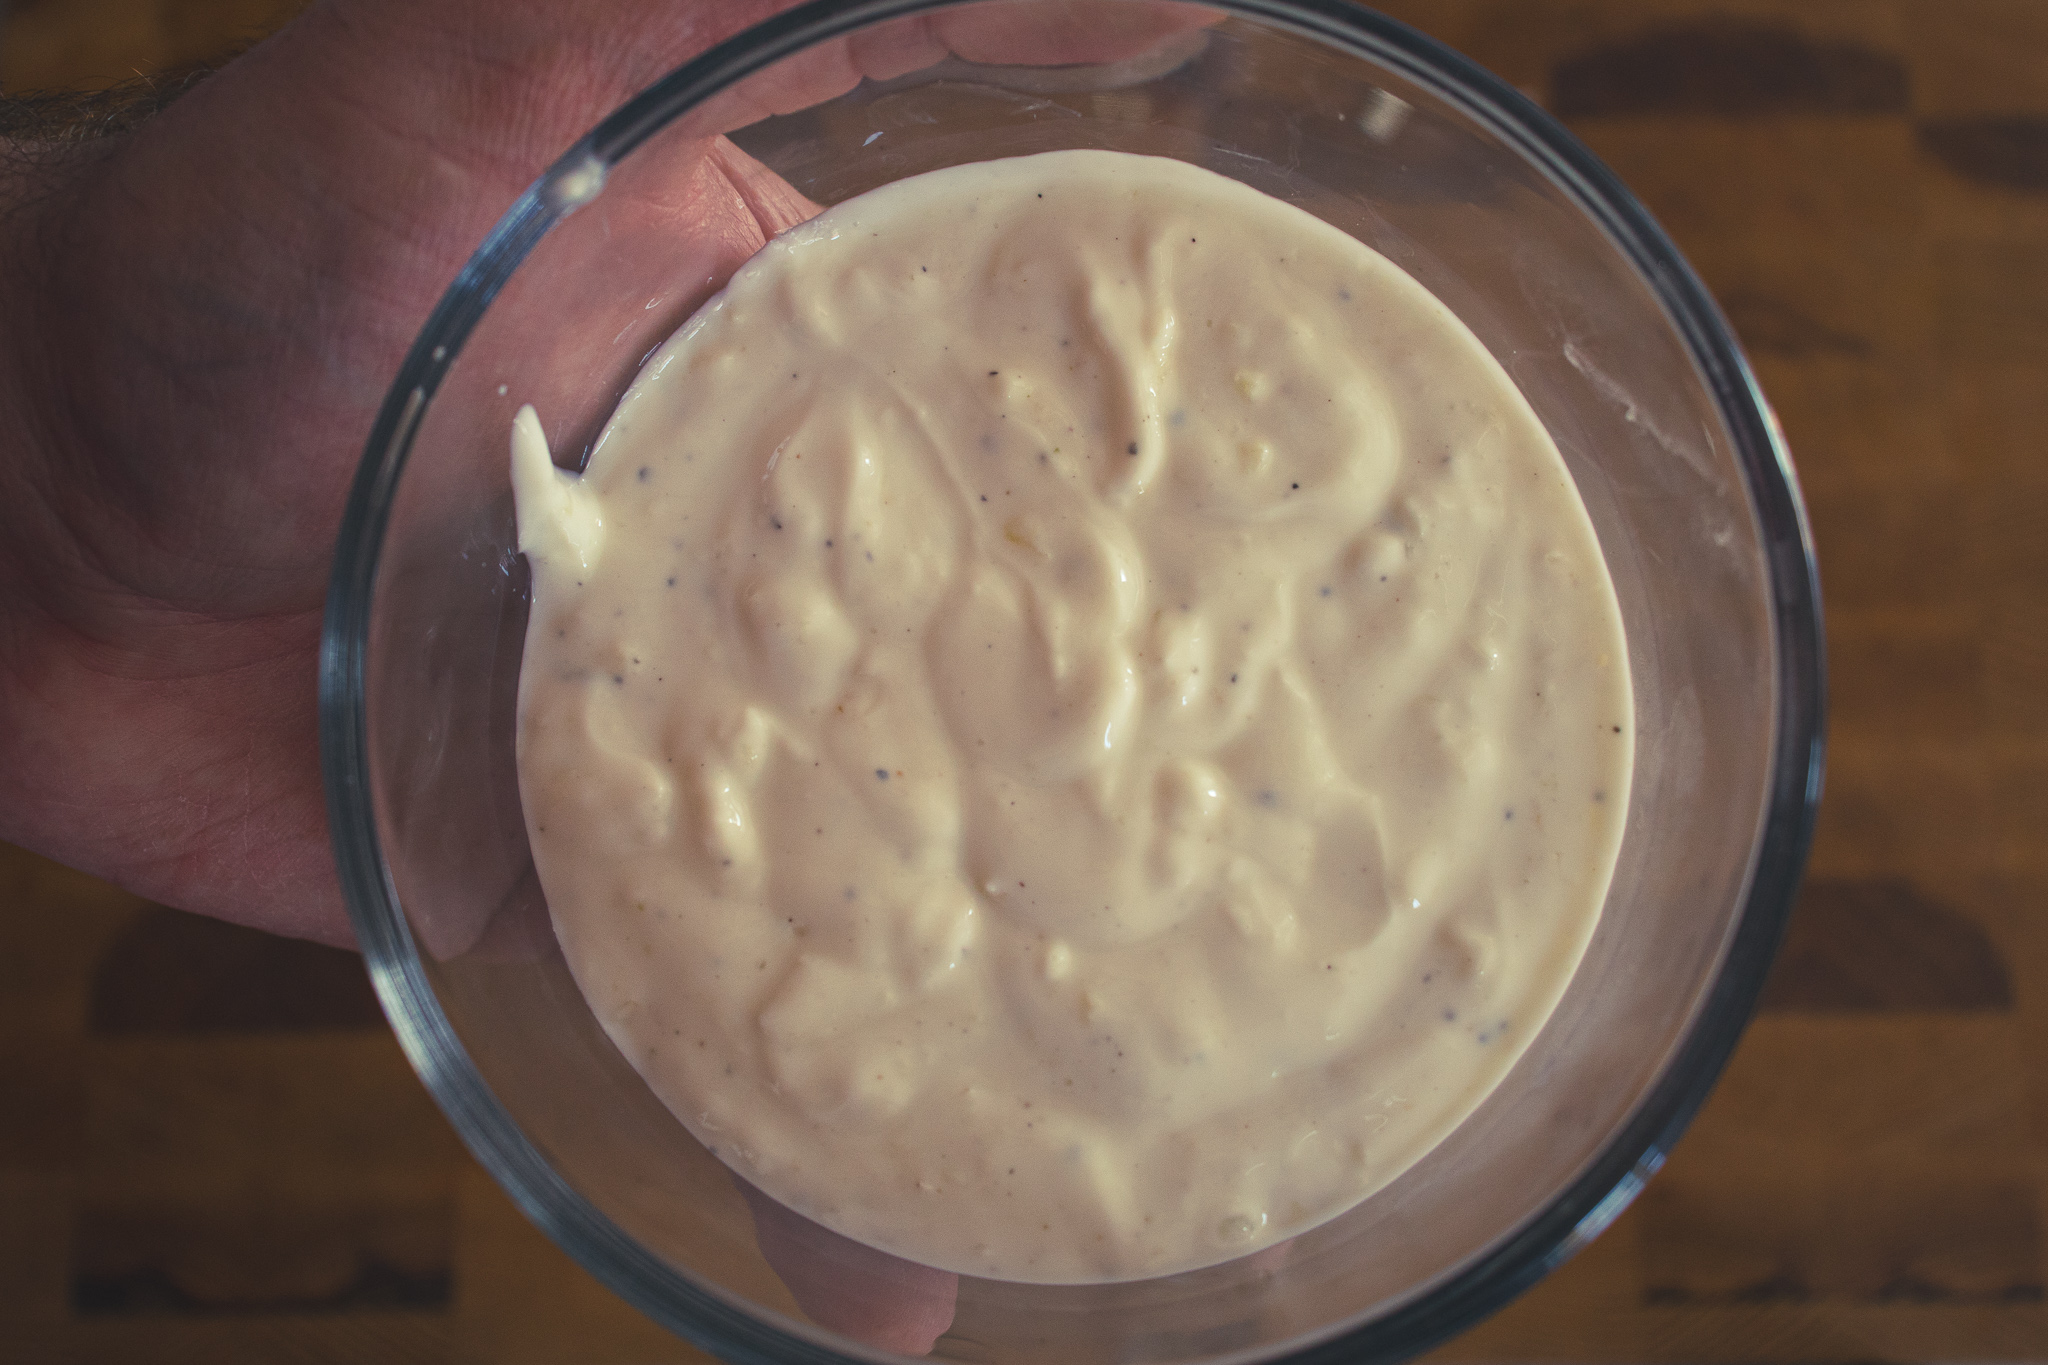
If you’ve been following this blog for any length of time, you probably have a pretty good idea of how to make a vinaigrette. Well, mayonnaise is a vinaigrette but made using egg as the binder to hold the liquid and oil together. That’s it. As with the mustard above, you can use this base homemade mayonnaise recipe as it is, or you can add to it and make it your own. Some of my favourite additions are chipotle and lime. Sriracha with fish sauce and a bit of extra sugar. Roasted red pepper. Or even sundried tomato.
Make Homemade Mayonnaise
Break an egg into a bowl. Add sugar, salt, vinegar, and lemon juice, then whisk. While whisking, add a few drops of oil. Whisk in a few more drops of oil. Repeat this two to three more times. Then, while whisking, add the remaining oil in a slow, steady stream until it has all been incorporated. Whisk in a little bit of water. Adjust the seasoning with salt, sugar, and lemon juice as needed. That’s mayonnaise, baby!
The Oil
It is important to use a neutral oil like canola or grapeseed. By neutral, I mean, has little to no flavour. The reason is that there are very few ingredients in mayonnaise, so the bulk of the flavour will come from the oil. If that oil has an off or strong flavour, so will the mayonnaise.
Homemade Mayonnaise
You can spread this homemade mayonnaise on a sandwich or a burger, or you can add other ingredients like chipotle, sundried tomato, or roasted red pepper to add a unique flavour.
Break the egg into a medium mixing bowl or the bowl of an electric mixer.
To the egg, add the vinegar, lemon juice, sugar and salt. Whisk until fully combined.
While whisking, slowly add the oil a few drops at a time. Wait to add any more oil until the first addition has been incorporated into the eggs.
Repeat the process 2 to 3 more times, then you can begin to add the oil, in a slow steady stream until all of the oil has been incorporated into the egg mixture.
Whisk in the water.
Taste the mayonnaise and adjust the seasoning with sugar, salt, and lemon juice as needed.
The final homemade condiment that we are going to learn to make today is relish. Like with ketchup, relish isn’t one thing. You can make relish out of cucumber, which is the most popular, but also out of zucchini, corn, peppers, and any other vegetable you could probably imagine. Today, we are going to make the classic cucumber relish.
Homemade Relish
Mince some cucumber and green pepper. Put them in a pot with sugar, cold water, white vinegar, salt, cornstarch, and mustard seed. Stir until the cornstarch is incorporated. Bring the pot to a boil over high heat. Turn the heat to medium-low and simmer for 10 minutes. Cool, and serve. Easy friggin’ peasey. To make other types of relish, follow the same process but substitute the cucumber and green pepper for other ingredients like corn and red pepper.
Homemade Relish
This homemade cucumber relish tastes almost exactly like the homemade stuff, but 100 times better.
You might be thinking that this was an interesting post but that you’ll never actually make your own ketchup, mustard, mayonnaise, or relish. To that, I say poppycock! Do it! Even if you only do it once, you’ll be able to say you did, and you’ll be happy you did. Now, I don’t expect you to throw away the store-bought versions of these condiments; god knows I’m not going to. But, knowing that you can make them if you want to is kind of empowering. Maybe you’ll never make ketchup, mayonnaise, or relish again, but maybe you fall in love with making mustard. I’ve been saying for years that we’re due for an artisanal mustard craze. Maybe you’ll be the one to start it. The point is, all four of these condiments are worth your effort and time at least once. Of course, there is only one way to know for sure.
Thanks for reading. Happy cooking. I’ll see you next week.
Remember to share this post on Facebook or Pinterest if you enjoyed it. Thank you for reading, and have a great day! Remember, there are new Chef’s Notes posts every Wednesday, and you can subscribe below, so you never miss one.
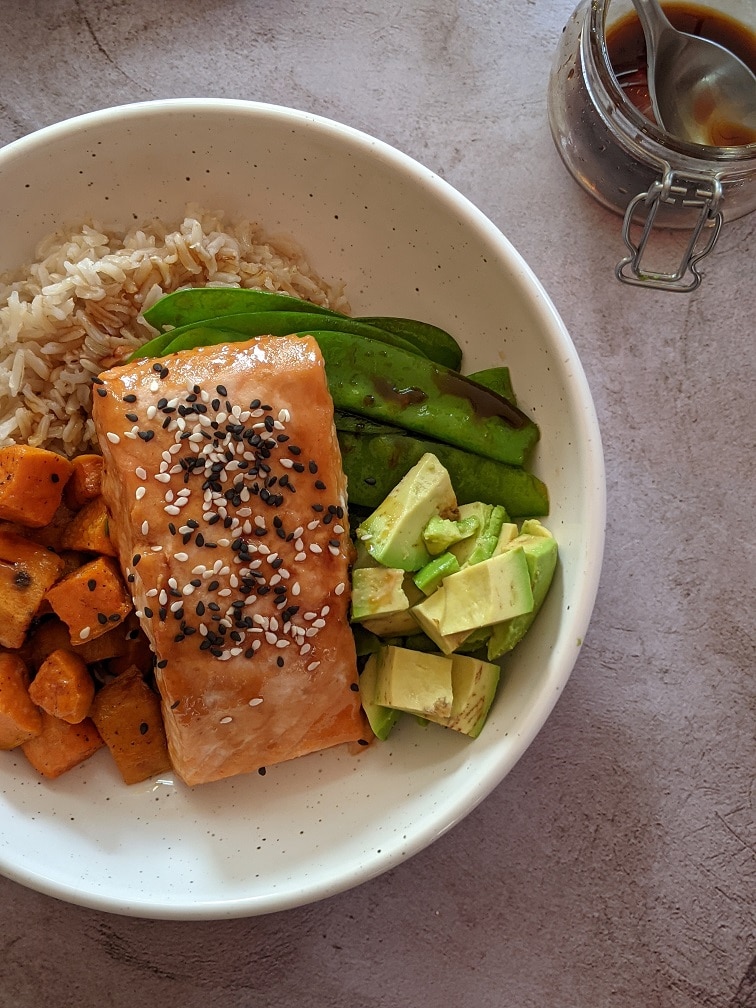
If you are looking for a new and exciting salmon recipe, look no further. This Miso Salmon Rice Bowl is everything you want and more. It’s got lots of vegetables, sweet and salty salmon, creamy avocado, and it’s all tied together by the nutty brown rice. What more could you want from a meal? Before you get too far into this, I want to say that this recipe may seem intimidating at first. There are a few different components that make it seem a lot more complicated than it is. Really, it’s no different than making any meal. If you make marinaded pork chops, mashed potatoes, and vegetables, you’re making the same number of components. All this to say, don’t miss out on this recipe. It is worth every second that goes into it. Now let’s get to it.
Miso Salmon Marinade
The marinade for the salmon is a combination of 1 tablespoon miso paste, which you can find in most grocery stores and all Asian specialty markets, 2 tablespoons mayonnaise, 1 teaspoon honey, and 1/2 a teaspoon of sriracha. Whisk these ingredients together. Put two 170 g (6-ounce) salmon portions in the bowl with the marinade, roll the salmon to coat it. Cover the bowl with plastic wrap and put it in the fridge for 30 minutes.
Sweet Potato
While the salmon is marinating, peel and dice two small (or 1 medium) sweet potatoes. You want about 2 cups of diced sweet potato in total. A little more or less is fine. Toss the sweet potato with 1 tablespoon of olive oil and a pinch of salt and pepper. Put the sweet potato in a small roasting pan and roast in a 400°F oven for 30 minutes. Flip the sweet potato halfway through cooking. Take the cooked sweet potato out of the oven and set it aside to cool.
Brown Rice
Once you get the sweet potato in the oven, start cooking your brown rice. For two portions, use 1/2 cup of rice and 11/2 cups of water. Ratios may vary by brand, so make sure to read the instructions on the rice package. Rinse the rice under cold running water until the water runs clear. Drain well. Put the rice and the 11/2 cups of water in a medium pot. You can add a pinch of salt and pepper and a teaspoon of olive oil if you want to. Bring the rice to a boil on high heat, stirring once or twice. Put a lid on the pot, turn the heat to low, and simmer the rice for 20 minutes. Take the pot off the heat, and set it aside to rest for 10 minutes.
Roasting The Salmon
Take the salmon out of the marinade, gently shaking off the excess. Put the salmon in a lightly oiled roasting pan and cook it in a 400°f oven for 12-15 minutes or until cooked. You can use the same roasting pan you cooked the sweet potatoes in if you put the cooked sweet potatoes in a bowl. That’s what I did to save on washing a bunch of roasting pans.
Snow Peas
While the salmon is in the oven, pull the strings off 200 g of snow peas. See this post for more clear instructions on how to do that. Heat a large skillet over medium-high heat. Add 2 teaspoons of canola oil to the pan along with the cleaned snow peas. Stir-fry the snow peas for 3 minutes, then add 2 teaspoons of soy sauce. Cook for 30 seconds more, then take the pan off the heat.
Avocado
Finally, cut an avocado in half and remove the pit. Hopefully, your avocado is better than mine was. Gently pull the peel off the avocado and discard it. Dice the avocado into bite-sized pieces.
Plating the Miso Salmon Rice Bowl
Divide the rice between two bowls. Push the rice to one side of the bowl. Put the sweet potato at the top of the rice and the snow peas at the bottom. Lay the salmon across the rice and use the avocado to fill any gaps. To make the miso salmon bowl look a little fancier, you can garnish it with sesame seeds. Also, I had some homemade Teriyaki sauce left in the fridge from the Sushi Bowl Post, so I drizzled that over the miso salmon to finish it. You don’t have to do that, but if you happen to have some in the fridge or want to throw a batch together, it is worth it.
Miso Salmon Bowl
There are a few different components to this miso salmon bowl. On their own, the components are all simple. When combined, they created something slightly complex and incredibly delicious. Don't let this recipe intimidate you. It is well worth the effort.
In a medium mixing bowl, combine the miso paste, mayonnaise, honey, and sriracha. Mix well. Add the salmon to the miso mixture, gently toss it to coat it in the sauce, cover the bowl and put it in the fridge for 30 minutes.
In a separate bowl, toss the diced sweet potato with olive oil, salt, and pepper. Spread the sweet potato out in a roasting pan and cook in the oven for 30 minutes, flipping halfway through. Once the sweet potato is cooked, take it out of the oven and set it aside to cool.
While the sweet potato is in the oven, make the rice. Rince the brown rice under cold running water until the water runs clear. Drain well. Put the rice in a medium pot with 1 1/2 cups of water. Bring the rice to a boil on high heat, turn the heat down to low, cover the pot with a lid and cook the rice for 20 minutes. Take the pot off the heat and let it rest for 10 minutes. Rice to water ratios may vary by brand, so always read the instructions on the package.
Lightly oil a small roasting pan. Place the salmon on it. Roast the salmon in the oven (still at 400°F) for 12 to 15 minutes or until cooked. Take the salmon out of the oven and assemble the bowl. Discard the leftover marinade.
While the salmon is cooking, heat a large skillet over medium-high heat. Add in canola oil and the snow peas. Stir-fry the snow peas for 3 minutes, add soy sauce and cook for 30 more seconds. Take the pan off the heat and set it aside.
Divide the rice, sweet potato, snow peas and avocado among two bowls. Top with the salmon and serve. Optionally, garnish the salmon with homemade Teriyaki sauce and sesame seeds.
My wife and I both went crazy for this Miso Salmon Rice Bowl. It may actually be my favourite in the bowl series so far. And with only one post left in the series, I’d say it has a good chance of being my number one. As I said in the intro, this recipe may seem intimidating becasue there are a few different components. Still, it’s no different from making a meal with mashed potatoes, vegetables, and protein. If you only make one recipe from this whole series, it should be this one. Have a great weekend everyone!
Remember to share this post on Facebook or Pinterest if you enjoyed it. Thank you for reading, and have a great day! Remember, there are new Chef’s Notes posts every Monday, Wednesday, and Friday, and you can subscribe below, so you never miss one.
Pork, you either love it or you hate it. I love it. And I firmly believe that if you eat pork that is perfectly done, meaning not dry and overcooked, you will love it too. This pork roast is a little more forgiving than some others. That in part is due to the long marinating time. The marinade consists of onion, apples, garlic, and a bunch of other stuff. This pork roast has loads of flavour and will remain juicy and tender even if slightly overcooked (but don’t overcook it). This is the first post in my six-week roast series, and I am very excited to get going. So, without another moment’s hesitation, let’s get to it.
The Right Pork To Roast
For my pork roast, I used a piece of pork shoulder. Pork shoulder is generally pretty cheap, it’s well-marbled, and it is often sold with a piece of bone in it. Those are all pluses. The marbling, meaning the lines of fat within the meat, helps prevent the meat from drying out. That fat also adds to the flavour of the pork. The bone, though it extends the cooking time, also helps to keep the pork moist. For roasts, pork shoulder or butt is the way to go, in my opinion. Pork loin is far too lean and requires very close attention to ensure that it is not overcooked the slightest bit. If pork loin is overcooked, it is as dry as anything and lacks all flavour.
Pork Marinade
The pork’s marinade is made primarily of grated apple, sliced onion, garlic, and thyme. To those base ingredients, juniper berries (optional) are added along with cider vinegar, olive oil, grainy mustard, maple syrup, smoked paprika, salt, and pepper. As always, you can find the full measurements in the recipe at the end of the post. All of the marinade ingredients are mixed, then rubbed on the pork. This gets covered and put in the fridge for up to two days before roasting.
Roasting The Pork
To roast the pork, take it out of the marinade and remove any excess. Place the pork on a rack set over a roasting pan. Cook the pork in a 375°f oven for one hour and forty-five minutes or until a thermometer inserted into the pork reaches a temperature of 155°f. Let the pork rest for at least fifteen minutes before slicing. If you want to speed up the cooking time a little, you can directly place the pork on the roasting pan rather than on a rack. This should take about fifteen to twenty minutes off of the total cooking time.
Maple Dijon Gastrique
What is a gastrique?
Gastrique is essentially a French sweet and sour sauce. This version is made of a mixture of maple syrup and cider vinegar to which grainy Dijon mustard and butter are added. To make the gastrique combine a quarter cup of maple syrup and two tablespoons of cider vinegar in a small pot. Bring to a boil and cook for three minutes. Take the pot off the heat and whisk in the mustard, then whisk in the butter. The gastrique should be the consistency of thick maple syrup and should be served warm.
Red Cabbage and Apples
One of my favourite sides with roast pork is red cabbage cooked with apples. As I love it so much, I thought I would share my recipe with you. This cabbage also goes very well with scallops and bacon.
Heat a large skillet over medium-high heat. Add in some olive oil along with four cups of sliced red cabbage, one cup of sliced onion, one cup of sliced green apple and two tablespoons of sliced garlic. Cook until the cabbage starts to soften. Season the cabbage with salt and pepper, add in a quarter cup of water along with two tablespoons of maple syrup. Continue to cook until the cabbage is completely soft. Finish the cabbage with two tablespoons of cider vinegar and a tablespoon of butter. Cook for three more minutes and serve.
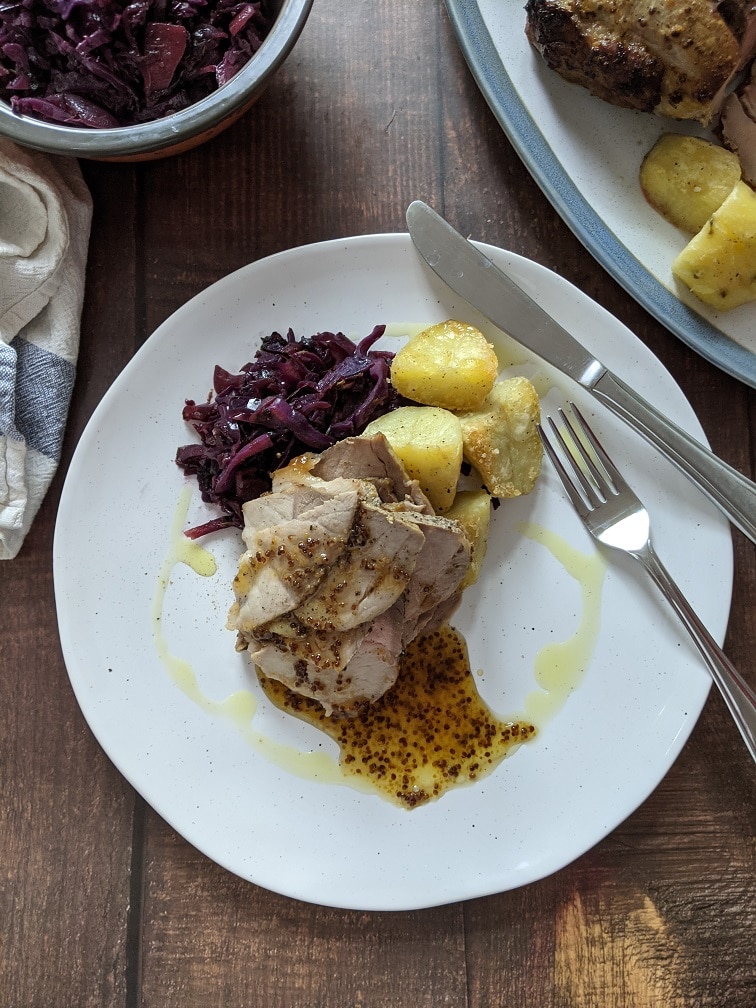
Serving The Pork Roast
Serve the pork roast with either roasted or mashed potatoes, the red cabbage, and a green vegetable like green beans if you’d like. Slice the pork as thin as you can, and top it with the gastrique. This is an absolute winner. Enjoy!
Perfect Roast Pork With Maple Dijon Gastrique and Red Cabbage and Apples
Tender, juicy pork roast, with a sweet and sou maple dijon gastrique, and cabbage cooked with apples.
In a large mixing bowl combine all of the ingredients except the pork. Mix well.
Rub the marinade into the pork, cover with plastic wrap and put in the fridge overnight or for up to two days.
Take the pork out of the fridge, remove excess marinade and place the pork on a rack set over a roasting pan.
Roast the pork in the oven at 375°f for 1 hour and 45 minutes or until an instant-read thermometer reaches a temperature of 155°f. Remove the pork from the oven and let it rest for 15 minutes before slicing.
Red Cabbage and Green Apple
Heat a large skillet over medium-high heat.
Add the olive oil, cabbage, onion, apple, and garlic to the skillet. Cook, stirring every once in a while for about 8 minutes or until the cabbage starts to soften. Add the maple syrup and water, cook for another 5 to 6 minutes or until the cabbage is completely soft.
Season the cabbage with salt and pepper and add in the cider vinegar. Cook for 3 more minutes, take off the heat and serve.
Maple Dijon Gastrique
In a small pot combine the maple syrup and cider vinegar. Bring to a boil over medium-high heat. Cook for three minutes, making sure it doesn't boil over.
Take the pot off the heat and whisk in the mustard and butter. Serve warm.
There you have it—the first post in my new roast series. We’ve got many exciting roasts coming up, including roast lamb, chicken, salmon, and more. I hope that you are looking forward to this as much as I am. I’ll see you soon and have a great weekend.
Thank you for reading this post. Share it on Facebook, Pinterest, or Twitter to help Chef’s Notes continue to grow. Subscribe to Chef’s Notes below, and you will never miss a post again.
Indulge in the traditional taste of Sweden with our mouthwatering recipe for authentic Swedish Meatballs. These tender and flavorful meatballs are braised in a rich mushroom gravy, making them the perfect comfort food to enjoy with mashed potatoes and vegetables. Impress your family and friends with this classic dish that will surely be a hit at any dinner party. Learn how to make the perfect Swedish Meatball Sauce and Gravy that will elevate your meatballs to the next level. Don’t just take our word for it. Try this recipe and taste the difference. Follow our step-by-step guide for a hassle-free and delicious meal that will transport you to the streets of Sweden.
How To Make Swedish Meatballs
Meatball Ingredients:
The key ingredients in these delicious Swedish Meatballs are medium ground beef, onion, garlic, and a blend of herbs. The medium ground beef is important for the perfect balance of fat content, ensuring that your meatballs will be moist and flavorful. The onion and garlic add a savoury depth to the meatballs, while the herbs bring a touch of freshness. For the breadcrumbs, I used the dried heels of gluten-free bread, grated on a cheese grater, to add a nice texture to the meatballs. While store-bought breadcrumbs can be used, it can be difficult to find high-quality gluten-free options. To ensure that the onion and garlic are finely chopped, you can even consider grating them. Just be prepared for some tears! I used a combination of fresh rosemary, thyme, and parsley for the herbs, but you can also use dried herbs if that’s all you have. If you opt for dried herbs, use about half the amount called for in the recipe.
Forming The Meatballs
Creating delicious, authentic Swedish Meatballs starts with mixing all ingredients until well combined. Divide the meat mixture into 24 evenly sized pieces, using your hands to roll each piece into a ball. To prevent sticking, wet your hands with cold water before rolling each meatball. To ensure even-sized meatballs, a tip is to use a small ice cream scoop to portion the meat mixture. Place the formed meatballs on an oiled sheet pan and roast in the oven at 400°F for 20 minutes. The browning of the meatballs is important as it adds a nice colour and flavour, but they don’t need to be cooked through at this point. They will be braised for an additional 20 minutes, ensuring they are cooked through and juicy.
Swedish Meatball Gravy
“The secret to the rich and savoury taste of our Swedish Meatball Mushroom Gravy lies in the carefully selected ingredients. The gravy is made with thinly sliced onions and mushrooms, oil, butter, flour (gluten-free or regular all-purpose), beef stock, and a blend of herbs. To add depth of flavour, I used a combination of cremini, portobello, and oyster mushrooms. However, you can also use cremini mushrooms only or even just button mushrooms. While using a variety of mushrooms does give the gravy a better flavour, it can get expensive. If you’re looking for a more budget-friendly option, cremini mushrooms, also known as brown mushrooms or mini Bellas, are a great choice. You can find the full list of ingredients and the amounts in the recipe at the end of the post.”
Making The Gravy
To create the delicious mushroom gravy that complements our Swedish Meatballs, you will need a large, heavy-bottom skillet. Heat the skillet over medium-high heat and add a tablespoon of olive oil and two tablespoons of butter. Once the butter has melted and started to foam, add in the thinly sliced onions and cook for three minutes or until they start to soften. Next, add in about two cups of mushrooms, a combination of cremini, portobello, and oyster mushrooms for a rich flavour, or use cremini mushrooms for a budget-friendly option. Cook for an additional three to four minutes or until the mushrooms and onions both start to brown. Sprinkle in flour, I used all-purpose gluten-free flour, but you can use regular all-purpose flour. Mix it in and cook, stirring, for two minutes. Then pour in the beef stock and bring the gravy to a boil, stirring continuously. You will have a delicious, rich and savoury mushroom gravy that will complement the meatballs perfectly. The perfect Swedish Meatball Sauce recipe.
Note: I used store-bought beef stock. Campbell’s, to be specific. It is gluten-free, and it saves a lot of time. If you would prefer to use homemade stock, all the power to you.
How To Braise The Swedish Meatballs in Gravy
To braise the Swedish Meatballs in gravy, start by bringing the mushroom gravy to a boil in a large, heavy-bottom skillet. Gently add the roasted meatballs to the pan, one at a time, taking care not to splash. To add a touch of freshness, add in a few sprigs of rosemary and thyme. I like to tie the herbs together with a thyme sprig, but you can also use butcher’s twine or leave them as is. You can also use dried herbs, about half a teaspoon of each, or fresh chopped herbs, in which case you would use one teaspoon of each.
Once the meatballs are in the pan, cover it and reduce the heat to low. Simmer the meatballs for fifteen minutes to allow them to fully absorb the flavours of the gravy. Then take the lid off the pan, turn the heat up slightly (it shouldn’t be higher than medium) and continue to simmer the meatballs until the gravy coats a spoon. Taste the gravy and season it with salt and pepper as needed. It’s important to note that when using store-bought stock, it’s best to wait until the end to season it because as it cooks, it will become saltier. So, taste it and add salt if needed.
Finishing and Serving The Meatballs
The final step in creating a delicious and authentic Swedish Meatball experience is in the presentation and serving. Serve the meatballs, three or four per person, with creamy mashed potatoes and a variety of vegetables of your choice. This dish makes a great hearty lunch or a nice filling dinner depending on the portion size, and it’s perfect to enjoy at any time of day. The meatballs are tender, juicy, and perfectly seasoned, while the mushroom gravy is rich, savoury, and flavorful, a perfect complement to the meatballs. The creamy mashed potatoes and fresh vegetables make the dish a complete meal that is sure to impress any guest. This is the perfect comfort food, with the flavours of Sweden in every bite. A spoonful of cranberry sauce over the top will take these Swedish Meatballs up to eleven.
Swedish Meatballs with Mushroom Gravy
Flavourful Swedish Meatballs braised in mushroom gravy. Serve the meatballs with mashed potatoes and vegetables. This is comfort food at its finest.
In a large mixing bowl, combine all the meatball ingredients and mix well.
Form into 24 meatballs and place on a greased sheet pan at least 2 cm apart.
Roast the meatballs for 20 minutes at 400°f
Mushroom Gravy
Heat a large skillet over medium-high heat and add the canola oil and butter to the pan. Once the butter melts and starts to foam, add in the sliced onions.
Cook the onions for 2 to 3 minutes, or until they start to soften. Add in the mushrooms and cook for another 3 minutes, or until the onions and mushrooms are slightly browned.
Sprinkle the flour over the mushrooms and onions, then stir to mix and cook for 2 minutes.
Add the stock, and bring to a boil, stirring. Add the meatballs to the gravy, cover the pan and reduce the heat to low. Simmer the meatballs, covered, for 15 minutes. Take the lid of the pot, turn the heat up slightly and cook for another 10 minutes or until the gravy is thick.
Serve the meatballs with mashed potatoes and vegetables.
Making this recipe, you can be confident that this dish will be one that you will want to make again and again. The flavours and textures of the Swedish Meatballs, the rich and savoury mushroom gravy, the creamy mashed potatoes, and the vegetables all come together to create a comforting and satisfying meal. This dish has the potential to become a classic in your home, and if I were to open a small restaurant, it would be on the menu pretty much exactly as it is in this post. This dish will leave you feeling like you’ve discovered something new, yet comforting and familiar. The fact that something you’ve never had before can be so comforting, familiar and make you feel like home, is truly remarkable. This recipe is proof that sometimes, the simplest things in life can bring the most joy. If you’re looking for a dish that can make the world seem just a little bit better for a little while, this is the one. Enjoy your homemade Swedish Meatballs with Mushroom Gravy and don’t forget to share the recipe with friends and family.
Don’t miss out on any of our delicious recipes, tips and cooking inspiration! Sign up for our blog today and be the first to know when we post new recipes like this one. Sign up with your email address below.
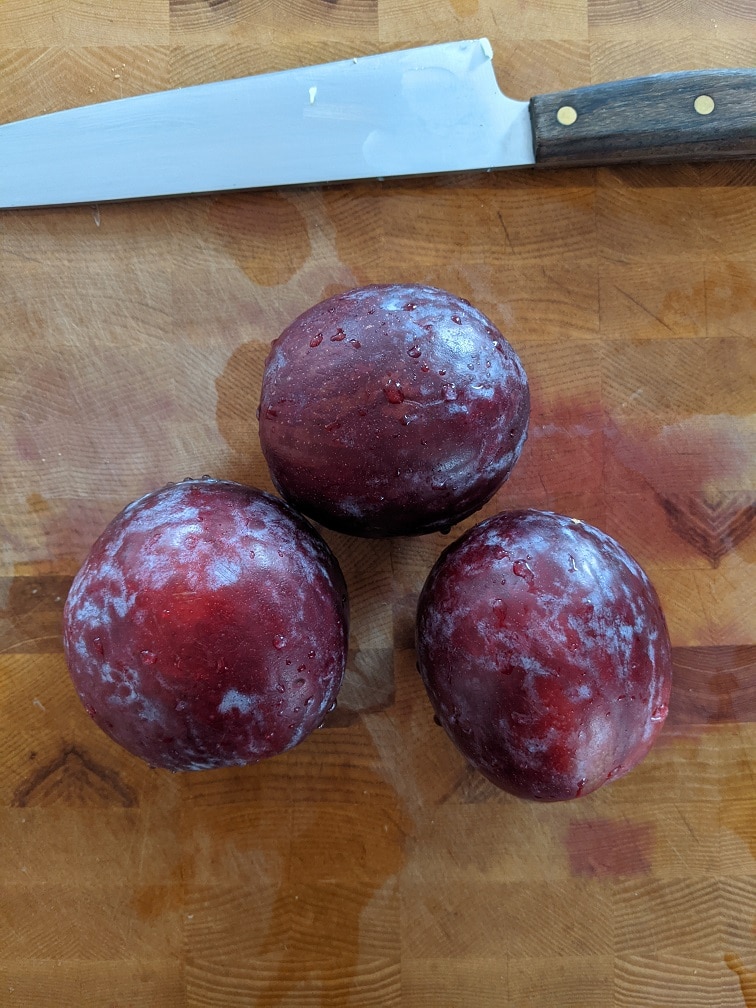
I miss many things from back when I could eat gluten or didn’t know that I couldn’t be more accurate. Egg Rolls are near the top of that list. Crisp pastry wrapped around a delicious filling, deep-fried and dipped in plum sauce. What’s better than that? In all honesty, it never even occurred to me to try and make my own gluten-free egg roll wrappers. But, you can’t do an entire series on Chinese Take-Out Food and not make egg rolls. You just can’t. So I figured it out.
Today, I’m going to share my recipe for Homemade Gluten-Free Egg Rolls and Homemade Plum Sauce. You can make these with regular flour. They don’t have to be gluten-free. But if you’re like me and have to avoid gluten at all costs, this is probably something you’ve been waiting for for a long time. And that’s just about enough chit chat. Let’s get to it.
How To Make Plum Sauce
This plum sauce recipe does not taste like bottled plum sauce. I would argue that it tastes much better, but when you know something as one thing, it’s hard to wrap your head around it being different. So, if you can eat gluten and want to use regular plum sauce, that’s perfectly fine. However, if you want to try something different or need it to be gluten-free, try this.
Plum Sauce Ingredients
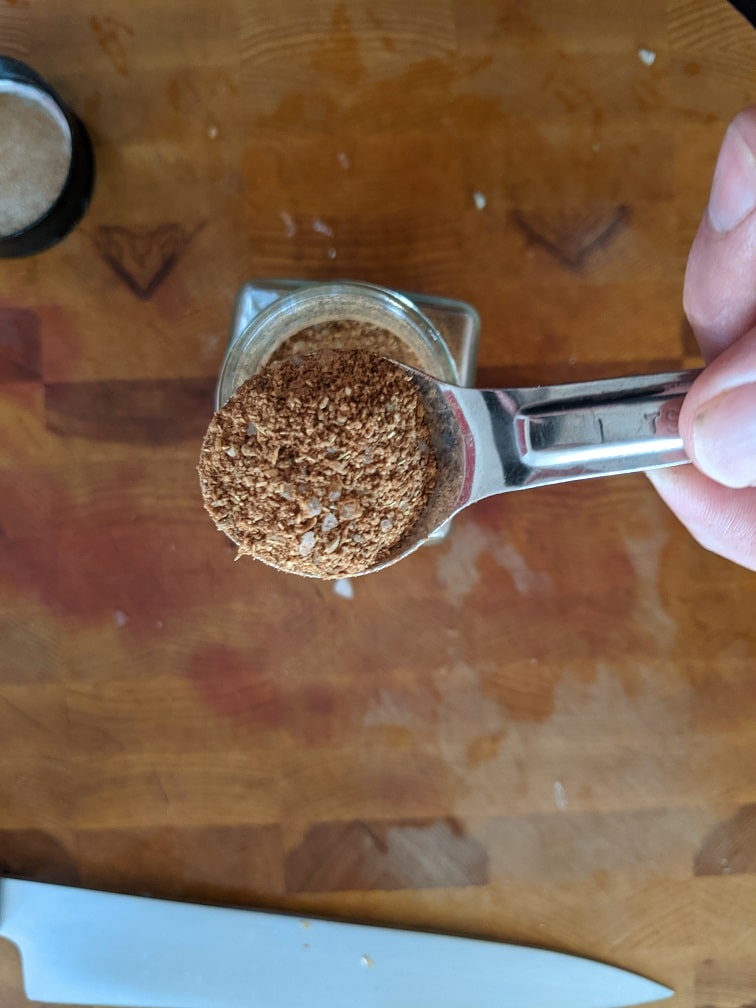
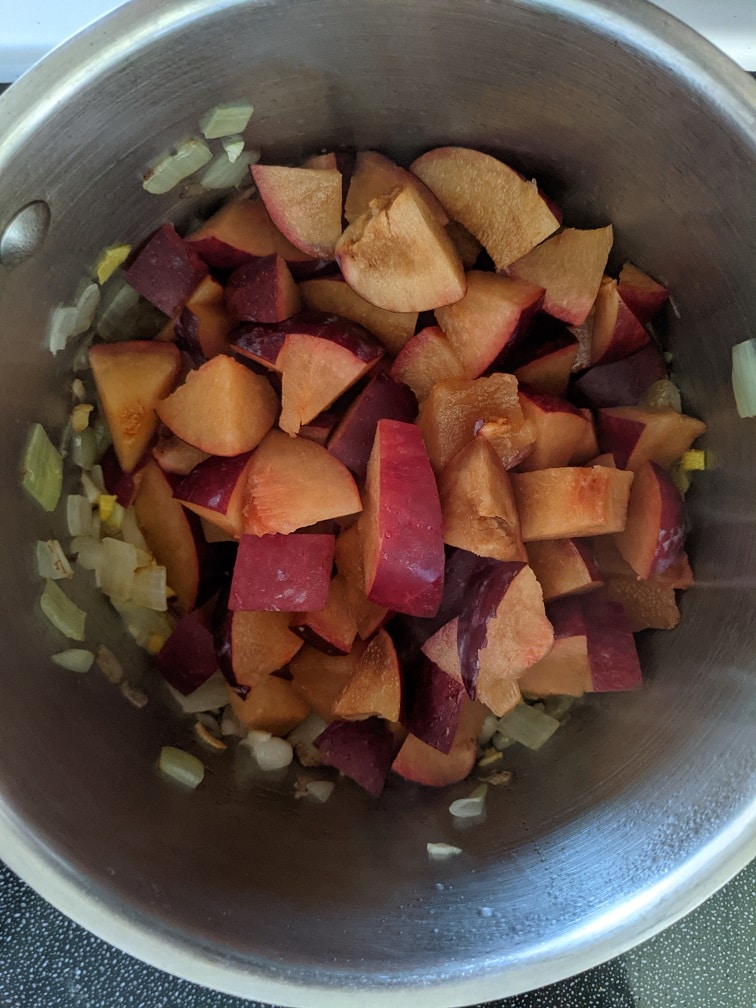
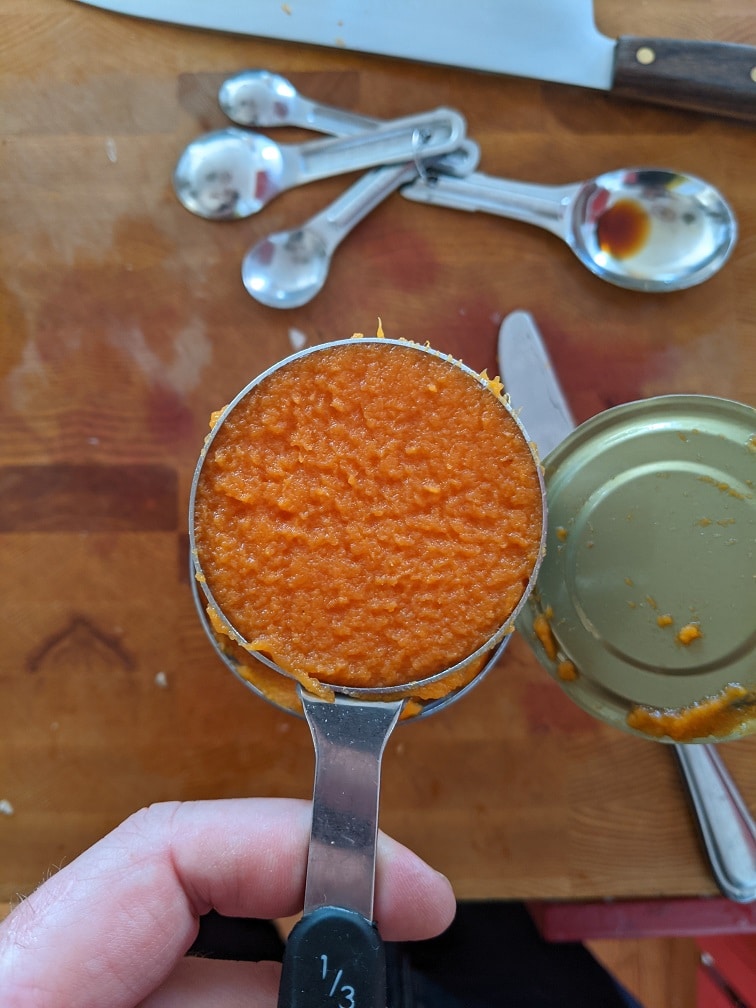
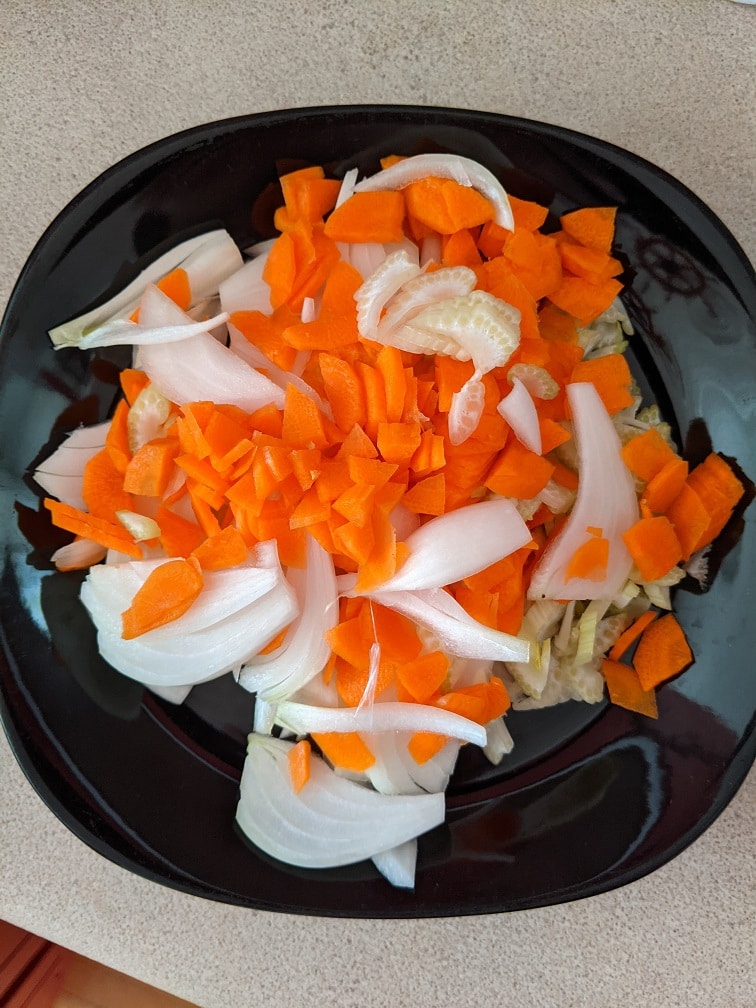
My plum sauce ingredients are onion, garlic, ginger, plums, Chinese 5 Spice (recipe at the end of the blog or you can use store-bought), pumpkin purée, sugar, salt, Tamari (gluten-free soy sauce), vinegar, and water. You can find the full measurement in the recipe at the end of this section.
Directions
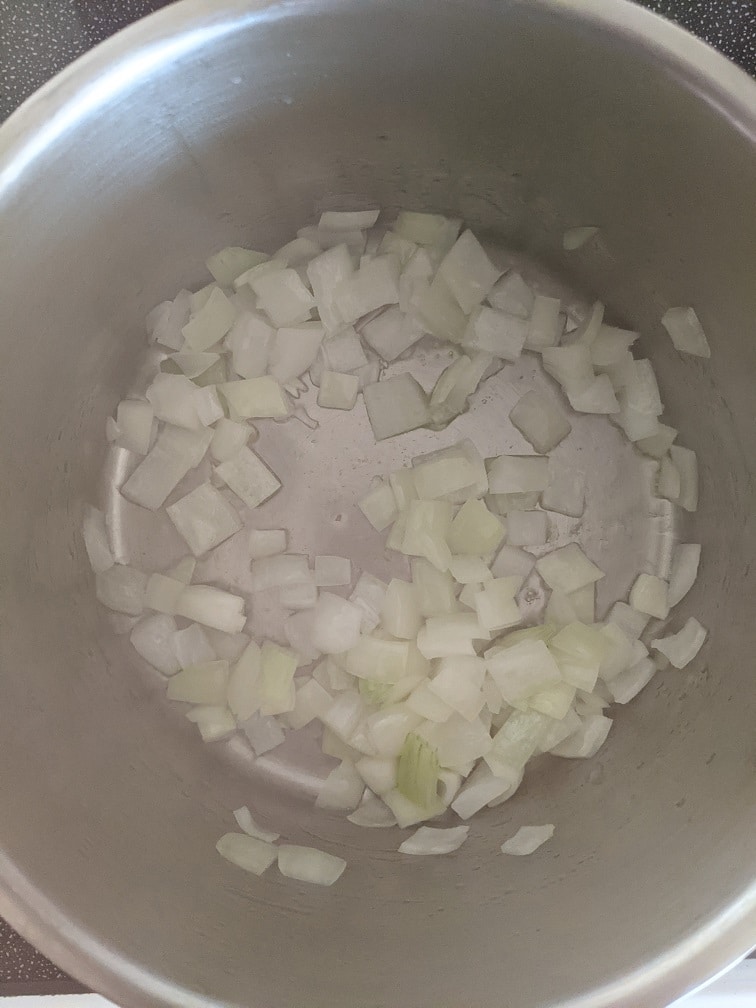
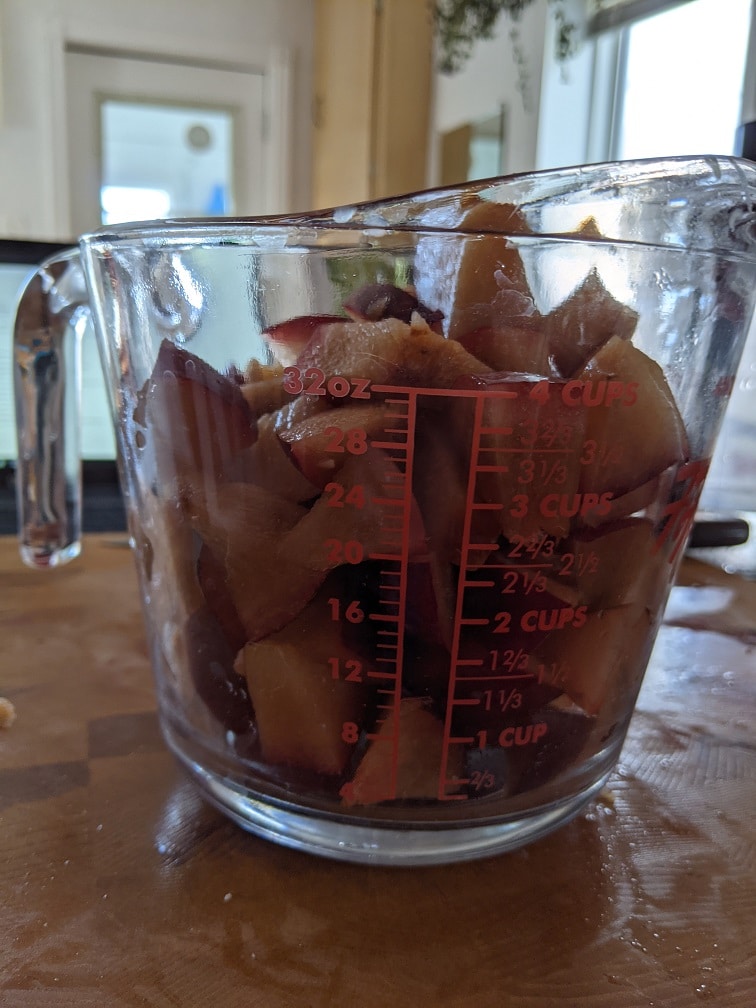
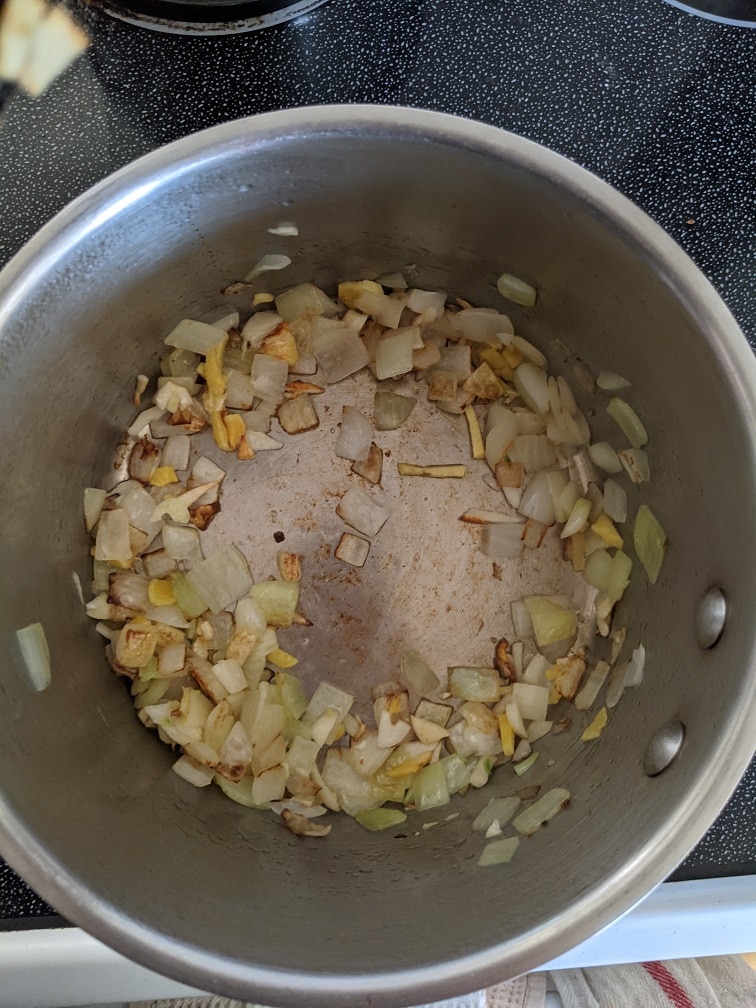
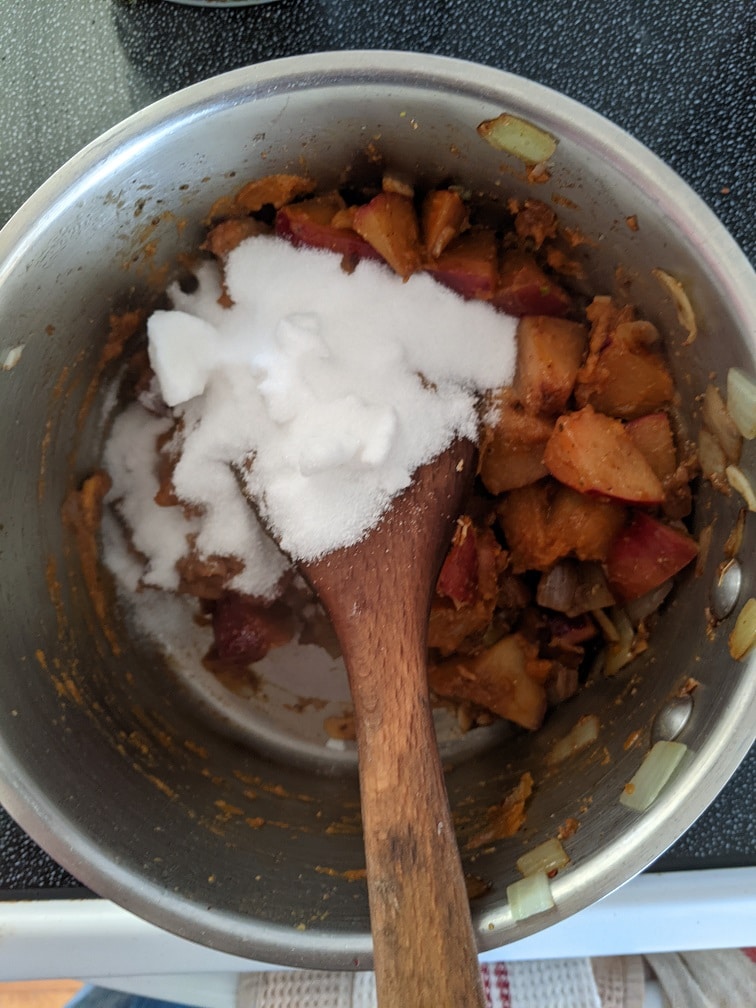
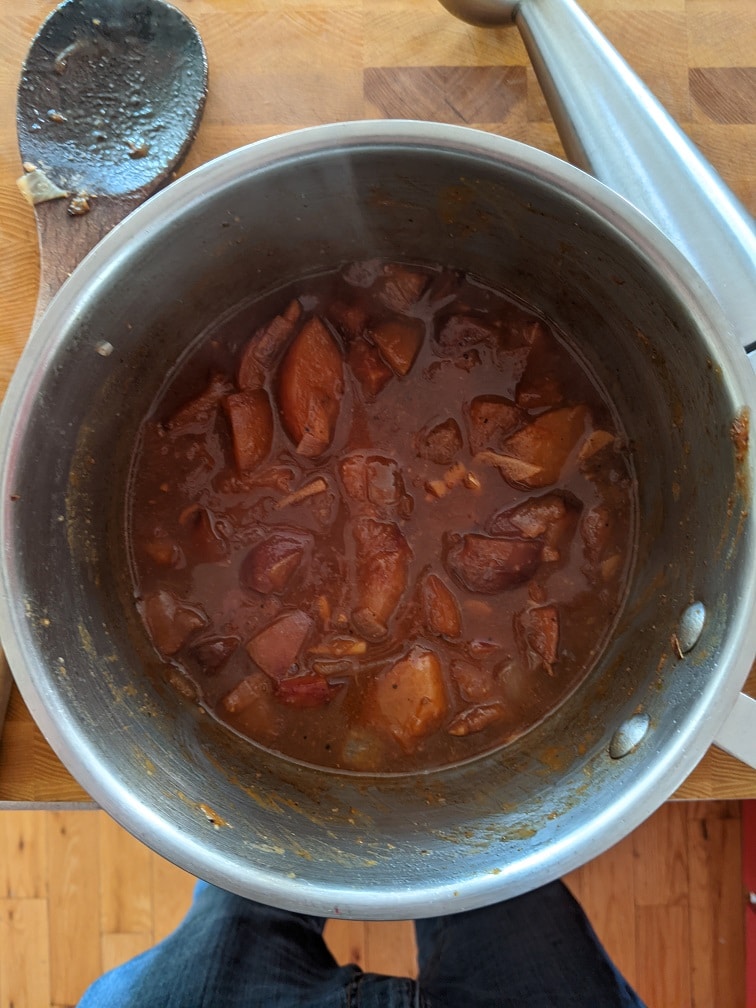
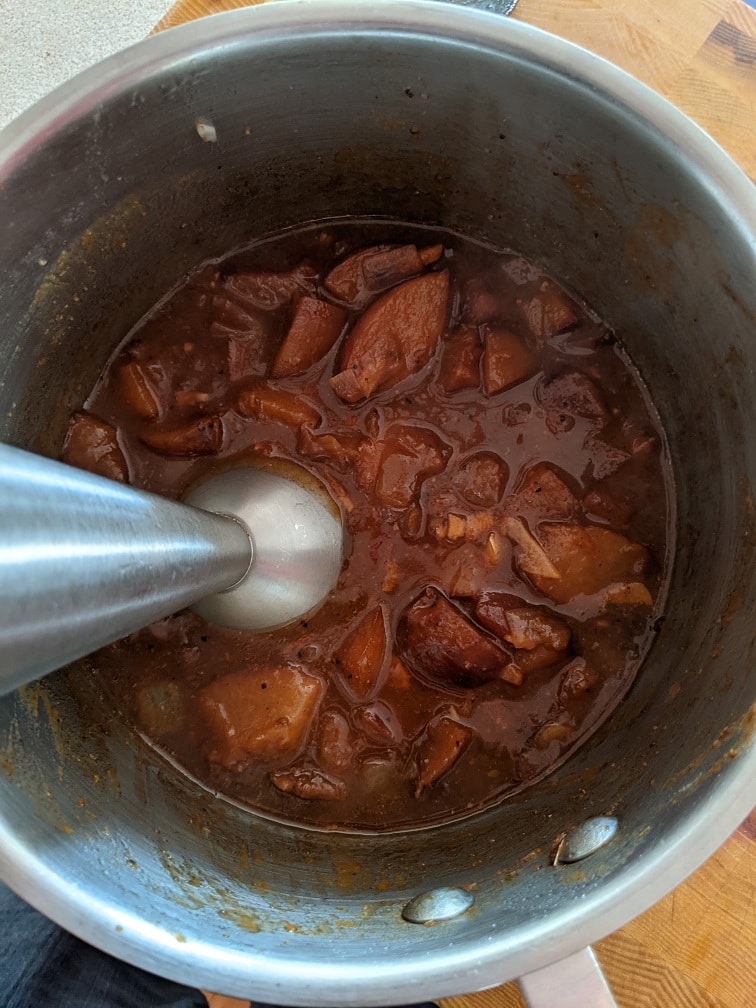
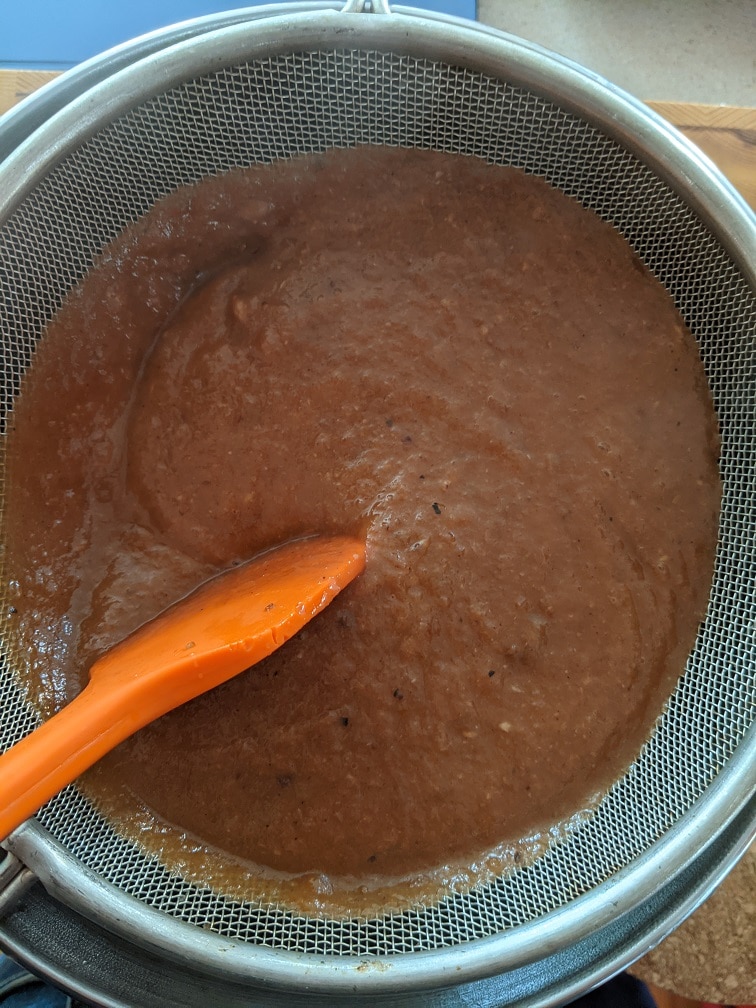
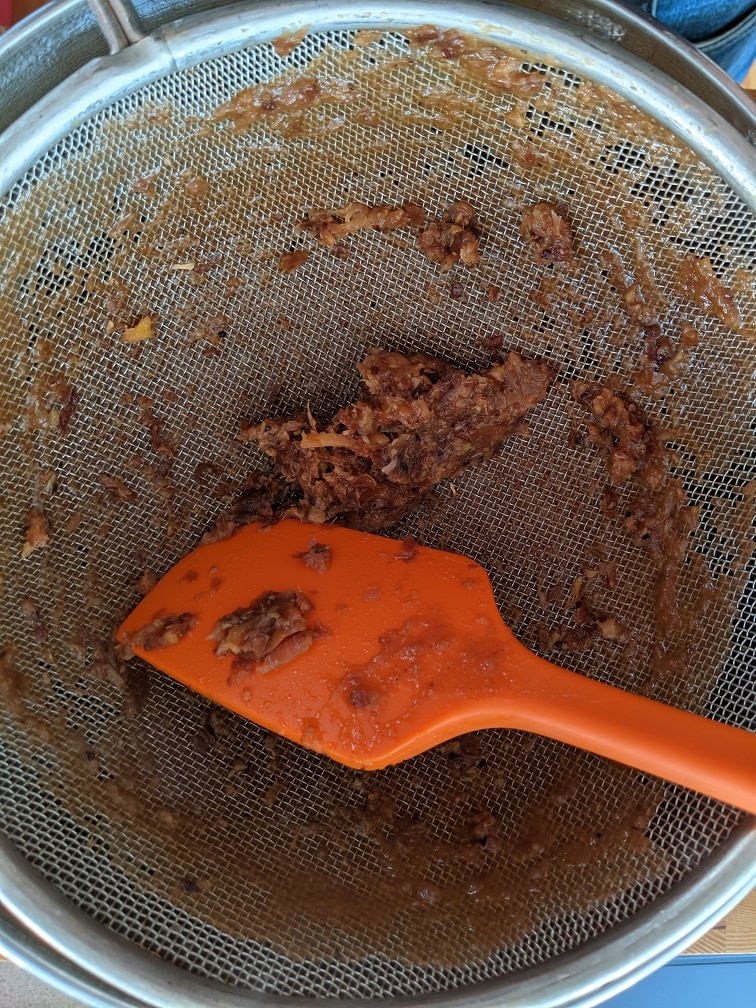
To make the plum sauce, start by dicing and sauteéing the onions in a bit of oil on medium-high heat. After about three minutes or when the onions turn translucent, add in the garlic and ginger, then cook for another minute or two or until slightly browned. Remove the pit from the plums, dice them, and then add them along with the five-spice to the pot. Cook for four to five minutes, then add in the remaining ingredients. Bring the pot to a boil, turn the heat to low, and simmer the sauce for twenty minutes. Let the sauce cool slightly, then purée it with an immersion blender and pass it through a fine-mesh sieve for a smooth sauce.
DIY Plum Sauce
This plum sauce isn't going to taste exactly like the stuff you get in a jar, but that may be a good thing. It is delicious
Heat a medium pot over medium-high heat. Add in the canola oil and the onion. Cook the onion for 3 to 4 minutes or until the onions start to turn translucent.
Add the ginger and garlic and cook for another 1 to 2 minutes or just until they start to brown.
Add the plums and Chinese 5 Spice into the pot and cook, stirring until the plums start to break down, about 5 minutes.
Add the remaining ingredients into the pot, bring to a boil, turn the heat down to low and simmer the sauce for 20 miuntes.
Let the sauce cool for 10 minutes, then purée using a blender or immersion blender.
For a very smooth sauce, pass the puréed sauce through a fine mesh sieve. Cool the plum sauce and serve or keep in the fridge in an airtight container for up to two weeks.
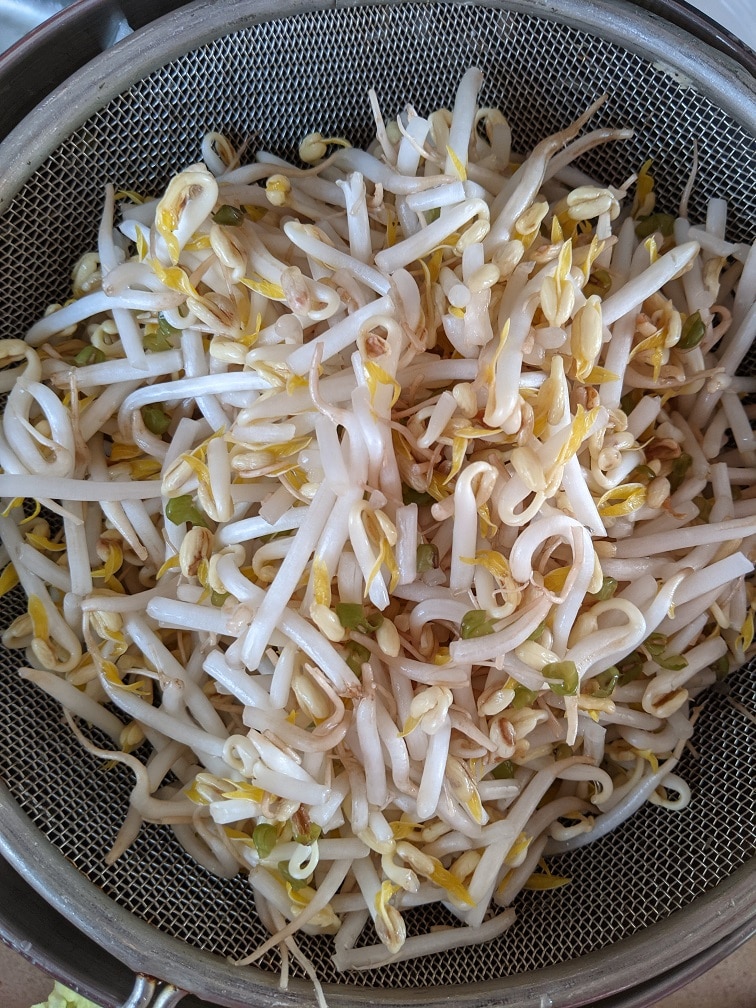
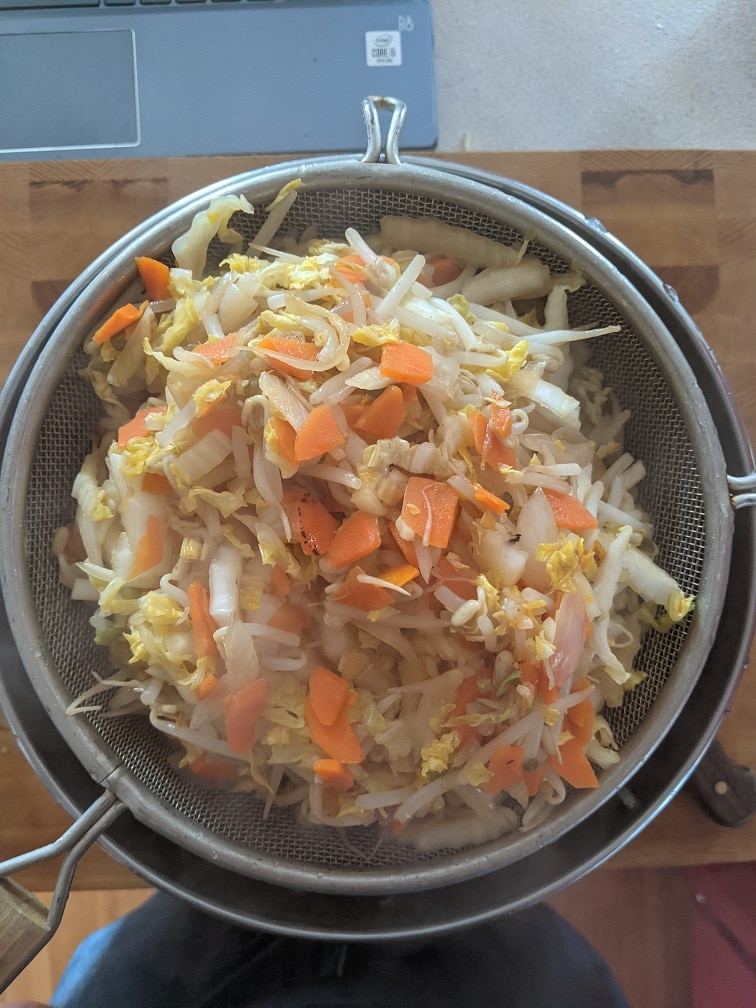
I like to keep my Egg Roll filling pretty basic, opting for onion, carrot, celery, cabbage, bean sprouts, garlic, soy sauce, and salt. You can add a bit of ginger, chilli, chicken, pork, beef, shrimp, or just about anything else you want. These are your Egg Rolls, after all. Do with them what you will.
Cooking The Filling
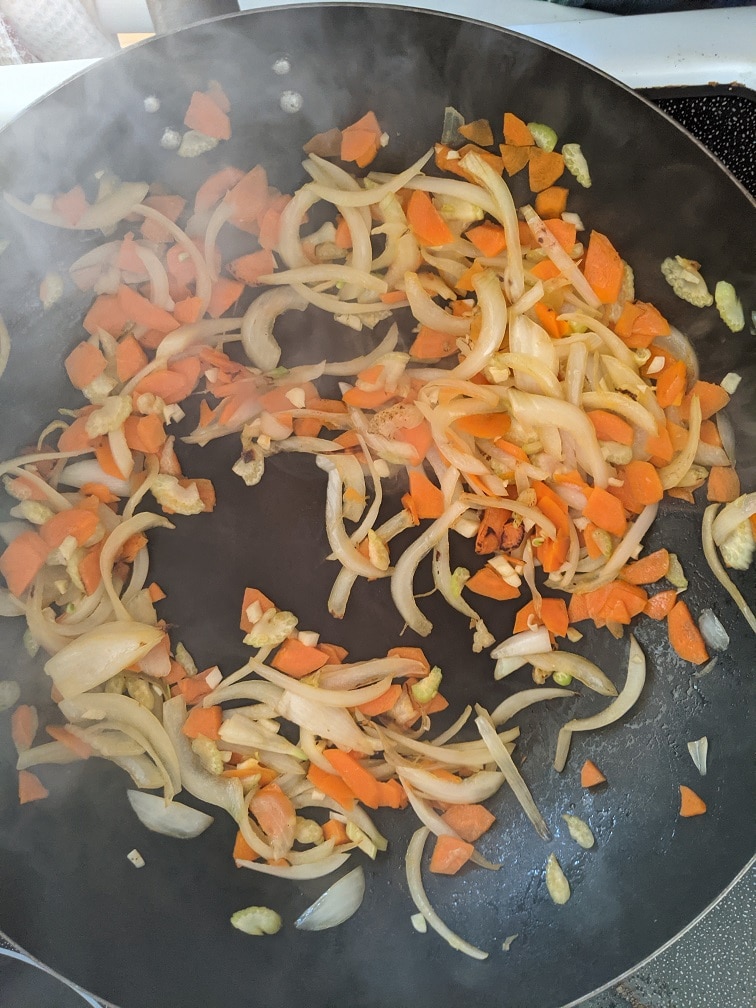
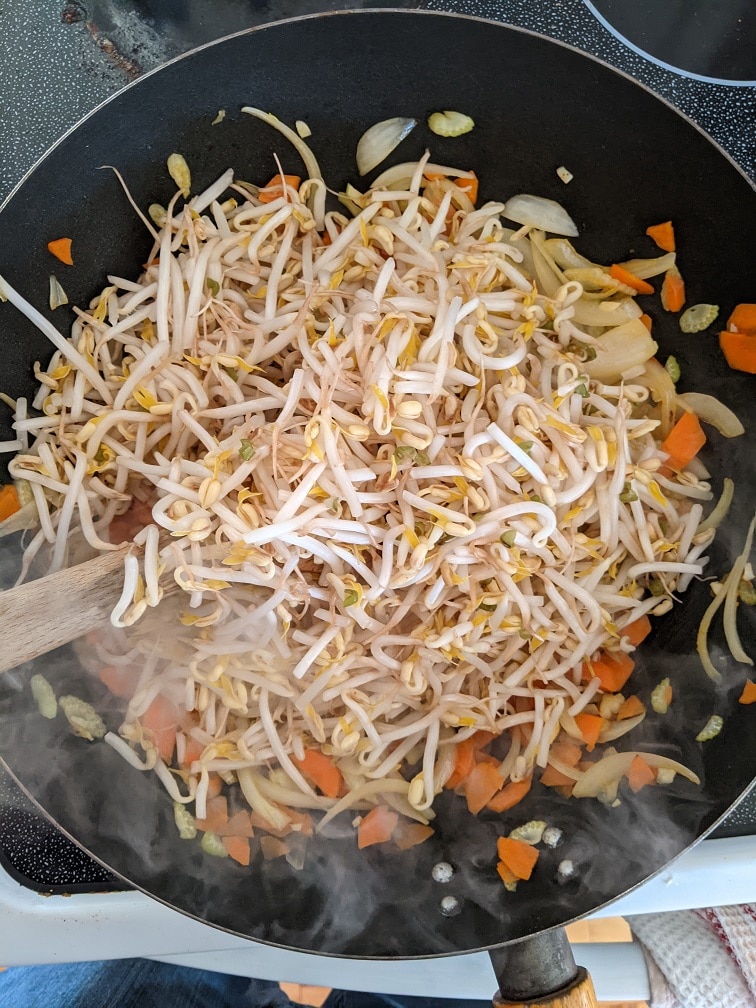
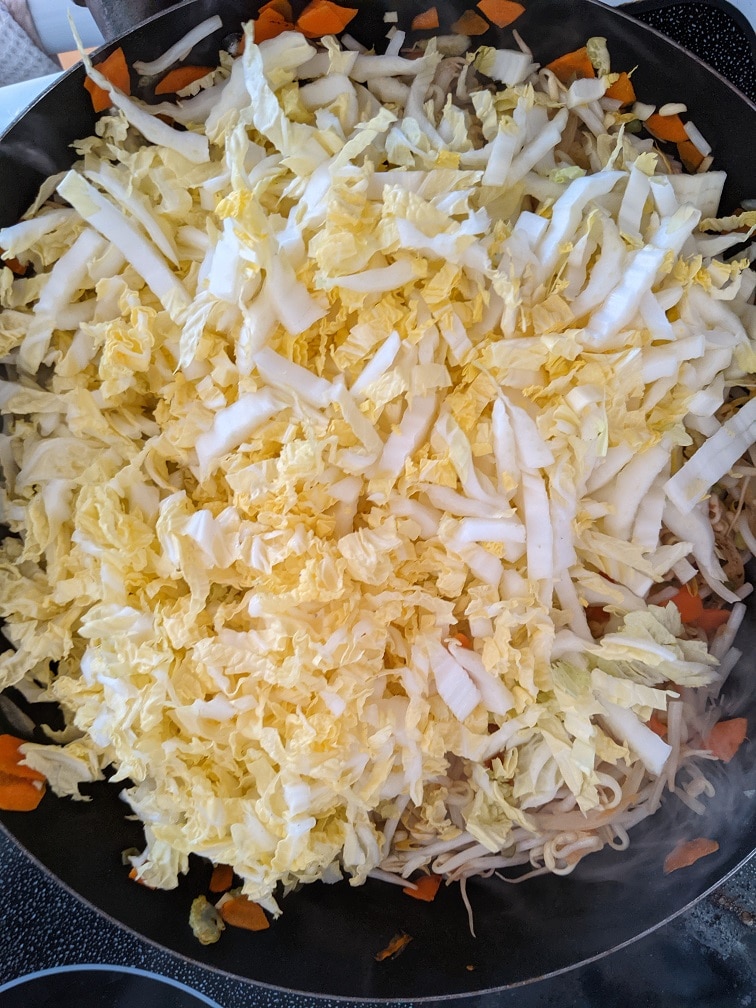
To cook the Egg Roll filling, heat a wok or large skillet over high heat. Add in a tablespoon of oil, then the carrot, onion and celery. Cook for four to five minutes or until the vegetables start to brown. Add in the garlic, and cook for one minute, then the washed and drained bean sprouts. Cook for one to two minutes before adding the cabbage. Cook until the cabbage has wilted, then season with soy sauce and salt. Transfer the cooked vegetables from the wok to the strainer set over a large bowl and let the mixture sit for twenty minutes. This will help prevent the Egg Rolls from becoming soggy and exploding.
Making Egg Roll Wrappers
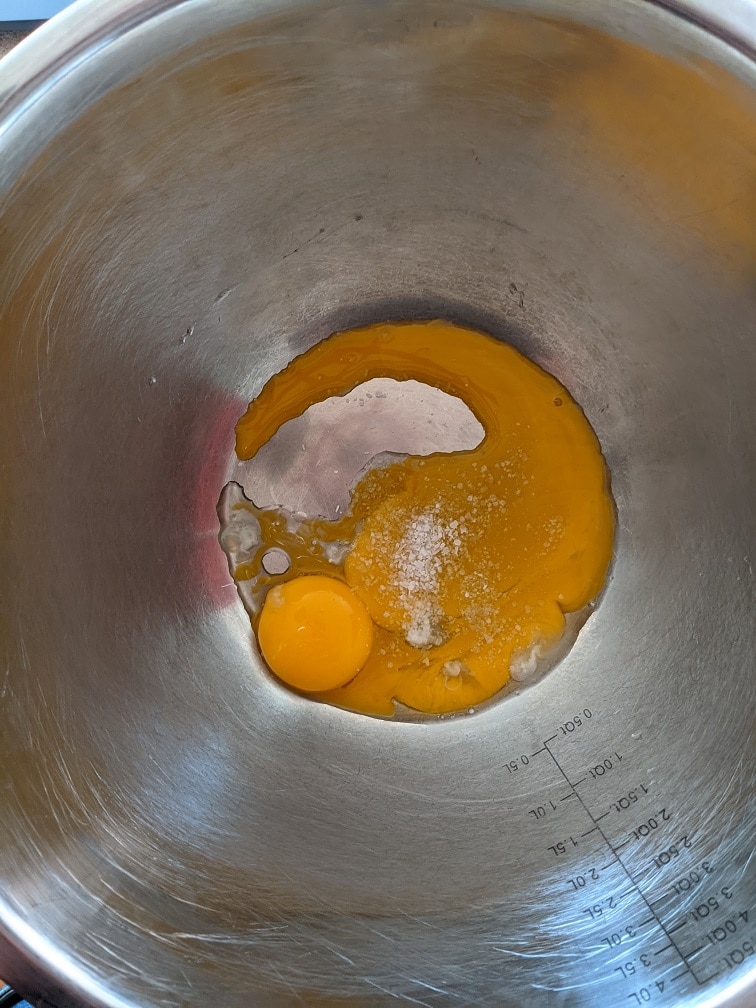
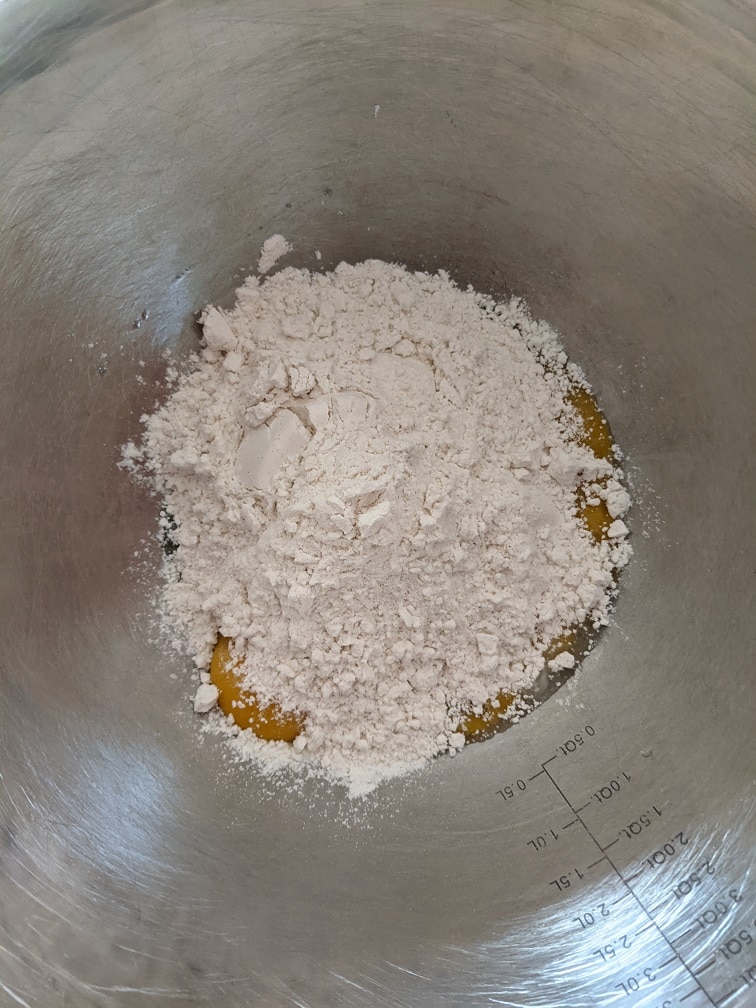
Egg Roll wrappers are essentially pasta dough. And they are made the same way. To make the dough combine egg yolks with flour and salt, add just enough water to bring the dough together. If you are using regular flour, knead the dough for ten minutes. Kneading for more than a minute or two isn’t needed if you are using gluten-free flour.
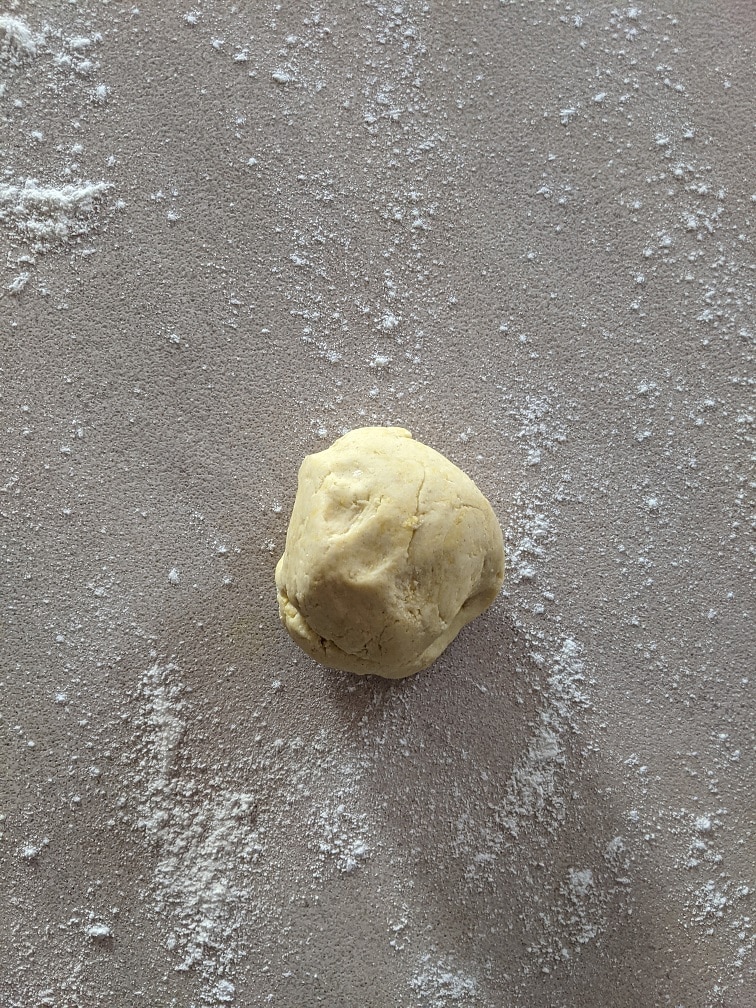
*Note: My batch of dough is half of what is written in the recipe below. I ended up having a bunch of leftover filling, so I doubled the recipe for you. So, if you are looking at my picture and wondering why it looks like I have less dough than you do, that is why.
Rolling The Dough
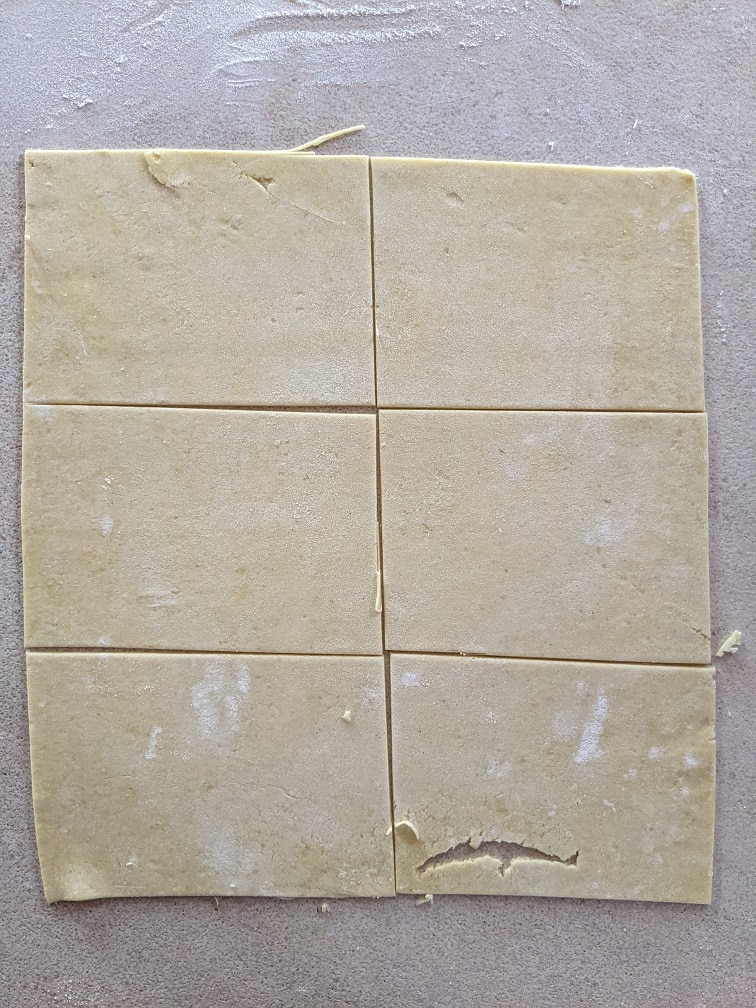
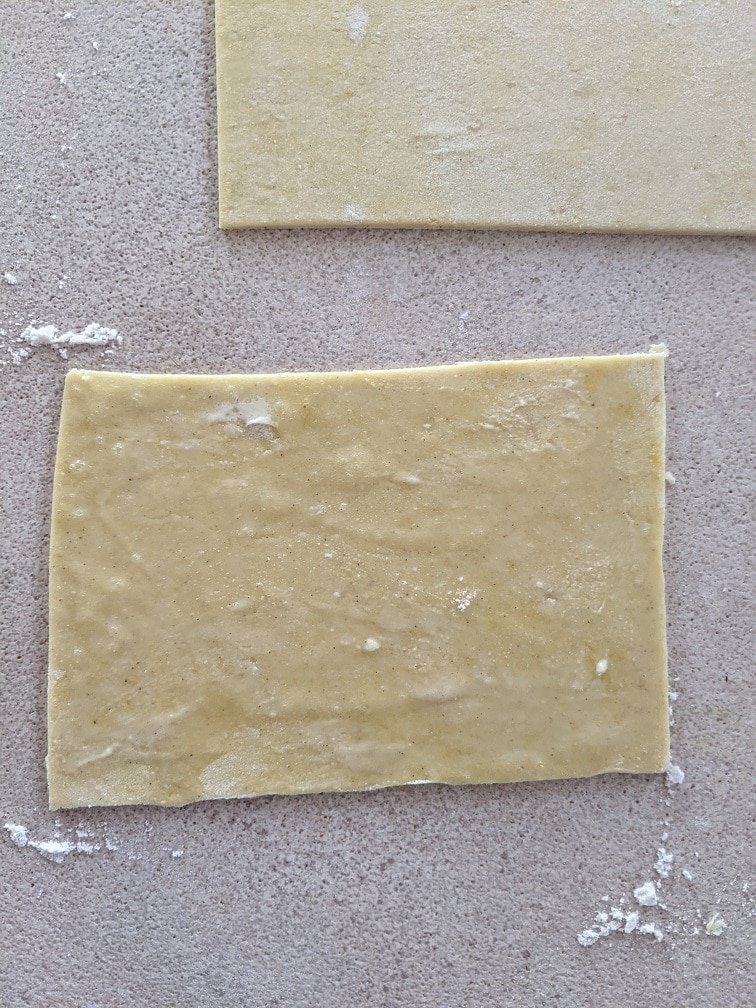
Put the dough on a floured work surface and roll it with a rolling pin to one to two milimeters thick. Trim the edges of the dough to make a large rectangle, then cut the dough into eight centimeter by ten centimeter rectangles. If you are using gluten-free flour, the excess dough can be re-rolled. I’m not sure how it will hold up to re-rolling if you are using regular flour.
*Note: When using regular flour, it is best to make the dough a day before you want to use it, then store it in the fridge overnight. Take the dough out of the fridge an hour before you want to start rolling it. If you try and make the dough using regular flour, it will be way too tough and springy to roll by hand without allowing it that day to rest.
Hand Rolling Egg Rolls
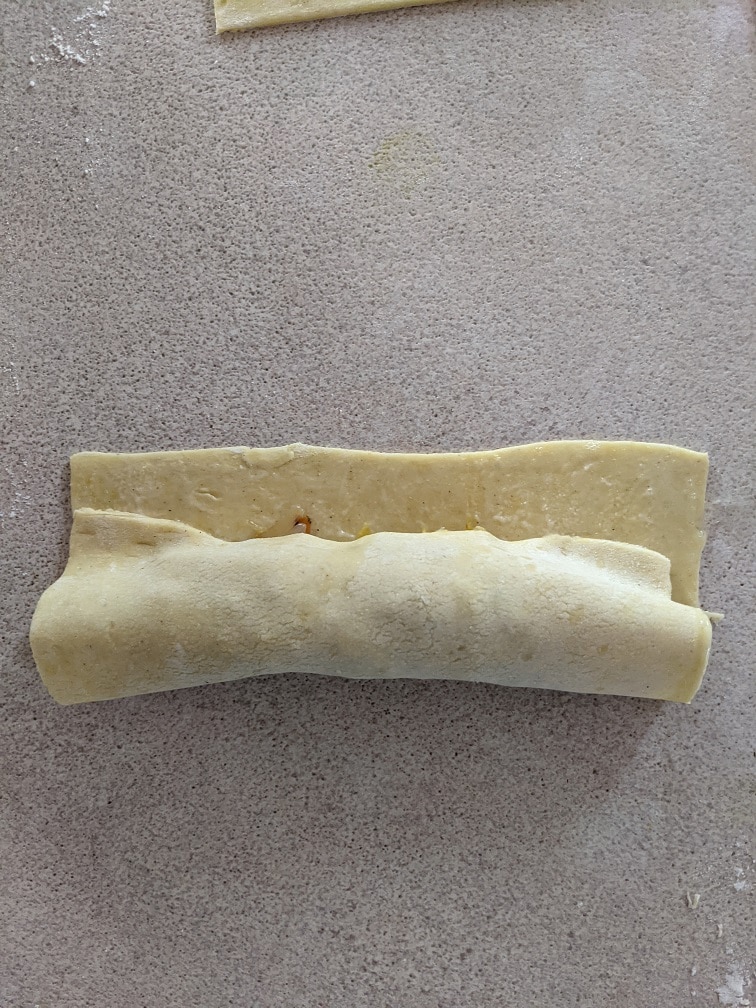
Take one of the dough rectangles and brush the edges with beaten egg white. Place two heaping tablespoons of the filling in the wrapper’s center, then spread it out, leaving a two-centimetre lip on both ends. Roll the wrapper’s bottom up and over the filling, pulling back to tighten, then roll forward to seal. Pinch the ends shut. Repeat until all of the egg rolls are made.
Deep-fry the Egg Rolls in 365°f oil for about five to six minutes or until they turn golden brown. Before you ask, I don’t know how these would stand up to an air fryer or to being baked. I only made them once, and I deep-fried them. Drain the fried egg rolls on a wire rack and serve with homemade plum sauce.
*Note: I did notice that when deep-fried a second time, after cooling, the egg rolls became much crispier. After the initial fry, you can cool the egg rolls and store them in the fridge for up to two days or freeze them.
Homemade Egg Rolls
This is how to make egg rolls from scratch. I used gluten-free all-purpose flour in this recipe, but you can substitute regular ap flour instead.
Heat a large wok or skillet over high heat. Add in the oil and swirl it around the pan. Put the carrot, onion, and celery in the wok and cook for 3 to 4 minutes or until the vegetables are slightly browned.
Add the garlic, and cook for 1 minute. Then add in the bean sprouts, cook for another two minutes, then the cabbage, cook for another 2-3 minutes, season with the soy sauce and salt, toss the vegetables and cook for 1-2 more minutes.
Transfer the vegetables from the wok to a strainer set over a large mixing bowl. Let the vegetables sit and drain for about 20 minutes.
Egg Roll Wrappers
Put the egg yolks into a large bowl along with the salt and flour. Mix well. Then add just enough water to bring the dough together. Transfer the dough from the bowl to a lightly floured counter. Flatten the dough with your hands then use a rolling pin to roll the dough to 2 to 3 mm thick.
Cut the dough into 8 cm x 10 cm rectangle. Any excess dough can be re-rolled and formed.
Making The Egg Rolls
Brush the edges of one egg roll wrapper with beaten egg white.
Place two tablespoons of the egg roll filling in the centre of the wrapper and spread the filling the length of the dough, leaving a 2 cm lip on both ends.
Roll the edge closest to you up and over the filling. Pull back gently to tighten then roll forward to seal.
Pinch the ends togehter to finish.
Place the rolled egg rolls on a lightly floured tea towel until all of the egg rolls have been rolled.
Deep Fry the egg rolls at 365°f for five minutes or until the egg rolls are crisp and golden brown. Serve with homemade plum sauce.
It was really something special for me to have Egg Rolls, let alone homemade ones. Of all the items I have made in this series so far, I think these are my favourite if for no other reason becasue I never thought I would ever eat an egg roll again. Whether you have to eat gluten-free or not, I suggest you make this. It is a great project for a rainy Sunday afternoon, and it is well worth the effort.
Thank you for reading the post. If you liked it, remember to share it on Facebook, Pinterest, or Twitter. Did you know that Chefsnotes.com has over 400 posts just like this one? Subscribe to the blog below, and you will be notified of every new post so you will never a helpful tip or recipe again. And if you would like to know more about me, click the picture of me below to read my story “Life on the line.”
This gluten-free sweet and sour chicken balls recipe with classic red sauce will make you forget that you’re eating gluten-free. It tastes just like what you’d find in an American-style Chinese Food Restaurant. More importantly, you don’t need a culinary degree to make this. The basic recipe is to make flavourful chicken meatballs, batter and fry them and toss them with the homemade red sweet and sour sauce. Anyone, no matter their skill level, can make this recipe.
Mixing The Chicken
Ingredients
In the meat mix itself, there are only five ingredients. This recipe will seem too simple for how delicious it is, but it works very well. The ingredients are two pounds of ground chicken, one teaspoon of salt, a quarter teaspoon of black pepper, one tablespoon of puréed garlic, and one tablespoon of grated ginger. Put all of those ingredients together in a bowl and mix.
Forming Chicken Balls
To form the balls, divide the meat into sixteen even pieces. If you’d like more petite chicken balls, you can get as many as 24 out of this recipe. Wet your hands with cold water when rolling the balls to prevent the chicken from sticking. Put the formed chicken balls on a greased baking sheet and cook at 400°f for twenty minutes. If you make twenty-four balls, it will only take seventeen minutes to cook them.
Why precook the chicken balls?
Precooking the chicken balls does three things. It makes them easier to batter. It makes them quicker to fry, giving them a lighter and crisper batter. And it makes them safer because they are fully cooked before they go in the fryer.
Gluten-Free Batter
While the chicken balls are cooking in the oven, make the batter and the sauce. Start with the batter because it needs to chill before being used. I’ve made this batter with two gluten-free flour brands, and both have come out very differently. This recipe would work the same with non-gluten-free flour as well. Depending on your flour, you may need to add more water than the recipe calls for. One of the gluten-free flour brands only required one cup of water, while the second brand needed two cups. The vital thing to note isn’t the exact quantity of water you add but the consistency of the batter. It should have the same consistency as melted ice cream.
Batter ingredients
The batter ingredients are one cup of all-purpose gluten-free flour, one teaspoon of baking powder, half a teaspoon of salt, one egg, and one to two cups of soda water (or sparkling water). Mix the dry ingredients first, then add the egg and soda water and mix. Again, add more water as needed to get the batter to the correct consistency. Once the batter is made, put it in the fridge for about fifteen minutes or until ready to use. The batter should be as cold as possible when it hits the hot oil to ensure a crisp texture.
Why Soda Water?
The reason the recipe calls for soda water over plain water is for the bubbles. The bubbles in the soda water will make the batter light and crisp. It is the reason why beer is used to batter fish. It’s all for the bubbles.
Sweet and Sour Sauce
The Red Colour
The red colour in some sweet and sour sauce recipes comes from either food colouring or ketchup. To get the red colour and that perfect sweet and sour flavour, this recipe uses the juice from a jar of Maraschino Cherries. If you’d like, you could use food colouring; cherry juice is a much better option because of the flavour although it obviously has food colouring in it.
Sweet and Sour Sauce Ingredients
The sweet and sour sauce ingredients are one cup of white vinegar, one cup of sugar, a quarter teaspoon of salt, half a cup of Maraschino Cherry juice, and a quarter cup of water mixed with a quarter cup of cornstarch.
Making Sweet and Sour Sauce
To make the sweet and sour sauce put the vinegar, sugar, salt and cherry juice in a medium-sized pot. Bring the pot to a boil over medium-high heat, stirring every minute or so. Once the sauce starts to boil, add the cornstarch and water mixture (stir the cornstarch and water before pouring it into the sauce). Whisk the sauce until it is thick and completely translucent. Take it off the heat until you are ready to serve.
Storing Sweet and Sour Sauce for later
You can store the sweet and sour sauce in the fridge in an airtight container for up to three weeks. To use it, heat it in a pot over medium heat with a tablespoon or two of water.
Finishing The Gluten-Free Sweet and Sour Chicken Balls
All that is left to do is to batter and fry the chicken balls. To do that, dredge the cooked balls in about half a cup of gluten-free flour first, dip them in the batter, then into a fryer set to 365°f and fry for five minutes. You can do this without a fryer, but it’s not recommended unless you know what you are doing. Deep-frying can be very dangerous. If you don’t have a deep-fryer, maybe you can borrow one from a friend. They would be glad to let you use their fryer in exchange for some chicken balls.
Once the chicken balls have cooked for five minutes, take them out of the oil and place them on a cooling rack set over a sheet pan. Continue until all of the balls have been cooked. At this point, the chicken balls can be cooled and frozen. They can be cooled and reheated in the oven or the fryer. Or, you can fry them again to brown them and eat them right away. If you want to eat the chicken balls immediately, keep the fryer’s temperature at 365°f and cook them for another four minutes or until they are browned. Once browned, take the balls out of the fryer, let them drain a little on a rack, then plate them and top them with the sweet and sour sauce.
Gluten-Free Sweet and Sour Chicken Ball Recipe
Make classic Chinese Take-Out Sweet and Sour Chciken Balls at home. You won't even know they are gluten-free.
Keyword: Chicken, Chinese Food, Chinese Food Series, Sweet and Sour, Take-out
Servings: 4people
Author: Chef’s Notes
Ingredients
Chicken Ball Mix
2lbsGround Chicken
1tbspPuréed Garlic
1tbspGrated Ginger
1tspSalt
1/4tspBlack Pepper
1tbspVegetables Oil
Batter
1cupAll-Purpose Flour(Gluten-Free)
1tspBaking Powder
1/2tspSalt
1Egg
1cupSoda WaterPlus More As Needed
Sweet and Sour Sauce
1cupWhite Vinegar
1cupSugar
1/2cupMaraschino Cherries Juice
3tbspWater
3tbpsCornstarch
Instructions
Chicken Ball Mix
Mix together the chicken, ginger, garlic, salt, and pepper.
Form the mix into 16 – 24 evenly-sized balls depending on the size chicken balls you'd prefer.
Place the balls on a greased sheet pan and bake them at 400°f for 17-20 minutes.
Batter
In a medium mixing bowl combine the flour, baking powder and salt.
Break the egg into the flour mixture and add 1 cup of soda water. Whisk until a smooth batter forms. Whisk in more water as needed. The batter should be the consistency of melted ice cream.
Put the batter in the fridge to chill for about 15 minutes before using.
Sweet and Sour Sauce
Put the vinegar, sugar, and cherry juice in a medium pot and bring to a boil.
Separately, combine the cornstarch and water then whisk it into the vinegar, sugar mix.
Boil and whisk the sauce until it is thick. Take it off the heat and let it sit until you're ready to serve.
Frying The Chicken Balls
Toss the chicken balls in a 1/2 cup of flour, dip them in the cold batter, and fry on 365°f for 5 minutes.
Let the balls cools on a rack then refry on 350°f until golden brown.
Serve with the sauce over them.
Notes
The last time I made these I used a different brand of gluten-free flour than I normally do and had to add about double the amount of water. Start with 1 cup of soda water then whisk in more as needed. The batter should be the consistency of melted ice cream.
It’s a good idea to take an afternoon and make a double or even triple batch of this recipe because once you taste these Gluten-Free Sweet and Sour Chicken Balls, you’re going to wish you had made more. The sauce works very well on all sorts of things from beef meatballs, to chicken legs. And it lasts a long tie in the fridge.
First of all, I hope everyone had a great long weekend. I know I did. Now, over the past few weeks, I have been writing a “Gourmet Sandwich” series, which has included Chicken Parmesan Sandwiches, Roasted Vegetable Paninis and Reubens. Today, we are going to continue with the series, but rather than focus on a single sandwich (don’t worry, we will get back to that next week), we are going to look at seven easy to make flavoured mayonnaise recipes to jazz up any sandwich. Sounds exciting, doesn’t it? Well, let’s get to it.
1. Pesto Mayo
This first mayonnaise recipe is for pesto mayo, which I used on the vegetable panini from two weeks ago. The pesto I used is homemade, but you can use store-bought if you would prefer. I’ve shared the pesto recipe below. To make the pesto mayo combine 3 tbsp of pesto with 1/2 cup mayo and mix. To get the most flavour out of the pesto mayo, wrap it and let it sit in the fridge for at least an hour before using it.
Pesto mayo is not only fantastic on a roasted vegetable panini, but also a chicken sandwich, tuna, or a sausage and pepper sandwich. That’s just to name a few options. I’m sure that you can think of a few different ways to use pesto mayo. What would you put it on? Tell me in the comments section at the end of this post.
Dijonnaise is a mixture of Dijon mustard(smooth or grainy) and mayonnaise. I prefer a 50/50 ratio, but that might not suit your tastes. I suggest starting with equal parts mayo and Dijon mustard, taste it, and if you find the mustard too overpowering, add in a bit more mayo. You can also add a splash of lemon juice and a pinch of salt to make the flavours a little more vibrant.
Dijonnaise is a most typically paired with ham and cheese on a baguette. However, it also works well with roast beef or roast pork. A mild Dijonnaise would also be good on a salmon sandwich.
3. Roasted Garlic Mayo
When you roast garlic, its flavour and texture completely change. The garlic becomes very soft and sweet, which makes it the perfect addition to mayonnaise. To roast garlic, you can cut the top off of a bulb of garlic, drizzle it with olive oil, wrap it in foil and roast it in the oven on 375°F for about 30 minutes or until the garlic is browned and soft. Or, you can take a handful of garlic cloves, put them in a small pot, cover them with olive oil, and cook them over low heat until they brown and soften. I prefer this second method, especially when making larger batches of roasted garlic. With the second method, you also get roasted garlic oil, which is fantastic for brushing on bread before grilling, on burger buns, or just for dipping bread into with a little balsamic vinegar.
To make roasted garlic mayo let the garlic cool, then squeeze it out of the peel (if using the first method to roast the garlic), mash it with a fork, then combine 2 tbsp of mashed roasted garlic with 1/4 cup of mayonnaise. You can also add a few drops of lemon juice to enhance the flavour a little.
Roasted garlic mayo is fantastic on burgers, roast beef sandwiches, vegetable sandwiches, french fries, and just about anything else you can think of.
4. Curry Mayo
Curry mayo, in its most basic form, is a mixture of madras curry powder (yellow curry powder) mixed with mayonnaise. Other ingredients like lemon or lime juice can also be added to make the flavour a little more pronounced. To make curry mayo combine 1 to 2 teaspoons of curry powder (recipe below) with 1/2 cup of mayonnaise and 1/2 tsp of lemon juice. Mix the ingredients very well, then cover and put in the fridge for at least an hour before using it.
Some curry mayo recipes will call for ingredients like sour cream or even cream cheese. You can do this, and it will make a tasty spread, but to me, that isn’t really curry mayo. Also, curry mayo is good as it is. It doesn’t need other ingredients.
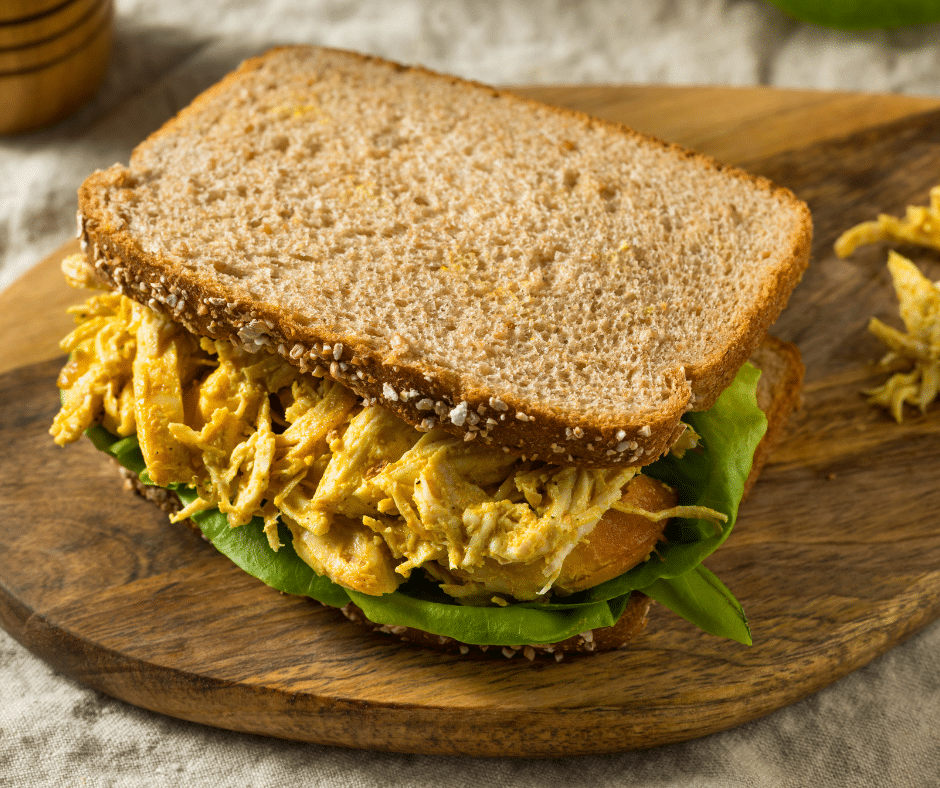
Curry mayo is often served alongside sweet potato fries. However, it makes a great addition to a chicken salad sandwich, especially if you throw some green apple in the mix. What sandwich would you put curry mayo on? Tell me in the comments section below.
By far, the flavoured mayonnaise that I use the most, Sriracha mayo, is a mixture of mayonnaise, sriracha, sugar, and fish sauce. You can find the recipe below. I sometimes add orange zest and juice to the recipe, which makes a fantastic sandwich spread but is also an excellent dip for onion rings.
Sriracha Mayo is excellent on chicken or fish sandwiches, with roast pork or beef, on Bahn mi, sushi, or on ginger beef lettuce wraps as in the recipe below. I make sriracha mayo at least once a month. Once you taste it, I bet you will too.
Ginger Beef Lettuce Wraps – 30 Minutes or Less
A quick and delicious recipe for ginger beef, with sriracha mayo, vegetables, and wrapped in lettuce.
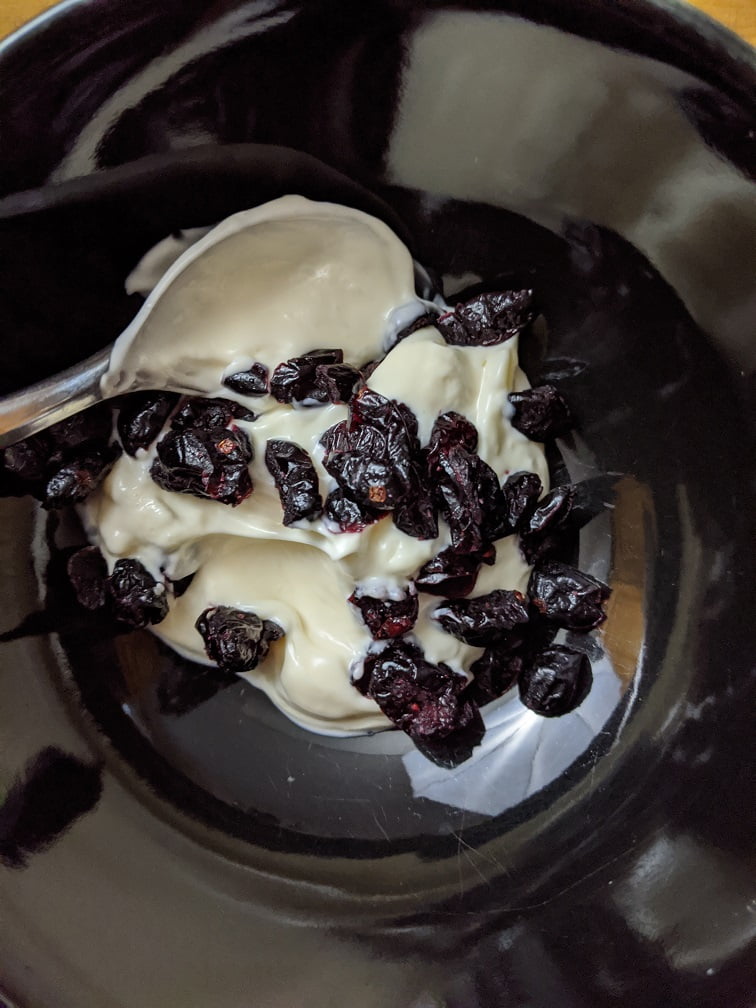
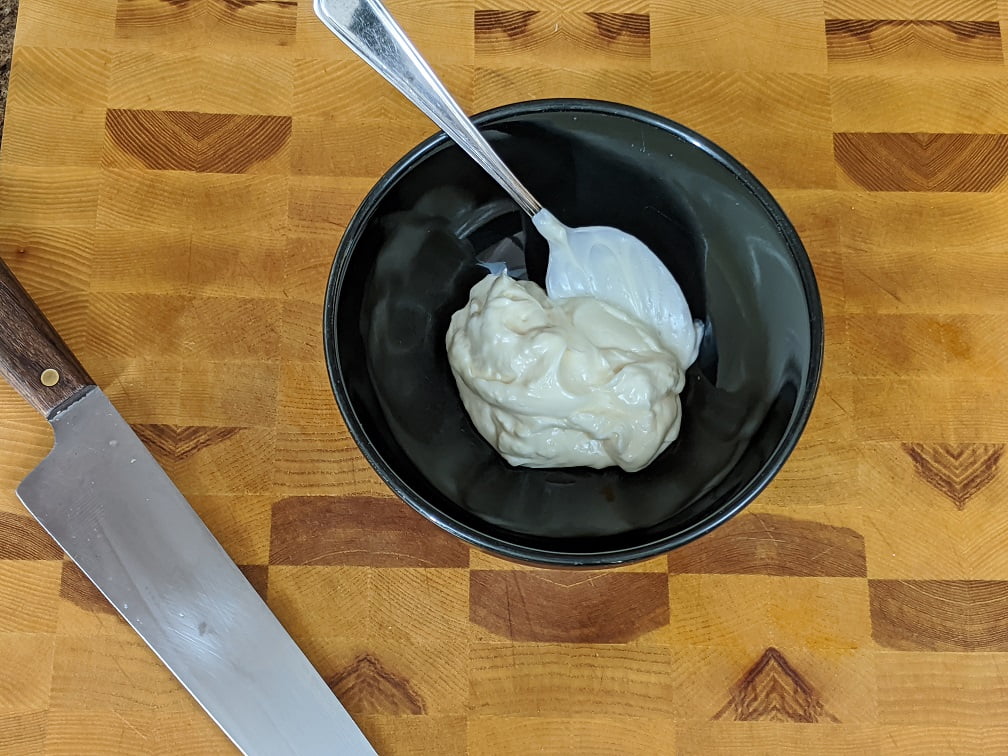
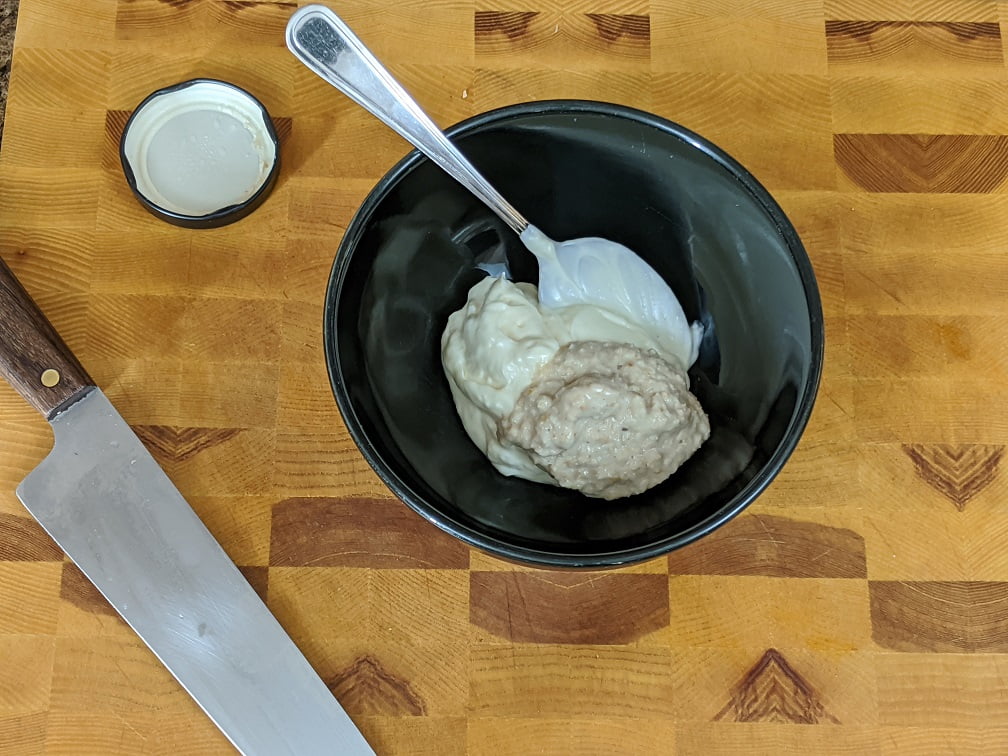
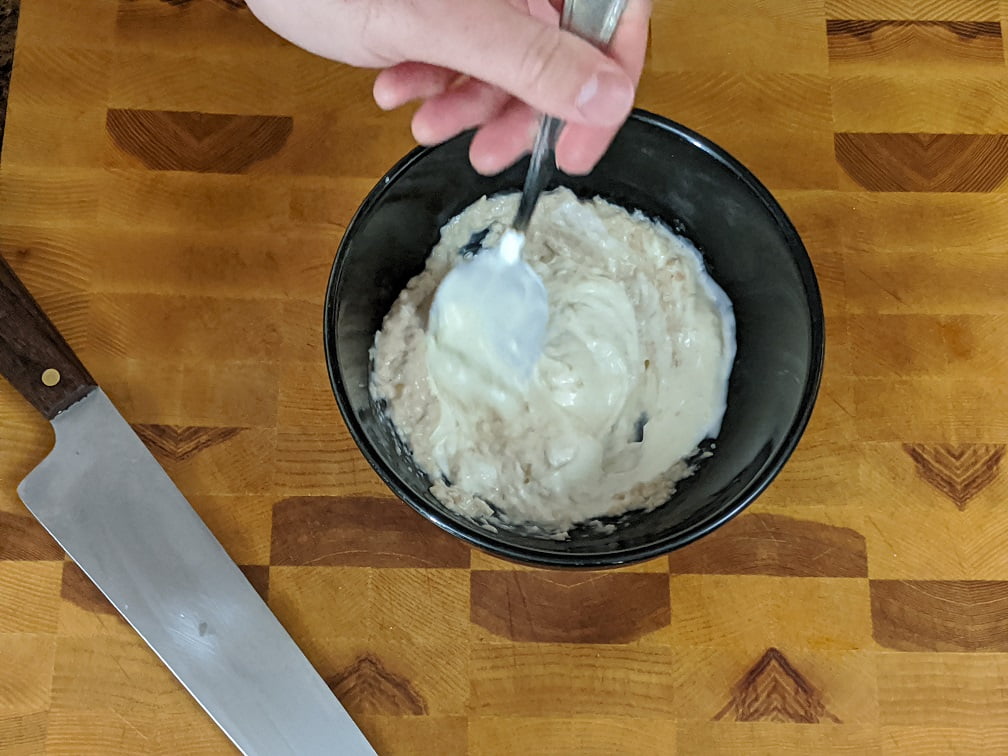
Cranberry mayo is usually made by mixing pre-made cranberry sauce with mayonnaise. There is nothing wrong with that. In fact, it is delicious. But, I like to mix dried cranberries with mayo and a little bread and butter pickle brine. I let the mayo sit in the fridge for an hour to soften the cranberries and blend the flavours. It is absolutely delicious.
Cranberry mayo is fantastic on a turkey or chicken sandwich or burger. It is excellent with roast pork, on a sandwich with brie and ham, or a grilled cheese.
Cranberry Mayo
A simple and delicious flavoured mayo for chicken or turkey sandwiches
I’m not sure what exactly it is about the combination of horseradish and mayonnaise that works so well, but it truly is a unique combination. I like a ratio of equal parts prepared horseradish and mayonnaise. That’s all there is to it.
Horseradish mayo is exceptional on burgers, roast beef sandwiches, mixed with egg salad, or with smoked salmon. It is so good on burgers in fact that it is one of my all-time favourite burger condiments. As I said earlier, I make sriracha mayo more than anything else on this list. Horseradish mayo comes in a very close second.
Conclusion
One of the easiest ways to make a good sandwich an exceptional one is to flavour the mayonnaise. It takes little effort to mix an ingredient or two into some mayo, and the impact on the overall flavour and sandwich experience is worth every second it takes. The flavour combinations in this list are my favourites, what are yours? Do you have a mayo mix that you love to put on sandwiches? Share it in the comments section below or on Facebook.
Thank you for reading the post. If you liked it, remember to share it on Facebook, Pinterest, or Twitter by clicking the icon to the left of the right of the page. Did you know that Chefsnotes.com has almost 400 posts just like this one? Don’t ever miss a post again. Become a Chef’s Notes member right here. You will be notified of every new post. And if you would like to know more about me, click the link below to read my story.
Pork tacos with pineapple salsa, yes, it is as delicious as you think it is going to be, maybe even more so. But do you want to know what the best part is? You can make this at home. Yes, you! I don’t care if you have never cooked anything in your life. I don’t care if you have never eaten a taco before. You can make this; I’m going to show you how. I am going to walk you through the whole process, and I’m going to make it look easy. Why? Because when you break it down into small steps, it is easy. Even for the most inexperienced cooks out there. Are you ready? Let’s go.
The Right Pork For The Job
First and foremost, we have to talk about the pork. It’s kind of the star of the show, so it seems like a logical place to start. Don’t use a lean piece of pork like loin or tenderloin for this. The pork needs to have a bit of fat because it is going to be slow-cooked. If there isn’t enough fat, it will dry out and ruin your tacos. I like to use pork shoulder. It might be called picnic roast or picnic ham (though it is not smoked). You can usually find it at the grocery store in relatively small pieces, on the cheap.
The pork shoulder is going to have a bit of skin on it, and a bone that runs through the middle of it. If you have the time to marinate the pork overnight, you don’t have to worry about the skin and bone. Just leave it alone. However, if you want to do this all in one day, you will need to remove the skin and cut the meat away from the bone.
To remove the skin from the pork shoulder, find the thinnest part of the skin (usually around the bone) and cut through it. Now, grab one piece of the skin that you just cut through and using your knife, slightly angled up towards the meat, cut the skin away from the meat. You should be able to take all the skin off in one piece.
Now that the skin is off the meat, you have to cut the meat into smaller chunks and remove it from the bone. If you look down at the piece of pork, you will see a few white lines. These lines separate individual muscles. Use these lines as your guide. Follow them with your knife making shallow cuts with the knife’s tip until you get one muscle cut away. At some point, your knife is going to hit bone. When this happens, angle your knife so that the side of the blade is being guided by the side of the bone. Use the tip of the knife to cut away any bits that you are finding difficult.
That’s it, you did it! You just cut up a pork shoulder. Now, it’s ready for the marinade.
The Marinade
For the most part, the marinade for this pork is pretty straight forward. There is, however, one ingredient that may be a little difficult to find. The ingredient in question is Annatto paste. You may be able to find it in the international section of your local grocery store. More than likely, however, you will have to find a Speciality Latin American Grocery Store. If neither of these options works for you, you can order Annatto on Amazon right here. You can leave Annatto out of the recipe, but it will affect the flavour and colour.
What is Annatto?
Annatto is a seed that is native to the tropical regions from Mexico to Brazil. You’ve eaten it whether you know it or now as it is used to colour cheddar cheese orange, among other everyday things. By itself, Annatto doesn’t have much of a flavour, though it does have some. More typically, it is used to add colour to a dish. The Annatto paste that I used is a combination of Annatto and spices. Even with the spices, the paste still has a mild flavour, but somehow, it adds a lot to the pork. For more information on Annatto, check out this Wikipedia article about it.
Making The Marinade
The marinade for the pork is a combination of the Annatto, citrus, garlic, onion, and spices. This mixture is puréed in a blender or with an immersion or stick blender, then poured over the pork. For full measurements and ingredients, see the recipe below.
If you are leaving the Annatto out of this recipe, double the cilantro, add in 1 tbsp dried oregano, 1/4 cup chopped parsley, and double the cumin and coriander. For a more smokey flavour, you can replace the jalapeno with an equal amount of chipotle in adobo. You can find this at most grocery stores.
When zesting the citrus (this can be done with a Microplane or on the finest part of a cheese grater), stop as soon as you get to the white part of the rind, this white bit is very bitter and can turn the whole marinade and the pork bitter. Also, zest the citrus directly into the bowl of the blender if you can. This will help to keep the natural citrus oil and most of the flavour in the dish rather than being lost in your cutting board.
Marinating The Pork
With the marinade made and ready to go, and the pork cut up and ready to go, it’s time to combine the two. Put the pork in a large ziplock bag. Pour the marinade over the pork, squeeze as much air out of the bag as possible and seal it. Gently toss the bag around to coat the pork in the marinade. Put the pork in the fridge for at least two hours to marinate. If you have the time, overnight is better.
Roasting The Pork
It’s been at least two hours, and the pork is ready to cook. Turn the oven on to 300°F and let it preheat for about 15 minutes. Put the marinated pork into a roasting pan, along with all the marinade. Cover with parchment paper, and wrap tightly with foil. Roast in the oven for 2 – 2 1/2 hours or until the pork is tender enough that it can easily be shredded with two forks.
Once the pork is cooked, take the meat out of the roasting pan and pull into small pieces using two forks or a set of tongs. Pour half the liquid from the roasting pan onto the pork, stir it in and taste. I used all of the liquid from my roasting pan, and you can too, but start with half and add more as needed. All of that liquid is pure flavour. You don’t want to lose it if you can avoid it. Once you get the pork and the liquid mixed, taste the pork again, and adjust the seasoning with salt, pepper, and lime juice to suit your taste.
Pork Taco Marinade
This citrus, annatto, and jalapeno, marinade, is the perfect thing to take those pork tacos from good to great.
Put all of the ingredients except the pork in a blender and blend until smooth. Taste and adjust the seasoning as needed.
Put the pork in a large ziplock bag and cover with the marinade.
Remove as much air as possible from the bag, seal, and put in the fridge to marinate for a minimum of 2 hours or up to 24 hours.
Remove the pork from the marinade, put in a mediumesized roasting pan and cook on 300°F for 2 – 2 1/2 hours or until the pork is easy to pull apart with two forks.
Shred the pork into the juices that have accumulated in the roasting pan. Taste adn adjust the seasoning with salt, pepper, and lime juice as needed.
Pork and pineapple are one of those magical combinations that go perfectly well together in most cases, but not all. (I’m looking at you Hawaiian Pizza). And so, pineapple salsa is the perfect accompaniment for our pork tacos. To make this Pineapple Salsa, combine 1 cup of diced fresh pineapple (dice it as fine as you can because it makes it easier to spoon on to the tacos) with 1/2 cup minced red onion, and the zest and juice from 1 lime. Add to that 1 tbsp chopped cilantro, 1/2 a tsp of cumin, 1/2 tsp kosher salt, 1 tbsp chopped pickled jalapeno (you can use fresh jalapeno, but I like the extra acidity these provide to the salsa.), and 1 tbsp olive oil. If you would like the salsa to be a little sweeter, you can add 1 tbsp of honey as well. Mix this all up, taste and adjust the seasoning with salt as needed then put in the fridge for at least 1 hour.
Pineapple Salsa
A simple, and delicious pineapple salsa recipe that pairs perfectly with pork or fish tacos.
Okay, you have the pork cooked and shredded. The pineapple salsa has been in the fridge for over an hour. It’s time to eat! You can take the pork as it is and throw it on a tortilla, eat it and be perfectly happy. However, I prefer to sauté the pork and brown it a little before serving it. As you can see in the pictures below, I did this on a little electric griddle, but of course, you can do this in a pan. Get the pan nice and hot over medium-high heat, add 1 tsp of oil then add in the pork along with the juices. Let the pork cook until most of the juices have evaporated and the pork is browned in some places. This will do two main things. It will give the pork a deeper more nuanced flavour by carmelizing some of the sugar. Secondly, a lot of the liquid in the sauce that the pork is in (the juices) will evaporate making the flavour of the sauce, and the pork, more intense. Do yourself a favour and do not skip this step.
The Tortillas
I made my own tortillas using P.A.N. masa flour. It is surprisingly easy to do, but it is a fair amount of work. I’m not going to judge you for buying tortillas for this. What I will say about it, though, is that you put in a tonne of effort up until this point, don’t blow it by cheap out on the tortillas. Buy soft, corn tortillas if you can, if not, buy soft flour tortillas. Leave the hardshell tacos to Old El Paso and Taco Bell.
You can heat the tortillas in the oven wrapped in foil, or a tortilla warmer if you have one. I heated mine right on the griddle with the pork. This way, the tortillas absorb a bit of the juice from the pork adding even more flavour. I’ll leave that up to you. If you are interested in making your own tortillas, check out this post I did about it a while back.
Time to eat some Pork Tacos
Once the meat is lovely and browned, put it on some warmed tortillas, along with a bit of the pineapple salsa. Add some of your favourite Mexican hot sauce (I like Cholula, which you can find in the hot sauce section of most grocery stores). Squeeze a bit of fresh lime over the tacos, throw on a sprig or two of cilantro and enjoy! If you’d like to, you can finish the tacos with a bit of queso fresco (I use ricotta cheese or sometimes feta because it is hard to find authentic Mexican queso fresco where I live). Just like that, you’ve made delicious homemade pork tacos with pineapple salad, congratulations!
Conslusion
Make these tacos. Seriously, you will be happy that you did.
If you enjoyed this post, share it on Facebook or Pinterest so more people can enjoy it. Subscribe to the blog at the top right of the sidebar, so you never miss a chef’s notes post again. Thank you for reading, have a great day!
We use cookies on our website to give you the most relevant experience by remembering your preferences and repeat visits. By clicking “Accept”, you consent to the use of ALL the cookies.
This website uses cookies to improve your experience while you navigate through the website. Out of these, the cookies that are categorized as necessary are stored on your browser as they are essential for the working of basic functionalities of the website. We also use third-party cookies that help us analyze and understand how you use this website. These cookies will be stored in your browser only with your consent. You also have the option to opt-out of these cookies. But opting out of some of these cookies may affect your browsing experience.
Necessary cookies are absolutely essential for the website to function properly. This category only includes cookies that ensures basic functionalities and security features of the website. These cookies do not store any personal information.
Any cookies that may not be particularly necessary for the website to function and is used specifically to collect user personal data via analytics, ads, other embedded contents are termed as non-necessary cookies. It is mandatory to procure user consent prior to running these cookies on your website.