Fresh corn on the cob is one of the best parts of summer. It’s sweet. It’s tender. And of course, it is delicious. But what if I told you it could be better? I know it is perfect when smothered in butter, salt and pepper. But, there is another way. Mexican Street Corn is corn on the cob grilled in the husk to retain maximum moisture and sweetness. Once cooked, the corn is husked and slathered in a mixture of mayonnaise, chipotle, lime, and cilantro. If this wasn’t enough, Mexican Street Corn is finished with a generous amount of fresh cheese. Are you drooling yet? I am. Let’s get to it. You can find the recipe directly below but for more detailed information, keep reading.
Mexican Street Corn
Corn grilled in the husk then slathered in chipotle, lime mayo and finished with fresh cheese and cilantro. That's Mexican Street Corn, baby!
Keyword: Corn on the cob, Mexican Food, Street Food
Servings: 4servings
Author: Chef Ben Kelly
Ingredients
4eaEars of Corn Still In The Husk
1/4cupMayonnaise
2tbspChipotle in Adobo chopped very fine
1eaLime, Juice and Zest
2tbspChopped Cilantro
Saltto taste
1/4cupCrumbled Ricotta or Feta CheeseIf you have access to queso fresco, use that.
Instructions
Soak the corn in water for 30 minutes.
While the corn is soaking, heat your barbecue on medium-high heat (about 350°f – 400°f) for 15-20 minutes.
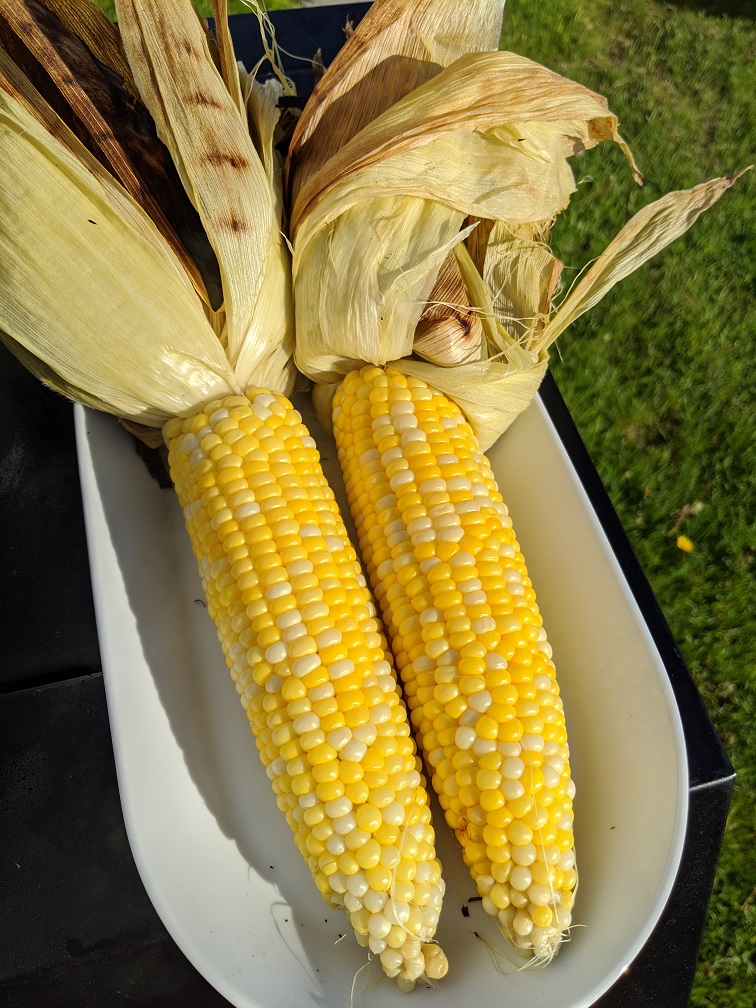
Take the corn out of the water, leave it in the husk, and put it on the grill. Close the lid and cook for 15 to 20 minutes. Flip it halfway through cooking.
Take the corn off the grill and let it cool for 5 minutes.
While the corn is cooling, combine the mayo, chipotle, lime zest and juice and cilantro. Mix well.
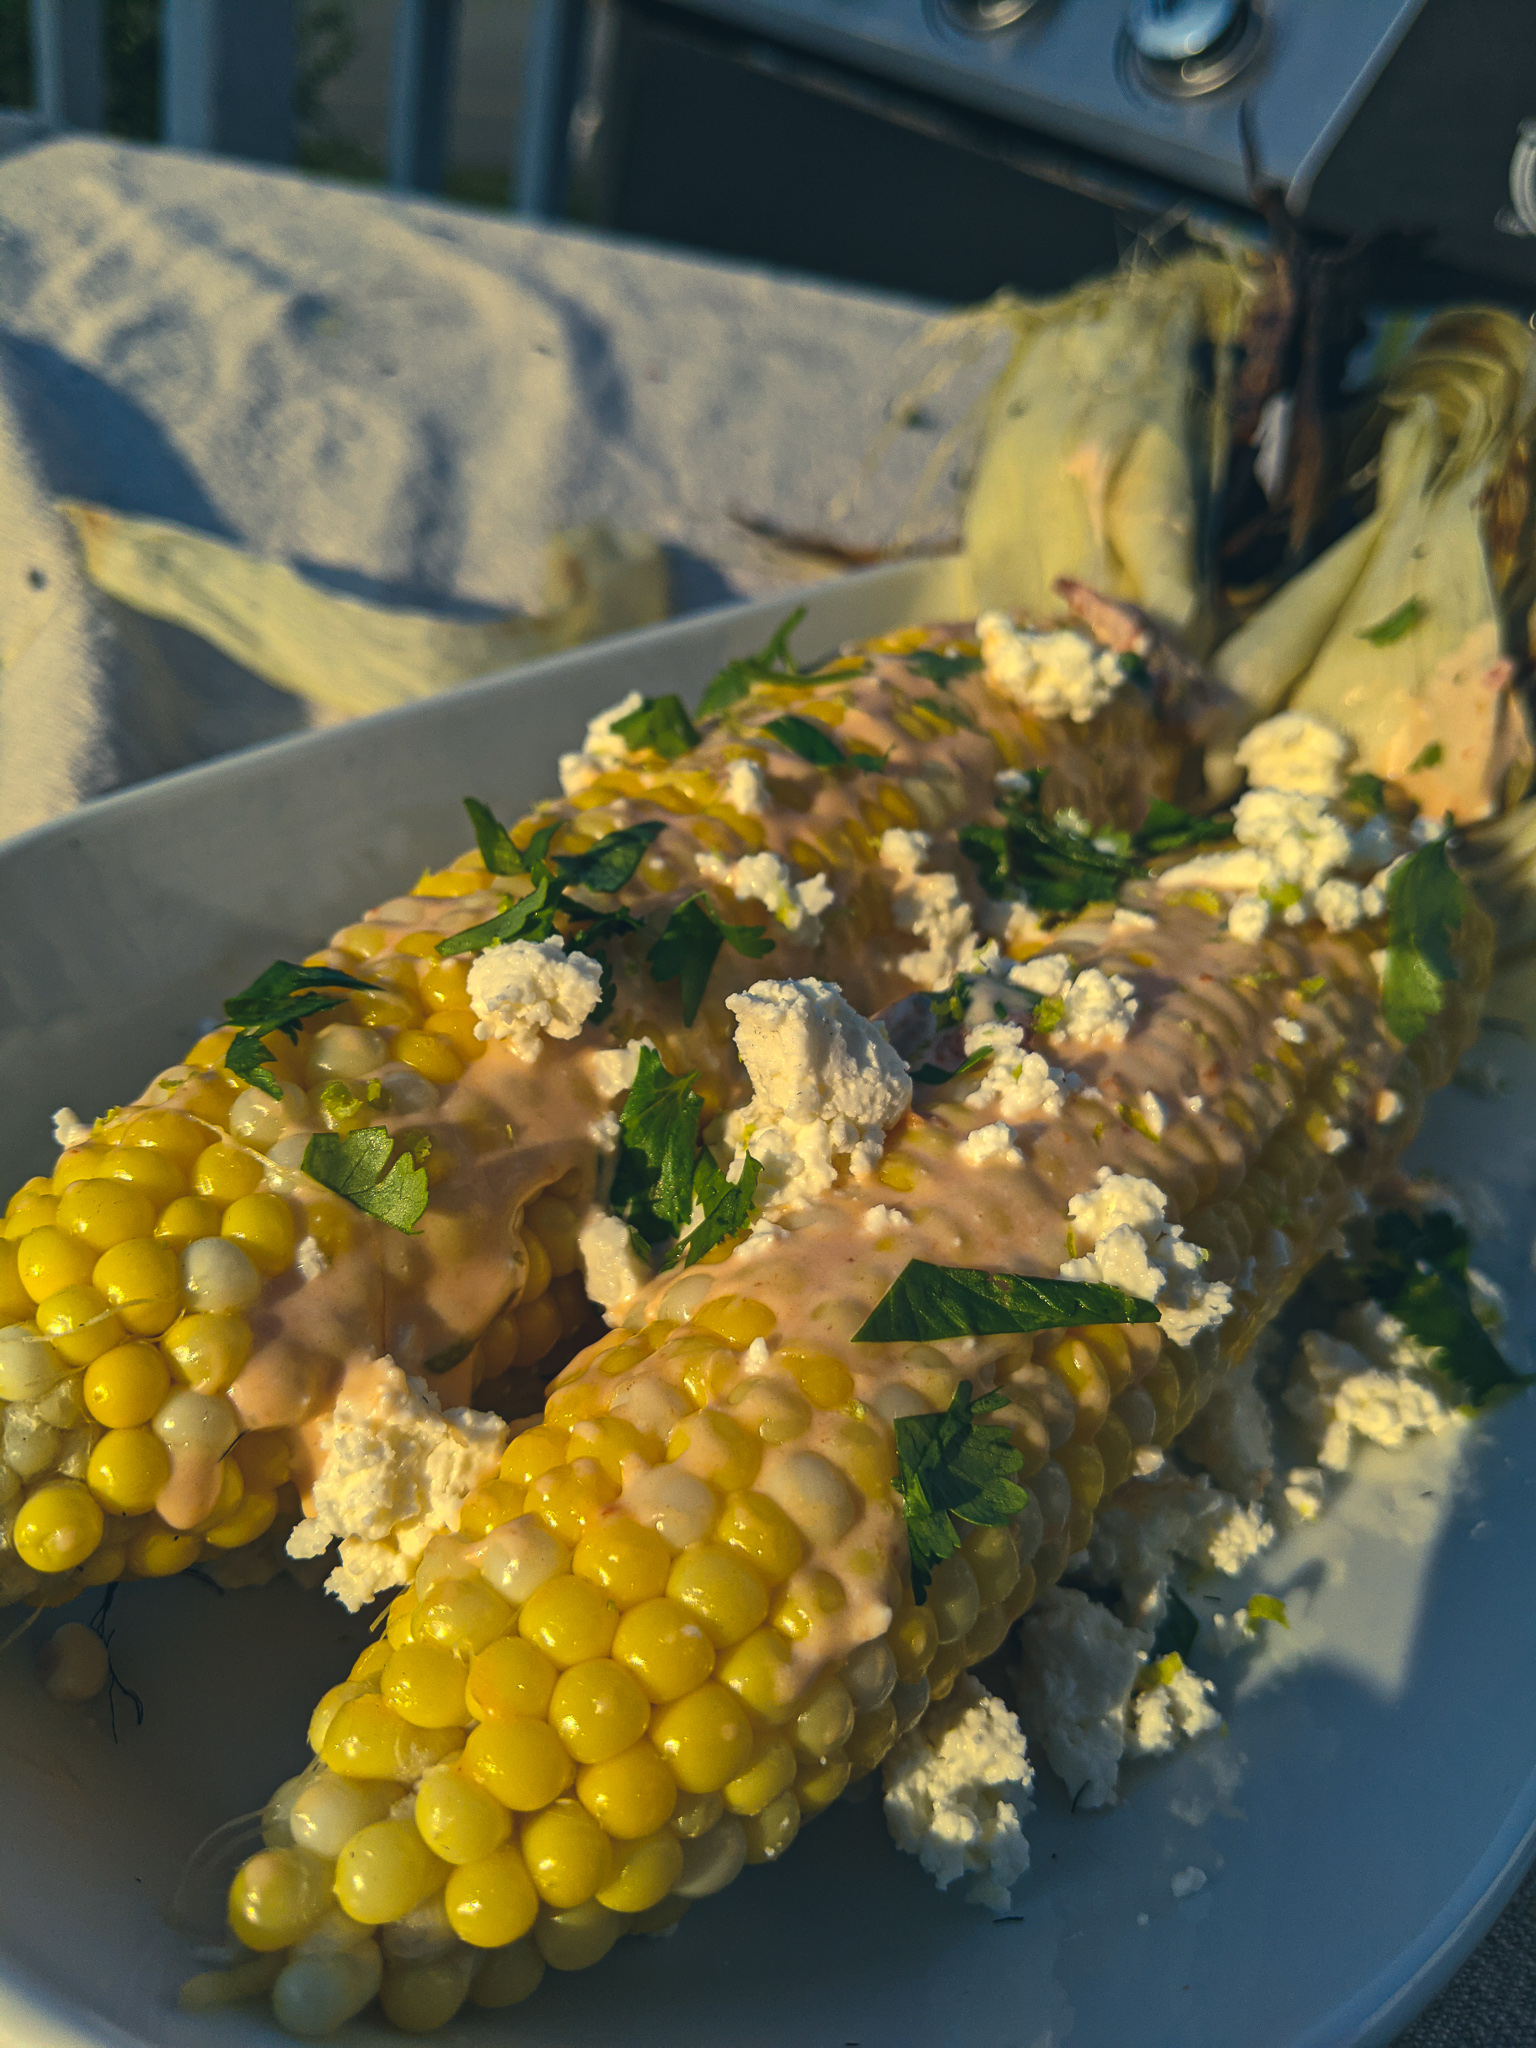
Pull the husk back off the corn but leave it attached for presentation and to provide a handle to hold on to. Brush the corn on all sides with the chipotle mayonnaise mixture and top with some crumbled cheese. Enjoy!
When making Mexican Street Corn or grilling corn in the husk for any purpose, you must soak it in water first. Soaking the corn in water does two things. It prevents the husk from catching on fire and burning your corn. And, the extra moisture added to the husk turns to steam and helps cook the corn. Some people recommend soaking the corn for as little as 10 minutes. I think 30 minutes is a safer bet.
Grilled Corn On The Cob
While the corn is soaking, take the opportunity to heat your grill. You want to cook the corn between 350°F and 400°F with the lid closed. Once the corn has soaked for 30 minutes, put it on the preheated grill and close the lid. Leave it alone for 7 to 8 minutes, then flip it. Close the lid and leave it alone for another 7 to 8 minutes. In total, the cooking time should be about 15 minutes for small to medium-sized corn and 20 minutes for larger cobs.
Rest the Corn
Once cooked, take the corn off the grill and set it aside for 5 minutes. Resting the corn will make it easier to handle when you go to remove the husk. It will also help keep the corn nice and juicy. After five minutes, peel the husk back. You can remove the husk completely, but I like to leave it on for presentation and because it gives you something to hold on to while eating the corn.
Make the Sauce
While the corn is resting, take a minute to throw the sauce together. The ingredients are mayonnaise, chopped chipotle in adobo, lime zest and juice, and cilantro. For all the measurements, check the recipe at the top of the page. Mix the ingredients. Taste and add a pinch of salt as needed. Once the corn has rested and is husked, brush the sauce all over the cobs.
Finishing The Mexican Street Corn
Traditionally the cheese used for Mexican Street Corn is Queso Fresco, but it is next to impossible to find where I live. Possibly where you live too. So, you can use either Ricotta or Feta that has been rinsed of its brine. Either one will work fine, but the feta will provide a little more flavour. I used feta for my corn. Whatever cheese you use, crumble it and sprinkle it over the cheese. If you’d like, garnish the corn with a little fresh chopped cilantro. That’s it. You just made Mexican Street Corn.
The Wrap Up
Mexican Street Corn is one of those things that you hear about and are initially unsure of. But once you try it, you’ll crave it over and over. The spicy smokiness of the chipotle, with the sweetness of the corn, and the fresh creaminess of the cheese, work together in perfect unison to make something that is, at the very least, equal to fresh corn with butter, salt and pepper, but possibly much better than that. Next time you buy some corn, give this a shot. I’m willing to bet that you will love it.
Thank you for reading, and if you enjoyed this post, please remember to share it on Facebook or Pinterest. And if you’d like to receive Chef’s Notes posts in your inbox, enter your email address in the subscription box below.
Imagine all of your favourite vegetables cooked on the grill, tossed together with arugula, and maple balsamic vinaigrette, then topped with goat cheese. That sounds amazing, doesn’t it? Well, that is exactly what I am going to show you how to make today. This Grilled Vegetable Salad is the perfect accompaniment to grilled chicken, steak, pork, or even fish. It screams summer, and it tastes amazing. Are you ready to see how it’s made? I know I am! So, let’s get to it.
Grilled Vegetable Salad Recipe
Before we jump into things, there is something I want to mention. I recently took ads off Chef’s Notes because I found them annoying, and if I felt that way, I’m sure other people did too. One other thing that I find annoying about this blog and most others is that when you want a recipe, you have to scroll through so much text to find it. Well, luckily, I have the power to change that, at least on this site. So, moving forward, all new posts will have the recipe published after the introduction. That way, if all you want is the recipe, you can find it instantly. If you want more detailed instructions, tips, and fun anecdotes (I hope they’re fun at least), you can keep scrolling.
I am always trying to improve Chef’s Notes, and I think that publishing the recipe at the top of the article is an easy way to improve the reader experience drastically. If you can think of any other ways to improve the site, please let me know either in the comments section at the end of this post or on my contact page.
Grilled Vegetable Salad with Maple Balsamic Vinaigrette
Take all of your favourite vegetables, cook them on the grill, toss them with arugula and homemade maple balsamic vinaigrette and top it all with crumbled goat cheese. That's what this salad is and it tastes like pure summer.
In a medium mixing bowl combine the mustard powder, maple syrup, and balsamic vinegar.
Whisk a few drops of the oil into the mixture. Once the oil has been incorporated, whisk in a few more drops. Repeat this three to four more times, then add the remaining oil in a slow, steady stream while constantly whisking.
Once all of the oil has been incorporated, taste the dressing and season with salt and pepper as needed. Use the Vinaigrette right away or store it in the fridge in an airtight container for up to two weeks.
Prepping The Vegetables
Cut the top and bottom off of the red and green bell pepper. Make a slice down one side of each pepper, then using your knife, cut the seed pod away from the pepper and discard. Cut the peppers in two.
Cut the onion into 1/4-inch rings. Remove the peel and thread the onions onto 2 10-inch metal skewers. If you use wooden skewers, soak them in water for 30 minutes first.
Cut the zucchini in 4 lengthwise.
Peel the sweet potato and cut lengthwise into 1/4-inch strips.
Thread the cherry tomatoes onto 2 10-inch metal or wooden skewers. If you use wooden skewers, make sure to soak them for 30 minutes first.
Place all the preparred vegetables on a sheet pan and drizzle with the olive oil. Season on both sides with salt and pepper.
Grill the vegetables on a preheated grill on medium-high heat until cooked. It is hard to give an exact time, but some things like the tomatoes will take 4 to 5 minutes, and other things like the onions and sweet potato will take 10 to 15 minutes. As things cook, remove them from the grill.
Once the tomatoes are cooked, take them off the skewers and add them to the vinaigrette to cool. The other cooked vegetbles can be returned to the sheet pan until it is time to assemble the salad.
Assemble the salad
Place the arugula in a large mixing bowl.
Cut all the cooked vegetables into bite-sized pieces and add to the arugula.
Pour the dressing and tomatoes onto the salad and toss.
Plate the salad on one big platter or in 4 small salad bowls.
The vegetables I used for my salad are red and green bell pepper, red onion, zucchini, sweet potato, and cherry tomatoes. What’s great about this salad is that you can use anything fresh and in season. Other vegetables like squash, eggplant, and asparagus all work really well in this. So, use what you like.
Prepping The Vegetables For The Grill
Bell Peppers
First things first, the vegetables have to be prepared for grilling. We’ll start with the peppers. Cut off the top and bottom and set them aside. Stand the pepper up and make a slice down one side of it. Place the pepper on its side and put your knife inside the slice you just made. Keeping your knife tight against the inside of the pepper, cut and roll. The idea is that you are cutting the inside ribs to release the seed pod without making a big mess of seeds. When you’ve gone all around the pepper, the seed pod should be free, and you should have one long strip of pepper. Cut the pepper stirp in half and move on to the next vegetable.
Red Onions
Next up, red onion. The easiest way I’ve found to grill onions is to slice them into fairly thick rounds (about 1/4 of an inch) and put them on a skewer. So, that is exactly what we’ll do. Slice the onion into thick rounds, remove the peel and put the rounds on a skewer. To ensure that the onion holds together while grilling, the skewer must be threaded through the middle of the onion.
Cherry Tomatoes
As with the onion, the easiest way to grill cherry tomatoes is to put them on a skewer. There’s isn’t really a trick to this. Just skewer them. I’m using fancy metal skewers because I’m cool like that, but if you use wooden ones, soak them for at least 30 minutes before putting them near a fire.
Zucchini
The second to last vegetable to prep is the zucchini. Cut it into long thick strips (again, about a 1/4 of an inch thick). That’s all you have to do. I like to cut vegetables like zucchini and the sweet potato, as you’ll see in a minute, into strips rather than rounds when grilling because I find they are less likely to fall between the grate of my grill. If you want to risk it and cut them into rounds, go for it.
Sweet Potato
I had three tiny sweet potatoes, but you can obviously use one large one instead if you have it. Peel it, and cut the sweet potato into thin strips. Becasue the sweet potato will take longer to cook than anything else, you want to cut it thinner than everything else. This will help ensure that everything cooks in about the same amount of time.
Grilling The Vegetables
The vegetables are all cut up, some are on skewers, and now it’s time to get grilling. Wow! Wait a minute there speedy. We have to season and oil the vegetables first. Drizzle a few tablespoons of olive oil over the vegetables and season them on both sides with a little salt and pepper. Okay, now we can hit the grill.
Even though I didn’t mention it before, your grill should have been preheating on medium-high heat for the last 15 minutes. Throw the vegetables on the grill. Close the lid and let them cook. How long it takes to cook the vegetables will be largely determined by your grill, how windy it is outside, and what the outside temperature is. So, all I can really say is cook your vegetables until they are cooked. Make sense? You want them to have some bite still but not be hard. They should have a little char but not be burnt. Take a look at the pictures below for a little guidance.
Subscribe To Chef’s Notes and Get New Posts In Your Inbox Every Week
While the vegetables are grilling, or before you put them on the grill, you need to make the Maple Balsamic Vinaigrette. Don’t worry, it is super easy. To make the dressing get a medium mixing bowl and combine 1 teaspoon mustard powder, 1 tablespoon maple syrup, and a 1/4 cup balsamic vinegar. Whisk it all together, then whisk in a few drops of canola or grapeseed oil. Once those drops have all been incorporated, whisk in a few more. Then a few more. After three or four oil additions, you can start to add the remainder (1/2 cup in total) in a slow, steady stream whisking the whole time. Once all of the oil has been added and is whisked in, taste the dressing, and season with salt and pepper as needed.
You can use this Maple Balsamic Vinaigrette right away or store it in the fridge in an airtight container for up to two weeks.
Marinate The Tomatoes
Okay, back to the grill. Once the tomatoes start to pop (4 to 5 minutes flipping once), take them off the grill, remove them from the skewer and put them right in the dressing to marinate while the other vegetables finish cooking.
Grilled Vegetable Salad
Finishing The Grilled Vegetables
As the vegetables finish cooking, take them off the grill and set them aside. Once all the vegetables are finished, take them back to the house, and make the salad. Start by cutting all of the grilled vegetables into bite-sized pieces.
Making The Grilled Vegetable Salad
Put four to five cups of arugula in a large mixing bowl, spoon the dressing and the tomatoes over the arugula. Add the rest of the vegetables and toss. If you are only making a salad for one or two people, prepare it in a medium mixing bowl with half the vegetables and spoon some of the dressing over the greens.
Finish The Salad
To finish the salad, plate it in four small bowls or on one large platter. Top it with crumbled goat cheese and serve.
The Wrap Up
I love this salad because the sweetness from the grilled vegetables plays with the spiciness of the arugula and the tartness of the vinaigrette. Then, the creaminess of the goat cheese ties it all together to create something truly delicious and memorable. Give it a try for yourself. You won’t be disappointed.
Thank you for reading. Remember to subscribe below to get every Chef’s Notes post delivered to your inbox. And If you enjoyed this post, share it on Facebook or Pinterest.
Do you dream of eating a delicious panini whenever you want but don’t own a panini press? Get ready to have your dreams come true. Today, I am going to show you how to make a homemade roasted vegetable panini without a panini press. How are we going to do it? You’ll have to keep reading to find out. Let’s take a look.
The Vegetables
The vegetables used for the roasted vegetable panini are eggplant, zucchini, red bell pepper, and red onion. If you’d like to, you could include portobello mushroom, tomato, other coloured peppers, spinach or anything else you’d like. We have to cook the vegetables before they go on the sandwich, but first, we have to salt the eggplant.
Salting the Eggplant
Why do we have to salt the eggplant?
Salting eggplant does two main things. The first is that it removes moisture from the eggplant, giving it a more firm texture when cooked. The second thing that salting the eggplant does is remove bitterness. Eggplant on its own can sometimes be bitter. As the salt pulls moisture out of the vegetable (eggplants are technically a berry), it also pulls out some of the flavour compounds that cause bitterness.
How to salt an eggplant
To salt, the eggplant (I bought the smallest eggplant I could find), wash it well, then slice it into 1-centimetre rounds. Lay a piece of paper towel or a clean dish towel down on a sheet pan and sprinkle it generously with salt. Lay the eggplant on the towel in one even layer, sprinkle more salt over the eggplant, then cover it with another towel. Let the eggplant sit for about half an hour, then rinse each piece well under cold water. Pat the eggplant dry and you are good to go.
I know that this may seem like a lot of work, but it is absolutely worth the effort. The flavour and textural difference between an eggplant that has been salted and one that hasn’t is night and day. This small thing can make the difference between a person loving eggplant and hating it.
Other Vegetables
While the eggplant is sitting with the salt, prep the rest of the vegetables. In total, I used one small eggplant, one red bell pepper, one zucchini, and one red onion. This amount of vegetables made enough for about six sandwiches. However, any leftover vegetables can be tossed in a salad, a pasta, or warmed and eaten as a side dish. So, don’t worry about having extra. It won’t go to waste.
To prep, the vegetables, wash them all very well, then cut the sides, top and bottom off the pepper. Discard the seeds and stem and cut the peppers into 2 cm x 2 cm pieces (these don’t have to be exact). Cut the ends off the zucchini then cut it into 1 cm thick pieces on a sharp angle. Finally, peel the onion, and cut it into 2 cm x 2 cm pieces (again, these don’t have to be exact). Once the eggplant is ready and rinsed, cut the pieces in half and add to the other vegetables.
Roasting the Vegetbles
Put all the vegetables in a large mixing bowl with 2 tbsp of olive oil and a generous amount of salt and pepper. Toss all the vegetables together then spread out on a sheet pan lined with parchment paper. You may need to use two sheet pans depending on how big your vegetables are. Roast the vegetables in a 400°f oven for 30 to 35 minutes, flipping halfway through. The vegetables are done when they are tender and slightly browned. Take them out of the oven and let them cool slightly.
Pesto Mayo
While the vegetables are roasting, take a minute to throw together some pesto mayo. Combine 3 tbsp of pesto (you can find the pesto recipe in last week’s sandwich post here) with 1/2 cup mayo. This amount will be enough for four sandwiches. If you make extra, you can store the mayo in the fridge for up to a week.
Putting the Sandwiches Together
The bread typically used for a panini is an Italian bun or sandwich roll. I am using Udi’s Gluten-Free Hotdog Buns. I would prefer Kinnikinnick Buns, but my local grocery store was out. The Udi’s ones, make a decent substitute. If you have to eat gluten-free as I do, hotdog buns make a fantastic sandwich bun.
To make the sandwiches cut the bun in half, spread the pesto mayo on, then top with the roasted vegetables. A sandwich like this needs some cheese to tie it all together. I used provolone, which added a sharp flavour to the sandwich. You can use mozzarella, swiss, or whatever else you would prefer. Put the cheese on, then put the sandwich on your super expensive and fancy panini press. Oh, you don’t have one of those…yeah, me either. Let’s see how to turn this vegetable sub into a vegetable panini without expensive equipment.
Pressing Paninis Without A Panini Press
To toast and press a panini without a panini press, we are going to go as low tech as we can get. Heat two pans over medium-high heat. Brush the sandwiches, top and bottom with olive oil, then place in one of the pans. Put the other pan on top of the sandwiches and press straight down. Leave the sandwich alone for a minute or two, or until golden brown on the bottom. Flip the sandwich over and do the same thing. The panini is ready when the bread is toasted, and the cheese is melted. If you notice that the bread is getting a little too dark, but the cheese isn’t melting, you may want to put the sandwich in the oven on 350°f for a few minutes to heat it through.
I used a grill pan to make my panini, but you don’t have to. The only reason I used it is that I have it. The only reason I have it is because it was given to me by T-fal last year. Use what you have, that’s kind of the whole point.
Roasted Vegetable Panini
After a few minutes of squishing a sandwich between two pans, we have a delicious roasted vegetable panini with pesto mayo and provolone cheese. If you would like the sandwich to have a little more acidity you can marinate the vegetables in balsamic vinegar, or drizzle the sandwich with a balsamic reduction after it is cooked. Either way, that acidity will make the flavour of the sandwich really pop.
Conclusion
Although this may seem like a lot of work for a sandwich, it isn’t that bad. The vegetables can be made a day or two ahead of time, and again, any extras can be used for a variety of other purposes. More than anything, I hope that you see how you can make delicious paninis at home without spending a bunch of money on a grill press. One word of caution, make sure the pans aren’t too hot when you put the sandwich in. I burnt my first batch. We still ate them, but they weren’t very pretty.
Thank you for reading the post. If you liked it, remember to share it on Facebook, Pinterest, or Twitter by clicking the icon to the left of the right of the page. Did you know that Chefsnotes.com has almost 400 posts just like this one? Don’t ever miss a post again. Subscribe to Chef’s Notes by putting your email address in the subscription box below or by becoming a Chef’s Notes member right here. You will be notified of every new post. And if you would like to know more about me, click the link below to read my story.
I grew up in a very meat and potato centric family. We would eat rice, and pasta on occasion but most days it was potatoes. I didn’t really have a favourite potato dish because generally, they were just mashed though or sometimes baked, which I hated. It wasn’t until my teens and early 20’s that I was exposed to a variety of different potato preparations. This mostly came from the restaurants I was working in at the time.
Growing up I never really thought much of potatoes. I didn’t hate them. I didn’t love them either. They were just always there. But, once I started to see all these different ways that they could be prepared I fell in love with them. Even the ubiquitous mashed potato which I’d eaten with the majority of my meals as a kid took on new meaning to me.
Potatoes, like so many other ingredients that I’d learned about over the course of my early culinary education, can be so much more than we typically think they can be. Even the most common potato dish, mashed potatoes, can easily be elevated by the addition of sour cream and chives, or caramelized onions, bacon or duck fat, pushing them through a food mill rather than mashing by hand, and the list goes on and on.
Today, I wanted to take a few minutes and focus on the humble potato. With that in mind, I am going to share with you a few of my favourite ways that potatoes can be prepared. Some of these I picked up in restaurants, some from cookbooks, some from friends or family. Wherever they come from, they come with love, and that is all the humble potato needs to be more than it already is.
With that, in no particular order, these are…
My 5 Favourite Potato Dishes
Mashed Potatoes
I would be lying to myself and you if mashed potatoes wasn’t on this list. Here’s why. In the 16 years I worked in restaurants the 2 years in catering and the 2 years that I’ve been a personal chef one thing has always stood out to me. Good mashed potatoes will outshine everything else on a plate every single time. I’m serious. It doesn’t matter what it is. I’ve personally served people and have seen people be served incredible meals. Perfectly cooked and well-seasoned proteins with a really well-balanced sauce, and tender vegetables with just the right amount of butter and crunch. The customer will say, “It was really good. Everything was great! But, oh my god the potatoes!”
I think the reason why people get really excited about good mashed potatoes is actually pretty simple. We’ve all eaten a pile of them. We have a very clear understanding and expectation of what mashed potatoes are going to be. But when we’re served silky, buttery, well-seasoned potatoes, it blows our expectations out of the water. We expect the protein to be perfectly cooked. We expect the sauce and vegetables to be really good. But the mashed potatoes we only ever expect to be mashed potatoes.
I love mashed potatoes for a lot of reasons. They obviously pair well with almost anything which is great. Anyone can make them and it takes little effort to make the great. Most importantly, they are delicious.
If you want to see some ways that you can up your mashed potato game you can find two different posts I wrote about them. Here and here.
Smashed Potatoes
The term “smashed potatoes” seems to get thrown around a lot over the past few years. But what exactly does it mean? Well, in my understanding, there are two styles of smashed potatoes. They both start by boiling baby potatoes. In the first style, the potatoes are placed on an oiled sheet pan then pressed. The potatoes are then drizzled with olive oil, seasoned with salt and pepper and roasted in a hot oven, usually around 400°F. These are also sometimes referred to as crushed potatoes. The outside gets a little crispy and golden and the inside stays light and fluffy. Delicious!
In the second style of smashed potatoes, the potatoes are boiled as in the first style. However, rather than being crushed and roasted with oil, these are smashed and mixed with cream, butter, salt, and pepper. I enjoy both of these styles a lot and honestly don’t know if I have a favourite out of the two. Which one do you prefer?
Pan-Roasted Potatoes
Pan-roasted potatoes are generally made with either baby red, golden-gem, or fingerling potatoes. These cook fairly quickly and get nice and crispy. In this method, the potatoes are sliced, halved, or quartered and then cooked about halfway on the stovetop with a bit of olive oil. A tablespoon or two of butter is usually added and then they go into the oven on 375°f to finish cooking. Because they are already partially cooked, the oven-roasting only takes a few minutes.
This is a really quick way to make delicious roasted potatoes. Not only that, but herbs like thyme or rosemary can easily be added for extra flavour.
Parsleyed Potatoes
Parsleyed potatoes. What could that possibly mean? Well, it means potatoes with parsley on them. And yes, as simple as that sounds this is in my top five potatoes dishes. Why?
Parsleyed potatoes is a dish usually made with new or young potatoes. The potatoes are boiled in salted water until they are cooked through and then drained and left to steam for a minute or two to ensure they are dry. While the potatoes are draining a bit of butter is melted along with a bit of salt and pepper. The potatoes are added to the butter and tossed with a big handful of fresh chopped parsley right before being served. It sounds simple because it is. It also happens to be delicious and beautiful.
I like parsleyed potatoes for big family-style meals because the bright green from the parsley in contrast with the potato really pops. Also, the flavour is incredible. This dish goes especially well with white fish, roasted chicken, beef bourguignon, or even coq au vin (chicken cooked in wine). Give it a try!
Oven Roasted French Fries
I have a bit of a problem with French Fries in that if I eat them once, I crave them for a month afterwards. It drives me crazy! But they’re just so damn good.
These specific fries are actually oven-baked and ridiculously crispy. I know you’re probably thinking I’m crazy. There is no way to get really crispy oven-baked fries. Well, you’re wrong. Let me explain. I first cut the potatoes into fries and then boil them in salted water just until they are about to fall apart. I drain them, let them steam dry in the colander for a few minutes, then toss them with olive oil, salt and pepper and bake them on 425°F. They are amazing!
This same boiling then roasting technique works to get really crispy roasted potatoes too!
If you love fries but heat the grease, this is your work around. You can find the recipe on my Instagram here.
Conclusion
Potatoes are a humble vegetable which when treated without care are boring, bland and blah. However, when shown a little love, these tubers can become something that your family, friends, or guests, will talk about literally for years.
What are your favourite potato dishes? Let me know in the comments or on social media. In the meantime, have a great Friday and a great weekend!
When done well there are very few things in the world better than good mashed potatoes. By good, I mean smooth, creamy, buttery, and well seasoned. Potatoes like that can be the star of any plate no matter what the main attraction is supposed to be. But how do we make potatoes like that? What’s the secret? Obviously, I’m going to tell you.
These are my…
5 TIPS FOR BETTER MASHED POTATOES
The right potato for the job
Believe it or not, there are right and wrong potatoes to use for mashed potatoes. For my money, I prefer a russet or white potato for mashed potatoes. I’ll get into the reasons for this in a second. Before I do though, I want to say that Yukon gold potatoes and a few other waxy varieties can and do make delicious mashed potatoes. Especially since these varieties of potato tend to have a superior flavour. However, it is a more difficult process and requires a little more finesse. This is due to the fact that when these types of potatoes are cooked they tend to get gummy. This is especially true when they start to lose their heat. Because of this, they have to be processed very quickly after cooking. They usually also require a higher portion of cream and butter to get the desired consistency. I save these for special occasions.
Why I like Russet Potatoes
To me, there are many benefits to using a russet potato to make mashed potatoes. First and foremost, their size is convenient. Russet Potatoes are a fairly large variety which makes them easy to hold while peeling, and you get more potato per potato. They are also cheap and readily available.
The russet potato is dry and mealy. This means it doesn’t generally hold a lot of water and it mashes very easily. However, like most potatoes, if over boiled russets can absorb and hold large amounts of water that will make mashed potatoes watery.
When cooking russet potatoes for mashed potatoes, peel and dice them into evenly sized cubes. Rinse the potatoes under cold water until the water runs clear. This will wash off excess starch. Next, put the potatoes in a pot of cold water. Add enough salt to make the water taste like the ocean. I suggest about 1 big teaspoon per litre of water. Bring the potatoes to a boil and cook only until the potatoes are tender, then drain.
Letting the potatoes dry
One of the most keys to really great mashed potatoes is to make sure the potatoes are dry before mashing them. This is done in two main ways. First of all, as I already mentioned, don’t overcook the potatoes. There really isn’t any coming back from this. The potatoes will become waterlogged and then there really isn’t much you can do about it.
The second way, or rather the second step to drying the potatoes is to let them steam dry in the colander. After the potatoes are cooked, drain them as you would in a colander. Then, just leave them alone for about five minutes. You will see all this steam coming up from the potatoes and you may think that this means you are losing heat, but really that steam means that moisture is evaporating from the potatoes and drying the out. You will even notice a colour change. The potatoes will go from a mild yellow colour to dry white colour. That’s what you want.
Cream and Butter
While the potatoes are steam drying in the colander take the opportunity to heat up the cream and butter. I say cream, but you can use milk if you prefer. However, the cream will provide a richer flavour and a better texture to the potatoes. Heating up the dairy before adding it to the potatoes will help keep the potatoes hot. Cold mashed potatoes aren’t nearly as good as hot ones.
Since the potatoes are in the colander, you can use the pot the potatoes were cooked in to heat up the cream and butter.
How much cream and butter should you use? For four to five russet I use between 1/4 -1/2 cup of cream and 2 tbsp of butter.
Seasoning
Potatoes on their own are pretty bland, they need salt and pepper. Add a little seasoning to the cream and butter then add more to taste once the potatoes are mixed in.
How much salt and pepper should you use? For four to five russets I generally use about 1 – 1 1/2 tsp of Kosher Salt and about 1/4 – 1/2 tsp of pepper. Really though, it comes down to taste. Add a little, taste and add more as needed.
Masher v. Mixer v. Food mill
There are three main tools that people use to mash potatoes. They are a regular old potato masher, a mixer like a kitchen-aid, or a food mill. I’m much more partial to the food mill than the other two options.
Why I prefer the food mill
I prefer using a food mill to make mashed potatoes because it yields the smoothest potatoes you will ever have. Using a hand masher it is next to impossible to get all the lumps out of the potatoes. As for a mixer, I find I rarely get all the lumps out and there is the risk of over-mixing the potatoes. This can cause the potatoes to get gummy and pasty.
So, the potatoes have been cooked and drained. The cream and butter have been heated, and seasoning has been added. Set the food mill over the pot and mill the potatoes right in. Then mix to combine the potatoes with the cream and butter. What you have will be absolutely delicious, smooth, buttery, creamy potatoes.
Conclusion
Delicious mashed potatoes are not difficult to make. They don’t really take any extra time either. It really just comes down to putting in a little extra care and love. I promise you it is worth the effort. If you want to see for yourself, make a steak dinner or something like that. Make the potatoes I just described as the side dish and don’t say anything to your family. See how quickly they eat the potatoes compared to the rest of the food on their plate. That will be all the proof you need.
Thank you as always for reading. Have a great weekend! See you Monday.
Good morning everyone and happy Friday! With Christmas right around the corner, only five short days away, I thought it was about time I acknowledged it here on the blog. Usually, around holidays like Christmas and Thanksgiving, I share tips and tricks to get you through the holiday. Well, been there, done that. Rather than just keep repeating myself year after year I thought this time I would do something different. This year, I wanted to give you a gift like no other, so I wrote an entire Christmas Dinner worth of recipes, and today I am going to share them with you.
Below you will find recipes for homemade Cranberry Sauce, Gravy, Glazed Carrots, Maple Pecan Roasted Brussel Sprouts, Garlic Mashed Potatoes, Stuffing, and of course, Turkey. There are seven recipes in total just for you as my way of saying thank you for your support throughout the year and for making this year so great here at How To Not Burn Shit.
Before I jump into this, this is my last post of the year. I’m going to take a little bit of well deserved time off to spend with my 10-week old baby and my lovely wife. I hope that you all have a great Christmas and a Happy New Year. I will see you all right back here on January 6th, 2020!
In the meantime…
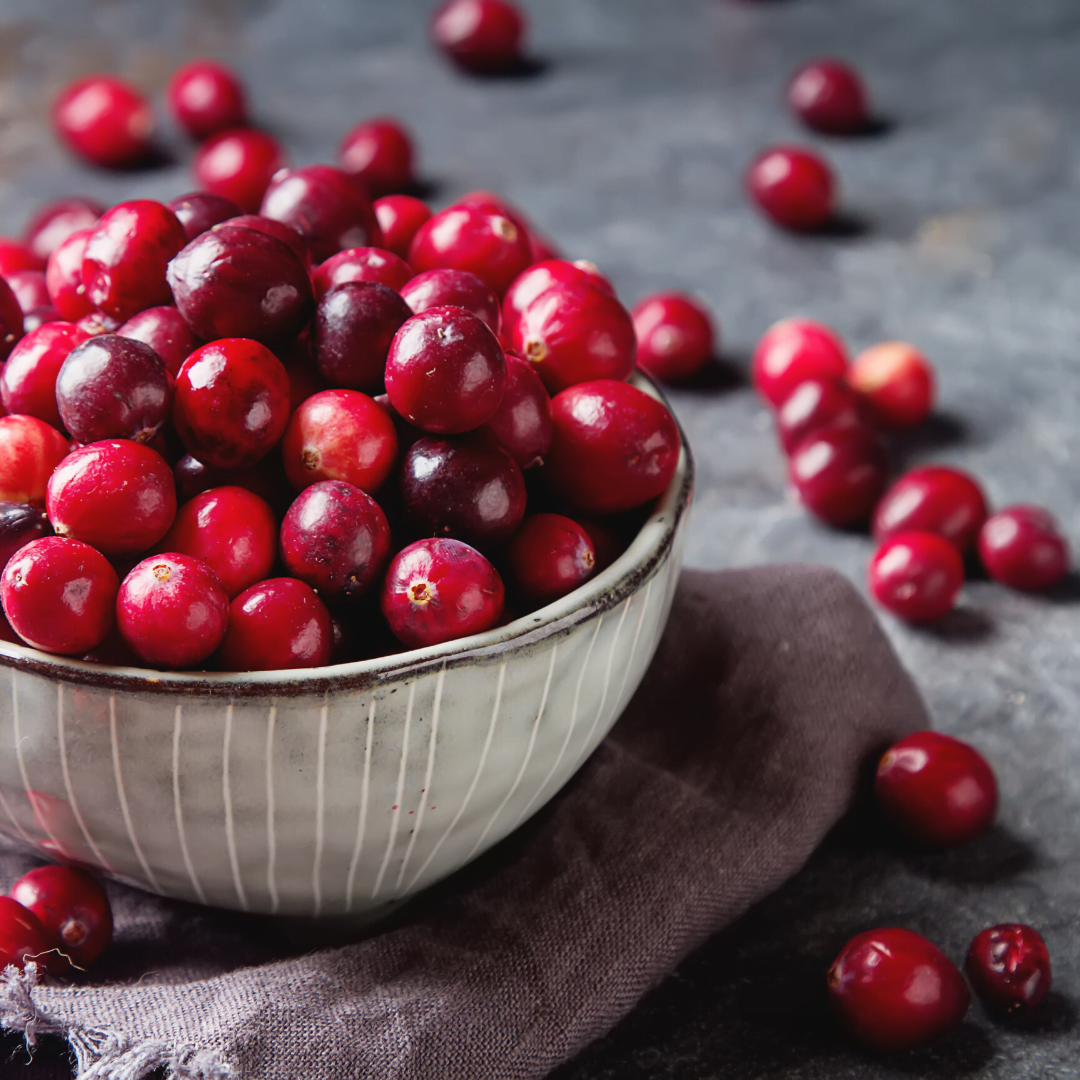
Cranberry Sauce
Way back in 1941, there was a former Lawer turned cranberry bog owner who was looking for a way to extend the short selling season for his Cranberries. He decided to make a cranberry jelly, can it and sell it year-round. He did this, though it mostly only sold at Christmas and Thanksgiving. Since its invention in 1941 canned cranberry sauce (jelly) has been a staple on holiday tables across North America. Well, I say 78 years is long enough.
It is only 11 days away from 2020 and if you haven’t already started, it is time to start making your own cranberry sauce. It isn’t hard, it doesn’t take a lot of effort, it’s not expensive, and it tastes way better. What have you got to lose?
Easy Homemade Cranberry Sauce
Why are you still buying cranberry sauce in a can? It is so easy to make and way better when made fresh.
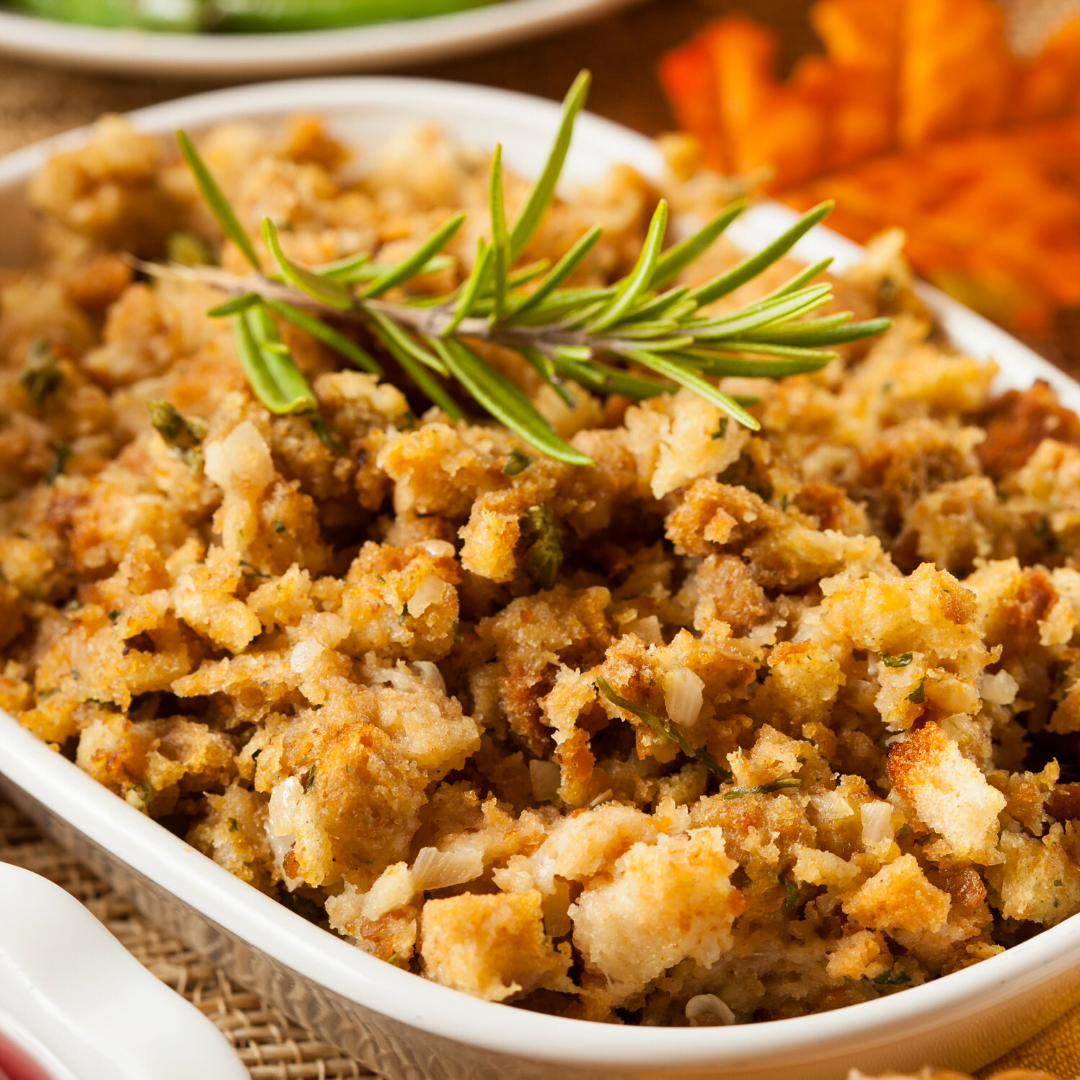
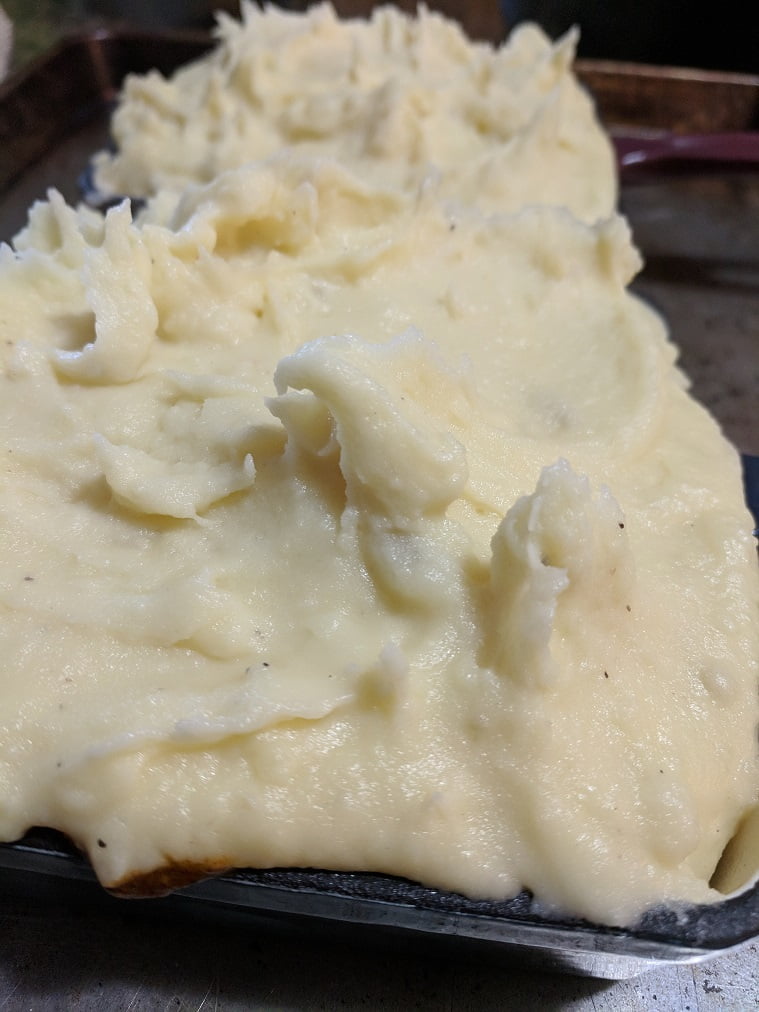
First of all, what’s the difference between stuffing and dressing? Stuffing is cooked inside a turkey, dressing is cooked outside the turkey. That’s it.
You may have grown up having stovetop stuffing every Christmas and you may even love it. But, I implore you to just this once make your own stuffing if you’re not already doing so. The recipe below is a straightforward no BS stuffing recipe that you will be happy you tried.
Add 2 tbsp of butter along with the onions into the pan.
Cook the onions for 10-12 minutes or until soft.
Put in a large bowl and allow to cool for 10 minutes.
Add the remaining ingredients and mix.
Stuff inside a turkey and cook the turkey as desired.
Notes
If you are cooking the stuffing outside the turkey (which makes it dressing) add 2 cups of chicken or turkey stock to it. Cover with foil and bake on 375°F for 35-40 minutes.
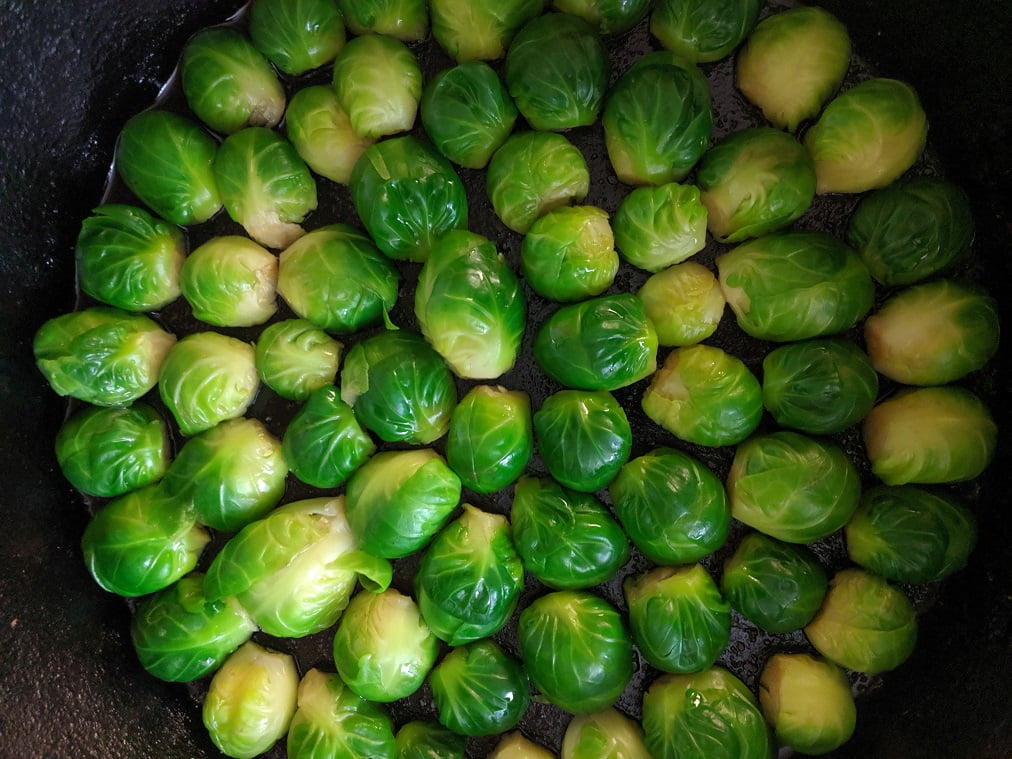
If you don’t like Brussel Sprouts, it’s probably because you’ve only ever had them when they’ve been boiled to death. When they are overcooked in that way they are mushy and taste like farts. However, when they are roasted, they get crispy, and not at all fart like. The touch of sweetness from the maple syrup in the recipe below really makes the flavour of the sprouts come to life. If you’ve never had roasted Brussel Sprouts, you are in for a very serious treat.
Maple Pecan Brussel Sprouts
A delicious alternative to your regular Brussel sprouts recipe
Cut the sprouts in half and place in a medium mixing bowl.
Pour the olive oil and maple syrup into the bowl along with the salt and pepper.
Spread the sprouts out onto a sheet pan lined with parchment paper and bake for 20 minutes on 400°F.
Remove the sprouts from the oven, sprinkle over the pecans, stir, and return to the oven for an additional 10-15 minutes or until the sprouts are tender and dark around the edges.
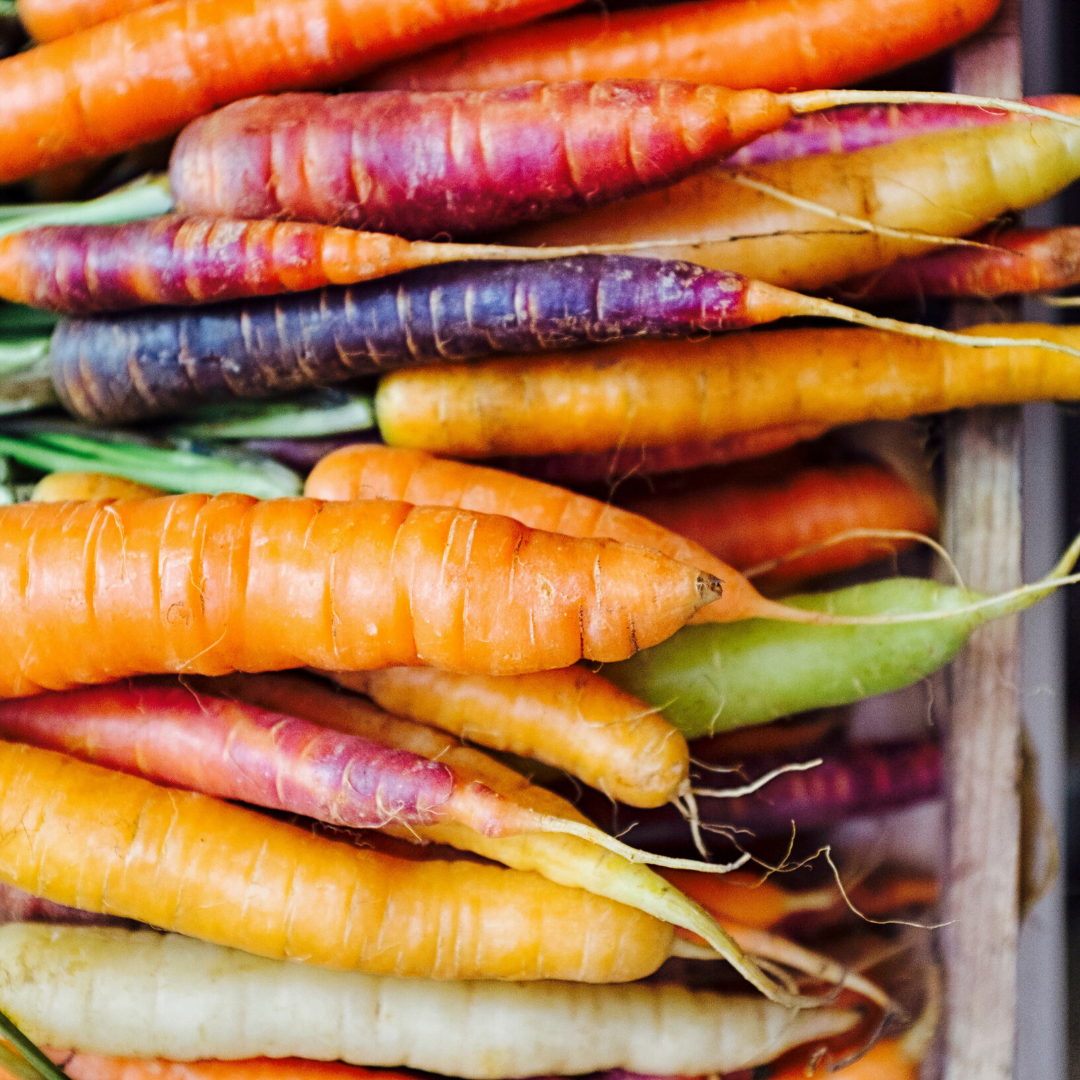
Let’s face it, those regular old boiled carrots are getting a little boring. Jazz up your carrots this year by making a glaze for them. Sound complicated? It isn’t. To make this recipe you just need to be able to use measuring spoons and a pot. All kidding aside, this is one of my favourite ways to make carrots. You put everything in the pot, and cook the carrots until the liquid has mostly evaporated. What you end up with are perfectly cooked carrots, with a flavorful glaze.
Glazed Carrots
Carrots cooked with honey, cider vinegar, thyme, and butter…what's not to love?
Put the sliced carrots in a pot along with the other ingredients.
Add enough water to just cover the carrots.
Bring to a boil and cook for 5 minutes.
Reduce the heat to simmer and cook for 5-10 more minutes or until the water has mostly evaporated and all that is left is the glaze at the bottom of the pot.
Stir the carrots, coating them in the glaze and serve.
Notes
Keep an eye on the carrots once the water starts to get low because you don’t want to burn them
We all have our own special way to cook our turkey for Christmas. But, there are some of us out there who might be making Christmas dinner for the first time. The recipe below is a very basic, intro to turkey type recipe. Having said that, it is still really delicious and I’m sure no matter how many turkeys you’ve cooked in your life you would be happy with it.
If you are looking for something a little different to do with your turkey check out this post I did back around Thanksgiving.
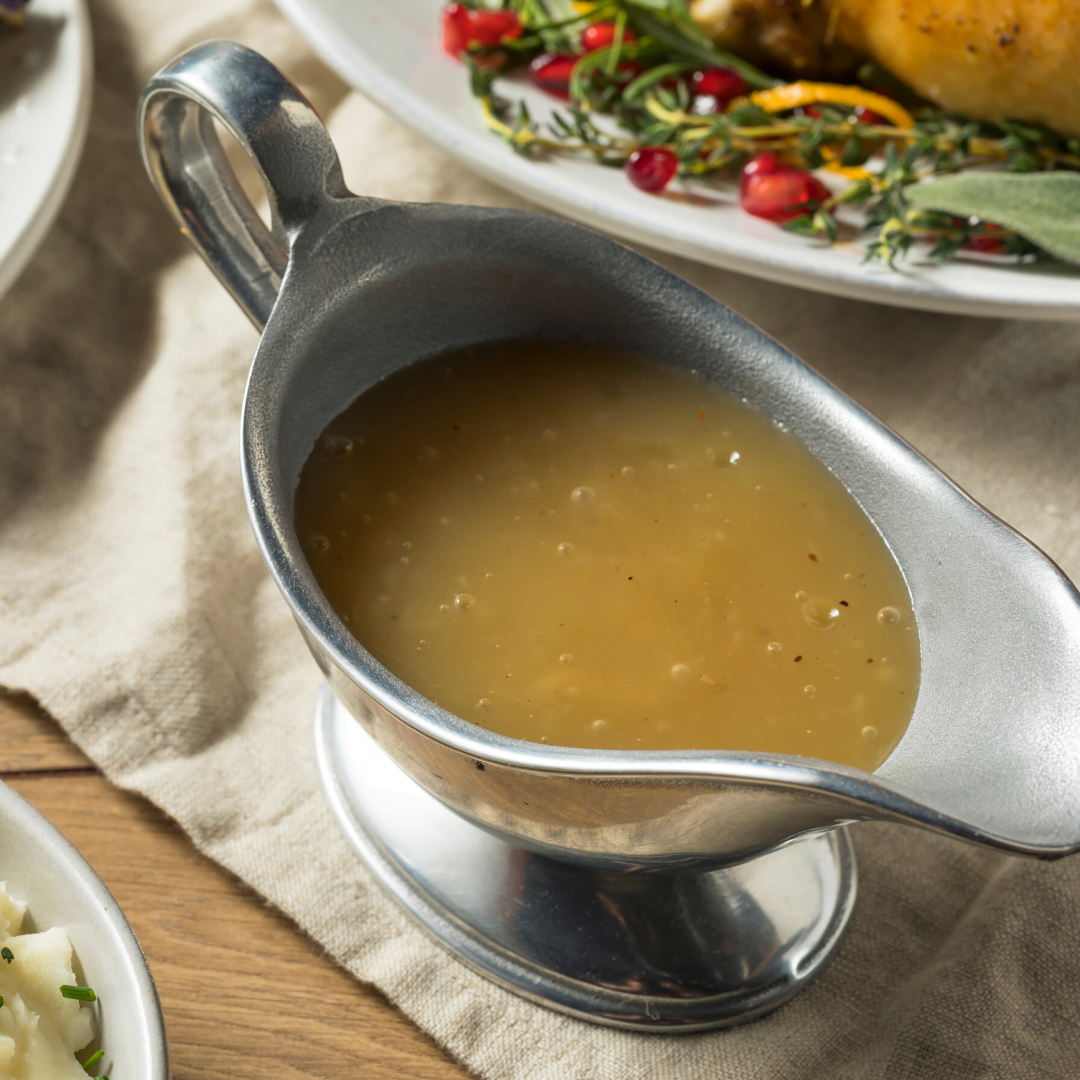
When I was a kid, one of my main jobs for Christmas Dinner was to stir the gravy. It had to be stirred while it cooked so that it didn’t scorch on the bottom. It was an important job and I took it very seriously.
The recipe below is not complicated but it does involve a lot of stirring. This is the perfect job for a child or that pesky inlaw who keeps asking if there is anything they can do.
Christmas Gravy
Wet your whistle with this delicious gravy recipe.
Cooking Christmas dinner can be stressful. It is usually the largest and most complex meal you will cook all year. The key to it being a success is to make everything the best it can be while at the same time not over complicating things. All the recipes above will add a little extra to the meal without adding much in the way of prep or cooking time. Elevation without complication.
And with that, I bid you ado. I hope that you have the Merriest of Christmases!
Oh and if you feel like you need to get me something this Christmas, the best gift you can give to me is to share this post around so that anyone who needs it can find it.
I think it is pretty obvious at this point that summer is finally here. The sun is shining, the temperature is way up, and the days are almost at their longest. You know what that means…Potatoes!!
You don’t want the same old boring mashed potatoes this summer, do you? You want something special. This summer you want potatoes that will be the star of any potluck or BBQ you take them to. Well, because I love ya’ here are…
5 Kick-Ass Summer Potato Dishes
1. Mashed Potatoes with Sour Cream and Chives
You love mashed potatoes. You love loaded baked potatoes. This dish combines the two. What’s not to love?
Here’s what you do. When mashing the potatoes take out the milk and replace it with sour cream. Mix in a big handful of chopped chives add a bit of butter, salt, and pepper, and you’ve got a pot of mashed potatoes that tastes like pure summer.
For those thrill-seekers out there, a big handful of crispy bacon bits can also be mixed into the potato mixture. And, I guess that if you wanted to get crazy a bit of cheddar cheese could be added in or sprinkled over the top. Sounds good right?
2. Buttermilk Smashed Potatoes
What are smashed potatoes?
Smashed potatoes are potatoes, usually small ones, that have been boiled until tender and then smashed with the back of a spoon or a masher. They are different from mashed potatoes in two main ways; the skin is left on them, and they are chunkier. The goal isn’t to have one smooth consistent texture.
This style of potato can be made in a variety of ways and there are actually two on this list. This first one is made by mixing buttermilk, butter, and salt and pepper into the smashed potatoes. Imagine that you are using the same proportions you would for regular mashed.
The buttermilk will give the potatoes a really nice fresh flavour. That flavour combined with the texture makes these potatoes a really unique potato dish and one that is terrific for summer.
3. Crispy Smashed Potatoes
Similar to the buttermilk smashed potatoes, these are made of boiled baby potatoes. Once the potatoes are cooked through, they are drained and then placed on a sheet pan that has been lightly drizzled with olive oil. Each potato is pushed down with a fork or a hand to flatten. The potatoes are drizzled with a little more olive oil, salt, and pepper and roasted on 400°f until crispy which will take about 20-30 minutes.
Flavourings like fresh herbs or parmesan cheese can also be added to these potatoes to add a little extra flair.
These crispy little buggers are so addictive you will wish you’d never heard of them at the time being oh, so glad that you did.
4. Lemon Roasted Potatoes
Potatoes tossed with lemon, olive oil, thyme, garlic, smoked paprika, salt, and pepper then roasted until crispy. Damn!
Just about any kind of potato can be used to make this dish. I like to use either russet or Yukon gold potatoes but, anything will work.
The first step is to combine the just form 1 lemon, 2-3 tbsp olive oil, 3-4 sprigs of thyme, 2 cloves of crushed garlic, 1 tsp smoked paprika, a big pinch of both salt and pepper. Mix this all up and give it a taste. Take some potatoes, cut them into wedges and toss with the lemon, olive oil mixture and spread onto a parchment-lined sheet pan. Bake in a 375°F oven for 35-40 minutes or until the potatoes are cooked through and crispy. They will have to be flipped at least once about halfway through cooking.
These potatoes go great with just about anything.
5. Pan-Roasted Fingerling Potatoes
Fingerling potatoes are small finger-shaped potatoes. They are relatively expensive when compared to other potatoes but their flavour and texture are worth the extra price every once in a while. Fingerling potatoes are a waxy potato which makes them really great in potato salad because they hold their structure.
One of my favourite ways and a common way to have fingerling potatoes is to roast them. This is a technique that was taught to me by one of my chefs years ago, and it remains one of my favourites to this day.
To make these roasted fingerlings the potatoes first have to be cut. They can be cut right down the middle lengthwise but I prefer to cut them into little coin shapes about 1/2 cm thick.
Heat an oven safe pan over medium high heat and get it nice and hot. Add 1-2 tbsp of olive oil and add enough potatoes to cover the bottom of the pan but not overcrowd it. Season the potatoes with salt and pepper and cook the potatoes, tossing every 30 seconds or so. The goal is to get a bit of colour on the potatoes. After about 4-5 minutes of this, add 2 tbsp of butter into the pan a long with 2-3 sprigs of thyme and 2 cloves crushed garlic. Put the whole pan in the oven at 375°F for 10-15 minutes or until the potatoes are cooked through.
Serve with roasted chicken, lamb, fish, steak… you get the idea.
Bonus!
If you read Monday’s post you know that one of my favourite ways to have potatoes right now is to boil them and toss them with salt, pepper, butter, and parsley. If you didn’t read the post you can check it out along with full recipes right here.
Conclusion
Potatoes are a versatile, nutritious, and delicious vegetable. But, if they are always made in the same way they can become boring. Try some of these techniques to jazz up your meals or come up with some of your own.
Let me know if you make these and how you liked them and remember to subscribe to the blog so you never miss a post.
Some people really love sauerkraut, others absolutely can’t stand it. That’s fine. I’m one of the people who loves it. I have since I was a kid. Good sauerkraut on a sausage with mustard is a thing of true beauty.
If you find yourself in the category of people that don’t like sauerkraut, maybe you want to skip today’s post. Come back on Friday when we talk all about everything I know about salsa. Having said that, if you are at all interested in at home fermentation, you should stick around whether you like sauerkraut or not.
Alright, enough preamble. Let’s jump into this.
What is sauerkraut?
Simply put, sauerkraut is fermented cabbage. What that means is that bacteria, specifically lactobacillus, is used to break down sugars naturally present in the cabbage to lactic acid. This creates a highly acidic environment which prevents bad bacterial growth. It’s much less complicated than it sounds, but we’ll get into that in a minute.
Lactobacillus is a very safe bacteria that humans have been relying on for thousands of years. It is used to develop everything from yogurt, wine, and cheese, to chocolate, beer, and obviously sauerkraut as well as it’s Korean counterpart, kimchi.
You’ve probably heard of probiotics. Good bacteria that help you to digest and develop a good gut microbiome. You’ve probably choked back a few bottles of kombucha or kefir in hopes of reaping their mythical benefits. Well, those mythical benefits are actually in large part due to the lactobacillus bacteria used to create those beverages.
The reason we are talking about homemade sauerkraut is that it’s a really good jumping off point into the world of fermentation. Once you figure out the basics, the sky is the limit.
How is sauerkraut made?
Real sauerkraut is made with three simple ingredients. Cabbage, salt, and water. That’s it. Sometimes carrot, and flavourings like caraway are added for appeal but they add nothing to the actual fermentation process.
The cabbage is cut or shredded into pieces and salt is added. The cabbage is then massaged a bit to kick start the breakdown of the cell structure. This is left to sit for an hour or two. Over that time, water will be extracted from the cabbage as it starts to break down. Now, the cabbage is packed tightly into a jar or other airtight container, filtered water is used to top it off, and the jar is sealed. The cabbage is then left at room temperature for a week or two to ferment. Everyday the jar needs to be burped, or opened quickly to let out excess gas.
Once the cabbage has reached the desired level of fermentation, it is put in the fridge to slow the process. The beauty of this is that you control the level of fermentation. Taste the cabbage everyday and once it reaches a point that you are happy with, put it in the fridge. It’s ready to eat.
The sauerkraut will last in your fridge for months if not longer. The longer it sits, the better it’s going to taste.
Risks
A lot of people get worried about making themselves sick when they first start learning about fermentation. Although there are some minor risks involved, lactofermentation is actually a very safe process. And, if something does go wrong and your cabbage is rotten, it will be very obvious.
The thing that you need to keep in mind is that fermentation is essentially controlled rot. I know that that can be a disconcerting thought, but it’s true. It’s also important to remember that fermented foods are a large part of our diet, (wine, chocolate, and salami for example are all fermented). The reason I bring up the controlled rot element of this is because of the smell.
When you first open the lid of your sauerkraut after it’s been fermenting for a few days, it’s not going to smell the greatest. Really, it’s going to smell like bad farts. That’s normal. It should start to smell sour over a few days. That’s exactly what you want.
What you don’t want, and how you can tell if it is bad, is mold growth. Or if it smells really, really bad and you’re questioning it, don’t eat it. It’s as simple as that.
Things To Remember
The key to preventing spoilage when making sauerkraut, or any fermented food is to keep everything clean. The jar and lid should be sanitized and the cabbage should be thoroughly washed.
Also, be wary of using tab water for fermentation. City water is treated with chlorine specifically to prevent bacterial growth. Because we are literally trying to grow bacteria, city water might not be the best option here. Distilled water is often recommended but a good bottle of mineral water would probably work just as well.
Lactobacillus is an anaerobic bacteria. What that means is that it thrives in an oxygen free environment. This is why you want to ferment the sauerkraut in a sealed jar. One of the many benefits of this is that a lot of bad bacteria needs air to survive. Having said that, there are anaerobic bad bacteria, but those don’t like acidic environments which is exactly what the lactobacillus is creating by developing lactic acid. That’s why it’s such a safe process when done correctly.
Storing Sauerkraut
The sauerkraut that we are talking about today is not being processed like you would with modern pickles. Meaning we aren’t boiling it in jars. The reason for this is very simple. The purpose of boiling pickles or something like that in a jar is to kill off bacteria and create a vacuum in the jar to prevent spoilage. But again, we don’t want to kill our bacteria.
If all you are looking for is that sauerkraut flavour without the benefits of the present bacteria, boil away. But to me, that kind of defeats the purpose. All this means, is that you have to store your sauerkraut in the fridge rather than in the cupboard.
Making Sauerkraut
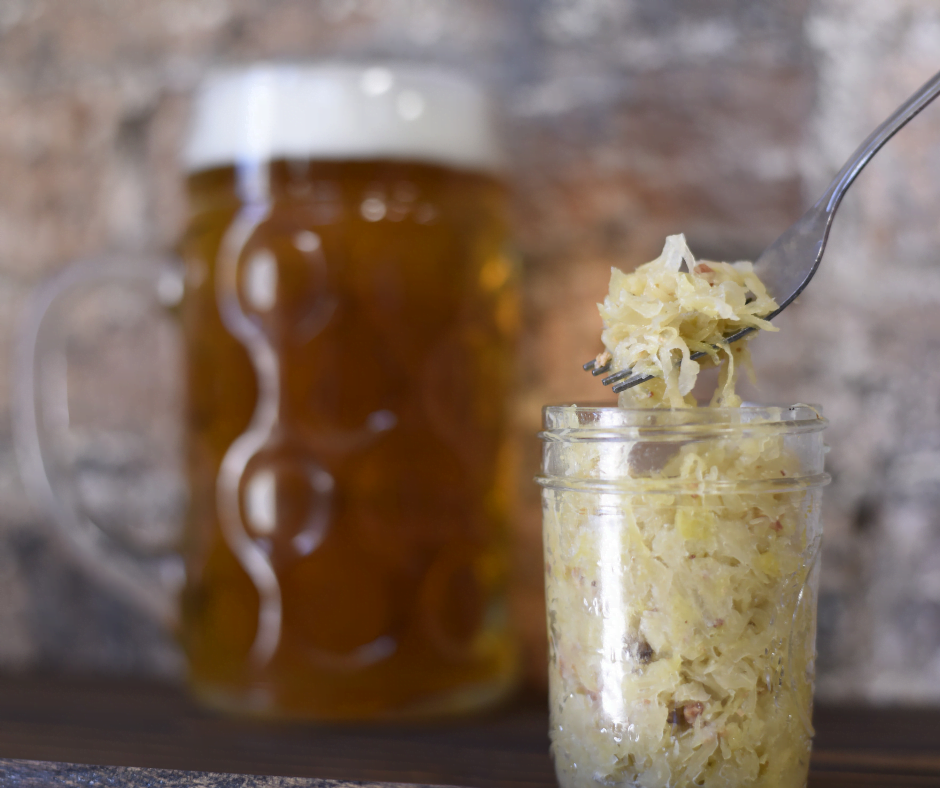
Sauerkraut
This basic sauerkraut recipe will open the door to the possibilities of fermentation.
Throughout this blog I have used and talked about a lot of fermented products. From fish sauce to sriracha, to miso paste and soy sauce, they are all made using the same basic principles that I have outlined here. It really all comes down to the main item being fermented, salt, and time. This is why I think it’s important to understand the basics of fermentation. It’s all around you all the time whether you know it or not.
If you listened to the podcast yesterday (anchor.fm/foodinfive) you would know that today’s post was supposed to be about everything I know about cooking bacon.
Early this morning while I was laying in bed, half way between being awake and being asleep, I realized that I had recently written about bacon. When I woke up I checked and I had. You can check that post out here.
So, rather than repeat myself, I decided to talk about an ingredient that we could all stand to use a little more; Eggplant.
This is…
Everything I know about Eggplant
What is an eggplant?
Eggplant is technically a berry and is a member of the nightshade family along with tomatoes and potatoes. It is commonly believed to have been first cultivated in India about 4000 years ago. The whole eggplant is edible; skin, seeds, everything. However, it is suggested that you shouldn’t really eat eggplant raw.
Though the eggplants we most recognize are egg shaped and deep purple in colour, there are many different varieties. Some are long and skinny, while some are small and round. Some are white, some are green, others are striped. This is all to say that there are a lot of varieties of eggplant out there.
Eggplant, or aubergine as it is called in Europe, is not particularly good for you. That’s not to say it’s bad for you, it just isn’t load with nutrients like some other foods. It’s benefit is its sponge like texture that allows it to soak up flavours from sauces, oils, and other ingredients.
Buying Eggplant
When buying eggplant you are looking for one with no bruising or marks. You want the flesh to be firm all over. Check the tops and bottoms particularly for soft spots.
Different ways to cook eggplant
Eggplant is used by many different cultures around the world. People from all over Europe, Africa, and Asia use eggplant and have historically for generations. Because it is used by so many diverse cultures, there are countless ways to prepare it.
Commonly, eggplant can be baked, roasted, stir-fired, deep fried, grilled, or even stewed.
When cooked eggplant often becomes soggy and soft. However there is a way to avoid this and get a firm textured eggplant. This is good when the eggplant will be breaded and deep fried, or in any application where a firm texture would be preferable to a soft texture.
The technique for getting firm textured eggplant is pretty straight forward. Cut the eggplant into evenly sized pieces. Season heavily with salt. Let sit in a strainer for about 30 minutes. Rinse the eggplant well under cold running water. Pat dry with paper towel and use as desired.
The salting technique works by drawing moisture out of the eggplant. This firms up the flesh and prevents it from turning to mush.
Salting has the added benefit of removing some of the bitter flavour that can be associated with eggplant.
My favourite ways to have eggplant
If I had to choose I would say that I have two favourite eggplant dishes. One is very, very simple. The other, though not complicated takes a bit of time. However, it yields such a delicious end result.
Eggplant Parmesan
Eggplant parmesan is kind of like lasagne but instead of pasta, breaded and fried pieces of eggplant are used between the layers. Usually, eggplant parmesan doesn’t have any meat in it.
To make eggplant parmesan the eggplant is cut into rounds or long thin pieces and salted, left to sit for 30 minutes, and then rinsed, drained, and patted dry. Then the eggplant is dusted with flour seasoned with salt and pepper, coated in beaten egg and then tossed in breadcrumbs. The breaded eggplant pieces are then fried in a pan or deep fried.
Once the eggplant has been fried it is layered in a casserole dish with tomato sauce and cheese then baked in the oven on 375°F for about 40 minutes.
This is a very Italian dish that is often over looked. If you’ve never had it, I highly recommend giving it a try.
Fire Roasted Eggplant
My second favourite preparation of eggplant is about as easy as cooking can get. Understand that I don’t use the word “easy” lightly here.
To make this dish one whole eggplant is put over an open fire. Every 10 – 15 minutes it is rotated. It is cooked like this until it starts collapse in on itself. Once the eggplant is cooked it is cut into and drizzled with olive oil, seasoned with salt and pepper, and eaten with pita bread or a spoon.
This eggplant can be garnished with yogurt and pomegranate seeds, tahini, parsley and garlic or anything else that you can imagine.
What I love about this preparation is that it is really simple to do. The eggplant pretty much liquefies and gets really sweet from roasting. And the fact that you can garnish it however you want is an added bonus.
Conclusion
Eggplant is another one of those ingredients that we all walk by everyday in the grocery store but rarely pickup.
For me it’s an ingredient I hardly every think about but when I eat it I’m always like, “Oh yeah! This is delicious. Why don’t I eat more of this?” Then I forget about it again.
I think it’s definitely time that we all take a second look at the eggplant and discover why the rest of the world loves it so much.
Announcement!
Earlier this week I launched a how to not burn shit store which you can check out here. Or by clicking the store link in the menu bar. Right now there are only a few items but I will be adding to the collection over time. All the proceeds from items sold go right back into this site and the podcast.
So, if you enjoy this site, or the podcast and want to be part of helping it grow and improve you can do so by buying a mug or a magnet. If you don’t want either of those things but still want to be part of the future of this site, the podcast, and the facebook live show you can become a patron at patreon.com/benkellycooks
For those of you that love the blog and everything but can’t spare $5, it’s okay I get it. Just reading and sharing is more than enough.
Leafy greens are an important part of the diet. They are low in fat and calories but high in minerals, nutrients, and vitamins. Swiss Chard falls into this category.
When young, the leaves of the chard can be used raw in salads. Older chard plants can be sauteed, braised, roasted, or cooked in soups. Usually, the leaves are separated from the stem as the leaves cook quicker. The stems will be cooked first and then the leaves will be added near the end of the cooking process.
Chard is part of the beet family. That doesn’t really matter, but I didn’t know that and thought it was interesting.
Flavour
Raw chard can have a slightly but not unpleasant bitter flavour. When cooked, the bitterness is taken away and you are left with a subtle green vegetable flavour. Imagine the flavour of cooked spinach but not as strong.
Because the flavour of chard is so mild when cooked, it is easily complimented. Acids like lemon juice or vinegar added at the end of the cooking process enhance the natural flavour of the chard.
Cooking
Sauteing
One of my favourite ways to eat chard (chard, and Swiss Chard is the same thing) is to pull the leaves away from the stems. Cut off and discard the very end of the stem and dice the rest. Cut the leaves into 1-2 inch pieces.
Heat a frying pan over medium high heat. Add 1 tbsp of butter and 1 tbsp of olive oil. Once the butter starts to bubble add the stems and sauté for two minutes. Add the leaves and sauté for another minute or two. Season with salt and pepper and finish with a small squeeze of lemon juice.
Braising
To braise the chard, start the same way as when sauteing it. Remove the leaves from the stems, discard the ends, dice the stems, and cut the leaves.
Heat a pan over medium high heat. Sauté the stems with a bit of garlic. Add 1/2 cup of chicken stock, white wine or water. Bring to a boil and then reduce the heat to low. Simmer for ten minutes.
Add the chopped leaves and simmer for another five to ten minutes. Season with salt and pepper, add a 1/4 cup of cream, turn the heat up, bring back to a boil and cook for five minutes. Finish with a tbsp of butter.
Roasting
To roast, start the chard the same way as with the other two processes. This time, drop the chopped stems in boiling water for thirty to forty seconds. Drain, and pat dry.
Toss the leaves and blanched stems with olive oil, salt and pepper. Spread out an a sheet pan and bake in a 400°f oven for fifteen to twenty minutes or until the leaves are crisp.
Soup
To add the chard to soup prep it the same way as with the other processes. This time add the chopped stems in with the onions. Add the leaves about five minutes before the soup is finished.
What to serve the chard with?
Chard goes well with chicken, pork, fish, or beef. It can be prepared in any of the above ways and served as a side dish. It also works well mixed in with cooked rice.
You don’t know what your missing!
Chard is one of those things that until you try it you don’t know what your missing. It has such a delicate flavour and works well with everything. Not to mention that it is really good for you. Oh, and it’s cheap!
Next time you’re in the grocery store grab a bunch. Take it home, cook it up, and serve it as a side dish with whatever you’re having for dinner. You won’t be disappointed.
We use cookies on our website to give you the most relevant experience by remembering your preferences and repeat visits. By clicking “Accept”, you consent to the use of ALL the cookies.
This website uses cookies to improve your experience while you navigate through the website. Out of these, the cookies that are categorized as necessary are stored on your browser as they are essential for the working of basic functionalities of the website. We also use third-party cookies that help us analyze and understand how you use this website. These cookies will be stored in your browser only with your consent. You also have the option to opt-out of these cookies. But opting out of some of these cookies may affect your browsing experience.
Necessary cookies are absolutely essential for the website to function properly. This category only includes cookies that ensures basic functionalities and security features of the website. These cookies do not store any personal information.
Any cookies that may not be particularly necessary for the website to function and is used specifically to collect user personal data via analytics, ads, other embedded contents are termed as non-necessary cookies. It is mandatory to procure user consent prior to running these cookies on your website.