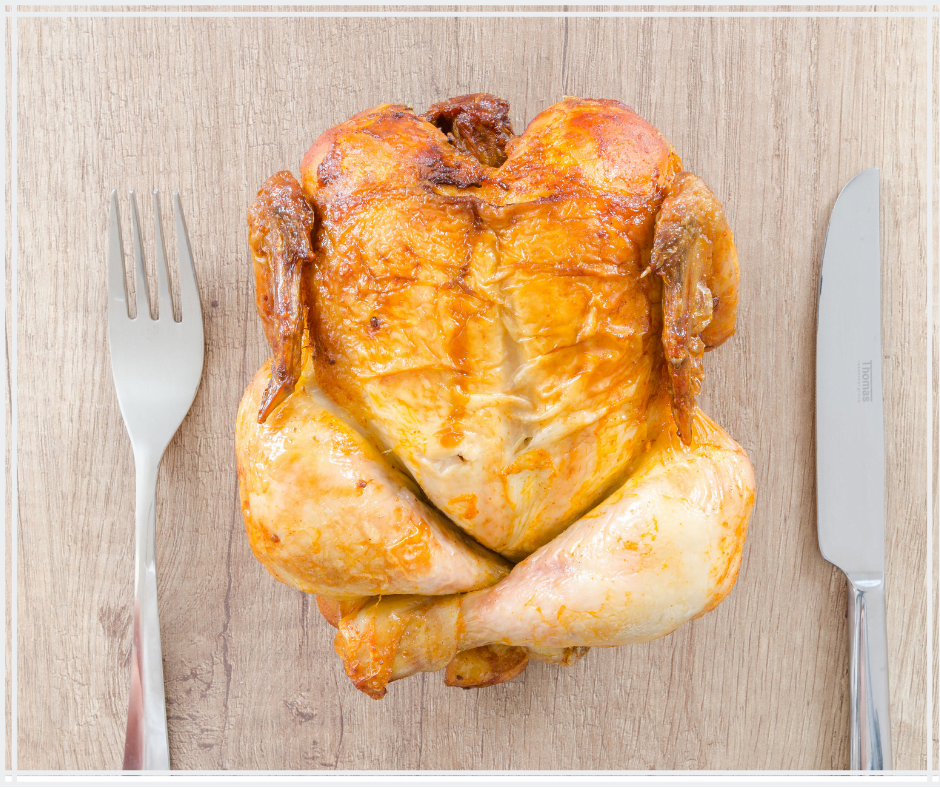
A well-cooked roast chicken is one of the rare pleasures in life. Crispy, buttery, golden skin, with tender, flavourful meat hidden below the surface. What could be better than that? But roasting a chicken isn’t something that people are just able to do. Its simplicity is extremely complex and takes practice and time to learn.
In some ways it feels like roasting a chicken is a dying skill. Most of us are much more likely to pick up a rotisserie chicken from the grocery store than to roast one ourselves. Of course, and I’m sure it goes without saying, there is no comparison when it comes to taste and quality. A home roasted chicken is a hundred times better. But, it does take time and effort to prepare.
Today, I am going to share with you…
Everything I know about roast chicken
The key to a good roast chicken is getting all of the skin nice and crispy without overcooking the rest of the bird. There are a few simple things that you can do to make this process easier.
Dry The Chicken’s Skin
Removing moisture from the skin of the chicken is the single most important step in getting really crispy and brown. This can be done in one of two ways.
Dry the skin with a paper towel.
This is not my personal favourite as I find it doesn’t do a fantastic job. However, in a pinch, if you are pressed for time, this is the go-to technique. Get a few paper towels and dry the chicken inside and out. It’s pretty straight forward.
The reason you want to dry the chicken inside is that any extra moisture inside the chicken will add moisture to the oven which will prevent the skin from crisping. The goal is to remove as much moisture from the surface of the chicken as possible.
Air-dry the chicken.
Air-drying the chicken is exactly what it sounds like. This is letting the chicken dry naturally over a period of time. To do this, the chicken is placed on a rack, set over a pan or baking sheet and placed in the fridge for a day or two uncovered. I know that this seems foreign to a lot of people, putting a chicken in the fridge uncovered, but it works and it is the technique.
The reason you want the chicken on a rack is because liquid will pool at the point of contact if it is sitting on a flat surface. This will lead to their being one big wet spot on the chicken that won’t brown and it looks pretty gross. The pan under the rack is there to collect any drippings.
Leaving the chicken uncovered, as I said may seem like a really weird and uncomfortable thing to do but it is what allows the skin to dry. If the chicken is wrapped, moisture will get trapped and the skin will stay damp. This process usually takes about two days and you may have to flip the chicken after the first day. It’s done when the skin is dry and tightly clinging to the meat.
Safety –
Leaving raw chicken uncovered in the fridge is perfectly safe as long as other foods aren’t coming into contact with it and it isn’t dripping on foods. Again, keep the chicken on a rack with a pan under it to prevent juices running on to other foods. Also, keep the chicken on the bottom rack of your fridge and make sure other food items are stored well away from it.
Cooking The Chicken
Now that the skin of the chicken is dry, it is almost ready to cook. There are only two things that need to be done first. The first step is to grease up the bird. I generally use a good quality olive oil for this or, clarified butter. I find regular butter has too much water in it which causes the skin to soften. So, rub the whole chicken inside and out with olive oil. The only thing left to do is to season the chicken very well, inside and out with salt. That’s it.
Once the chicken is oiled and seasoned, put it in a roasting pan with a rack and fire it into an oven heated to 400°F.
Now comes the fun part. The best way to ensure that the chicken gets evenly crispy on all sides is to rotate it every 20 minutes or so. Start with the chicken breast up. After the first 20 minutes rotate it onto its left side. Then after another 20 minutes rotate it to breasts down, and so on. Continue doing this until the chicken is cooked through. And yes, it is worth the effort.
How long to roast the chicken?
How long the chicken takes to cook depends on the size of the chicken and the quality of your oven. Generally, 15-20 minutes per pound is suggested. The only way to know for sure if the chicken is done is with a thermometer stuck into the deepest part of the thigh. The temperature should be 168°F – 170°F.
Basting
If you notice that there are some spots of the chicken that just aren’t crisping up you may want to baste or brush those spots with a little more oil. You shouldn’t need to worry about basting the whole chicken.
Resting
With the chicken cooked through and the skin nice and crispy all that is left is to let the chicken rest. In a lot of ways, this is the hardest part. The chicken will look so good, like a cartoon roast chicken form bugs bunny or the Simpsons, but leave it alone! Don’t touch the chicken for at least 10 minutes. 15-20 is better.
Let the chicken rest, uncovered on the rack it was cooked on. This will allow the juices to redistribute throughout the bird keeping it juicy and moist. Resting will also give air time to circulate around the skin causing it to crisp up even more.
While the chicken is resting you can make gravy or sides.
Conclusion
I wasn’t joking when I said there were few things in the world better than a perfectly roasted chicken. Nothing compares to it. The only way for you to know for yourself is to give it a shot. Try this technique if you haven’t already. It is incredibly simple on the surface. It does take time and practice to master but it is so worth the effort.
Last night I made one of my wife’s go-to meals; Chicken and Quinoa Greek Salad. This is something that she will often make at the beginning of the week and then use it as lunch for three or four days. When using it for lunches it is best to either leave the dressing off until you are ready to eat it, or leave the lettuce out until you are ready to eat it. Either way, it will still be delicious.
At first glance, this may not seem like a very substantial meal, but I could barley finish the bowl that I had. The chicken and the quinoa make this salad really filling.
One other great thing about this salad is considering how many meals you can get out of it, it is pretty inexpensive. The total cost for all the ingredients was around $30. But, I still had loads of tomatoes, mini cucumbers, feta, lettuce, and yogurt left to use in other things. Also, this salad will stretch four people at least two days possibly longer. So really, that’s a minimum of eight meals for $30 or, $3.75 a meal. That’s pretty good.
All right, enough chit chat. This is how to make…
Chicken and Quinoa Greek Salad in 30 Minutes or Less
6:36 – Quinoa
I meant to start cooking at 6:35 but there were technical issues that set me back slightly. So, I started at 6:36.
The first thing I did was get the quinoa on. I measured 1 cup of quinoa and 2 cups of water into a medium-sized pot and put it on the stove on high.
I brought the quinoa to a boil, put the lid on, reduced the heat to low, and let it simmer for 15 minutes. Then I took it off the heat and let it sit for 5 minutes before fluffing it. Of course, while the quinoa was cooking I was busy doing other things.
6:37 – Cut and wash the lettuce
After I got the quinoa on I cut and wash the lettuce. Pretty straight forward. If you want a more detailed description of how to properly cut the lettuce check out last weeks 30 minutes or less here.
6:39 – Chicken
With the lettuce cut and set aside and the quinoa simmering away I got to work on the chicken. I first put a large cast-ironskillet on the stove over medium heat. Then, I cut the two chicken breasts in half horizontally. I laid the breasts on my cutting board, drizzled them with Picholine Olive oil, dried oregano, and salt and pepper. I rubbed the seasoning into the breasts and then placed them in the hot cast-iron skillet. I didn’t need to add any oil to the skillet because of the oil I had rubbed into the chicken breasts.
6:48 – Flipping the chicken
Full disclosure I messed up a bit here. It took me a good three or four minutes of rummaging through my spice cupboard to find the oregano and my pepper. So, this took a little longer than they should have. However, I did still finish within 30 minutes. But, this should not take you 10 minutes.
The chicken was in the pan for about 4 minutes before I flipped it. Then I put a lid on the pan and cooked it until it was done flipping it once or twice more.
I also washed the chicken off my knife and cutting board before jumping into cutting the vegetables.
6:49 – Cut Veg
I occasionally do some contract work with Super Store which is a grocery store chain here. Mostly I do cooking classes but I also sometimes do culinary demos and sampling. Yesterday I was doing sampling of mini cucumbers and feta. Standing there all day handing out samples of these things gave me a really bad craving which is what led to this dinner. That is why I am using baby cucumbers. Feel free to use regular ones.
At 6:49 I got down to business cutting up all the vegetables. I started by dicing the mini cucumbers. Then I quartered some grape and cherry tomatoes. Finally, I sliced up a green pepper and a quarter of a large red onion. I put all of the vegetables in a bowl.
6:54 – Greek Dressing
Cutting the vegetables took about 5 minutes with stopping to take the pictures. If it takes you a bit longer it isn’t the end of the world. Remember that I blew a bunch of time looking for spices.
I made the dressing right in the bowl with the vegetables. I could give you some fancy made-up reason as to why I did this but I honestly don’t know why I did. I was watching my self do it and thought “Um, why am I doing this.” I didn’t have an answer and I had already gone too far. You can make the dressing in the bowl with the vegetables as I did or, you can make the dressing like a normal person in a separate bowl.
Either way, the ingredients in the dressing were 1/4 cup Picholine Olive Oil, 1 tbsp oregano, 1 tbsp red wine vinegar, the juice of 1 lemon, 2 cloves of minced garlic, 1/4 cup pulled curly parsley, 1 tsp dried dill, salt, and pepper.
I mixed up all the dressing ingredients tasted it and adjusted it as needed. At this point the quinoa was done and had rested and the chicken was done.
I added about half the quinoa into the salad saving the rest for another use. I also added about 1/4 cup crumbled feta and mixed everything together. This cooled the quinoa down a bit which meant it was time to mix in the lettuce.
This all took about 6 minutes.
7:00 –
All that was left was to plate the salad.
I put the quinoa Greek Salad mixture into a bowl, sliced one of the half chicken breasts and put that over the salad. I finished it with a little more feta and a little yogurt. Done and done and well within the 30 minute mark.
Conclusion –
This salad is seriously delicious and seriously filling. You could serve this with some warm naan bread or pita which would make it even more filling. This is a nice dish for hot weather as the only two things that need to cook is cooked on the stovetop. This way your house doesn’t get too hot.
I highly suggest that you try this salad. I’m pretty confident that you will love it and it may get you thinking about ways that you can bulk salads up a little more to turn them into meals rather than side dishes.
As always thanks for reading the blog and remember to subscribe so you never miss a post. Also, if you have any salad tips that you would like to share, post them in the comments section below.
Chicken Quinoa Greek Salad
A delicious and filling salad. The perfect meal for a hot summer day.
1/2cup Good Quality Olive Oilhalf for dressing half for the chicken
2 tbspDried oreganohalf for dressing half for the chicken
1tbspRed Wine vinegar
2clovesMinced Garlic
1lemonJuiced
1/4cupChopped Parsley
1tspDried Dill
Salt & Pepper
2tbspPlain Greek Yogurt
Instructions
Quinoa
Combine the quinoa with two cups of water and a pinch of salt in a medium pot and bring to a boil over high heat.
Once the pot begins to boil, cover it with a tight fitting lid and reduce the heat to low.
Let the quinoa simmer for 15 minutes.
Remove from the heat and let rest, covered for an additional 5 minutes.
Fluff with a fork and serve.
Chicken
Cut the two chicken breasts in half horizontally.
Lay flat on the cutting board and drizzle with olive oil, salt, pepper, and dried oregano on both sides.
Heat a large skillet on medium heat.
Sear the chicken on one side. Flip the chicken and cover. Reduce the heat slightly and cooked covered, flipping once or twice until the chicken is cooked through.
Let the chicken rest, then slice and serve.
Salad
Cut, wash, and spin dry the lettuce.
Combine all the vegetables in a large mixing bowl, except the lettuce.
Add the olive oil, red wine vinegar, lemon juice, oregano, dill, garlic, parsley, and salt and pepper into the bowl. Taste and adjust seasoning as needed.
Mix the warm quinoa into the vegetables along with 1/4 cup of crumbled feta cheese. Mix well.
Add the lettuce and mix.
Serve the salad in a large bowl, top with sliced chicken, the remaining feta, and a spoon full of yogurt.
Not that long ago I was contacted by Canadian Turkey Farmers and asked if I would be interested in working with them on a new promotion they were putting together called Think Turkey. I jumped at the opportunity to help spread the word about how delicious and versatile turkey can be.
As most of you know, I was raised on a small farm. Turkey was one of the animals that we raised for food and so we always had lots of it around. My mom was always finding new and interesting ways to prepare it.
One thing I’m sure we all know is that turkey can be used in the recipes we all use everyday. If you have never had a turkey pasta sauce or chili you don’t know what you’re missing. But I really wanted to highlight the fact that turkey can take on a lot of different flavours and be used in a lot of different cuisines.
When we think of turkey certain things come to mind. What probably doesn’t come to mind is tacos or Mexican food in general. But here’s the thing, turkey is a very traditional Mexican protein. Actually, the most traditional Mexican protein. Prior to the arrival of Europeans in Mexico in the 1500’s turkey was the main protein in the diet of the region. Even mole, the national dish of Mexico is traditionally made with turkey.
Rather than come up with a brand new way to use turkey, I looked to the past. Using traditional Mexican flavours with a modern twist, I created these Chipotle Lime Turkey Tacos. It’s my hope that with one bite you will begin to see what is possible when you Think Turkey.
The Marinade
The marinade I used actually plays double duty. I used it to marinate the turkey breast, but I also saved about 1/3 of it to use as a sauce for the tacos later. Let’s take a look.
To make the marinade I used 3 tbsp of puréed chipotle in adobo (this is the brand I use. You can probably find it in your grocery store for cheaper than it is on amazon. *I puréed it myself as the chipotles are whole in the can*). To this I added the juice and zest of 1 lime, the juice of 1 navel orange, 2 cloves of garlic, 1/4 cup of chopped white onion, 1/4 cup chopped cilantro, 1/4 cup olive oil, 1 tsp cumin, 1/2 tsp kosher salt, and 1 tbsp honey.
I puréed all the ingredients with an immersion blender(you can use a regular blender). As I said, I saved about 1/3 of the marinade and the rest I poured over the turkey breast. Finally, I sealed the turkey breast in a ziplock bag making sure it was completely covered in the marinade and then put it in the fridge for two hours (you can leave it over night).
Orange Pineapple Salsa
This salsa adds a really nice pop of fresh flavour to the tacos and contrasts beautifully with the chipotle in the marinade. The orange I used is a blood orange. It gets it’s name from the deep red colour it has. Feel free to change this out for any other type of orange.
To make the salsa I combined 1 cup of diced fresh pineapple with 1/4 cup of thinly sliced red onion, 1/4 cup minced jalapeno (take out the seeds for less heat), the juice and zest of 1 lime, 2 tbsp chopped cilantro, 1 clove minced garlic, 1 blood orange cut into segments, 1 tbsp olive oil, and salt and pepper to taste.
After I had this all mixed together, I covered it and put it in the fridge for 30 minutes to let all the flavours combine.
Segmenting an orange
To segment an orange first cut off the top and bottom. Then, cut off the skin and any of the white pith following the curvature of the fruit.
The next step is to use your knife and cut between the membrane holding the segments together. The idea is to free the segments leaving the membrane behind. Do this until all the segments have been freed.
Squeeze the juice out the reaming orange membrane into the salsa.
Cumin Lime Sour Cream
The final piece of the puzzle is the cumin and lime sour cream. This is really straight forward but as simple as it may seem it really ties the tacos together.
To make this I combined 1 cup full fat sour cream with the juice and zest of 1 lime, 1 tsp cumin and 1/4 tsp smoked paprika. Mix this really well and let sit, covered in the fridge for at least 15 minutes. This time will open up the spices and give you a more flavourful sauce than if you just ate it right away.
Roasting the turkey breast
Once the Turkey Breast has had time to marinate remove it from the plastic bag, shaking off any excess marinade, and place on a parchment lined sheet pan. Put the turkey in the oven preheated to 375°F and roast for 45 minutes.
Remove the turkey breast from the oven and check the doneness using an instant read thermometer. The temperature should be 165°F when the turkey is done. If it’s not done put it back in the oven until it reaches that temperature.
Once the turkey breast is cooked, remove it from the oven and wrap tightly in foil. Let the turkey rest for ten minutes. This resting will prevent the turkey from losing it’s juices when it is sliced keeping it nice and moist.
Putting the turkey tacos together
When I make tacos I prefer homemade corn tortillas, however that is a lot of work. If you don’t want to put in that effort that’s okay. I do suggest soft corn tortillas for this. They are more traditional, they hold up better, and the flavour really adds to the quality of the taco. Having said that, if you prefer flour tortillas use those. You are the one eating this after all.
Whether you are using corn or flour tortillas you are going to want to warm them up first. Follow the warming instructions on the package.
To put the tacos together I prefer to start with the sour cream, followed by the salsa, then the turkey, the marinade that we reserved for the sauce (this did not come into contact with raw turkey), finally some fresh cilantro.
Conclusion
The turkey recipe I used here would be just as good with some mashed or roasted sweet potato, corn on the cob, and green beans. The marinade could also just as easily be used on turkey legs or wings as well. And the turkey would be just as good barbecued as it is cooked in the oven.
The marinade not only imparts a delicious flavour to the turkey but it also helps to keep it moist during cooking. So, what you end up with is this really flavourful, really juice turkey.
I hope that you take the time to make this recipe because honestly I think that you will absolutely love it. Hopefully it will change your perspective a bit so that the next time you are craving Mexican you will Think Turkey.
Visit thinkturkey.ca for even more delicious turkey recipes
Turkey Tacos
Though we may not think of turkey really having anything to do with Mexican food, it does. Turkey was and is a traditional Mexican and South American protein. Prior to the arrival of the Europeans it was one of very few proteins available to the people of this region. With this in mind I wanted to highlight that connection and so that is what I hope to do with this delicious Turkey Taco Recipe.
Put all the ingredients, except the Turkey Breasts in a blender and purée until smooth.
Place the Turkey Breasts in a zip seal bag or plastic container.
Pour half the marinade over the Turkey Breasts, reserving the rest to use as a sauce for the tacos later.
Toss the Turkey Breasts to evenly coat with the marinade.
Seal the container with the Turkey Breasts and place in the fridge for a minimum of 2 hours or up to 12 hours.
Preheat the oven to 375°F.
Take the turkey out of the marinade and shake off excess.
Place the turkey on a parchment lined sheet pan and roast in the oven for 45 minutes to 1 hour or until the internal temperature of the Turkey Breast reaches 165°F.
Remove the turkey from the oven, wrap in foil and let zest for 10 minutes.
Thinly slice the Turkey Breast and serve on Tacos.
Orange Pineapple Salsa
Combine all the ingredients and mix well.
Taste and season as needed.
Cover with plastic and let sit in the fridge for 30 minutes.
Remove from the fridge, stir, and serve.
Cumin & Lime Sour Cream
Combine all ingredients and serve.
Turkey Tacos
Warm the tortillas.
Top the tortillas with sliced Citrus Chipotle Turkey, Citrus Chipotle Taco Sauce, Orange Pineapple Salsa, Cumin Lime Sour Cream, Fresh Cilantro, and a squeeze of Fresh Lime.
Chicken Shawarma is typically layers of spiced chicken breast stacked on a vertical spit and roasted rotisserie style. As the chicken cooks it is sliced off and served on pita with lettuce, pickled turnip, dill pickles, tomato, tabbouleh, cucumber, and sauce which is often garlic mayo.
I love Chicken Shawarma. It used to be my go to after a long night of work or if I was out with friends for the evening. But then, two years ago when I found out I couldn’t eat gluten anymore I had to stop eating them, along with a lot of other things. That’s when I started eating Shawarma Bowls.
What is a Shawarma bowl?
A Shawarma bowl is pretty much exactly what it sounds like. Everything you would find in a Shawarma, but rather than being wrapped up in a pita it is served in a bowl with rice. This is a great alternative to the traditional Shawarma. It makes a really delicious and healthy dinner as long as you go easy on the garlic mayo.
Today’s version…
The version of this I am going to show you today is a bit different than what you might find in a restaurant. First of all, the chicken isn’t cooked on a vertical rotisserie. Secondly, I opted not to include the pickled turnip. I left the turnip out because it didn’t make sense to tell you to make or buy pickled turnip that you would likely only use once. And finally, rather than making actual tabbouleh (which has gluten in it) I just add some chopped parsley to the mix.
The Shawarma spice mix that I make for this is not traditional. I used madras curry powder with the addition of a few more ingredients for the simple reason that it is easier and more accessible than stocking 10-15 different spices just to make this. The seasoning may not be traditional, but it tastes pretty close, and it is really delicious.
Alright, that is enough preamble. This is…
Chicken Shawarma Bowl in 30 Minutes or Less
4:15 pm
I started cooking at 4:15 pm.
Now, for whatever reason I when this was all said and done, I went to download the pictures from my camera to my computer and realized that the first 20 pictures or so didn’t save. That means I don’t have any pictures of making the spice blend or spicing the chicken or anything. Sorry about that.
At 4:15 I put 2 cups of water with a big pinch of salt on for the rice, turned the oven on to 350°F, turned the cast iron pan for the chicken on to medium and started making the spice blend.
At 4:19 the water for the rice started to boil so I added the rice to the pot, put a lid on it, reduced the heat to low and set a 15-minute timer.
At this point, I also tossed the chicken breast in the spice blend, added a tablespoon of oil to the cast iron pan and put the chicken in the pan.
4:22 pm
At 4:22 I started cutting the romaine lettuce.
4:24 pm
At 4:24 I flipped the chicken let it cook for a minute and then put it in the oven. I also finished washing and spin-drying the lettuce.
4:27 pm
Now it was time to make the garlic dressing. First I had to purée 4 cloves of garlic.
Once the garlic was puréed I added 1/4 cup of mayo, the juice of half a lemon, and a pinch of salt and pepper. This all got mixed together and set aside.
4:33 pm
By 4:33 pm the garlic sauce was all done. It was not time to start cutting up my vegetables. At this point, the timer for the rice also went off so I removed it from the heat and left it to rest for 5 minutes.
Slicing Red Onion
The first vegetable I cut was the red onion. I cut off the top and bottom of the onion, and then cut it down through the middle. Then I peeled it. Peeling it after it is cut in half is a lot easier than peeling a whole onion. Then I thinly sliced half the onion and saved the rest for another use.
Slicing Cucumber
After the red onion, it was time to slice the cucumber. I used about 1/3 of an English Cucumber. I cut the very tip off, split the cucumber in half lengthwise and then thinly sliced it on a slight angle or on a bias.
Slicing Cherry Tomatoes
After the cucumber, it was time to cut some cherry tomatoes. To cut a pile of cherry tomatoes at one it is easiest to a plate or something on top of them. Make sure the plate has a ring on the bottom to hold the tomatoes in place. Then you just slice right through the middle of the tomatoes. If you are going to do this it is important that you have a sharp knife. If you don’t you can use a serrated knife. Really though, get a sharp knife.
Parsley and pickles
Finally, all that was left was to cut the parsley and the pickles.
4:40 pm
By 4:40 all the vegetables were cut, and the chicken and rice were cooked. It was time to put it all together.
First I had to fluff the rice and put some in the bottom of a bowl. Then I added lettuce, cucumber, red onion, tomatoes, and pickles. At this point, the chicken had rested for a few minutes. I sliced it and add that to the bowl. I topped all of this with some garlic mayo and parsley.
By 4:45 all the pictures were taken and I was happily eating my Chicken Shawarma Bowl.
Conclusion
This is the type of dish that you makes you feel really good after eating it. Not only is it delicious but with all those fresh vegetables you feel like you did something good for your body.
Another great thing about this is that it is great whether the chicken and rice are hot or cold. I made the bowl in the pictures and then the rest got packed up and divided for lunches.
If you have never had a Shawarma, you don’t know what you are missing. Whether you have ever had a Shawarma or not, you will love this dish. Give it a shot.
Chicken Shawarma Bowl
A healthy and delicious Shawarma Bowl that can be made from scratch in under 30 Minutes.
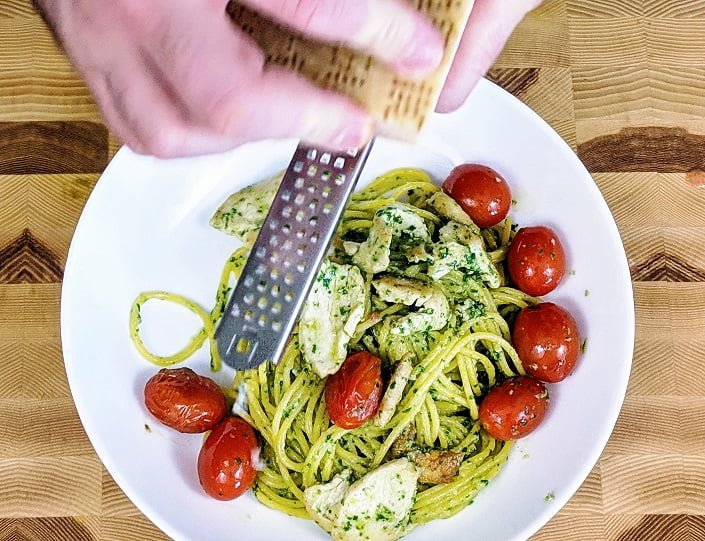
For this week’s 30 minutes or less post I made chicken pesto and garden salad with homemade French dressing. This is a really delicious meal that I would be happy to eat any day of the week.
Recipe Notes
As usual, the meal I prepared would be enough to feed a family of four, with two exceptions. I didn’t cook enough pasta for a family of four because it’s just my wife and I and there’s no point wasting it. Same with the chicken. I only used one large chicken breast. For four people I would use two chicken breasts.
I should also say that to make the pesto I used an immersion blender. You can use a regular blender, a food processor, or a mortar and pestle, though that may add some preparation time.
One final note before we jump into this. Chopping the vegetables for the salad can be time consuming, especially if you’re nervous with a knife. To get around this, and speed things up feel free to use the slicer attachment on a food processor. Things won’t look as nice but they will taste just as delicious.
Okay, without further ado, this is…
Chicken Pesto in 30 Minutes or Less
4:51 pm
At 4:51 I put a pot of salted water on the stove for the pasta, turned in on high and started chopping 1 cup of basil leaves for the pesto.
Because I was using an immersion blender to make my pesto I had to chop the basil first to prevent it from jamming the blades. If you are using a food processor or blender you can skip this step. This will save you some time.
Once the basil was chopped I put it in a large measuring cup along with 2 tbsp of pine nuts (which add flavour and creaminess to the pesto), 2 cloves of garlic, a big pinch of salt, and 1/2 cup of olive oil. I pureed all this until smooth.
I would normally add parmesan to the pesto as well but I find when adding it to pasta like we are going to the cheese burns to the bottom of the pan. I opted to garnish the pasta with a little extra parmesan to make up for this.
At 4:57 pm the pesto was finished and set aside.
4:58 pm
At 4:58 I started cutting the lettuce for the salad. I used one head of romaine lettuce for this.
To cut it I first took off the very end of the leaves as they had some brown spots on them. Next I made a slice through the middle of the head of lettuce from the tip of the leaves to the root, but not through the root. I rotated the romain by one quarter turn and made the same slice. Then I cut the romaine across those slices giving me nice bite sized pieces.
Here is a quick video I did demonstrating what I’m talking about.
I put the romaine in a salad spinner, rinsed it a few times, and then spun it dry. Once it was dry I set it aside.
5:03 pm
At 5:03 pm I started prepping the vegetables for the salad. I peeled and sliced two carrots, sliced 1/2 a cucumber, 1/2 a green pepper, and 1 broccoli stalk. I put a few handfuls of lettuce in a bowl and topped it with the sliced vegetables and a few cherry tomatoes. I set this aside.
There was enough romaine left over for another salad of this size. The leftover romaine got covered with a damp paper towel and put in the fridge.
Also, at 5:04 the pasta water started boiling.
5:10 pm
At 5:10 the salad was done and set aside. I put the pasta in the water, and started heating the frying pan for the chicken. While the pan was heating over medium low heat I put the salad dressing together.
For he salad dressing I altered the French Dressing recipe from Genius Kitchen. They’re batch was way to big for what I needed, and I took away or changed some of the ingredients based on what I like.
The ingredients in the French Dressing are as follows:
2 tbsp olive oil
1/4 cup ketchup
2 tbsp sugar
3 tbsp white vinegar
1 tsp onion powder
1/4 tsp paprika
1/4 tsp garlic powder
1 tbsp mayo
salt and pepper to taste
To make the dressing all of these ingredients go into a bowl and get mixed together. That’s it.
5:12 pm
At 5:12 the salad dressing was done. I gave the pasta a stir and then quickly sliced one chicken breast very thin. I added 1 tbsp of olive oil to the hot frying pan and then the chicken.
Because the pan was hot and the chicken is sliced thin, it didn’t take long for it to cook.
5:17 pm
By 5:17 the chicken was all browned and I added a handful of cherry tomatoes to the pan.
I drained my pasta, added the pesto to the pan along with the now drained pasta. I tossed this all together, seasoned with salt, pepper, and parmesan, and that was that.
5:19 pm
At 5:19 I plated the pasta and the salad and dinner was ready to go.
Conclusion
In all honesty, this was the closest I’ve come to going over the 30 minute mark. I really had to hustle for the last two minutes but that was my own fault. I went into this with the mind set that this would be exceptionally quick, I mean it was just chicken pesto. But there were a few things that caught me up.
Like I said, I had to chop my basil because of the immersion blender, and I dillydallied cutting all the vegetables. Again, that’s my own fault.
Between my dillydallying, cutting the basil, and taking all the pictures, I blew through a lot of time that you shouldn’t have to. Because of that I see no reason why you or anyone else shouldn’t be able to make this dish in under 30 minutes start to finish.
Two bonuses of this are, you get to see how quickly pesto and and a delicious salad dressing can be put together. It’s almost quicker than grabbing them off the shelf at the grocery store. Almost quicker, but 100 x better.
“You can always judge the quality of a cook or a restaurant by roast chicken. “
Julia Child
There are few things in this world better than a perfectly roasted chicken. The crispy browned skin, the tender, juicy meat. What’s not to love? The thing is, I fear these days, few people have ever actually had a perfectly roasted chicken.
It isn’t nearly as common as it used to be to cook a chicken whole. More often than not, when we buy chicken we buy it in pieces. Not only is the chicken in pieces, we only buy the pieces we want. Breast, legs, thighs, and wings. There isn’t anything inherently wrong with this except for what we’re missing.
There is something magical and special about a really good roast chicken. The way the skin crisps up. The way the fat renders and evenly flavours the meat. The way the bones help to flavour the meat and keep it juicy. It really is amazing.
If you haven’t figured it out yet, today we are talking about roast chicken. More specifically, we are talking about
Everything I know about Roast Chicken
Okay, first of all, there are many, many ways to roast a chicken. One way is generally not more right than another. But for today, we are focusing on a very basic, French style roast chicken based on Julia Child’s own recipe. We are aiming for very specific results which are crispy brown skin, and juicy meat.
Ingredients
Often when people go to roast a chicken they open up their spice cupboard and seemingly start grabbing things at random. The chicken get’s coated with paprika, garlic powder, oregano, chili flakes, or whatever else is in the line of sight when the cupboard door opens on the spices. In all honesty, I was guilty of this for a long time.
A really good roast chicken needs only four ingredients:
a chicken
salt
pepper
butter
It seems too simple. Almost ridiculous. But it isn’t. You can add one onion into that ingredients list which can be put in the chickens body cavity for flavour but it really isn’t needed.
Secrets
One of the most important things, or the big secret, to getting the brown crispy skin on a chicken, is dryness. The skin has to be dry. Traditionally, chickens and other poultry would be tied up and left to dry for a few days.
Drying the chicken does a few things. First of all it removes moisture from the skin. If that moisture isn’t removed prior to cooking, it will come out during cooking. It is very difficult to develop browning on a wet surface. The second thing drying does is to intensify the flavour of the skin and the chicken.
How To Dry A Chicken
Ideally, when you buy a chicken, it should be taken out of the package and set on a rack over a pan which will collect any drippings. This is put in the bottom of your fridge uncovered for a couple of days and rotated every twelve hours or so.
This seems like a lot of work and like the opposite of everything you have ever been told. We have a tendency to wrap or cover everything that goes into the fridge. The reason we do that is to protect from contamination by other food products and to prevent food from drying out.
When we are drying a chicken we aren’t really that concerned with other food products contaminating it, and we put it on the bottom of the fridge so it won’t contaminate other foods. We aren’t worried about it drying out because that is actually the result we are aiming for.
Can’t I use a paper towel to dry it?
Using a paper towel to dry off a chicken is only going to pull moisture off the surface. It’s definitely better than nothing but it’s not going to give you the same result as air drying the chicken. You won’t get the same quality roast chicken.
Cooking the chicken
The chicken is dry and now it’s time to cook it.
The first thing you want to do is season the inside of the chicken with salt and pepper. Next melt some butter, about 1/4 cup. Once the butter is melted you want to brush the dried chicken with it on all sides. Then season the surface of the chicken well with salt. Put the chicken breast side down on a rack set over a roasting pan and put it in a 400°f oven.
Rotating
Every 15 minutes or so you want to rotate the chicken by a quarter turn. So, it started breast side down, after 15 minutes rotate it so the wing and leg on one side is down. After another 15 minutes that chicken will be rotated again, this time breasts will be facing up. You get the idea.
Basting
Every second time rotate it, so every time the breasts are facing up, or facing down, you want to baste the chicken with a bit more melted butter.
Cooking time and finished temperature.
Depending on the size of the chicken it is going to take between an hour to an hour and a half to cook it. Just keep rotating it every 15 minutes until it is done cooking. It’s done when the legs and wings easily move in their sockets or when a thermometer placed in the thickest part of the breast reads 170°F.
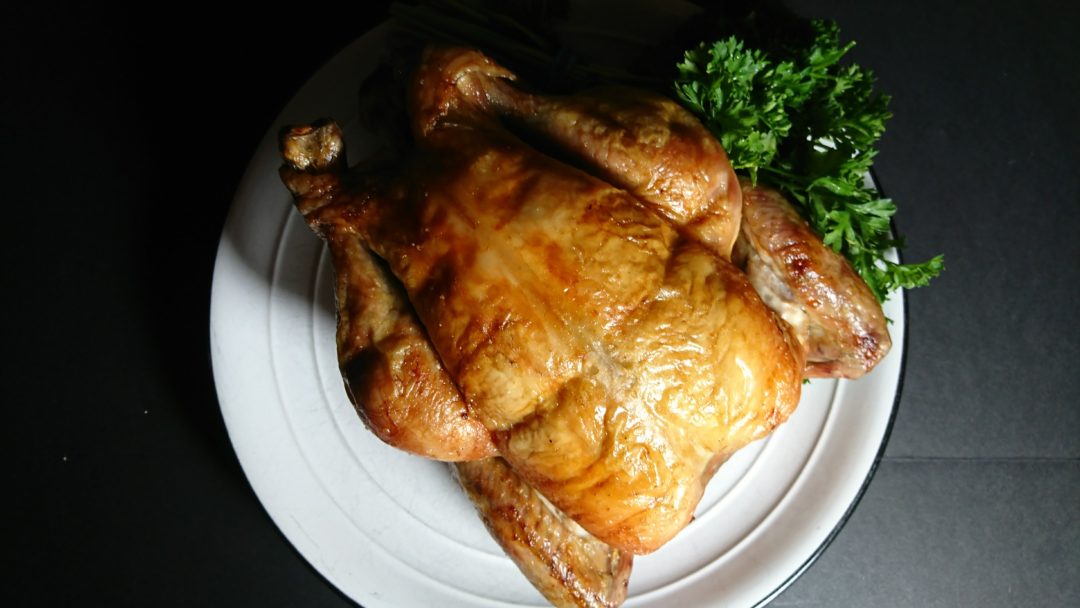
Remove the chicken from the oven, and keeping it on the rack it was cooked on let it rest for at least 10-15 minutes.
Serving the chicken
While the chicken is resting a gravy can be made with the drippings that have accumulated in the bottom of the pan.
For my money a roast chicken is best served with mashed or roasted potatoes and a few vegetables.
Conclusion
I’m not delusional. I know that no one is going to cook a chicken like this all the time. It’s a lot of work. It isn’t a complex process but it takes time. This type of chicken is really meant for special occasions or when you have people coming over for dinner.
If you’ve never had a chicken like this, I highly, highly suggest that you try it at least once. You won’t believe that a simple roast chicken can taste so good.
If you do make this for guests, document the process with pictures because it will be so good that they won’t believe that you made. Seriously!
Thanksgiving day is almost upon us and that can only mean one thing; people are going to be eating a lot of dry ass turkey. It seems almost inevitable that by the time the turkey hits the table every last ounce of moisture will be cooked out of it. This leaves a table full of people thankful that they only have to eat turkey twice a year. But is this inevitable? Is there a way to have moist, tender turkey? Can it be cooked, and delicious? Well, there’s really only one way to find out.
It’s turkey time!
There are a few common mistakes that we all make that cause our turkeys to dry out. Today, we are going to talk about those mistakes. It’s my hope that we can all sit down to a delicious meal on Thanksgiving day without having to lube up every bite with gravy and cranberry sauce just so we can swallow it. So, what can we do to make our turkey delicious?
Stuffing
You’re not going to like this, but don’t stuff it. Stuffing your turkey does two things. Number one, stuffing creates a solid mass in the centre of your bird that slows down the cooking time. Number two, the internal stuffing has to be cooked to a temperature of at least 165°F in order for it to be safe to eat. By the time the centre of the stuffing reaches 165°F the turkey is going to be very overcooked.
You want the stuffing because it’s delicious. Well, cook it separately. Once the turkey is cooked use the fat in the bottom of the pan to moisten your stuffing (which is dressing if it’s not being cooked inside the turkey) and then bake. You will still get the turkey flavour, plus your turkey won’t have to be overcooked.
If I don’t fill my turkey with stuffing what should I do with the giant open cavity?
Well, there are a few options. First of all, leave it the hell alone. Don’t do anything. Leaving this cavity empty will allow heat to get inside the bird and it will cook in less time. I do recommend seasoning the inside of the turkey with salt, pepper, and herbs. This will flavour the meat from the inside out.
The other option that I really like is to loosely pack the turkey with onions, carrots, celery, fresh herbs and butter. This will add a pile of flavour to the finished bird. Having everything very loose in the bird will still allow it to cook from the inside out as opposed to having that solid mass of stuffing.
So, if you wanted a delicious turkey that isn’t overcooked, don’t stuff it!
Cooking the turkey
It is generally recommended that you cook your turkey to an internal temperature of 170°f in the breast and 180°f in the thigh. For unstuffed, this is going to take about 15 minutes per pound at 325°f. After the turkey is cooked, allow it to rest for at least 30 minutes if it’s under 10 lbs and 60 minutes if it’s over 10 lbs. This resting period is key. This allows all the internal juices to redistribute throughout the meat keeping the turkey moist and tender. While the turkey is resting, cover it loosely with foil so not too much heat is lost.
For really crispy golden skin make sure the surface of the turkey is dry when it goes into the oven. Just pat it dry with paper towels and season it as you normally would.
Depending on the size of your turkey, you may want to flip it halfway through cooking. If your turkey is giant you probably don’t want to do this, but if you have a bird that is around 10 lbs cook it for the first half breast side down. At the halfway mark flip the bird, maybe pat it dry again and re-season it. Finish cooking breast side up. This will keep the breasts really juicy.
Leftovers can get pretty boring. Just think of Christmas or Thanksgiving. You get so tired of turkey by the end of it that you never want to eat it again. This doesn’t have to be the case. With a little creativity and ingenuity, you can use leftovers to create unique meals that will make you forget you’re eating the same thing as the night before. Learning this skill will help you stretch your grocery budget further than ever before.
This is the story of how one $20 duck fed my wife and me three distinct meals.
Late last week I was wandering around the grocery store when something caught my eye. In the area of the protein aisle where the sale items are displayed, there were ducks. It is very rare that duck goes on sale. I saw this as an opportunity I couldn’t pass up. And with that, I had a duck in my arms and a smile on my face.
When I arrived home I showed my wife the duck as though I was an excited retriever returning to my master from a marsh with freshly killed fowl. She appeared indifferent (although I know she’ll argue this with me). Her indifference was due to the fact that she was unaware of my vision.
Duck. Duck. Duck soup.
The first thing I did when I got home with my duck was free it from the confines of its packaging. I then laid it out on a roasting rack and set it to dry in the fridge for a few days. Drying the duck like this makes for nice crispy skin when roasted. This works with chicken as well. Three days after I had bought the duck, it was ready to be cooked.
Duck Day One.
The first meal I cooked with the duck was pretty simple. Duck roasted in a hot oven. Glazed with a soy and honey reduction. Served sliced thin, with rice and steamed vegetables. It was delicious. The duck was medium well, so it still had a touch of pink. It was tender and juicy. We ate one breast between the two of us that first night. The remaining duck was returned to the fridge until the next day.
Duck Day Two. Leftovers Part One.
The second meal we had with the duck was even more simple than the first. I made duck salad rolls. They were delicious and surprisingly filling.
I mixed thinly sliced carrot, celery, green onion, napa cabbage, and duck meat. To this, I added the zest of one orange, a touch of soy sauce, some chili sauce and a tsp of Chinese five spice. I then soaked some rice paper wrappers. I put a thin line of the leftover duck glaze from the previous night down the center of the wrapper, filled it with the duck and vegetable mixture and rolled it up. Again, they were delicious and surprisingly filling. A healthy and delicious way to use up some duck.
Duck Day Three. Leftovers Part Two.
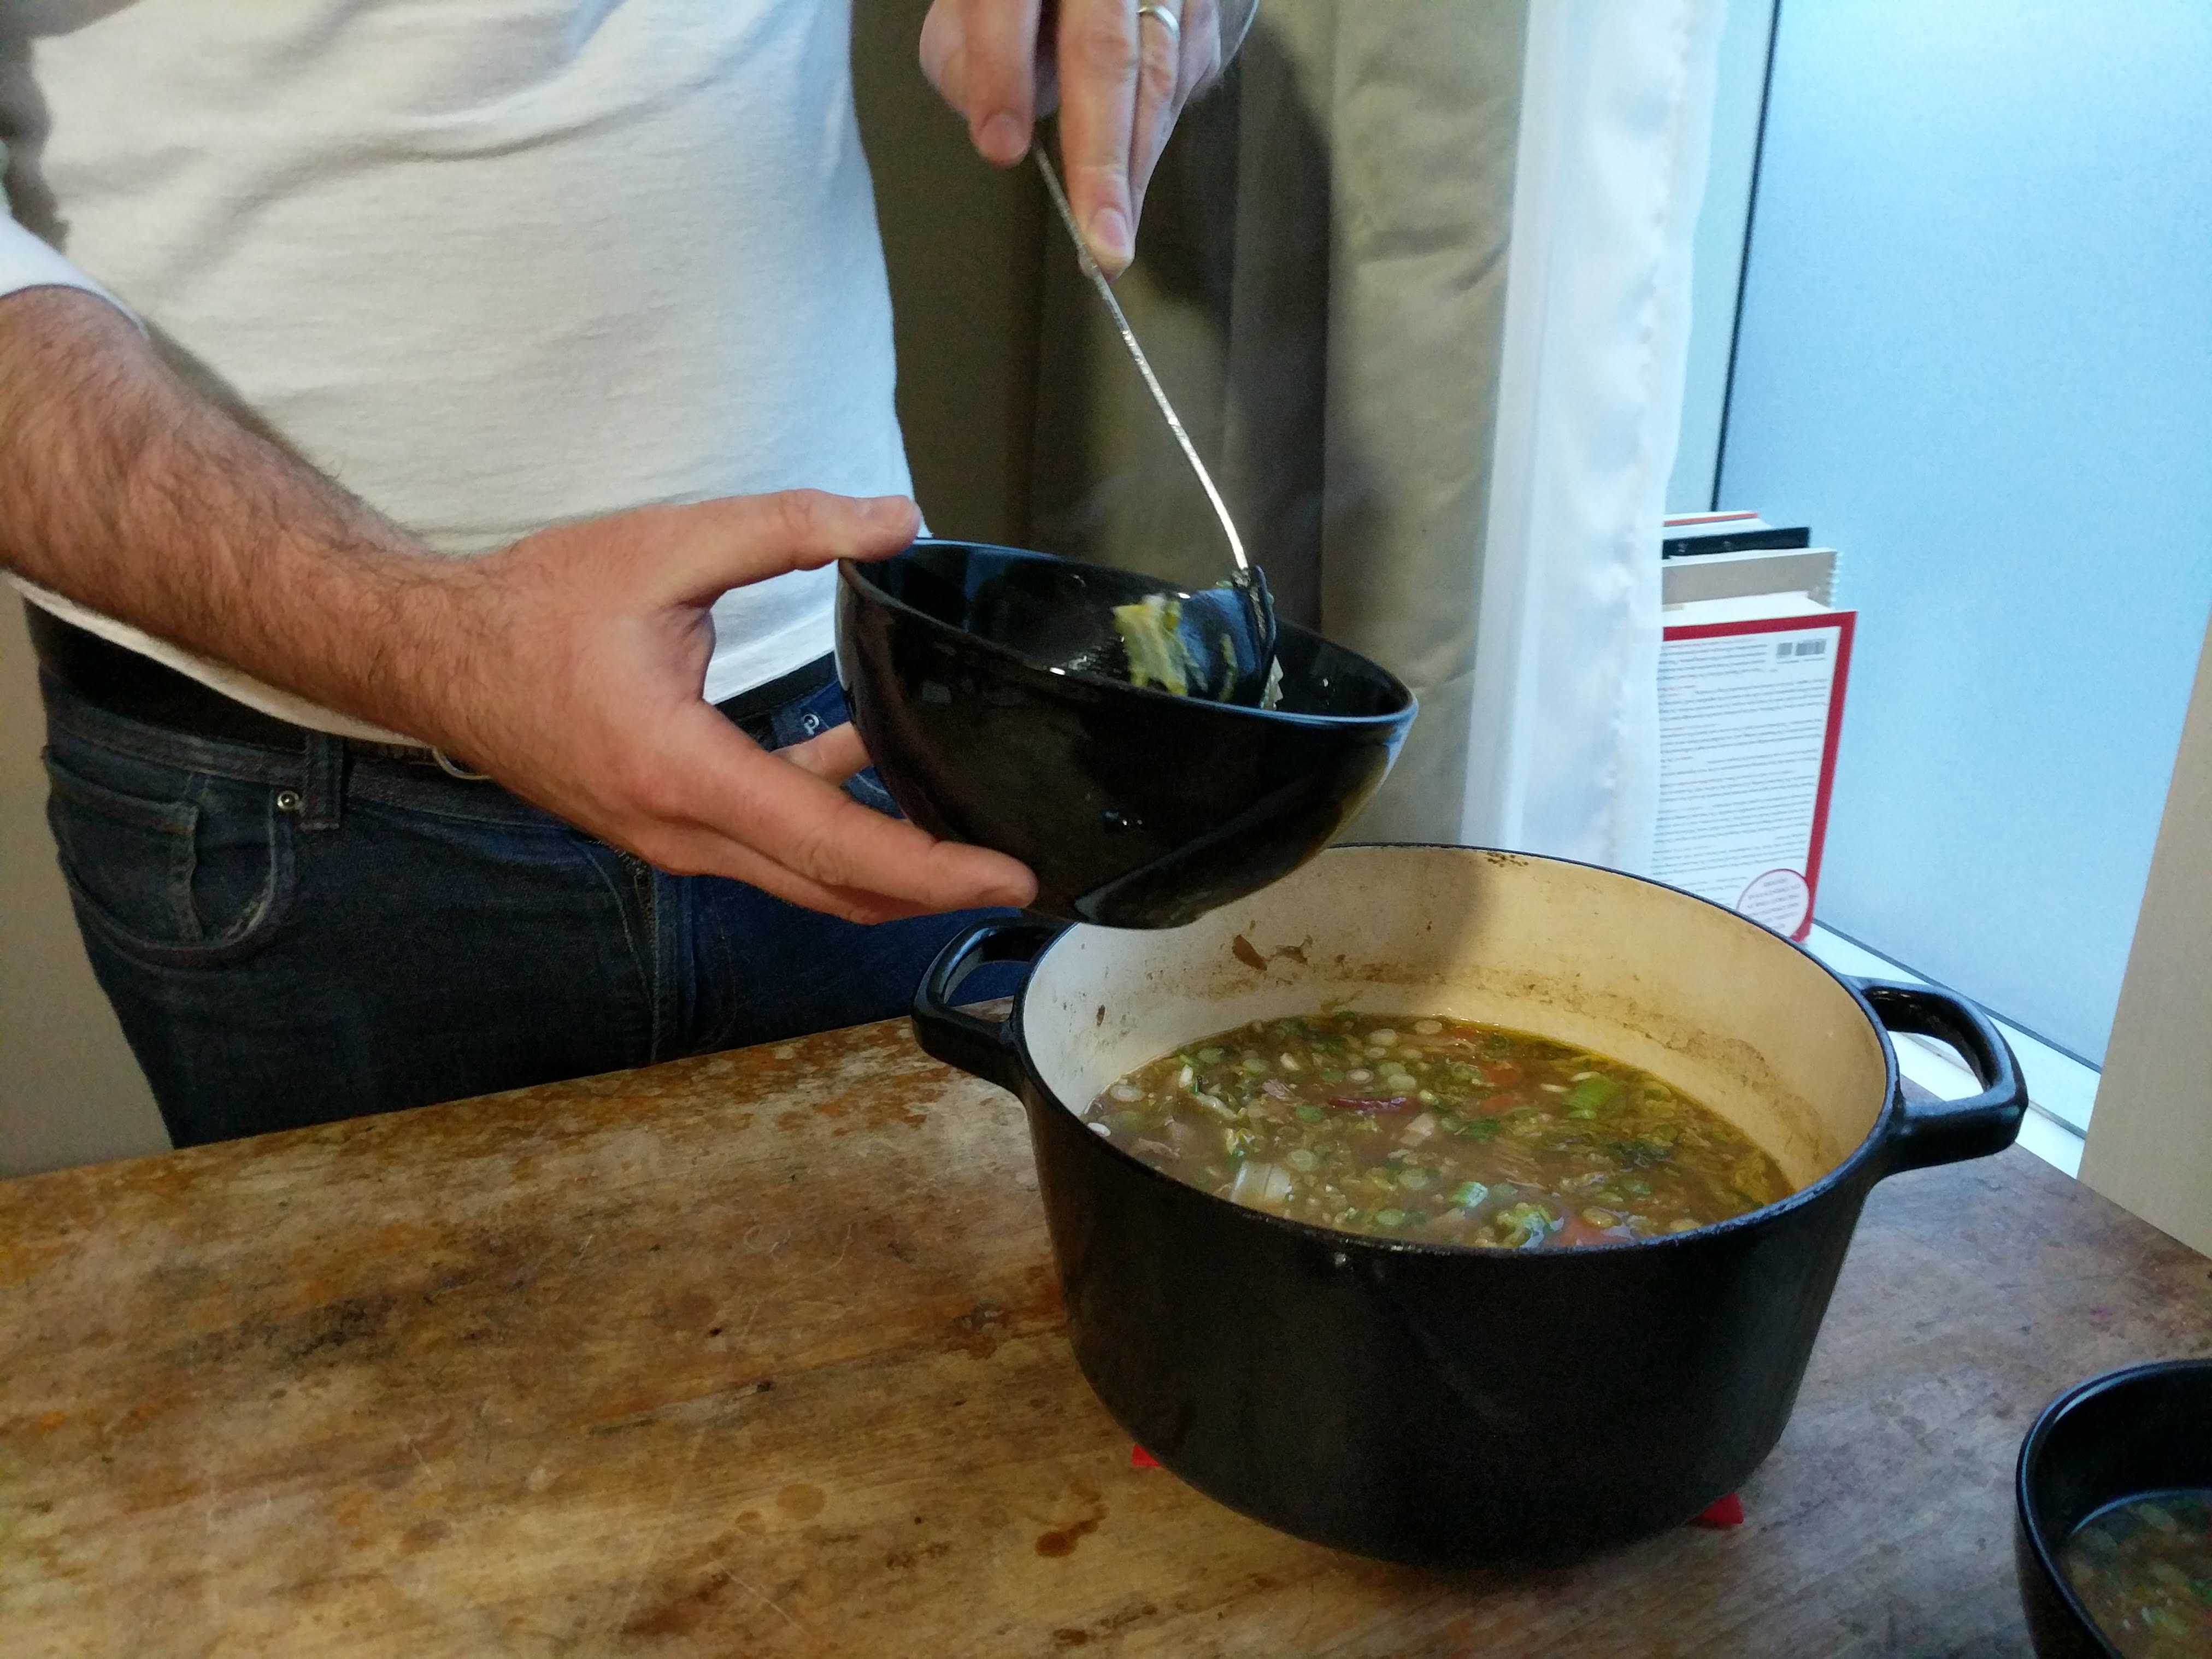
The final meal I made with the duck, may have been the most exciting. I simmered the carcass for about an hour then strained and reserved the liquid. I picked all the meat I could off of the carcass and discarded the bones. I then sauteed one sliced onions, one sliced carrot, and one sliced celery stalk until the onions started to brown. I added three chopped cloves of garlic, and one tablespoon of chopped ginger. I cooked this all for a minute or two and then added one teaspoon of Chinese five spice, one teaspoon of chili flakes, and four dried Thai red chilies. I deglazed the pan with half a cup of white vinegar and then returned the duck broth to the pot.
I left my soup simmer for about an hour. I then added one cup of shredded napa cabbage, four sliced green onions, all of the duck meat, two tablespoons of brown sugar, and a pinch of salt. I finished the soup with some soaked and chopped rice noodles.
I turned a sad duck carcass into a flavourful and vibrant hot and sour soup.
The point of all of this is that if you put a little thought into it, leftovers can become something new and exciting. All three of these dishes have a lot in common. However, they are different enough that you would never know you were eating leftovers. That should be the goal. There was not a point in the last three days where my wife or I said “Oh man! Duck again!”
All it takes is a little forethought and planning and you can stretch your grocery budget and still have a series of unique and enjoyable meals.
We use cookies on our website to give you the most relevant experience by remembering your preferences and repeat visits. By clicking “Accept”, you consent to the use of ALL the cookies.
This website uses cookies to improve your experience while you navigate through the website. Out of these, the cookies that are categorized as necessary are stored on your browser as they are essential for the working of basic functionalities of the website. We also use third-party cookies that help us analyze and understand how you use this website. These cookies will be stored in your browser only with your consent. You also have the option to opt-out of these cookies. But opting out of some of these cookies may affect your browsing experience.
Necessary cookies are absolutely essential for the website to function properly. This category only includes cookies that ensures basic functionalities and security features of the website. These cookies do not store any personal information.
Any cookies that may not be particularly necessary for the website to function and is used specifically to collect user personal data via analytics, ads, other embedded contents are termed as non-necessary cookies. It is mandatory to procure user consent prior to running these cookies on your website.