I spent way too long buying mediocre mochi from the freezer aisle and convincing myself it was fine. It wasn't fine. It was rubbery and bland and nothing like what I'd had at actual Japanese bakeries.
So I looked up how to make daifuku from scratch, expecting some elaborate process with specialty equipment. Nope. A microwave, a bowl, and about half an hour.
Now I'm the person who shows up to gatherings with a plate of handmade stuffed mochi, and honestly, it's the best reputation to have.
What Is Daifuku?
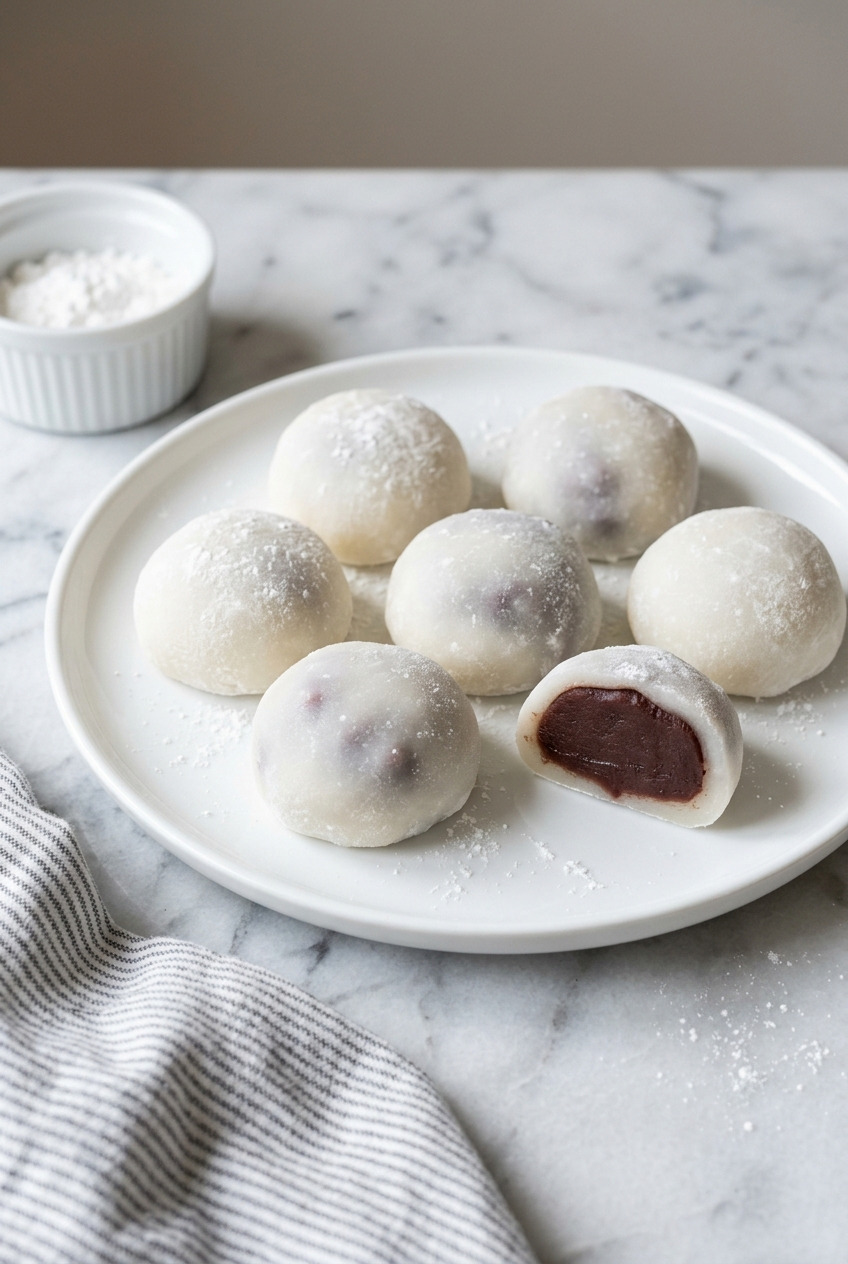
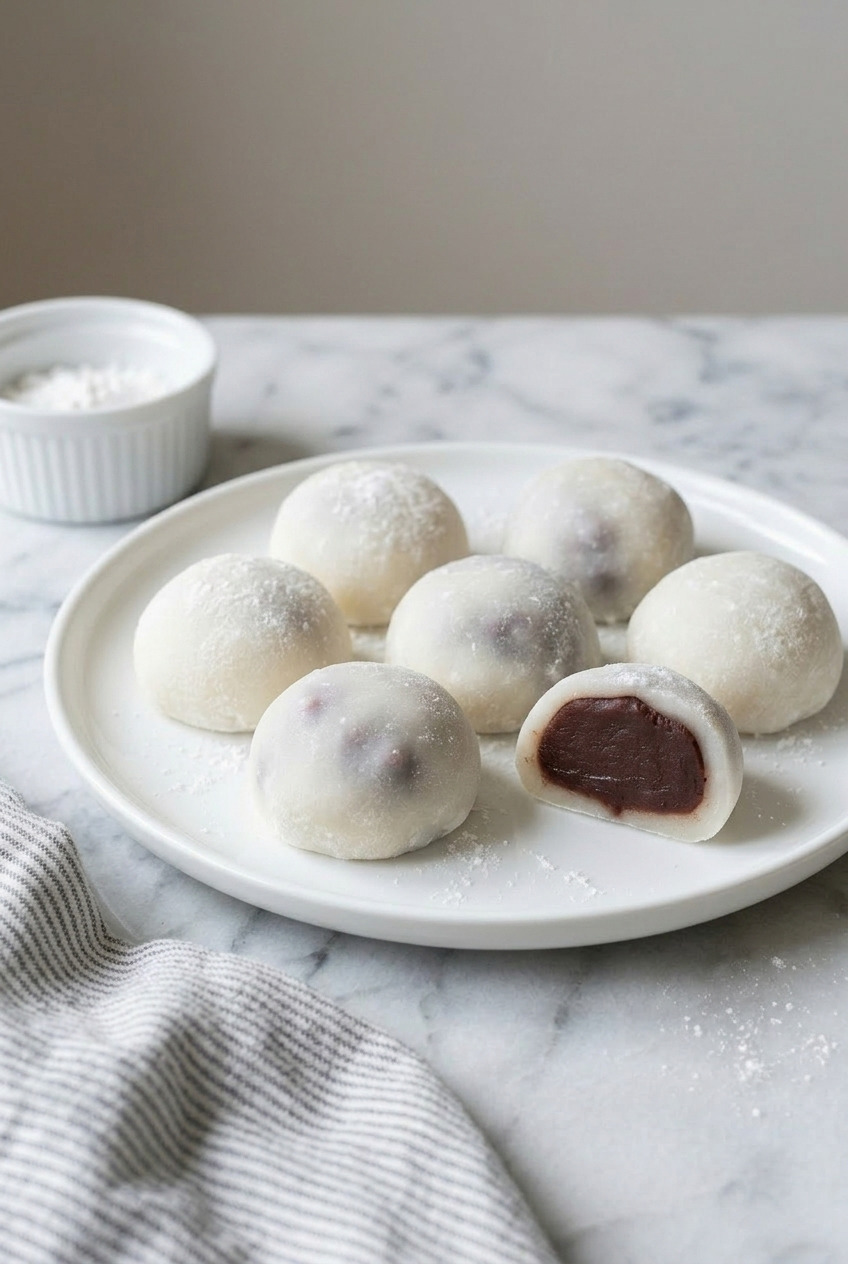
Daifuku (大福) literally translates to "great luck." It is a type of wagashi, or traditional Japanese confection, made from soft mochi wrapped around a sweet filling.
The most classic version is filled with anko, sweet red bean paste made from azuki beans. You will also find daifuku stuffed with strawberries, white bean paste, matcha cream, and all sorts of modern fillings.
A common question: what is the difference between mochi and daifuku? Mochi is the rice cake itself, plain and unshaped. Daifuku is mochi that has been stuffed with a filling and shaped into smooth, round balls. Think of mochi as the dough and daifuku as the finished pastry. If you want to get comfortable with the dough itself first, this guide to homemade sweet mochi is a great starting point.
Most daifuku are about the size of a golf ball, though some shops make them palm-sized. I prefer them a bit smaller, about two to three bites each. Just the right size to pop one without feeling guilty about reaching for a second.
A Brief History
Daifuku traces its roots back to the Edo period (1603 to 1867), when a similar treat called uzura mochi was popular. These were shaped like quail and filled with salted red bean paste, since sugar was still a luxury at the time.
In 1875, a widow in Koishikawa, Edo (modern-day Tokyo) reshaped the treat into something smaller, rounder, and sweeter. It was originally called habutai mochi, meaning "thick belly rice cake," because the stuffed shape resembled a well-fed belly.
The name eventually shifted to daifuku mochi, using the kanji 大福, which means "great luck" instead of "great belly." Today, daifuku is served during Japanese New Year and springtime celebrations as a symbol of good fortune. I love that a snack this delicious also brings luck.
Ingredients You'll Need
One of my favorite things about daifuku is how short the ingredient list is. Five items. That is it.
- Glutinous rice flour (shiratamako or mochiko). This is the foundation of your mochi dough. Shiratamako comes in coarser granules and produces a softer, stretchier result. Mochiko is a finer powder and more widely available at regular grocery stores. Either one works, but if you can find shiratamako, I recommend it. One thing to remember: regular rice flour will NOT work. It must be glutinous rice flour, sometimes labeled "sweet rice flour."
- Sugar (50 g, about 3 tablespoons). Granulated or caster sugar both work fine. The sugar is not just for sweetness. It helps the mochi stay soft and pliable even after it cools. Do not skip it.
- Water (150 ml, about ⅔ cup). Room temperature water. The ratio of water to flour matters for the right consistency, so measure carefully.
- Sweet red bean paste, anko (200 g, about ¾ cup). This is your filling. You can use koshian (smooth) or tsubuan (chunky with visible bean skins). More on that choice below. Store-bought is perfectly fine.
- Potato starch or cornstarch (½ cup). For generously dusting your work surface, your hands, and the finished daifuku to prevent sticking. Potato starch gives a slightly smoother finish, but cornstarch works just as well.
How to Make Daifuku
The process is straightforward, but timing matters. You want your filling pre-portioned and chilled before you start the mochi, because the dough needs to be shaped while it is still warm. I will walk you through each step.
Prepare the Filling
Scoop about 1 tablespoon (20 g) of red bean paste and roll it into a ball between your palms. Repeat until you have 10 balls.
Place them on a plate or small baking sheet lined with parchment paper and refrigerate while you make the mochi. Cold filling is much easier to handle and holds its shape inside the warm dough.
This step might feel fussy, but trust me. Pre-portioning your anko before the mochi is ready is non-negotiable. Once that dough is cooked, you are working against the clock as it cools and stiffens.
Make the Mochi Dough (Microwave Method)
In a microwave-safe bowl, whisk together 120 g glutinous rice flour and 50 g sugar. Add 150 ml water and stir until the mixture is smooth with no lumps.
Loosely cover the bowl with plastic wrap. Microwave on high for 1 minute.
Remove the bowl, stir the mixture with a wet spatula (wetting the spatula prevents the dough from sticking to it). The dough will look partially cooked and lumpy. That is fine.
Cover loosely again and microwave for 1 more minute. Stir well. Then microwave for a final 30 seconds.
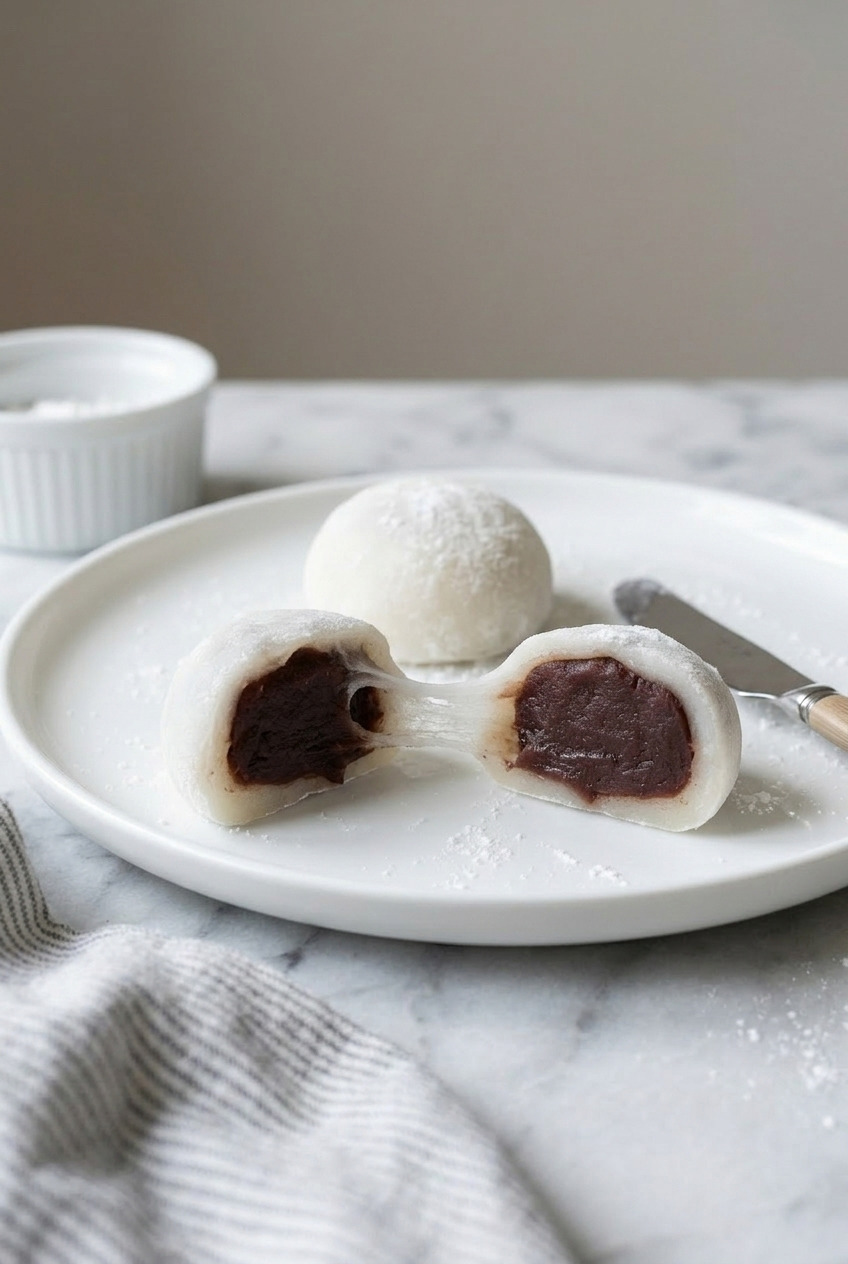
Here is how you know it is done: the mochi will change from bright white and opaque to slightly translucent and cream-colored. This color shift is your visual cue. If you still see white, chalky patches, give it another 20 seconds and stir again.
Make the Mochi Dough (Stovetop Steamer Method)
No microwave? No problem. You can steam the mochi instead.
Whisk together the glutinous rice flour, sugar, and water in a heat-safe bowl, the same way as the microwave method.
Set up a steamer and wrap the lid with a clean kitchen towel. This prevents condensation from dripping into your mochi and making it watery.
Place the bowl in the steamer basket, cover, and steam for 15 minutes. About halfway through, remove the lid and stir the mixture with a wet spatula. Cover again and finish steaming.
The same visual rule applies: you are looking for that shift from white to translucent. The stovetop method takes longer but produces the same result. I use the microwave on weeknights and the steamer when I have a bit more time.
Shape and Fill the Daifuku
Generously dust your work surface with potato starch or cornstarch. Use a wet spatula to scrape the hot mochi out of the bowl and onto the starch.
Sprinkle more starch over the top of the mochi. Let it cool for 2 to 3 minutes, just enough that you can handle it without burning your fingers, but not so long that it stiffens up.
Dust your hands well with starch. Divide the mochi into 10 equal pieces using a bench scraper or knife (dust the blade with starch too).
Pick up one piece and flatten it gently in your palm into a disc about 3 inches (8 cm) wide. The center should be slightly thicker than the edges.
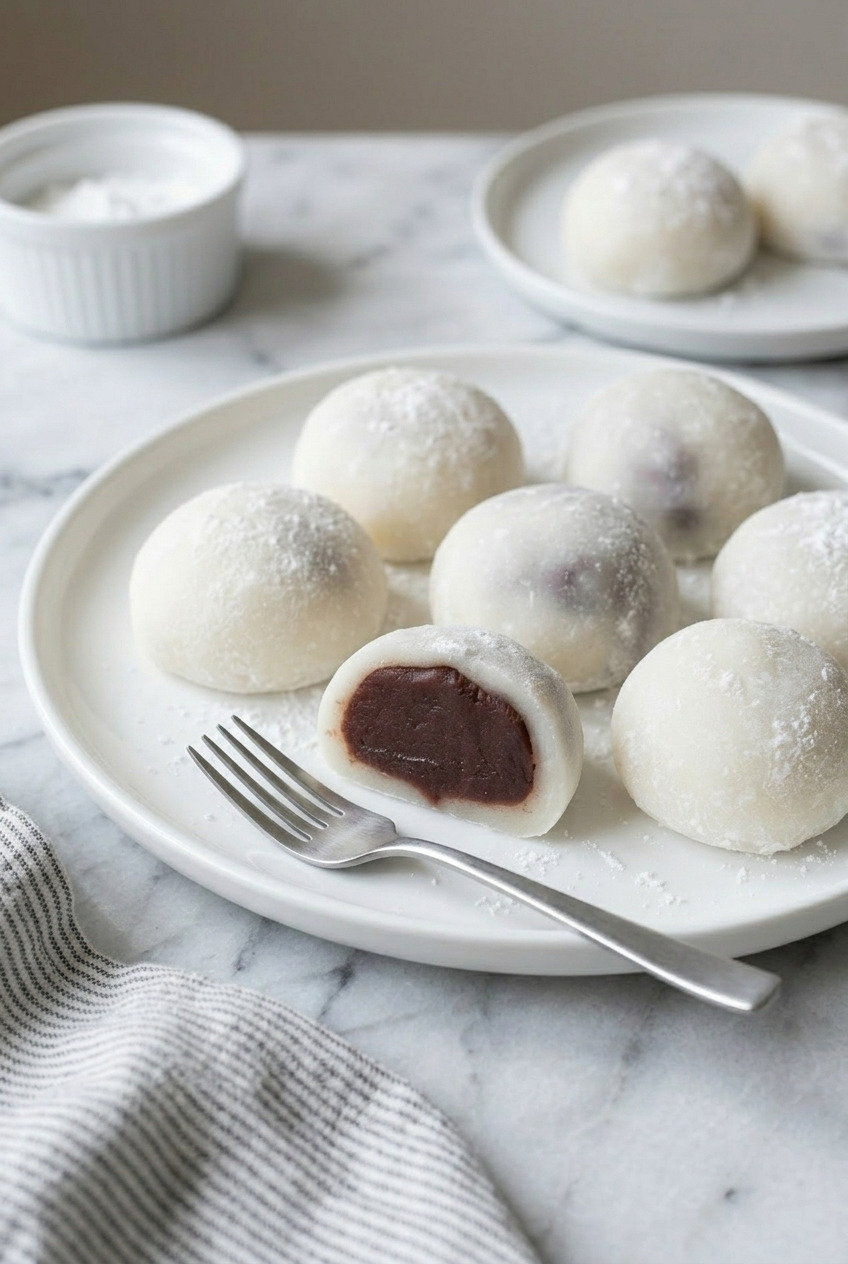
Place a chilled anko ball in the center. Pull the edges of the mochi up and around the filling, stretching gently. Pinch all the edges together at the top to seal.
Place the daifuku seam side down on a starch-dusted surface. The mochi is very forgiving. If it tears, just pinch the hole closed. If it sticks, add more starch.
Repeat with the remaining pieces. You will get faster as you go. My first few are always a little rustic-looking, and the last few are much smoother. All of them taste the same.
Tips for Perfect Daifuku
- Dust everything with starch. Your surface, your hands, your knife, even the plate where the finished daifuku will rest. Mochi is extremely sticky. Starch is your best friend here.
- Watch for the color change. The shift from bright white to translucent cream tells you the mochi is fully cooked. Undercooked mochi will have a grainy, chalky texture.
- Work while the mochi is still warm. As the dough cools, it forms a skin and becomes harder to stretch. If it starts getting stiff, you can microwave it for 10 seconds to soften it back up.
- Use wet utensils for hot mochi. Before the dusting step, a wet spatula and wet hands will keep the mochi from bonding to everything it touches.
- Pre-portion ALL your filling first. I cannot stress this enough. Once the mochi is ready, you need to move quickly. Having your anko balls chilled and waiting means you can focus on shaping.
- Pinch tears closed. Mochi is incredibly forgiving. A small tear or thin spot? Just pinch it together with starch-dusted fingers. Nobody will know.
Koshian vs. Tsubuan: Choosing Your Red Bean Paste
This is one of those delightful personal preference decisions that can spark a lively debate in any Japanese household.
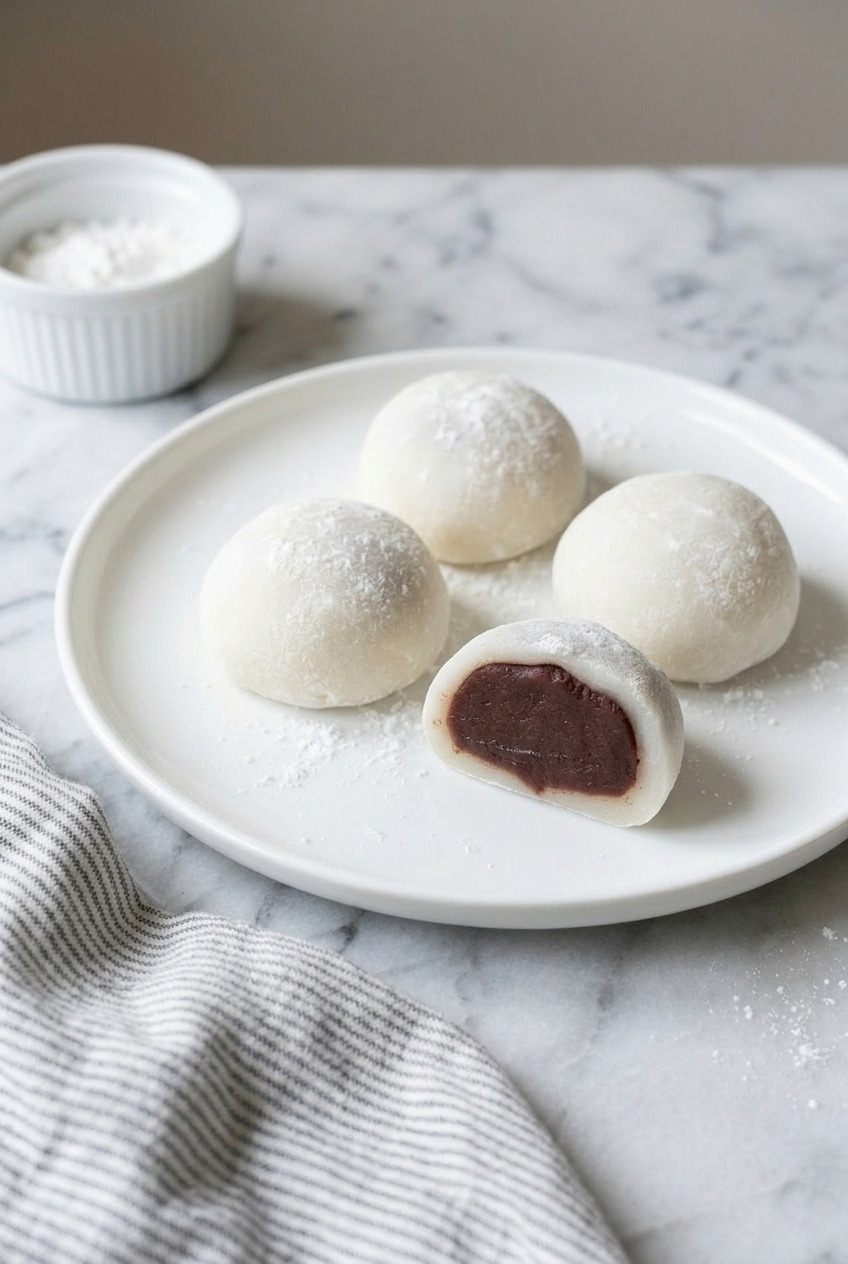
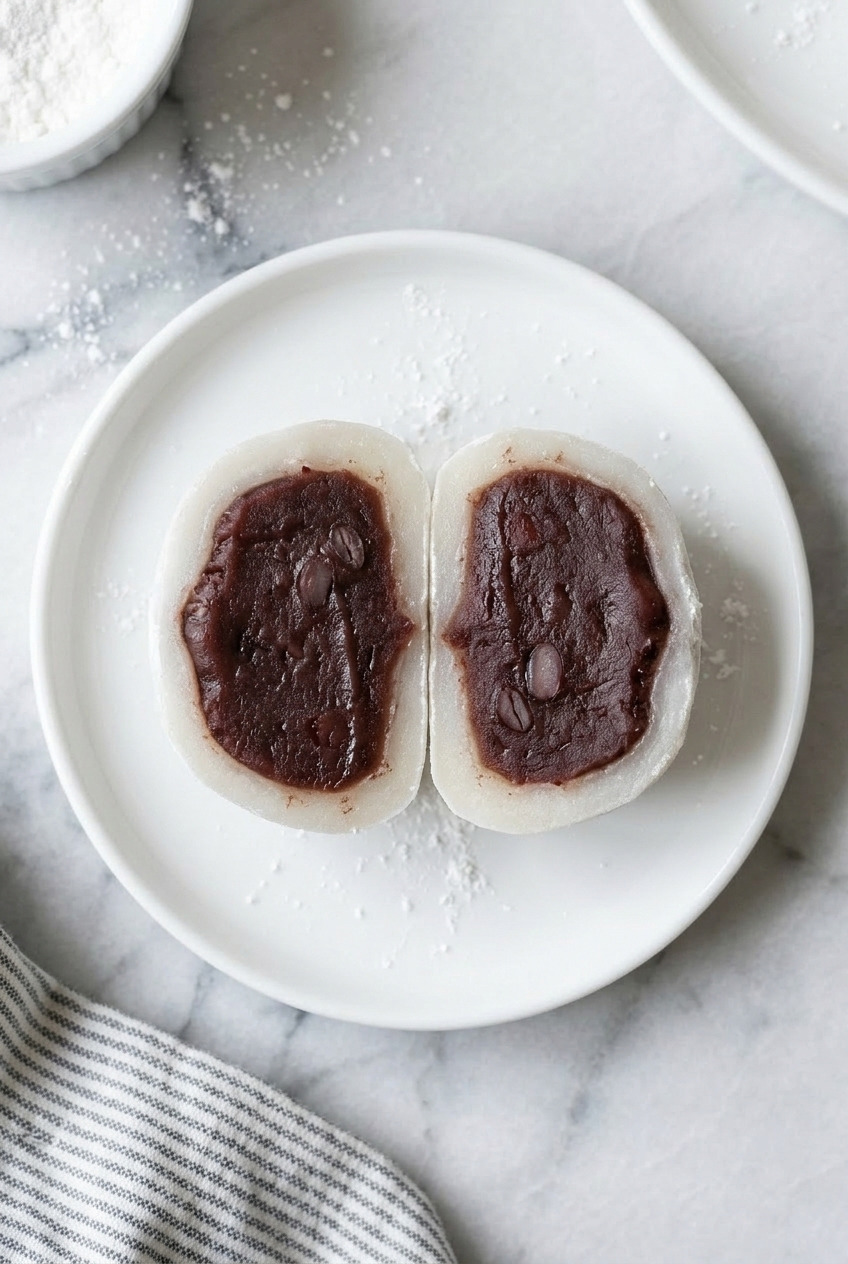
Koshian is smooth, fine red bean paste that has been strained to remove all the skins. It has a velvety, uniform texture and a refined sweetness. If you like your fillings silky and seamless, this is your pick.
Tsubuan is chunky red bean paste with visible pieces of azuki bean skin still in it. It has more texture and earthiness, and you can really taste the individual beans. I personally lean toward tsubuan. I like that little bit of bite in contrast with the smooth mochi.
Either type works perfectly for daifuku. Store-bought anko from any Asian grocery store is excellent. Look for it in cans or vacuum-sealed pouches near the baking aisle. If you are feeling adventurous, homemade anko made from dried azuki beans, sugar, and a pinch of salt is a rewarding weekend project.
Daifuku Variations and Filling Ideas
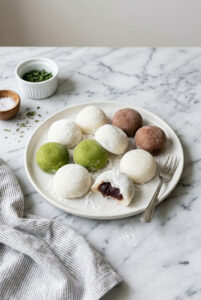
Classic red bean daifuku is just the beginning. Once you have the mochi-making process down, you can stuff these little pillows with almost anything. Here are some of my favorites.
- Ichigo daifuku (strawberry). The most popular variation. A whole strawberry is wrapped in a thin layer of anko, then wrapped in mochi. The tart berry, sweet bean paste, and chewy mochi create the most wonderful balance. Best eaten same day since the berry juices will start to leak.
- Matcha daifuku. Add 1 to 2 teaspoons of matcha powder to the mochi dough for a pale green color and a subtle, earthy bitterness that pairs beautifully with sweet anko.
- Yomogi daifuku. Traditional mugwort-flavored mochi with a gorgeous deep green color and a slightly herbal, grassy flavor. A springtime classic.
- Mochi ice cream. Wrap thin discs of mochi around small scoops of frozen ice cream. Work fast and keep everything cold. Green tea, black sesame, and strawberry are crowd pleasers.
- White bean paste (shiroan) daifuku. A milder, more delicate filling made from lima beans or butter beans. Less sweet than red bean, with a creamy, almost vanilla-like flavor.
- Fresh cream daifuku. Whipped cream and fresh fruit (often strawberry or mango) wrapped in mochi. Light, airy, and dangerously easy to eat five in one sitting.
- Nutella or chocolate ganache daifuku. A modern fusion twist. Freeze small scoops of Nutella or ganache before wrapping so they hold their shape. Rich, indulgent, and always a hit with the kids.
- Peanut butter daifuku. Use about 1 tablespoon of peanut butter per piece, frozen first so it is firm enough to wrap. The salt and the sweetness dance on your tongue.
How to Store Daifuku
Daifuku is best eaten the same day you make it. Fresh mochi has that perfect soft, pillowy chew that starts to fade as the hours pass.
- Room temperature (same day). Keep your daifuku in an airtight container at room temperature for up to 24 hours. This is the ideal way to enjoy them.
- Refrigerator (up to 2 days). Mochi hardens in the cold, so if you must refrigerate, wrap the container in a thick kitchen towel to insulate it. The towel keeps the daifuku cool without letting them get too cold. Eat within 2 days.
- Freezer (up to 1 month). Coat each piece in extra starch so they do not stick together and store in a zip-lock bag. To thaw, leave them at room temperature for about 1 hour, or microwave in 10-second bursts until soft. Best within 1 month for the freshest taste.
- Daifuku with fresh fruit. If your daifuku contains strawberries or other fresh fruit, eat them the same day. The fruit releases juices over time, and the mochi will get soggy.
Recipe
Daifuku (Japanese Stuffed Mochi)
Ingredients
For the Mochi
- 120 g shiratamako (glutinous rice flour) or mochiko; do not use regular rice flour
- 50 g sugar granulated or caster
- 150 ml water room temperature
For the Filling and Dusting
- 200 g sweet red bean paste (anko) koshian (smooth) or tsubuan (chunky)
- ½ cup potato starch or cornstarch for dusting
Instructions
Prepare the Filling
- Scoop about 1 tablespoon (20 g) of red bean paste and roll it into a ball. Repeat to make 10 balls.
- Place the anko balls on a parchment-lined plate and refrigerate while you prepare the mochi.
Make the Mochi Dough (Microwave)
- In a microwave-safe bowl, whisk together the glutinous rice flour and sugar. Add the water and stir until smooth.
- Loosely cover the bowl with plastic wrap. Microwave on high for 1 minute.
- Remove and stir with a wet spatula. Cover loosely and microwave for 1 more minute.
- Stir again, cover, and microwave for a final 30 seconds. The mochi should change from bright white to slightly translucent and cream-colored. If white patches remain, microwave in 20-second intervals until translucent.
Make the Mochi Dough (Stovetop Alternative)
- Whisk together the flour, sugar, and water in a heat-safe bowl. Set up a steamer and wrap the lid with a clean kitchen towel to prevent condensation from dripping in.
- Place the bowl in the steamer basket, cover, and steam for 15 minutes. Stir with a wet spatula halfway through. The mochi is done when it turns translucent.
Shape and Fill
- Generously dust your work surface with potato starch or cornstarch. Use a wet spatula to transfer the hot mochi onto the starch. Sprinkle more starch on top and let cool for 2 to 3 minutes.
- Dust your hands with starch and divide the mochi into 10 equal pieces using a starch-dusted knife or bench scraper.
- Flatten one piece into a 3-inch (8 cm) disc in your palm, keeping the center slightly thicker than the edges.
- Place a chilled anko ball in the center. Pull the mochi edges up and around the filling, stretching gently, then pinch all edges together at the top to seal.
- Place seam side down on a starch-dusted surface. Repeat with remaining pieces.
Notes
- Flour choice: Shiratamako produces a softer, stretchier mochi. Mochiko works but gives a slightly firmer texture. Regular rice flour will not work.
- Keep everything dusted: Mochi is extremely sticky. Dust your hands, surface, knife, and finished daifuku generously with starch.
- Work while warm: Shape the mochi while it is still warm and pliable. If it stiffens, microwave for 10 seconds to soften.
- Color change = done: The mochi is cooked when it shifts from bright white to translucent cream. Undercooked mochi will taste grainy.
- Storage: Best eaten same day. Room temperature in airtight container up to 24 hours. Refrigerate up to 2 days (wrap container in a towel). Freeze up to 1 month coated in extra starch.


Leave a Reply