Over the last few weeks, we have talked at great length about four of the five classic French mother sauces. We have covered tomato sauce, béchamel, velouté, and hollandaise. We have covered what they are, how to make them and different sauces you can make from them.
Today, in our fifth and final entry of the classic mother sauce series we are looking at Espagnole. Just like with the other mother sauces we will be looking at what it is, how to make it, how to use it, and other sauces that can be made from it.
Of all the five mother sauces Espagnole maybe the most important. It absolutely has the most derivative sauces of all the mothers. More importantly, it is by far the most versatile of all the mother sauces.
Now, you may have never heard of Espagnole before. That’s fine. My guess is that you have likely eaten it. Possibly made it. And by the time you’re done reading this post you will understand why for my money I think it’s the most important of all the classic mother sauces.
What is Espagnole?
Sometimes referred to as brown sauce, Espagnole is made by bolstering the flavour of a brown stock and thickening it. We’ll get into that more later.
If you have never heard of Espagnole sauce don’t beat yourself up. Unlike it’s more common mothers, Espagnole isn’t generally used on it’s own. What you likely have heard of is Demi Glace or demi for short.
Demi
Demi is traditionally made by combining equal parts Espagnole and brown stock and reducing the volume by half through simmering. Demi literally means half in French. Glace can mean a lot of things but in this context it means glaze. So demi glace means half glaze. Make sense?
Very often what you will find labelled as demi glace on menus is actually just Espagnole. Even if the sauce isn’t a true Espagnole it is generally brown stock bolstered and thickend through reduction rather than a roux. It would almost be like a hybrid between Espagnole and Demi Glace.
Today, a brown sauce can be a lot of things. It can be the classic espagnole that we’re talking about. It can be demi glace. The term can even cover pan sauces which I’ll get into later.
Making Brown Stock
Espagnole maybe be the mother sauce but brown stock is where it all starts.
Brown stock is made by roasting veal or beef bones until they get a rich, deep brown colour. Then simmering the bones with heavily roasted onions, carrots, and celery. Often flavourings like parsley stems and bay leaves will be added as well.
All of this is slowly cooked together for an extended period of time. At least 2-3 hours but in can be much longer depending on the size of the bones. The idea is to extract as much flavour and gelatin from the bones as possible.
After the stock has reached its peek flavour the solids are strained out and the liquid is left to cool in the fridge over night. In the morning there will be a layer of fat on the surface of the stock which is skimmed off. This leaves only the rich brown stock remaining.
This brown stock can be used to make Espagnole and demi. It can also be used as the base of soups, braises, and pan sauces or to cook rice, potatoes, or vegetables.
Making Espagnole
To make Espagnole we essentially repeat the the process of simmering and adding flavour. The difference is that this time we don’t use bones. Generally, meat trim will be roasted and added to the stock to add a more intense meat flavour.
Other ingredients that will generally be added to bolster the beef stock into Espagnole are more roasted vegetables like onions, carrots, and celery. Mushrooms are also generally added, as is tomato paste. It is also common to add red wine, port, or sherry.
After the stock has been simmered with the roasted vegetables and meat trim it is once again strained to remove the solids. To the remaining liquid a roux (equal parts butter and flour mixed together) is added to thicken the sauce.
Pan Sauces
A pan sauce is exactly what it sounds like. It is a sauce made in the pan that a piece of meat was cooked in. So, if you sear a steak in a pan, you can use that pan along with any stuck bits on the bottom of it to make a sauce.
To make a pan sauce remove the protein from the pan. Pour off any excess oil. Add 1-2 tbsp of butter and 1-2 tbsp chopped shallot or onion. Cook the shallot or onion until it starts to turn translucent. Deglaze the pan with red wine, port, or sherry and reduce by half. Now add a bit of Espagnole, or beef stock. Reduce. Adjust seasoning, and if desired add a touch of cream.
Derivative Sauces
Bigarde: To make the bigarade sauce caramelize sugar and to it add vinegar, orange and lemon juice. Add this to Espagnole and garnish with lemon and orange zest. Serve with duck and other game birds.
Bordelaise: This is red wine, shallots, peppercorns, thyme, and bay leaf simmered together and added to Espagnole. This sauce is finished with a little bit of demi glace, lemon juice, and sliced bone marrow. This sauce works very well with grilled meats and roasted fish.
Bourguignonne: Simmer red wine, shallots, thyme, parsley, bay leaf, and mushrooms together and add to Espagnole. Finish with whole butter and a pinch of cayenne pepper. Serve with eggs or beef.
Robert: The sauce is onions, butter, white wine added to Espagnole. The sauce is finished with a pinch of sugar, and English mustard. Serve it with grilled pork.
Financière: Add Maderia wine and truffle to Espagnole. Serve with beef.
I could honestly go on and on and on as there are loads of sauces made with Espagnole. I think the above list gives you an idea of it’s versatility.
Conclusion
This concludes our five week series on the classic French mother sauces. I hope that you have enjoyed this series but more importantly I hope that you have learned from it.
Like anything, being a good cook is about knowing the fundamentals. Know the basics and you can create incredible things. Now, you can say that you know the five classic French mother sauces. Hopefully, you will even use them.
Over the last three weeks, I have talked about tomato sauce, béchamel, and veloute. Those sauces are three of the five mother sauces of classic French cooking. Today, we are going to talk about the fourth and most highly regarded. Today we are talking about…
How To Make Hollandaise Sauce
Hollandaise sauce has a reputation as being very difficult and temperamental. It’s the type of thing that home cooks often steer clear of because of the perceived level of skill required to make it. But, what if I told you that all of the hype about hollandaise is just that, hype. Just propaganda propagated by big hollandaise to keep the little guy down. Okay, maybe I made that up, but it’s not that far off.
Today, I am going to take you through an in-depth guide on how to make hollandaise sauce. We are going to look at all the things that can go wrong, how to prevent them, and how to fix them if you can. I hope that you come out the other end of this post, ready to make your first batch of artery-clogging yellow sauce. If you already know how to make hollandaise, you may just learn a thing or two as well. Let’s get into it.
What is Hollandaise Sauce?
I think that it might be a good idea to answer this question before we get too deep into this post. So, what is hollandaise sauce?
Hollandaise is a warm, egg-based sauce. It is an emulsification of fat and acid facilitated by a string of proteins found in egg yolk known as lecithin. Sound complicated? It isn’t. All that means is that an acid like lemon juice is mixed with egg yolks, heated, and then melted, clarified butter is whisked into the mixture. Does that sound less complicated?
How do you make Hollandaise Sauce?
Well, like I just said, you mix egg yolk and acid, heat them up and then whisk in melted clarified butter. Let’s break this down a little bit.
Clarified Butter
Clarified butter is just butterfat. Butter is melted, which causes a separation of milk solids and fat. The solids form two layers, one on top of the fat, and one below. The top layer is skimmed off, revealing the golden liquid below the surface. Once all of the top milk solid layers has been skimmed off and discarded, the butterfat is separated from the bottom layer of milk solids. Ideally, all you should be left with is the clear, golden butterfat.
Why clarify butter?
We clarify butter for a few reasons. The majority of the salt content of the butter is removed with the solids, as is the water content. What you are left with is pure butterfat, which has a higher smoking point than regular butter and longer shelf life. We use clarified butter for Hollandaise sauce because it gives us a better-textured sauce. It also allows us to have more control over the salt and water content of our sauce.
Acid
The acid most commonly used acid for hollandaise sauce is lemon juice. However, it is not uncommon to use vinegar. When vinegar is used, it is often in the form of a flavoured reduction. Vinegar is simmered with peppercorns, bay leaf, and maybe cloves. The solids will be strained out, and the flavoured vinegar will be used as the acid in the sauce.
It is also not uncommon to use another citrus as the acid in hollandaise sauce. Grapefruit surprisingly makes a delicious hollandaise.
The acid in hollandaise sauce has two purposes. First of all, it is there for flavour. The sauce would be kind of bland without it. The second purpose is that the acidity cuts through the intense richness of the sauce and makes it palatable. Without the acid, hollandaise would be too rich. It wouldn’t be enjoyable to eat.
Egg yolks
Egg yolks are the only other ingredient necessary to make hollandaise. The egg yolks are also multipurpose. First and foremost, they bind the sauce. The lecithin in the egg yolks is what holds the emulsification of the oil and the acid. Without the egg yolks, you would just have a very loose vinaigrette.
The second purpose of the egg yolks is texture. They are the main reason hollandaise has the velvety texture that it does.
Procedure
The procedure for making hollandaise is honestly as basic as it can get. Literally, all you have to do is mix the acid with the egg yolks and then slowly heat the mixture in a double boiler. A double boiler is just a bowl set over a pot of barely simmering water. It’s important that the bowl not touch the water.
Once the egg yolk and acid mixture are set over the simmering water, it is important not to stop whisking. You don’t have to whisk vigorously but you do have to whisk constantly. The risk here is that the yolk will cook to the bottom and sides of the bowl. This will lead to a grainy textured hollandaise. Unpleasant to say the least. It’s also important that the water not be boiling as the yolks will heat too quickly and you will have scrambled eggs which does not make a good hollandaise sauce.
The egg yolks are being cooked for two reasons, to thicken them which will lead to a thicker consistency of the final sauce. The second reason is to pasteurize the egg yolks to make them safe to eat.
The egg yolks are done cooking when they are thick and reach the ribbon stage. That is when you lift the whisk out of the egg yolks and the yolk that falls back into the bowl forms almost like a ribbon and sits of the surface for a second. Now, it’s time to add the butter.
I prefer to add the butter to my hollandaise when it is off the heat which is a slightly safer method. The key to this is that the butter has to be hot.
I remove the bowl from the double boiler and a few drops at a time I start to whisk in the butter. Once those first few drops have been incorporated I whisk in a few more drops. Essentially, this process just keeps repeating until all the butter has been incorporated. You may need to add a little more lemon juice or water to your sauce to thin it out so you can add the entirety of the butter. What’s interesting, is the more butter you add the thicker your sauce will get.
Once you get your sauce to the desired consistency, taste it, season it with salt and pepper, and cover it with plastic wrap until you are ready to use it. Ideally, you want to use the sauce right away. It can be held at room temperature, covered for about an hour. After that though, it isn’t really safe to eat. It isn’t something you want to put in the fridge and use over a couple of days either. It doesn’t hold well and it certainly doesn’t reheat well. I suggest making only what you are going to use right away.
What can go wrong?
There are really only two things that can go wrong when making hollandaise sauce.
The first thing is that the egg yolks get too hot and solidify. This can occur only on the bottom and sides of the bowl. Or, if the bowl gets really hot the whole batch of egg yolks can cook. If this happens the only solution is to start again. There is no coming back from scrambled egg yolks.
To prevent the egg yolks from getting too hot make sure the bowl isn’t touching the water in the pot below. Make sure the water in the pot isn’t boiling and is actually just barely simmering. And finally, don’t stop stirring. Keep the egg yolks moving and watch closely. You want the egg yolks to coagulate but there is only a few degrees difference in temperature between slightly coagulated egg yolk and rock hard egg yolks. So watch carefully.
The second thing that can wrong is that the butter is added too quickly into the sauce and it separates. A hollandaise that has separated looks pretty disgusting. Like curdled milk. However, if this happens it isn’t the end of the world or even the end of your sauce. It can be saved.
To fix a broken sauce start with a clean bowl and a few fresh egg yolks. Put the bowl over the heat and cook the egg yolks just like you did with the ones in the split sauce. Once the egg yolks have begun to thicken start incorporating the broken sauce as though it was the butter you originally added. What I mean by that is slowly add the broken sauce a few drops at a time, whisk to incorporate and then add more. Do this until all of the broken sauce has been incorporated. Now, you can finish adding the rest of your clarified butter if needed.
In all honesty, it is kind of a pain in the ass to have to fix your sauce. This is especially true if you are hungry and just want to eat. The real solution is not to let your sauce break at all.
Ratios
For hollandaise sauce, I usually stick to 1/4 cup of clarified butter and 1-2 tsp of lemon juice for every egg yolk. To that, I may need to add 1-2 tsp of water as well. For Eggs Benedict for two use 2 egg yolks and 1/2 cup of clarified butter.
Derivatives
Béarnaise sauce –
By far the most popular hollandaise derivative is béarnaise sauce. It is a classic steak sauce and with good reason. To make this start the hollandaise the same way you normally would except instead of using lemon juice make a vinegar reduction with shallot and tarragon. The final sauce may also be garnished with fresh tarragon.
Choron –
Choron is a mixture of béarnaise sauce and tomato sauce. Commonly served on grilled or roasted meat and poultry.
Maltaise –
The addition of blood orange juice and segments makes hollandaise a Maltaise sauce. Very, very good on asparagus.
Mousseline –
Hollandaise mixed with whipped cream. A lighter version of hollandaise great on fish and asparagus.
Paloise –
Similar to béarnaise sauce except mint is used rather than tarragon. Good with lamb.
Royal –
A really old school sauce made of equal parts velouté, hollandaise, and whipped cream. Traditionally served over white meats and poached fish.
Conclusion
It is my sincere hope that if you have never made hollandaise sauce before that this post has given you the confidence to give it a shot. At the very least I hope that you now see that hollandaise is not this mystical sauce that only true masters can make.
If you have been paying attention you may have noticed that the process for making hollandaise is almost identical to making mayonnaise and even Caesar salad dressing. The only real difference is the temperature. You may also have realized the principles for making hollandaise are the same principles for making vinaigrettes as well.
The idea here is that by learning one technique you are actually learning how to make literally thousands of things whether you realize it or not. So, if you have even made a vinaigrette, you can make a hollandaise sauce. If you have ever made hollandaise sauce you can make mayonnaise. If you can make mayonnaise you can make caesar dressing. Get it? I hope so.
Next Wednesday we will be looking into the fifth and final mother sauce. I hope that you are looking forward to it as much as I am.
Last Wednesday, I wrote about how to make a bechamel sauce, and it’s derivatives. The week before, I talked about tomato sauce. Those two sauces have one thing in common. In French cooking, they are both considered mother sauces. What that means is that they are “base” sauces. Sauces that, with the addition of other ingredients, become new sauces. In French cooking, there are five of those mother sauces. Today we are going to talk about the third sauce in the group; velouté.
You may have never heard of a velouté before. Whether you have heard of it or not, I can almost guarantee that you have made one previously. You definitely have eaten a velouté before. So then, what is a velouté? Well, that is what we’re going to talk about today.
How To Make Velouté and Its Derivative Sauces
What is velouté?
In French velouté means velvety, soft, and smooth on the palate. That should tell you what the texture of a velouté should be.
If you remember from last week, a bechamel sauce is milk thickened with a roux (equal parts flour and butter). A velouté is very similar, with one main difference. Rather than thickened milk, a velouté is a thickened white stock. Let’s break that down a bit.
A stock is just water flavoured with meat bones and vegetables. There are two main types of stock: white and brown. A white stock is made by adding raw bones to a pot with carrot, onion, and celery, and simmering it for a long period of time. This yields a clear, yellow, or light amber stock. No matter what colour the stock actually is one made with this technique is a white stock.
A brown stock is made the same way as a white stock with one additional step. Prior to being simmered the bones and often the vegetables will be roasted in the oven. This gives the stock a deep brown colour and a more intense flavour. It is also common to add tomato paste to brown stocks.
This may seem like unnecessary information. However, it is important to make the distinction between white and brown stock and here is why. A white stock thickened with a roux is a velouté. A brown stock thickened with a roux is an Espagnole sauce which is its own mother sauce. We will get into that more next week.
How to make a velouté.
Typically when making a velouté additional flavourings will be added. These may include carrots, onion and celery or herbs. Once the velouté is finished, these will be strained out and you will be left with a silky, smooth sauce.
Step 1
If you are adding additional mirepoix (mirepoix = carrots, onion, and celery) sweat it in a pot with a bit of butter. Sweating vegetable means to cook them in a bit of fat over moderate heat. The purpose is to draw moisture out of the vegetables. The intent is not to brown the vegetables.
Step 2
The second step in making a velouté is to make the roux. Now, if you did sweat mirepoix you will already have fat in the pot. You may need to add more. A roux is equal parts flour and fat (typically butter). If you don’t have enough fat in the pot add some more and then sprinkle the flour over the contents.
Stir the flour and butter together until all of the flour has been incorporated and cook for two minutes stirring constantly.
Step 3
Once the roux is ready add the stock and stir to fully distribute the roux. You will need to turn the heat down to low and simmer the sauce for twenty minutes. If the heat is too high the roux will stick to the bottom of the pot and burn. You will also have to stir the velouté every few minutes. If you would like to add herbs like thyme or bay leaf now would be the time to do that so the flavour cooks into the sauce.
Step 4
Once the sauce has simmered and has the desired consistency it’s time to taste it. You are checking for two things. You want to make sure the seasoning is good. If needed, add some salt and pepper. Some people prefer to add white pepper as not to get black flakes in their sauce. I don’t actually care but I’ll leave that up to you.
The second thing you are tasting for is flour. If the velouté hasn’t been cooked long enough you may be able to taste raw flour. If this is the case, put the pot back on the heat and cook for a few more minutes.
Step 5
The fifth and final step in making a velouté is to strain it through a fine sieve or cheesecloth. As I said earlier, the word velouté means silky and smooth. A chunky velouté just won’t do. So, strain it.
Uses
Now you have a delicious velouté, but what are you going to do with it? What was the point?
As I said in the intro to this post, you have likely eaten and even made velouté and not even known it. So, what did I mean? Well, velouté is a fancy word for a very basic thing; gravy. If you have ever eaten or made gravy at Thanksgiving or Christmas, you have had velouté. Stew is a velouté. There are lots of other sauces and soups that are veloutés as well. This brings us to the derivatives of velouté.
Derivatives
Allemande –
With the addition of mushrooms, egg yolks, and lemon to a basic velouté you get allemande sauce. This is great over poultry. The egg yolks are whisked into the hot sauce to give it a richer more decadent texture and flavour. The lemon acts to brighten the sauce and the mushrooms add flavour and texture.
This is essentially the high-end version of putting cream of mushroom soup on chicken or pork chops.
Aurore –
The addition of tomato purée makes velotué Aurore sauce. This would typically be served with white meat, poultry and even eggs.
Bercy –
Bercy sauce is velouté with the addition of shallots, white wine, fish trim, butter and chopped parsley. This makes a great sauce for any kind of fish dish.
Suprême –
Suprême sauce is made by adding mushrooms, cream and butter to a velouté. This is a classic sauce for chicken. The butter is whisked in at the last minute before serving to give the sauce a velvety texture.
Diplomate –
This sauce is velouté with fish trim, lobster, butter, and truffle and typically served over a whole roasted or poached fish.
Conclusion
The above list is not a complete representation of what can be made with velouté. It is simply a few of the many possibilities. I hope that the derivative sauces above give you an idea of how versatile a velouté can be. Also, how something simple like a stock thickened with a roux can create some of the most decadent and delicious sauces in French cooking.
Come back next Wednesday when I will be covering our fourth mother sauce, Espanagloe.
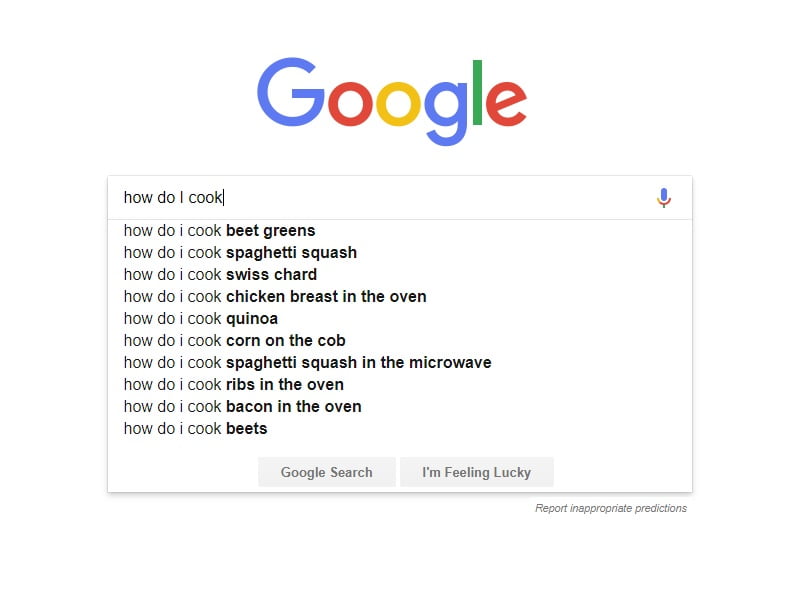
The time has come once again for a google autocomplete “how do you cook…” post. What is that you ask? Well, very simply I went to the Google homepage and typed “how do you cook” into the search bar. Google suggested ten options to finish my search quarry. I picked five of those ten to answer. So, without further ado here are my answers to…
Google Autocomplete “How Do You Cook…”
How do you cook pumpkin seeds?
Okay, the first autocomplete answer that I am going to talk about is “how do you cook pumpkin seeds?”
Pumpkin seeds are best when toasted in the oven at 350°F for about 35-40 minutes. It is very important that you clean us much pumpkin gunk off of the pumpkin seeds as you can before you roast them. Any residual pumpkin gunk will likely burn.
I also like to toss the seeds in a little bit of olive oil, salt and pepper before I roast them but this isn’t mandatory.
How do you cook bok choy?
Bok choy is a type of Chinese cabbage that has been gaining in popularity in North America over the last 5 – 10 years.
Bok choy is very versatile and very delicious. It can be sliced thin and added to a stir-fry. It is great steamed or sauteed as well either whole or cut into pieces. I really like bok choy steamed and then tossed with butter, salt and pepper and served with steak.
Bok choy is also really good to be cut up and thrown in soups, stews or braises. Next time you see it in the grocery store (most of them have it now) think of all the things you can do with it.
How do you cook beets?
Beets are delicious. There are no two ways about it. They are also pretty good for you.
There are three main ways to cook beets. You can boil them, steam them, or roast them. Any of these cooking techniques work with either whole beets or cut beets.
To boil whole beets first cut off the beet greens if they are attached leaving a 1-inch piece of stem still attached to the beet. This will prevent excess bleeding. Put the beets in a pot and cover with water by about 2 inches. Add salt to the water and cook for 20-40 minutes depending on the size of the beets. Let the beets cool slightly, cut the top and bottom off and then rub with either a clean dish towel or paper towel. This will easily pull the skin off the beets.
To roast, beets wash and dry them. Toss them in a bit of oil, and put them in a covered roasting pan. Roast the beets in a 400°F oven for about 45 minutes to one hour or until they are tender when poked.
To steam beets, follow the instructions for boiling but put the beets in a steamer and cook until tender.
How do you cook asparagus?
Asparagus is another one of those versatile vegetables. It can be steamed, boiled, sauteed, roasted or even grilled.
No matter how you are cooking asparagus you should first break the ends off. Grab the bottom of the asparagus stock and the middle of the stock. Bend the asparagus until the breaks. That breaking point is where the asparagus becomes tender. Below that breaking point is woody and not very good to eat. Discard the bottom and save the rest. Do this with all of the asparaguses.
To boil asparagus bring a pot a salted water to a boil. Add the asparagus and cook for three minutes.
To steam asparagus, bring some water to a boil put the asparagus in a steamer above the boiling water and cook for 2-3 minutes.
Sauteeing asparagus is easily done by first heating a pan over medium heat, adding butter or oil and then sauteeing the asparagus for 4-5 minutes.
For roasting asparagus first toss it in oil and salt and pepper. Spread the asparagus out onto a baking sheet and roast in a 400°F oven for 15 minutes.
To grill asparagus, prepare it the same way as for roasting but then just cook it on a grill for 4-5 minutes turning it once or twice.
No matter how you cook asparagus it is always good to finish it with salt and pepper, butter or olive oil, and lemon juice…and maybe some parmesan cheese.
How do you cook eggplant?
Our final Google Autocomplete “how do you cook” question today is about eggplant. How do you cook eggplant? Well, just like anything, there are a few different ways.
My favourite way to cook eggplant is also the easiest. Take a whole eggplant and put it on a hot grill or in a hot oven. Cook it for about 40 minutes, turning every once in a while. The insides of the eggplant will essentially melt. Once it’s cooked, open the eggplant scrap the flesh into a bowl, season with salt, pepper, lemon juice, and olive oil and scoop it up with pita bread. So delicious!
Another way to cook eggplant is to first salt it. Slice the eggplant into rounds, season on both sides with salt and let sit for 30 minutes. Rinse the eggplant and pat dry. Now you can bread and fry the eggplant, or even roast it.
The salt removes a lot of moisture giving the cooked eggplant a firm texture. It also takes away some bitterness which is commonly associated with eggplant.
The final way that I like to cook eggplant is to peel it, cube it, toss it with salt, pepper, and olive oil and roast in a 375°f oven for 25-30 minutes.
Last Friday I did a post all about lasagna. In that post, I briefly talked about bechamel and how to make it. Today, I want to look more deeply into bechamel. I am going to give a more in-depth recipe and process and talk about some of the derivative sauces you can make with a few simple additions to the recipe. Let’s jump into it.
What is Bechamel?
Bechamel is a white sauce made with milk (sometimes cream) thickened with a roux. In French cooking, it is one of the five classic mother sauces. A mother sauce is a base out of which many other sauces can be made. We will talk about some of the sauces that can be made with bechamel shortly.
Don’t let the fancy name fool you. It is not nearly as intimidating as it seems. As I said in the lasagna post, it is more than likely that you have made bechamel before and didn’t know it.
First things first let’s talk about pepper. A lot of people like to use white pepper in their bechamel so they don’t get the black specks you get with black pepper. I happen to hate white pepper. I find it smells and tastes like a horse barn. I also don’t mind the black specks in my white sauce. I’ll leave it up to you whether you use white or black pepper.
It is very easy for the roux to stick to the bottom of the pan and burn as the bechamel is simmering. There are a few ways to help prevent this.
Number one is to use a heavy bottom pot.
Number two is to stir the sauce regularly making sure to scrape the bottom of the pot. If you do scrape the bottom of the pot and notice brown or black bits floating in your bechamel, strain it right away and put it in a new pot. Taste it before you continue cooking because it may already taste burnt. In that case, you have to start over.
The third and probably safest option is to make the roux separately and add it after the milk has already been heated. In this case, you would simply cook the butter and flour together in a separate pot. The milk would be added to the softened onions and heated. At this point, the roux would be whisked in. You will still have to be vigilant in making sure the roux doesn’t stick to the bottom of the pot, but this way is safer if that is your concern.
Derivative Sauces
From that basic bechamel recipe above many other sauces can be made. Below I am going to name the sauce and list what ingredients need to be added to make it. All the below additions are based on the above recipe. I should say that the sauces I’m about to list are very old school. You will likely only ever use one, maybe two of them.
Bohemienne
The simple addition of a tsp or two of tarragon to the bechamel makes it a bohemienne sauce. This is a sauce that is traditionally served cold with cold fish or poached salmon.
Cardinal
The additions of truffles and lobster make a Cardinal sauce. How much lobster and truffles do you add? Until you can’t add any more. This sauce is about decadence, not moderation. This sauce would typically be served over fish, lobster and truffles. That’s right lobster and truffles on lobster and truffles.
Ecossaise
Three or four whole eggs whisked into the bechamel makes it an Ecossaise sauce. Unsurprisingly, this sauce is traditionally served over eggs.
Mornay
This is probably one of only two of these derivative sauces you will ever make. This is 1 cup of grated gruyere, 1/4 cup grated parm, whisked into the bechamel. At the last minute before serving 1-2 tbsp of butter is whisked in as well. Traditionally this sauce is served with fish but it is also the base for mac and cheese. You can obviously add whatever cheeses you would like.
Alfredo
2-3 cloves of garlic sauteed with the onion, a 1/4 cup of white wine reduced before the milk is added and then 1 cup of parmesan whisked in at the end. You likely already know what to do with alfredo sauce.
Conclusion
Bechamel is not only the base that makes up some weird classic sauces that you forgot about as soon as you read them. It is also the base to soups and chowders. It makes a great centre for a lasagna or topping for a moussaka.
The recipe may seem very basic but there are things that can go wrong. Practise making this sauce, master it, and you are on your way to mastering classic cooking.
Tomato sauce is one of those things that a lot of us take for granted. It’s assessable, and it’s easy. But what if I told you that the tomato sauce you’ve been eating, isn’t the best tomato sauce it could be? What if there were a few simple things that you could do to make that tomato sauce not just good, but absolutely great? Well, today that is what we are doing. Today, we are talking about…
The Art Of Tomato Sauce
Every single tomato sauce has one thing in common. The main ingredient is tomatoes. I know, I know captain obvious right, but we have to talk about the tomatoes.
Tomatoes
To make this as accessible as possible I am going to focus mainly on using canned tomatoes as opposed to fresh. If you want to use fresh tomatoes that’s great! Process the tomatoes by either blanching them to remove the skin or by roasting them. Now, you are pretty much caught up to the rest of us that are using canned tomatoes.
Not every can of tomatoes is created equal. I’m not saying that you can’t use “no name” brand tomatoes for this. You can. But if you want the best tomato sauce possible you want to use the best tomatoes possible. Generally, this means San Marzano tomatoes. These are a type of plum tomato typically grown in and imported from Italy. They are slightly sweeter and less acidic than Roma tomatoes which is another classic sauce tomato. If you can’t find or don’t want to spend the money on San Marzanos, that’s okay. Most canned tomatoes will do the job. And if you are using fresh tomatoes, Romas are what you want.
I typically buy whole canned tomatoes and puree them myself. I find the ones that are already pureed sometimes have an odd flavour that I don’t like in my tomato sauce. Often I don’t actually puree the tomatoes but rather crush them with my hands. First of all, it’s a lot of fun. Secondly, it means that I might get a few small chunks of tomatoes rather than just fully pureed. I like a few tomato chunks in my sauce but that’s up to you.
Tomatoes, even San Marzano’s are acidic. The goal is to balance that acidity with sweetness. More often than not, people will just put a tablespoon or two of sugar into the sauce. I prefer a different approach that does the same thing but without adding sugar directly.
Onions
Onions are a typical addition to tomato sauce. They are generally lightly sauteed right before the tomatoes are added. I like to take this a step further and actually caramelize the onions. What this means is that I am essentially browning the onions over a moderately low heat. What is happening is that starches and sugars in the onion are being broken down by the heat and caramelized. This intensifies their sweetness and means that I don’t need to add sugar to my sauce for balance. The natural sweetness from the caramelized onions is what balances the sauce.
When people think of caramelized onions they often think of thinly sliced onions. But I want to be clear, that for a sauce I use a finely diced onion, not sliced. I caramelize them with olive oil on medium-low heat and it takes about twenty minutes.
Other Ingredients
There is a tendency to overcomplicate tomato sauce. All too often people end up throwing in everything but the kitchen sink. But to make a really good tomato sauce takes restraint. You really need to take a minimalist approach.
In addition to the tomatoes and onions, I typically add salt, pepper, and finish the sauce with some fresh basil. Occasionally, I will add a clove or two of garlic and saute with the onions, but more often than not I leave it out.
In Italian cooking, the sauce is more just lubrication than the star of the show. In North America, we generally think of this in reverse. We load our pasta up with sauce to the point that we can’t taste the pasta at all. It’s okay that we do that. I do that. I’m not trying to change the way four hundred million people eat pasta. But whether you eat like the Italians, or like North Americans, this sauce will suit your needs.
The sauce I described above is a fantastic all-purpose tomato sauce. It can be used on pasta with a bit of parmesan cheese, used to top chicken parmesan, served with spaghetti and meatballs, or even as the base of a meat sauce. Think of it as a swiss army knife. It can do a lot of things really well.
I know that there are some people out there thinking that their tomato sauce is perfect as it is. They can’t believe that I didn’t add oregano or handfuls of garlic. Well, I implore those people to try this method just once before they judge it too harshly. You never know, you may have just found your new favourite tomato sauce.
I have always loved bread. It was always one of my favourite things to make and to eat. A fresh baguette or oatmeal brown bread slathered with butter while still warm from the oven is what dreams are made of. Unfortunately, as most of you know, I can’t eat real bread anymore. I’m stuck eating the gluten-free equivalent which doesn’t always stack up that well. However, just because I can’t eat bread doesn’t mean that I can’t share what I know about making bread.
So today, as the temperature continues to drop, and heavy rains threaten to become heavy snow, I thought I would do a post about the most comforting of comfort food. Today we are talking all about bread. Here are…
7 Tips That Will Change How You Make Bread Forever
Lean Dough vs. Enriched Dough –
There are two main types of bread dough. There is lean dough and there is enriched dough. The enriched dough is bread dough that has a high fat and sugar content. These sometimes have eggs and or milk in them as well. These enriched breads are generally softer, and more akin to white sandwich bread than traditional bread.
The lean dough is bread dough that obviously has little to no fat, or sugar added. These are the more classic breads like sourdoughs, Italian bread, and baguettes.
Sponge vs. Straight Method –
There are two main ways to make bread, you either activate yeast in a bit of water and mix that into flour. This is known as the straight method. Or you activate yeast using a bit of flour, water, and maybe a bit of sugar. This is called the sponge method. Both techniques have their merits and either one can make great bread. The real difference is that with the sponge method you can use less sugar or no sugar at all as the yeast will feed on the natural sugars in the flour. Generally, for this technique, you need to use a good quality unbleached flour. There are two real benefits to this technique. Number one, this is how you get lean loaves of bread like classic French baguettes. It also leads into the next tip.
Starter –
Using a starter to make bread is probably the oldest way to make leavened bread. Originally, flour and water would be mixed together and left to sit to collect natural yeasts from the air. This dough would then be used to make bread, but a small portion of the dough would be saved to be added to the next batch. Every time bread was made a little piece of the dough would be saved (a starter) and added to the next batch. This starter would contain enough yeast and leavening power to raise the next batch of dough. It would also add flavour as it would continue to age and sour over time. This is how our ancestors made bread for thousands of years.
We use a similar technique today for making sourdough bread. The only real difference is that instead of collecting yeasts from the air we generally use commercially produced yeast for our starter. The starter is really just the sponge from the sponge method above. So, to make sourdough you start with a sponge and let it sit. Every day you take a bit away from it and you feed a bit more flour and water. When you want to make bread you simply take half your starter and use it as the sponge for your bread. You may need to add a bit more yeast to make your bread rise in desired time. Then, you just feed your starter and it good to use again.
Resting between mixing and kneading –
This is a really simple thing that you can do that I find really improves the texture of bread. After all of the ingredients are mixed, let the dough rest for five to ten minutes prior to kneading it. I don’t really know the science behind this, but I do find that it gives a much better texture to the bread.
Steam –
If you have ever wondered how bakers get that will thick crips crust on baguettes or French rolls the secret is steam. When the bread goes in the oven, the oven is injected with steam. This delays the formation of the crust allowing the high heat of the oven to penetrate more deeply into the surface. Once the steam has evaporated the crust begins to form giving a nice thick crust layer that is crispy and delicious. You can simulate this by heating a cast iron pan in your oven. When you put your bread in the oven throw a handful of ice cubes into the cast iron pan and shut the door until the bread is cooked.
Heat –
The temperature at which you cook bread has a major impact on flavour and texture. The general rule of thumb is that lean dough gets cooked on high heat between 375°F – 450°F. Enriched doughs are cooked on lower temperatures around 350°F to 400°F.
Cooking Vessel –
When I was really focusing on learning to make bread there were to major aha moments for me when it came to actually cook the bread. The first came when I started using a pizza stone. A pizza stone is a big piece of ceramic that you put in your oven and that can withstand pretty high heat. These work really well for making free-standing loaves like baguettes.
The second aha moment came when I saw someone using a dutch oven to cook bread. They heated the dutch oven in their oven. Once it was hot they carefully lowered a round freestanding loaf into it, put the lid on and put it back in the oven. Having the lid on the dutch oven trapped all the escaping steam and caused the delayed crust formation I talked about above. If you want a really good bakery quality bread a dutch oven and a pizza stone are the ways to achieve it.
Sauce making sometimes has this air of mystery about it. There is an implied complication that can deter people from making even the most basic sauces. Today, I am going to show you how uncomplicated sauce making can be. We are going to look at two types of sauces today. Barbecue sauce and pan sauce. It’s my hope that by the end of the post you will be inspired to get a little saucier.
Let’s Get Saucy
First of all, a sauce can be almost anything. If you put butter on a cooked steak, that’s technically a sauce. So, right off the bat let’s get rid of the idea that a sauce has to be a complex combination of twenty different ingredients that have simmered together for hours and hours. I mean yes, there are a lot of sauces that start that way, and that’s okay. Just because there are a lot of sauces that take a long time to make doesn’t mean that aren’t just as many or more sauces that take no time at all. Those are the sauce we are going to focus on today.
Barbecue Sauce
At its core, barbecue sauce is a mixture of sugar, vinegar, and ketchup. That’s really it. The flavour of a barbecue sauce is determined by the ratios of those three ingredients, the type of sugar or vinegar used, and the addition of secondary ingredients. So, that raises the big questions…
How much of each ingredient do I use?
How do I know what sugar or vinegar to use?
How will I know if it tastes good?
What else should I add?
Here’s the thing, and I’m going to try to answer each of these questions in the most honest and thoughtful way I can.
How much of each ingredient do I use? It doesn’t matter at all.
How do I know what sugar or vinegar to use? It doesn’t matter, use whatever you want.
How will I know if it tastes good? Taste it.
What else should I add? Whatever you want including but not limited to onion, garlic, cayenne pepper, soy sauce, liquid smoke, etc.
Okay, maybe those weren’t the most helpful answers but they are accurate. The ratio of ingredients is 100% based on personal preference. If you like a sweet sauce, add more sugar than vinegar. Like a more acidic sauce? Add more vinegar than sugar. Like a balanced sauce? Add about the same amount of vinegar and sugar. The ketchup mostly controls the consistency of the sauce. Like a thinner sauce? Add less ketchup. Like it a bit thicker? Add more.
When it comes to what sugar or vinegar to use it again comes down to personal preference. For sugar, you can use white sugar, brown sugar, honey, molasses, maple syrup, or any other sweetener you can think of, or even a combination of two or more. And yes, whatever sweetener your thinking of that I didn’t mention, you can use it. Vinegar is that same thing. White vinegar, wine vinegar, cider vinegar, malt vinegar, whatever you want to use, use it. Whatever you like, use it. It’s that simple.
If you mix sugar, vinegar, and ketchup, and it doesn’t taste good you have seriously effed up. There are only two things that could happen. You either added too much or not enough of one ingredient or the other. If it’s too acidic, add more sugar. If it’s too sweet, add more vinegar. If it’s too thick, add a bit of water, or a bit more vinegar and sugar. If it’s too thin, add a bit more ketchup. Also, a little tip, if tastes good when you make it, it’s going to taste good when it’s cooked on to ribs or chicken.
In terms of what else to add to your barbecue sauce, I can’t give you specifics of what to add or when or why. What I can say is I usually find it better to add powdered onions, garlic, and ginger rather than fresh. Other than that it comes down to personal preference and trial and error. Just always start with little additions of things and add more are you go.
Pan Sauce
Let’s start with what’s a pan sauce?
Imagine you just cooked a steak in a frying pan. You take the steak out of the pan, and there are all these bits of meat, salt, and pepper stuck to the bottom of the pan. You drain off the excess oil that has accumulated and then you add liquid, usually booze of some kind. This liquid lifts all that stuff off the bottom of the pan. You reduce the liquid until it has almost completely evaporated. Then, you add a secondary liquid like beef stock. Not too much, about the same amount as the booze you added. You cook this down until it is almost evaporated. Now you add a sprig of thyme and a few tbsp of heavy cream. You cook that down until the cream is thick. Now, you pour that over your steak.
So, what is a pan sauce? It is a sauce made by using the flavours left in the pan after cooking to flavour the sauce.
I know some of you are thinking that the process I just described seems kind of complicated. But bear in mind that the whole process takes about three minutes depending on the temperature of your pan.
It is typical to use booze of some kind to deglaze the pan but stock works just as well. Deglazing is adding a liquid into a hot pan to lift up anything stuck to the surface of the pan. Now, what booze you choose depends on the dish. It’s most typical to use wine. For steak red wine would be more common, and for fish or chicken white wine would be more common. But you can also use brandy, whiskey, port, or anything like that. That just comes down to personal taste really.
The secondary liquid should generally be stock, which is just flavoured water. If you are cooking beef, use beef stock. Chicken equals chicken stock. Now, if you are making pork or fish and can’t find their respective stocks, use chicken stock. I prefer homemade stock, but there are good quality store stocks out there that won’t cost you much and are perfectly fine to use.
In the example I used above I added cream to the sauce. I did this for two reasons. The cream helps to thicken the sauce and it enriches the flavour. If you wanted to you could add cornstarch or a roux to thicken it. Alternatively, once the liquids are reduced, you can remove the pan from the heat and whisk in a few tbsp of cold butter. This will thicken and enrich the sauce as well. I prefer to use butter or cream for pan sauces over cornstarch or a roux because they are quicker, and because the batches are so small.
You can also add, chopped shallots, or onions, a bit of garlic, fresh herbs, a bit of lemon juice. It comes down to the flavour you want, the item you are making the sauce for and your personal preference. But, the technique remains the same.
This technique is important to know because it is so versatile. You’ve probably already done something similar to this when making gravy at Thanksgiving or Christmas and not even realized it. But whether it’s beef, pork, chicken, fish, or whatever you can make a very delicious sauce, very quickly, and with only a few ingredients.
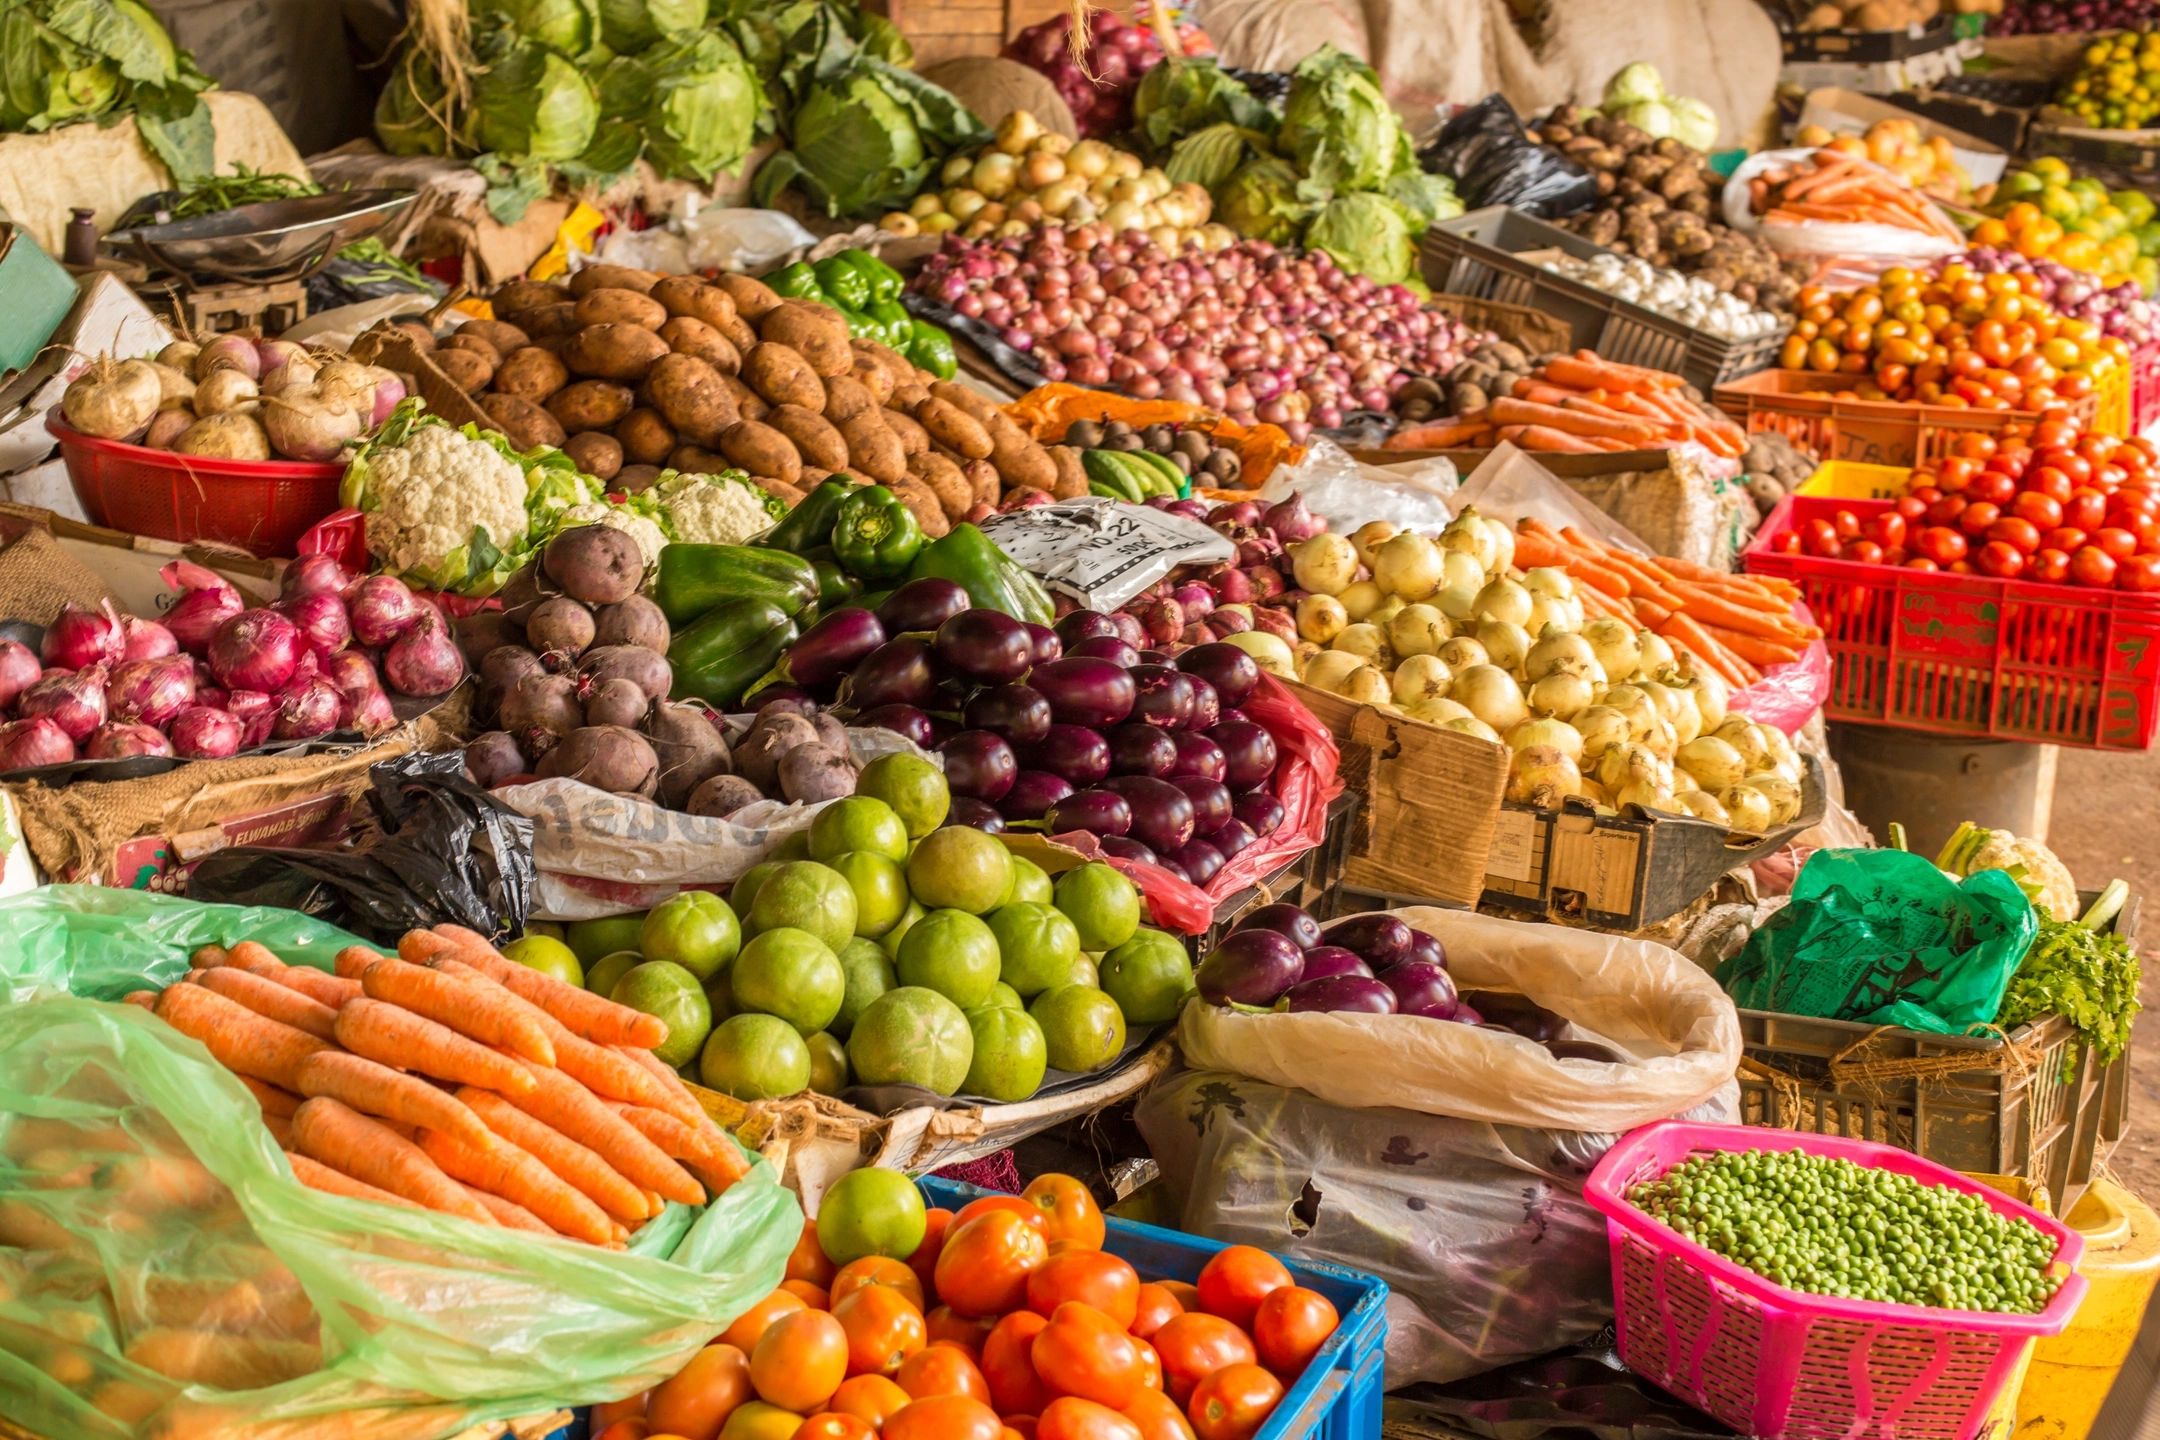
We get stuck eating the same things over and over…
It is very easy to walk around the grocery store and only see the things that we’re used to. We walk through the produce aisle and see carrots, onions, kale, spinach but we miss the Chinese long beans, eggplants, and bok choy. We wander through the meat section seeing chicken, beef, and pork but miss the lamb, rabbit, and game hens. It’s even hard to believe that the seafood counter has things other than haddock, salmon, mussels, and lobster. We get stuck eating the same things over and over when there is an abundance of new and exciting ingredients out there for us to try.
It is often nerve-racking buying new ingredients.
It is often nerve-racking buying new ingredients. We’re not sure if we’re are going to like it. We don’t know how to prepare it. And the last thing any of us want is to buy it, and then just let it sit in the fridge or freezer until it’s time to throw it away. Luckily, there is something that we can use to help us understand the ingredient before we buy it. We can know everything we ever wanted to know about that ingredient in seconds. How is that possible you ask?
If you are an adult in Canada there is a 71% chance that you have a smartphone on you all the time. Which means that you have instant access to the internet where ever you are. And that means you can look up any ingredient and in seconds know multiple ways to cook it and other ingredients to pair with it. What it tastes like and even what to look for when buying it.
To some of you, it may seem obvious to use your smartphone to look up ingredients in the grocery store. However, I guarantee that a large percentage of people reading this can’t believe that they have never thought to do that. I’m even willing to bet that the people who have thought to do it haven’t really used it to buy new ingredients that often or at all.
There is no reason for any of us to get stuck buying and eating the same things over and over.
Here is my point. There is no reason for any of us to get stuck buying and eating the same things over and over. Before you say anything, I understand that the offerings at the grocery store are in fact limited to a large extent. But, there are ingredients in every grocery store that you, myself, and most people walk by every day. All I’m saying is that it is worth taking a few seconds to look up an ingredient you have never tried. It may become your new favourite.
The next time you’re in the grocery store take a little extra time and actually look around. Look at the ingredients you have never paid attention to before and if you find one of them interesting, look it up. It’s probably worth trying. There is one thing you have realize about the grocery store. They generally only bring in things that they can sell. So, someone is buying these ingredients that we all walk past. What are we missing? I know I want to find out. Don’t you?
Today, on this rainy Friday morning I will be answering the top five Google autocomplete answers for the question “How do I cook…” So, let’s jump right into it.
How do I cook… With Google Auto Complete
How do I cook beet greens?
Beet greens are the top of the beet. You know…the green part.
When it comes to beet greens the method of cooking that I prefer is steaming. They are a tender green and so they don’t actually need much cooking.
The first thing you want to do is wash the greens very well under cold running water. The next step is to remove any of the thick pieces of stem. Thin, tender pieces of stem are fine, but anything bigger than a wooden skewer isn’t going to cook nearly as quickly as the greens. You can save the stems, chop them and add them to soups or braises.
Put about an inch or of water in the bottom of a medium to large pot, depending on the number of greens you have. Salt the water and bring it to a boil. Put the greens in the pot, cover, and cook for about 2-3 minutes. Drain off any excess water and then season the greens with butter, salt & pepper, and a bit of cider vinegar. Delicious and very good for you.
How do I cook Spaghetti Squash?
If I’m being completely honest, spaghetti squash is not my most favourite thing in the world. My wife absolutely loves it though. Cooking it is actually pretty easy, it just takes a long time.
The first thing you want to do is cut the spaghetti squash in half lengthwise. This can be difficult and dangerous so please be careful. The best way that I have found to do this is to hold the squash straight up on your cutting board. Place the blade of a sharp knife against the surface of the squash. Give the back of the knife blade a firm whack with your hand. Now, the blade should be penetrating the skin of the spaghetti squash. Slowly work the knife down until you have cut the squash in two.
Preheat your oven to 400°f. Put about 1/2 an inch of water in a roasting pan or casserole dish. Put the squash in cut side down. Roast in the oven for about 40 – 60 minutes. Now, take two forks and scrape the “noodles” away from the skin of the squash. Season with salt & pepper, and butter or toss with your favourite pasta sauce.
How do I cook Swiss Chard?
Swiss Chard is heartier than beet greens and thus takes a bit more time to cook. There are two main ways to cook this delicious green. But either way, you want to separate the leaves from the stems first.
The two main ways to cook swiss chard are sauteeing and steaming. You can also cook the chard with a combination of both sauteeing and steaming.
To saute the swiss chard first, wash it, pat it dry, remove and dice the stems, and thinly slice the leaves. Heat a frying pan or wok over medium-high heat. Add a touch of oil, chopped onion and the stems. Sautee for about two minutes. Now, add the leaves into the pan and saute for another two to three minutes or until the leaves and stems are tender.
To cook the swiss chard by steaming it, follow the same method as for the beet green simply cook the chard for three to four minutes longer. You can also saute the chard for a minute or two and then put a lid of the pot or pan and steam the chard in its own moisture for a few minutes.
All three cooking methods produce equally delicious swiss chard.
How do I cook Chicken Breast in the oven?
Cooking chicken breast in the oven is pretty straightforward.
Season the chicken breast with salt & pepper, or your favourite barbecue sauce. Put the breasts on a baking sheet, broiler pan, or a roasting rack. Place in a 375°f oven for 30 – 45 minutes depending on how thick the breasts are. When they are cooked, they will be firm to the touch and white in the middle. You can also use a thermometer to check doneness. It should read 165°F.
Once the chicken breast is cooked, remove it from the oven and let it rest at least five minutes before cutting into it.
How do I cook ribs in the oven?
Okay, so this question is actually pretty far down the Google autocomplete list but, I have answered all other questions in previous posts. I also think that this question can bring a lot of value to people.
I’m going to assume that we are talking about pork side ribs for purposes of this answer.
The key to cooking ribs, in the oven or otherwise, is low and slow. You want to cook them at a low temperature for a long time. Generally, I cook mine at 300°f for 4-5 hours, or until they are tender. This is completely from raw. Usually, when cooking ribs this way I will brine them in a solution or water, salt, and sugar. This helps the ribs retain moisture over the long cooking time. Though it is a good idea to brine the ribs it is not necessary.
I also usually dry rub the ribs for this type of cooking. It creates a nice crust on the surface of the rib. Don’t worry, if you want a saucy rib, you can just start basting the ribs with sauce about an hour before they are finished cooking. You can also put some sauce on them at the last minute and broil them quickly to get that nice caramelization.
We use cookies on our website to give you the most relevant experience by remembering your preferences and repeat visits. By clicking “Accept”, you consent to the use of ALL the cookies.
This website uses cookies to improve your experience while you navigate through the website. Out of these, the cookies that are categorized as necessary are stored on your browser as they are essential for the working of basic functionalities of the website. We also use third-party cookies that help us analyze and understand how you use this website. These cookies will be stored in your browser only with your consent. You also have the option to opt-out of these cookies. But opting out of some of these cookies may affect your browsing experience.
Necessary cookies are absolutely essential for the website to function properly. This category only includes cookies that ensures basic functionalities and security features of the website. These cookies do not store any personal information.
Any cookies that may not be particularly necessary for the website to function and is used specifically to collect user personal data via analytics, ads, other embedded contents are termed as non-necessary cookies. It is mandatory to procure user consent prior to running these cookies on your website.


 Clarified Butter
 The procedure for making hollandaise is honestly as basic as it can get. Literally, all you have to do is mix the acid with the egg yolks and then slowly heat the mixture in a double boiler. A double boiler is just a bowl set over a pot of barely simmering water. It’s important that the bowl not touch the water.
 surface for a second. Now, it’s time to add the butter.
 Once you get your sauce to the desired consistency, taste it, season it with salt and pepper, and cover it with plastic wrap until you are ready to use it. Ideally, you want to use the sauce right away. It can be held at room temperature, covered for about an hour. After that though, it isn’t really safe to eat. It isn’t something you want to put in the fridge and use over a couple of days either. It doesn’t hold well and it certainly doesn’t reheat well. I suggest making only what you are going to use right away.


 If I’m being completely honest, spaghetti squash is not my most favourite thing in the world. My wife absolutely loves it though. Cooking it is actually pretty easy, it just takes a long time.
 How do I cook Chicken Breast in the oven?
