Eggs
-
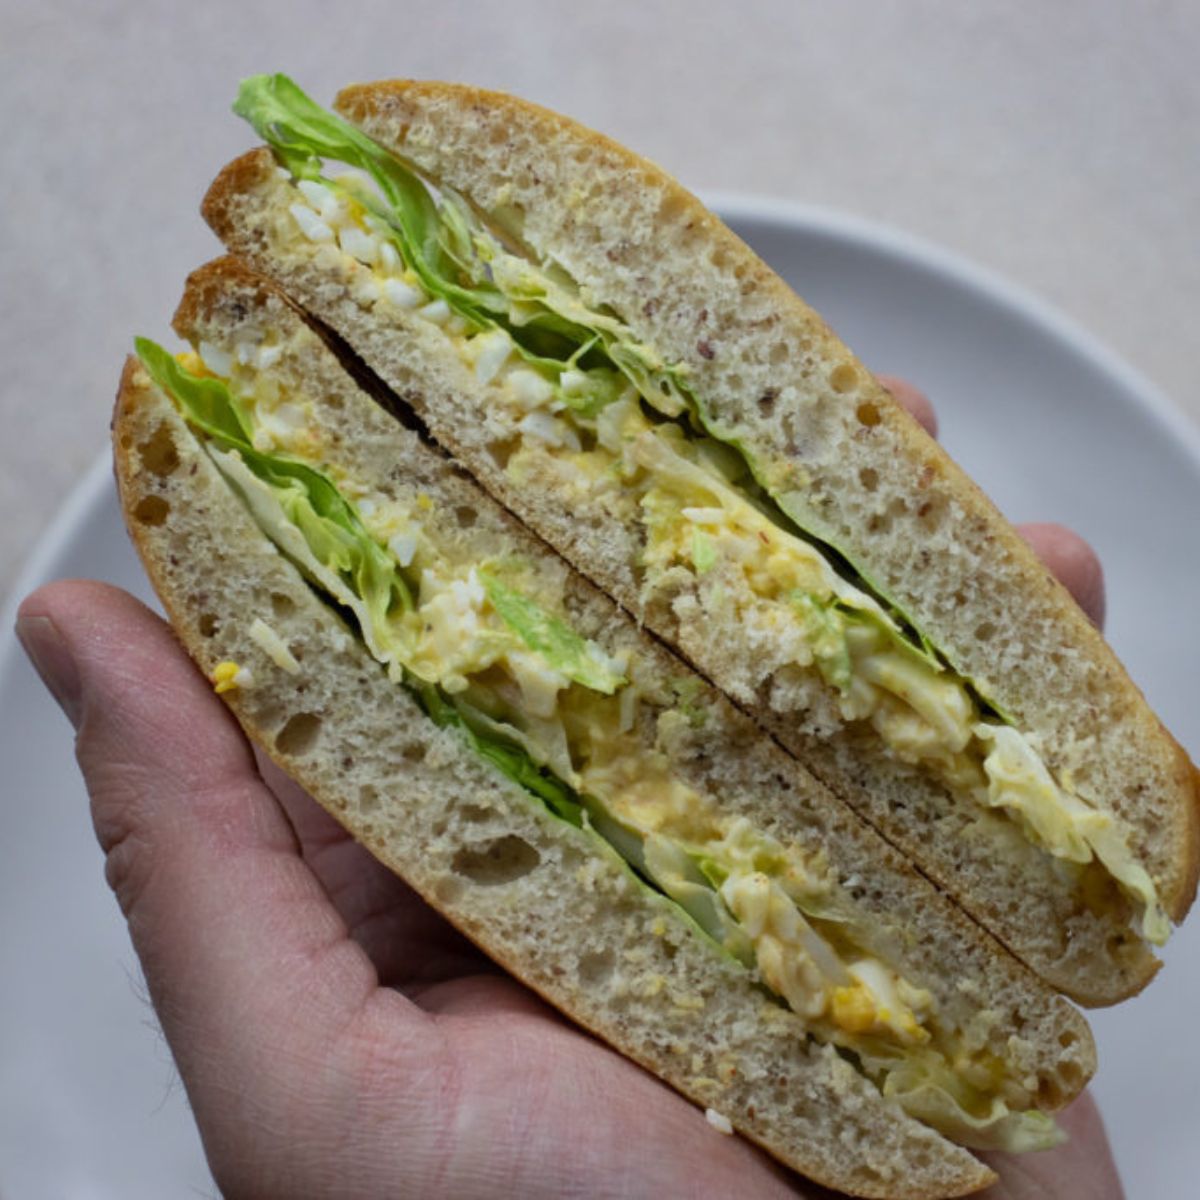
Deviled Egg Salad Sandwiches
-
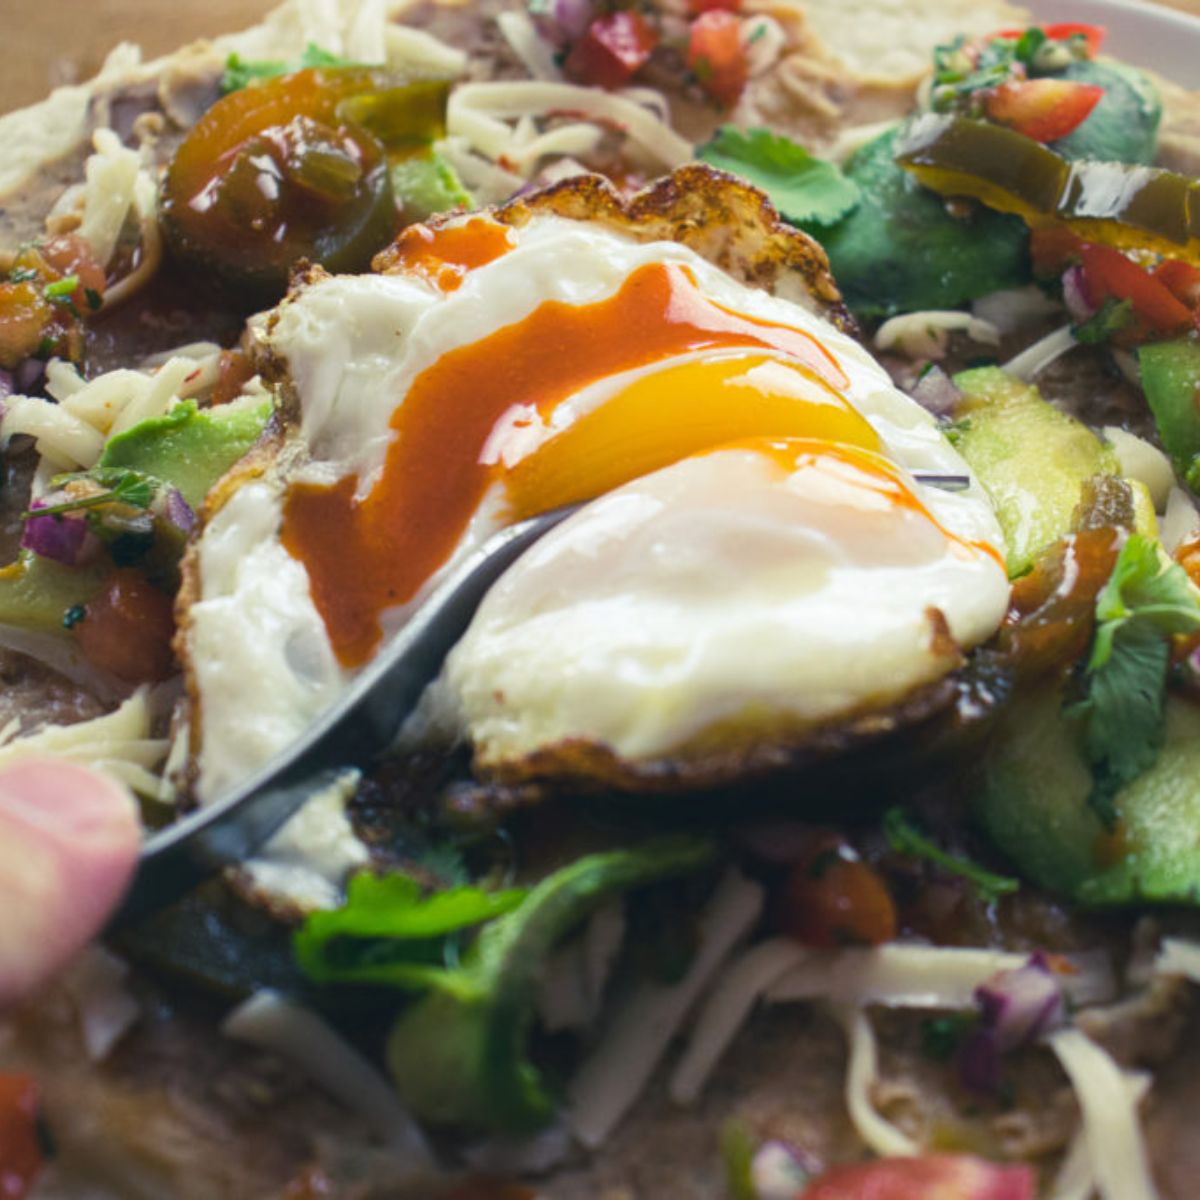
Huevos Rancheros
-
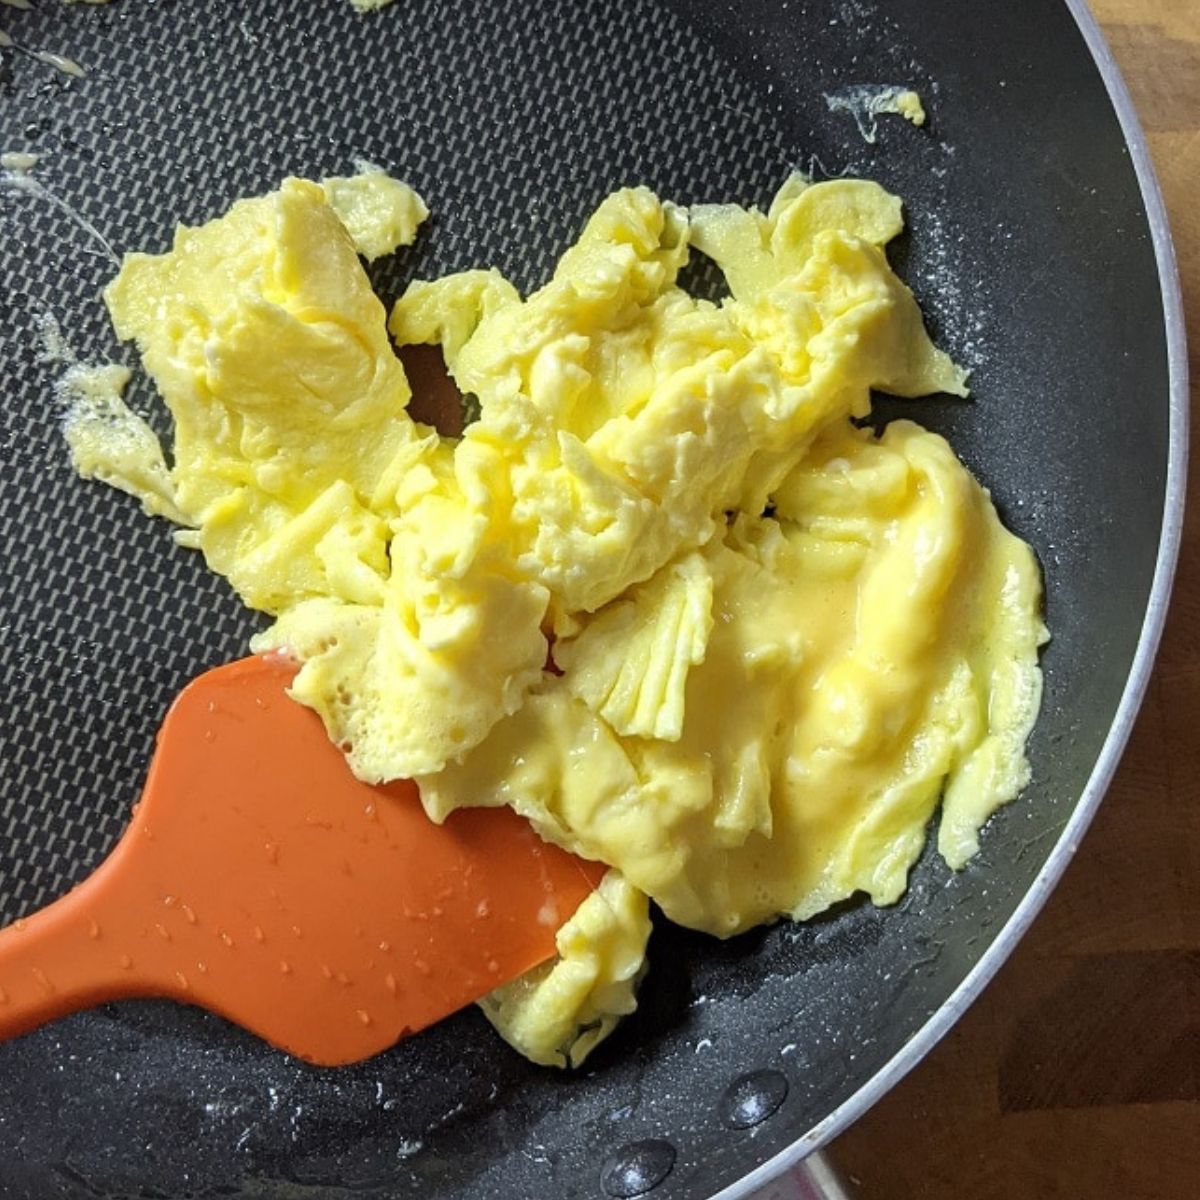
7 Simple Tips For Perfect Scrambled Eggs
-
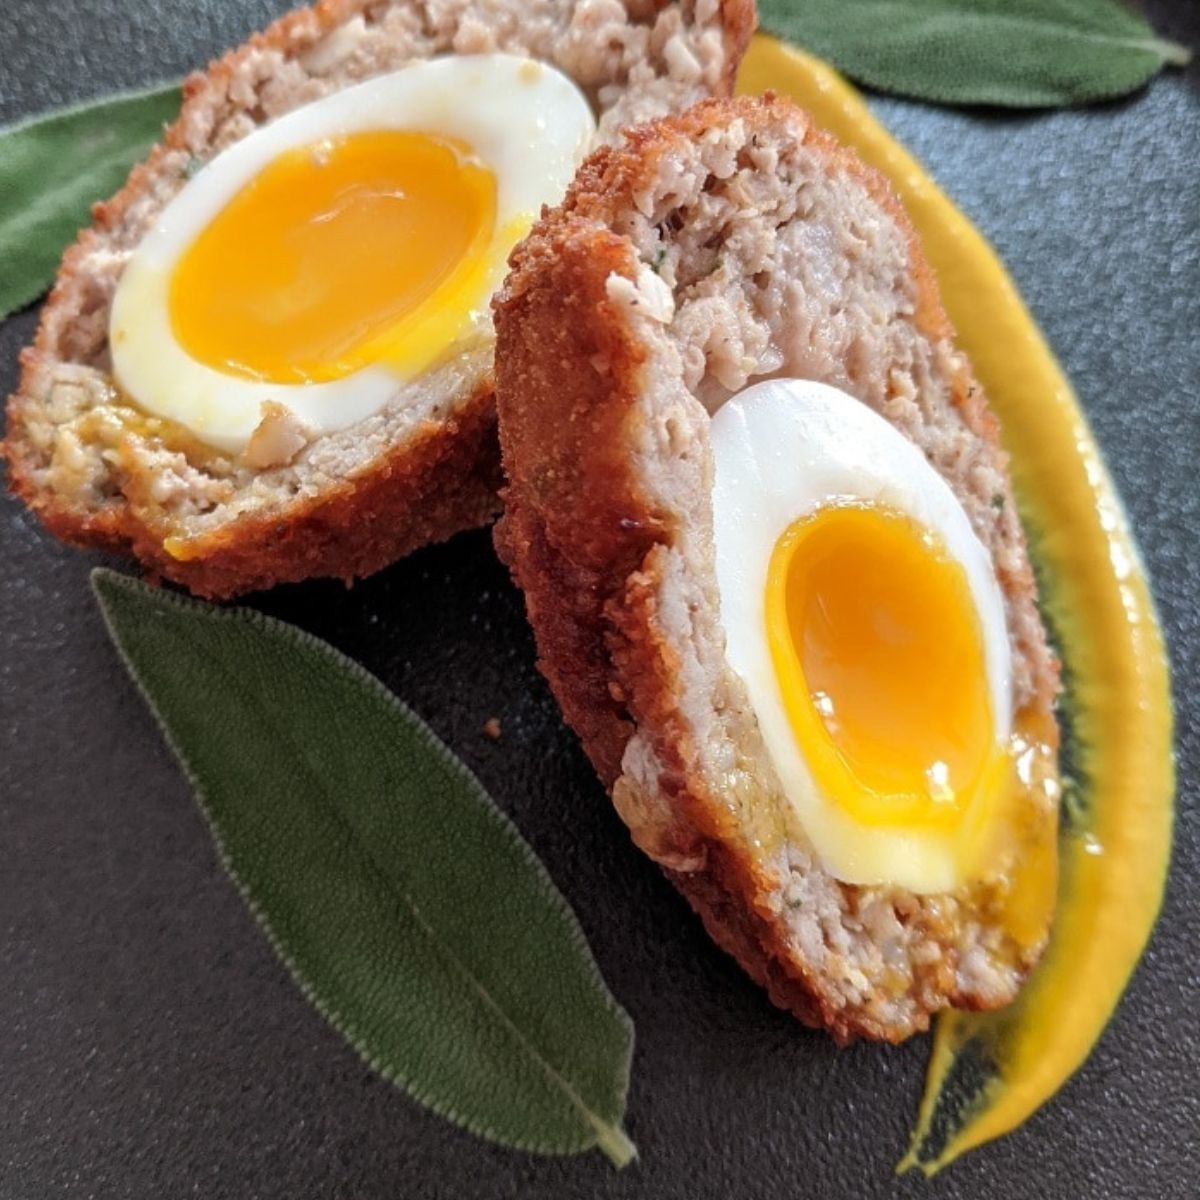
Creating the Best Scotch Egg: A Step-by-Step Recipe
-
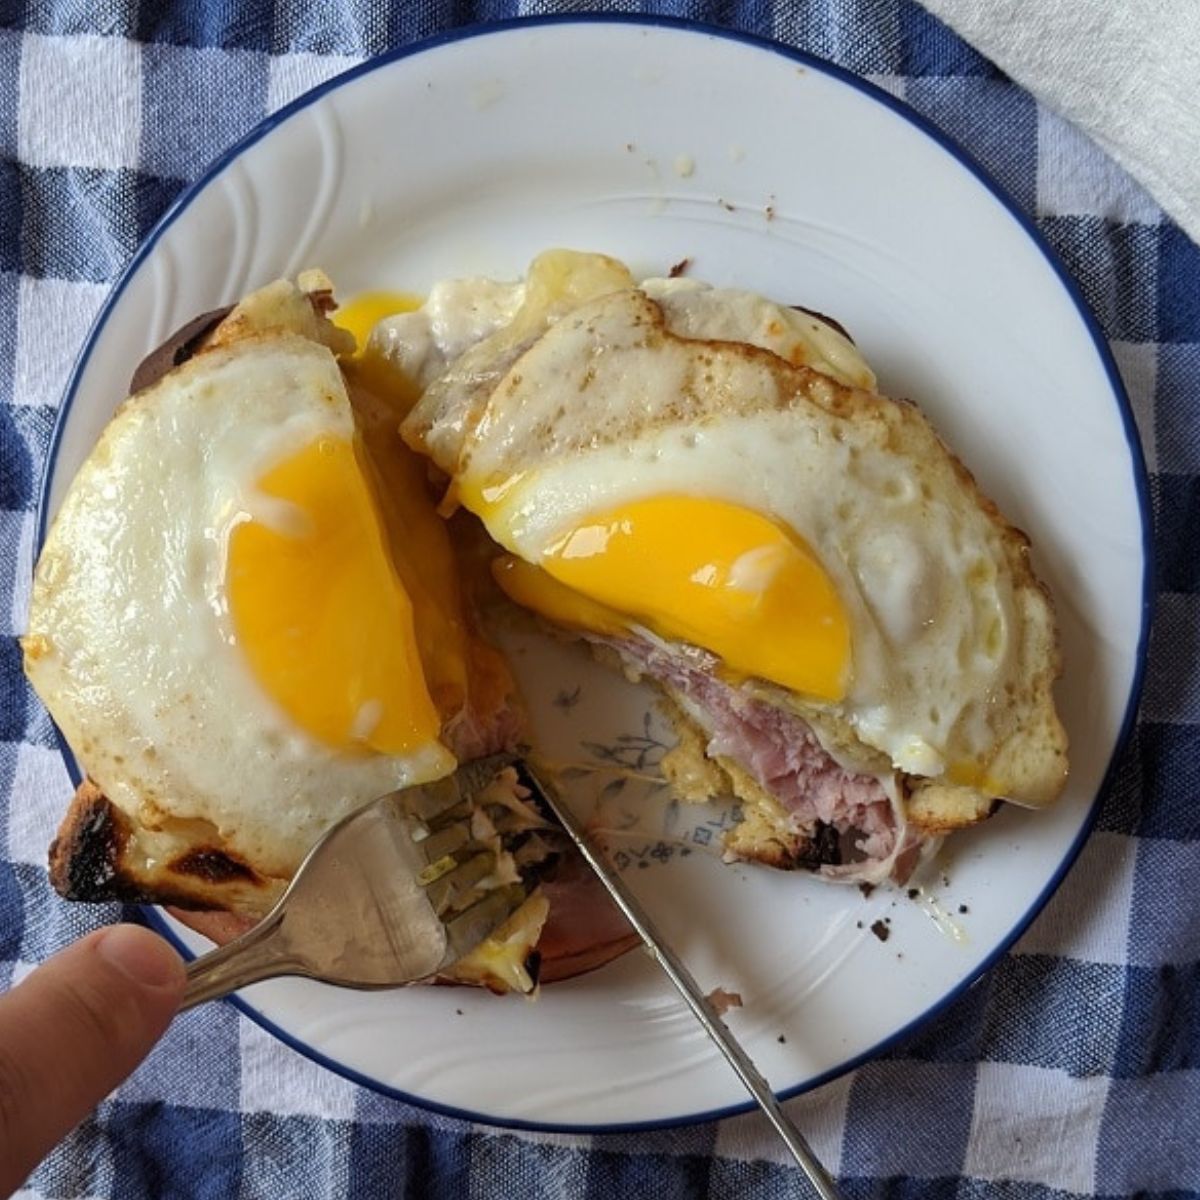
What is a Croque Madame and Why Should You Make One Right Now?
-
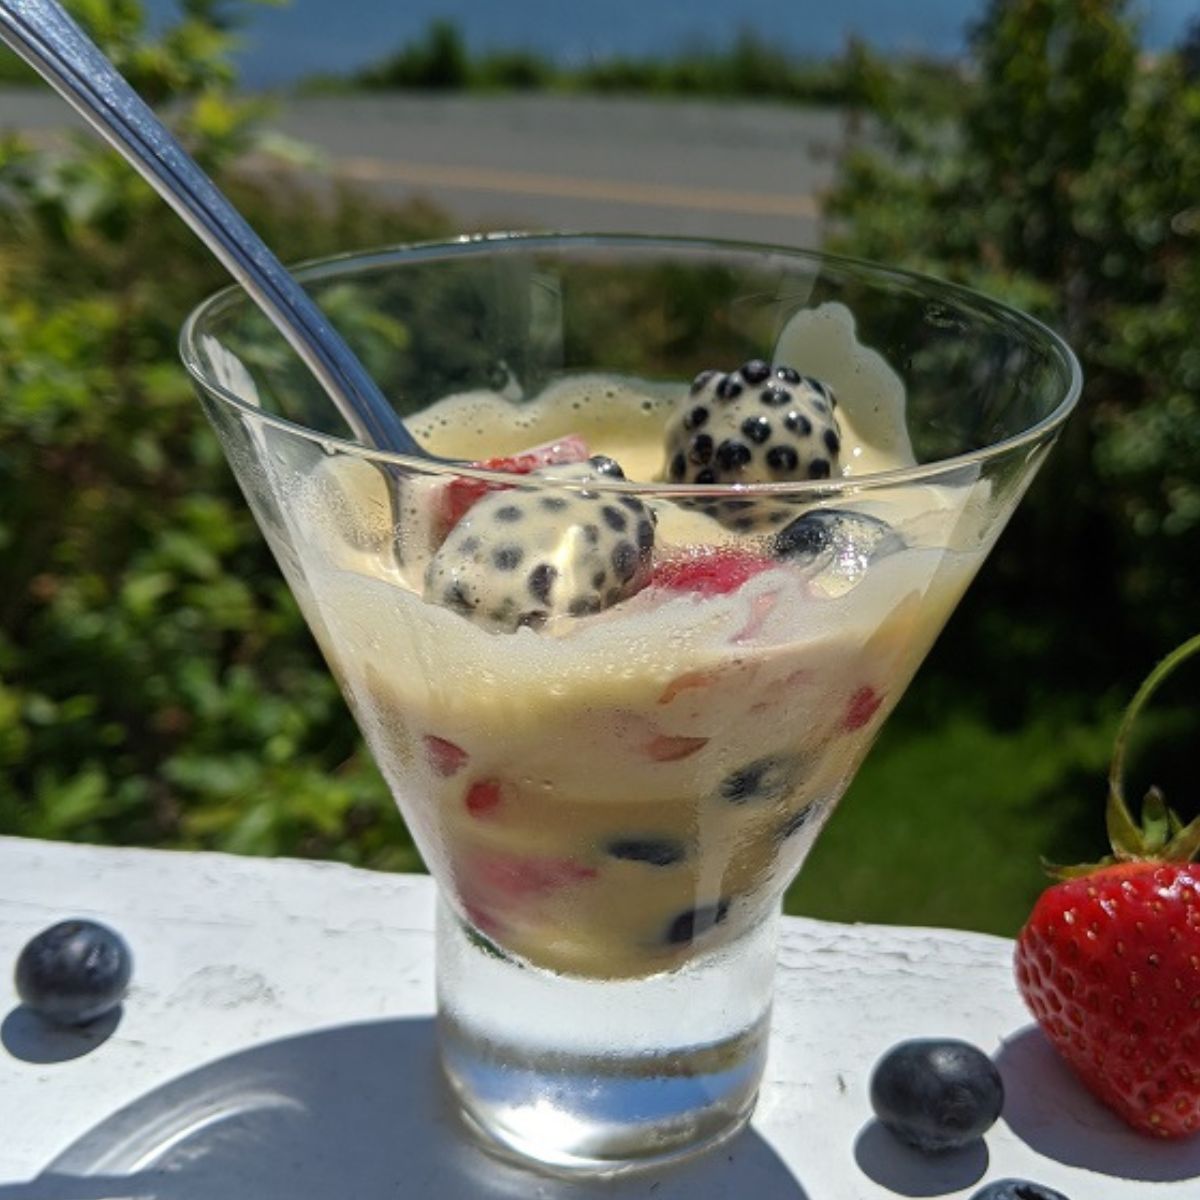
How To Make Sabayon - Another Simple Summer Dessert
-
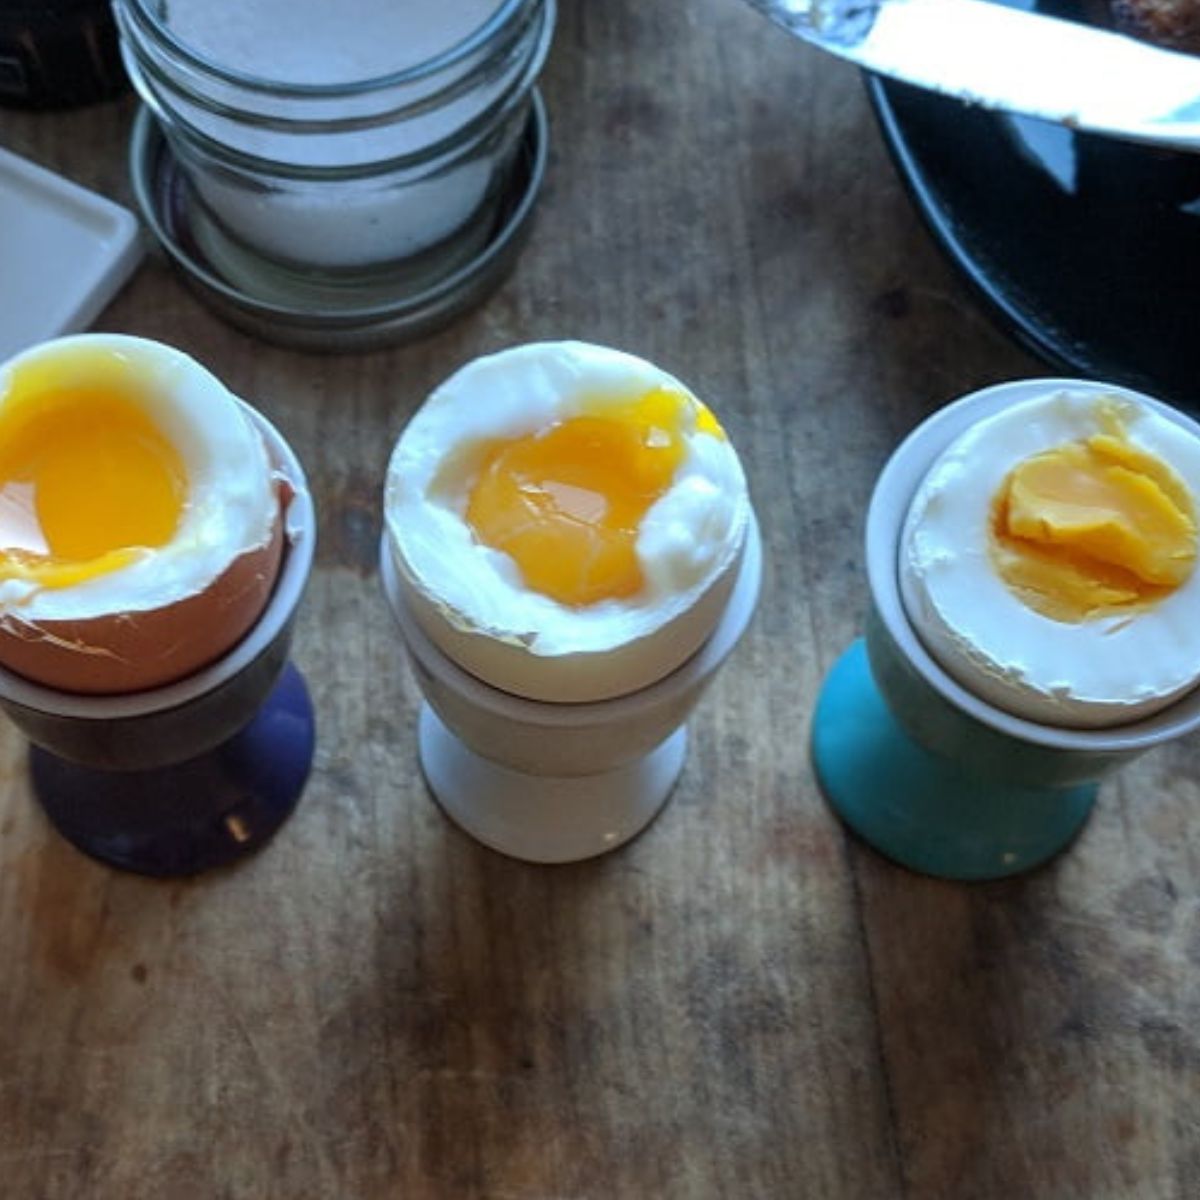
The Perfect Boiled Egg Guide: Techniques, Tips and Tricks
-
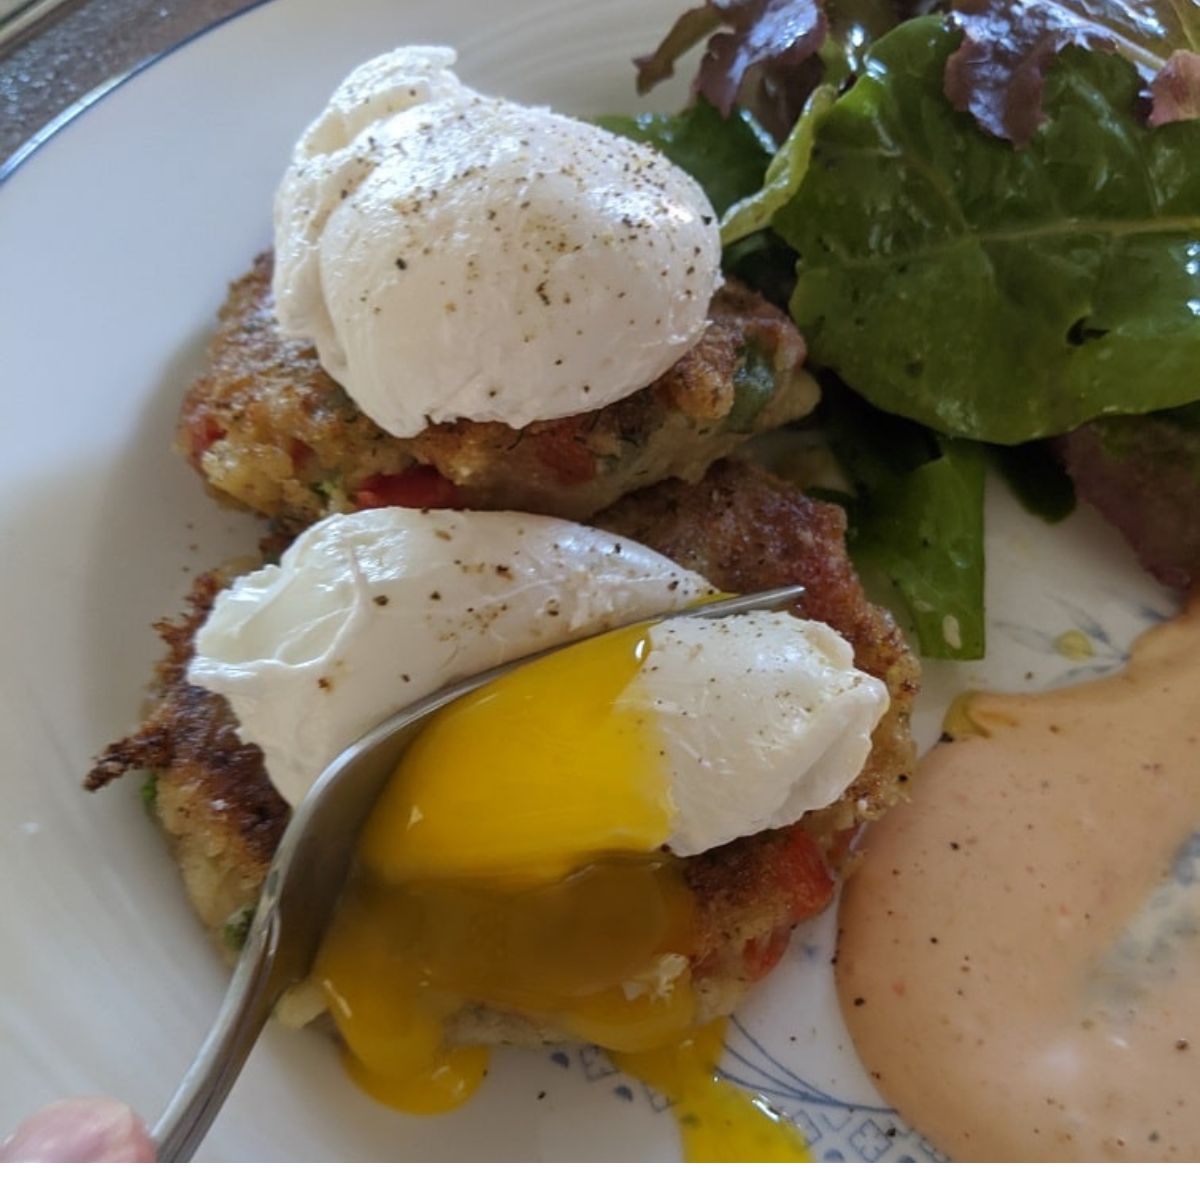
The Secret to perfectly poached eggs