Today we are going to take a look at pâté. Specifically, we are going to look at country pâté and how to make it at home. Before you jump away from this post because you are convinced that you hate pâté at least let me explain exactly what I’m talking about.
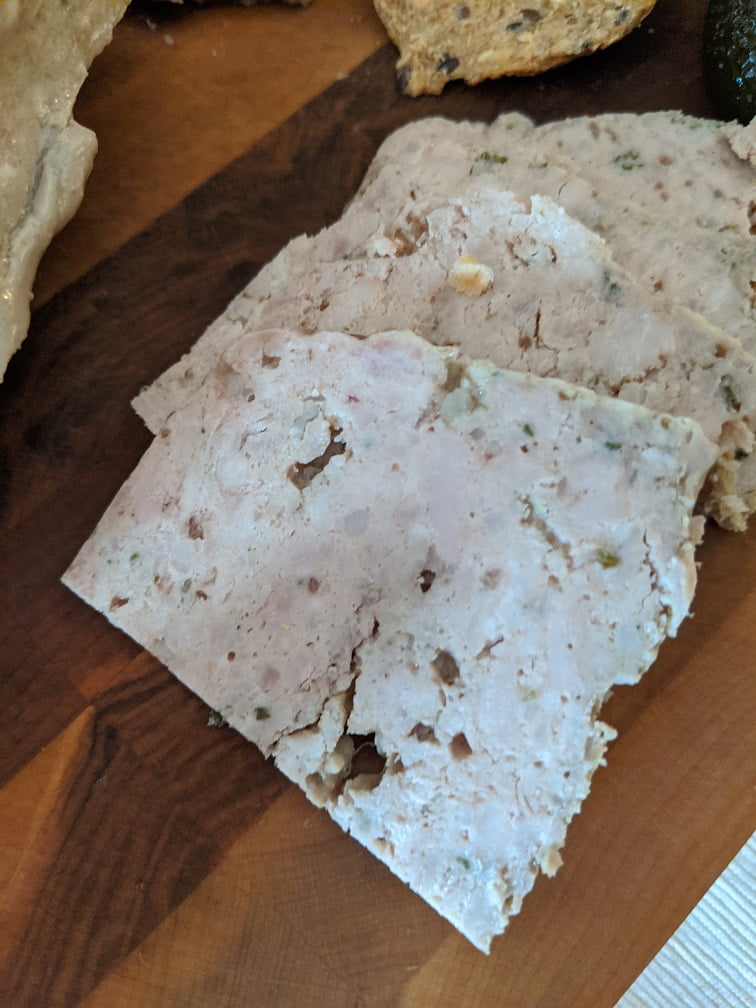
First of all, and most importantly, let’s clear up what exactly pâté is. The easiest way to think about it is as a kind of fancy meatloaf. Really, it’s fancy only in perception. Now, there are different kinds of pâté. Some are smooth like butter, some are smooth but firm, and some like the country pâté we are going to be looking at today are more coarse in texture. There are some pâtés that are loaded with expensive ingredients like truffles or foie gras. But, at the heart of it, pâté is really just a cheap and easy way to use up scraps of meat.
Are all pâtés made of liver?
A misconception about pâté is that it is always made from liver. There are liver pâtés, and the one I am talking about today does have a little bit of liver in it, but it doesn’t have to. It is by no means made exclusively of the liver. Our pâté is mostly ground pork with a little bit of liver for flavour and texture. Other than that there are some herbs and spices, onions and garlic, egg, and a bit of flour (gluten-free for me). That’s it. Nothing scary or fancy.
Why make pâté at home?
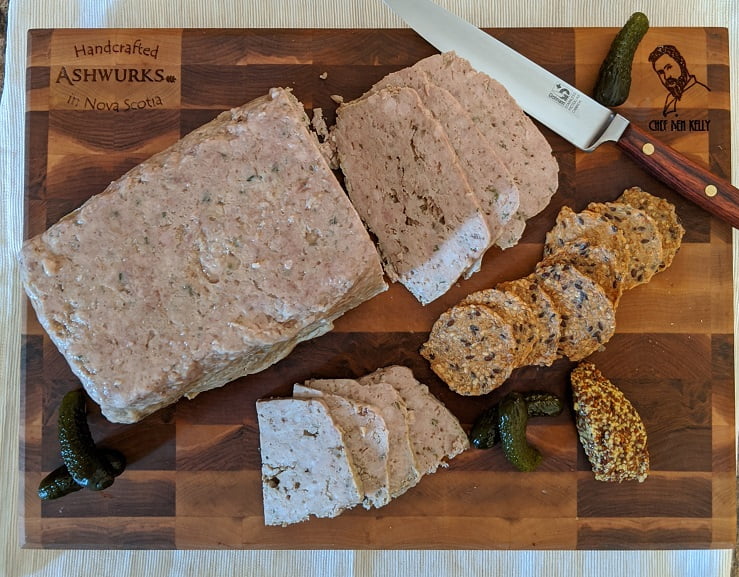
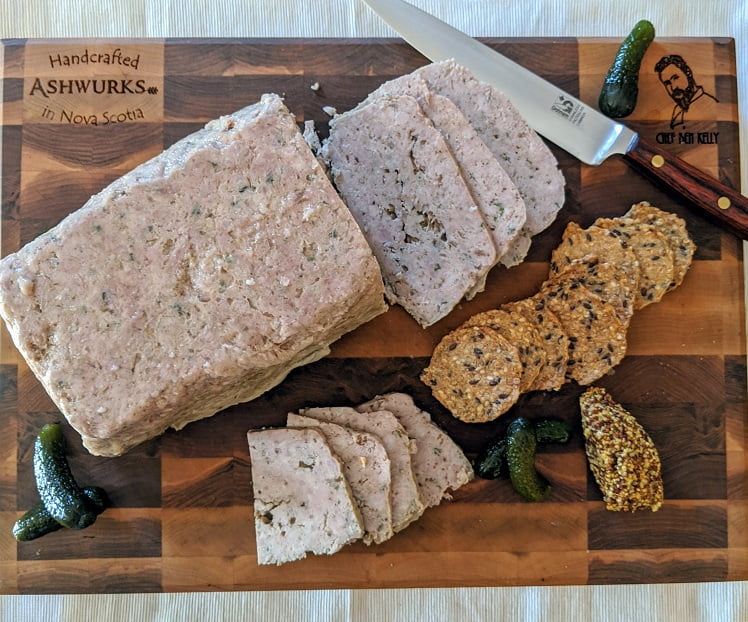
Okay, now that you hopefully have a bit of a better understanding of what pâté is, you may be wondering why you should make it at home. Well, the simple answer is that it is delicious. Really, a well-made pâté is a very special thing. It’s great for a light breakfast or lunch with pickled eggs, gherkins, crackers, mustard, a bit of cheese, and grapes or apple. It is terrific to start a dinner party, take to a pot luck, or just serve with cocktails if you have guests coming over. It also freezes really well so you can make a batch like the one I’m going to describe below, slice it, and freeze it, then just pull out pieces when you want them. That is why you should make it at home.
But don’t you need special equipment?
Do you need special equipment? Nope. To be fair, I have a meat grinder that I use. And though I didn’t use it for this pâté I do have a small terrine or pâté dish. However, if you buy pre-ground pork, coarse if you can get it, the rest can be done by hand or in a food processor. As for baking, that can be done in any kind of loaf pan.
Isn’t it difficult?
Is it difficult to make pâté? It takes about the same level of skill to make a meatloaf or meatballs. If you can do that, you can do this. I will say that smooth pâtés are more involved and do require more skill.
Okay, let’s take a look.
Pork
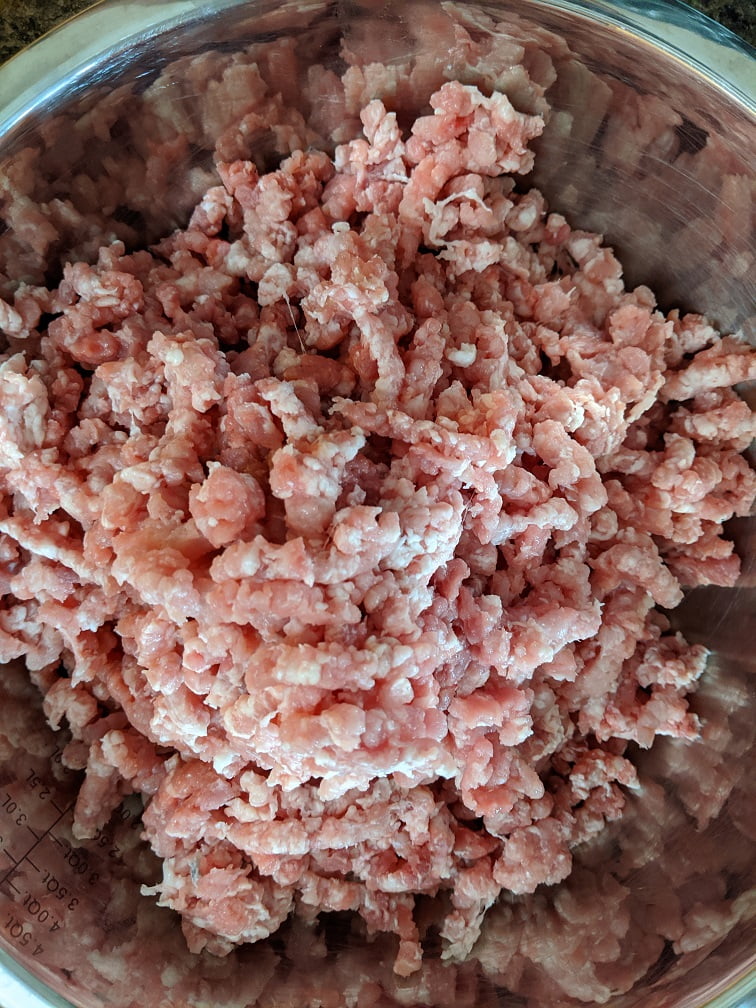
Our country pâté starts with pork. I’m using pork shoulder which was recently on sale at the grocery store. You may see it labelled as picnic roast. Pork shoulder is what is generally used to make sausage and pâté because it has the perfect ratio of fat to meat. Fat is important in these types of things because without it the final product has a gritty, dry texture which is not enjoyable at all. If you are using pre-ground pork do not buy lean. Go for medium or regular if you can. All told we want 2 lbs of ground pork.
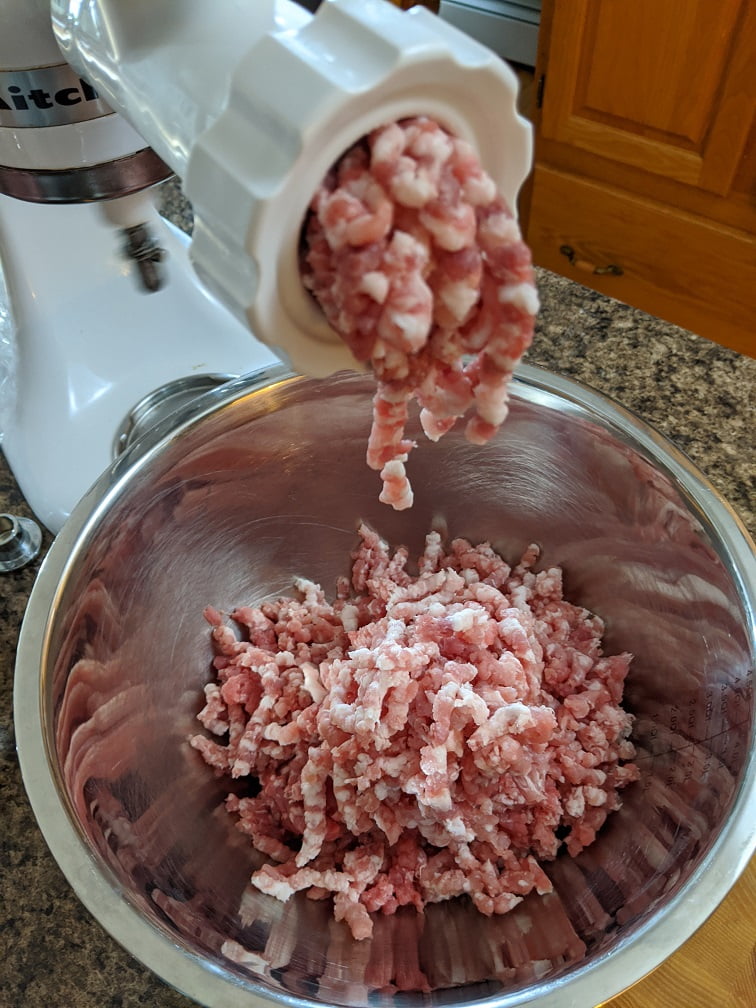
Meat Grinder
If you are using a meat grinder, hopefully, it is better than the KitchenAid one that I have. Cut the meat into strips and put it in the freezer it for about 30 minutes. The meat shouldn’t be frozen, but very cold and slightly firm. This will make the grinding easier on your grinder and most importantly will keep the meat cold throughout the grinding process.
It is also generally recommended that you set the bowl the meat is being ground into over a bowl of ice to make sure it stays cold. However, because I generally grind such small amounts of meat I don’t find that step that crucial. Usually, after grinding I will pop the meat back in the fridge for 20 minutes or so to cool it back down. If you are doing large batches, definitely grind into a bowl set over ice. Not only does it keep the meat out of the temperature danger zone, but it also allows for a better mixture keeping the fat bound to the protein so you don’t get a lot of fat separation when cooking.
Seasoning the meat
A good pâté is a well-seasoned one. It is important to remember that pâté is served cold. What that means is that you have to use more salt than you would if you were serving it hot. The reason for this is because of the way your taste buds interact with salt when they are cold and because the cold fat from the pâté will coat your tongue. For the 2 lbs of pork we are using, we will also be using 2 tbsp of coarse kosher salt. It is important to use either kosher or sea salt for this. DO NOT USE TABLE SALT. And, make sure that the salt is coarse not finely ground.
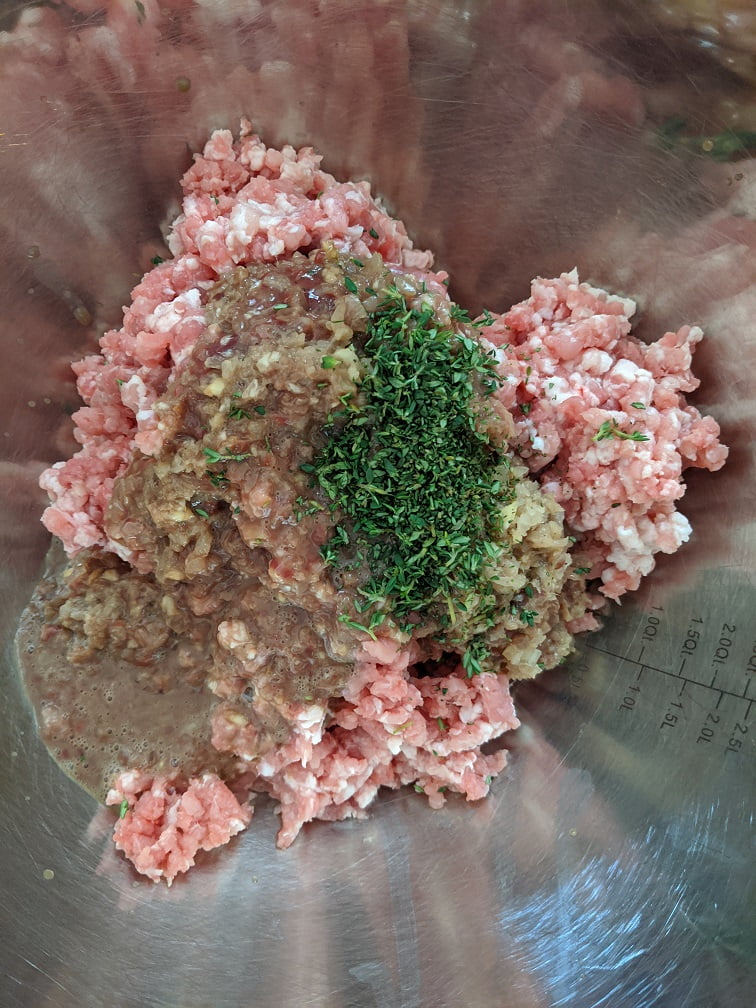
Along with the salt, there have to be some other flavours in the mix. For this I used 2 tbsp chopped fresh thyme, 2 tsp dried sage, 2-3 cloves minced garlic, 1/2 medium white onion, minced or puréed, 1 tsp black pepper, 4 oz pork or chicken liver, and 1 tsp pâté spice (recipe below).
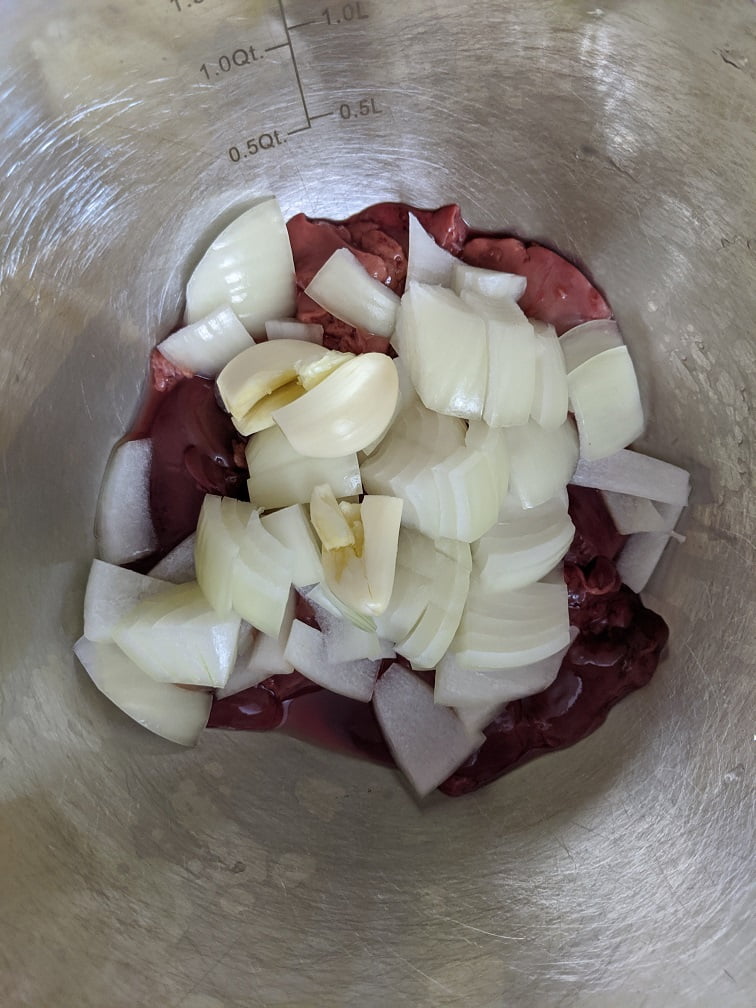
I should say that I put the liver, onions, and garlic, right through my meat grinder. If you don’t have a meat grinder (why would you?) these items can be pulsed in a food processor or cut as small as possible by hand. I will tell you that hand chopping the liver can be a messy affair.
The recipe above for Pâté Spice is taken from Charcuterie by Michael Ruhlman & Brian Polcyn. In fact, the Country Pâté recipe I am sharing here is adapted from the version in this book as well. Click here to find the book on Amazon. (It makes a really great gift for any foodies on your Christmas list)
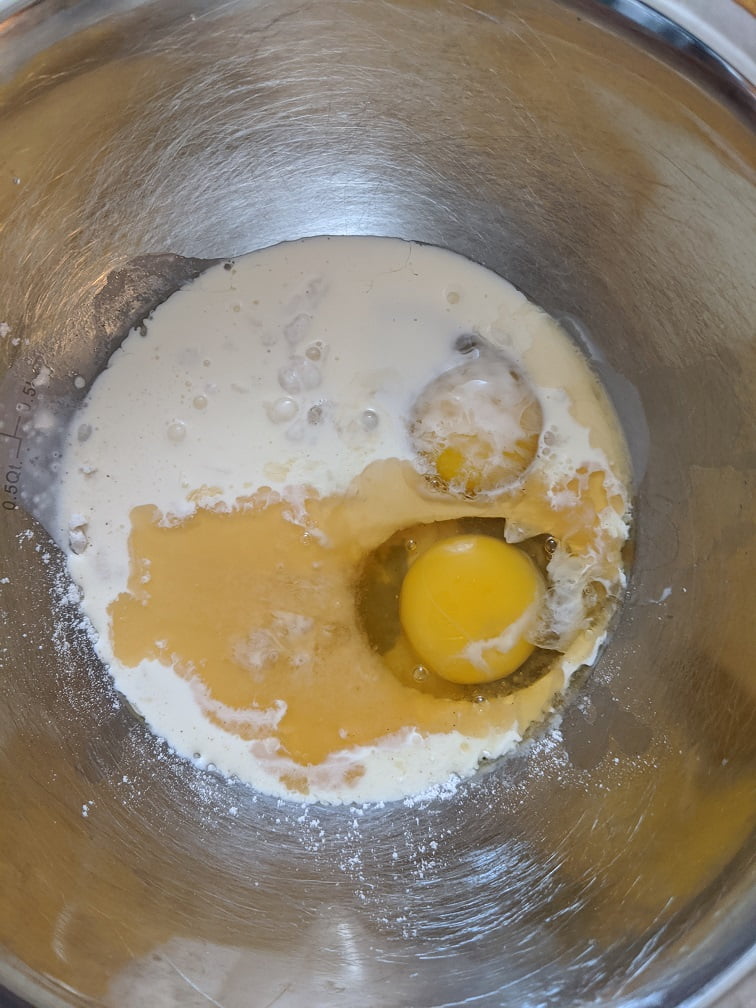
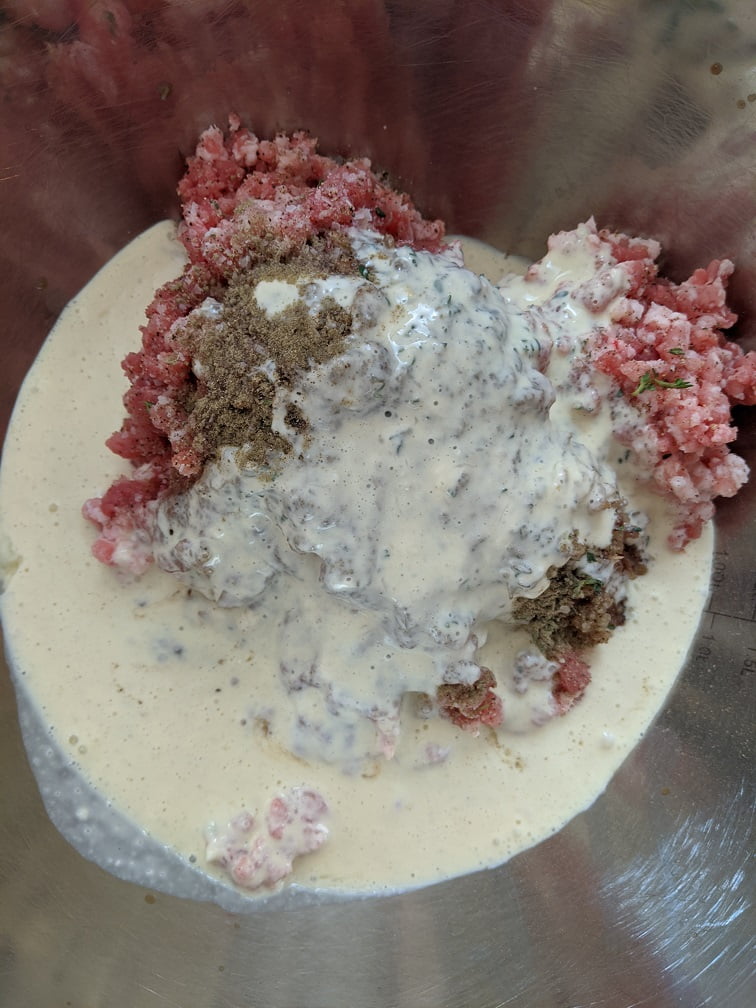
In a separate bowl from the meat, we mix together 2 eggs, 2 tbsp all-purpose flour (gluten-free for me), 2 tbsp brandy or port, and 1/2 cup whipping cream. This gets whisked together then mixed into the meat and spices.
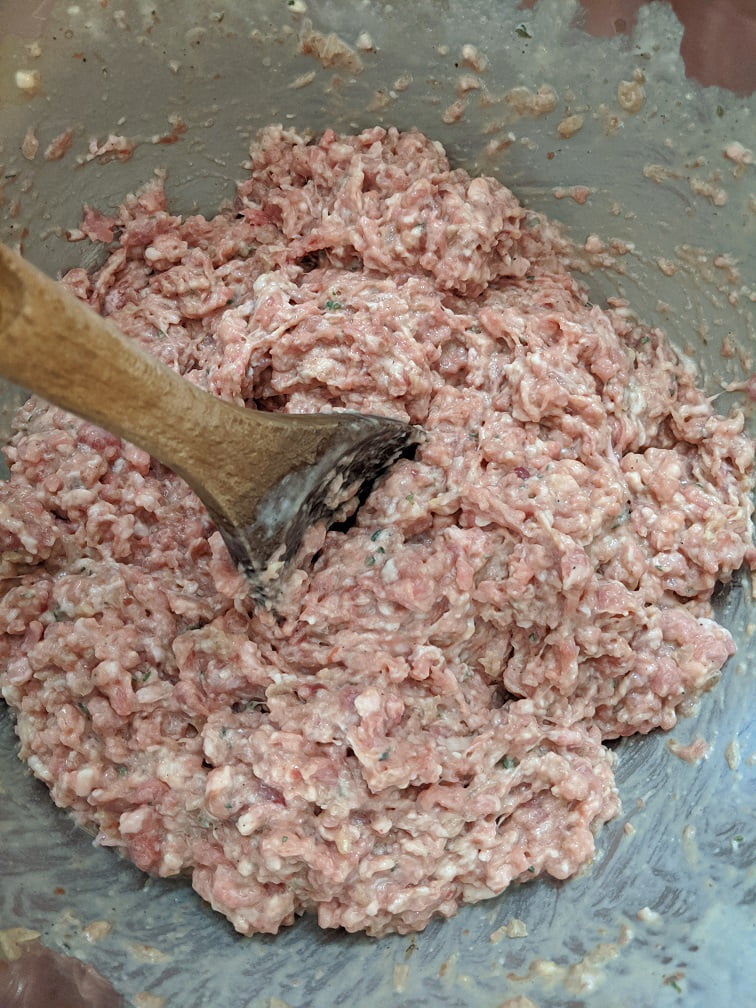
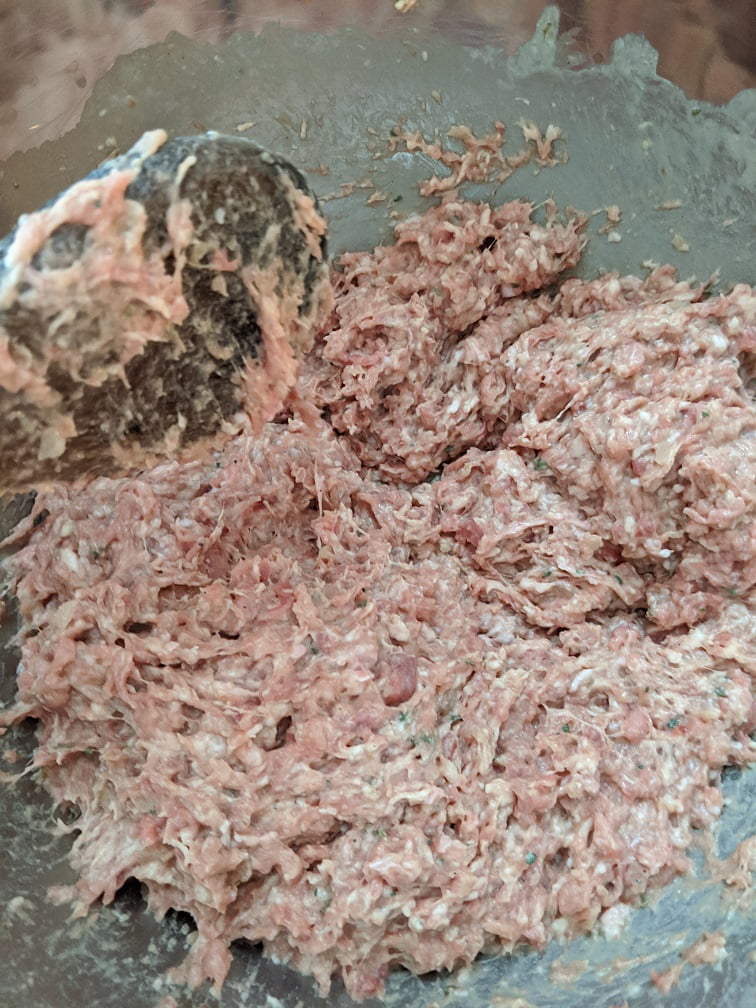
Beat the meat
At this point, all of the ingredients for the country pâté are mixed together but there is one very important step that has to be completed before the mixture can be put in the dish and baked. The meat has to be beaten. This doesn’t take long and it can be done in the bowl of a mixer, with a wooden spoon, or by hand. The idea is that you want to vigorously beat the meat until it gets a tacky texture and appearance. This will help bind the pâté together and yield one solid, well-structured mass. I did this with a wooden spoon in about two minutes.
Baking the Country Pâté
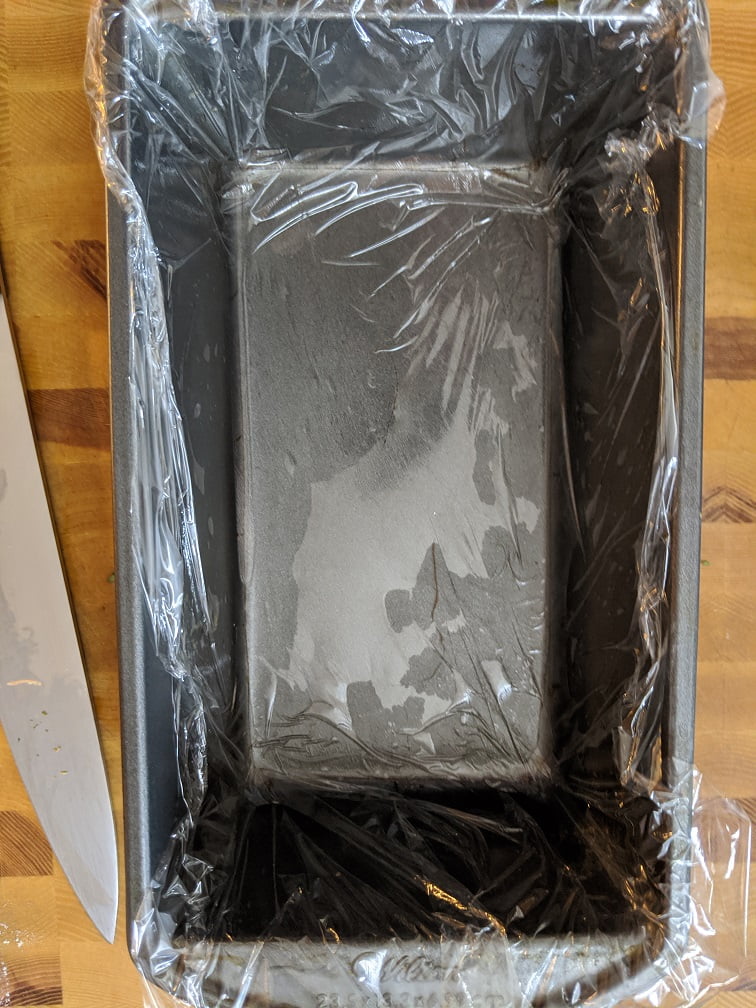
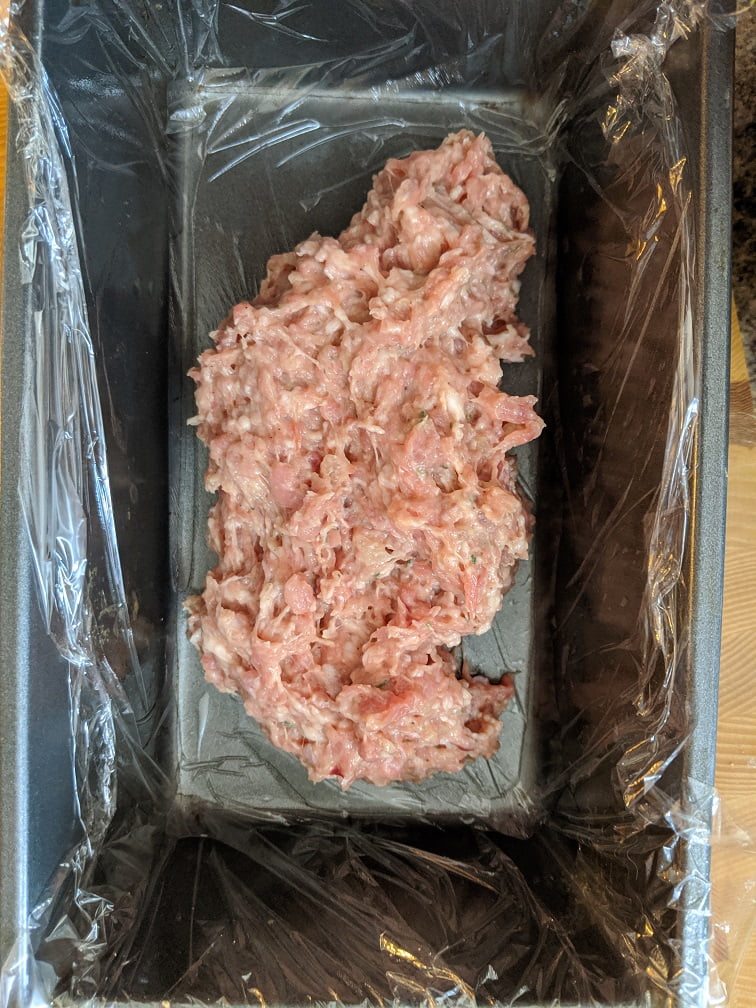
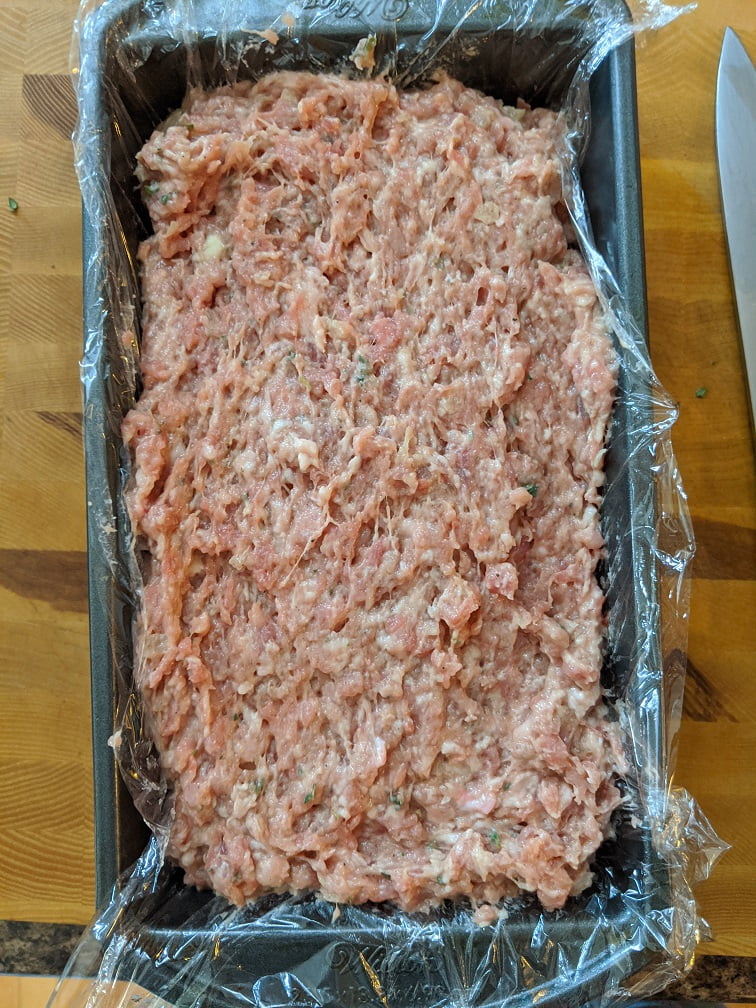
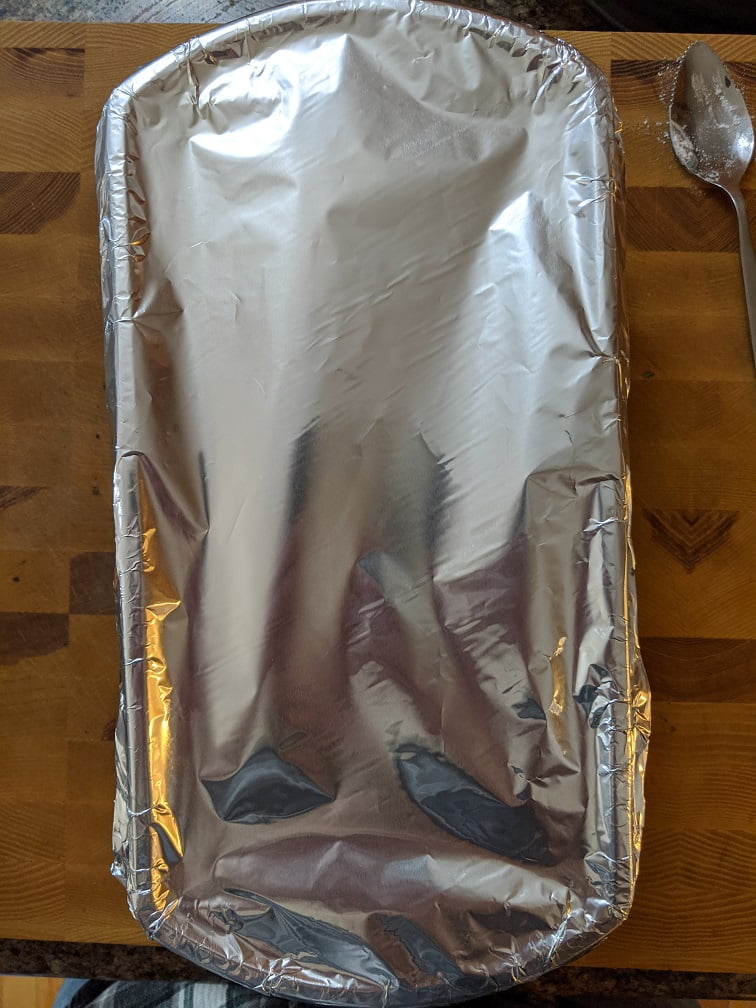
To bake the pâté first line a loaf pan, just a regular bread pan, with plastic wrap. I know this seems odd because it is going in the oven but it is on a low enough temperature that it will be fine. Now put the mixture in the lined loaf pan patting down as you go to fill any voids. Do your best to make sure there are no air pockets or anything like that. Cover the top of the pâté with plastic wrap and then tin foil. Firmly tap the loaf pan on your counter a few times to settle the meat mixture.
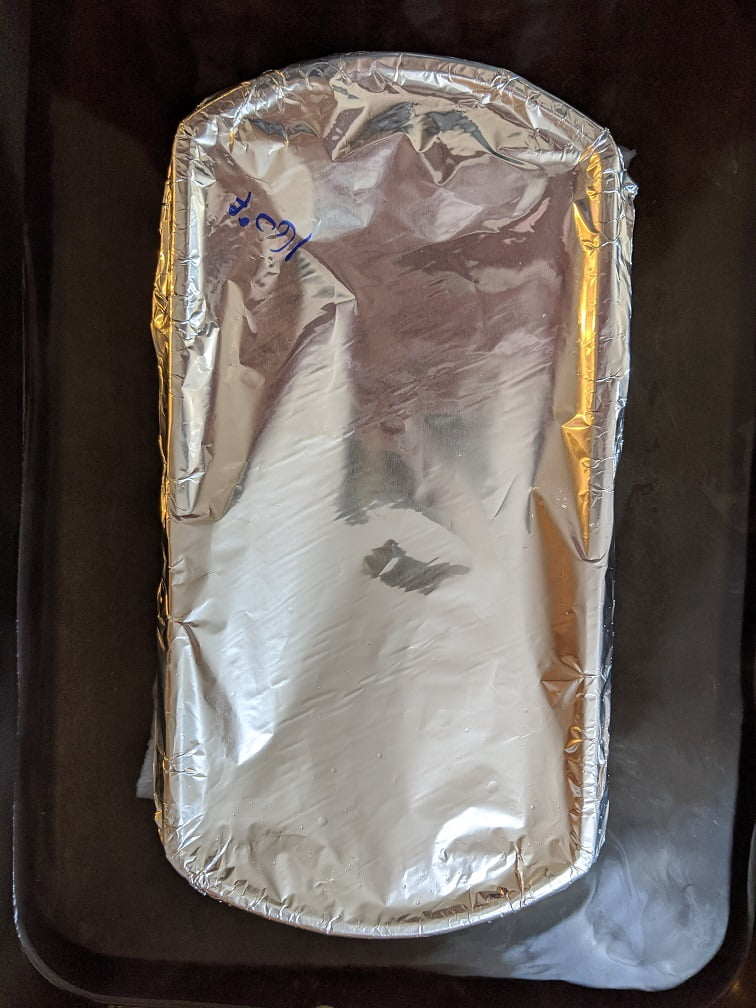
Water Bath
In order to ensure that the pâté cooks evenly and that the sides don’t brown we need to cook it in a water bath. This is easy enough. Put a damp towel in the middle of a high-sided roasting pan and put the loaf pan in on top of it. The towel will prevent the loaf pan from sliding around when moving from the oven. Pour enough hot water into the roasting pan to come halfway up the loaf pan. Put the roasting pan in the oven and bake the pâté on 300°F until a thermometer inserted into the center reaches 160°f. In my oven (which may not be working right) this took about 2 hours. It may take slightly less in your oven. It is important not to overcook this as it will become gritty and dry.
Once it’s cooked
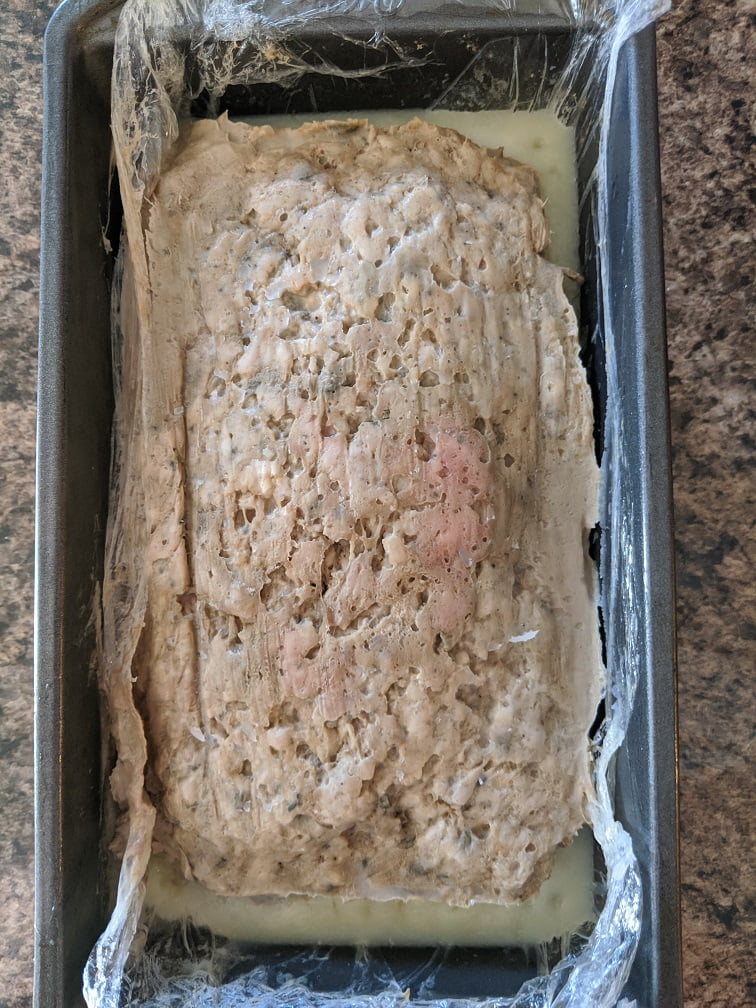
Once the country pâté is cooked, leave it covered, remove it from the water bath, and place it on a cooling wrack. Cool at room temperature for about an hour before putting it in the fridge.
You never want to cut into a pâté right away. The flavours take time to develop. So, at the very least leave it until the next day. Ideally, leave it for two to three days before you cut into it.
Weighting
One final step that is very important is to weight the pâté. To do this simply put a loaf pan on top of the loaf pan containing the pâté and fill it with cans of soup or cans of beans, anything kind of heavy. Leave this weight on overnight in the fridge.
The idea is that the weight is going to help compress the pâté giving it a consistent texture.
As a side note, I wasn’t expecting my pâté to take as long as it did. I actually ran out of time and had to get my wife to take it out of the oven, cool it, and put it in the fridge but I forgot to ask her to weight it. By the time I got home, it was already cool so, mine isn’t the exact density I would prefer, but it is still delicious.
Done
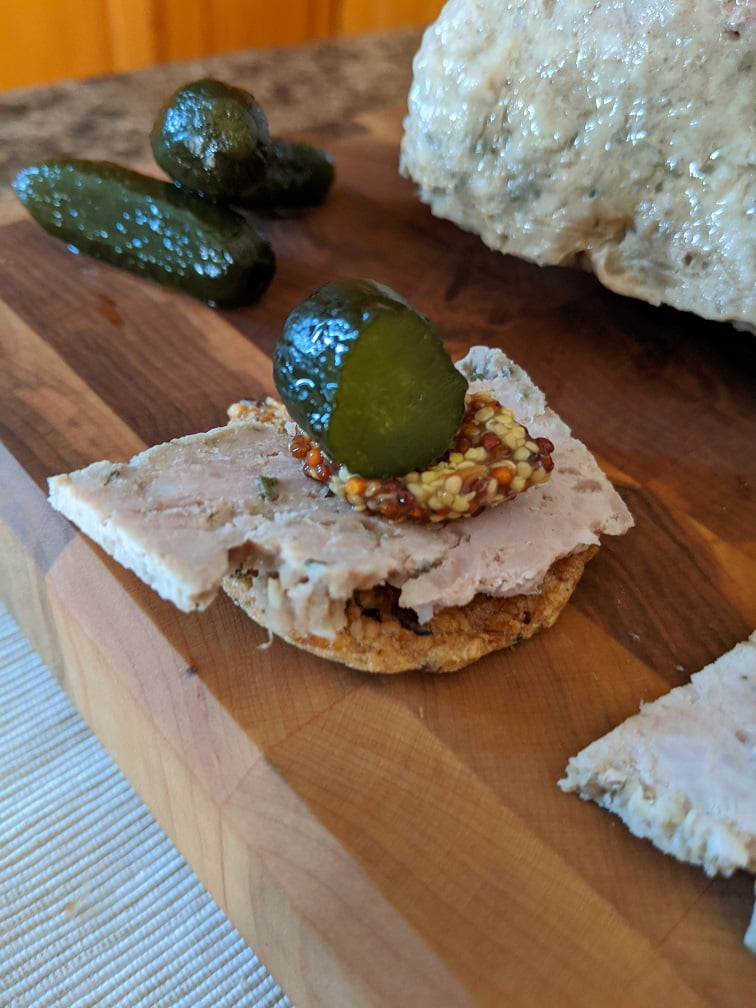
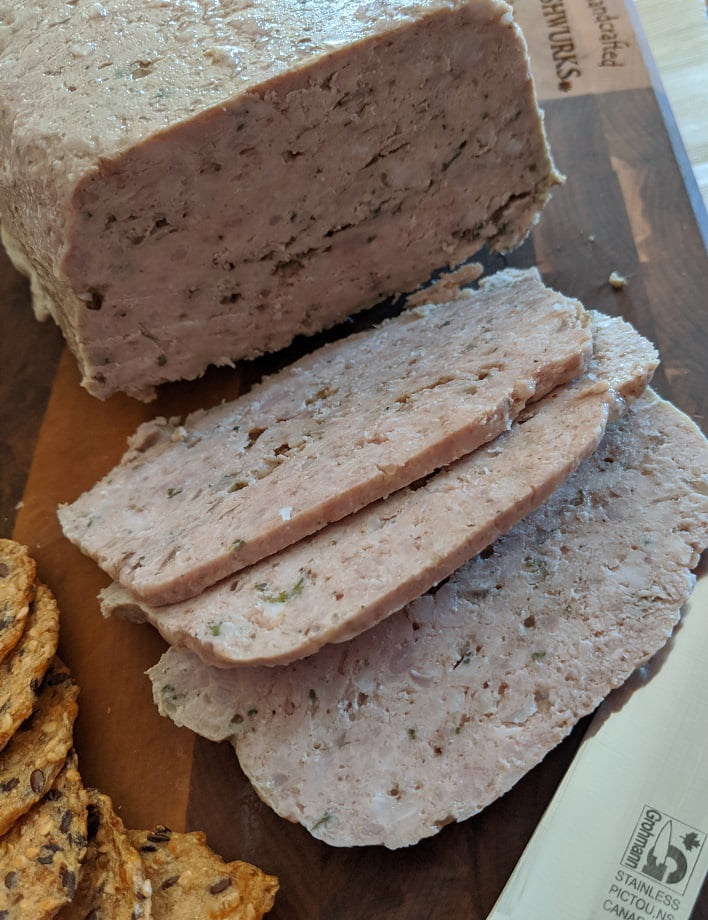
Okay, it’s been three days since you cooked your pâté and put it in the fridge. Now, it’s time to unmold and eat it! All you have to do is take the foil and plastic off the top, carefully lift the pâté out of the loaf pan and wipe away an exterior fat and gelatin. Then slice it up and serve it with crackers, mustard, and pickles.
As I said in the intro, this freezes really well. It is best to cut it into portions and vacuum seal it, but portions tightly wrapped in plastic then put in freezer bags will do the trick as well.
Conclusion
There are two things that I hope you take away from this. First of all, country pâté isn’t this scary or fancy thing. It is pretty much just a meatloaf that you eat cold. Secondly, pâté isn’t hard to make. Again, it is just a meatloaf that you eat cold.
I hope that you’ve enjoyed this post as much as I’ve enjoyed creating it. If you did like it please share it with someone you think will like it too. And remember to join the mailing list so you never miss a post.
Thanks for reading!
Country Pâté
A classic country pâté that you will make over and over again.
Keyword: appetizers, cooking techniques, French Food, party food, pâté, snacks
Servings: 12people
Author: Chef Ben Kelly
Ingredients
2lbsground pork
2tbspof coarse kosher salt
2tbspchopped fresh thyme
2tspdried sage
1tspblack pepper
1tsppâté spice
2-3clovesminced garlic
1/2medium white onionminced or puréed
4ozpork or chicken liver
2eggs
2tbspall-purpose flourgluten-free for me
2tbspbrandy or port
1/2cupwhipping cream
Instructions
Combine the first 6 ingredients in a medium mixing bowl.
Using a food processor pulse the liver, onion, and garlic until puréed then add to the pork mixture.
In a separate bowl combine the eggs, flour, milk, and brandy and mix well.
Pour the milk and egg mixture over the meat and mix.
Using either a mixer or a wooden spoon beat the meat mixture for 2-3 minutes or until it develops a tacky appearance.
Line a loaf pan with plastic wrap and put the meat mixture in it making sure to press it down to fill any voids.
Cover the loaf pan with plastic wrap and foil.
Firmly tap the loaf pan on the counter a few times to settle the meat mixture.
Put a damp towel in the bottom of a high-sided roasting pan and put the loaf pan in on top of it.
Fill the roasting pan with enough hot water to come halfway up the side of the loaf pan.
Bake the pâté on 300°f for between 1 1/2 – 2 hours or until a thermometer inserted into the center reaches a temperature of 160°F.
Remove the loaf pan from the water bath while keeping it covered.
Place the loaf pan on a cooling rack and cool for 1 hour before putting in the fridge.
While the pâté is cooling in the loaf pan weight it by placing another loaf pan on top and filling it with cans of soup or vegetables. Leave this weight on overnight.
Let the pâté rest in the fridge for 2-3 days before serving.
Remove the pâté from the loaf pan, rub off any exterior fat or gelatin and slice.
I have been asked a lot recently about cooking pork. I’ve been asked if I had any tips. I’ve been asked about how pink is too pink. Essentially, I’ve been asked to do a post about cooking pork, so here it is. Today we are going to take a look at some ways you can get the most out of those pork chops, that pork tenderloin that’s on sale, those back ribs, or that pork loin. Today is all about my favourite meat, pork.
1. Don’t Overcook it
First and foremost a lot of people don’t like pork because they have only ever had it overcooked. When it is overcooked it is dry, hard to chew and tasteless. When it is properly cooked it is juicy, tender and flavourful. Makes sense right? But how do we make sure not to overcook our pork?
The Canadian government recommends that pork be cooked to an internal temperature on 160°f. If you are using a meat thermometer that is perfect. If you don’t have one you can gauge the cook by eye. To do this you have to cut into the meat and it isn’t actually that reliable a method. If you want to do this you just want to make sure there is next to no pink. A little tiny bit is fine. The final test is the finger test. This is where you poke the pork chop with your finger to check doneness. But, you have to know how the pork should feel to use this technique. A good method of measure for this is to touch your thumb and ring finger together and then poke the meaty part of your thumb. That should be about the same firmness as a finished piece of pork.
2. How long to cook
Another key aspect of not overcooking pork is to know how long it should be cooked. It’s next to impossible for me to tell you an exact time because ovens and stoves are different, pork chops are different thicknesses and a variety of other factors. Having said that, bone-in pork chops in a pan will usually take about 4-6 minutes per side of cooking. Pork chops without a bone about 3-5 minutes per side. These times are based on cooking over medium-high heat. In the oven bone-in, pork chops will take between 20-35 minutes on 375°f. Pork tenderloin will take 35-40 minutes in the oven though if you sear it in a pan first it will cook in 12-15 minutes in the oven. Really, you should always sear pork tenderloin first. As for roasts, cooking at 325°f 25-35 minutes per pound. If you are making pulled pork, you want to cook on a low heat until the meat is literally falling apart.
3. Pork Cooking Styles
We’ve touched on a few different cooking techniques already. Roasting, and pan-searing mostly. However, pork can be slow-cooked, braised, stir-fried, deep-fried, grilled, smoked, cured, or dried. One of the greatest and most important things about pork is that it is the most versatile meat on the planet. You can do so much with it.
Think about sausages, prosciutto, bacon, and ham. All made of pork. Then add ribs, and pulled pork in there and you have magic. But, that’s not all. Think about Chinese food, sweet and sour pork, pork fried rice, Chinese BBQ pork, and the list goes on. Essentially, other than Jewish, and Muslim cultures everyone eats pork, and eats a lot of it. So, the point is that you can take one piece of pork and cook foods from around the world with it.
Now, you may be wondering what makes pork so great. Well, a few things. First of all, as I already said, the versatility but there is more to it than that. Pork shoulder, for example, has the perfect ratio of fat to meat to make sausages. Sausages need fat otherwise they become dry and gritty. When sausages are made of other meats, like beef, pork fat is usually added in for flavour and texture. Another great thing about pork is that it is fairly neutral flavoured meat. That means it can be paired with just about anything. Also, pork makes bacon.
4. Flavours that go with pork.
At this point, you may be wondering about what flavours go well with pork. Well, it’s a good question and the answer is just as good, all of them. Yes, I mean all of the flavours go with pork. Honestly, as I sit here and write this there is not a single thing that I can think of that I couldn’t find a way to pair with pork. From sweet to salty, spicy to sour, and everything in between pork can handle it. This may or may not help you but it is the truth. If you can dream it, you can probably find a way to pair it with pork.
5. Don’t be afraid.
Part of what I hope you take away from this is that pork is amazing. You shouldn’t be afraid of it, though a lot of people are. Older generations did have a little to worry about when it comes to pork due to a parasite called Trichinosis. In Canadian pork, this has pretty much been completely eliminated. It isn’t really worrying anymore. Does that mean that you should eat rare pork, no. It wouldn’t kill you but why take the risk. Cook it to 160°F and you will be fine, and the pork will be delicious.
One more great thing about pork is that compared to beef, chicken, or fish, it is inexpensive. A family pack of pork chops will run you between $8-$15 and can be made to stretch over multiple meals.
All I can really suggest is that you go out there, and experiment with pork. You will be so happy that you did.
What’s your favourite way to have pork? Tell me about it in the comments below.
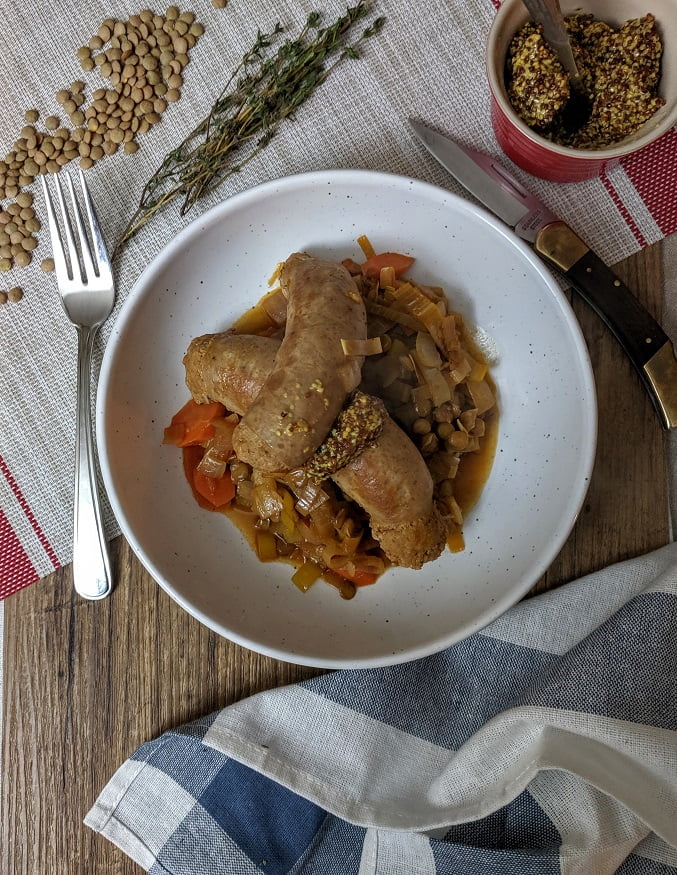
French food often gets labeled as being overly complicated, elaborate, and difficult. I wanted to share this Sausage and Lentils dish to show that that isn’t always the case. French bistro food, French country food, these are simple foods made well, with care and good quality ingredients. That’s it.
This is a great Bistro dish that is terrific for a Sunday lunch or a weeknight dinner. Give it a shot!
This is…
Sausage and Lentils in 30 Minutes or Less
Before we begin
Before I get too far into this I need to tell you that I made a mistake. When I made this last night I added the dried lentils to the pot and only gave them about fifteen minutes to cook. That really isn’t enough time. My lentils were still a bit…firm let’s say. So, I suggest that at the beginning of the 30 minutes you put the lentils in a small pot, cover them with water and boil for 15 minutes. Then at the 15-minute mark drain them and add them to the sausages and everything just like I did. The difference is, your lentils will actually be cooked at the end.
7:45 pm – Turn on the heat
I started cooking last night at 7:45 pm and in all honesty, this was the last thing I wanted to be doing. Between daylight savings time and the 3-week old baby, I was feeling pretty exhausted. But, that’s what’s great about these 30 Minute Meals. They’re quick enough that they can be made even when you really don’t feel like it.
Okay, I started at 7:45 pm. The first thing that needed to be done is getting the lentils cooking. Again, I didn’t do this but I recommend that you do. Put the lentils in a pot, cover with hot water, bring to a boil and simmer for 15 minutes.
I’m used a large enameled castiron dutch oven to make this which takes a little while to heat up. So, I turned it on over medium heat and then got down to business dicing my onion.
7:47 pm – Sausages in Pot
It took me longer than it should have to dice my onion, and I really don’t know why. But whatever the reason, 2 minutes after I started on my onion I was done. It also happened that at this point my pot was hot so I added in the sausages.
With the sausages in the pot and the onion set aside I sliced 1 celery stalk.
7:50 pm – Leeks
I let the sausages cook for about 3 minutes before flipping them. I’m not at all concerned with cooking the sausages all the way right now. I just want to get some colour on them. We’ll finish cooking them later.
I also sliced up a leek at this point. To do this first cut off and discard the root, and the top dark green bits. Slice the leek in half lengthwise then cut across in half-inch or 1 cm pieces. Put the leeks in a bowl, cover with cold water and swish them around. Let them sit in the water until ready to use.
When the time comes to use the leeks, scoop them out of the water using your hand rather than pouring them out of the bowl. If you pour the leeks into a strainer all the dirt that was cleaned off the leeks and settled to the bottom of the bowl will be poured on top of them and you will have dirty leeks once again.
7:52 pm – Cook the vegetables
Take the sausages out of the pot and add in the onion, celery, and leeks. This is all going to be cooked for about 6 minutes. Really, the goal is just to start softening all the vegetables.
7:53 pm – Garlic
While the leeks, onion, and celery are cooking slice 2 cloves of garlic and peel and slice 2 carrots.
7:56 pm – Tomato Paste
Add about 2 tbsp of tomato paste to the pot and cook for 1 minute. Then add in the garlic and carrots and cook for 1 more minute.
7:58 pm – Sausage and Lentils
At this point, everything gets added into the pot. The lentils, which hopefully have been cooking for about 15 minutes, the sausages, thyme, stock, and salt and pepper.
7:59 pm – Turn up the heat.
With everything in the pot, its time to crank the heat up to high, and bring everything to a boil. Once it starts to boil put a lid on the pot, turn the heat down to medium-low and simmer for 15 minutes.
After 15 minutes of simmering, taste and adjust the seasoning as needed and serve.
8:15 pm – Plate Dinner
I like to serve this dish with some nice French mustard and if I had of had it a crisp white wine.
Sausage and Lentils
A bistro classic you can make at home in under 30 minutes.
Good morning world! After just over two weeks of radio silence, I am back and ready to roll. For those of you that don’t know, my wife and I just had a baby and so I took a bit of time off to adjust to that massive life change. For me, everything is different, but for you, things should mostly be the same. Some of my posts may appear a little later in the day than they normally would, and down the road, things may become a little more oriented to feeding a young family, but other than that it is business as usual. Speaking of business, as usual, let’s get to it.
As I am just kind of easing back into work I thought it would be good to start with a fairly simple dish for 30 minutes or less. Don’t let the long name confuse you. This is a simple dish that anyone can make and pretty much everyone will enjoy. Let’s take a look.
This is…
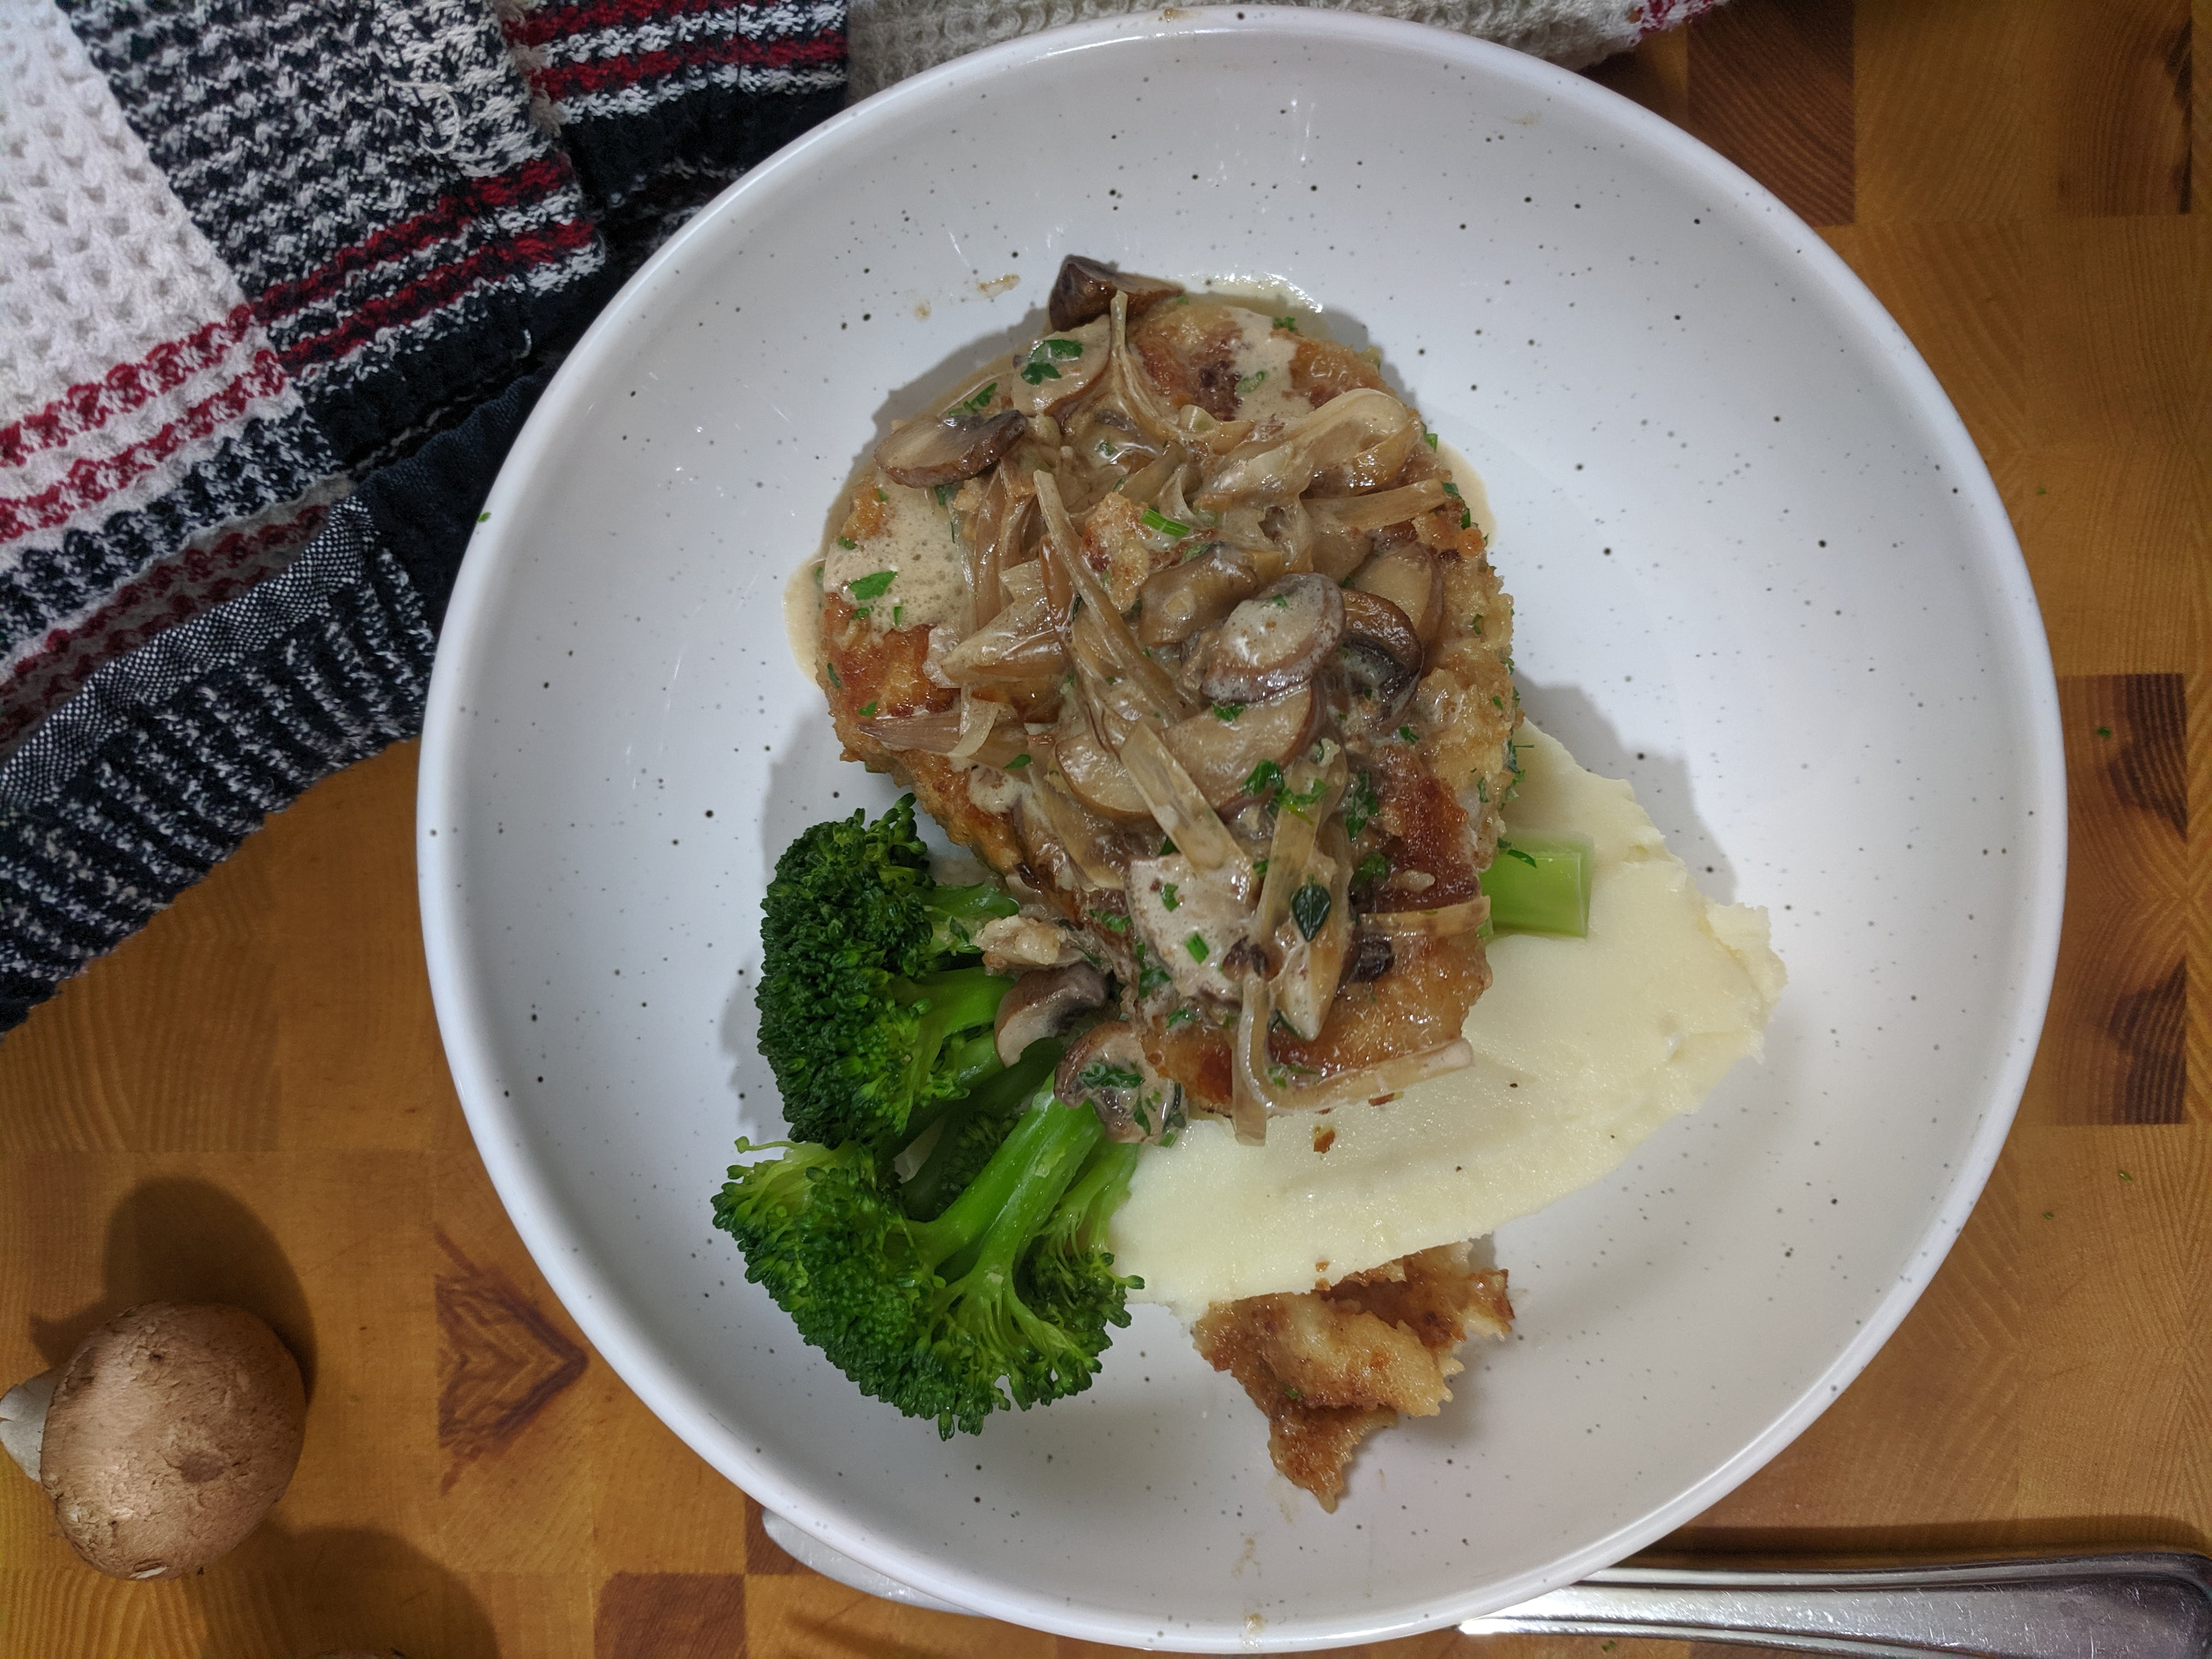
Pork Schnitzel with Brandy Mushroom Sauce In 30 Minutes or Less
6:20 pm – Potatoes
It was 6:20 pm when I started cooking last night and the first thing I had to get going on was the potatoes. I took 4 small-ish russet potatoes, peeled them, diced them, rinsed them in cold water until the water ran clear, then covered them with hot salted water and cooked them on high until they were tender. With the potatoes on the stove which took about 4 minutes in total, it was time to focus on my sauce ingredients.
6:24 pm – Sauce Prep
The sauce for this dish is what is known as a pan sauce. All that means is that the sauce is made in the same pan as the main protein, usually incorporating drippings from the protein. We aren’t going to really have any drippings, but we are going to use one pan to cook the schnitzel and the sauce.
The first thing I did was peel and thinly slice one shallot. If you don’t have shallots, half a small onion would work. Next up, I removed and discarded the stems from four cremini (brown) mushrooms, and thinly sliced them. The last thing I sliced was 2 cloves of garlic. To the sauce ingredients, I added 2 sprigs of thyme.
6:28 pm – Broccoli
I set the sauce ingredients aside, which took about 4 minutes to prep, then I got to work on some broccoli. I really like long spears of broccoli and I find cutting broccoli this way leads to the less wasted stem. To do this cut off the bottom third or half of the broccoli stem. I cut the bottom half off because my pot wasn’t big enough to hold longer stems. Then cut the broccoli into 6 pieces lengthwise.
After the broccoli was cut I put it in a pot with just about 1 inch of water. The goal here is to steam the broccoli rather than boiling it. I set the pot aside until I was ready to cook it.
6:29 pm – Breading Pork Schnitzel
Finally, it was schnitzel time! To make the schnitzel I used what is known as the standard breading procedure. You start with flour (I used potato flour because it’s what I had on hand), then a beaten egg, then bread crumbs. The idea is that the flour sticks to the meat (or vegetables), the egg sticks to the flour, and the bread crumbs stick to the egg.
Really, all I did here was beat 1 egg, and season the potato flour with salt and pepper. I used “fast fry” pork loin chops so I wouldn’t have to pound them out with a meat mallet. I dipped them in the flour, then the egg, then the bread crumbs and set them aside.
6:35 pm – Cooking Pork
As I was finishing breading the pork I turned my pan on to medium-high heat. Once the pan was hot I add in 1 tbsp of butter, then the pork. I cooked the pork for 2-3 minutes per side then removed it from the pan. I wiped the pan out with a paper towel and put it back on the heat.
I also turned the broccoli on high at this point.
While the pork was cooking, I chopped up about 2 tbsp of parsley and set it aside.
6:41 pm – Sauce
At this point the broccoli had started boiling. I turned the heat off and left the lid on the pot.
I added 1 tsp of olive oil into the pan I cooked the pork in along with the mushrooms, shallots, garlic, and thyme.
While the sauce vegetables were cooking I drained my potatoes, heated up 1 tbsp of butter, 2 tbsp of cream, and mashed the potatoes into it. I put a lid on the potato pot and set it aside until I was ready to eat.
I cooked the mushrooms and onions for about 4 minutes then added in 2 tbsp brandy. This got cooked for 1 minute then in went the beef stock and a pinch of salt and pepper. I added the pork back into the pan and cooked it for 1 minute per side before adding in a 1/4 cup of cream. I cooked the sauce for 1-2 more minutes, seasoned with salt and pepper, added in the parsley and served.
To plate the food I started with mashed potatoes, then the broccoli upon which I placed a pork chop and some of the sauce. Such a delicious meal!
Conclusion
This really is a great meal that you can make any day of the week. Also, that breaded pork is fantastic for pork parmesan, pork burgers, and lots of other things.
Cover the potatoes with hot salted water and put on high.
Cook the potatoes until tender, drain, warm 1 tbsp of butter with 1/4 cup cream then mash the potatoes and mix with the hot cream and butter.
While the potatoes are cooking slice the broccoli into spears.
Add 1 cup of water to the pot with the broccoli, bring to a boil and cook for 3 minutes with a lid on the pot.
Remove the broccoli from the heat and let sit with the lid on the pot.
While the broccoli and the potatoes are cooking season the flour with salt and pepper then dip the pork in the flour, egg then bread crumbs. Heat a frying pan over medium-high heat with 1 tbsp butter.
Cook the pork chops for 2-3 minutes per side.
Remove the pork from the pan, wipe out the paper towel, and in 1-2 tbsp of olive oil along with the mushrooms, shallots, thyme, and garlic. Cook for 4 minutes.
Add in the brandy and cook for 1 minute before adding in the beef stock and the pork,
Cook for 1-2 minutes per side then add in the cream, salt and pepper, and parsley.
Happy Monday everybody! Today we are going to take a look at a really delicious recipe for pork chops. This recipe uses an ingredient some of you may not be familiar with, fennel. Fennel has a very mild anise or black licorice flavour but don’t let that throw you off. It can be eaten cooked as we’re doing today, but it is also fantastic cut very thin and served raw in salads.
This pork chop recipe uses fennel sautéd with onions, garlic, and thyme then finishes with white wine, dijon mustard, and lemon to make both the sauce and a vegetable component for the dish. I served the pork with mashed potatoes and steamed green beans. Oh yeah, and I’m going to show you how you can make all of this in under 30 minutes.
You know the drill, let’s get to it. This is…
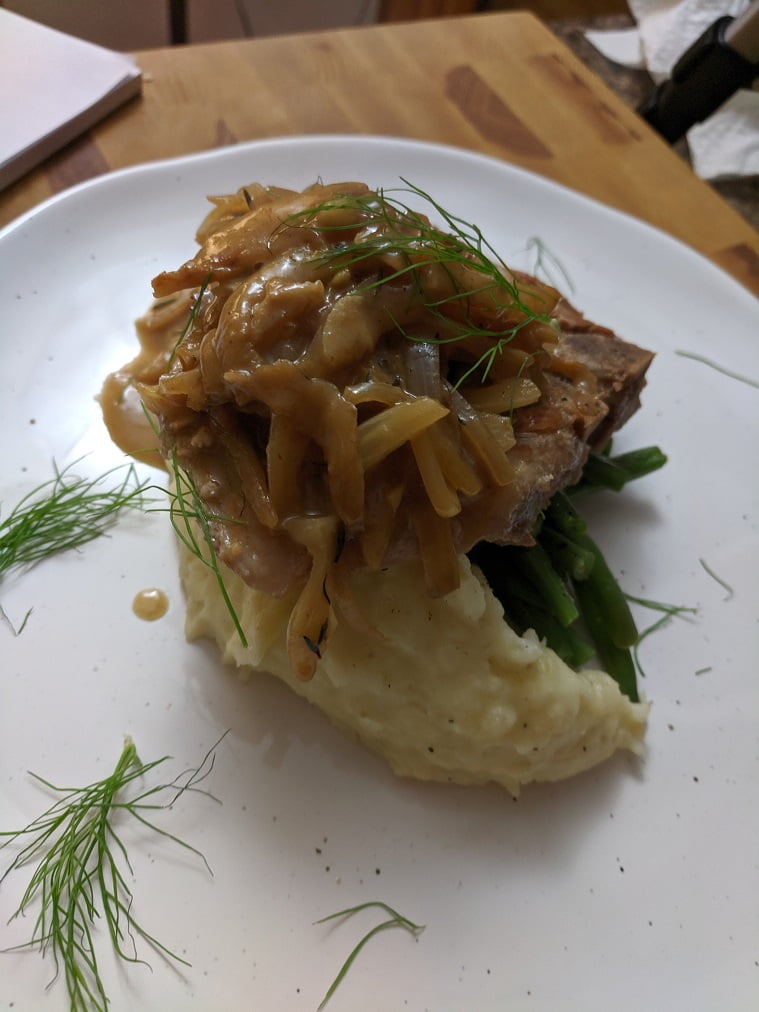
Pork Chops With Fennel In 30 Minutes Or Less
8:35 pm – Potatoes
I started cooking really late last night, it was a busy day. So, I was thankful going into this that it was only going to take a maximum of 30 minutes. The first thing I had to do was get the potatoes going.
I peeled two russet potatoes and then diced them into roughly 1-inch cubes. Then I rinsed them in cold water until the water ran clear, changed the cold water out for hot water, added a big pinch of salt and put the pot on the stove on high.
8:38 pm – Onions and Fennel
With the potatoes on the stove it was time to start prepping the ingredients for the sauce. I cut the top and bottom off of a small onion, peeled it and thinly sliced it. Then I cut the fennel bulb into quarters, one quarter is all I need for this recipe. The rest of the fennel can be used in salads, or cut into thick slices, drizzled with olive oil and roasted on 400°f to make a nice side dish. I cut the core out of the fennel quarter and then thinly sliced it to match the onions.
At this point, I also peeled and sliced 2 cloves of garlic and got 2 sprigs of thyme ready for the pan.
8:42 pm – Dry The Pork Chops
With all the sauce ingredients ready to go it was pork time. I took two center-cut pork rib chops, patted them dry with a paper towel, and seasoned them on both sides with salt and pepper. While I was doing this I heated a large frying pan over medium-high heat.
8:45 pm – Sear the Pork Chops
It took about 3 minutes for the pan to heat up. Once it was hot I add about 1 tbsp of grapeseed oil to the pan along with the pork chops. I cooked the pork for about 3 minutes per side then removed them from the pan and turned the heat down to medium.
8:51 pm – Starting the Sauce
The pork was seared off, cooked about 50% through and out of the pan. Now it was time for the fennel and onions. These got cooked for 3 minutes before adding in the garlic and thyme which was then cooked for an additional 2 minutes.
8:55 pm – Adding in the Wine
At this point, the fennel and onions were starting to soften and the garlic was becoming very aromatic. With that, in goes the wine. When you add in the wine make sure to scrape any brown bits stuck to the bottom of the pan. This will help to flavour your sauce and make cleaning the pan much easier later on.
The wine cooked for about 1 minute then I added in a 1/2 cup of hot water along with the pork chops.
At this point, I also put the green beans in hot water and then on the stove on high. To prep them I just cut the ends off.
8:56 pm – Mashing the Potatoes
At this point, the potatoes were cooked. I drained them, added in some cream, butter, and salt and pepper then mashed them. That was it.
8:59 pm – Flip the Pork
Once the potatoes were mashed I flipped the pork, cooked for 2 more minutes to finish cooking them through then took them out of the pan.
9:01 pm – Pork Chops out of the pan
To finish the sauce I add in 1 big tablespoon of Dijon mustard and 1 big tablespoon of butter along with the juice from 1/2 a lemon. I whisked this and cooked it until it was thick.
9:02 pm – Green Beans
By 9:02 the green beans were done. All that was left was to let the sauce thicken up a bit more so I started plating. Potatoes first, then green beans, then pork.
9:03 – Finish Dinner
Once everything was on the plate the sauce was done so I spooned it over the pork. Delicious!!
Conclusion
This is a really fantastic recipe that I’ve actually been making for years. Obviously, this is only for 2 people because it was just my wife and me eating but the recipe could easily be bumped up to serve 4-6.
If you are looking for something new and delicious to do with pork chops, this is it.
The typical approach to pork fried rice or any fried rice is to use day old rice that has been slightly dried. In this version, we actually use fresh rice. Specifically, sticky sushi rice. It may seem strange but it works very well and the rice holds its structure.
Fried rice is a great, quick dinner that can be easily made with whatever you have on hand. This version is pork and vegetables, but the exact same technique can be used for chicken and mushrooms, beef and broccoli, or shrimp, or scallop. Whatever you want to put in here, you can.
I first learned to make fried rice when I worked in a Chinese Restaurant nineteen years ago. It was so good, and so simple that I have been making it pretty much the same way ever since. So, let’s take a look at how you can make restaurant quality pork fried rice at home from scratch in 30 minutes or less.
This is…
Pork Fried Rice In 30 Minutes Or Less
6:45 pm – Start Cooking
I started cooking at 6:45. The first step was to get the rice going. Again, I used short grain sushi rice. 1 cup of rice and 1 1/2 cups of water. I brought this to a boil stirring once, put a lid on the pot, turned the heat down and let the rice simmer for 12 minutes. Then I took it off the heat and let it sit for a few minutes.
6:47 pm – Cutting Vegetables
After I got the rice on and while it was cooking it was time to start slicing up some veggies.
First up was to dice an onion. I cut it in half, peeled it, made a couple horizontal cuts, then a few vertical slices. Then I cut across the onion, making perfectly diced onion.
Next up was the carrot. I peeled it and cut it into manageable sized pieces. I cut the carrot into slabs, then sticks, and finally diced them.
Also, right around here is when the rice started to boil. I put the lid on the pot, turned the heat down to low and set a 12 minute timer.
Then it was celery time. Wash and trim the ends. Cut into manageable sized pieces cut in half or thirds lengthwise, and then cut across those pieces.
I also cut up two Green Onions. Trim off the ends and cut the whites and greens on a slight angle.
Finally, I cut some garlic. I cut the root end off. Peeled the two cloves and thinly sliced them. That was it.
6:58 pm Cutting Pork
You can’t have pork fried rice without pork. So, after the vegetables were cut it was time to get the pork ready.
At this point I also turned on the wok to get that heating up. I was using a heavy cast iron wok which takes 4-6 minutes to heat up. If you are using a wok made of a thinner metal you may only need 2-3 minutes to heat it. But you want it very hot before anything goes in it. I was heating mine up on medium high. Once the pork went in I turned the heat up to high to maintain it.
For the pork, I use a shoulder chop. These have a good amount of fat and tend to not dry out too quickly.
All I did was cut out any bones that were in the pork and then diced it into cubes about the size of the end on my thumb. Bigger or smaller doesn’t really matter too much. Just try to get all the pieces about the same size.
7:04 – Wok Is Hot
At 7:04 the wok was hot and it was time to get cooking. Two minutes before this the timer went off for the rice. I knew that by the time I was ready to add the rice in with the rest of the ingredients it would be ready to go.
First things first, 1-2 tbsp canola oil and 1 tbsp sesame oil into the wok followed by the pork. Once the pork is added to the wok just let it sit for a minute or two so that it gets a nice sear on the bottom. Then give it a toss and do the same thing. It took about four minutes to sear the pork.
7:08 – Vegetables go in the wok
At 7:08 I added the garlic and chopped vegetables except the green onions into the wok and cooked them for about 2 minutes.
7:10 pm – Rice
After cooking the vegetables for about 2 minutes I added in the rice and about 2-3 tbsp soy sauce. This got stir-fried for about 1 minute then I added the peas.
7:12 pm – Egg
Next up, I made a little well in the middle of the rice and broke one egg into it. I let this cook for about 30 seconds and then mixed it into the rice then added in 1 big tbsp of Sambal and the green onions. Once this all got tossed together the pork fried rice was done with three minutes to spare.
Conclusion – Pork Fried Rice
This is one of my preferred go to meals in a pinch. This is such a versatile dish that can be made really quickly for next to no money. You can use any leftovers you have on hand, or use fresh ingredients. I really like using left over BBQ or roast chicken, left over BBQ pork chops, whatever. You can make it vegetarian with mushrooms and/or tofu.
The other great thing about this pork fried rice is that you can eat it as a meal or use it as a side dish. It is even delicious as leftovers the next day.
You really just can’t go wrong with pork fried rice, or fried rice in general.
Oh! I almost forgot, while you are stir-frying all of this together make sure to scrape the bottom of the wok. Any bits of rice or whatever that get stuck, crisp up and brown will add a really nice flavour and texture to the finished rice.
I hope that you enjoyed this post as much as I enjoyed making and eating. Check out below for the full recipes and as always thank you for reading. Also, remember to subscribe to the blog so that you never miss a post.
I am a meat eater. I love cooking meat, and eating it. It doesn’t get much better than a perfectly cooked rib eye steak or pork chop. As much as I love both of those things, there is more to meat than the “glamour cuts”. Beef isn’t just tenderloin, rib eye, and New York strip. Just like pork isn’t just chops, tenderloin, and ribs.
I will talk a little bit in this post about cooking those “glamour cuts”. I think it’s important that we all know how to cook those properly. But more importantly, I want to talk about the lesser known cuts. The pieces of meat that we walk by on a daily basis never giving a second thought to. The cheap cuts. The cuts that take real skill and knowledge to perfect.
If you give a toddler a piece of beef tenderloin they can probably make it delicious. Why? Because it’s already delicious. With the more popular or “glamour cuts” it isn’t so much about what you do to them that makes them great. It’s what you don’t do. It is a matter of taking something that is already amazing and just not screwing it up.
So, what else is there? Well, let’s take a look.
Glamour Cuts
Okay, let’s actually get these guys out of the way first.
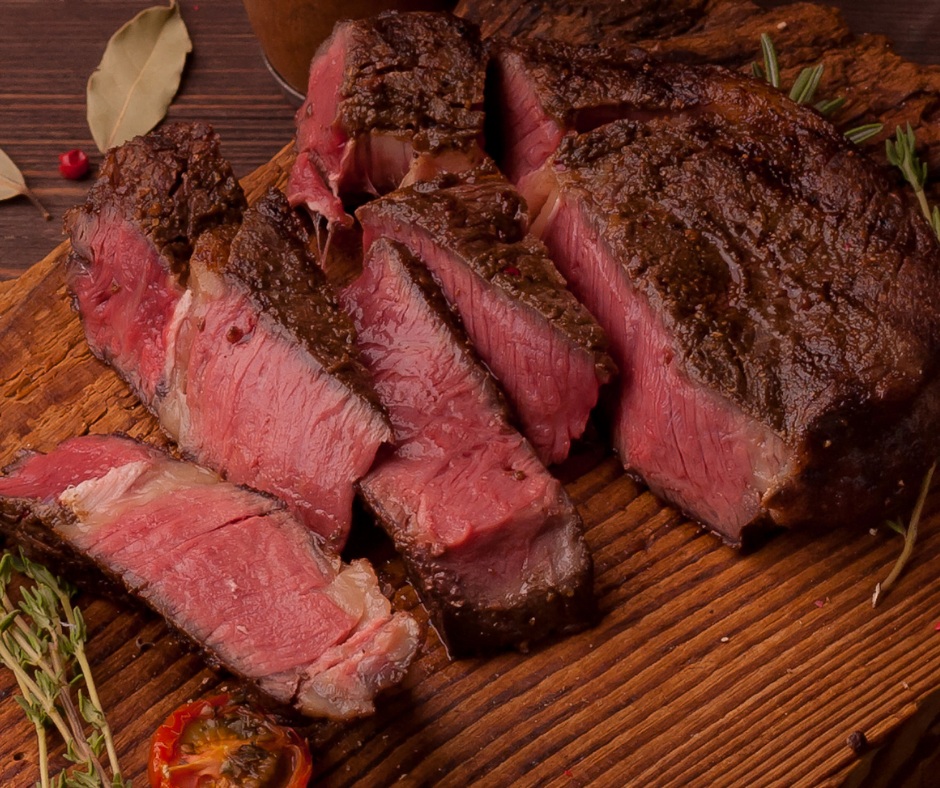
Steak Cuts-
When it comes to steak there are three main cuts. You have Strip Loin, Tenderloin, and Rib Eye. Pretty much all other steaks are a variation or combination of these. For example a T-Bone steak is really just a strip loin and a tenderloin with the dividing bone still attached. Chateaubriand is cut from the thickest part of the tenderloin. Sirloin, is essentially just a strip loin with the fat cap removed and cut from higher up on the loin.
This may seem stupid at first. Why have multiple names for the same thing? There are two main reasons. One is that it depends on where you live in the world. What we call beef tenderloin is known as fillet of beef in Europe. The other reason is that there are differences, subtle as they may be. If you have a whole strip loin or tenderloin, one end is considerably different than the other.
Would the average person really notice these differences? Probably not. But they are different.
There are other steaks like skirt steak, tri-tip and flat-iron. These are different parts of the animal entirely. They also take more skill to prepare than a tenderloin or a strip loin and thus are less popular. These fall into the other category which I will cover in a bit.
Cooking Steaks –
I did a post a few months ago called Everything I Know About Steak. I really focused on the glamour cuts in that post. So, rather than taking the time to repeat myself I am going to link to that post here. There is way more information about steak specifically in that post than I can write here. This way we can move on to the more interesting stuff.
Cooking Ribs –
I’m going to do the same thing with ribs. Rather than repeating myself, I am going to direct you to a post I wrote all about cooking ribs. You can check that out here.
Pork Cuts –
The glamour cuts of pork are really the tenderloin, and the chop. In all honesty, the tenderloin is my least favourite part of a pig. There is no fat on it. It has the least amount of flavour. And if it is even slightly overcooked it is dry as all hell. Despite all of this, people love it. I don’t know why.
Pork chops and pork loin (not tenderloin) are the same thing. The difference being the bone. I prefer bone-in pork chops because the bone helps to keep them moist and provides flavour. Whole pork loin, bone in or out is good roasting whole. It can be stuffed or left as is.
Cooking Pork To Temperature –
Pork is one of those tricky beasts that freaks a lot of people out. There is a fear of eating under-cooked pork which leads a lot of people to over cook it. This is bad news bears. Over cooked pork is terrible. It is dry. It is tasteless. And, it is joyless. On flip side, perfectly cooked pork is a thing of true beauty.
If you are that worried about eating under-cooked pork, invest in a instant read thermometer like this. Cook all of your pork to 162°F, let it rest to 165°f and everything will be glorious. If you aren’t that worried about it, which you shouldn’t be, cook all of your pork to 155°F- 158°F and let it rest to 160°F-165°F.
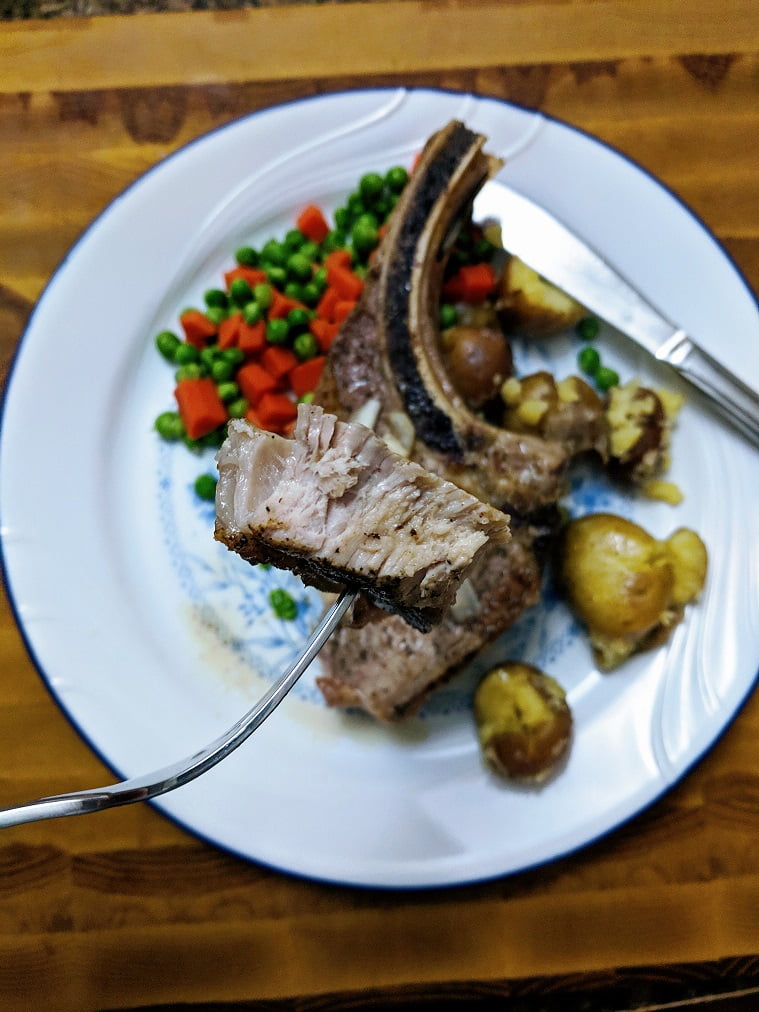
A little bit of pink in the middle of your pork chop or pork loin is fine. It is desirable.
Pork Cooking Techniques –
When it comes to cooking pork there are multiple techniques you can use. For indoor cooking for pork chops and tenderloin, I suggest a two stage cooking process. Start with a hot pan and brown the pork on all sides. Then finish it in a 400°F oven.
For out door cooking, a moderate heat is preferred. With pork chops you may not want to cook directly over the flame of the BBQ. There may be a lot of flare ups.
Pork Cooking Times –
The amount of time it takes to cook a pork chop or a whole loin or a tenderloin is really dependant on the size of it and how you are cooking it. If you took the time to sear pork chops in a pan before they go in the oven they will take less time than if you put them straight in the oven.
I don’t really have a hard and fast rule for cooking times with stuff like this as there are way to many variables. Again, I would say get a thermometer and cook to temperature not time.
Skill Cuts
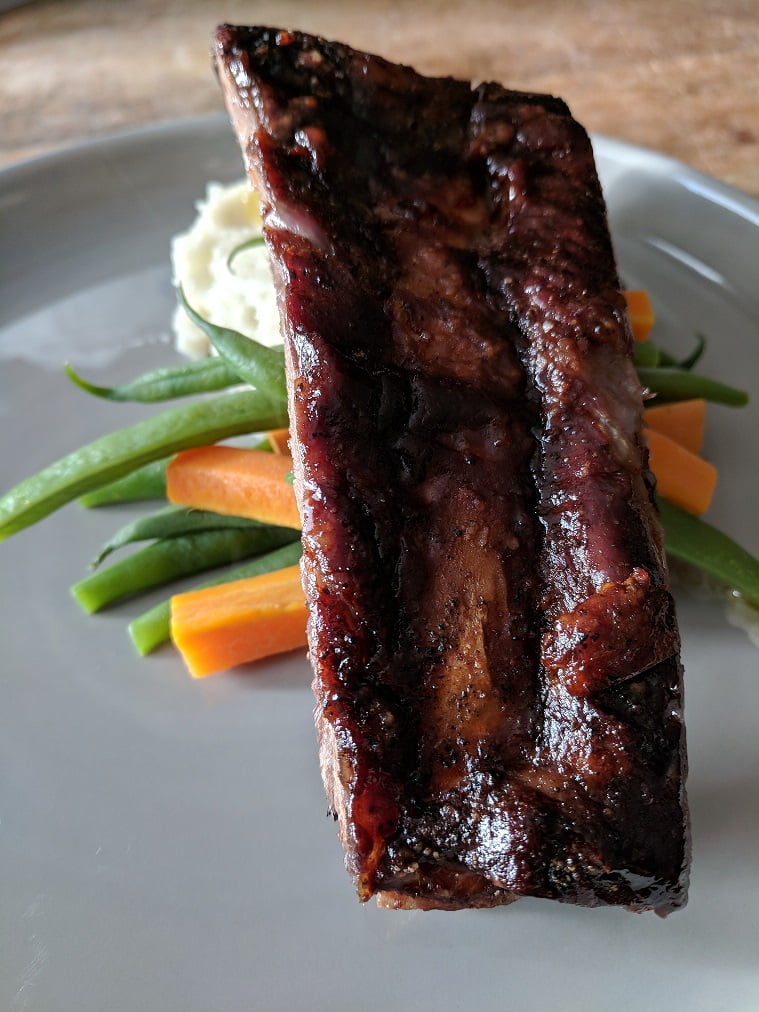
Skill cuts are those cuts of meat that take more effort and skill to prepare, but that generally have a greater pay off. Yes, a perfectly cooked rib eye steak is amazing, but so is a melt in your mouth beef short rib. Typically, the rib eye is going to cost you a lot more.
These types of cuts include beef short rib, shank (ossobuco), round, brisket, tongue, and cheek to name a few. For pork we have shoulder (picnic ham), shank, belly, spare ribs, and jowl, etc.
The thing that all of these pieces of meat generally have in common is that are composed of muscle groups that get used a lot. The more a muscle gets used the tougher it is. But, more importantly, the more flavourful it is.
With these cuts, someone who knows what they are doing can make a dish that will blow a perfectly cooked beef tenderloin out of the water.
Cooking Skill Cuts –
Pretty much all of these cuts of meat are best suited to long, slow cooking. That could be slow roasting, smoking, or braising. The key is that the tougher muscle fibres and connective tissues need time to break down. Let’s use beef cheek as an example.
First of all, I am using beef cheek because I know just about everyone cringed when they read that and that is wrong. Beef cheek is amazing. It is important to remember that it is just another piece of meat. Other than toughness and flavour there is no difference between beef cheek and beef tenderloin. And yeah, beef cheek tastes way better than beef tenderloin.
So, imagine how often the cheek of a cow moves. Every time they chew or moo. I don’t know if you have ever seen a cow, but they are pretty much always doing one of those two things. The cheeks get used more than almost any other muscle on the cows body.
If you took that cheek, put it on a barbecue for five minutes per side and tried to eat it, you wouldn’t be able to. You honestly, wouldn’t be able to chew. It would be worse than leather. On the other hand, if you took that cheek, put it in a flavourful liquid and put it in the oven on low heat for four hours, it would melt in your mouth. You wouldn’t need to chew it at all.
When you are cooking meat on low heat, for a long period of time you don’t need to worry about what temperature the meat reaches. The goal is texture and consistency. You are softening the meat. Breaking down the muscle fibres and connective tissues.
I did a much more in depth article about braising which you can find here.
Slow Roasting –
Slow roasting is the same idea, minus the flavourful liquid. In this case the meat would be rubbed with flavourings, and put it the oven to roast on low heat for a long period of time. By low heat I mean around 300°F.
Marinading, and Brining –
Often with these tougher cuts they will be marinated or brined prior to being cooked. This imparts flavour and helps to keep the meat moist. The difference is that a marinade is mostly to impart flavour. A brine is mostly to retain moisture.
Conclusion
There is so much more that I could talk about but I’m out of time for today. I will have to do a follow up post at some point down the road. I hope that this post has given you at least an idea of what is possible and why you shouldn’t just buy the “glamour cuts”.
Also, I think it is important to mention that with the slow roasting and braising of the lower end cuts it may seem like three or four hours is a long time to be cooking something but the effort is minimal. You really don’t need to do much but wait. Put something in the oven at lunch time on a Saturday or Sunday and it will be done in time for dinner. In the mean time you are free to go about your day. With today’s slow cookers it is even easier to create something amazing from these less known, and less used cuts of meat.
If you don’t love pork chops you have probably never had them cooked to perfection… Or you just don’t eat pork which is completely possible but not at all what we are talking about today.
Let’s assume for arguments sake that you don’t like pork chops because whenever you eat them, they’re over cooked and dry. This is a very common problem, especially with the thin grocery store pork chops that we’re all used to.
So, what can be done? How can we prevent pork chops from becoming dry pieces of particle board that absorb all the moisture out of our mouths? How can we add flavour before we even cook them? How can we make something that seems so mundane, the star of any meal?
All of this and more because this is…
Everything I know about pork chops
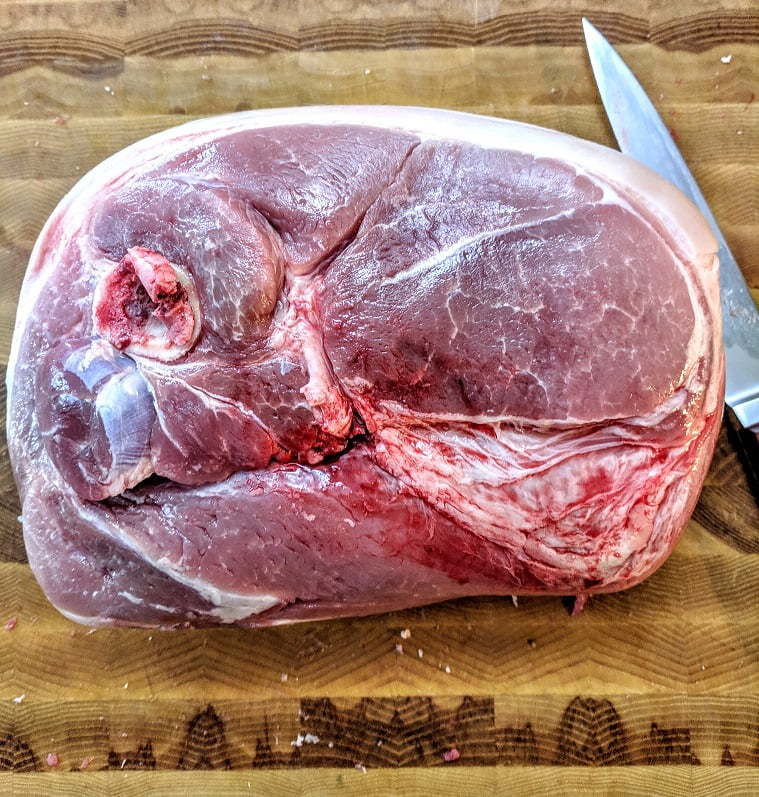
Part of the problem with pork chops is the part of the pig that they come from. It is a very lean part of the animal. The less fat, the less flavour and the more likely to dry out while cooking. There is one bonus however, because these muscles don’t get a tonne of work compared to leg muscles, they are very tender.
The Fear of Pork
The big fear that people have with pork is that if they under cook it they will get trichinosis. With modern farming and butchering techniques this isn’t actually much of a worry. There has only been one case of trichinosis in Canada since 1980. This happened in 2013 and it was from a homegrown hog not a commercially produced one.
Having said that, I’m not suggesting that you start eating rare pork. What I am saying is that pork doesn’t have to be over cooked. It just has to be cooked to a final temperature of 165°F or 74°c. By final, I mean the temperature that it comes to after resting. So, cooking a pork chop to 160°f and letting it rest will bring it up the other 5° without over cooking it.
As a bit of a side note, you are much more likely to get trichinosis from under cooked game meat like venison then you are from pork. The most common occurrences in Canada come from bear and walrus meat.
A Bone To Pick
Another problem with pork chops is that they are often sold with either a rib bone or a piece of the spine attached. I prefer bone-in pork chops but, the meat nearest the bone takes longer to cook than the rest of the chop. So, by the time that meat is cooked, the rest is over cooked. This is a problem. Especially, when people are afraid of under cooked pork.
There are some ways to cook the pork chop completely through, including around the bone, and keep the meat tender. But these processes can be complicated like confit or require special equipment like a sous vide cooker.
So, what we have to think about is either eating the pork with the meat around the bone a little underdone. Or, finding away to keep the meat tender while still cooking it through around the bone.
Brining and Marinating
The difference between a marinade and a brine can be kind of hard to pin point. The key is that they serve different purposes. We will get into that in a second but I think an easy way to think of it is that a brine is salty, a marinade is acidic.
Brine
A brine is a solution of water and salt. Usually, sugar and other flavourings are added as well. I actually talked about this a bit and gave a recipe in Wednesday’s post when I was talking about ribs.
The traditional purpose of a brine was to preserve meat over a long period of time. We don’t often use a brine for this any more because we have fridges and freezers.
Today, there are two main reasons to use a brine. The first is to impart flavour through herbs and aromatics. The second purpose is two fold:
Brining has a tenderizing effect because the salt breaks down certain muscle filaments. The salt also causes the proteins to absorb and hold more moisture. What that means is that brining pork chops makes them more flavourful, more tender, and more juicy.
Brined pork chops are more forgiving than un-brined ones. They can stand to be a little over cooked and still be juicy and tender. This means that the meat around the bone can be cooked without sacrificing the rest of the chop.
Marinades
Because marinades are by their nature acidic they break down muscle fibers making meat more tender. The problem with marinades is that they are slow to penetrate the meat. This can cause an overly acidic exterior with an untouched interior.
Due to the nature of marinades they are generally suggested for smaller pieces of meat or even meat cut into thin strips.
Marinades can absolutely be used for pork chops. There is no question about it. For my money a brine is much more forgiving and the better option.
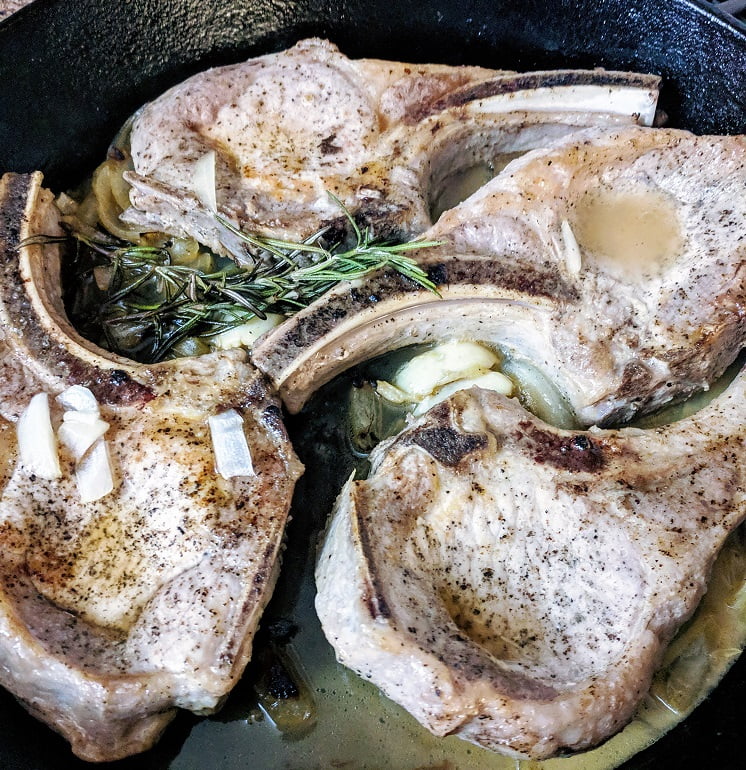
Cooking Pork Chops
When cooking pork chops (BBQ excluded) I prefer a two stage cooking process. All that means is that I start them in a pan and finish them in the oven or in liquid like a sauce.
Starting them in a pan or skillet allows me to brown the surface of the pork chops. This adds depth to the flavour of the pork. This also cuts down on my cooking time.
Imagine I have two identical pork chops. I put one directly in the oven. The other, I sear on all sides in a pan and then put it in the oven. Which one will cook quicker?
The seared one will cook quicker, even when taking the time to sear into account. The seared pork chop still takes less time to cook compared to the one that went directly in the oven.
Direct heat vs. indirect heat
The reasoning behind this little experiment is pretty straight forward. Cooking in pan on a burner is a direct heat transfer cooking method. Meaning, the heat is coming from the element which is in contact with the metal pan which is in contact with the pork chop. This contact allows for a fairly smooth and consistant transfer of heat from the burner, through the pan, to the pork chop.
An oven is an indirect heat source. The heat coming off of the elements have to travel through the air present in the oven. Air is a terrible conductor of heat. By the time the heat reaches the pork chop it has lost a lot of it’s energy and heating ability.
So then, why not cook the pork chop fully in the pan?
Although direct heat is an efficient way to transfer heat energy, it isn’t great at evenly distributing that heat throughout the item being cooked. So, you can cook a pork chop completely in a pan. It is however, fairly difficult to get a nice even cook on the chop.
The other problem with completely cooking in a pan is heat management.
Imagine I have a pork chop that is 1 inch thick that I’m cooking in a pan. There is going to be a very large temperature variance from the part of the pork chop that is in contact with the pan, and the part that is contact with the air. Every time I flip the pork chop there is going to be this heating and cooling cycle.
An oven, though not really efficient, holds a fairly stable temperature. This means that there will be less of a temperature variance from the top to the bottom of the pork chop. This makes for a more even cook. This is why I prefer a two stage cooking process for pork chops.
Put a lid on it
There is the option to put a lid on your pan and create a little oven inside. This still raises the issue of the direct vs. indirect heat transfer. The only real way to avoid this is liquid. If I were to add some wine, stock, cream of mushroom soup (as we are all probably familiar with) or sauce to the pan this could balance out the heat. There is a danger in using liquid in this way.
If you are using liquid to finish your pork chop it is important that you don’t boil the meat. Boiling will toughen the pork chop and quickly over cook it.
Ideally, when finishing your pork chop with a liquid this would be the process you would follow:
Sear the pork chops on all sides.
Remove them from the pan.
Drain off any excess fat.
Add your liquid.
Bring it to a boil.
Reduce the heat to low and add the pork chops back in.
Put a lid on the pot and simmer for five to ten minutes.
This liquid process has the added benefit of a more even distribution of heat. This will cook the meat closest to the bone along with everything else.
Grilling
Grilling is an entirely different ball game. And one that I unfortunately don’t really have time to get into today. In the spring I will do a whole grilling post to answer any questions that you may have.
Saucing
There is one more benefit of the two stage cooking method. I can develop that nice sear on the surface, and then add sauce to the pork chops when they go in the oven.
The sauce doesn’t have to be BBQ sauce. It could be some white wine, stock, brandy and cream, any number of things. This allows me to develop that deeper flavour that a sear provides while still enjoying my favourite sauce.
Conclusion
A well cooked pork chop is a thing of beauty. It’s flavourful, succulent, and delicious. In all honesty, a really good pork chop beats the hell out of a decent steak any day of the week.
I didn’t talk much about sauces because it’s not nearly as important as the actual cooking process. But use whatever sauce you like. That’s up to you.
I know that this is a lot of information. Most of which you don’t need to really think about too much. But I think it is good to have this somewhere in the back of your mind. Hopefully, it will help you fall in love with pork chops all over again.
Today, on this lovely Monday morning, I am launching a new segment here on HTNBS. From here on out, every Monday’s post will be based around a meal that can be cooked from start to finish in 30 minutes or less.
The idea here is to demonstrate that quick food can still be good food. And, even with limited time you can have a healthy and delicious home cooked meal.
These meals are based around a family of four. However, they can be scaled up or down to adjust to your family size, and still remain with the 30 minute cooking window.
Without further ado, I present…
30 Minutes Or Less – Pork Chops with Smashed Potatoes
Okay, I started this meal at 5:45 pm and was eating by 6:12 pm. Before you say, “Yeah, but your a chef…” I had to stop to take pictures every few minutes. The time I lost taking pictures should make up for any speed advantages I have.
Ingredients
Here’s what you’ll need;
4 pork chops (any cut will do)
20 or so baby potatoes ( I used red and white potatoes) \
2 cloves of garlic
1/2 a baseball sized onion
frozen peas and carrots (or any other vegetables you would prefer)
salt and pepper
2 sprigs of rosemary (or thyme)
2 tbsp butter
2 tbsp milk
1/2 cup white wine or chicken stock
1 tbsp olive oil
Here’s how this is going to work. Because the whole idea is to do this in under 30 minutes I am going to write the recipe based on time. Don’t get too caught up in it. The point is just to show you exactly how I did this so you understand how it can be done.
Let’s do it.
Directions:
5:45 pm
Turn the oven on to 400°f and start preheating a large oven safe skillet over medium high heat.
5:47 pm
Potatoes rinsed, topped with hot, salted water, and put on the burner on high.
5:51 pm
Pork chops are seasoned with salt and pepper. Olive oil is added to the skillet and the pork chops are placed in to sear.
5:54 pm
Onion is sliced and garlic is crushed and peeled. Pork is flipped and onion and garlic are added into the pan.
5:56 pm
Wine or stock is added to the pork chops along with 1 tbsp of butter, and 2 sprigs of rosemary or thyme. Once the wine starts to boil the pan goes in the oven.
5:59 pm
Frozen vegetables go in a pot, get covered with hot water and are put on a burner on high.
6:00 – 6:08 pm
Take a few minutes and tidy up any mess you’ve made.
6:09 pm
Pork is checked for doneness and removed from the oven. It is set aside to rest.
6:10 pm
The potatoes are drained, and lightly mashed (only enough to break up them up) with the remaining butter, milk, and some salt and pepper.
6:13 pm
The vegetables are drained.
6:14 pm
Dinner is served!
Explantation
There are a few important things to note about this meal. Things that can be applied to a lot of meals.
Number 1
Because the pork chops (which were about 1 inch thick) were seared on both sides in a hot pan before going in the oven, their over all cooking time was reduced by half when compared to baked pork chops.
The fact that the pork chops went into the oven in the hot pan, with hot wine or stock, also sped up the cooking process. The wine or stock also adds flavour to the pork chops.
Number 2
The flavours in this dish are simple. The pork is seasoned with salt and pepper, and then the brunt of the flavour comes from the few additional ingredients. The herbs, the liquid, the onion, and the garlic.
The liquid left in the bottom of the pan after the pork is cooked can be spooned over the pork as a light sauce.
Number 3
Baby potatoes have thin skins that can be easily eaten and are delicious. I used these to save time peeling, cutting, and mashing larger russet potatoes. They’re called “smashed” potatoes because the intention isn’t to mash them into a smooth texture. We want to just hit them once to break them apart.
Seasoning the potatoes with the salt, pepper, butter, and milk adds flavour and makes them a little more than just a broken potato.
Number 4
You can use any kind of vegetables you want for this. Peas and carrots are what I had on hand. I do recommend frozen vegetables for quick meals, especially in the winter. This is because there is no prep time and often in the winter frozen vegetables are more nutritious than anything you can buy fresh.
Conclusion
I want to make it very clear that this meal can be prepared by anyone in under 30 minutes not just me.
I hope that you enjoyed this post. I’m excited to write more of these 30 minutes or less as I think they’re going to be fun to put together. I think and hope that the information provided is valuable. If it is, or even if it isn’t I’d love to hear your thoughts in the comments.
Thanks, Chef Ben
Here are a few of my favourite kitchen tools on Amazon.
If you’re reading this, you probably already have an affinity for bacon. Who could blame you? The fatty, salty, porky flavour of bacon is the perfect combination. But what do you really know about the stuff? More importantly, what don’t you know about bacon that you should?
This week, in the continuing series about getting to know your ingredients we are talking about bacon. What exactly is it? The different ways it’s made. Different ways to cook it for different outcomes. And how to buy it.
Without further ado, sit down, relax, grab a napkin to wipe away the drool because today we are getting to know…
Bacon
What is Bacon Anyway?
Depending on where you are in the world the word bacon can mean a few different things. For our purposes here today we are talking about belly or side bacon.
Bacon as we generally refer to it in North America is cured and smoked pork belly. In other parts of the world they have smoked and non-smoked bacon, and bacon can come from different parts of the pig.
We do have different types of bacon as well such as back bacon which comes from the loin. However, we have different names for different bacon. In some places it’s all just bacon.
The cure
There are two types of cures that are used to make bacon. Wet and dry. We are going to take a look at both of these processes but first let’s talk about what a cure is.
A cure is essentially a salty brine or mixture which draws moisture out of the pork belly. This is a very old form of food preservation. Lowering the moisture content and increasing the salt content makes a very inhospitable environment for microbes. Today sodium nitrite is often added to the bacon cure to help it retain it’s colour.
Wet Cure
A wet cure is exactly what it sounds like. Rather than a salt rub the pork bellies are put in a salt brine. Alternatively the bellies may be injected with the brine rather than being soaked. A brine is a salt water solution.
This wet cure draws moisture out of the belly while replacing it with the salt water solution. This method is the way most commercially produced bacon is made.
I personally feel as though wet cured bacon is inferior to dry cured bacon. If you have ever bought bacon that was very wet and soggy you understand what I mean.
Dry Cure
Just like with the wet cure the purpose is to extract moisture from the belly. Where a wet cure replaces the drawn out liquid with the salt water solution, dry curing doesn’t replace the extracted liquid.
The result of a dry cure is a firm, dry texture to the pork belly. This is the traditional way of making bacon. And the technique that I prefer to use when making bacon or to buy when purchasing bacon.
Often with a dry cure there will also be sugar added to the salt which adds a bit more depth of flavour to the final product.
Once the bacon is in the cure, wet or dry, it needs to sit for a period of time to allow the cure to do it’s job. This can be as little as a day or two or as long as a month.
Smoke
We all love that smoky flavour of bacon. However, not all bacon is actually smoked the way you would think it is.
Often with commercially produced, wet cured bacon, liquid smoke is used rather than actual smoke. This can be added to the brine and/or the bacon can be given a bath in it. This liquid smoke also adds colour to the meat.
Better quality bacon, and even a lot of commercially produced bacon, is actually smoked with wood smoke. If tasted side by side it is very easy to tell the difference between bacon with real smoke, vs. bacon with liquid smoke.
Liquid smoke is often used for the same reason that a wet cure is used. It is much cheaper than a dry cure and real smoke. However the result is sub-par at best.
Types of smoke
Bacon can be smoked with a variety of woods and even corn cobs. Often maple wood, apple wood, and hickory will be used. Each wood provides a different flavour and smoke profile to the bacon. Honestly though, they all taste good.
Buying Bacon
When buying bacon look for a firm dry texture. This signifies high quality and more traditional techniques.
Wet, soft bacon is low quality. It costs less for a reason. However, when you cook this bacon a lot of moisture comes out and is lost. The dry, firm bacon has much less loss in the form of liquid and fat.
The shitty bacon may seem cheaper. However, when you calculate all the loss that occurs when it’s cooked the price is actually similar to the better quality stuff. Remember, bacon is sold by weight. So, if you are losing 25% of the bacon’s weight when you’re cooking it, compared to maybe a 10% loss, you are actually paying 15% more than you think you are. Make sense?
The final point is that dry cured, naturally smoked bacon just tastes 1000 times better than wet cured artificially smoked bacon.
Cooking Bacon
Often when people cook bacon they get a pan really hot, add the bacon, and cook it on high heat. I’m going to tell you right now that this is a terrible way to cook bacon.
There are a few methods that can be used to produce a really tasty finished product.
The first, and my personal favourite way to cook bacon is to start it in a cold pan. Lay the bacon down flat in the pan off the heat. Put the pan on medium low heat and cook the bacon slowly. Flip the bacon after 5- 10 minutes. This slowly renders the fat out of the bacon and leaves you with the crispiest bacon you have ever had.
The second way I like to cook bacon is in the oven at 350°F pressed between two cookie sheets. This does the same thing as the first method with the added bonus of perfectly flat bacon.
Another method that I have been hearing a lot about but personally have not tried is to start the bacon in a bit of water. To do this, put the bacon in a pan, cover with a tiny bit of water and cook. Let the water evaporate and finish cooking the bacon in the pan until crisp.
This final method I wouldn’t use with good quality bacon. However, for a wet cured bacon it could actually help make it crispy.
Conclusion
You may have just read through this whole thing and thought it doesn’t matter. Bacon is bacon. Well, I challenge you to try the difference side by side. Get a wet cured artificially smoked bacon and a dry cured naturally smoked bacon and test them. The moment the bacon goes in the pan you will see the difference.
Don’t let yourself be fooled into thinking that all bacon is created equal. And definitely don’t be fooled into thinking that cheaper bacon is actually cheaper.
We use cookies on our website to give you the most relevant experience by remembering your preferences and repeat visits. By clicking “Accept”, you consent to the use of ALL the cookies.
This website uses cookies to improve your experience while you navigate through the website. Out of these, the cookies that are categorized as necessary are stored on your browser as they are essential for the working of basic functionalities of the website. We also use third-party cookies that help us analyze and understand how you use this website. These cookies will be stored in your browser only with your consent. You also have the option to opt-out of these cookies. But opting out of some of these cookies may affect your browsing experience.
Necessary cookies are absolutely essential for the website to function properly. This category only includes cookies that ensures basic functionalities and security features of the website. These cookies do not store any personal information.
Any cookies that may not be particularly necessary for the website to function and is used specifically to collect user personal data via analytics, ads, other embedded contents are termed as non-necessary cookies. It is mandatory to procure user consent prior to running these cookies on your website.