This week we walk through how to make the classic of all classics; Tomato Soup and Grilled Cheese. The kicker…we do it from scratch in 30 Minutes Or Less.
Let’s take a look!

There are few things in life that reach the height of perfection that you will find while dipping a crunchy, gooey grilled cheese into a bowl of creamy tomato soup. A staple of childhood lunches for generations, what’s not to love?
Although there are some decent canned tomato soups out there, nothing beats the homemade stuff. Today, we make the soup from scratch using only a small handful of ingredients. We speed up the process by using canned tomatoes instead of fresh ones. This makes a really delicious, quick soup.
It may not look it, but this meal is very filling. Having said, if you are serving it for dinner, feel free to add a salad to it as well.
A note about basil
I used fresh basil for this and highly recommend that you do the same. It adds a much fresher flavour than dried basil. If buy basil for this and have a bunch left over, simply purée it with a bit of olive oil and freeze it into shallow ice cubes. One or two cubes of basil purée would flavour this soup very nicely.
Okay, enough chit chat. Let’s get into this.
Ingredients
For the soup I used
- 1 can of whole reduced salt tomatoes
- 3 cloves of garlic
- 1 baseball sized onion
- 6-8 fresh basil leaves
- 1/2 cup whipping cream
- 1 tbsp sugar
- salt and pepper to taste
For the grilled cheese I used
- 4 slices Schar Gluten Free Bread (use whatever bread you would like)
- 8 1/4 inch slices of aged Cheddar Cheese (a variety of cheese such as Swiss, Cheddar, and Jack Cheese work’s very well)
- 2-3 tbsp butter
Let’s get cooking
5:10 pm
At 5:10 I gathered all of my ingredients and diced my onion, garlic, and basil.
The size that you cut this stuff isn’t super important as it’s going to be puréed later one. However, it’s still important to cut it up fairly small so that it will cook quickly and evenly.
This all took me until about 5:15 pm.
The trick to dicing the onion is to first cut the top off. Next, cut the onion in half down through the root. Peel the onion. At this point you should have two peeled onion halves with the root still attached. The root holds the onion together.
The next step is to make a few horizontal cuts, making sure to keep your fingers flat and clear of the knife. Your horizontal cuts should be separated by about a quarter inch. Likely you will only need two in your onion. You still do not want to cut through the root.

Next, using the same principles as with the horizontal cuts, you want to make a few vertical cuts. These cuts should go all the way through the onion to the cutting board, but still not through the root. Use the tip of your knife to do this.
It’s easiest to make these vertical cuts with the root of the onion pointing away from you.
The root should still be intact so that your onion is mostly being held together.

Finally, you cut across the onion, and the slices you’ve made, leaving you with a perfectly diced onion.

For this we also have to peel and chop the garlic and basil. For the garlic, cut the root off, press down firmly on the garlic to crush it, pull the peel off and rough chop it.


Wash the basil and pat dry. Roll the leaves into a cigar shape and slice them evenly.


5:15 pm
By 5:15 the onion, garlic, and basil were ready. I added 1 tbsp of olive oil to a medium pot a long with the onion and garlic. I put the pot over medium heat and cooked until the onions were soft.
Usually, I am pretty adamant that the pot be preheated and the onion goes in long before the garlic. The reason it doesn’t matter here is because we are only cooking the onions long enough to soften them, and we didn’t cut the garlic very small. This just means that there isn’t going to time for the garlic to burn. And as we aren’t trying to colour the onions, a hot pot isn’t needed.


At this point I started cutting the cheese. All of this took me about 3 minutes.

5:18 pm
At 5:18 I buttered my bread, stacked them slices buttered side together, and topped one un-buttered side with the cheese. I stacked the bread like that just to keep everything neat and tidy.


By 5:22 the cheese was all cut, and the sandwiches were assembled.
5:23 pm
At 5:23 the onions were softened and just starting to brown. I opened the can of tomatoes and added them to the pot, whole. I added the basil, cream, sugar and some salt and pepper in as well.
Using an immersion blender, I puréed all these ingredients together until smooth.
A regular blender can be used but rather than adding all of the ingredients into the pot, add everything into the blended along with the cooked onion and garlic. Once everything is puréed add it back into the pot and heat.
Now that the soup was puréed, it went back over medium heat and was left to heat through and simmer while I made the grilled cheese.


5:28 pm
Now that the soup is all but done, I started heating my cast iron skillet over medium meat.
If you don’t have cast iron, use what you do have. Ideally, you should have a pan big enough to make multiple grilled cheeses at once. This will obviously save you time.
It took about 3 minutes for the pan to heat up. Once it was hot I separated my two slices of bread, and put the buttered side of the slice with the cheese on it down. I topped this with the second piece of bread with the butter side up. This might be written in a confusing way… Cheese in the middle of two pieces of bread with butter on the outside of both pieces. That feels like a much better explanation. I put the second sandwich in as well.
The key to an evenly cooked grilled cheese is to keep it moving. Every 45 seconds or so move it around the pan to make sure it isn’t sitting on a hot or cold spot. Once it’s golden brown on one side flip it and brown the other.
What you will probably notice is that both sides of the sandwich will be brown but the cheese won’t be melted. Once both sides are browned I keep flipping the sandwich every minute or so. This keeps both sides hot, heats the sandwich evenly throughout, and gives the cheese time to melt without burning the bread.
If you feel like the bread is going to burn even with all the flipping, turn the heat down a bit.


5:35 pm
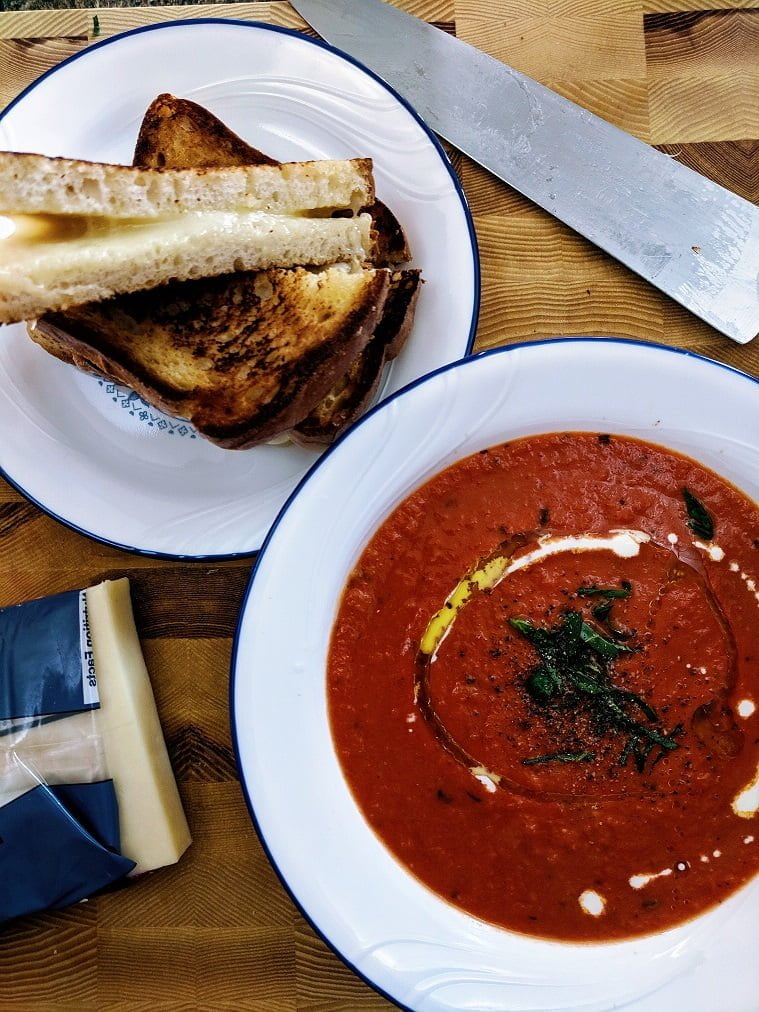
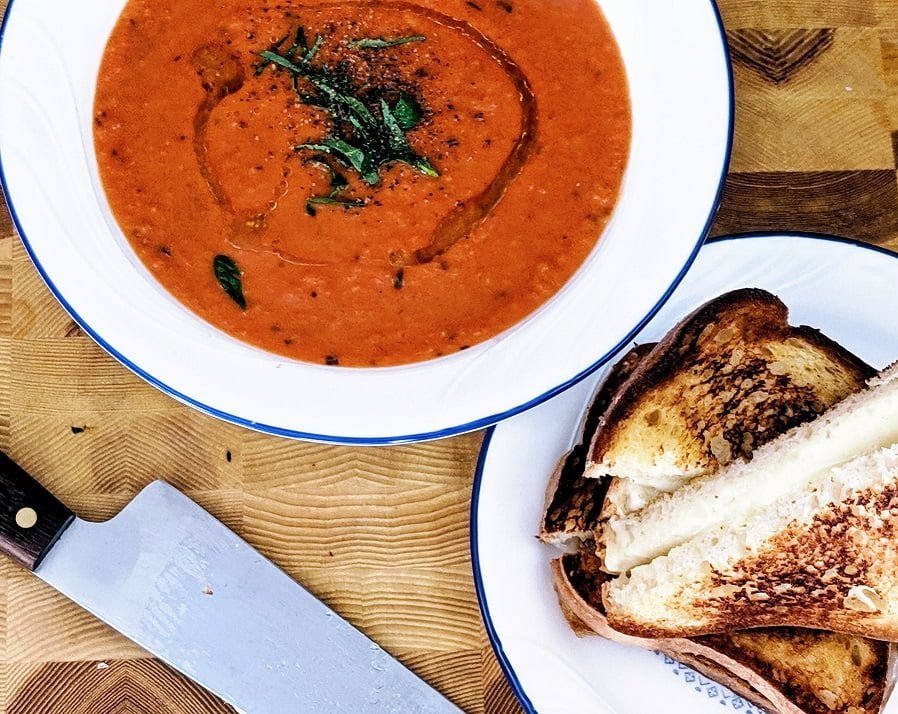
By 5:35 the grilled cheese and the soup were both done, plated, and the final pictures had been taken. Within this time, I also made a non gluten-free grilled cheese for my wife, so three grilled cheese in total.
If you need to make a bunch of grilled cheese, cook them in the pan just enough to toast the bread on both side and then put them in a 350°f oven for 5-7 minutes, flipping them at least once. This should be enough to melt the cheese. And, you can make a lot of them this way.


I added a bit of olive oil, cream, basil and pepper to the top of the soup for garnish. The first picture doesn’t have cream on it, you see the difference in presentation a little contrast can make. You can thank my wife for that.
Conclusion
This meal took no time at all and is guaranteed to please. the best part is that it works just as well for a Saturday lunch as it does for a Tuesday dinner.
Once you try this and see how quickly it comes together and how delicious it is, I doubt you will want to go back to canned soup.
Ingredients
- 1 can Whole Tomatoes I used reduced salt
- 1 Baseball Sized Onion
- 2-3 cloves Garlic
- 1/2 cup Whipping Cream
- 1 tbsp Sugar
- To taste Salt and Pepper
- 8-10 Basil Leaves
Instructions
- Peel and dice the onions and garlic
- Add the olive oil, onions, and garlic to a medium sized pot and place over medium heat.
- Cook the onions and garlic until the onions are soft. About 5-8 minutes.
- Add the reaming ingredients and purée using an immersion blender or a standard blender.
- Put back on the heat and simmer for 5-10 minutes.
- Season to taste with salt and pepper.
- Served with grilled cheese sandwiches.


0 Comments