Imagine yourself sitting at a table in a restaurant in Greece. The sea air gently blowing in from the open windows. A server walks up to your table and with a big smile puts a bowl of freshly grilled pita bread and homemade Tzatziki down for you to enjoy. You tear apart a piece of the pita and dip it into the Tzatziki as your mouth waters in anticipation. The first taste of the Tzatziki and bread turns on all your senses. It is pleasantly sour, herbaceous, fresh-tasting, and creamy. You enjoy the rest of the dip and bread with a nice glass of wine looking out over the ocean a million miles away from any worries or cares.
I can’t fly you to Greece, and I can’t make all your cares and worries go away. What I can do, is share with you how to make the best Tzatziki you’ll ever have. Then maybe with an open window and a bit of imagination, you can create the rest of the experience.
So, what are the secrets to the best Tzatziki ever? Let’s take a look.
This is how to…
Master Tzatziki In 5 Simple Steps
What is Tzatziki?
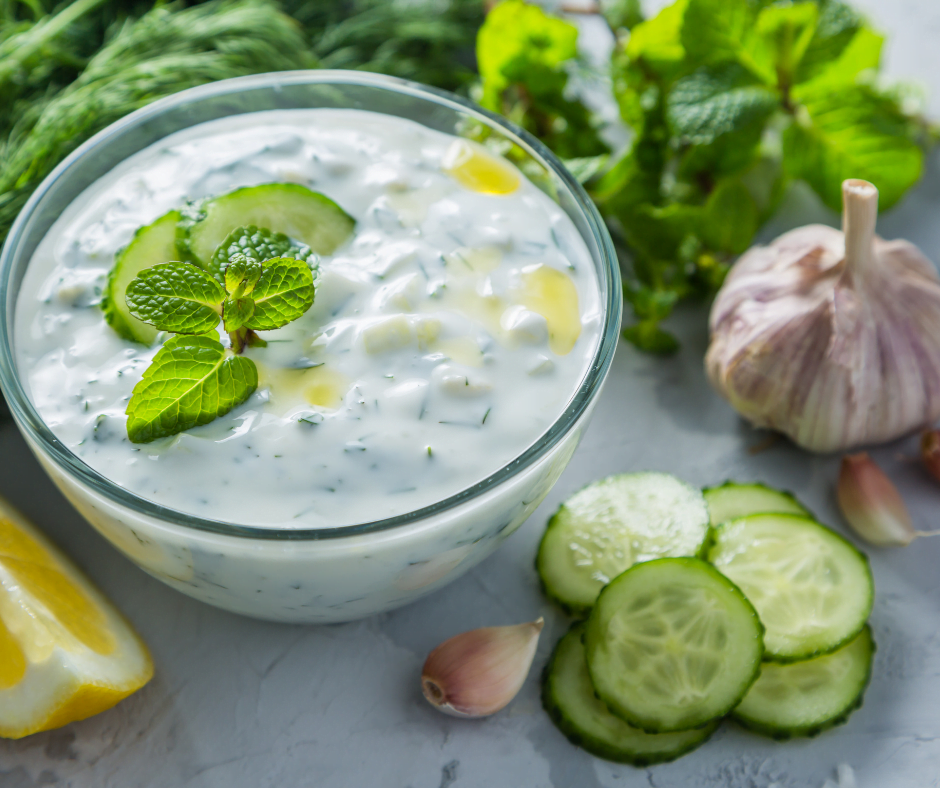
I guess there might be some people out there who don’t actually know what Tzatziki is. Essentially it is a yogurt dip made with cucumber, herbs, garlic, and lemon. That’s really about it. It is great with chicken, pork, lamb, bread, vegetables, wraps…you name it Tzatziki goes with it.
Now that we all know what it is let’s break down how to make it.
Step 1 – Cucumber
One of the main ingredients in Tzatziki is cucumber. It is generally grated on a cheese grater, salted, left to sit for 20 minutes or so, and then squeezed. The purpose behind all of this is to extract moisture from the cucumber. If we skip this step our Tzatziki will end of watery which is not at all what we want.
Take an English cucumber and cut a piece that equals about a quarter of the length of the cucumber. Wash it, pat it dry, and grate it into a bowl on the large grater setting of a cheese grater. Add 1/8 tsp Kosher or Sea Salt. It is best not to use table salt here as table salt is terrible. Mix the salt and cucumber together, place in a fine-mesh sieve set over the bowl for about 20 minutes.
Once 20 minutes have passed come back to the grated cucumber and squeeze out any excess juice. The cucumber is now ready to use.
If you plan on keeping the Tzatziki in the fridge for more than a day or two it is best to remove the seeds from the cucumber. The seeds go bad quickly. Cut the quarter cucumber in half lengthwise. Use a spoon to scoop out the seeds. Now grate and salt the cucumber as you normally would.
Step 2 – Herbs
Pretty much everyone puts dill in their Tzatziki, but what most people miss is the mint. It may seem like a very strange combination, but mint and dill actually work really well together in this application. That little hint of mint will take a decent Tzatziki and make it amazing. Don’t leave it out!
For our Tzatziki which will be about 1 cup in total, we want about 1 tbsp chopped fresh dill and 2 tsp chopped fresh mint.
Step 3 – Garlic
Tzatziki without garlic is no tzatziki at all. Having said that, we don’t want to be biting into a big chunk of garlic. It is best to purée the garlic or chop it as fine as you can.
We are going to use 2 cloves or about 2 tsp chopped or puréed garlic.
Step 4 – Yogurt
When cooking Greek food it is always best to use Greek yogurt. The main difference between Greek yogurt and other types is that Greek yogurt is strained to allow moisture to drain off. This gives Greek yogurt a creamier texture and a slightly more intense flavour.
Take about 3/4 cup of plain Greek yogurt and mix it with the cucumber, herbs, and garlic from earlier. Just like that, your Tzatziki is done…no, of course, it’s not. We still have…
Step 5 – Finishing Touches
Our Tzatziki is almost done but it is missing two critical ingredients. These are the two not so secret ingredients in just about all Greek food, lemon, and olive oil.
It is very important that we use high-quality olive oil to avoid any bitter flavours. For out 1 cup of Tzatziki we should use 1-2 tbsp of olive oil and 1-2 tbsp of lemon juice.
Add the olive oil and lemon juice to the other ingredients, mix it up, give it a taste and adjust the seasoning with a bit more lemon, and a touch of salt as needed. Use the Tzatziki right away or store in the fridge covered, for 3-5 days.
Conclusion
Tzatziki is a favourite of a lot of people and as you can see it is not difficult to make at all. It works well with so many things and can be eaten just as it is with some vegetables or bread to dip in it.
If you are currently buying Tzatziki, stop now. You don’t need to do that anymore. You can make a batch of this once a week and you are good to go.
I know that some people add red onion to their Tzatziki but I prefer to leave it out as I find it doesn’t really add anything. But, if you want to add a bit of red onion, go for it.
And that does it. I hope you enjoyed this post. If you did please check out my amazon store. If you go there and see something you were going to buy anyway, buy it from there. I get a few cents from every dollar spent and that goes right back into the blog to help me buy ingredients and equipment.
It is that time of year again, parents are sending their little ones off to school. University kids are moving out on their own once again. And, summer vacations have all but come to an end. Getting back into the daily grind can be a bit hectic, and overwhelming. Things get lost and fall through the cracks as time seems to slip by ever quicker. Eating well should not be one of the things that get away from us.
Today, we are going to talk all about meal prep. We’ll look at how you can maximize the time you have to cook to prepare food for a few meals at once without getting overwhelmed. The same principles apply whether you are a college kid out on your own for the first time, a young couple making their way in this crazy world, or a parent of three. Let’s get to it.
Meal Prep 101
Why meal prep?
Picture this, you just got home from work it’s about 6 o’clock and you are exhausted. It was a rough day. Everything you did just seemed to be not enough. There seemed to be something in the air that was making everyone a little cranky. Once you were finally able to leave work you got stuck in traffic for an hour. Now that you’re home you are starving since you haven’t really eaten anything since noon. The last thing in the world you want to do is cook dinner so you pick up your phone and order take out. It’s the second time this week and it’s only Wednesday. While you’re waiting for the food to arrive you snack on a bag of chips as you sit and zone off into space watching tv or scrolling Instagram.
Maybe your story is a little different than that one. Maybe you had to run around picking your kids up from different after school activities. Maybe it’s 7 o’clock by the time you get home. You aren’t going to be cooking too much at this point. More than likely you stopped at the grocery store and bought a cooked chicken and a premade salad. Or, it’s pizza night again.
The truth is that we are all busy. It doesn’t matter what our circumstances are, there are always things going on and there is never enough time. But we shouldn’t sacrifice eating well. It is a really important part of a healthy life.
So, what can you do?
The short answer is to plan your meals around your busy schedule and do meal prep. But how do you actually do that?
The key to this really is planning. Take a bit of time, between 15 to 30 minutes and map out your meals for the next week. Looking at your schedule figure out at least two days that you will have time, 1-2 hours to cook. Plan out when the best time to go to the grocery store is. I recommend around 9 pm. There isn’t usually anyone there and you can zip in, get what you need and zip out. Then cook based on the plan you’ve made.
How to build a meal plan
Building a successful meal plan is like doing a puzzle. There should be no spaces left and you shouldn’t have any extra pieces left over at the end. Start with the edges just like doing a puzzle. In the case of meal planning, the edges would be the main ingredient. This would usually be the protein. Now, fill in the rest of the puzzle with vegetables, starches, and sauces.
Buy as few ingredients as you can while still maintaining a varied diet.
There are some ingredients that you really can’t buy in small quantities. Things like cabbage for example. So, if you plan on making a stew or soup with cabbage plan on making coleslaw and using what’s left in a stir-fry. Essentially, the idea is that you buy as few ingredients as you can while still maintaining a varied diet.
Try at least one new recipe or ingredient each week.
Plan for variety. Try not to get stuck in a cycle of making the same meals every week. This will get boring to eat and to cook. Build into your meal plan the idea that you will try at least one new recipe or ingredient each week and it will keep things exciting. This will also make you a better cook.
You should also, on occasion, plan for a night out or to get take out. I think it’s important to build this into your plan once or twice a month. Acknowledge that you are going to order a pizza sometimes, or go out for burgers. By building this into the meal plan you are taking away any negative feelings and instead have given yourself something to look forward to as a fun night.
How do you stick to the plan?
Sticking to your meal plan comes down to practice. Really, you just have to do it. But once you do it for even just a few weeks, you will notice that you are less stressed, you are spending less money, and you are eating better. You may even find that you enjoy cooking a bit more because there is a lot less stress.
Try not to be too hard on yourself if you mess up. Life is ever-changing and despite your best efforts sometimes your plan will just go to hell. Live with it, learn from it, and get right back to it. But don’t beat yourself up over it.
Prepping your meal plan
Now that you have a meal plan in place it is time to prep it. Take that 1-2 hour every 3-4 days and cook. Cook 1-2 big items like chicken, roast beef, or chili. Figure out how you can use those in multiple meals. Chicken, for example, can be a chicken dinner one night, a pulled chicken salad with lots of fresh vegetables the next night and chicken soup the third night. All of that can easily be prepared in 2 hours. Roast beef can be roast beef dinner the first night, really great sandwiches with horseradish mayo, arugula, and cheese, served with a salad the next night, and beef and barley soup the last night. Again, this can all be prepped in an hour or two.
Containers
Preparing all kinds of food is great, but unless you have a way to properly store the food, it is all kind of pointless. Invest in some multi-compartment containers. They are inexpensive and will do wonders for your meal prep game. Just build your meals in them, then you can quickly grab one, heat it and eat it. The meal will be fully portioned and ready to go. You can find a variety of meal prep containers here.
The point
The point is that eating well, even on a busy schedule isn’t impossible. It isn’t easy, it takes work and effort but isn’t it worth it? If you think it is then it’s time to get going on it.
I have put together a little infographic and meal prep guide that you can use to get yourself on the right track. You can download it here.
Also, if this all seems like too much work and you live in the Halifax area I do offer a meal prep delivery service. You order 3 – 5 days worth of food, I prepare it and deliver it. You just have to reheat it. You can check that out here.
Poached eggs are a great alternative to both fried and boiled eggs. They also happen to be the style of egg required for one of the best egg dishes of all time, eggs benedict. But if you don’t really know what you’re doing, making poached eggs can be a bit of a pain.
Today I am going to share with you all the tips and tricks I have learned for perfectly poached eggs from my years in professional kitchens.
This is…
The Secret to perfectly poached eggs
What is a perfectly poached egg?
What exactly constitutes a perfectly poached egg is a matter of opinion. Some people like their poached eggs soft, some like them medium, and some like them hard. Whatever camp you fall into, I prefer mine soft, these tips still apply.
A perfectly poached egg is one where the whites and the yolks stay together, and the yolk is the doneness the diner prefers. The last thing we want is for a solo yolk floating around in a pot of murky water because the whites all broke apart. So, how do we make sure that never happens?
The Eggs
Eggs used for poaching should be as fresh as possible and taken directly from the fridge before use. Fresh, cold eggs have firmer whites that will hold together better during poaching.
The colour and size of the eggs aren’t really important. However, the size of the egg will have an effect on cooking times. Any times that I suggest in this post are based on large-sized eggs.
Vinegar
I’m sure that most people reading this are aware that vinegar is often used when poaching eggs. What might not be as commonly known is how and why we use it and how much should we use?
I know that a lot of people out there are inclined to put the vinegar in the poaching water but this is ineffective. Instead, we actually want to put the vinegar in a bowl and break the eggs into it. Allowing the eggs to sit in the vinegar for a minute or two before adding them to our poaching liquid causes the whites to firm up slightly. Slightly firmer whites mean that the eggs will hold together better in the poaching water.
How much vinegar should we use?
The answer is not much. For two eggs, you may add 1-2 tsp of vinegar to the bowl before adding in the eggs. That is all that is needed for the desired effect.
Make sure to choose a bowl that will allow you to gently slide the eggs into the pot. A small bowl that can actually fit inside the pot so the eggs can be slid right into the water is best. And yes, the vinegar gets poured into the water with the eggs.
The poaching water
People often ask me if they should salt the poaching water and the answer is a resounding no. The salt will actually toughen the egg causing it to be chewy and rubbery. The difference between the effect the salt has and the vinegar has is that the salt pulls moisture out of the white, causing a rubbery texture. The vinegar is kind of cooking the egg so the texture of the final egg is the same as it would be without the vinegar.
Poaching vs. Boiling
It is really important to note the difference between poaching and boiling. Boiling is a violent process where the water is constantly churning and bubbling. If we boil our eggs two things are going to happen. Number one, the eggs are going to break apart. Number two, the eggs will get hard because the high heat required for boiling is too hot for the eggs.
Poaching is done in simmering water. Imagine that simmering is a peaceful babbling brook, while boiling is violent white water rapids. We want peace for our eggs.
When poaching in simmering water, because there is little to no movement, it is possible for the eggs to sink and stick to the bottom of the pot. To help prevent this and to help keep the egg together right before adding the eggs into the water, give it a big stir creating a cyclone in the center of the pot. Gently, pour the eggs into the cyclone. This should be enough movement to prevent the eggs from sticking.
Once the eggs are in the pot, leave them alone. Stirring or trying to pick them up will only break them apart and you run the risk of breaking the yolk. Don’t touch them for at least four minutes.
Timing for poached eggs
For a soft poached egg, the ideal cooking time is between 4-5 minutes. For a medium poached egg 5-6 minutes. And for a hard poached egg, 7-8 minutes.
When you think your egg has reached the desired doneness carefully remove it from the pot using a slotted spoon. Give the egg a gentle poke with your finger. If the egg is soft, it is poached soft. If it is firm but there is some give, it is poached medium. And of course, if the egg is completely firm, it is poached hard. Remove the eggs from the water, pat dry on a paper towel or clean dishcloth and serve.
Notes on poached eggs
It is important to remember that a bit of white will always come off the egg. This will likely end up as long thin strands of white floating in the water. This is perfectly normal. Just pull or carefully cut away any strands of white that are hanging on to the egg.
If you are having a bunch of people over for brunch you can pre-poach the eggs. Just poach them soft, remove them from the poaching water directly into ice water. Then when your guests arrive the eggs can be quickly reheated and even cooked through by adding them back into simmer water for 2 minutes or so.
When cooking eggs in any form always add salt after the egg is cooked to prevent the toughening of the white.
Always clean the poaching pot as soon as you can. The stray strands of white will dry on to the pot as will any foam that has formed. If you don’t clean it right away it will become very difficult to clean later.
Conclusion
Poached eggs are delicious and a great alternative to fried or hardboiled eggs. Follow the above tips and you will be eating perfectly poached eggs whenever you want.
I don’t go camping that often. If I get out 2-3 times a year, that’s good. When I do go camping, I see no reason not to eat just as well as I do at home. Now, I have absolutely no problem with hot dogs. I am actually pretty fond of them. But cooking food over an open wood campfire is a rare treat that I’m not going to waste on hot dogs.
I want to just say first, I am not an expert in open fire cooking. There are some people out there that are and I tip my hat to them. I just love cooking good food and if I get to do that with wood and flames sometimes then all the better.
So, in this post, we are going to take a look at some basic principles of cooking over a campfire. We will talk about foods that are well or ill-suited to campfire cooking. Essentially, I’m just going to tell you everything I know about cooking over a campfire. So, let’s get to it.
Basic Principles of Fire
To say that we are “cooking over a campfire” is actually a bit of a misnomer. What we actually are doing is cooking over the coals of what was a campfire. Just to clarify, when cooking, flames aren’t really our friend. We want smoldering coals.
When I go camping the first thing I do is get the fire going. I put four or five logs on and let them burn down while we are setting up the rest of the site. This way, when I’m ready to cook lunch or dinner (depending on the time of day we arrive) the fire has burnt down and the coals are ready to go. What becomes very apparent is that a pile of glowing embers is way hotter than a big flame.
In Nova Scotia, and I’m sure other places as well, most campgrounds are equipped with fire pits and grills. There are two main types of fireboxes as can be seen in the pictures below. These are great for containing a fire, but both styles have their pros and cons.
As you can see from the picture the first box is a small rectangle about two feet long and one foot wide. It is only about ten inches high. These boxes are actually terrific for cooking because the grill grating is low and close to the fire. However, they are pretty terrible for a campfire because they are small and restricted.
The second box is larger in every way and round. It has a two to a three-foot diameter and is probably almost two feet high. These fireboxes are great for getting a really nice campfire going but not so great for cooking if you are planning on using the grill grate.
Either style can be used for cooking, but the technique you use may have to change. For example, in the picture on the right, you may notice the logs piled vertically in the corner of the box. I did this because as those logs burn down and began to smolder they were just the right height from the grill grate to cook with. So, with a little creativity, anything is possible.
Coal Cooking
One of my favourite ways to cook while camping is right up against the coals. This works really well for any kind of root vegetables. In the picture above I am cooking potatoes and onions, but I have done this with sweet potato, and squash as well. Sometimes I will just put the food right on the coals as opposed to right in front of them. This works really well but you have to keep turning the food every few minutes so it doesn’t just burn. And yes, I learned that from experience.
I’m sure that some people are looking at the picture above and thinking that the potatoes and onions look really dirty and that they may not want to eat them. To that I say this; what is happening to those potatoes and onions is absolutely magic. The outside, dirty and burnt as it maybe is forming something of a crust. This protects the insides of the roots from the extreme heat. It also seals in moisture. So, the onions and potatoes in this picture are being steamed from the inside with their own aromatic juices. When you cut into these and take a bite, that flavour is unparalleled.
As for the cooking technique, all I have done in the picture is form a bit of a circle of hot coals around the vegetables. Every few minutes I turn the onions and potatoes for even cooking. It takes about forty-five minutes to an hour to cook through, but what else do you have to do. And, it’s not like you have to sit there watching them the whole time. Just like at home, poke with a knife or form to see if the vegetables are cooked.
If the fire pit is big enough keep a small fire burning a bit away from the food. This way you have fresh coals that you can keep adding to make sure the cooking temperature is even.
Other Vegetables to Cook on a Campfire
Root vegetables aren’t the only vegetables that cook well over a fire. Corn on the cob is fantastic and can be cooked either on the grill grate or right next to the coals like the root vegetables. The trick is to keep the husk on and not catch it on fire. The husk traps moisture and the corn steams in its own juice just like the potatoes and onions. The result is corn that is so sweet and so tender. It is amazing.
I love cooking asparagus and green beans on the grill grate as well. All they need is a touch of oil and some salt and pepper. The heat and smoke from the coals will do the rest. Roasted bell peppers or chili peppers are fantastic cooked over a fire as well.
In all honesty, I would be surprised if you found a vegetable that with a little creativity couldn’t be cooked over a campfire. The trick is just to give it a try. Only two things can really go wrong. The vegetables can be overcooked, or they can be undercooked. If they are undercooked, put them back on the fire and eat everything else while they are cooking. If they are overcooked, cut away what you can, and eat the rest.
Meat on the fire.
There is something about meat cooked over a wood fire that is unexplainable. The flavour from the smoke penetrates the meat. The heat from the coals crisps up the fat. There is nothing like it.
There is no meat that you can’t cook over a campfire. Having said that, I don’t usually take chicken with me unless it is cut and put on skewers. I just feel like it could be a little dicey.
I usually take steaks, pork chops, or even fish. The cut doesn’t matter just take good quality meat that you already like to eat. And remember this is a rare treat so feel free to splurge a little.
Just like when cooking at home, we want a higher heat for smaller pieces of meat and lower heat for larger pieces. So, more coals, closer to the grill grate equals more heat. Fewer coals further away from the grill grate equal lower heat.
What I take with me.
You may be thinking that I pack up my whole kitchen and take it to the campsite with me. Really, I try and keep what I pack to a minimum. Obviously, I take a cooler packed with cold packs. Other than that I take one spatula, one pair of tongs, one cast iron pan, a kettle, a small cutting board, salt and pepper, butter, and olive or canola oil. Some times, depending on what I’m cooking I will take some fresh thyme, rosemary, or a lemon, but that’s it. I keep it as simple as I can.
With the herbs, I will usually leave them whole and put them right on the grill grate then put pork chops or steak right on top of them. This imparts a really nice flavour. Or, I will just throw the herbs right on the coals and let the smoke flavour the food.
The cast-iron pan I take is only nine inches in diameter. So it is fairly small. I pretty much only take it for cooking eggs in the morning. But, if I were so inclined, it would make a great stir fry for dinner. The nice thing about cast iron is that it can be put directly on the coals for high heat cooking. For lower heat cooking it can be placed on the grill grate.
Conclusion
This post is getting pretty long, and I am about half an hour late posting it so I am going to wrap it up now. I just want to leave you with two final points. Don’t be afraid to cook over a fire. It is so much fun and can make such delicious food. Cook things that you like to eat and adjust as you go. Understand that things are going to cook a bit differently, the timing will be different and that’s okay. If you have to eat your pork chop first and your squash a little later, it isn’t the end of the world. You’re camping after all. Relax and enjoy it.
I woke up yesterday morning at a campsite overlooking the bay of fundy. I got the fire going, made some coffee and let the logs burn down to embers. I cooked up some bacon, onion, and potatoes with a little salt and pepper. When that was all cooked I cracked some eggs into the pan and added a bit of cheese. I let this cook for a few minutes, flipped it to finish the eggs (my wife is pregnant so the eggs have to be fully cooked) and served it up. The bottom got this really nice crispiness, the eggs were over hard but tender, and the only seasoning came from a little salt and pepper and the bacon.
As we sat there eating my wife remarked how delicious it was. I agreed with her, it was delicious, it was amazing actually. But then I thought about it and I said that if I had made this dish at home I would be really disappointed in it. I would actually be kind of upset with myself. The bottom was really crispy which it shouldn’t have been, the eggs were too hard, and there next to no seasoning. But there, around the fire, with the sun coming up through the trees over the bay of fundy, it was exactly what we needed and wanted.
If you take anything from this post take this; Do not cook over a campfire and judge your food with the same level of expectation you would at home. Enjoy the fact that you are outside, in the fresh air, having a good time eating good food. That’s all you need. It doesn’t need to be perfect to be perfect.
Last week I wrote an article about how food prices were going to continue to rise making food unbearably expensive. Today I want to offer some semblance of a solution. So, I am going to share with you a handful of basic cooking skills that will hopefully allow you to eat well, even when food prices go through the roof.
Basic Knife Skills
Knowing how to properly hold and use a knife is important for a variety of reasons. The first being that holding a knife properly is safer than holding it improperly. The second being that once you get used to holding and using a knife properly, you will be able to cut items much quicker and with more confidence. This comes with practice of course, but the right technique will get you there much quicker.
When holding a knife, I generally recommend that you grab the top of the blade just above where the handle ends between your thumb and index finger. Then wrap your remaining fingers around the handle in a firm but relaxed grip. This will give you the most control over the knife.
If the handle of your knife is too big to do this, simply hold the knife as high up on the handle as is comfortable. Again, use a firm but relaxed grip.
Your other hand should be used to secure the food that you are slicing or chopping. The key is to make sure that your fingertips are curled back, and that you always know where they are in relation to the blade. I suggest keeping the back of your fingers in contact with the flat side of the knife. This has the added bonus of helping to secure the knife even more. Just make sure you keep those fingertips and your thumb back away from the blade.
You can see the technique at work in all of the above pictures. Once you get the hang of it you will use it for everything.
Building Flavour
When we think of building flavour, if we do at all, it generally is thought of as adding spices and herbs to a dish. But the truth is that lots of flavour can be added into a dish just by cooking each ingredient properly. That is why two people can make vegetable soup from the same recipe and have them taste very different. It’s the difference between roasting or sauteeing the vegetables versus just throwing them into the water raw. It completely changes the flavour and quality.
So, how can you get more flavour out of your basic ingredients? There are a variety of ways. As I mentioned, roasting or sauteeing is always a good start. Roasting especially, will bring out the natural sweetness in vegetables, and intensify the meaty flavour of bones used for stock.
To roast vegetables, or bones simply get your oven nice and hot, 400°F – 450°F will be more than enough. Spread the vegetables or bones out on a roasting pan or sheet pan. Vegetables should be drizzled with a little oil, and then put in the oven, on the middle rack for about 15-20 minutes, turned, and put back in until they develop a deep brown colour. This will probably take another 15-20 minutes or so. Bones may take longer.
If using the bones to make a stock, once they are roasted, cover them with cold water, add in a bit of onion, carrot, and celery, preferably roasted, and simmer for an hour or two. Herbs like bay leaf and thyme can also be added in. After a few hours, strain the stock, keeping the liquid and discarding the bones and vegetables. Now, you can add a bit of roasted meat, a few roasted vegetables, a bit of seasoning, and all of a sudden you have a delicious flavourful soup.
Sauteeing Vegetables
Sauteeing just means to cook something in a hot pan while keeping it moving. It is essentially the French version of stir-fry. Sauteeing vegetbales, rather than steaming or boiling them brings out their natural sweetness without developing the same dark brown colour you get from roasting.
If you are making rice, sautee some diced onion, carrot, and celery in a bit of oil until the onion starts to soften and go see-through. Then add the liquid as directed by the rice cooking instructions and cook the rice as you normally would. This will add a lot of flavour as well as a bit of vegetable to the rice. It is a simple and delicious way to bulk up the flavour.
Basic Cooking Lower End Cuts Of Meat
Lower end cuts of meat are usually those that come from the more used parts of the animal. Like around the legs. The more expensive cuts, like beef tenderloin, are muscles that don’t get used very often if at all, that is why they are so tender. So, the more used a muscle is, the tougher it will be and generally, the cheaper it will be. Knowing what do to with these cheaper cuts is a really valuable skill.
The number one technique for these lower-end cuts is braising. Now, braising is a fancy word for slowly cooking something in or with a bit of liquid. So, essentially, you put a piece of meat in a pot, with enough liquid to cover it by at least 1/3. Then you cover the pot and put it in the oven on 300°F for a couple of hours. It takes time, but you don’t have to do anything while it’s cooking.
To get the most flavour out of a braised cheap cut of meat, we need to use all the other techniques we talked about. The liquid used to braise the meat should be stock if available because it is already flavourful and will add that flavour to the meat. Vegetables that are used can be roasted a little as can the meat before being braised. Essentially, the idea is to add as much flavour, into the basic ingredients as possible.
Conclusion
There are a million other basic techniques that we should all know, but the few that I listed above will get you really far. Those few techniques will allow you to eat well on very little money for a long time. Learn them, use them, master them, and you will be happy you did.
It’s that time again! Fresh local strawberries are appearing on grocery store shelves and at farmers’ market stalls. That can mean only one thing; it’s strawberry shortcake time!
I know that we are fortunate enough to live at a time when we can buy “fresh” strawberries all year round. But, I think we can all agree that the strawberries we buy in January are not the same as the berries that we can buy now. There is no comparison. Fresh local in-season strawberries actually taste like strawberries. And, they are way cheaper than they are in January. Take advantage of them.
Strawberry shortcake comes in many different forms. But, all forms have three basic elements; some kind of cake or biscuit, whipped cream, and of course strawberries.
Today I am going to break down the fundamentals of strawberry shortcake, share with you my little secret additions, and hopefully inspire you to get out there and fill your belly up with amazing strawberries while you still can.
Are you ready? Because this is…
Everything I know about Strawberry Shortcake
Shortcake
What exactly is a shortcake?
Shortcake is a sweet cake or biscuit. Most commonly the shortcake part of strawberry shortcake is either yellow sponge cake or a sweetened tea biscuit. However, there are some versions that also use rounds of pie crust or crumbled pieces of pie crust.
The word “short” in shortcake doesn’t refer to height but rather the consistency of the crumb of the cake or biscuit. Shortcakes have a more crumbly texture than regular cakes and biscuits.
Cake or Biscuit?
I’m sure we have all had those little yellow cakes you can buy in a six-pack at the grocery store. Let’s be honest, they make a pretty good strawberry shortcake. However, for my money, I prefer a fresh tea biscuit over sponge cake any day.
I find that a tea biscuit holds its structure better than a sponge cake. And, it feels a bit more substantial. I know that some people feel that tea biscuits are a little too firm and would rather the soft texture of the cake. But, that is why I always suggest warming the biscuits to soften them. I will also often drizzle some strawberry juice over the biscuit before topping it with the strawberries. This helps to soften it and adds a bit of extra flavour.
In all honesty, whether you decided to use a tea biscuit or sponge cake is really a matter of personal preference. There is no right or wrong answer. Just make sure that whatever you are using is good quality and everything will be good.
Strawberries
The strawberries for a strawberry shortcake are most commonly macerated. What that means is that the berries are sliced, tossed with a little sugar, and left to sit for about an hour. As the berries sit the sugar draws moisture out of them creating a syrup. This a classic way, and a fantastic way to prepare the berries. And, most of the time this is what I do as well but with a few adjustments.
Often I will add a few leaves of mint and let those sit with the berries. I take them out before I serve the dessert. This imparts a very light mint flavour to the berries. I will also occasionally add some strips of lemon zest to the berries as they are macerating which has the same effect as the mint leaves.
Some other possible additions to the berries are a little thyme. Yup, you read that right. And even a little balsamic vinegar.
One of my personal favourite things to do with the berries is to actually add a little Sprite or Gingerale to them along with the sugar. This creates a bit of extra syrup but also adds extra flavour. For a pint of berries, I would use about 1/4 cup Sprite or Gingerale and 2 tbsp of sugar. I often also use a few mint leaves along with the pop to really jack the flavour up.
When spooning the berries over the biscuits make sure to add a bit of the extra syrup. Your guests won’t know what they are tasting, but they will know they like it.
Whipped Cream
When most people make whipped cream they will add a bit of sugar and a bit of vanilla whip it and stop. That’s good. That makes a delicious cream, just don’t over whip it. But, there is an oportunity to add a bit of extra flavour, so why not?
I like to add a bit of additional flavour to the cream by adding a bit of finely grated lemon zest, minced crystallized ginger, a little brandy, or even a little bit of the strawberry syrup. The minimal effort involved in doing this will be paid off tenfold by the additional WOW factor the comes with that hint of flavour.
When whipping cream it is extremely important not to over whip it. Really, for this application, you only want to whip it to the point that it holds its shape. Any more than that and you are making the cream denser and taking away that lighter than air texture. Once the cream is whipped, gently fold in any additional ingredients and serve.
If you are still using cool whip or canned whip cream it is time to stop. Whipping cream is not that expensive. Whipped cream is not that hard to make. And the difference in quality and eating experience is a thousand times different.
Conclusion
Strawberry Shortcake is one of the most classic and delicious summer desserts. But, making it the same way over and over can get boring and even tedious. Mix it up, try new things. You never know how good something can be, and how much you may love it until you try it.
Thanks for reading and remember to subscribe so you never miss a post. Also, if you enjoyed this post please like and share.
A well-cooked roast chicken is one of the rare pleasures in life. Crispy, buttery, golden skin, with tender, flavourful meat hidden below the surface. What could be better than that? But roasting a chicken isn’t something that people are just able to do. Its simplicity is extremely complex and takes practice and time to learn.
In some ways it feels like roasting a chicken is a dying skill. Most of us are much more likely to pick up a rotisserie chicken from the grocery store than to roast one ourselves. Of course, and I’m sure it goes without saying, there is no comparison when it comes to taste and quality. A home roasted chicken is a hundred times better. But, it does take time and effort to prepare.
Today, I am going to share with you…
Everything I know about roast chicken
The key to a good roast chicken is getting all of the skin nice and crispy without overcooking the rest of the bird. There are a few simple things that you can do to make this process easier.
Dry The Chicken’s Skin
Removing moisture from the skin of the chicken is the single most important step in getting really crispy and brown. This can be done in one of two ways.
Dry the skin with a paper towel.
This is not my personal favourite as I find it doesn’t do a fantastic job. However, in a pinch, if you are pressed for time, this is the go-to technique. Get a few paper towels and dry the chicken inside and out. It’s pretty straight forward.
The reason you want to dry the chicken inside is that any extra moisture inside the chicken will add moisture to the oven which will prevent the skin from crisping. The goal is to remove as much moisture from the surface of the chicken as possible.
Air-dry the chicken.
Air-drying the chicken is exactly what it sounds like. This is letting the chicken dry naturally over a period of time. To do this, the chicken is placed on a rack, set over a pan or baking sheet and placed in the fridge for a day or two uncovered. I know that this seems foreign to a lot of people, putting a chicken in the fridge uncovered, but it works and it is the technique.
The reason you want the chicken on a rack is because liquid will pool at the point of contact if it is sitting on a flat surface. This will lead to their being one big wet spot on the chicken that won’t brown and it looks pretty gross. The pan under the rack is there to collect any drippings.
Leaving the chicken uncovered, as I said may seem like a really weird and uncomfortable thing to do but it is what allows the skin to dry. If the chicken is wrapped, moisture will get trapped and the skin will stay damp. This process usually takes about two days and you may have to flip the chicken after the first day. It’s done when the skin is dry and tightly clinging to the meat.
Safety –
Leaving raw chicken uncovered in the fridge is perfectly safe as long as other foods aren’t coming into contact with it and it isn’t dripping on foods. Again, keep the chicken on a rack with a pan under it to prevent juices running on to other foods. Also, keep the chicken on the bottom rack of your fridge and make sure other food items are stored well away from it.
Cooking The Chicken
Now that the skin of the chicken is dry, it is almost ready to cook. There are only two things that need to be done first. The first step is to grease up the bird. I generally use a good quality olive oil for this or, clarified butter. I find regular butter has too much water in it which causes the skin to soften. So, rub the whole chicken inside and out with olive oil. The only thing left to do is to season the chicken very well, inside and out with salt. That’s it.
Once the chicken is oiled and seasoned, put it in a roasting pan with a rack and fire it into an oven heated to 400°F.
Now comes the fun part. The best way to ensure that the chicken gets evenly crispy on all sides is to rotate it every 20 minutes or so. Start with the chicken breast up. After the first 20 minutes rotate it onto its left side. Then after another 20 minutes rotate it to breasts down, and so on. Continue doing this until the chicken is cooked through. And yes, it is worth the effort.
How long to roast the chicken?
How long the chicken takes to cook depends on the size of the chicken and the quality of your oven. Generally, 15-20 minutes per pound is suggested. The only way to know for sure if the chicken is done is with a thermometer stuck into the deepest part of the thigh. The temperature should be 168°F – 170°F.
Basting
If you notice that there are some spots of the chicken that just aren’t crisping up you may want to baste or brush those spots with a little more oil. You shouldn’t need to worry about basting the whole chicken.
Resting
With the chicken cooked through and the skin nice and crispy all that is left is to let the chicken rest. In a lot of ways, this is the hardest part. The chicken will look so good, like a cartoon roast chicken form bugs bunny or the Simpsons, but leave it alone! Don’t touch the chicken for at least 10 minutes. 15-20 is better.
Let the chicken rest, uncovered on the rack it was cooked on. This will allow the juices to redistribute throughout the bird keeping it juicy and moist. Resting will also give air time to circulate around the skin causing it to crisp up even more.
While the chicken is resting you can make gravy or sides.
Conclusion
I wasn’t joking when I said there were few things in the world better than a perfectly roasted chicken. Nothing compares to it. The only way for you to know for yourself is to give it a shot. Try this technique if you haven’t already. It is incredibly simple on the surface. It does take time and practice to master but it is so worth the effort.
What is a vinaigrette? How do you make one? And why should you care?
Those are all good questions that I am about to answer.
Everything I know about Vinaigrette
What is a vinaigrette?
A vinaigrette is a mixture (emulsion) of oil and vinegar most commonly used to dress salads. An emulsion is a mixture of two liquids that don’t typically mix. Some vinaigrettes have a stronger emulsion which means that they stay together longer. A weak emulsion will break (oil and vinegar separate) within a few minutes.
Typically, a vinaigrette is held together by a binder. In the case of homemade vinaigrettes, this is most commonly mustard. This can be any style of prepared mustard or even ground mustard seed. When used in vinaigrette mustard is playing the same role as egg yolks do in a mayonnaise. Both mustard seeds and egg yolks contain a substance called Lecithin which is both hydrophilic and lipophilic meaning it attracts water and fatty substances. All that really means is that it creates a bond between the vinegar and the oil.
A strong emulsion is one that is built slowly. This allows time for a strong bond to form. That is why when making a vinaigrette the recipe usually calls for the addition of only a few drops of oil to start. Once the base of the emulsion is built the oil can be added more quickly. A strong emulsion will hold together days, weeks, or even months.
Oil to Vinegar Ratio
There is a limit to how much oil and vinegar can be emulsified together. Generally, a ratio of 3:1 oil to vinegar is followed however a 4:1 ratio is common as well. A 4:1 ratio will yield a thicker creamier vinaigrette.
So, if you wanted one cup of salad dressing, you could use 1/4 cup vinegar and 3/4 cup oil. Or, 1/3 cup vinegar, and 2/3 cup oil.
What is the best type of oil to use?
There isn’t really one type of oil that is best suited to making a vinaigrette. Really, it comes down to the flavour you are looking for. For example, if you wanted to make a vinaigrette that tasted of hazelnuts you would likely want to use a hazelnut oil.
More commonly the flavour of a vinaigrette comes from the vinegar and additional flavouring ingredients. Flavoured vinegar may include raspberry, balsamic, apple cider, white wine, red wine… you get the idea.
Because the flavour isn’t typically coming from the oil, we generally want a to use a neutral oil. This could be canola oil, sunflower oil, or any number of other oils.
Using olive oil in vinaigrettes.
Olive oil has a pretty strong and distinct flavour that be be overpowering in large doses. This means that it isn’t well suited to being used to make vinaigrettes. I should say that I often use 1/4 olive oil and 3/4 canola oil to make my vinaigrettes. I get a little bit of that olive oil flavour but it isn’t going to ruin my vinaigrette.
What type of vinegar should you use?
The type of vinegar you use is most commonly what dictates the flavour and name of the vinaigrette. A white wine vinaigrette is made with white wine vinegar. So, you can use any kind of vinegar you want, just try and pair it with the ingredients in the salad you will be using the vinaigrette on.
Other ingredients.
It is very common for there to be a sweet element in vinaigrettes. This helps to balance the acidity. This sweetness can come from the addition of honey or maple syrup. It may come from the vinegar, like balsamic, or it may be the combination of two or more things. The only rule here is that we still want a bit of that acidity so, don’t sweeten the dressing too much. For 1 cup of vinaigrette, I typically use 1-2 tsp of honey.
Herbs, spices, garlic, and shallots, can all be added to a vinaigrette to add flavour. Again, it comes down to the type of vinaigrette you are making and how you will be using it.
How do you make a vinaigrette?
The first step in making a vinaigrette is to combine the vinegar with the binder. For one cup of vinaigrette this would be 1/4 cup vinegar with 1 tsp mustard powder or Dijon. To this other ingredients like honey, and herbs can be added. This is all whisked together.
The second step is to start adding the oil. Always start with just a few drops of oil and add it while whisking. There two main ideas that you need to keep in mind. The first is that you are trying to break the oil into tiny, tiny droplets with the whisk as this makes it easier for the oil to bond with the vinegar. The second is that you are trying to build a foundation without overpowering the binding power of the mustard.
Once the first few drops of oil have been whisked into the vinegar add a few more. Do this three or four times. You shouldn’t really be able to see any oil separation (oil floating on top of the vinegar) at this point. Now, in a slow, steady stream, while whisking, add the remaining oil. You may want to stop the stream every once in a while to make sure the oil is being properly absorbed. Once all the oil has been added taste the vinaigrette and adjust the seasoning with salt and pepper.
Storing a vinaigrette.
Vinaigrettes should be stored covered in the fridge. Because of the nature of the acidity and oil in the vinaigrette, it will last for weeks if not months. A well-made vinaigrette should hold together for a very long time. However, over time the oil and vinegar may separate, this is common. If this happens just shake the mixture back together before use.
Conclusion
Knowing how to make a vinaigrette form scratch is a very valuable skill. With this basic knowledge you can make a unlimited amount of salad dressings. Just stay within that 3:1 or 4:1 ratio and play with adding different ingredients. You own’t believe what you’re able to make.
Basic Vinaigrette
This basic recipe can be used to make thousands of kinds of salad dressings. Change the vinegar and add different ingredients like herbs and garlic to make whatever vinaigrette you would like.
All too often when making dinner, or cooking anything, we can fall into a trap of overdoing it. We keep adding more and more ingredients to cover up our own insecurities about our cooking. Or, we do it because we think that it is the way to make food taste better. It isn’t.
Today day, we are going to look at three magical ingredients that when used in tandem and with reckless abandon will absolutely change the way we cook, eat, and dare I say, live our lives. What could they be?
This is…
The 3 Magic Ingredients That Will Change Your Life
One of the most important lessons I’ve learned as a Chef, and I would say the thing that defines my cooking style is “less is more”. I believe that it is better to let the food speak for itself. Use minimal ingredients, of the best quality, combined with good technique and care, and you will have a winning dish every time.
With that mindset, I came across a combination of three magical ingredients that changed everything. Olive oil, salt, and pepper. I know, I know, it sounds way too simple and way too obvious. But, that’s kind of the point. It is simple. It is obvious.
Olive Oil Salt and Pepper
Whether cooking chicken, fish, steak, pork, or roasting vegetables, these three ingredients are the secret to success. Seriously! You can add a fresh herb like thyme or rosemary to the mix or even a squeeze of lemon but it isn’t even necessary. The key is that all the ingredients you are using, including the olive oil, salt, and pepper need to be really good quality.
When cooking with minimal ingredients, and approaching food from a simplistic perspective, there is no where to hide low quality. We can’t bury poor tasting ingredients. Everything has to be able to stand on it’s own.
Really what I’m talking about is that it is important to buy good quality olive oil. It is important to buy good quality salt. And yes, of course, it is important to buy good quality pepper. So what does this look like?
Olive Oil –
Good quality olive oil generally doesn’t have a grocery store brand name on it. In fact, we might be hard-pressed (no pun intended) to find it at the grocery store at all. Good quality olive oil can generally be found at gourmet grocery stores and specialty olive oil stores. Having said that, Costco has a pretty good brand that I have started to see other places. It’s what I used before I discovered Picholine Olive Oil which is all I use now. (full disclosure: Picholine Olive Oil is a sponsor of my Facebook live show but only because I love their product)
Salt –
There are a million types of salt out there. Different colours, from different parts of the world, in different shapes and textures. Most of it is a rip off. All you need is a good quality kosher or sea salt. Do not use iodized table salt. In fact, throw it away. The iodine that is added to the salt gives it a harsh flavour and it doesn’t dissolve evenly.
Sea salt and Kosher salt can be found at the grocery store and are much better quality. They have a less harsh flavour than iodized table salt and dissolve evenly for a more consistant taste.
Pepper –
Just don’t buy pre-ground pepper. Get a pepper mill, or bust the peppercorns up in small batches in a blender. Fresh cracked pepper is 1000 x better than pre-ground.
How to use Olive Oil, Salt, and Pepper
The big secret here is that we want to be very generous with our olive oil, salt and pepper. Go crazy!
Vegetables –
Any vegetable or combination of vegetables can be tossed with a generous amount of olive oil, salt, and pepper and roasted in a 400°f oven for 35-45 minutes. They should be flipped about halfway through cooking, and then pan should be placed on the center rack of the oven. The vegetables will develop a natural sweetness which is complemented by the three magic ingredients that we added.
Chicken –
For a whole chicken we want to pat the skin dry with paper towel first. Then rub the whole thing inside and out with olive oil, salt and pepper. Put it in the oven on 400°F for about 1 hour and 15 minutes depending on the size (170°F in the thigh). Flip the chicken twice during cooking. It will come out with crisp brown skin and tender meat.
Fish –
Lay fish on a lined baking sheet. Drizzle with olive oil, salt and pepper and cook on 400°f for 12-15 minutes or until the fish is cooked through.
Get the idea??
Conclusion –
This may seem too simple. Almost like a copout. We are hardly doing anything to the food. But I have to tell you, it took years for me to learn this. I know that sounds crazy but it takes a lot of confidence to approach food this way.
All I will say is that you should try it. Maybe throw a few sprigs of thyme or rosemary in there but keep it as simple as possible. You won’t believe how good simplicity can taste.
Rice is a staple food for billions of people around the world. In terms of actual human consumption, it is the largest food crop on the planet. But, what do we actually know about it?
In North America, we are generally only exposed to a handful of rice varieties and so in the interest of actually getting this post done today, I am going to mostly stick within the confines of what we actually use. Let’s get to it.
This is…
Everything I Know About Rice
Types Of Rice
Rice is generally broken down into three categories: Long grain, medium grain, and short grain.
Long Grain Rice
Long grain is the most common category of rice in North America. It includes basmati, jasmine, and many others. It is generally agreed that long grain rice is four times as long as it is wide. So, if you have some rice and aren’t sure if it is long grain or not bust out that ruler and check.
Cooking Long Grain Rice
I suggest that whenever you buy rice you read the cooking instructions on the bag or box that it came in. Different brands suggest different cooking procedures even for the same type of rice.
Long grain rice is generally cooked with either a 2:1 ratio or a 1.5:1 ratio of liquid to rice. Typically, the liquid is brought to a boil over high heat. The rice is added, the temperature is turned down and a lid is put on the pot. This is left to cook for 15-20 minutes depending on the rice. After the initial time has passed the rice is removed from the heat and left to rest with the lid on for another 5-10 minutes.
Another less common technique for cooking long grain rice is the pasta method. This is where rice is added to a large pot of boiling water and boiled like pasta. Once the rice is cooked the water is drained. The problem with this method is that it is very easy to overcook the rice. Another problem is that a lot of nutrients are being dumped out with the water. This makes this method less than ideal.
Soaking or Rinsing Long Grain
Rinsing or soaking long grain rice is a practice that is much more common in Asia than it is in North America. I don’t even usually do it.
Soaking the rice will reduce the cooking time but it can also complicate the ratio of water to rice. As the rice soaks it is absorbing liquid, so the amount of liquid it is being cooked in has to be reduced. However, it can be difficult to gauge just how much water should be removed from the recipe.
Rinsing removes excess starch from the rice. This makes the finished rice less sticky yielding a fluffier texture. To rinse the rice place it in a sieve and run it under cold water until the water runs clear. Let it drain for about 20 minutes before cooking it.
Medium and Short Grain Rice
I am grouping medium and short grain rice together because they are commonly mixed up anyway. It isn’t really easy to tell the difference between the two. Depending on the source of the information arborio rice, commonly used for risotto may be classified as a medium or short grain variety. The same is true of bomba rice used to make paella. This lack of distinction can make buying rice confusing so we’re just going to put them together.
Short and medium grain rice has a higher starch content than long grain rice. This can make it sticky like sushi rice, or creamy like risotto. Short grain rice is typically used in sweet applications like in rice pudding or sweet coconut rice.
Medium grained rices are typically consumed in South East Asia.
Cooking Short and Medium Grain
It is next to impossible for me to give you exact cooking instructions of all medium and short grain rice because there are just too many. But, I will talk about two specifically, arborio or risotto rice, and sticky or sushi rice.
Sushi rice is typically cooked in a similar fashion to long grain rice. The only difference is time. Rather than 15-20 minutes, sushi rice is generally only simmered for 12 minutes and then left to sit for 5 minutes. When making sushi a mixture of seasoned rice vinegar and sugar is added to the rice after it is cooked to sour it slightly.
When making risotto with arborio rice it is cooked slowly with the liquid being added and absorbed in stages. The rice is also being stirred to draw starch out of the grains and make the risotto creamy.
Par-boiled
Par-boiled rice is rice that has been soaked, steamed, and dehydrated. This speeds up the cooking time but destroys the quality of the rice. I generally recommend staying away from this stuff. Rice doesn’t really that long to cook. The benefits of par-boiled rice do not outweigh the costs.
Conclusion
There is so much more to know about rice that is actually kind of crazy. If you want to learn more I suggest check out the great resources I listed below.
Also, remember to check out last week’s “Everything I know about…” post if you missed it. And, subscribe to the blog in the sidebar so you never miss a post again.
We use cookies on our website to give you the most relevant experience by remembering your preferences and repeat visits. By clicking “Accept”, you consent to the use of ALL the cookies.
This website uses cookies to improve your experience while you navigate through the website. Out of these, the cookies that are categorized as necessary are stored on your browser as they are essential for the working of basic functionalities of the website. We also use third-party cookies that help us analyze and understand how you use this website. These cookies will be stored in your browser only with your consent. You also have the option to opt-out of these cookies. But opting out of some of these cookies may affect your browsing experience.
Necessary cookies are absolutely essential for the website to function properly. This category only includes cookies that ensures basic functionalities and security features of the website. These cookies do not store any personal information.
Any cookies that may not be particularly necessary for the website to function and is used specifically to collect user personal data via analytics, ads, other embedded contents are termed as non-necessary cookies. It is mandatory to procure user consent prior to running these cookies on your website.