Salad comes in many different forms and flavours. It actually sometimes seems as though the term salad is so broad that it could mean just about anything. To keep things simple today we are going to focus specifically on green or garden salads. We will leave all the other types for another time.
The salads that we are going to focus on today have a base of leafy greens. They are served cold or at room temperature. They have a dressing, and garnish ingredients like fruit, vegetables, seeds or nuts.
Why are we talking about these salads today? Well, because we are deep into spring with summer fast approaching. The first wave of fresh seasonal vegetables are just starting to hit the stores and markets. Essentially, it is salad season.
Really though, do we need an excuse to talk about salads? They are a delicious addition to any meal, or a great light meal on their own. With that let’s look at…
Everything I Know About Salad
Salad Greens
Leafy greens make up the base of our salads. As the base they provide a lot of the flavour and texture. So, the type of green we choose for our salads is actually pretty important. It sets the tone of the salad as a whole.
With so many options out there for leafy greens it can be hard to decided which one is best for the salad we want to make. If we make the wrong choice we could end up over powering the other ingredients. We could end up with soggy greens.
A salad can be made mainly in two different ways. We can start with the greens and build the salad from there. Or, we can start with the garnish and match the greens to it. Either way we can make a delicious salad, it just takes some thought.
Let’s take a look at some common greens and the types of dressings and garnish we can pair with them.
Baby Spinach
Baby spinach is a hearty green with a fairly mild flavour. This green can hold up to just about anything. It may even be served with a warm vinaigrette and garnish though this is more of an autumn style salad.
Baby spinach does really well when balanced with sweet and salty. Sweet ingredients like fresh or dried fruit and berries, or even candied nuts work very well. Also sweeter vinaigrettes like maple, honey Dijon, and balsamic all work as well.
Bacon is always a great choice to bring that salty element to a spinach salad. It could also come from salted nuts or slightly salty cheese like parmesan. Speaking of cheese, goat cheese and spinach are always a good friend.
Arugula
Arugula,
also known as rocket is a hearty green with a complex peppery, spicy flavour. Like spinach, arugula can hold up to just about anything. It is commonly served as part of a mixture of greens though it is delicious on its own.
Typically, salads made from arugula are very simple. This simplicity is due to the complexity of flavour coming from the arugula itself. There is no need to add a bunch of extra stuff. Having said that, an acidic vinaigrette balances that complexity very well.
Generally, I serve arugula with a simple lemon vinaigrette. To this I add some segmented oranges, a little shaved parmesan or Asiago, and some toasted almonds. Anything along those lines will work well.
Mesclun
Mesclun
is really just a mixture of tender baby greens. These greens are typically a little more fragile than arugula or spinach and they have a more mild flavour. They do add a lot of colour to any salad.
The great thing about this mixture is it generally tastes great on its own with a light vinaigrette. It doesn’t really need much else. Of course, it can be used to make a salad but it is important to be light handed with the garnish and dressing as the greens will literally and figuratively collapse under the weight of a lot of ingredients. A few thinly sliced or shaved fresh vegetables and a light dressing is all you need.
Iceberg lettuce
Iceberg lettuce
is fantastic for tossed salads. It holds up well against lots of vegetables and a thick rich dressing. Iceberg has a very mild, neutral flavour and a pleasant crisp texture that is so unique and amazing.
In terms of garnish I always think of pairing iceberg lettuce with whatever vegetables are freshest and lots of them. For dressing, generally something creamy like ranch or french. We want a dressing that is going to coat the lettuce and vegetables and provide a lot of flavour.
Iceberg lettuce often gets a bad rap, but for my money I think it is kind of the rock star of the salad world. To put things into perspective mesclun would be like a really good classical musician. Arugula would be a jazz drummer, and spinach would a folk singer.
I could spend all day just talking about different kinds of greens and lettuces but we need to move on. I think that this should give you a few good ideas and a decent starting place. I think really the key is to try different greens and experiment a little. You never know what you might fall in love with.
Salad Garnish
As we saw a little bit when talking about greens, a salad garnish can be just about anything. Fresh vegetables, fresh or dried fruit and berries, cold sliced meats, cooked or smoked seafood, cheese, nuts or seeds.
Although just about anything can be a salad garnish that doesn’t mean that everything should be all the time. What I mean by that is when it comes to garnishing a salad, generally less is more.
As far as I know there aren’t really any hard and fast rules for when, what, and how much of something should be added to a salad. I would say just use your better judgment. If something seems really out of place, probably avoid it.
The only other thing I would say about garnish is just make sure that the ingredients you are using are the best quality they can be. There is no hiding mushy tomatoes, or sour grapes.
Salad Dressing
There are three main types of salad dressings. Basic vinaigrettes, think Italian or Greek Dressing. Egg or mayonnaise based vinaigrette like Caesar dressing. And creamy, dairy based dressing like ranch. All three of these dressings have their purpose and applications. Let’s take a look at each individually.
Basic Vinaigrettes –
At its most basic form a vinaigrette is just oil and vinegar. Typically, other ingredients are included to add flavour, and to bind the oil and vinegar together.
Most often homemade vinaigrettes are held together by mustard either prepared or in powered form. There is a whole scientific process behind this that I don’t really have time to get into. What I will say is that mustard and egg yolk both hava a group of proteins known as lecithin that act to hold together the oil and vinegar molecules. So, in a basic vinaigrette the mustard holds it together. In an egg based vinaigrette the egg holds it together.
Basic vinaigrettes often have some kind of sweetener in them as well. This could be the vinegar in the case of balsamic or a raspberry vinegar. These both have a bit of sweetness already. More often a little honey, or maple syrup may be added.
For more information on this check out this post I did this time last year about how to make a kick-ass salad.
Egg Based Vinaigrette –
Egg based vinaigrettes are made in exactly the same way as basic vinaigrettes, the difference being egg is used rather than mustard as the binder. In egg based vinaigrettes are thicker and creamier than basic vinaigrettes.
There is some concern with egg based vinaigrettes because the egg is used raw. The health department suggest that you pasteurize your eggs first, but no one does this. I think that there is enough acid coming from the vinegar that there isn’t too much of a worry. Having said that, I cannot suggest that you use raw egg to make a dressing. Instead, I suggest using mayonnaise as the base as it really is pretty mush the same thing you were going to make anyway.
If you are going to use mayonnaise as the base you may have to thin it out with a little more vinegar and then just whisk your flavourings into it. Easy enough.
Dairy Based Dressings –
Dairy based dressings are generally made from some kind of fermented or cultured dairy such as yogurt, sour cream, or buttermilk.
When using yogurt or sour cream it really just comes down to thinning it out with liquid, adding more acid to it and then flavouring it. Buttermilk is usually used with other bases to add a tart creamy flavour.
Conclusion
Salads are a great way to add greens and fresh fruit and vegetables to your diet. They can be as simple or complex as you want. You can use homemade or store bought dressing (I suggest homemade but that’s just me). And you can dress it up however you want. Experiment, play around and have fun. To me, that is what salads are all about.
The May long weekend is here! For many of us that means the official start to summer. Weekends at the cottage, drinks on the deck, and of course barbecues. In honour of the long weekend we are going to talk in depth about one of those barbecue staples; homemade hamburgers.
There are as many styles of homemade hamburgers as there are people making them. Everyone has their secrets and preferences. There are little things that we all do differently or add to our meat to make our burgers stand out.
Everyone thinks their homemade hamburgers are the best, myself included. However, what I know is that you don’t know until you know. You know? What I mean is that maybe there is something that you could be doing differently, a new idea you just never thought of that would completely change your homemade hamburger game forever.
With that in mind, today I’m going to tell you…
Everything I know about Homemade Hamburgers
In my experience there are two main approaches that people take to making burgers. One, and unfortunately the more common of the two approaches is to throw everything but the kitchen sink into the mix. The second approach is more stripped down and minimalist. I fall into the second camp. Let’s take a look at them separately for a second.
Just to clarify, we aren’t going to talk about toppings, or even buns today. Just the homemade hamburger patty itself. Otherwise, this post will be way to long and a little unruly.
Kitchen Sink Burgers –
These are by far the most common type of homemade hamburger. People put everything in there. Chopped garlic and onion. Some kind of filler like bread crumbs, oat meal, or even crushed up tortilla chips. Usually there is an egg in the mix somewhere. I’ve seen people mix in Montreal steak spice, barbecue sauce, even celery salt. You name it, I’ve pretty much seen it go into a burger.
The problem I have with these types of burgers is that they don’t taste anything like a hamburger. The flavour get’s completely muddied and lost among all these different ingredients that don’t really need to be in the mix.
Minimalist Burgers –
When I make homemade hamburgers I typically add a little garlic and onion powder, and I add either salt and pepper or a little seasoning salt like old bay. That’s it. No binders. No fillers.
On the outside of the burger, right before I start to cook it, I season it with the same ingredients I seasoned the meat with. This way there is no confusion of flavours.
Rather than covering up and muddying the taste of the beef, these few ingredients act to compliment and enhance the flavour. So, the burger tastes like beef.
Type of Meat –
When I make homemade hamburgers, I prefer a medium ground beef, to a lean ground beef. The reason why is threefold and very simple.
Reason 1. The fat adds flavour.
Reason 2. The burger holds together better.
Reason 3. The burger will be juicier.
That’s it. What else do I need to say?
If you are sitting there thinking, “But Ben, it’s so fatty!” then you have bigger problems. These are burgers we are talking about. And, most of that fat is going to be cooked out anyway. If you want a juicy, flavourful burger, the secret isn’t to add a pile of ingredients. The secret is to leave the fat in.
Grinding your own meat –
If you are set up for grinding your own meat, fantastic! Myself, and I think most chefs, prefer a mixture of chuck and brisket for burgers. Chuck is very lean and brisket is pretty fatty. The combination of the two make for a perfect ground beef for burgers. But, what exactly is beef chuck, and brisket?
Brisket –
Brisket, as I’m sure most of us are familiar with comes from the bottom front of the cow, right above the front shoulder. It is fatty and tough, but very flavourful. This makes it perfect for grinding, smoking, and braising.
Chuck –
Chuck sits right above the brisket and behind the head/neck of the cow. It also is a very tough cut of meat. It is very lean and also flavourful. Most typically you would find this as a pot roast.
Other meats –
It isn’t uncommon for a little pork either raw or in the form of bacon to be added to ground beef to add flavour or fat. This would be especially necessary if you were only using ground chuck, or venison. Because it is so lean, the pork (or brisket) is needed to prevent the meat from becoming really dry and crumbly. Without the fat it would be like eating sand unless the burgers were cooked no more than medium.
Cooking burgers to temperature –
This actually brings up another good point. Cooking homemade hamburgers to temperature. Essentially, is it safe to eat hamburger rare, medium rare, or medium? The answer is yes and no.
It is very strongly suggested that you fully cook ground meat from the grocery store, or even from your butcher. Obviously we prefer to think that everyone handling our raw meat is maintaining the highest food safety standards possible, but it isn’t always the case.
The problem with ground meat is that by grinding it you are creating all of this surface area for bacteria to live and grow. By contrast, a whole steak only has the top, bottom, and sides for bacteria to populate. When the steak is cooked, even if it is rare, these surfaces are getting hot enough to kill that bacteria. But, because there is so much surface area with ground meat, it is impossible to kill all the potential bacteria unless the burger is cooked through.
Having said all of this, if you grind the meat yourself right before you make your hamburgers, and you make sure all the equipment is clean and sanitized, then yeah knock yourself out. Eat your burger rare. Why not?
For those of you that do have instant read thermometers, and you all should, burgers should be cooked to an internal temperature of 165°F.
The perfect size for the perfect burger –
When it comes to hamburgers I would rather have two thin patties than one giant patty. I know that a lot of people like a big juicy patty and that’s fine but not me. Let me explain.
There are a lot of reasons why I prefer thin patties to thick ones. One of the really big reasons is cook time. If I make a hamburger patty that is 1/4 inch thick it is going to cook in 4-5 minutes rather than 10-15 minutes for a really thick patty. This means it is less likely to burn on the outside while it’s cooking. Also, by stacking two thin patties I get four grilled surfaces rather than the two that you get with one thick patty. That equals more flavour. There is also an extra surface for cheese.
With thin patties there is also the option to have small single patty burgers for guests who may not be as hungry. What this means is that your meat goes further without having to add any fillers.
Cooking homemade hamburgers –
I think that we can all agree that the best way to cook a homemade hamburger is on the grill. If you make thick burgers, use a moderate heat. For thin burgers, you can use a high heat. Don’t press them and try to only flip them once.
If you don’t have a grill, I prefer to cook them in a hot cast iron pan. I don’t add oil to it as there will be enough coming out of the burger itself.
That’s really about it.
Conclusion –
Pretty much everybody loves burgers, except Barb and vegetarians (I’ll eventually do a veggie burger post). How you make your burgers is up to you. You are the one eating them after all. All I suggest is taking a step back, thinking about your burgers as they are now, and asking yourself if they could be better. If they can be, I hope that this helped. If they are as good as they can possibly be, I would love to hear about them. Talk to me in the comments.
Have a great long weekend everyone and thank you for reading!
When I was growing up cheese was mostly orange and firm. Occasionally, there would be a plastic cylinder of grated parmesan, a block of mozzarella or some cream cheese, but that was about it. It wasn’t until I was in my 20’s that I was really exposed to a greater variety of cheese.
For a long time, even after I was introduced to all these different cheeses, I assumed I didn’t like them because I hadn’t really eaten them before. But, as time went on and I was pushed into trying cheeses I had never even heard of, I realized that I had been missing out. I did like them! I loved them in fact!
There are more varieties of cheese than I could possibly name. It isn’t that surprising when you think about the fact that the history of cheese making dates back over 7000 years. You can come up with a lot of different ideas, and a lot of different ways to make something when you have 7000 years to think about it.
One of the really interesting things about cheese to me is that it is all pretty much made the same way, and always has been. For all of those 7000 years, very little has changed about the way we actually produce cheese. Yes, the technology has changed. The standards of cleanliness, and quality have changed. But, the actual way that milk is transformed from milk to cheese, is pretty much identical to how it has always been done.
Why Cheese?
Like other things we love, bacon, prosciutto, salami, pickles, jam, cheese was originally produce to save a product over time. Before refrigeration, milk spoiled very quickly. Cows only really produce milk naturally in the spring and summer after they give birth to a calf. So, there needed to be a way to save milk over the winter. Once cheese making was discovered, it became the answer to that problem.
How is Cheese Made?
At the most basic level, making cheese is actually a very simple process. Rennet (which is a complex set of enzymes that can be found in a cows fourth stomach) is added to milk. This causes the milk to coagulate and separated into curds and whey. The curds are cut and the whey is drained. The curds are then usually salted, and either put into moulds to form and age, or served fresh.
Aged Cheeses
As cheese ages the enzymes in the rennet and the natural bacteria in the milk (in modern cheese making this bacteria often has to be added as a starter culture due to pasteurization) break down the lactose(a sugar present in milk) into lactic acid. This makes the cheese more acidic providing a different flavour than fresh cheese. On top of that, the lower ph (from the lactic acid) creates an inhospitable environment for bad bacteria.
In the U.S. for example it is illegal to sell cheese that has been made with unpasteurized milk unless that cheese has been aged for at least six months. The reason being that after six months of aging the acidity in the cheese is high enough to kill off bad bacteria.
How are different aged cheeses made?
Originally, different cheese came from different places. This is still true to some extent. For example, all the Parmesan Reggiano in the world comes from the same place in Italy. But truthfully this is more for economic and cultural purposes than it is due to the ability to make that type of cheese anywhere else.
Before starter cultures were developed in labs and sold to dairies all over the world the cheese you made was very much dictated by where you lived and where you were selling your cheese. Let’s use cheddar as a simple example of this.
How Cheddar Cheese Became Orange
In the spring and summer Jersey cows in England would typically eat a lot of buttercups, yellow clover and dandelions. This would give their milk a yellow hue. The milk that was produced at this time of year was sweeter and generally considered of better quality. The cheese that was produced from this milk would be yellow to slightly orange. And so everyone knew that the yellow or orange cheese was the best. Before too long people were adding dye to the cheese to fake that yellow or orange colour. We still do this today.
The idea here is that the cheese that was made in this area was specific to that area because of the breed of cow and what they were eating. When it comes to aging cheese, historically at least, the same principles apply. The bacteria in the air of a specific region effects the cheese. What the cow ate and what ended up in the milk had an effect on the cheese. Even the temperature and amount of moisture in the air had an effect on the cheese.
The French call this “terrior”. They use that term to describe the environmental context of where an item comes from. It is used to describe the soil grapes are grown in for wine, to the acorns that Ibérico pigs eat to make Ibérico ham.
The reason we have so many different varieties of aged cheese, why they don’t all come out the same, has to do with where they came from originally.
Fresh Cheese
A lot of the same principles that apply to aged cheese apply to fresh cheese too. The temperature, the amount of moisture in the air, the quality of the milk, this all changes the flavour and texture of the cheese.
Fresh cheese are usually eaten within a few days or weeks of production. Because they aren’t given the time to develop the same amount of lactic acid as aged cheeses, fresh cheese can be spoiled very quickly.
Soft Cheese
The difference between hard and soft cheese really just comes down to how much moisture has been removed from the cheese and how much the cheese has been pressed. The more a cheese has been pressed, the tighter the curd will be, the firmer the cheese will be.
Moldy Cheese
Moldy cheese falls into three main categories. Interior mold. Exterior mold. And rotten.
Interior mold
We generally know cheese with interior mold as blue cheese. Mold generally in the form of mold penicillium is injected into the cheese as it ages, or kneaded with the curds as the cheese is formed. The cheese is then left to sit in a temperature and moisture controlled environment that is ideal for the propagation of the mold spores in the cheese. This gives the cheese a distinctive flavour and smell.
Exterior mold
Some cheeses have a white mold rind like brie. This forms naturally. This white mold can often be seen on the exterior of aged salami as well. It is a perfectly healthy mold that won’t hurt you at all and is actually beneficial to the cheese and salami.
Rotten Cheese
If you have cheese sitting in your fridge and it grows green or black mold, say good buy to it. Don’t cut the mold off and eat the cheese. Research has shown the surface mold is not just surface mold. It stretches like the roots or a tree under the surface and can make you really sick.
So, if you buy cheese that is supposed to be moldy, that’s good. But, if you buy cheese and it goes moldy, that’s bad.
One thing to keep in mind is that cheeses with a thick rind like parmesan may develop a green mold on its exterior as it ages. This is common. But, because of the thick rind that mold and penetrate into the cheese so it is perfectly fine. So, if you buy a cheese with a thick rind and there is a bit of mold on the rind, it is perfectly fine. Just cut it away, or wash it with vinegar.
Other types of cheeses
There are literally thousands of types of cheese out there. As I said they are all initially pretty much made the same and left to transform over time. Some are left to develop mold. Some are pressed to make them firm. Others like feta are left in a brine to preserve them. Or, washed in a brine like Parmesan. Some cheeses have long traditions and some are brand new.
The fact is that cheese and humans go way back. We’ve been friends for a very, very long time. Although production technology may change and our understanding of the process of making cheese at a micro level increases, the cheese itself is pretty much unchanged. So too, is our relationship with it and love for it.
Bonus Fact!
If you are ever eaten a hard cheese like parmesan or beemster and you notice crunchy or crystallized bits, those are just salt crystals. These form as moisture evaporates.
It is spring, which means lots of rainy, dreary days spent waiting for warmer weather. What better way to perk up those spring blues then with a nice big bowl of soup?
Soup can be made of so many things, and made in so many ways. But there is an art to it. It does take some amount of knowledge and skill to make a really good bowl of soup.
In restaurants, soup is generally made of products that are reaching the end of their lives or leftovers from the day before. We use as few ingredients as possible and manipulate them to get as much flavour as we can. The goal of a restaurant chef is to maximize profit, and make the most out of very little.
Your goals probably aren’t based on balancing profit and loss. However, the same principles that we use in restaurants can be applied to make much tastier soup at home.
So, let’s get in to it. Here are…
Restaurant Secrets For Making Better Soups
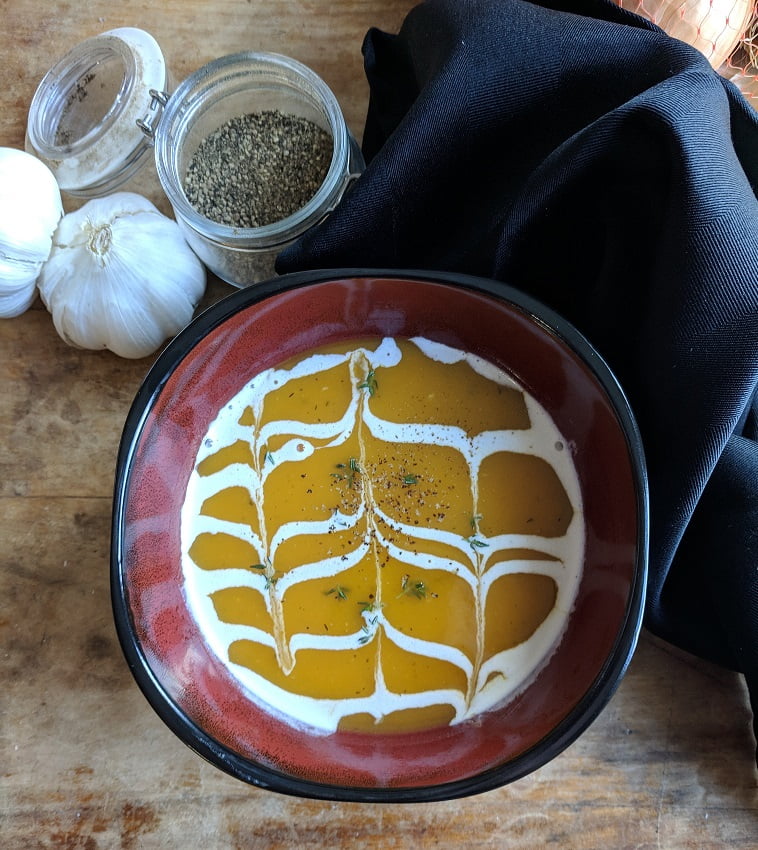
Puréed Soups – Maple Butternut Squash
Who doesn’t love butternut squash soup? Ideally it is smooth, creamy, a bit sweet, and oh so delicious. What’s not to love?
Butternut squash soup is usually made fairly simply. A butternut squash is peeled, the seeds are removed, and it is cut into cubes. Some onions and perhaps garlic will be cooked a little, and then the squash will be added. This will be covered with water and maybe some maple syrup, boiled until the squash is soft and then puréed. Finally, it will be seasoned with salt and pepper and that’s about it.
The soup I just described is the most basic version of a butternut squash soup. It’s not bad, in fact most people would probably be happy with that. But with just a little more effort, that good soup can be made extraordinary.
Roasting Squash
Try Roasting the squash on 425°f for 35- 45 minutes prior to adding it to the soup. This will draw the natural sweetness out of the squash and intensify it’s flavour.
Just cube the squash as described above. Toss it with a few tablespoons of olive oil, and a bit of salt and pepper. Spread the squash out on a sheet pan lined with parchment paper and bake. You want to develop a little colour on the squash, a little caramelization.
Once the squash is thoroughly roasted, add it to the soup pot as you normally would.
Caramelizing the onions
While the squash is cooking take the time to caramelize the onions. This is done by cooking the onions in a little oil, on low heat for a long period of time. All you have to do is stir the onions every once in a while and scrape the bottom of the pot from time to time.
Caramelizing onions, just like roasting the squash, draws out their natural sweetness and deepens their flavour. It makes the flavour of the finished soup richer and deeper.
Maple Syrup
A little maple syrup adds a nice pop to the flavour of the soup. Too much can quickly become over powering and make the soup sickeningly sweet. By roasting the squash and caramelizing the onions, you are already adding sweetness to the soup. This means that the maple syrup is just there for that maple flavour.
A little maple syrup can go a long way if you take the time to reduce it. Once the onions are cooked, add about half as much maple syrup as you think you should and cook it until it has almost completely evaporated. This will intensify that maple flavour meaning you can use less than you normally would.
Liquid
Use stock instead of water when making soup. The reason being that soup is usually made with only a few ingredients. Those ingredients have to provide as much flavour as possible. Otherwise, you may have to add other ingredients to compensate for the lack of flavour.
Stock is just flavoured water. It could be flavoured with vegetables to make vegetable stock. It could be flavoured with chicken bones and vegetables to make chicken stock. Beef bones and vegetables to make beef stock. You get the idea.
I generally recommend making your own stock. It is really straightforward and takes no effort at all. But, feel free to buy it at the grocery store if you prefer. Just, use stock instead of water.
Puréed soups
Maple butternut squash soup is generally a puréed soup. Often at home people will purée their soup in a blender and call it a day. A blender alone will never be able to give you that smooth, creamy texture that you get from soup in restaurants. That comes from passing the soup through a fine mesh sieve once it has been puréed.
Passing the soup through a fine mesh sieve is just what it sounds like. Pour the soup into the sieve, and using a spatula or the bowl of a ladle, push the soup through the tiny holes. You are trying to get as much of the solids through the sieve as possible. What comes out the other side is the smoothest, creamiest possible.
Conclusion
The principles I just described for making butternut squash soup can also be applied to pretty much an other puréed vegetable soup. Roast the main ingredient. Caramelize the onions. Use stock instead of water. Pass the final soup through a fine mesh sieve. Done and done.
Broth Based Soups – Chicken Noodle
Broth based soups like chicken noodle are one of the classic home remedies for whatever it is that ails you. But rarely does homemade chicken noodle soup taste as good as the stuff made in restaurants. So, what’s the secret?
It will likely come as no surprise to learn that the secret to a really flavourful and delicious broth based soup, is a really flavourful and delicious broth. This brings up the question, what exactly is a broth and is different from a stock?
Broth vs. Stock
There is one really big difference between broth and stock. Stock is made from bones. Broth is made from meat. Stock uses water as the base. Broth often uses stock as the base. That’s pretty much it. Other than that they are made the same way.
To make it a little clearer… to make stock you take chicken bones and simmer them with carrot, onion, and celery. To this some herbs might be added. To make broth you simmer the whole chicken with vegetable and herbs.
In terms of flavour, broth is much stronger than stock. It generally has a slightly higher fat content and so it has a richer mouth feel. Broth is also usually clearer than stock. This comes from clarification, which is a relatively complicated process that we don’t need to get into. One way to keep a broth fairly clear is to not add carrots to it as they will cloud it. And do not boil the broth while you are making it.
Cooking the ingredients
Another secret to flavourful broth based soups is to cook all the ingredients separately. This seems kind of counterintuitive but it’s true. Start with a hot flavourful broth and add cooked ingredients to it. This keeps the flavours clean and crisp as well as the broth clear.
If you are making the soup a day in advance, all of the ingredients can be combined the day before except any ingredients that will continue to absorb liquid like rice or pasta. Add these only at the last minute before serving otherwise they will suck up way too much liquid and become mushy and gross.
Conclusion
Again these same principles apply to most broth soups not just chicken noodle.
Start with a rich, flavourful broth. Add only cooked ingredients. Leave ingredients like rice and pasta out until the last minute so they don’t become soggy, mushy and gross.
Conclusion
Nothing beats a really good bowl of homemade soup. Hopefully, with these restaurant secrets you can now find yourself making better soup then you ever thought possible. I hope what you’ve realized is that with just a little more effort, the ordinary becomes extraordinary. That is true of all cooking, not just soup. It is always that little be extra that separates the good from the great.
The next time you make soup, even if you are following a recipe, take the time to roast the vegetables, or make a flavourful broth. You will be able to taste the difference, and so will everyone else.
For a lot of people out there, likely a lot of people reading this, cooking isn’t fun. It’s something that has to be done, but isn’t enjoyed. But what if it was? What if you could step into your kitchen confident and relaxed and just cook? I mean cook because you enjoy it. Cook because you want to. Because it is fun. It’s not a crazy idea.
As humans it is rare that we enjoy doing things that we feel we have to do or things we feel we’re not good at. Unfortunately, cooking often falls into both those categories. But I’m here telling you that you can enjoy cooking. It doesn’t matter who you are or current skill level, you can enjoy it. So, what’s the secret? More importantly…
When Does Cooking Become Fun?
There are two kinds of people out there. People who enjoy the process and people who enjoy the results. What do I mean?
Learning to play the guitar.
When I was 16 I decided that I wanted to learn to play the guitar. I was handed an old beat-up guitar and a song book that showed how to form chords. I started practising. Eventually I learned a “C” chord and then a “G” and then a “D”. My fingers hurt, I would get frustrated that my hands wouldn’t do what I wanted them to do. Sometimes I would hate it and give up, but I always went back to it.
Even though there were parts of the learning process I hated, I enjoyed the fact that I was learning something. Every time I learned a new chord or got closer to playing a song it pushed me forward. It drove me to continue.
It’s been almost 20 years since I first started learning those basic chords. I will be the first to tell you that I am no great guitarist. However, I don’t need to be. I was never trying to be. I am able to draw a lot of joy out of what I can do and that’s all that ever mattered to me.
Because learning to play the guitar was something that I really wanted to do, I enjoyed the process of learning just as much as I enjoy being able to play. The fact of the matter is, I enjoyed learning because I was physically playing the guitar the whole time. It didn’t matter that it sounded terrible or that it was frustrating. I was playing.
Learning about food photography
A couple of years ago when I started growing my Instagram following I would just point my phone camera at my food take a picture and be done with it. I quickly realized that that just wasn’t enough. I had to learn about lighting, and staging photos, and composition, and photo editing. In all honesty, I hated every minute of it.
Truth be told I don’t really like taking pictures of food. I get no joy out of the process. Lighting photos, worrying about what’s in the background, blah. I don’t like thinking about composition and everything else. But I know that it is better for me to do all that stuff than to not do it.
Here’s the kicker to all this; I love the photos. Even though I don’t really enjoy the process of getting the photo, I love when I get it right. I love when the photo comes out perfect and the food looks amazing. The amount of joy I get out of that, actually makes all the other stuff worth it. It has actually made me start to enjoy that process.
The other part of all of this is that now I have learned enough about food photography that I can actually have a little fun with it. I’m am not expert, there’s loads more to learn. Really though, I know enough that I’m kind of over that hump. I can relax a little, think about things a little less, keep the outcome in mind since that is that part I really love.
So…when does cooking become fun?
The answer to that question comes down to the type of person you are. Are you the person who wants to cook and is going to enjoy the process of learning? Because if so, cooking becomes fun the moment you set your mind to learning more about it and actually doing it.
Are you the kind of person who likes eating good food but doesn’t like the process of making it? If you are this type of person, cooking becomes fun when you get to the point when you can make what you want, when you want, without thinking about the process and all the steps.
Really, it doesn’t matter what type of person you are. Cooking is the most fun when you know the fundamentals of it. Once you know the basic building blocks of a vinaigrette and can make an infinite number of vinaigrettes, it’s fun. When you know the basics of roasting meat and no longer how to worry about getting the oven temperature perfect or the exact amount of time it takes to cook, it’s fun. And, when you step into your kitchen without a recipe, have something in mind that you want to cook, and you just cook it exactly how you want, it is so much fun.
So, when does cooking become fun? That’s up to you. The more important point is that no matter who you are, it can become fun.
Last week I wrote about everything I know about curry. The thing was, it wasn’t everything I know. Curry is just too big a topic to cover in one post. I don’t even know if I’ll be able to cover all I want to cover in two posts, but we’ll see. If you haven’t read Everything I Know About Curry pt. 1 from last week, I would suggest you check it out before reading today’s post.
As we all know, when you build a house you start with a solid foundation. Using that metaphor, I would say that last week we poured a concrete slab, we let it set over the last week, and today we are pouring the concrete walls for the basement.
What I’m trying to say is that reading this post isn’t going to make a you curry master. Hell, I’m definitely not a curry master. What it will do is build on the information from last week and add to your foundational knowledge of curry. That foundation will make it easier for you to explore the wonderful world of curry in even more depth.
Today our focus is going to be on actually cooking curries. We are going to take a look at one classic curry, butter chicken. When broken down into it’s individual parts it should help to illustrate the points I made in pt 1. Let’s get to it.
Butter Chicken
By far one of the most famous Indian Dishes is Butter Chicken or murgh makhani. It is made up of two main components, the chicken and the sauce. To fully understand these two elements we need to first take a look at the origins of the dish.
The Origins of Butter Chicken
Butter chicken as we know it isn’t some ancient Indian dish. On the contrary. It was actually born out of the 1950’s.
Essentially, in Delhi there was a restaurant owned by three partners. They were trying to come up with ways to save money and reduce costs. One of the partners, the one who was mostly in charge of the food, realized that at the end of the night they always had Tandoori Chicken left over. This chicken would be pretty dry by closing time and so was generally thrown away.
After some thought this partner decided to put the chicken in some tomato gravy over night. The gravy was a combination of tomato, spices, and cream. The next morning the partner heated up the chicken and sauce and found the chicken to be tender and even more delicious than it had initially been. With a few tweaks, butter chicken was born.
With that in mind, let’s take a look a the two components of this dish.
Tandoori Chicken
Although butter chicken is a very new invention, tandoori chicken has been around possibly thousands of years. At it’s core, tandoori chicken is chicken marinated in yogurt and spices and then roasted in a tandoori oven. The spices used to marinate the chicken vary by region but generally are referred to as Tandoori Masala.
Tandoori Masala
Basic Tandoori Spice Blend for Tandoori Chicken This recipe is adapted from “The Indian Cooking Course” by Monisha Bharadwaj
To make the tandoori chicken 3 tbsp of onion, ginger, and garlic paste is cooked in oil and then the spices are added. This is then mixed with 1/2 cup or so of yogurt, and the juice of half a lemon. A dozen or so pieces of chicken are then added to the marinate and left to sit over night. The chicken is then cooked on high heat either on a BBQ or in an oven. That’s really it.
The chicken most typically used for butter chicken is boneless, skinless, thighs. The thighs are better suited to this than breasts because they don’t dry out nearly as much. There is an added bonus that thighs are generally cheaper than breasts. Having said that, this marinade works well on any piece of chicken, or even whole chickens.
Marinating with Yogurt
One thing you may notice about this is that the chicken is marinated in yogurt. This is common in Indian cuisine as well as Mediterranean cuisine. And not only for chicken. It works well with any kind of protein. Enzymes in the yogurt help to tenderize the chicken while imparting a nice fresh flavour. It’s the same idea as marinating chicken in buttermilk prior to making fried chicken.
The Spices
You may also have noticed that the spices were cooked briefly in oil prior to being added to the yogurt. This was done to “open” the spices. Meaning to draw out their natural oils which is where the flavour comes from. If we were using whole spices, rather than ground, we wouldn’t use any oil. We would simply toast the spices in a dry pan and then grind them. This just doesn’t work as well with ground spices which have a tendency to stick and burn.
Cook the spices on a moderate heat and only until they start to release their smells.
Okay, so this recipe for Tandoori Chicken is basically the starting point for butter chicken. The only additional element is the sauce. Before we get into that, I want to say that Tandoori Chicken is absolutely delicious on it’s own. I actually suggest making the chicken one night and having it for dinner by itself. The next day you can make the sauce and have some butter chicken with the leftovers. This was how the dish came about anyway.
Remember, you don’t have to use chicken thighs or breast for this. You can easily make a whole chicken with this recipe, and then just pick any excess meat off the bones after dinner and add it to the sauce the next day.
The Butter Chicken Sauce (Makhani Sauce)
There are a lot of variations to this sauce. Some, like the one I am going to share with you use cream to enrich it. Others use ground cashews. The thing about cashews is that they are much less expensive in India than they are here. Because of this I tend to use cream.
Some people feel very strongly about whether or not cashews should be used to make butter chicken. This is a very regional argument that sometimes has a lot of emotion behind it. What I will say is that there is no one right way to make this dish. That is despite what some people will say.
Principles of Butter Chicken Sauce
The principles of this sauce are the same basic curry principles I shared in pt. 1 of this post. Make a paste with onion, garlic, and ginger. Cook that over a moderate heat and then add the spices. We then cook the spices until they become aromatic (start to release their smells). Then we add some tomato paste, cook that for a bit. And finally some liquid, in this case cream.
What may seem odd to you is that so far we haven’t seen or even mentioned butter. With that in mind, there are a few points I’m going to make. The term butter in this sense, more than likely refers to the texture of the sauce as opposed to actual butter. Having said that, in Indian cooking the fat or cooking oil most commonly used is Ghee. This is actually clarified butter. Finally, a little butter can be, and sometimes is whisked into the sauce at the end of cooking to make it richer and creamier. This isn’t always the case though.
Okay, let’s take a look at the recipe.
Butter Chicken Sauce (Makini Sauce)
Traditional Sauce for Butter Chicken. Add this to Tandoori Chicken to make your own delicious butter chicken.
Add this sauce to the cooked tandoori chicken and you have yourself some butter chicken. For a milder sauce, use less of the green chili. Also, that classic butter chicken flavour is primarily coming from two ingredients; fenugreek and cardamom. Don’t exclude those or this won’t taste like butter chicken.
The key to not having to add sugar to this is to brown the tomato paste. This will essentially caramelize it, drawing out the natural sweetness and sweetening the sauce. Do this before the water is added.
Conclusion
I really hope that you take more away from this than just a Butter Chicken Recipe. I used butter chicken as the example because you likely know what butter chicken is, and probably have eaten it (you really should if you haven’t. It’s delicious). I think it’s important to give context to these principles.
Putting knowledge in context is a good way to learn but it is no substitue to actually doing. So, make a curry. You can start with this one or something else but keep the basic principles in mind. They will stay pretty much the same across the board.
Curry can be a very healthy, and delicious way to jazz up your weekly meals. I hope that this has helped you understand curry better and has given you a bit of confidence to start playing with these ideas. That’s what it’s all about.
Have a great weekend everyone. And thank you for reading.
The term “curry’ means a lot of different things to a lot of different people. It all depends on where you’re from in the world. Growing up in rural eastern Canada curry meant spice. It meant heat and mystery. Curry wasn’t so much a part of food as it was the representation of some far off land that I could never understand. Fair to say that I never really had curry growing up.
As I grew up, moved away from home and started working in restaurants, I discovered that to some, curry just means stew or sauce. To others it’s a specific spice paste that get’s added to stir-fries and soups. What I didn’t realize growing up is that curry isn’t one thing. It isn’t just some yellow spice blend that you buy from the grocery store. It is so much more than that.
Curry Powder
Curry powder, as we know it, is not Indian at all but rather British. In old english, curry simply means to cook. “The Forme of Cury” is a 14th century British cook book that I assure you has nothing to do with Indian food.
Curry powder actually comes out of British colonization. People returning home from India in the 18th century wanted an approximation of the food they had been eating while abroad.
Some enterprising spice merchant saw a market blossoming and came up with the idea of creating an “Indian” spice blend. This blend could be added to anything to get the flavours of India. Whoever this person was kept things simple and went with the name curry powder, or… cooking powder.
There are a few other versions of this story, but I find them slightly less practical and so I haven’t included them here.
Curry Varieties
Although we often associate curry specifically with India, there are many countries that have their own indigenous versions of curry. Thailand is one very well know example. The majority of Asia has their own types and styles of curry that are very different from anything you would find in India.
In all honesty it would be impossible to talk about all of the forms of curry in one single post. So, today we are going to focus mainly on Indian curries. I promise you, even this is way too much for one post. Having said that, I am going to jam as much information in here as I can.
Chili Peppers
It is important to note that we often associate curry with spicy, hot food. Don’t get me wrong, there are some very hot curries. However, curry has existed in India for at least 4500 years. Probably much longer. Chilies were only introduced to India in the 16th century.
I think it is obvious to say that 500 years is more than enough time for a cuisine to adopt a new ingredient. It goes without saying that Indian cuisine has full heartily adopted the chili. However, the point I am trying to make is that there are thousands of years of curry history, that don’t include chili. So, liking heat, is a not a prerequisite to liking curry. It helps. But, it isn’t necessary.
I would say, based on my experience, and I may be wrong, that there are more curry dishes that aren’t hot than ones that are. But, that is also subjective and comes down to your tolerance to spice.
The Basis of Curry
Giving you a road map to making all curries is impossible. Within India there are hundreds, if not thousands of very specific curry dishes. All of these dishes have hundreds of regional variations. That is hundreds of thousands if not millions of individual dishes. Not really that surprising for a country with 1.3 billion people.
What I can do is give you a place to start. A jumping off point that will throw you head first into the wonderful world of curry. Let’s get into it.
The foundation
Pretty much every great cuisine in the world has three ingredients that are used to build the base flavours of that cuisine. In French cooking it is mire poix. Two parts onion to one part each carrot and celery. In Spanish, Portuguese, and a lot of Italian cooking it is sofrito. Which varies depending on the region but usually consists of onion, garlic, and bell peppers. In Indian cuisine it is onion, garlic, and ginger.
Very often a paste will be made with onion, garlic and ginger which will be used in abundance to build the initial flavour profile of a curry. For this I usually follow a similar ratio as I would for French mire poix. Two parts onion, to one part each ginger and garlic. This is ground to a paste and stir-fried or sautéed in oil before other ingredients are added.
Spices
Three very common spices in curries are cumin, turmeric, and coriander. Beginning with these three as base is a great start. Adding other spices to these will create more specific dishes and recipes.
Other spices often used include fenugreek(either ground seeds or leaves), cardamom, ground mustard, pepper, chili, curry leaves(from the curry tree), star anise, bay leaf, cinnamon, and clove just to name a few.
A really good spice blend that you can buy as kind of an all purpose is garam masala. This is a blend of pepper corns, coriander, cumin, star anise, cinnamon, and bay leaf. Often other spices as well. It’s really good for dipping your toe into the world of curry without spending a bunch to stock all the individual spices.
Which spices you use and how much of each really depends on what your cooking. Generally, I always say when making curry is to add as much of each spice you are using as you think you need to. Then go back and double it.
The thing that confuses a lot of western cooks and eaters about curry is that it is not subtle. There is no playing coy with Indian flavours. They are big and bold and they are meant to be. That’s one of the many beauties of the cuisine. And so, that is why I say to put in as much spice as you think you need and then double it. It’s because western cooking is largely about delicate subtle flavours and restraint. This mindset often leaves western cooks, home or professional, with flat, bland tasting curry. Be bold with it.
Cooking Spices
Another thing that kind of differentiates the use of spice from western cooking and Indian cooking is how the spice is used. In western cooking spices will often be added once liquid has already been added to a dish. In Indian cooking, some or all of the spices will be cooked briefly in oil with the onion, ginger and garlic. This “opens” the spices. The heat and the oil causes them to release their essential oils which flavours the dish. This also changes their flavours.
Care must be taken when cooking the spices in oil like this as they will burn quickly. Only a minute or two over moderate heat is all that is needed. Really, once they become aromatic, you can really start to smell them, they are ready. At this point another ingredient, often a liquid would be added to stop that cooking process.
Because this all happens so quickly it’s always best to have all of your ingredients ready to go before you start cooking. Have all of your spices measured out and in one bowl so they can all go into the pan at once (if they are supposed to). Have your liquid ready. Just have everything ready.
Spices can be added at different times throughout the cooking process to achieve different flavours but that is a little too advanced for today’s post. I will talk about that in a future post.
Liquids
Liquids used in curries can be as varied as the curry itself. Water, stock, cream, coconut milk, tamarind juice, or just about anything else can be used. It really comes down to your desired result and the curry you are making.
For lighter curries use water or stock. For heavier curries use cream or coconut milk. You can also use a combination of stock and coconut milk etc.
Conclusion
First of all I think I am going to have to eventually do a second part to this post. Because there is some much more to cover that I just don’t have time to get into today.
I do hope that by reading this you have a much better understanding of what a curry is and how to make it. Having said that, the only real way to learn is by doing. So, plan out a curry. Find a recipe you like and make it keeping all the principles I talked about here in mind.
Indian cooking, like anything takes time and practice to get good at, but it’s worth the effort. This isn’t just because then you will know how to make curry. It’s because the things you learn while making curry can be applied to all of your cooking and will make you a better over all cook.
If you don’t love pork chops you have probably never had them cooked to perfection… Or you just don’t eat pork which is completely possible but not at all what we are talking about today.
Let’s assume for arguments sake that you don’t like pork chops because whenever you eat them, they’re over cooked and dry. This is a very common problem, especially with the thin grocery store pork chops that we’re all used to.
So, what can be done? How can we prevent pork chops from becoming dry pieces of particle board that absorb all the moisture out of our mouths? How can we add flavour before we even cook them? How can we make something that seems so mundane, the star of any meal?
All of this and more because this is…
Everything I know about pork chops
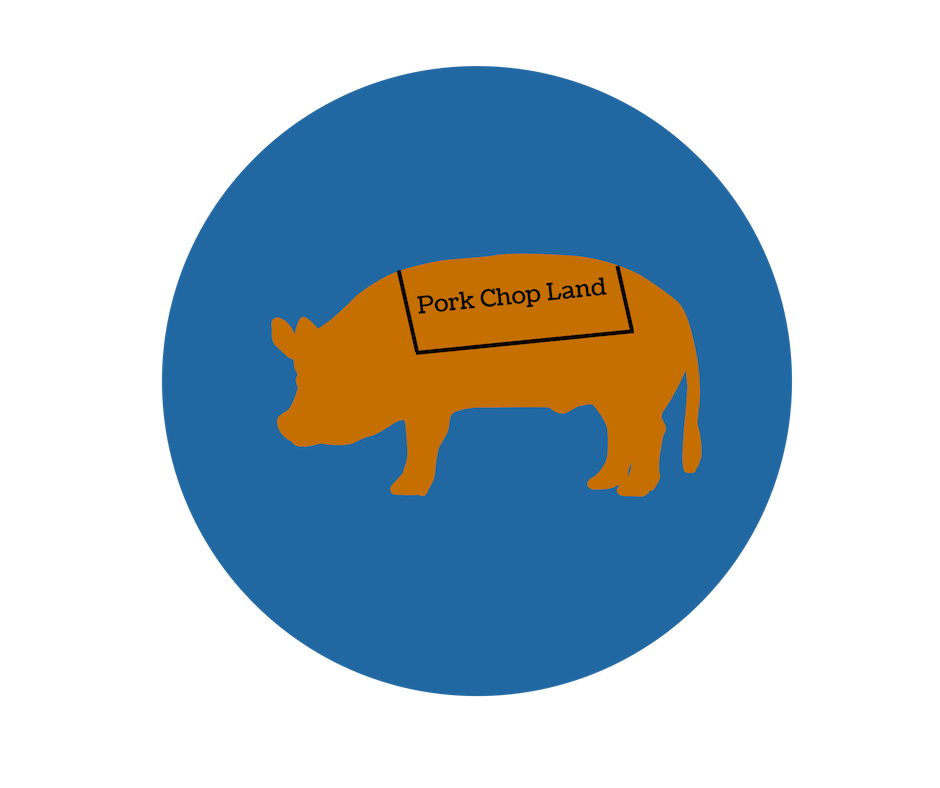
Part of the problem with pork chops is the part of the pig that they come from. It is a very lean part of the animal. The less fat, the less flavour and the more likely to dry out while cooking. There is one bonus however, because these muscles don’t get a tonne of work compared to leg muscles, they are very tender.
The Fear of Pork
The big fear that people have with pork is that if they under cook it they will get trichinosis. With modern farming and butchering techniques this isn’t actually much of a worry. There has only been one case of trichinosis in Canada since 1980. This happened in 2013 and it was from a homegrown hog not a commercially produced one.
Having said that, I’m not suggesting that you start eating rare pork. What I am saying is that pork doesn’t have to be over cooked. It just has to be cooked to a final temperature of 165°F or 74°c. By final, I mean the temperature that it comes to after resting. So, cooking a pork chop to 160°f and letting it rest will bring it up the other 5° without over cooking it.
As a bit of a side note, you are much more likely to get trichinosis from under cooked game meat like venison then you are from pork. The most common occurrences in Canada come from bear and walrus meat.
A Bone To Pick
Another problem with pork chops is that they are often sold with either a rib bone or a piece of the spine attached. I prefer bone-in pork chops but, the meat nearest the bone takes longer to cook than the rest of the chop. So, by the time that meat is cooked, the rest is over cooked. This is a problem. Especially, when people are afraid of under cooked pork.
There are some ways to cook the pork chop completely through, including around the bone, and keep the meat tender. But these processes can be complicated like confit or require special equipment like a sous vide cooker.
So, what we have to think about is either eating the pork with the meat around the bone a little underdone. Or, finding away to keep the meat tender while still cooking it through around the bone.
Brining and Marinating
The difference between a marinade and a brine can be kind of hard to pin point. The key is that they serve different purposes. We will get into that in a second but I think an easy way to think of it is that a brine is salty, a marinade is acidic.
Brine
A brine is a solution of water and salt. Usually, sugar and other flavourings are added as well. I actually talked about this a bit and gave a recipe in Wednesday’s post when I was talking about ribs.
The traditional purpose of a brine was to preserve meat over a long period of time. We don’t often use a brine for this any more because we have fridges and freezers.
Today, there are two main reasons to use a brine. The first is to impart flavour through herbs and aromatics. The second purpose is two fold:
Brining has a tenderizing effect because the salt breaks down certain muscle filaments. The salt also causes the proteins to absorb and hold more moisture. What that means is that brining pork chops makes them more flavourful, more tender, and more juicy.
Brined pork chops are more forgiving than un-brined ones. They can stand to be a little over cooked and still be juicy and tender. This means that the meat around the bone can be cooked without sacrificing the rest of the chop.
Marinades
Because marinades are by their nature acidic they break down muscle fibers making meat more tender. The problem with marinades is that they are slow to penetrate the meat. This can cause an overly acidic exterior with an untouched interior.
Due to the nature of marinades they are generally suggested for smaller pieces of meat or even meat cut into thin strips.
Marinades can absolutely be used for pork chops. There is no question about it. For my money a brine is much more forgiving and the better option.
Cooking Pork Chops
When cooking pork chops (BBQ excluded) I prefer a two stage cooking process. All that means is that I start them in a pan and finish them in the oven or in liquid like a sauce.
Starting them in a pan or skillet allows me to brown the surface of the pork chops. This adds depth to the flavour of the pork. This also cuts down on my cooking time.
Imagine I have two identical pork chops. I put one directly in the oven. The other, I sear on all sides in a pan and then put it in the oven. Which one will cook quicker?
The seared one will cook quicker, even when taking the time to sear into account. The seared pork chop still takes less time to cook compared to the one that went directly in the oven.
Direct heat vs. indirect heat
The reasoning behind this little experiment is pretty straight forward. Cooking in pan on a burner is a direct heat transfer cooking method. Meaning, the heat is coming from the element which is in contact with the metal pan which is in contact with the pork chop. This contact allows for a fairly smooth and consistant transfer of heat from the burner, through the pan, to the pork chop.
An oven is an indirect heat source. The heat coming off of the elements have to travel through the air present in the oven. Air is a terrible conductor of heat. By the time the heat reaches the pork chop it has lost a lot of it’s energy and heating ability.
So then, why not cook the pork chop fully in the pan?
Although direct heat is an efficient way to transfer heat energy, it isn’t great at evenly distributing that heat throughout the item being cooked. So, you can cook a pork chop completely in a pan. It is however, fairly difficult to get a nice even cook on the chop.
The other problem with completely cooking in a pan is heat management.
Imagine I have a pork chop that is 1 inch thick that I’m cooking in a pan. There is going to be a very large temperature variance from the part of the pork chop that is in contact with the pan, and the part that is contact with the air. Every time I flip the pork chop there is going to be this heating and cooling cycle.
An oven, though not really efficient, holds a fairly stable temperature. This means that there will be less of a temperature variance from the top to the bottom of the pork chop. This makes for a more even cook. This is why I prefer a two stage cooking process for pork chops.
Put a lid on it
There is the option to put a lid on your pan and create a little oven inside. This still raises the issue of the direct vs. indirect heat transfer. The only real way to avoid this is liquid. If I were to add some wine, stock, cream of mushroom soup (as we are all probably familiar with) or sauce to the pan this could balance out the heat. There is a danger in using liquid in this way.
If you are using liquid to finish your pork chop it is important that you don’t boil the meat. Boiling will toughen the pork chop and quickly over cook it.
Ideally, when finishing your pork chop with a liquid this would be the process you would follow:
Sear the pork chops on all sides.
Remove them from the pan.
Drain off any excess fat.
Add your liquid.
Bring it to a boil.
Reduce the heat to low and add the pork chops back in.
Put a lid on the pot and simmer for five to ten minutes.
This liquid process has the added benefit of a more even distribution of heat. This will cook the meat closest to the bone along with everything else.
Grilling
Grilling is an entirely different ball game. And one that I unfortunately don’t really have time to get into today. In the spring I will do a whole grilling post to answer any questions that you may have.
Saucing
There is one more benefit of the two stage cooking method. I can develop that nice sear on the surface, and then add sauce to the pork chops when they go in the oven.
The sauce doesn’t have to be BBQ sauce. It could be some white wine, stock, brandy and cream, any number of things. This allows me to develop that deeper flavour that a sear provides while still enjoying my favourite sauce.
Conclusion
A well cooked pork chop is a thing of beauty. It’s flavourful, succulent, and delicious. In all honesty, a really good pork chop beats the hell out of a decent steak any day of the week.
I didn’t talk much about sauces because it’s not nearly as important as the actual cooking process. But use whatever sauce you like. That’s up to you.
I know that this is a lot of information. Most of which you don’t need to really think about too much. But I think it is good to have this somewhere in the back of your mind. Hopefully, it will help you fall in love with pork chops all over again.
It is important to eat a healthy well balanced diet. We all know this. But sometimes we don’t want a nice balanced meal. Sometimes, we want decadence. Sometimes, we want to forget about our mortality and indulge our baser instincts. That dear reader, is what we are talking about here today.
So, please set aside the kale. Push the whole grains away. Disregard everything you know about what you should and should not be eating and let’s get dirty.
This is my…
Guide To Un-Healthy Eating
Un-healthy foods, the once in a while treats, are best when balanced by the perfect combination of sweet, salty, acid, fatty, and spicy. The more you can maximize those five elements the tastier your junk food will be.
Let’s take a look at those five elements individually to see how to get the most out of them.
Sweet
In junk food sweetness generally comes from sugar. This sugar can be in many forms such as honey, maple syrup, molasses, fruit juices, caramel, or straight up sugar. It has a number of purposes in this un-healthy food application.
The first purpose of sugar is obviously sweetness. Humans generally love sweet. It’s like crack to our brains. Having that sweet element goes a long way to waking your brain to the fact that what you are eating is delicious and that you should eat more of it.
Another job the sugar does is work to mellow out heat. If you have something very spicy, a sweet element in the dish, even just some fruit will go a very long way.
One more job that the sugar is doing, is the same that all the other components are doing, adding balance to the dish. Rarely do you want to eat something that is all one flavour or sensation. It bores the palate. It becomes mundane. The more balance of flavours the better.
Salty
Salt as an element in junk food, like sugar, has many purposes. There is the obvious purpose of making something salty, like potato chips. But there are other purposes as well.
In junk food, salt can be thought of as a flavour unto itself, but also a flavour enhancer. In all food, salt acts to enhance the flavours around it.
A simple way to see this for yourself is to take a piece of watermelon, or even a piece of apple and sprinkle it with a little bit of good quality salt. Eat it. It will taste sweeter and some how more like itself than it does without salt.
Acid
If you’ve been reading this blog for a while you have probably seen me write about building flavour with all these ingredients before. But when it comes to junk food, everything is turned up to 11. There is little to no subtlety. Flavours are bold and in your face.
If you were to read the label of your favourite type of potato chip (other than plain) or Doritos, or even candy, you will notice citric acid as one of the top ingredients. This adds that acidic element to these items.
We can add acid to our un-healthy foods in a variety of ways. These include vinegar, citrus juices, tomatoes, pickles, wine, cultured dairy products like cheese and yogurt, or condiments like ketchup, mustard, or hot sauce. All of these, if used as stand alone ingredients, think ketchup or vinegar on fries, adds a massive pop of flavour.
When the acidic ingredient is fully incorporated into a dish like tomato sauce in chili, it enhances all of the flavours around it. It does this without necessarily giving you that big acidic pop.
There are very few foods that I can think of, especially in the junk food arena that don’t benefit from a bit of acid. When used in small quantities, acidic ingredients perform in a similar manner to salt acting to enhance other flavours. In larger quantities, think hot sauce on wings, it alone packs a massive punch of flavour.
This actually leads perfectly into our next topic…
Fat
Fat can be a flavour, but more than that it is a texture and a sensation. The best way to illustrate this is pretty simple. Imagine eating a hot wing, like a very hot wing. What most commonly comes with hot wings? Either blue cheese dressing, or ranch. The reason for this is that the fattiness of the dressing coats the tongue and mellows the heat. That is fat as a sensation.
Another way this sensation can be demonstrated is to think of eating a rib eye steak or even a pork chop. Think of flavour and texture of the fattier bits. Just the mere thought of it has probably already got your mouth watering. Mine is.
The fact that your mouth is likely watering is the point. The fattiness in foods causes your mouth to water. This wakes up your taste buds and makes everything taste better.
A really, really good example of a balance of fatty and salty is potato chips. Three ingredients; potatoes, fat, and salt. The world most popular snack. What about buttered popcorn. Again three ingredients; popcorn, fat and salt. Even a really simple steak; steak, fat, and salt. Amazing, right?
Spicy
There aren’t many un-healthy foods, or even healthy foods for that matter than can’t benefit from a bit of spice.
Spice, isn’t just a flavour, it is a full body experience. Don’t believe me? Think about it. When you eat something spicy, your skin warms, your pupils dilate, you salivate like crazy. Your nose runs, your eyes water. You start to sweat, your whole body tingles. A lot of spicy food can even give you a sense of euphoria.
There is nothing else like chilies. Nothing. Having this spicy element in your junk or un-healthy food makes it taste better, and brings the whole body into it. What could be better than that?
My favourites/Putting it all together
Chicken Wings
One of my favourite junk foods is chicken wings. The way I like to make them is first make a sauce by cooking equal parts Franks Red Hot Sauce with honey until it is thick.
I deep fry my wings in 350°f oil for 8-10 minutes or until they are cooked through. I toss them in the sauce and then serve them with a mixture of sour cream, mayo, blue cheese, green onions, parsley and garlic. Essentially, a quick blue cheese ranch.
These have the perfect balance of sweet, salty, acid, fatty, and spice. It doesn’t get better than that.
Ribs
There are not many things better than ribs. I like to brine my ribs in a solution of water, salt, sugar, and flavourings like bay leaf, thyme, clove, cinnamon, and pepper corns. This builds the salty and the sweet right into the meat.
To make the brine I use 2 L of water, 1/4 cup of kosher salt, 1/4 cup of sugar, 6 cloves, 1 cinnamon stick, 1 thinly sliced onion,1 bay leaf, 2 cloves crushed garlic, and 12 pepper corns. Bring all of this to a boil and cook until the salt and sugar are fully dissolved. Let the brine cool completely and then strain it and pour the liquid over some ribs and let them sit in it, in the fridge over night.
Once the ribs have come out of the brine I rinse them off, pat them dry, season them with salt and pepper and slow roast them on 300°F for about four hours. Then I sauce them with a sweet, acidic sauce and broil them.
Perfection!
Conclusion
The idea with junk food is to pack as much flavour into as small a package as you can while keeping balance between those five elements.
Like I said, junk food or un-healthy food has the flavours turned up to 11. Eating this kind of stuff everyday will absolutely take time off your life. But, what’s the point in living if you don’t get to indulge once in a while?
Braising is a very versatile and important cooking skill to have. It allows us to take tougher cuts of meat and cook them to tenderness. It helps us impart good flavours while mellowing out stronger ones. But most importantly, it’s a technique that we all have probably already used.
Using this technique and mastering it are two very different things. Today, I am going to share with you everything I know about braising in hopes that you can master this technique and cook dishes like you never have before. But first…
What is braising?
To quote Wikipedia “Braising is a combination cooking method using both wet and dry heat.” Essentially, braising uses a relatively small amount of liquid in a sealed cooking vessel on a moderately low heat to cook something over a long period of time.
Essentially, it’s a combination of simmering and steaming. The Wikipedia definition specifies “…dry heat” for one simple reason; the item being braised is usually seared in a hot pan first. This is the “dry heat”
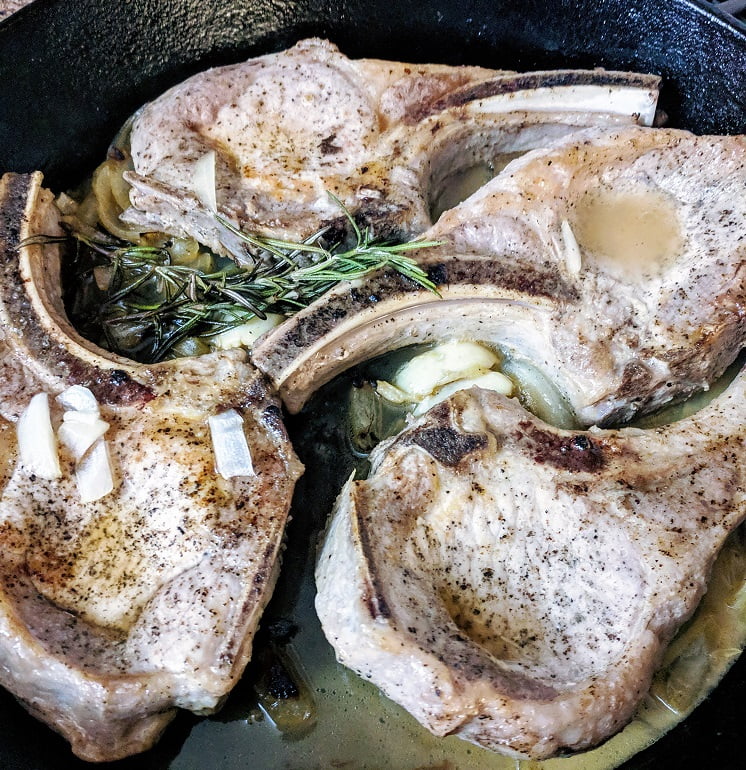
Searing
Searing browns the meat deepening the flavour. A proper sear should look like a deep caramel colour. In the picture above, you can see a clear example of this. I have highlighted a part of the picture that best illustrated what I’m talking about below.
It used to be believed that searing actually sealed in juices. This has however been proven false. It really just adds to the flavour, and less importantly to the appearance. Whether it is a large piece of meat like a pot roast or smaller chunks of meat like in a stew, the meat should always be seared prior to being braised.
Liquid
Once the meat is seared some liquid is added. The liquid can be water, stock, wine, beer, or any combination of these or any other liquids. The general rule of thumb is that you don’t want the liquid to cover more than a third of the item being braised. This is more true for larger items, however you don’t need or want too much liquid for smaller items.
Part of the idea is that after the item is braised, the braising liquid is then used as a sauce. If too much liquid is added the sauce will be very watery and you may have to reduce it separately.
Additional Ingredients
Often tomato paste will be added to the braising liquid to add to the flavour and to help thicken the sauce. Other ingredients like root vegetables, herbs both fresh and dried, and spices, will usually be added for flavour as well. If the vegetable are meant to be eaten with the meat they are generally added a third of the way through cooking.
Time
The time it takes to braise really depends on the item being braised. Small pieces of meat will take less time than larger pieces of meat. Generally, two to three hours is a good starting point. I know that seems like a lot of time, but it is passive. You don’t have to do anything but wait.
Temperature
The temperature used for braising is moderately low. If you are braising in the oven, which is suggested because of the more consistent heat, a temperature between 250°f – 325°f is optimal.
It is important that the temperature isn’t too high. A high temperature will cause the liquid to boil rather than simmer. The high heat of boiling will toughen the meat rather than tenderize it.
Cooking Vessel
Often times a dutch oven like the ones pictured below from Amazon.ca are used for braising. They are specifically designed for this purpose. One thing that makes them great for this is that the meat can be seared in them, the liquid added and then the whole pot can go in the oven.
Of course, you can braise in anything that can go in the oven. It is not uncommon to sear meat in a pan, and then remove it to a casserole dish. The pan is then deglazed with wine or stock, the main cooking liquid is added, brought to temperature, and poured over the meat. The casserole dish is then covered with parchment and foil and put in the oven.
Start to finish
Get a dutch oven or other pan hot over moderate heat. Add a bit of oil. While the pan is heating up season 2-3 lb beef roast or 1-2 lbs cubed beef with salt and pepper. Put the meat in the pan and let sear to a deep caramel brown colour, then flip to sear the reverse side. Sear the meat on all sides.
If you are using small cubes of meat like for a stew, sear them in batches as not to lower the temperature of the pot too quickly.
Once the meat is seared, remove it from the pan, turn the heat down slightly and add two tablespoons of tomato paste, 1 sliced onion, and 2 cloves roughly chopped garlic. Stir the tomato paste, onion, and garlic cooking for 1-2 minutes. Add 1/2 cup of red or white wine and cook scraping the bottom of the pot, until the wine has all but evaporated.
Add the meat back into the pot and pour over enough stock to cover the meat by one third. Bring the stock up to a simmer. Add a small bunch of thyme tied in a bundle along with 1-2 bay leave and season with salt and pepper. Put a lid on the pot and put it in a 300°f oven for 3 hours.
Remove the pot from the oven and let it sit for 5-10 minutes. Remove the lid and poke the meat with a fork. If the meat is tender it is finished cooking. If it still feels firm adjust the liquid level if needed, put the lid back on the pot and put the whole thing back in the oven for another 30-60 minutes.
Conclusion
Braising is one of my all time favourite cooking methods. This is especially true in the winter. There are few things better on a cold winters day than a nice, deeply flavoured braise.
As I said in the intro, whether you know it or not, you have like braised something before. If you have ever made a pot roast, or a stew, you have braised.
It is not an overly complicated process, just keep an eye one the heat and the amount of liquid and everything should be fine.
We use cookies on our website to give you the most relevant experience by remembering your preferences and repeat visits. By clicking “Accept”, you consent to the use of ALL the cookies.
This website uses cookies to improve your experience while you navigate through the website. Out of these, the cookies that are categorized as necessary are stored on your browser as they are essential for the working of basic functionalities of the website. We also use third-party cookies that help us analyze and understand how you use this website. These cookies will be stored in your browser only with your consent. You also have the option to opt-out of these cookies. But opting out of some of these cookies may affect your browsing experience.
Necessary cookies are absolutely essential for the website to function properly. This category only includes cookies that ensures basic functionalities and security features of the website. These cookies do not store any personal information.
Any cookies that may not be particularly necessary for the website to function and is used specifically to collect user personal data via analytics, ads, other embedded contents are termed as non-necessary cookies. It is mandatory to procure user consent prior to running these cookies on your website.