Spaghetti and Meatballs is the most Italian food (other than pizza) that most of us can think of. Strangely enough, most Italians would never combine the two. If they do, the two items would be served separately rather than as one dish. However, in North America Spaghetti and Meatballs is a classic. It also happens to be one of my wife’s all-time favourite dishes, so we had it last night for her Mother’s Day dinner. Today, I’m going to show you exactly how I made it.
This…
How To Make Spaghetti and Meatballs Like a Pro
The Sauce
It should go without saying that you are never going to make a great bowl of Spaghetti and Meatballs without first making a great sauce. What is really important to note here is that great does not mean complicated and it absolutely does not mean a lot of ingredients. Case in point, the sauce we are going to look at today has only eight ingredients. That’s all. Let’s take a look at it.
Making the Sauce
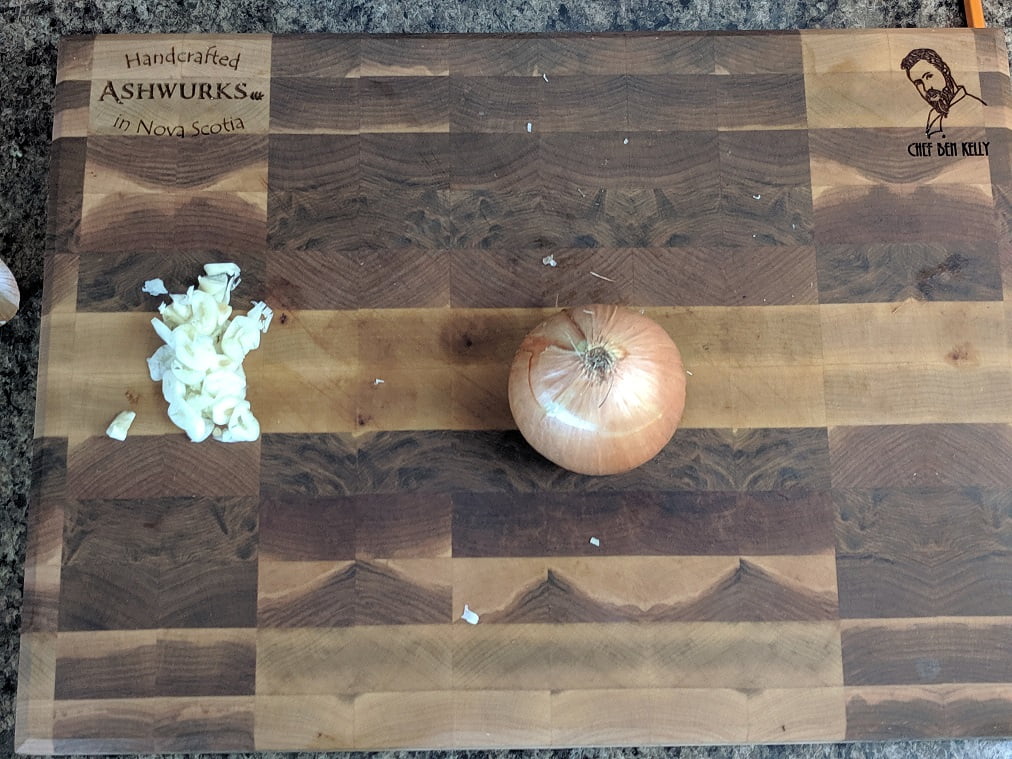
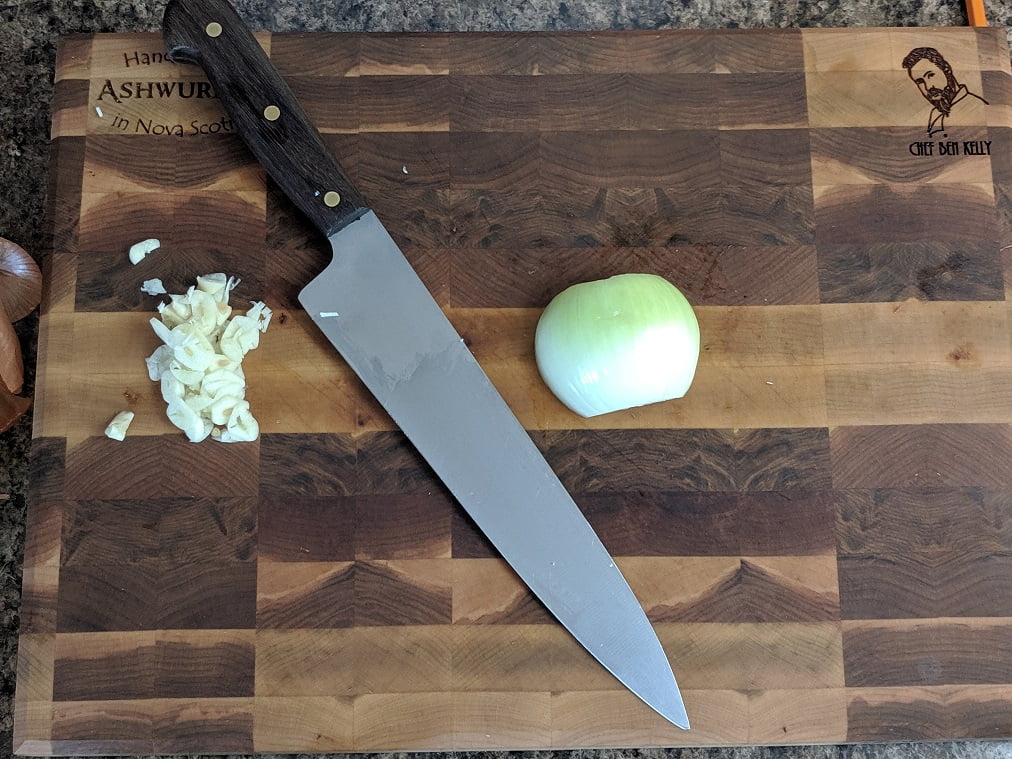
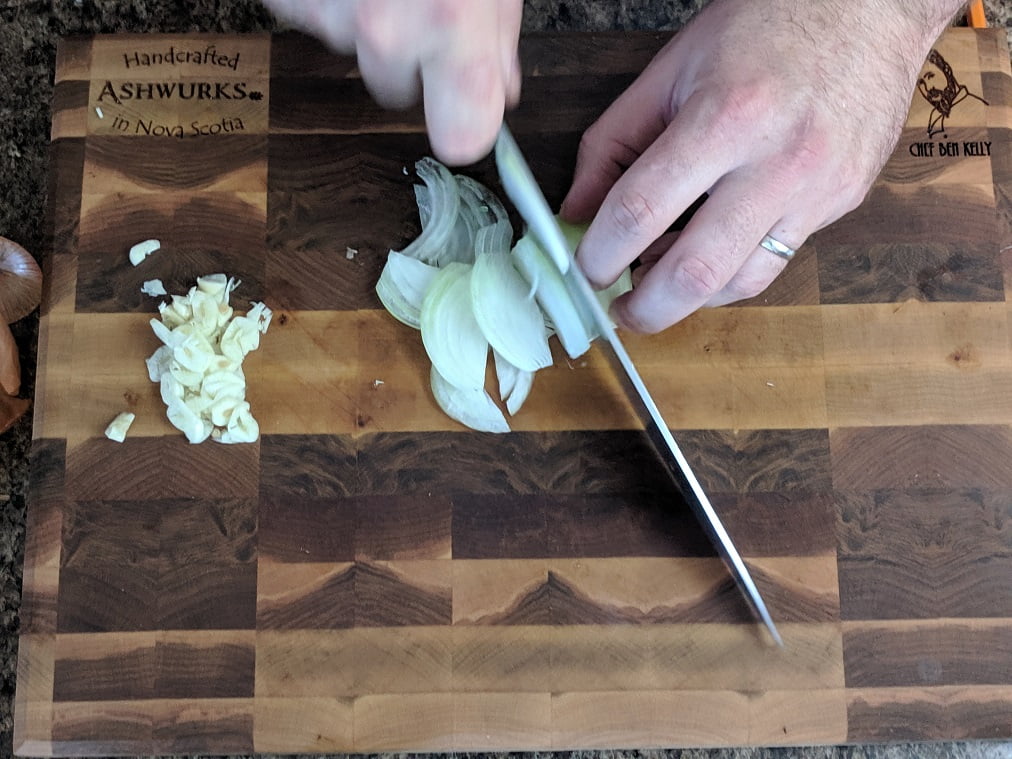
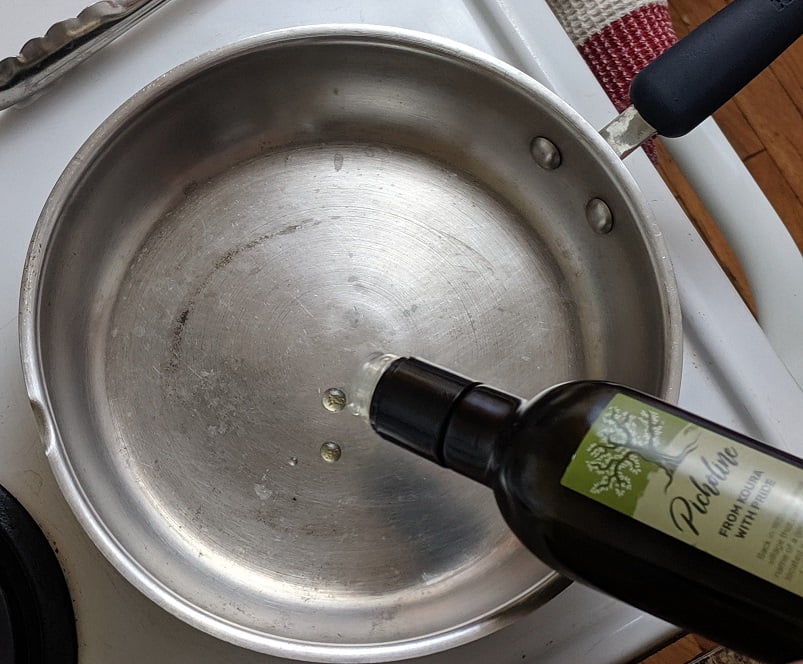
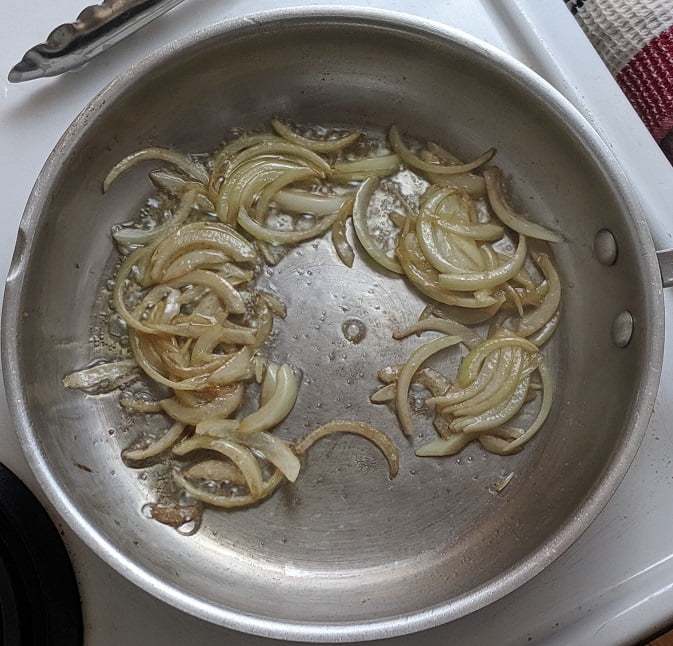
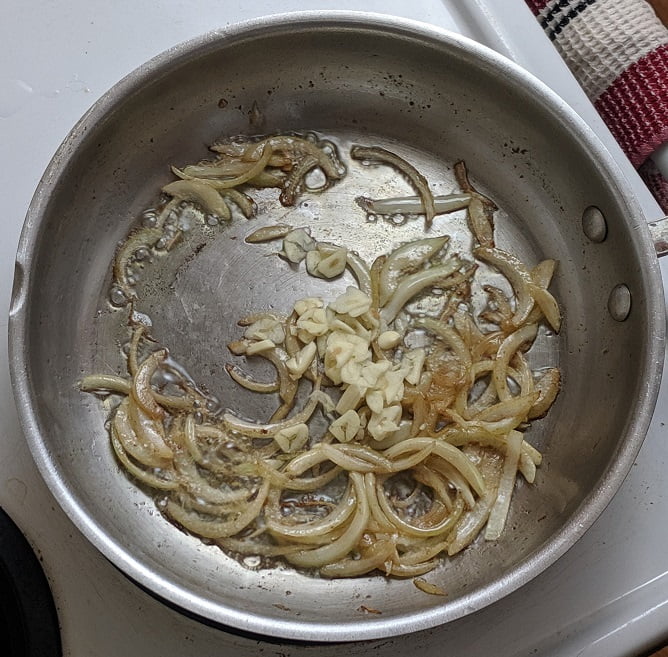
To start the sauce I first diced 2 medium onions which came out to be about 1 cup. While I was dicing the onion I heated a large pot over medium-high heat and added in about 3 tbsp of olive oil. I added the onions into the pot and cooked them for about 10-15 minutes or until they started to caramelize. It is important to stir the onions every few minutes so they don’t burn.
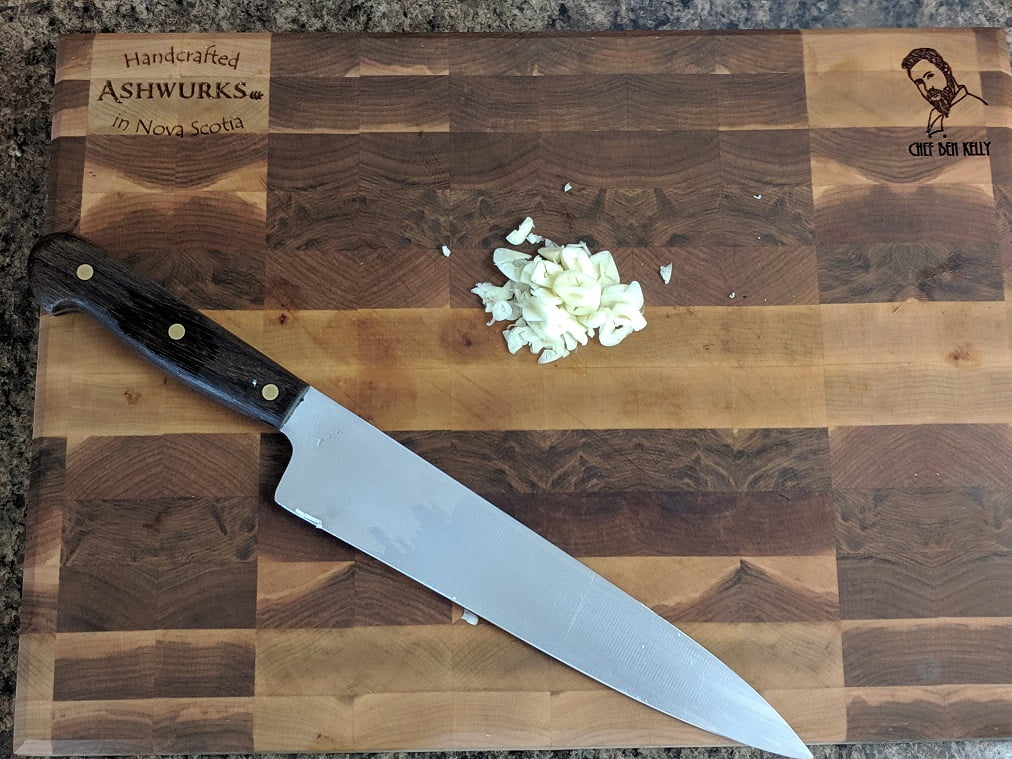
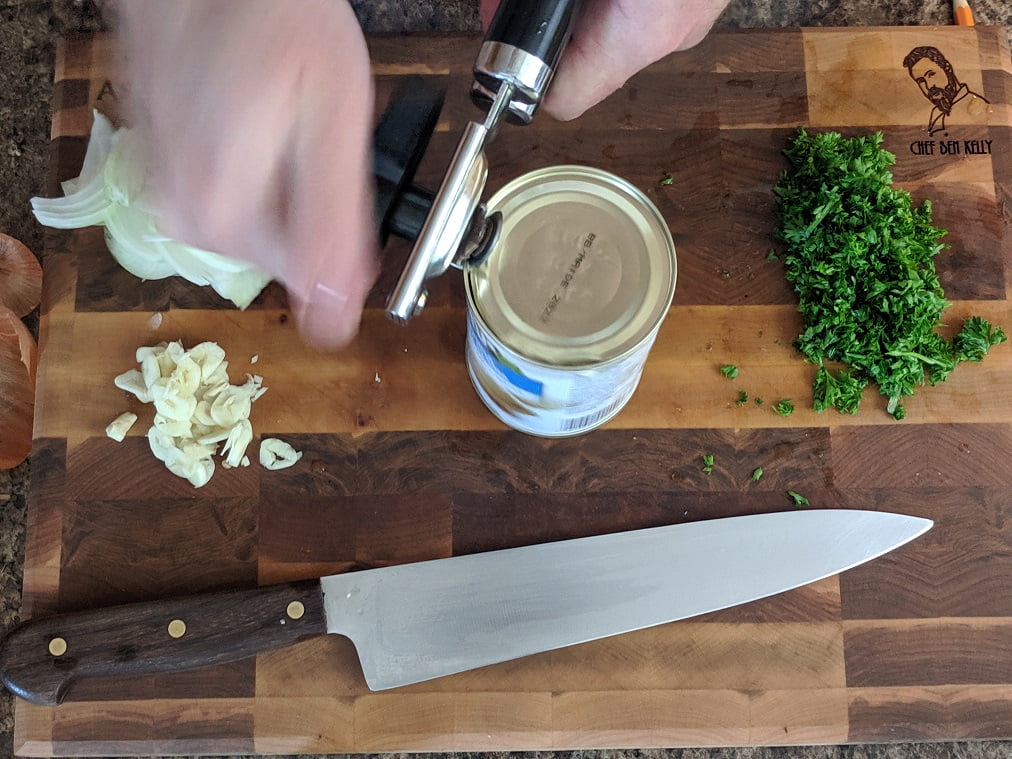
While the onions were cooking I used the time to prep my other ingredients. First, I chopped up 3 cloves of garlic which was about 2 tbsp in total. Once the onions were caramelized I added the garlic in and cooked it for about 2 minutes.
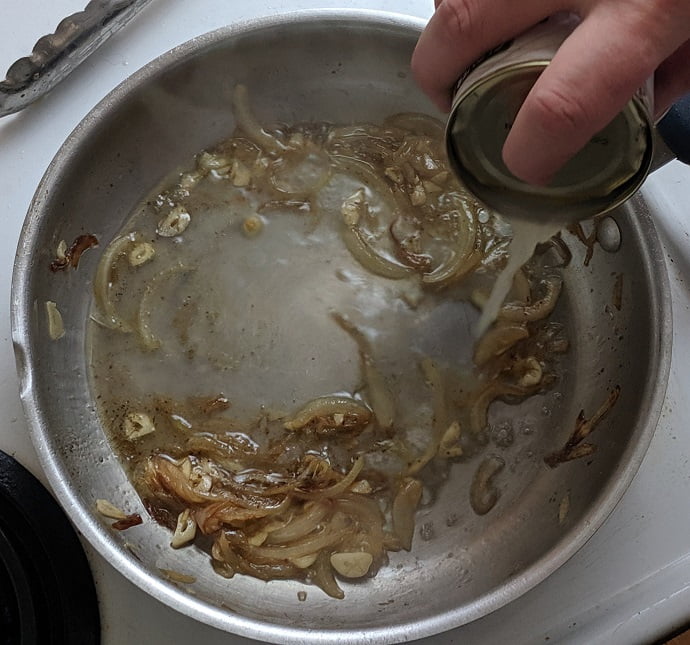
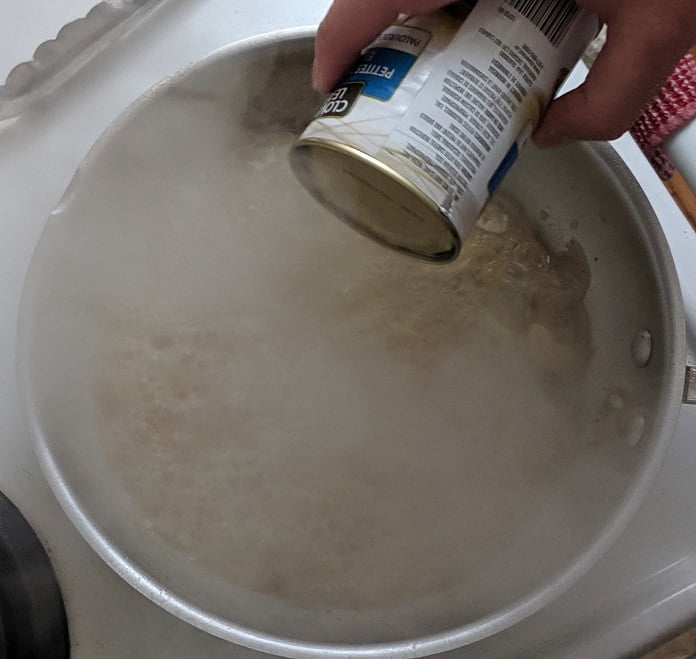
While the garlic cooked with the onions I opened a can of whole Italian tomatoes, poured them into the bowl, then crushed them with my hands. You can use a hand blender if you’d prefer, I just like to get my hands dirty. Then, I dumped the tomatoes into the garlic and onions. Depending on how much liquid there is in your tomatoes you may need to add a bit of water to the sauce.
For the last few steps of the sauce, I chopped up about 1-2 tbsp of rosemary and added it to the pot. Finally, I seasoned the sauce to taste with salt, pepper, and sugar then let it simmer for 20 minutes and set it aside until I was ready to use it.
Basic Tomato Sauce
This is a really great all-purpose tomato sauce. Here I use it with Spaghetti and Meatballs, but it works just as well on a meatball or sausage and pepper sandwich, chicken parmesan or just about anything you can imagine.
1 796 mlCan Of Whole Italian Tomatoesdumped into a bowl and hand crushed
1cupDiced Onion
2tbspMinced Garlic
1-2tbspFresh Chopped Rosemaryor basil
3tbspOlive Oil
Salt, Pepper, and Sugar to taste
Instructions
Heat a large pot over medium heat then add in the olive oil and onions.
Cook the onions for 10-15 minutes or until they are lightly caramelized then add in the garlic and cook for 2 more minutes.
Add in the tomatoes, and a 1/4 to 1/2 cup of water if needed then add in the rosemary and seasoning.
Bring the pot to a boil, turn the heat down to low and simmer for 20 minutes. Taste and adjust the seasoning with salt, pepper, and sugar as needed. Remove from the heat and set aside until ready to use.
With the sauce out of the way, let’s now take a look at the meatballs.
First of all, I should say that for a very, very long time I hated meatballs. (I feel like this is becoming a theme on the blog). I found them to be dry, chewy and tasteless, it didn’t matter who made them, I hated them. Then, I started working at an Italian restaurant and discovered how good a meatball could actually be. A good meatball is tender, juicy and full of flavour. Easy to say, but how do you accomplish it?
The meat
The first step to making a delicious meatball is using the right meat. There has to be fat in the meat, meaning you should not use lean ground beef to make a meatball. This lack of fat will lead to all the common issues people encounter when making meatballs like dryness and chewiness. Having said that, I also wouldn’t suggest using full-fat ground beef. I generally suggest a nice medium ground. Not only does it have more flavour than lean ground beef, but it is also considerably cheaper. If you want to really step up your game substitute a quarter of the ground beef for ground pork. I didn’t do that in this recipe but it does make a really great meatball.
The flavourings
The next step to making a great meatball are the flavourings. I find that meatballs are like burgers. People add way too many ingredients and the flavour becomes jumbled. Like with most things I cook, I prefer a more minimalist approach. I also much prefer fresh herbs to dried herbs if you have them.
For these meatballs I used about 1 cup of very finely minced onion, about 2 tbsp of minced garlic, 1 tbsp each chopped parsley, rosemary and dried oregano (the one exception to the fresh herb comment), 1/2 tsp crushed red pepper flakes, and 1/2 cup fresh grated parmesan. Of course, I also added salt and pepper which was about 1 1/2 tsp kosher salt (less if you are using table salt) and about 1/2 – 3/4 tsp fresh cracked black pepper.
The binders
The last things to add to the meatball mix are binders. For this, I used about 1/2 – 3-/4 of a cup of bread crumbs (gluten-free of course) and 1 lg egg. That’s it.
Now that all the ingredients for the meatballs were in the bowl and ready to go it was time to mix. For this, I used my two favourite tools in the kitchen, my hands. I mixed not only until the ingredients were fully incorporated but until the meat got a little tacky. This has a specific culinary name that you really don’t need to know. All you do need to know is that by mixing the meat until it is tacky, you are creating a mix that is going to give you smooth tender meatballs. This took 4-5 minutes.
Forming/Cooking the Meatballs
With the meat all mixed I poured about 1/4 cup of olive oil into a roasting pan and preheated my oven to 400°f, then I started making the meatballs.
The size that you chose to make your meatballs really comes down to personal preference. I like kind of medium size while some people like really big ones and some people prefer very small ones. Make them however you’d like, just make them all the same size. Once all of the balls have been formed and placed in the roasting pan, put the whole thing in the heated oven for about 35 minutes or until they are nice and brown. You can flip them halfway through cooking if you’d like.
After that initial cook, I removed the meatballs from the oven and drained off as much of the fat as I could from the roasting pan. Next, I added about 2 cups of beef stock (you could also use red wine) to the roasting pan along with about 1/3 of the tomato sauce. I tossed the meatballs around to coat them, turned the oven temperature down to 325°f, covered the roasting pan with foil and put it back in the oven for another 35 minutes. After the 35 minutes, I removed the foil cover from the meatballs and put them back in for another 20 minutes.
Finishing the dish
While the meatballs were finishing in the oven I brought a large pot of water to a boil and cooked my pasta. I also heated the remained of my sauce back up. Once the meat balls were finished, I added 8 of them (4 each for my wife and me) to the hot sauce, add in the pasta and tossed. At this point, I also add in about 2 tbsp of garlic butter. This may seem odd, but it adds so much flavour it is incredible. This is optional however I highly recommend it. Also, finishing tomato sauces with a bit of butter (plain or garlic) is always the way to go. Try it for yourself. I then plated the Spaghetti and Meatballs and finished it with freshly grated parmesan, fresh chopped parsley, and a bit of fresh cracked pepper.
Keyword: Chicken Pasta, Meatballs, Spaghetti and Meatballs
Servings: 23meatballs
Ingredients
1.2 kgMedium Ground Beef
1cupMinced Onion
2tbspMinced Garlic
1tbspChopped Parsley
1tbspChopped Rosemary
1tbspDried Oregano
1/2tspCrushed Red Pepper Flakes
1/2cupFreshly Grated Parmesan
1 1/2tspKosher Salt1 tsp if using table salt
3/4 tspBlack Pepper
3/4cupBread CrumbsGluten-Free
1lgEgg
1/3batchBasic Tomato Sauce
2cupBeef Stock
1/4cupOlive Oil
Instructions
Combine all the ingredients except the olive oil, tomato sauce and beef stock in a large bowl and mix until the meat is tacky, about 5 minutes.
Add the olive oil to a roasting pan.
Form the meat into 23-24 even size balls and place in the oiled roasting pan.
Bake the meatballs in a 400°f oven uncovered for 35 minutes flipping them halfway through.
Remove the meatballs from the oven and drain off all the excess fat.
Add the beef stock and tomato sauce to the roasting pan, cover with foil and bake in a 325°f oven for 35-45 minutes. Remove the foil and bake for another 10-20 minutes.
Toss the meatballs with tomato sauce and pasta and serve.
I highly recommend that you try this meatball recipe. I’m willing to be that it will be one of the best meatballs that you’ve ever had. If you do try them I’d love to hear about it. Also, if you have a meatball secret that I havn’t mentioned I would love to hear that too.
Thank you as always for reading and remember to subscribe to the blog so you never miss a post. And…if you really liked this post please remember to share it! Have a great Monday everyone, talk to you soon.
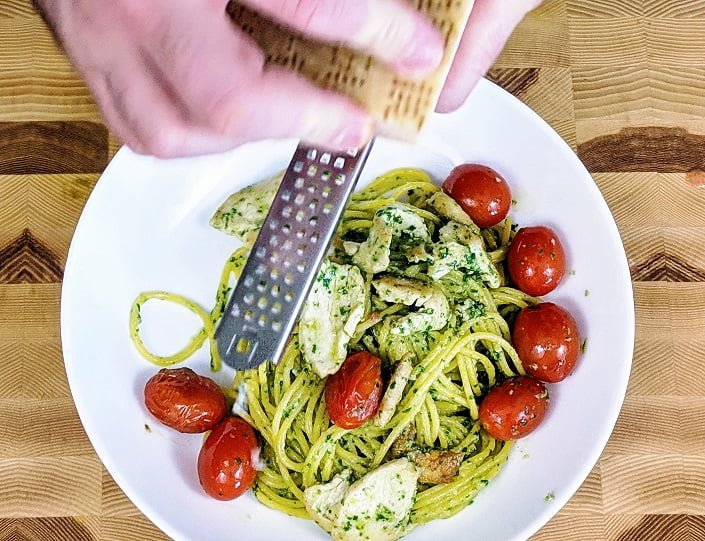
Hello and happy Monday, everyone! Today, we are going to kick the week off right with a quick recipe for Creamy Chicken Pesto Pasta. It’s so fast to make you can do it from start to finish in under 30 minutes. Oh, and it is delicious!
Some of you may remember that way back in March of last year; we did a 30 Minutes or Less Chicken Pesto. Though similar to what we are doing today, there are some apparent differences between the two. The Chicken pesto from last year was pretty much just chicken, cherry tomatoes, pesto, and pasta. Today our pasta has chicken, roasted red pepper, spinach, pesto, and cream. So again, it is similar but different. One other significant difference between the two posts is that in the one from last year, we made the pesto, this time we are using premade, though I did make it. You can make it or use store-bought stuff if that’s what you prefer.
Okay, let’s take a look at how to make…
Creamy Chicken Pesto Pasta in 30 Minutes or Less
7:05 pm – Getting Started
It was 7:05 pm when I started cooking last night. The first step was to get the pot on for the pasta. I filled a medium-sized pot with hot water, added some salt, and put it in the stove on high.
Once the pot was on the stove, I got to work on an onion and some garlic. The onion I used was pretty small, so if all you have are large onions, only use half. For whatever reason, I cut the onion as though I was going to dice it. At the last minute, I changed my mind and decided I want to slice it, so I went back after it was peeled and cut the root off. With the root cut off the onion, I proceeded to slice it. I also peeled and sliced one relatively large clove of garlic. Once the onion and garlic had been sliced, I put them on a plate and set them aside.
7:08 pm – Chicken
Once I was done with the onion and garlic, it was chicken time. But, before I got my hands all covered in chicken, I put a large, heavy-bottomed skillet on medium heat on the stove.
The chicken I bought was a chicken breast that still had a bit of the rib and wing bone attached. I bought this because it was cheaper than boneless chicken breast. I should also say I’m not generally a fan of chicken breast. However, on the rare occasion that I do buy it, I usually get it bone-in and skin-on. It is way cheaper and with a little practice takes next to no time to clean.
To clean the chicken, I found the bone and followed it with my knife to cut it away. I then took the tenders off the breast. The tender is the little flap of meat on the underside of the breast. If you’ve ever bought breaded chicken tenders, this is what they are made of. With the tender removed, I sliced the breast and tender into 1/2 cm pieces.
7:12 pm – Cooking the chicken
Now, that the chicken was all sliced, I added 1-2 tbsp of olive oil into my pre-heated pan along with the chicken. When I added the chicken in, I spread it out in a single layer to speed up the cooking process. I also turned the heat up a little on my pan as it wasn’t quite hot enough. You may not need to do this. The issue was that my pan is very thick and just wasn’t getting hot enough.
While the chicken was cooking I took a few minutes and thoroughly cleaned my knife, cutting board, and work area.
7:15 Cooking the pasta
Around 7:15 pm the water for my pasta was boiling, and my chicken was cooking. The pasta I used takes about 12 minutes to cook. I knew that if I started cooking it at this point it would line up pretty perfectly with when the sauce would be done. How did I know that? The chicken was almost cooked through and I knew that sauce wasn’t going to take that long. Also, even if the timing didn’t line up perfectly, there was only going to be a few minutes difference and I could compensate for that. So, I dropped the pasta in the water.
I also took this opportunity to season the chicken generously with salt and pepper then I flipped the chicken and finished cooking it through.
7:20 pm – Onions and Garlic In
At 7:20 I add the onion and garlic into the pan along with the chicken. I cooked, stirring for about 2 minutes before adding in the roasted red peppers.
The roasted red peppers I used were jarred. They came pre-roasted and sliced into thin strips. You can obviously roast your own peppers. However, I happened to have this on hand and wanted to use them up. They’re actually pretty good out of the jar so if you want to save some time I suggest going this route. I used about 1/2 a cup of peppers in total.
7:24 pm – Sauce It
At 7:24 pm I added in about 1/4 cup of pesto. Again, this was pesto that I had made a few days ago and had in the fridge. You can make it from scratch (link at the top of the post) or you can buy it. I prefer to make it because it tastes better and has no preservatives and stabilizers. But, if you want to save some time you can go that route. Once I added in the pesto I let it cook for about a minute before adding in the cream.
At first, I added in a 1/2 cup of heavy cream, but I ended up having to add in a bit more to loosen the sauce. In total, I used about 3/4 of a cup. If you don’t want to use the cream I suggest making a bechamel by cooking roux into milk to thicken it. You don’t want to add straight milk or anything less than heavy cream (whipping) because it will curdle when it hits the heat.
7:26 pm – Spinach
After adding the cream, which came to a boil very quickly I tasted the sauce and added a bit more salt and pepper as was needed. Then I added in 2 big handfuls of baby spinach and stirred until it was softened into the sauce.
7:28 pm – Drain Pasta
At 7:28 pm my pasta was done. I drained it and added it to my sauce.
7:29 pm – Turn off heat and finish
I grated about 1/4 cup of parmesan into the pasta, stirred everything together and served.
Conclusion
This is not a diet pasta recipe by any means but it also isn’t nearly as heavy as you may think it is. Recipes like this will often suggest multiple additions of cream, each one being reduced before the next is added. This makes the pasta very heavy. You don’t get that with this. Also, the roasted red pepper and spinach along with the pesto give this pasta an incredible flavour. I highly recommend you give this a shot. If you do, I’d love to hear what you think.
Thank you, everyone, and have a great Monday. And remember to tune into Dinner with Ben tonight at 6 pm Atlantic time on my Facebook page.
Creamy Chicken Pesto Pasta
What more is there to say? It's creamy, it's chicken, and it's pesto. Delicious!
Thank you for reading the post. If you liked it, remember to share it on Facebook, Pinterest, or Twitter by clicking the icon to the left of the right of the page. Did you know that Chefsnotes.com has almost 400 posts just like this one? Imagine all the great tips, tricks, and recipes you’ve missed. Don’t miss any more! Subscribe to Chef’s Notes by putting your email address in the subscription box at the top right of the sidebar. You will be notified of every new post. And if you would like to know more about me, click the link below to read my story.
When I was around 12 my mom had a friend who had children that closely matched the age of my sisters and me. She lived right by our school. Occasionally, when mom had to go into town we would go to this friend’s house for dinner. It was one of these days when I first experienced tuna casserole.
My mom’s friend’s version of tuna casserole, as I now know, was pretty classic. It was tuna, pasta, and vegetables in a cream of mushroom sauce, covered with crushed potato chips and baked. My mom was a great cook but for whatever reason had never made anything like the tuna casserole I had that day. It made such an impression on me that I remember it more vividly than almost anything else from that period of my life. Interestingly enough, to this day that is the only tuna casserole I’ve ever had.
It was that tuna casserole I had in mind while I was creating this creamy tuna pasta recipe. Essentially, I wanted to make an updated version of that tuna casserole I ate well over 20 years ago. Gone are the crushed potato chips, cream of mushroom soup and long baking time. Now, we can all have that flavour and experience in under 30 minutes. Let’s take a look at how to me my…
Creamy Tuna Pasta In 30 Minutes or Less
12:45 – Getting Started
I made this creamy tuna pasta for a late lunch and started cooking at 12:45. The first thing I did was get a big pot of salted water on the stove for the pasta. Next, I put a frying pan on the stove over medium heat for the sauce. With that, it was time to get down to the real work.
For the sauce I started with a base of carrot, onion, and celery, I peeled and diced 1 onion and 1 carrot, then sliced 1 celery stalk.
12:49 pm – Start cooking
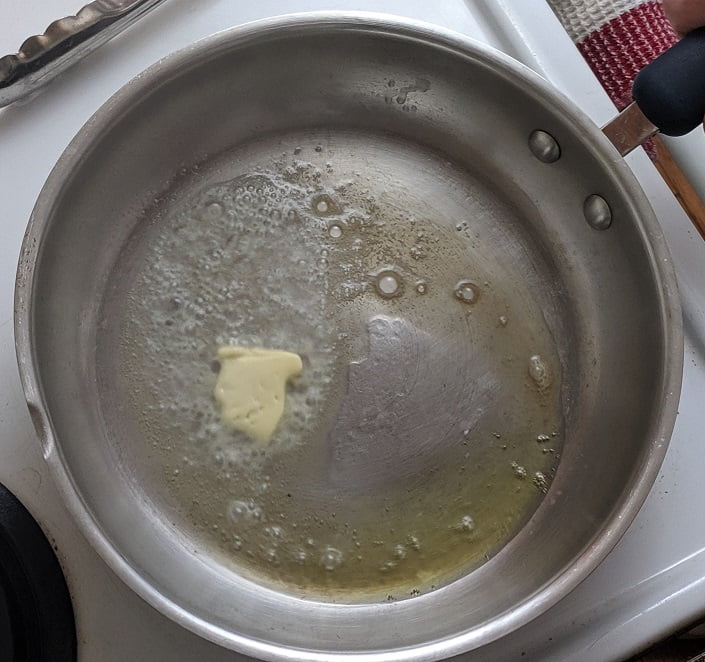
By the time I was done cutting my vegetables my pan was nice and hot. I added in 1 tbsp each butter and olive oil. I used butter for the flavour and the olive oil to help prevent the butter from burning. Once the butter melted I added in the vegetables.
12:50 pm – Garlic
While the vegetables were cooking I peeled and sliced 2 cloves of garlic. I also diced about a 1/2 cup of roasted red pepper. I added roasted red pepper because I just happened to have it in my fridge. You don’t have to add this but I did find it added a nice sweet tone to the overall flavour.
I gave the carrot, onion, and celery a stir then added in the roasted red pepper and garlic.
12:54 pm – Tuna
While the garlic and peppers were cooking I opened up my can of tuna. I drained the liquid right into the frying pan. This added a really nice subtle tuna flavour to the pasta that you won’t get from the tuna itself. The pan was hot enough that the juice evaporated very quickly.
12:55 pm – Cream
After the tuna juice mostly evaporated I added in 1 cup of whipping cream and a 1/2 cup of frozen peas. I’ve said it before and I’ll say it again. Don’t skimp out on the cream here. If you use blend cream, coffee cream, half and half, or milk, it will curdle and it will be gross. If, for some reason you want a lighter version of this, take the time and make a bechamel. Otherwise enjoy the rich delicious flavour of full fat, 35% whipping cream.
Once the cream and peas go into the pan bring it to a boil then reduce the heat to low and simmer.
12:57 pm – Pasta in
Around this point, my pasta water was boiling and yours should be too. Add the pasta in and cook it according to the package instructions. While the pasta is cooking chop about a 1/2 cup of parsley.
1:05 pm – Drain Pasta
Once the pasta is cooked drain it as you normally would. While it is draining, add the tuna into the sauce and stir to break it up.
1:06 pm – Finish the creamy tuna pasta
Add the pasta into the sauce along with the parsley. Toss or stir the pasta to coat it with the sauce. Taste and adjust the seasoning with salt and pepper. Serve by itself or with a green salad.
Conclusion
The first bit of this pasta took me back to that dinner at my mom’s friend’s house all those years ago. I hope that you have a similar experience with it.
If you aren’t a big fan of tuna you could add canned or fresh salmon, chicken or ham instead. No matter what, it will be delicious. But don’t take my word for it. Try it for yourself.
Thank you as always for reading and stay tuned for Wednesday when I am launching my free 10-week basic cooking course “Kitchen Clueless to food independent” and remember to subscribe to the blog so you never miss a post.
Creamy Tuna Pasta
A new take on the old school Tuna Casserole. A quick meal your family will love.
Happy Monday everybody! Being that it is Monday, we all know that means it is 30 Minutes or Less Day. The day when I show you how to make a meal from start to finish in under 30 minutes. Today, will not disappoint. We are making 3 Cheese, Ham & Broccoli Penne and oh is it delicious! Now, don’t confuse this with the Chicken and Ham Penne we did a few months back. Though these dishes seem very similar, they are very different in flavour.
With that, let’s get cooking. This is…
3 Cheese Ham & Broccoli Penne – 30 Minutes Or Less
2:50 pm – Getting Started
I actually made this fairly early yesterday afternoon. It was a busy day, I had a lot going on, and I need to get dinner done fast. That always seems to be the way.
I started cooking at 2:50 pm and the first step was to turn the oven on to 425°F. Then I filled a medium pot with hot salted water and put it on high.
2:51 pm – Ham & Onions
With the oven and the pasta water heating up I moved on to prepping my ingredients. The first of the two ingredients I prepared were onions and ham. I diced 1 medium to large onion and about 1 cup of ham.
Once these were done, I set them aside and turned a medium-sized frying pan on to medium heat. I let the pan sit for a few minutes to heat up while I moved on to my next ingredient.
2:55 pm – Broccoli
At 2:55 pm I started cutting up a head of broccoli. First, I cut the stem off, then started cutting the florets into small pieces. When cutting up broccoli, or cauliflower, cut from the bottom up. Cut through the small stems, not through the florets. Cutting through the florets will just make a big mess.
Once all the florets were separated I cut the bottom inch off the broccoli stem, peeled away the outer bark, then diced the tender inner stem. I used the inner stem in the pasta, but it is also really great for broccoli soup, stir-fries, and salads.
2:58 pm – Get Cooking
It took me about 3 minutes to cut my broccoli up and this was the perfect amount of time to heat up the pan. So, I added about 1 tsp of olive oil to the pan along with the ham and onion. You may take a little longer to cut the broccoli. If that is the case, just add the ham and onion to the pan while you are still cutting.
2:59 pm – Garlic
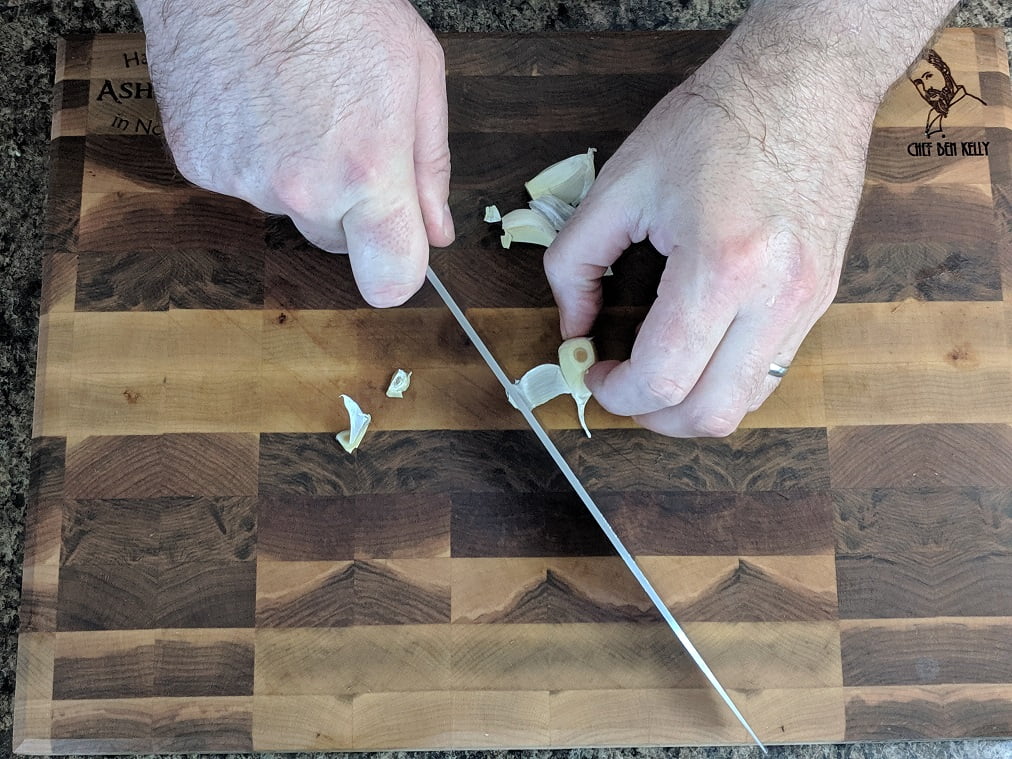
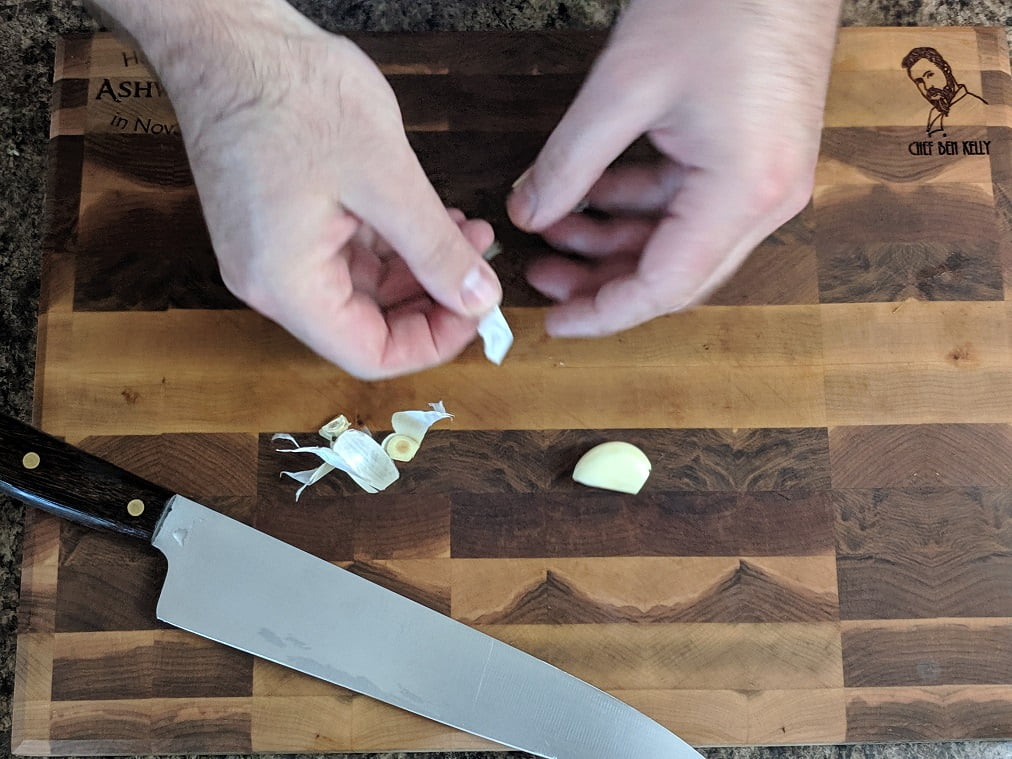
With the ham and onion cooking away and the broccoli set aside it was time to cut some garlic. I used 3 cloves, though 2 of them were fairly small, so 2 medium to large garlic cloves would be fine.
I cut the ends off of the garlic, gently crushed them with the flat edge of my knife, removed the peel, and thinly sliced them.
3:01 pm – Ham, Broccoli, Pasta
At this point, the pasta water had started to boil. I poured the box of penne into the water and stirred it for a minute or so to make sure it didn’t all stick together.
After putting the pasta in the pot I added the broccoli and garlic into the pan with the ham and onion. I waited to do this until the onions started to soften.
3:02 pm – Cheese
The vegetables and ham were cooking away, the pasta was boiling, and that meant it was time to cut the cheese. (7 years old me laughs out loud)
I grated a 1/2 cup each of parmesan and Jarlsberg Cheddar Cheese. Jarlsberg Cheddar is a Norweigan Cheese with a similar flavour to Swiss Cheese. If you can’t find it, you can substitute it with Swiss, Emmenthal or aged or smoked cheddar.
3:05 pm – Thyme
With the cheese grated and set aside, and the vegetables mostly cooked, I added 1 big sprig of thyme into the pan. I tossed this around for 1 minute. This was just enough time to heat the thyme sprig and for it to become aromatic. That just means I could smell it.
3:06 pm – Cream
After the thyme had heated enough to start flavouring the sauce (about 1 minute after adding it into the pan) I add in 1 cup of whipping cream. Don’t skimp here. Use whipping cream. Any other dairy will split because of the lower fat content. Also, this dish already has about 1 cup of cheese in it, and we are going to be adding more. Low fat, went out the window a while ago. Just embrace it, you will be happy you did.
3:07 pm – Cheese
Once I added the cream into the pan, it was time to drain the pasta. I drained it, then put it in a large mixing bowl. When that was done I added the cheese to the sauce and cooked it just long enough to melt the cheese.
3:10 pm – Sauce, meet pasta.
When all the cheese was melted and mixed into the cream I added it to the pasta and seasoned well with salt and pepper. I mixed this altogether.
3:11 pm – Casserole
I poured the pasta and sauce into a casserole dish and covered it with about 1/2 a cup of grated mozzarella cheese.
3:12 pm – Into the oven
Finally, I put the pasta in the oven for 5-10 minutes. I actually did 7 minutes in the oven. All I really wanted was to melt the cheese on top. With that, dinner was ready.
3:19 pm – Done Like Dinner
With one minute to spare, the pasta was plated and ready to serve.
Conclusion
It seems like there really isn’t too much to this dish and that’s because there isn’t. It is a few ingredients, tossed with pasta, cheese, and cream. That’s it. What’s more than that, everyone is going to love it.
I suggest serving this with a salad to add some greens and a few more vegetables into the meal. It can be thrown together while the pasta is in the oven.
And that just about does it. Thank you as always for reading and remember to subscribe so you never miss a post and also share this with anyone who you think would like it. Have a great Monday everyone.
3 Cheese Ham and Broccoli Penne
A quick and delicious weeknight meal. 27 minutes from start to finish.
Hello everybody! I have been off for the last week which was very nice, but I have to say that it is good to be back. And what a doozy to come back on! Chicken and ham penne, what’s not to love?
This recipe came together in about 20 minutes from start to finish and will satisfy any appetite. The portion I made was enough for two people, but the recipe can easily be doubled or tripled with little additional time. This would be very good with a side salad, though I just ate it as it is.
Okay, let’s cut the preamble, and get to the point. This is how to make…
Chicken and Ham Penne in 30 Minutes or Less
8:05 pm – pots on pots
I started this bad boy at 8:05 which I know is pretty late but don’t judge. Step one is to get the pot on for the pasta. I filled a medium pot with hot water, which I added salt to and put it on the stove on high.
With the pasta water on I also put the frying pan on the stove on medium-high heat. That way, by the time I cut the chicken, the pan would be hot and ready with no time wasted. That brings me to step two…
8:07 pm – Chicken
I used one chicken breast which along with the ham is more than enough for two people, cost-effective too. I thinly sliced it. That’s it.
With the chicken breast sliced and the frying pan hot, I added 1 tbsp of canola, along with the chicken and got down to business.
My pan looks a little beat up because of a dinner I did over the weekend. I scrub and I scrub and it just won’t come off. I’ll have to get some steelwool to make it shine.
8:08 pm – Cleaning the board
As you probably noticed I cut raw chicken on my cutting board. So, before I went any further I took a minute or two to wash my board and my knife.
Keep it clean people!
8:10 pm – Going ham
With my knife and board once again clean and ready to use it was time to get down with the slice and dice. First up, the ham. I had a nice little piece of ham, about 2 inches squared. I diced it into small evenly sized pieces then set it aside.
With the ham diced and out of the way, it was onion time. This recipe doesn’t need much onion and I already had a quarter of an onion cut in the fridge so that was what I used. Waste not want not. I diced it up.
By the time the ham and onion were diced, the chicken was browned. That meant I could add the newly diced ham and onion into the pan.
I should also say that I as intermittently stirring and flipping the chicken while I was doing my dicing.
8:12 – Garlic
Chicken, ham, and onion in the pan. It’s time to get down with some garlic. Two cloves to be exact. I cut the root end off the cloves, gave them a little crush, removed the peel and thinly sliced them. That’s it.
At this point the pasta water was boiling so, I added the penne into the pot and gave it a stir (I’m using gluten-free penne).
I added the garlic into the pan and cooked it for a minute. Then I added in the wine and cooked it until about half of it had evaporated.
8:18 pm – Peas
Between cutting the garlic, adding the pasta to the water, adding the garlic to the sauce, cooking it for a minute, deglazing with the white wine, and then cooking it down about six minutes had gone by in total. It was no 8:18 and time to add the peas in. I used a handful of frozen peas.
With the peas in the pan, I started picking some thyme. The trick here is to grab the sprig right at the top with one hand and run the fingers of your other hand straight down the stem. This should strip the leaves off fairly easily. Then just give it a quick chop.
8:20 – Cream
The peas had cooked a little bit which meant it was time to add a bit of cream and some salt and pepper. I cooked the cream down for about 2 minutes, add the thyme and then removed the pan from the heat.
8:22 pm – Pasta
At 8:22 I drained the pasta and added it into the sauce which I then tossed together. I finished the dish with some freshly grated parmesan cheese. I tasted it, adjusted the seasoning with salt and pepper, and just like that, dinner was done.
Conclusion
This is a really delicious and quick pasta and just about everyone will love. Once you plate it add a bit more parm and a bit more pepper and enjoy.
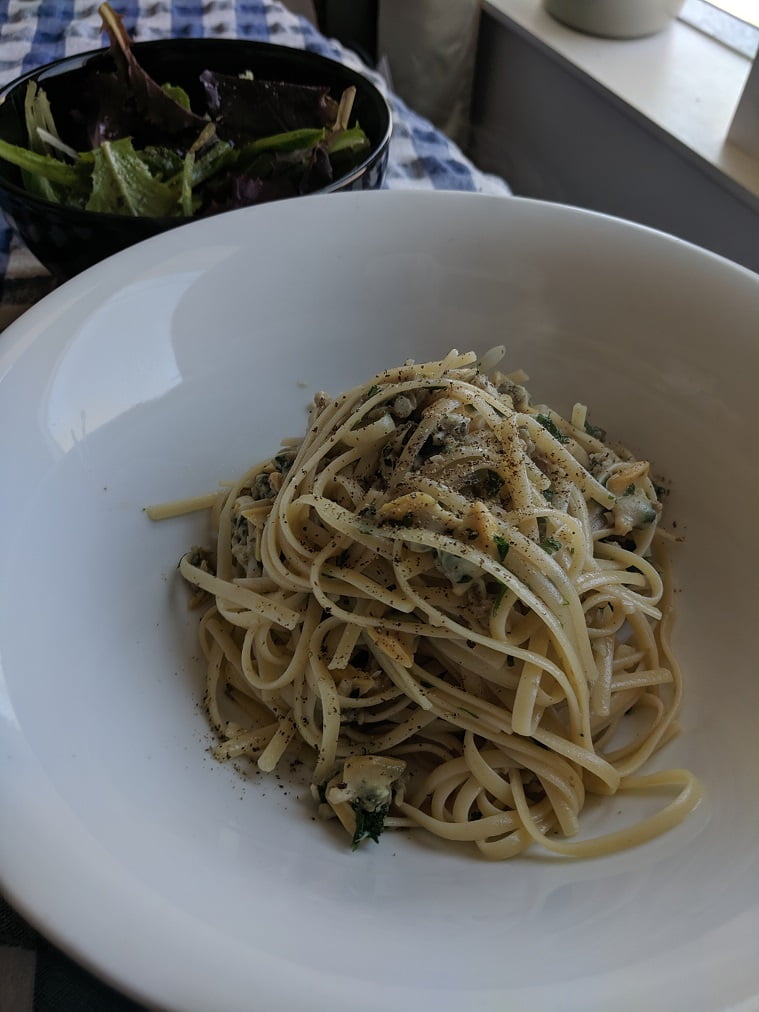
Linguine and Clams is such a classic pasta. Featured in more movies than I can count, it is almost the quintessential Italian-American pasta dish. There is for good reason for this; it’s absolutely delicious!
I’ve been craving Linguine and Clams for a while now and thought it would make a great dish for 30 minutes or less. In fact, it took me only about 20 minutes to put this all together from start to finish. I served the pasta with a light salad of mixed greens drizzled with olive oil, white wine vinegar, and a little salt and pepper.
I used canned clams for this for two simple reasons. The first being that whole clams need to be soaked for at least a few hours, then cleaned prior to using. That can’t be done in under 30 minutes. The second reason is because I actually prefer canned clams in this. The juice from the clams makes a delicious sauce and the clams are tender and flavour without being sandy.
Okay, enough chit chat, let’s get to it. This is
Linguine and Clams in 30 Minutes or Less
12:20 – Getting Started
I actually made this for lunch, but it works just as well for dinner.
To start I filled a large pot with hot salted water, put it on the stove on high, and put a lid on it. Covered pots boil about 30% quicker than pots that aren’t covered.
12:21 – Garlic
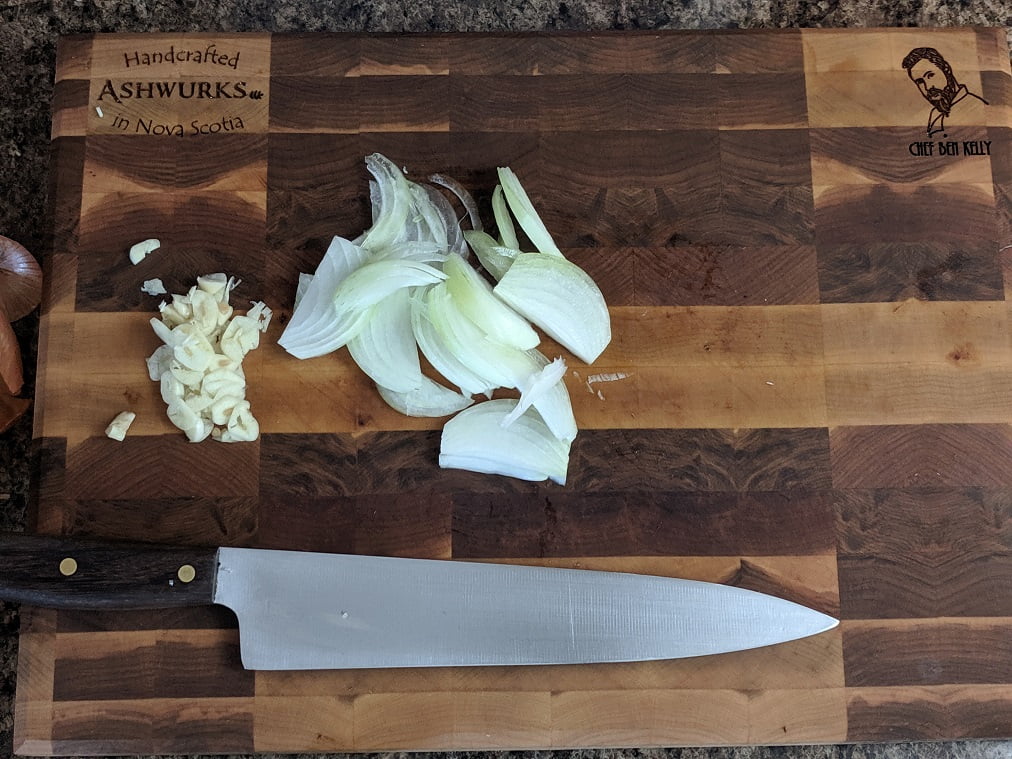
With the pot on and starting to heat up, I got down to business prepping my ingredients. The first was a few cloves of garlic.
I cut the ends off the garlic, crushed them a little, pulled the peel off and then thinly sliced it. I set it aside.
12:23 – Onion
With the garlic done and out of the way I went about slicing an onion. First I cut the top and bottom off, then I cut the onion in half down through the middle. I set aside half the onion for another time and removed the peel from the half I kept. With the onion peeled all that was left was to slice it.
I always suggest slicing onions with the grain as opposed to across them. They cook better and less onion juice ends up spraying into the air. So, you cry less.
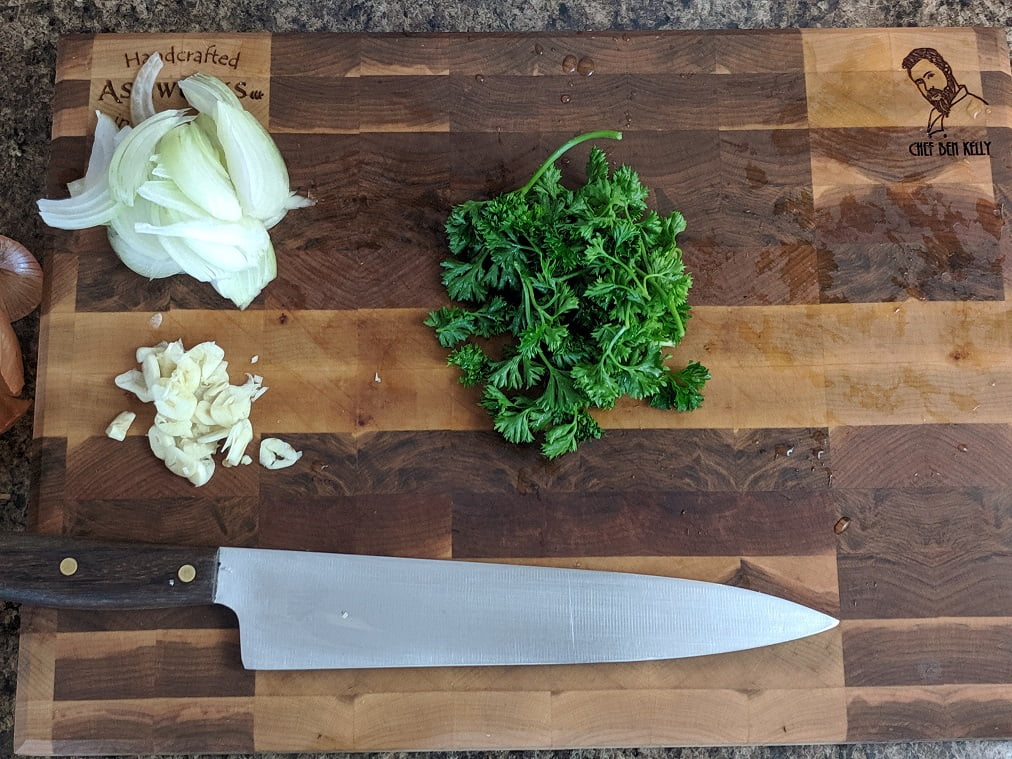
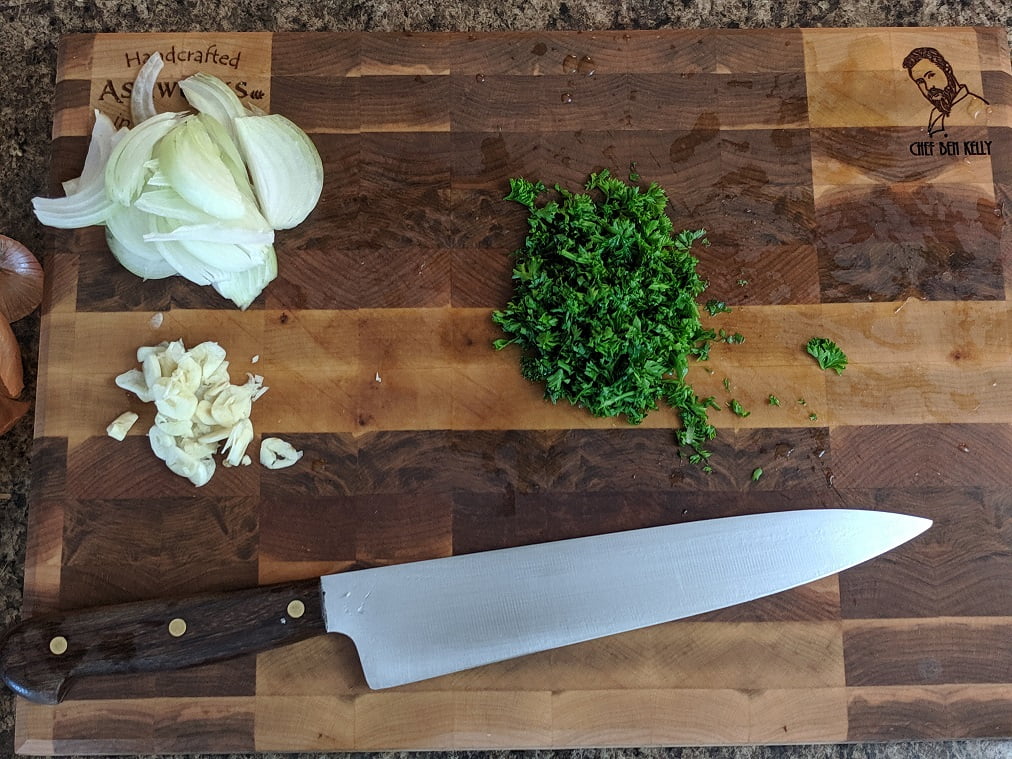
12:25 – Parsley
The last bit of chopping I had to do was the parsley. I took about 1/4 cup of curly parsley that had already been washed and chopped it up until it was fairly fine.
The trick for chopping parsley is to bunch it up into a tight ball and slice it as thin as you can. Then go over one or two more times with your knife.
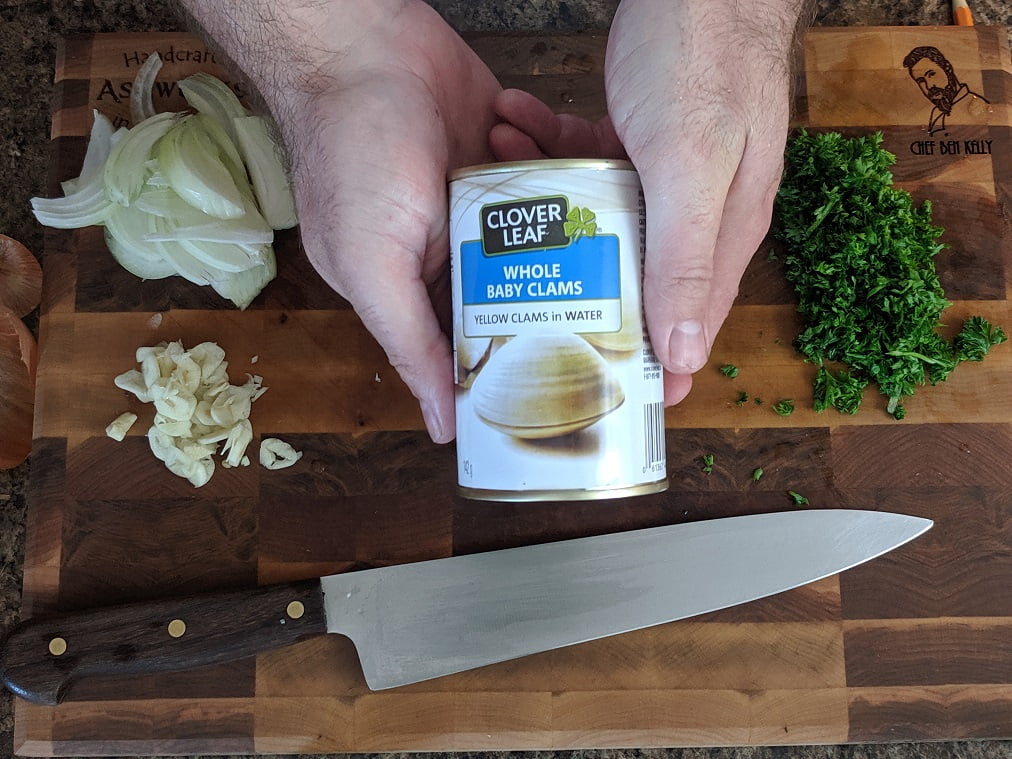
12:26 pm – Clams
At this point I was pretty much just waiting for the pasta water to boil so I opened up my clams and set them aside. I left the lid slightly attached because I wanted to be able to easily strain the liquid from the clams. This liquid will go into our sauce, but if the clams get added at the same time they will become rubbery, which is not what we want.
12:30 pm – Boiling
Okay, so I had to wait another 4 minutes for the pasta water to boil. Once it did start boiling, I turned the pan on for the sauce to medium then added the linguine to the water.
12:31 pm – Sauce
I let the pan heat up for about a minute then added in olive oil and butter. Once the butter melted the onions went in.
12:33 pm – Garlic
I cooked the onions for about two minutes then added the garlic. I cooked this for another two minutes then added in the white wine and reduced it until it was almost completely evaporated, then I added some pepper and the juice from the clams. I turned the heat up and cooked this for 3 or 4 minutes.
12:37 pm – Pasta
At 12:37 I drained the pasta and then added the remaining ingredients into the sauce. That was the clams, parsley, a bit of butter, a bit of salt and the drained pasta.
The extra bit of butter at the end helps to thicken and enrich the sauce. Don’t leave it out. It’s really important.
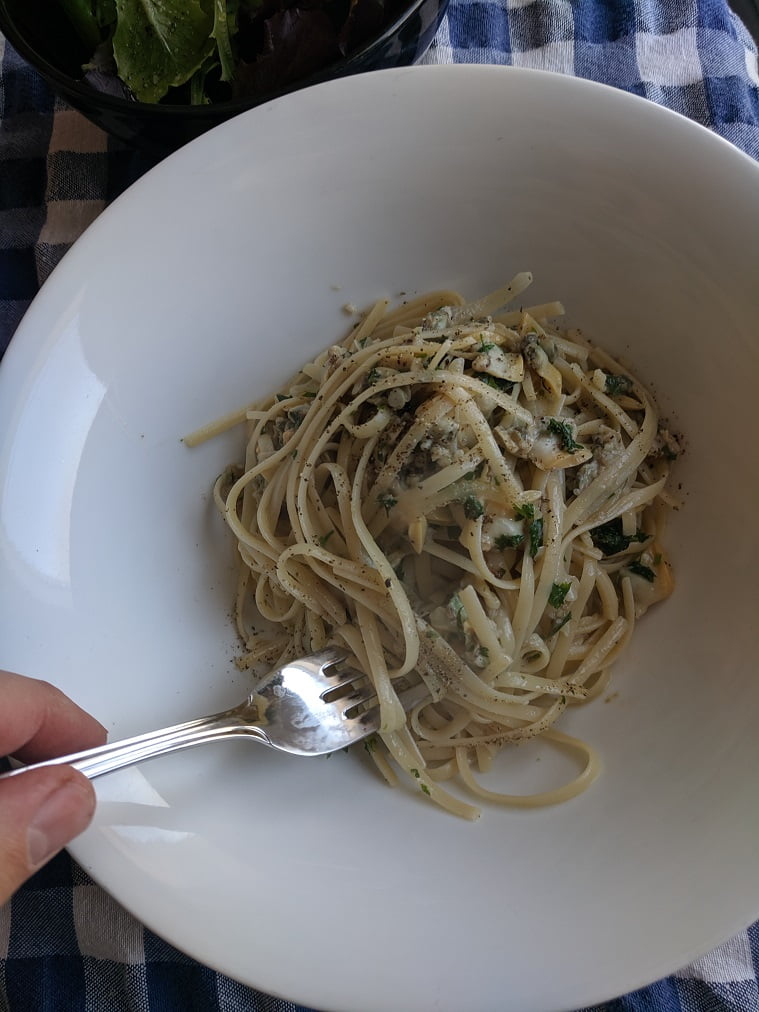
12:39 pm – Finished
At 12:39 I plated the pasta, put some washed mixed greens in a bowl and drizzled them with a bit of olive oil, white wine vinegar, and salt and pepper. Just like that dinner was done!
Conclusion
I don’t think I can say enough how much I love this pasta. It is light, quick and super delicious. I strongly advise you to give this a shot. It’s worth it.
Pasta Carbonara sometimes gets a bad rap. Often in restaurants what is sold as carbonara is actually nothing like the real thing. It is all too common to see a big bowl of pasta tossed in a heavy cream sauce with a bit of bacon and maybe some peas and have it labeled as pasta carbonara. I’m here to tell you that that ain’t it. Today, we are going to talk about the real thing.
Prepare to have your mind blown because this is…
Everything I Know About Pasta Carbonara
What is pasta carbonara?
Pasta carbonara is a simple pasta dish originating in Rome. A true carbonara should have five, maybe six ingredients maximum. One of those being pasta. It absolutely does not contain cream of any kind.
If carbonara doesn’t have cream in it, what makes the sauce so creamy?
Great question!
The creaminess of the sauce comes from the combination of two ingredients; egg and cheese.
How to make carbonara
I’ve been trying to kind of beat around the bush here and build up suspense but it’s almost impossible to talk about carbonara without completely giving up what it is. So, let’s cut preamble and get to it.
Carbonara consists of guanciale(we’ll get to that in a second), pasta, parmesan or pecorino cheese, eggs, and pepper. Sometimes parsley will be added. That’s it.
What is guanciale?
Guanciale (guan-chal-a) is cured and dried pig cheek or jowl. It is very similar in taste and texture to good bacon with the exception that there is no smoky flavour. If you can’t find or don’t want to use guanciale, pancetta, or bacon can be used as a substitute.
What type of pasta should you use?
The pasta used for carbonara is most commonly spaghetti or a slightly thinner spaghettini.
How is it made?
Okay, here comes the fun part!
When I say that carbonara is a simple pasta dish, I really mean that. In fact, most classic Italian pasta dishes only contain a handful of ingredients and take a few minutes to make. They are often light as opposed to their North American counterparts.
To make carbonara get a pot of water boiling for the pasta. Dice up the guanciale or bacon into pieces (about 1/2 a cup total) about the size of the fingernail or your little finger. Put the bacon in a pan with a teaspoon or two of olive oil and turn on to medium-low heat. Cook the bacon until it has crisped up a little.
While the bacon is cooking put a handful of dried spaghetti in the pot of boiling water, you want enough pasta for two people.
Now, in a mixing bowl combine two eggs, plus one extra yolk along with half a cup of grated parmesan cheese. It is really important to use real parmesan for this, not the pre-grated stuff out of the bottle. Mix the cheese and egg yolks really well and season with fresh cracked pepper.
Keep the bacon in the hot pan but drain off half of the oil. Add the cooked pasta to the bacon pan and toss to mix and coat the pasta with the remaining oil. Add the hot pasta and bacon mixture to the egg and cheese mixture and stir with tongs.
If you’ve been paying attention you will realize that the eggs aren’t cooked. Good eye! But, that’s not really true. The heat from the bacon and the pasta, as long as your timing is right, will be enough to cook the egg and melt the cheese. This will make the sauce and give the pasta that creamy consistency.
Serve the pasta garnished with a little more grated cheese and maybe a touch of parsley.
That’s it. That is how you make a true pasta carbonara.
Conclusion
The simplicity of carbonara is part of its magic. This dish can be made in as long as it takes to boil some pasta and cook some bacon and with ingredients you probably already have.
It is fantastic for a quick dinner, along with a salad. Or, for a light lunch. And, that’s actually something to think about as well, this dish, pasta carbonara is not heavy. It is actually very light. You don’t feel gross after eating it, unlike the version that is made of pure cream.
If you’ve never had anything like this before I beg you to try it. Because once you see how amazing this is, you may start to understand the real reason why pasta is so popular in Italy. It isn’t because it’s heavy, or because it has twenty ingredients. Pasta is popular in Italy because it is a terrific vessel for almost anything, no matter how simple it may seem.
Thanks for reading everyone and remember to subscribe so you never miss a post.
Just as a quick note, Monday is Canada day and I will be taking the day off. This means that there will not be a 30 minutes or less post this week. I will be back in full force the week after. Enjoy your long weekend!
Last night I made spaghetti and meat sauce with garlic bread and Caesar salad. I did it in under 30 minutes however, it was very difficult. And, in all honesty, it wasn’t the best pasta sauce I have ever made (as my wife was quick to point out). It was good, but it could have been better.
For the tomato portion of the sauce, I used one can of crushed tomatoes and one can of diced tomatoes. The diced tomatoes were pretty watery. Because of the limited time, I wasn’t able to cook off enough of the tomato liquid. I would suggest using two cans of crushed tomatoes rather than diced ones.
Putting the garlic bread together was pretty easy and took very little time. The Caesar salad, on the other hand, did kind of get in the way. Within the half-hour cook time, I not only made the sauce from scratch, cooked the pasta, made garlic butter and garlic bread, but I also made everything for the salad from scratch. It’s not impossible, obviously, but again, it was difficult. I would suggest having the salad mostly ready to go. You can do this the day before, just don’t dress it.
Finally, while the bacon and the beef were cooking I stirred them every chance I got. It was too frequent and probably unnecessary to give exact times.
Okay, with all that in mind, let’s take a look at how I made…
Spaghetti & Meat Sauce in 30 Minutes or Less
7:10 pm – Getting Started
The first thing I did was get the heat on for everything. I turned on the pot for the sauce, the pan for the bacon bits, the oven for the garlic bread 425°F, and I filled a large pot with hot water, turned it on high and put a lid on it for the pasta.
This all sounds like a lot but it only took about one minute.
7:11 pm – Nice to meat you!
With all the heat on it was time to get cooking. I diced about a 1/2 lb of bacon and put it in a slightly warm cast iron pan on medium low heat.
Once the bacon was in the pan I added about 1 tbsp of canola oil to my saucepot and added 1 lb of medium ground beef.
This all took about 3-4 minutes during which I also washed my knife and cutting board.
7:15 pm – A roll of the dice.
With the meat cooking, it was time to get going on the vegetables. I diced an onion, a red pepper, four cloves of garlic, and a couple of cremini mushrooms.
I separated the garlic into three and put 1/3 in a small ramekin which I used later to make garlic butter. I put 1/3 in a bowl for Caesar dressing. And, I left 1/3 on the cutting board for the sauce.
7:21 pm – What’s the beef?
By 7:21 all the vegetables were cut and I added them to the now browned beef.
I cooked all of this together for about three minutes and then added 1 tsp chili flakes, 2 tbsp, dried oregano, and salt & pepper.
7:25 pm – The can-can
At 7:25 it was time to open up the cans of tomato purée and diced tomatoes. I added them into the pot. (Again if you want to do this in 30 minutes I would suggest using two cans to tomato purée and leaving out the diced tomatoes.)
I brought the sauce to a boil and then reduced the heat to let it simmer.
7:28 pm – Pasta in the pool
I used gluten-free pasta which takes about two minutes longer to cook than regular pasta. I added mine to the boiling water at 7:28 but, if you are using regular dried pasta probably wait another minute or two. Though, in all honesty, it doesn’t really matter that much as long as you drain it before it overcooks.
Right around this time, I drained the bacon which by now was nice and crispy. I cooked it on medium-low heat to draw the fat out. This is an old French technique that yields the crispiest bacon ever.
7:29 – Butter that bread
It was time to get going on the garlic bread. I took that little ramekin of garlic that I set aside earlier added about 1 1/2 tbsp of butter to it. I mixed this up really well. I then sliced a gluten-free baguette (you can use non-gluten-free) down the middle lengthwise, spread the garlic butter on the and popped it in the oven right on the rack.
7:30 pm – Dress it up.
It took me about a minute to assemble the garlic bread and get it in the oven. The next step was to make the Caesar salad dressing.
Generally, Caesar salad is made with raw egg yolk. As my wife is pregnant and definitely cannot have raw egg yolk I made mine with mayonnaise as the base.
I took the bowl with the final 1/3 of garlic in it and added about 1/4 cup mayo to it. To this, I added 1 tbsp red wine vinegar, a few drops of fish sauce (you can use Worcestershire sauce), the juice of 1/4 of a lemon, 2 tbsp grated parmesan, and a bit of salt and pepper.
I mixed all of this together and the dressing was done.
7:33 pm – The old cut n’ wash
With the dressing made and set aside I got straight to cutting the romain lettuce.
I used 1 romain heart for this as it was just my wife and I eating, but two should feed a family of four.
I pulled off any brown leaves, sliced the head lengthwise through the middle, but not through the root. I rolled the lettuce 1/4 turn and the sliced again. Essentially I was making a plus sign ( +) cut down the center of the romaine head while keeping the root attached to hold the head together. I then cut across the head making bite-sized pieces of lettuce. These went into the salad spinner, got rinsed with cold water, drained, and spun.
If this all sounds confusing then just watch the quick video below to see what I’m talking about.
7:35 pm – Putting it all together.
At this point, I was still waiting on my pasta to cook (I stirred it every couple of minutes to prevent clumping) but, everything was ready for my salad. I already had the Romain in a big metal bowl and so I added my dressing, bacon bits, and a bunch of parmesan right in on top of it.
I left the salad in the bowl and went about finishing everything else.
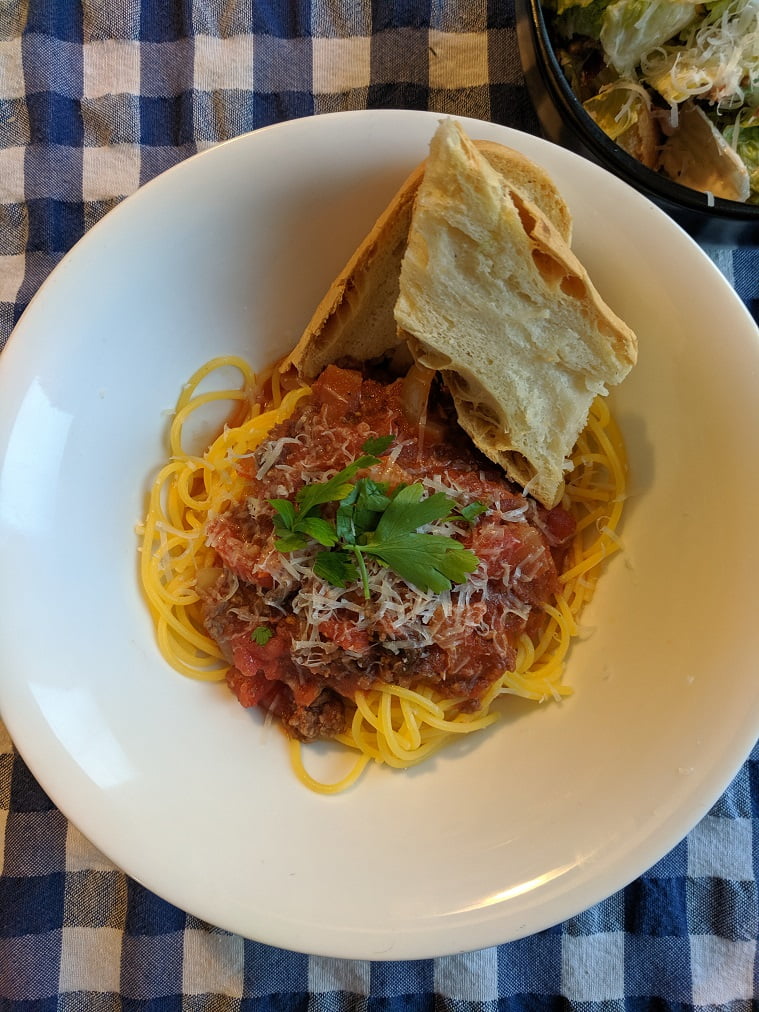
7:37 pm – Spaghetti and Meat Sauce
Okay, at 7:37 the spaghetti was cooked so I drained it. After it was very well-drained I put some in a big bowl. I tasted the sauce and adjusted the seasoning with salt and pepper. Once the sauce was seasoned I took a big ladle full and poured it over my pasta. I topped the pasta with pepper and parmesan cheese.
Once the pasta was plated I took the garlic bread out of the oven. I sliced the two halves into three pieces. I put two pieces with my pasta, saved two pieces for my wife, and the other two I cut into croutons and tossed with the salad to finish.
I tossed the salad quickly and served it into bowls with a slice of lemon. Just like that dinner was done. The time was 7:39 pm.
Conclusion –
Once more I want to say that this would be better using two cans of tomato purée rather than one purée and one dice. Other than that this spaghetti and meat sauce was delicious. The salad was spot on and the garlic bread was delicious.
I hope that you enjoyed this post. The full, printable recipe is right below and remember to subscribe to the blog to never miss a post.
Spaghetti and Meat Sauce with Caesar Salad and Garlic Bread
This is a delicious meal that I was able to make in under 30 minutes.
It is Monday and that can only mean one thing. It’s time for another instalment of my weekly segment where we make a dish from start to finish in 30 minutes or less.
This week on 30 minutes or less we will be making the quickest dish to date; Spicy Noodles. From start to finish this dish took 20 minutes. There is one caveat however. I used left over, already cooked chicken which obviously sped up the cooking and prep time a little. Having said that, if you were to use raw chicken breast, slice it thin, and stir-fry it, it shouldn’t add more than 4-5 minutes onto the total time. This will still bring you well within the 30 minute mark.
Okay, let’s talk about the dish.
To start with this thing is loaded with vegetables. We will get into the specifics in a minute. Despite what vegetables I used you can easily add other vegetables like broccoli, cabbage, bean sprouts, snow pea, or really anything else you want.
The chicken could easily be subbed for beef, pork, mushroom, or tofu.
The noodles are rice noodle which are very quick to cook and hold up pretty well to being stir fried.
The sauce is homemade in under two minutes and uses a left over ingredient, miso paste, from last week’s 30 minutes or less. The miso paste adds a nice depth and saltiness to the sauce along with a creamy texture.
Ingredients:
Here is a full list of the ingredients I used.
1 cup, cooked, and picked chicken
1 carrot
1/2 a baseball sized onion
1 celery stalk
2 green onions
1/2 red bell pepper
2 cloves garlic
2 tsp grated ginger
2 tbsp miso paste
1 tbsp soy sauce
1 tbsp honey
1 tbsp sambal chili sauce
2 drops of fish sauce
1 tsp sesame oil
1 tbsp canola oil
enough rice noodles for 4 people (1/2 a pkg)
Timing
I actually started this really late last night as you will see in a second. What I have found since doing these 30 minutes or less meals is that every single time, I am really glad I have something quick to cook. For whatever reason, whenever I do these I am either cooking late, it’s been a long day, I don’t really feel like cooking whatever it is. So, these come in very handy for me, and I hope they do for you as well.
Okay, let’s get into it.
8:25 pm
I started this at 8:25 and the first thing I had to do was fill up the kettle and get it going. You’ll see why in a few minutes. The next thing I did was quickly round up all of my ingredients and start prepping my vegetables.
8:31 pm
It took me until 8:31 to finish prepping my vegetables. Now it was time to make the sauce.
I combined the miso paste, honey, soy sauce, fish sauce, ginger, and sambal chili sauce, in a bowl and thinned it all out with about 1/2 cup of warm water. I stirred it until it was nice and smooth.
8:34 pm
At 8:34 the sauce was done and the kettle started to boil. I put my dry noodles in a large bowl and poured the boiling water over them. I gave them a few stirs with a fork and let them sit for four minutes. Once they were soft, I drained them, rinsed them with cold water, and set them aside.
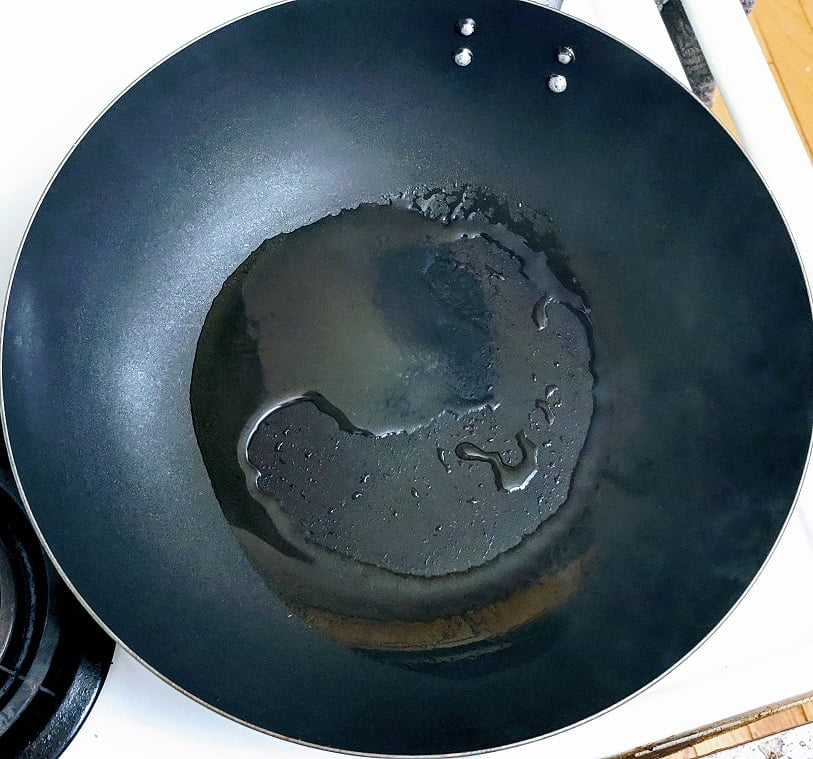
Once the noodles were soaking I put the wok on the stove and started heating it over high heat.
8:37 pm
By 8:37 the wok was nice and hot. The sesame and canola oil were added to the wok, along with all of the vegetables excluding the garlic.
This was all stir-fried for about two minutes and then the garlic and the already cooked chicken were added.
I cooked all of this for two more minutes and then added the sauce. Once the sauce was boiling and everything was coated, I add the noodles and tossed them to heat them up and mix them with the other ingredients.
8:45 pm
By 8:45 the dish was done, plated, and pictures were taken.
Conclusion
This is one of my go to meals on busy nights, or when I don’t feel like doing much. It is so versatile, and quick what’s not to love? All of the vegetables can be subbed for other vegetables or just added to. The chicken can be subbed for pork, beef, tofu, mushroom, shrimp, even scallop. Even the sauce can easily be altered depending on what you have in the fridge and what you like. You could also sub rice wheat noodles for rice noodle if you want.
The real point here is that a stir-fried noodle dish can be made from scratch, sauce and all, very, very quickly. This portion will easily feed a family of four, but can also be scaled up or down.
So there you a very quick and delicious meal that is guaranteed to become one of your go to meals.
For this week’s 30 minutes or less post I made chicken pesto and garden salad with homemade French dressing. This is a really delicious meal that I would be happy to eat any day of the week.
Recipe Notes
As usual, the meal I prepared would be enough to feed a family of four, with two exceptions. I didn’t cook enough pasta for a family of four because it’s just my wife and I and there’s no point wasting it. Same with the chicken. I only used one large chicken breast. For four people I would use two chicken breasts.
I should also say that to make the pesto I used an immersion blender. You can use a regular blender, a food processor, or a mortar and pestle, though that may add some preparation time.
One final note before we jump into this. Chopping the vegetables for the salad can be time consuming, especially if you’re nervous with a knife. To get around this, and speed things up feel free to use the slicer attachment on a food processor. Things won’t look as nice but they will taste just as delicious.
Okay, without further ado, this is…
Chicken Pesto in 30 Minutes or Less
4:51 pm
At 4:51 I put a pot of salted water on the stove for the pasta, turned in on high and started chopping 1 cup of basil leaves for the pesto.
Because I was using an immersion blender to make my pesto I had to chop the basil first to prevent it from jamming the blades. If you are using a food processor or blender you can skip this step. This will save you some time.
Once the basil was chopped I put it in a large measuring cup along with 2 tbsp of pine nuts (which add flavour and creaminess to the pesto), 2 cloves of garlic, a big pinch of salt, and 1/2 cup of olive oil. I pureed all this until smooth.
I would normally add parmesan to the pesto as well but I find when adding it to pasta like we are going to the cheese burns to the bottom of the pan. I opted to garnish the pasta with a little extra parmesan to make up for this.
At 4:57 pm the pesto was finished and set aside.
4:58 pm
At 4:58 I started cutting the lettuce for the salad. I used one head of romaine lettuce for this.
To cut it I first took off the very end of the leaves as they had some brown spots on them. Next I made a slice through the middle of the head of lettuce from the tip of the leaves to the root, but not through the root. I rotated the romain by one quarter turn and made the same slice. Then I cut the romaine across those slices giving me nice bite sized pieces.
Here is a quick video I did demonstrating what I’m talking about.
I put the romaine in a salad spinner, rinsed it a few times, and then spun it dry. Once it was dry I set it aside.
5:03 pm
At 5:03 pm I started prepping the vegetables for the salad. I peeled and sliced two carrots, sliced 1/2 a cucumber, 1/2 a green pepper, and 1 broccoli stalk. I put a few handfuls of lettuce in a bowl and topped it with the sliced vegetables and a few cherry tomatoes. I set this aside.
There was enough romaine left over for another salad of this size. The leftover romaine got covered with a damp paper towel and put in the fridge.
Also, at 5:04 the pasta water started boiling.
5:10 pm
At 5:10 the salad was done and set aside. I put the pasta in the water, and started heating the frying pan for the chicken. While the pan was heating over medium low heat I put the salad dressing together.
For he salad dressing I altered the French Dressing recipe from Genius Kitchen. They’re batch was way to big for what I needed, and I took away or changed some of the ingredients based on what I like.
The ingredients in the French Dressing are as follows:
2 tbsp olive oil
1/4 cup ketchup
2 tbsp sugar
3 tbsp white vinegar
1 tsp onion powder
1/4 tsp paprika
1/4 tsp garlic powder
1 tbsp mayo
salt and pepper to taste
To make the dressing all of these ingredients go into a bowl and get mixed together. That’s it.
5:12 pm
At 5:12 the salad dressing was done. I gave the pasta a stir and then quickly sliced one chicken breast very thin. I added 1 tbsp of olive oil to the hot frying pan and then the chicken.
Because the pan was hot and the chicken is sliced thin, it didn’t take long for it to cook.
5:17 pm
By 5:17 the chicken was all browned and I added a handful of cherry tomatoes to the pan.
I drained my pasta, added the pesto to the pan along with the now drained pasta. I tossed this all together, seasoned with salt, pepper, and parmesan, and that was that.
5:19 pm
At 5:19 I plated the pasta and the salad and dinner was ready to go.
Conclusion
In all honesty, this was the closest I’ve come to going over the 30 minute mark. I really had to hustle for the last two minutes but that was my own fault. I went into this with the mind set that this would be exceptionally quick, I mean it was just chicken pesto. But there were a few things that caught me up.
Like I said, I had to chop my basil because of the immersion blender, and I dillydallied cutting all the vegetables. Again, that’s my own fault.
Between my dillydallying, cutting the basil, and taking all the pictures, I blew through a lot of time that you shouldn’t have to. Because of that I see no reason why you or anyone else shouldn’t be able to make this dish in under 30 minutes start to finish.
Two bonuses of this are, you get to see how quickly pesto and and a delicious salad dressing can be put together. It’s almost quicker than grabbing them off the shelf at the grocery store. Almost quicker, but 100 x better.
We use cookies on our website to give you the most relevant experience by remembering your preferences and repeat visits. By clicking “Accept”, you consent to the use of ALL the cookies.
This website uses cookies to improve your experience while you navigate through the website. Out of these, the cookies that are categorized as necessary are stored on your browser as they are essential for the working of basic functionalities of the website. We also use third-party cookies that help us analyze and understand how you use this website. These cookies will be stored in your browser only with your consent. You also have the option to opt-out of these cookies. But opting out of some of these cookies may affect your browsing experience.
Necessary cookies are absolutely essential for the website to function properly. This category only includes cookies that ensures basic functionalities and security features of the website. These cookies do not store any personal information.
Any cookies that may not be particularly necessary for the website to function and is used specifically to collect user personal data via analytics, ads, other embedded contents are termed as non-necessary cookies. It is mandatory to procure user consent prior to running these cookies on your website.