Chicken Cacciatore is a classic dish with loads of flavour. Today I am going to show you how to make this classic chicken recipe in 35 minutes from start to finish. But first, you may be wondering, what exactly is Chicken Cacciatore? That’s a great question. Let’s answer that, then get to cooking.
What exactly is Chicken Cacciatore?
Cacciatore means “hunters-style.” Imagine you live in the Italian countryside. You’ve been out all morning hunting rabbits or birds. You come home with a big appetite and some small game, what do you make to eat? Well, you use whatever kind of meat you have, chicken, rabbit, quail, pheasant, whatever it might be. You sear it in a pan, add some onions, garlic, maybe bell peppers, a bit of wine, some herbs and tomatoes, then you cook it nice and slow for an hour or two. That is cacciatore, and that is what we are going to make. The only difference is that instead of doing it in one or two hours, were are going to make our chicken cacciatore in thirty-five minutes.
Let’s get to it.
6:45 pm- Getting Started
It is pretty common to serve cacciatore with pasta or even polenta, but I’m serving mine with rice. Serve yours with whatever you’d like. To get started, combine 1 cup of rice with 2 cups of water and a bit of salt and pepper in a medium pot and put it on high heat. Leave the rice alone until it comes to a boil about 3 minutes later. Once it boils, put a lid on the pot, turn the heat down to low and set a 17-minute timer.
Right before you put the rice on turn a large skillet on medium-high heat to pre heat.
6:47 pm – Seasoning
With the rice coming up to the boil and the skillet heating, turn your attention to the chicken. Use six bone-in, skin-on chicken thighs. Chicken thighs have much more flavour than chicken breasts, and they also retain more moisture when cooked, which makes them perfect for this type of dish. Seasoned the chicken thighs generously with salt and pepper.
6:48 pm – Let’s Get Cooking
When the rice boils, put a lid on the pot, turn the heat down to low and set a 17-minute timer. Your skillet should be hot by this point, so add in 2 tsp of olive oil and place the chicken thighs in skin side down. Leave the chicken alone to cook for about 6 minutes. The idea here is that you want to get a nice deep golden brown colour on the skin before you flip it.
6:50 pm – Onions & Garlic
While the chicken and rice are cooking, prepare you other ingredients. First up slice 1 onion and 3 cloves of garlic, then set them aside.
6:52 pm – Red Bell Pepper
Next up, cut the lobes off of 1 red bell pepper by starting at the top of the pepper, and using your knife to cut down while following the natural curve of the vegetable. Once you have all 4 lobes cut off, the pepper cut them in half, then slice them about a 1/4 inch thick and set them aside.
6:54 pm – Flip the Chicken
At this point, the chicken should be golden on the skin side. Flip the chicken and let it cook for 1 minute, then take the chicken out of the pan and set it aside.
6:56 pm – Onions and Garlic
Once the chicken is out of the pan, drain off all the excess fat leaving about 2 tsp then added in the onion. Cook the onions for about 3 minutes before adding in the garlic and cooking for 1 more minute.
7:00 pm – Wine
Add a 1/2 cup of white wine along with a 1/4 tsp of dried red chilli flakes into the pan if your pan is still how the wine will cook down very quickly. You want the wine to almost entirely evaporate before you move on to the next step.
7:01 Chicken Stock
With the wine and chillis in, it is now time to add in a 1/2 cup of chicken stock, 1 1/2 cup diced canned tomatoes (I used baby San Marzano tomatoes.) and 1 tbsp of dried oregano.
7:03 pm – Chicken and Herbs
With the base of the sauce now firmly established, it is time for the chicken to go back into the pan. It’s also important to pour in any drippings that have accumulated on the plate the chicken was resting on. This can add a surprising amount of flavour back into the dish. Along with the chicken add in 1 sprig of rosemary and 2-3 sprigs of thyme.
Put a lid on the skillet, turn the heat down to medium-low and let it cook for 5 minutes.
7:08 pm – Basil
While the chicken cacciatore simmers take a small handful of basil leaves, roll them in a tight “cigar” shape and slice them very thin.
7:10 pm – Peppers & Olives
Let the cacciatore simmer for 5 minutes, then add in the bell peppers and 12 green (cerignola) olives. Put the lid back on the pan and let it simmer for another 10 minutes. Your chicken may cook a little faster or a little slower. It’s essential to confirm that your chicken is cooked all the way by checking the temperature with a thermometer. The temperature of the cooked chicken should be a minimum of 165°F.
7:20 pm – Chicken Cacciatore
To finish the chicken cacciatore add in the fresh basil and served it up over the rice.
Conclusion
Make this dish. Seriously. Make it! Even if it seems a little weird to you, take a little step outside your comfort zone and give it a shot, you will be so, so happy that you did.
There are few dishes that offer such a heartwarming and soul-filling eating experience. This is one of those dishes. True, and absolute comfort food. Enjoy!
Thank you for reading the post. If you liked it, remember to share it on Facebook, Pinterest, or Twitter by clicking the icon to the left of the right of the page. Did you know that Chefsnotes.com has almost 400 posts just like this one? Imagine all the great tips, tricks, and recipes you’ve missed. Don’t miss any more! Subscribe to Chef’s Notes by putting your email address in the subscription box at the top right of the sidebar. You will be notified of every new post. And if you would like to know more about me, click the link below to read my story.
35 Minute Chicken Cacciatore
A delicious Chicken Cacciatore recipe that only takes 35 minutes from start to finish.
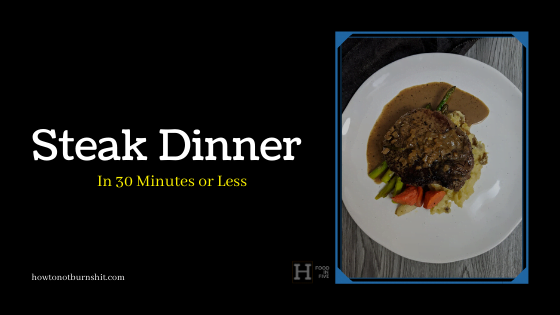
In most of these “30 Minutes or Less” posts, I show you how to make fairly basic homecooked dishes. Today, we are going to do something a little different. Today, we are going to take a look at how to make a relatively high-end meal, but while still hitting that 30-minute mark.
Okay, what we’re making today is a steak dinner, I’m using both beef tenderloin, and ribeye because I like one and my wife likes the other. Along with the steak we are making smashed red potatoes, as well as roasted carrots and asparagus. I actually made a meal very similar to this for a dinner I did this weekend and got a craving that just needed to be satisfied.
So, here we go. This is…
5:15 pm – Getting Started
Things got cooking at 5:15 pm. To get started I got the potatoes cooking, cranked the oven up to 450°F, and turned a castiron pan on over medium heat.
For the potatoes, I rinsed them, covered them in hot salted water and turned them on high.
5:16 pm Carrots
Next up I got to work on some carrots. I peeled them and cut off the two ends. I cut the carrots using a technique called the “roll cut” or “oblong cut”. To do this keep your knife at a 45° angle to the carrot. Cut the carrot about 1 inch thick. Roll the carrot 1/4 turn forward and cut once again on that same 45° angle. Continue to do this until the entire carrot is cut.
This technique takes a little practice to get the hang of but it is worth the effort. This style of cut works really well for stew, soup or roasted carrots. Give it a shot.
Once the carrots were cut, toss them with olive oil, salt and pepper, and rosemary. Then I put them in the oven. I didn’t wait for the oven to come up to full temperature here because it just would have taken too long. If you have the time, wait. If not, the carrots should still be cooked at the end of the 30 minutes.
5:20 – Steak on
At this point, the cast iron pan for the steak was hot and ready to go. I seasoned the steak with homemade steak spice. I would give you the recipe but I can’t actually remember what’s in it. You can use salt and pepper or your favourite steak spice instead. With the steak seasoned, into the pan it went.
5:22 pm – Asparagus
While the steak was cooking I prepared the asparagus. The trick with this is to grab the asparagus on the top and bottom and gently bend until it breaks. This breaking point is where the asparagus goes from the woody stem to the tender steam. Break all the asparagus spears and discard the bottoms. Set aside the usable asparagus until ready to use.
5:24 pm – Steaks in the oven.
The steaks are seared on one side. Flip them, and put the pan in the oven.
5:25 pm Onion and Garlic
Now, its time to mince half an onion and two cloves of garlic. This will be used to make the sauce once the steak comes out of the oven.
5:27 pm – Hurry up and wait.
With everything cooking, there really isn’t much to do other than just wait. So, crack a cider, a beer or pour a glass of wine.
5:30 pm – Check the steak
At 5:30 the ribeye was cooked through (135°F) but the tenderloin which was thicker still needed more time. I took the ribeye out of the pan, wrapped it loosely in foil and put the tenderloin back in the oven.
I also put the asparagus in the oven in the same dish as the carrots.
5:37 pm – Tenderloin Done
7 minutes later the tenderloin was done. It got wrapped right along with the ribeye.
At this point, it was time to get going on the sauce. I added 2 tbsp of butter into the pan the steak was cooked in. Along with the butter I added in both the onion and garlic. This got cooked for 1-2 minutes. Then, I added in 1/2 cup of Whiskey, and let that cook for another 2 minutes. After that, I added in 1 cup of beef stock along with 1 sprig of rosemary.
5:40 pm – Drain and Smash Potatoes
Once I got the sauce cooking, my potatoes were cooked. I drained them, let them dry out for a few seconds. Then I heated up about 1/4 cup of cream and 2 tbsp butter. I mashed the potatoes and seasoned with salt and pepper.
5:43 Finish the sauce
The beef stock has cooked way down and now it’s time to add a bit of cream, about 1/4 cup, and about 2 tbsp of butter. Stir it up, it should get thicker. Give it a taste and adjust with salt and pepper as needed.
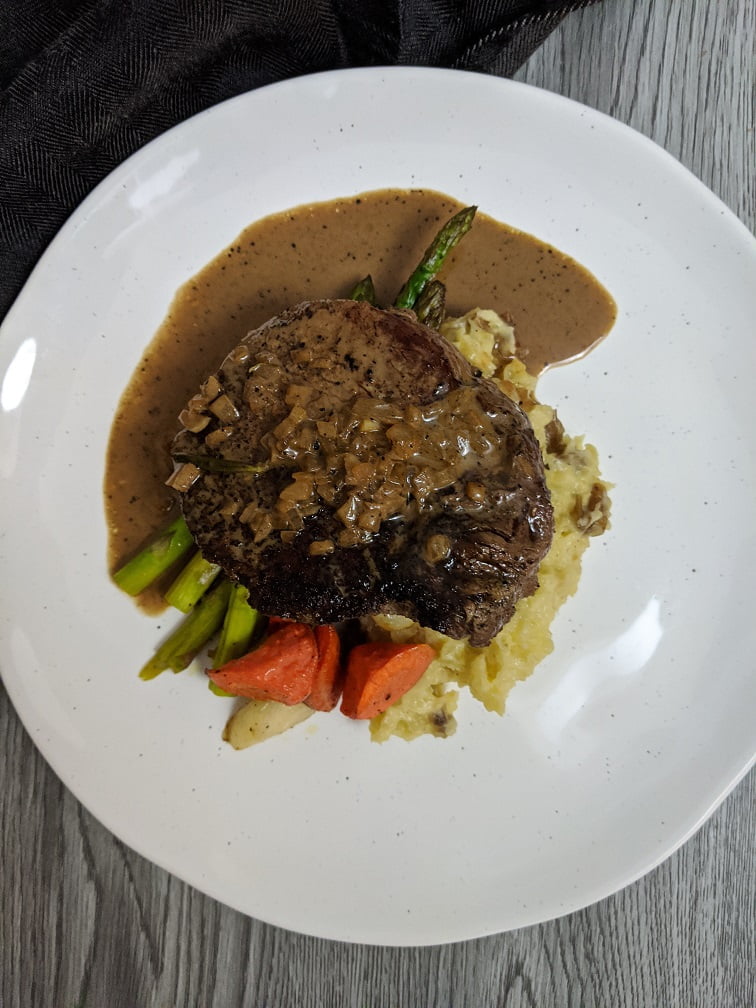
5:44 pm Plate it up
Take the carrots and asparagus out of the oven and get it on the plate. Potatoes down first, the vegetables next, followed by the steak and the sauce. Good to go.
Conclusion
This meal likely isn’t going to be an everyday kind of meal. That’s fine, it shouldn’t be. But the next time you have a special occasion, your partner’s birthday, or an anniversary, maybe instead of going out and spending a bunch of money, stay in, spend a little money and little time, and enjoy.
Beef Tenderloin with Bourbon Cream sauce in 30 minutes or less
A delicious steak dinner that can be made in under 30 minutes.
Put the potatoes in a pot, rinse, and cover with hot salted water. Place on a burner over high heat and cook until tender.
Turn the oven on to 450°F and turn a cast iron pan on medium for the steaks.
Peel and cut the carrots, toss with olive oil, salt, pepper, and fresh rosemary.
Put the carrots in a roasting pan and pop in the oven.
Put the steaks in the hot skillet and cook for four minutes before flipping and putting in the oven.
While everything is cooking prep the asparagus by breaking the bottom ends off of each stalk.
Once the steaks are cooked to 135°F, remove them from the oven and loosely wrap them in foil.
Put the pan back over medium heat and add 2 tbsp of butter along with the onion and garlic to the pan.
Add the asparagus to the roasting pan with the carrots and return to the oven.
Sauté the onions and garlic for 1-2 minutes then add in the Whiskey.
2 minutes after adding in the whiskey add in the stock and simmer.
Once the potatoes are cooked drain them, add half the cream and the butter and mash the potatoes. Season to taste with salt and pepper. Put a lid on the pot and set aside.
Finish the sauce with 1-2 more tbsp of butter, and the remaining cream. Season to taste with salt and pepper.
Remove the carrots and asparagus from the oven and serve.
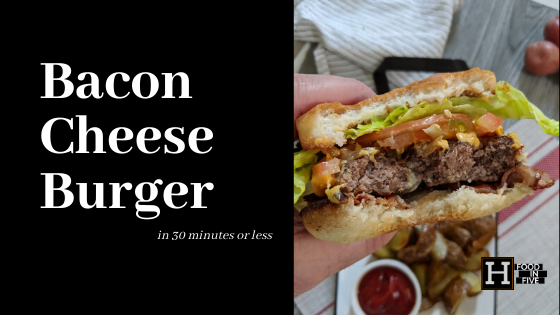
Okay, everybody, it’s Monday, you know what that means! It is 30 Minutes or Less time. Today we are going to make a bacon cheeseburger with horseradish mayo and roasted potatoes in under 30 minutes. And, I’m going to show you how to do it too. You don’t need to be a professional chef, just a hungry person who is short on time and hungry for something delicious.
This is how to make…
2:25 pm – Pre-heat
I actually made this bacon cheeseburger for a late lunch as I had things to do in the evening, so I started at 2:25 pm. The first thing I did, and you should to was to heat up the oven to 400°f, get a skillet or oven-safe pan heating up on the stove over medium heat, and heat up a griddle to 375°F.
A note about the griddle.
If you don’t have a griddle it isn’t the end of the world. These burgers can be cooked in a pan or on the BBQ. Generally, I don’t use special equipment for these posts but I just got my griddle and I know a lot of people do have them. If you’re curious this is a link to the one I’ve got. I’ve used it a handful of times and it works well so far.
2:26 pm – Potatoes
With everything heating up it was time to get down to business. First up, potatoes. I used baby red potatoes for this as they hold up really well in the oven. You can use any kind of potato you want, but I do recommend a yellow-fleshed variety for various reasons.
All I did with the potatoes was cut them into quarters, toss them in the pan with a little oil and salt and pepper and let them cook. I tossed them every few minutes while I went about other things.
We will come back to these later.
2:29 pm – Onion
It took me a few minutes to get the potatoes cut and in the pan, then I went to work on an onion. I cut the ends off, cut the onion in half and peeled it. Then I thinly sliced it along the grain of the onion. Once the onions were cut, I put them on the griddle with a touch of oil.
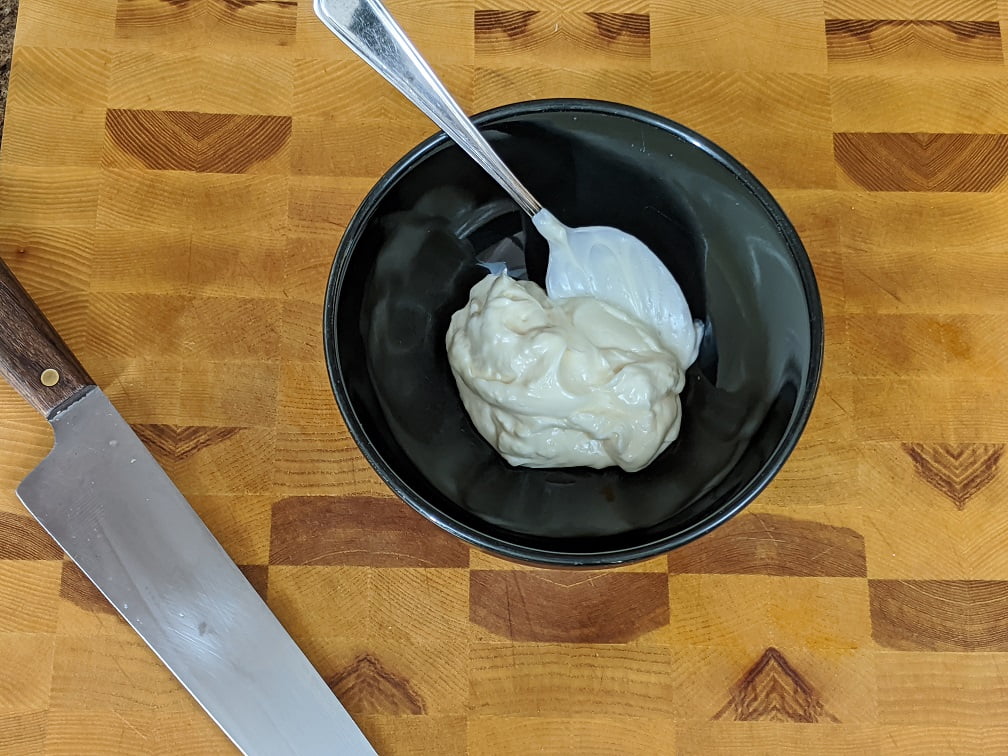
2:31 pm – Horseradish Mayo
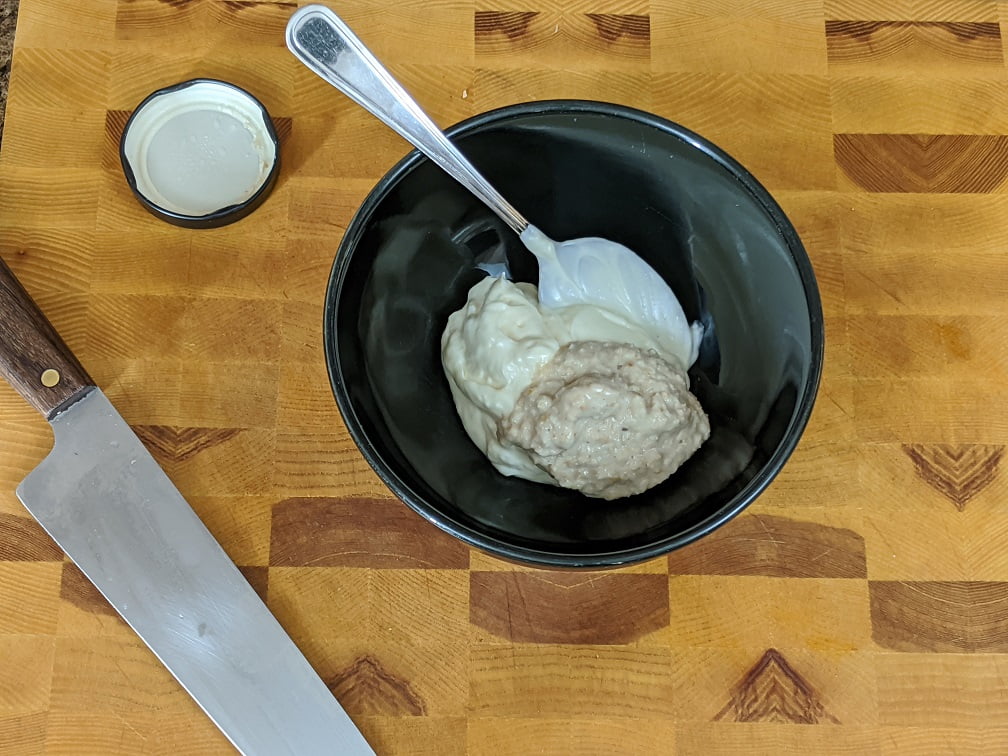
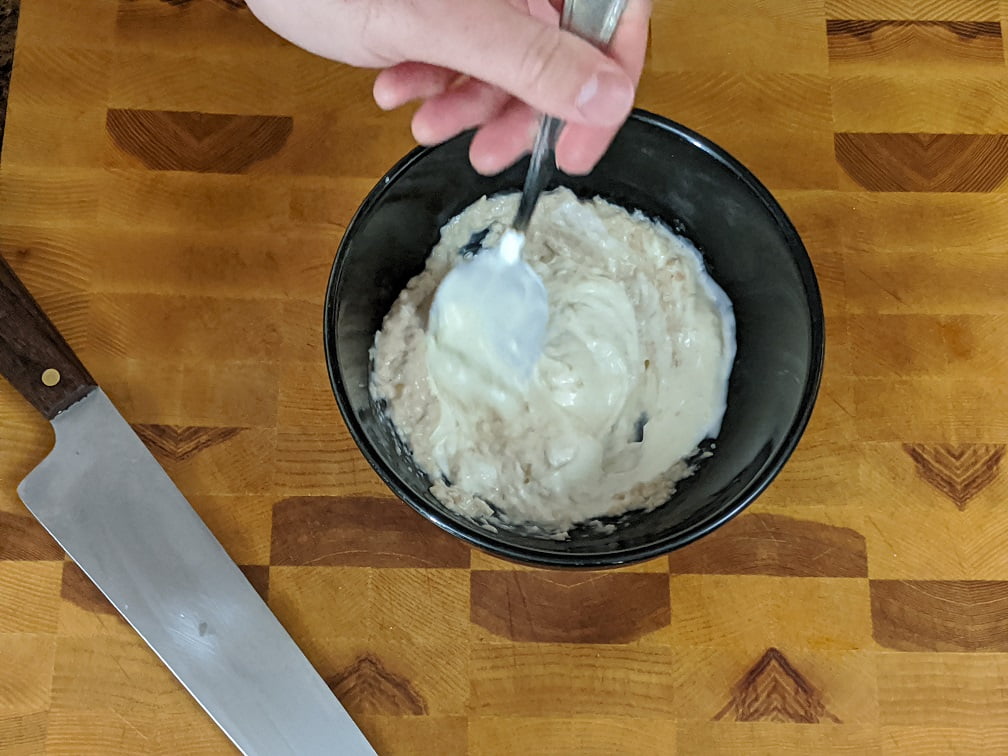
It was now 2:31 and this seemed like the perfect opportunity for me to mix up a batch of horseradish mayo. What’s in it? Prepared horseradish and mayonnaise. That’s it. Let’s call it 1/2 cup of mayo and 1/4 cup horseradish. I mixed it up and set it aside.
2:33 pm – Potatoes in the oven
I had been tossing or stirring the potatoes every minute or two up until this point. But not they were browning and the oven was hot. In the oven, they went. I also gave the onions a stir and cut four strips of bacon in half and put them on the griddle.
2:35 – Prep the vegetables
Another small job I got out of the way was prepping the vegetables. I sliced a tomato and tore apart some iceberg lettuce. Nothing too exciting.
When it comes to burgers and sandwiches in general thinly sliced tomatoes are always the way to go. I slice them as thin as I can. I find the sandwich or burger is less likely to slide apart with thin tomatoes.
2:37 pm – Burger
Okay, with the veg out of the way I gave the onions another toss, flipped the bacon and got to work on the burger. I didn’t do anything crazy here. I took one pound of medium ground beef and combined it with 1 tsp garlic powder, 1 tsp onion powder, 1 tsp salt (with the bacon this was a bit much. In the full recipe I cut this back to 1/2 tsp), and 1/2 tsp of black pepper. That’s it. I mixed this up and made four evenly sized balls.
2:39 pm – Bacon
The onions were starting to look pretty good and the bacon was cooked. I tossed the onions, and took the bacon off the griddle and set it on some paper towel to absorb the excess grease.
2:41 pm – Bacon Off Burgers On
With the bacon off the griddle and the onions pushed to the side, there was now room for the burgers. I flattened the beef balls until they were about 1/4 inch thick and put them on the griddle. I seasoned the burger lightly with salt and pepper and let them cook.
Notice that I didn’t take a lot of time to make sure the burgers were perfectly round. That is an unnecessary step that eats time. Just flatten the ball and put it on the griddle, no one is going to care.
2:45 pm – Flip burgers
About four minutes after the burgers went on the griddle I flipped them. I then sliced the buns and put them on the griddle too. I didn’t butter the buns because there was enough grease on the griddle from the bacon and the burgers.
A note about the buns.
I am obviously using gluten-free buns here. The best ones I have found so far are made by kinnikinnick. You can check out their website here. The only place I’ve been able to find them around here is Sobeys.
2:48 pm – Onions on burgers
At this point, the burgers were cooked so I topped them with the onions and one Kraft single each. The buns were also ready so I took them off the griddle.
Why am I using Kraft Singles?
You may be wondering why I used Kraft Singles on my burger, surely there must be a better cheese I could have used. Nope. In all honesty, I think for a bacon cheeseburger, there isn’t much better than a Kraft Single. I used them because I like them on cheeseburgers.
2:51 pm – Dress Buns
While the “cheese” was melting I dressed my buns. Horseradish mayo on the top and bottom bun. Bacon on the bottom bun. Lettuce and tomato on the top.
2:52 pm – Cheeseburger Done
With the cheese melted the burgers were done. On to the buns they went.
2:53 pm – Potatoes Done
At 2:53 the potatoes came out of the oven. Crispy on the outside and soft on the inside. Delicious!
2:54 pm – Dinner is ready
And just like that, dinner was done.
Conclusion
All too often we try to over complicate things that are best when left simple. This cheeseburger has only a few ingredients but was absolutely delicious. Keep it simple.
There is also this misconception that homemade burgers takes a long time to make. Seasoning the meat, forming the patties, it seems like it should take a long time. But, clearly, that doesn’t have to be the case. The next time you get a craving for a burger make this instead of going out. You will be so happy that you did.
Bacon Cheeseburger
This recipe makes a delicious burger with onion, bacon, cheese, and horseradish mayo. What could be better?
French food often gets labeled as being overly complicated, elaborate, and difficult. I wanted to share this Sausage and Lentils dish to show that that isn’t always the case. French bistro food, French country food, these are simple foods made well, with care and good quality ingredients. That’s it.
This is a great Bistro dish that is terrific for a Sunday lunch or a weeknight dinner. Give it a shot!
This is…
Sausage and Lentils in 30 Minutes or Less
Before we begin
Before I get too far into this I need to tell you that I made a mistake. When I made this last night I added the dried lentils to the pot and only gave them about fifteen minutes to cook. That really isn’t enough time. My lentils were still a bit…firm let’s say. So, I suggest that at the beginning of the 30 minutes you put the lentils in a small pot, cover them with water and boil for 15 minutes. Then at the 15-minute mark drain them and add them to the sausages and everything just like I did. The difference is, your lentils will actually be cooked at the end.
7:45 pm – Turn on the heat
I started cooking last night at 7:45 pm and in all honesty, this was the last thing I wanted to be doing. Between daylight savings time and the 3-week old baby, I was feeling pretty exhausted. But, that’s what’s great about these 30 Minute Meals. They’re quick enough that they can be made even when you really don’t feel like it.
Okay, I started at 7:45 pm. The first thing that needed to be done is getting the lentils cooking. Again, I didn’t do this but I recommend that you do. Put the lentils in a pot, cover with hot water, bring to a boil and simmer for 15 minutes.
I’m used a large enameled castiron dutch oven to make this which takes a little while to heat up. So, I turned it on over medium heat and then got down to business dicing my onion.
7:47 pm – Sausages in Pot
It took me longer than it should have to dice my onion, and I really don’t know why. But whatever the reason, 2 minutes after I started on my onion I was done. It also happened that at this point my pot was hot so I added in the sausages.
With the sausages in the pot and the onion set aside I sliced 1 celery stalk.
7:50 pm – Leeks
I let the sausages cook for about 3 minutes before flipping them. I’m not at all concerned with cooking the sausages all the way right now. I just want to get some colour on them. We’ll finish cooking them later.
I also sliced up a leek at this point. To do this first cut off and discard the root, and the top dark green bits. Slice the leek in half lengthwise then cut across in half-inch or 1 cm pieces. Put the leeks in a bowl, cover with cold water and swish them around. Let them sit in the water until ready to use.
When the time comes to use the leeks, scoop them out of the water using your hand rather than pouring them out of the bowl. If you pour the leeks into a strainer all the dirt that was cleaned off the leeks and settled to the bottom of the bowl will be poured on top of them and you will have dirty leeks once again.
7:52 pm – Cook the vegetables
Take the sausages out of the pot and add in the onion, celery, and leeks. This is all going to be cooked for about 6 minutes. Really, the goal is just to start softening all the vegetables.
7:53 pm – Garlic
While the leeks, onion, and celery are cooking slice 2 cloves of garlic and peel and slice 2 carrots.
7:56 pm – Tomato Paste
Add about 2 tbsp of tomato paste to the pot and cook for 1 minute. Then add in the garlic and carrots and cook for 1 more minute.
7:58 pm – Sausage and Lentils
At this point, everything gets added into the pot. The lentils, which hopefully have been cooking for about 15 minutes, the sausages, thyme, stock, and salt and pepper.
7:59 pm – Turn up the heat.
With everything in the pot, its time to crank the heat up to high, and bring everything to a boil. Once it starts to boil put a lid on the pot, turn the heat down to medium-low and simmer for 15 minutes.
After 15 minutes of simmering, taste and adjust the seasoning as needed and serve.
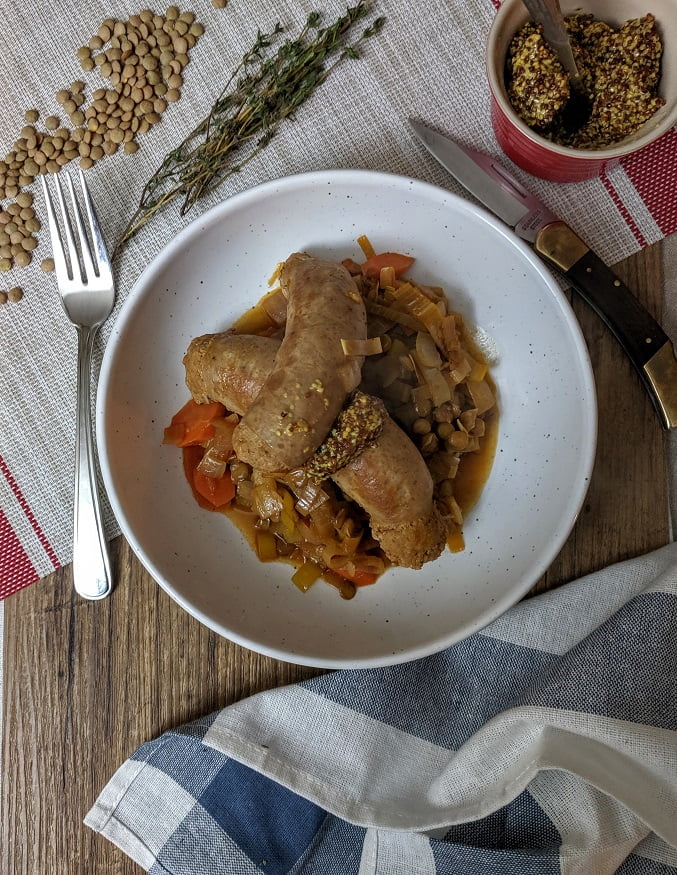
8:15 pm – Plate Dinner
I like to serve this dish with some nice French mustard and if I had of had it a crisp white wine.
Sausage and Lentils
A bistro classic you can make at home in under 30 minutes.
Good morning world! After just over two weeks of radio silence, I am back and ready to roll. For those of you that don’t know, my wife and I just had a baby and so I took a bit of time off to adjust to that massive life change. For me, everything is different, but for you, things should mostly be the same. Some of my posts may appear a little later in the day than they normally would, and down the road, things may become a little more oriented to feeding a young family, but other than that it is business as usual. Speaking of business, as usual, let’s get to it.
As I am just kind of easing back into work I thought it would be good to start with a fairly simple dish for 30 minutes or less. Don’t let the long name confuse you. This is a simple dish that anyone can make and pretty much everyone will enjoy. Let’s take a look.
This is…
Pork Schnitzel with Brandy Mushroom Sauce In 30 Minutes or Less
6:20 pm – Potatoes
It was 6:20 pm when I started cooking last night and the first thing I had to get going on was the potatoes. I took 4 small-ish russet potatoes, peeled them, diced them, rinsed them in cold water until the water ran clear, then covered them with hot salted water and cooked them on high until they were tender. With the potatoes on the stove which took about 4 minutes in total, it was time to focus on my sauce ingredients.
6:24 pm – Sauce Prep
The sauce for this dish is what is known as a pan sauce. All that means is that the sauce is made in the same pan as the main protein, usually incorporating drippings from the protein. We aren’t going to really have any drippings, but we are going to use one pan to cook the schnitzel and the sauce.
The first thing I did was peel and thinly slice one shallot. If you don’t have shallots, half a small onion would work. Next up, I removed and discarded the stems from four cremini (brown) mushrooms, and thinly sliced them. The last thing I sliced was 2 cloves of garlic. To the sauce ingredients, I added 2 sprigs of thyme.
6:28 pm – Broccoli
I set the sauce ingredients aside, which took about 4 minutes to prep, then I got to work on some broccoli. I really like long spears of broccoli and I find cutting broccoli this way leads to the less wasted stem. To do this cut off the bottom third or half of the broccoli stem. I cut the bottom half off because my pot wasn’t big enough to hold longer stems. Then cut the broccoli into 6 pieces lengthwise.
After the broccoli was cut I put it in a pot with just about 1 inch of water. The goal here is to steam the broccoli rather than boiling it. I set the pot aside until I was ready to cook it.
6:29 pm – Breading Pork Schnitzel
Finally, it was schnitzel time! To make the schnitzel I used what is known as the standard breading procedure. You start with flour (I used potato flour because it’s what I had on hand), then a beaten egg, then bread crumbs. The idea is that the flour sticks to the meat (or vegetables), the egg sticks to the flour, and the bread crumbs stick to the egg.
Really, all I did here was beat 1 egg, and season the potato flour with salt and pepper. I used “fast fry” pork loin chops so I wouldn’t have to pound them out with a meat mallet. I dipped them in the flour, then the egg, then the bread crumbs and set them aside.
6:35 pm – Cooking Pork
As I was finishing breading the pork I turned my pan on to medium-high heat. Once the pan was hot I add in 1 tbsp of butter, then the pork. I cooked the pork for 2-3 minutes per side then removed it from the pan. I wiped the pan out with a paper towel and put it back on the heat.
I also turned the broccoli on high at this point.
While the pork was cooking, I chopped up about 2 tbsp of parsley and set it aside.
6:41 pm – Sauce
At this point the broccoli had started boiling. I turned the heat off and left the lid on the pot.
I added 1 tsp of olive oil into the pan I cooked the pork in along with the mushrooms, shallots, garlic, and thyme.
While the sauce vegetables were cooking I drained my potatoes, heated up 1 tbsp of butter, 2 tbsp of cream, and mashed the potatoes into it. I put a lid on the potato pot and set it aside until I was ready to eat.
I cooked the mushrooms and onions for about 4 minutes then added in 2 tbsp brandy. This got cooked for 1 minute then in went the beef stock and a pinch of salt and pepper. I added the pork back into the pan and cooked it for 1 minute per side before adding in a 1/4 cup of cream. I cooked the sauce for 1-2 more minutes, seasoned with salt and pepper, added in the parsley and served.
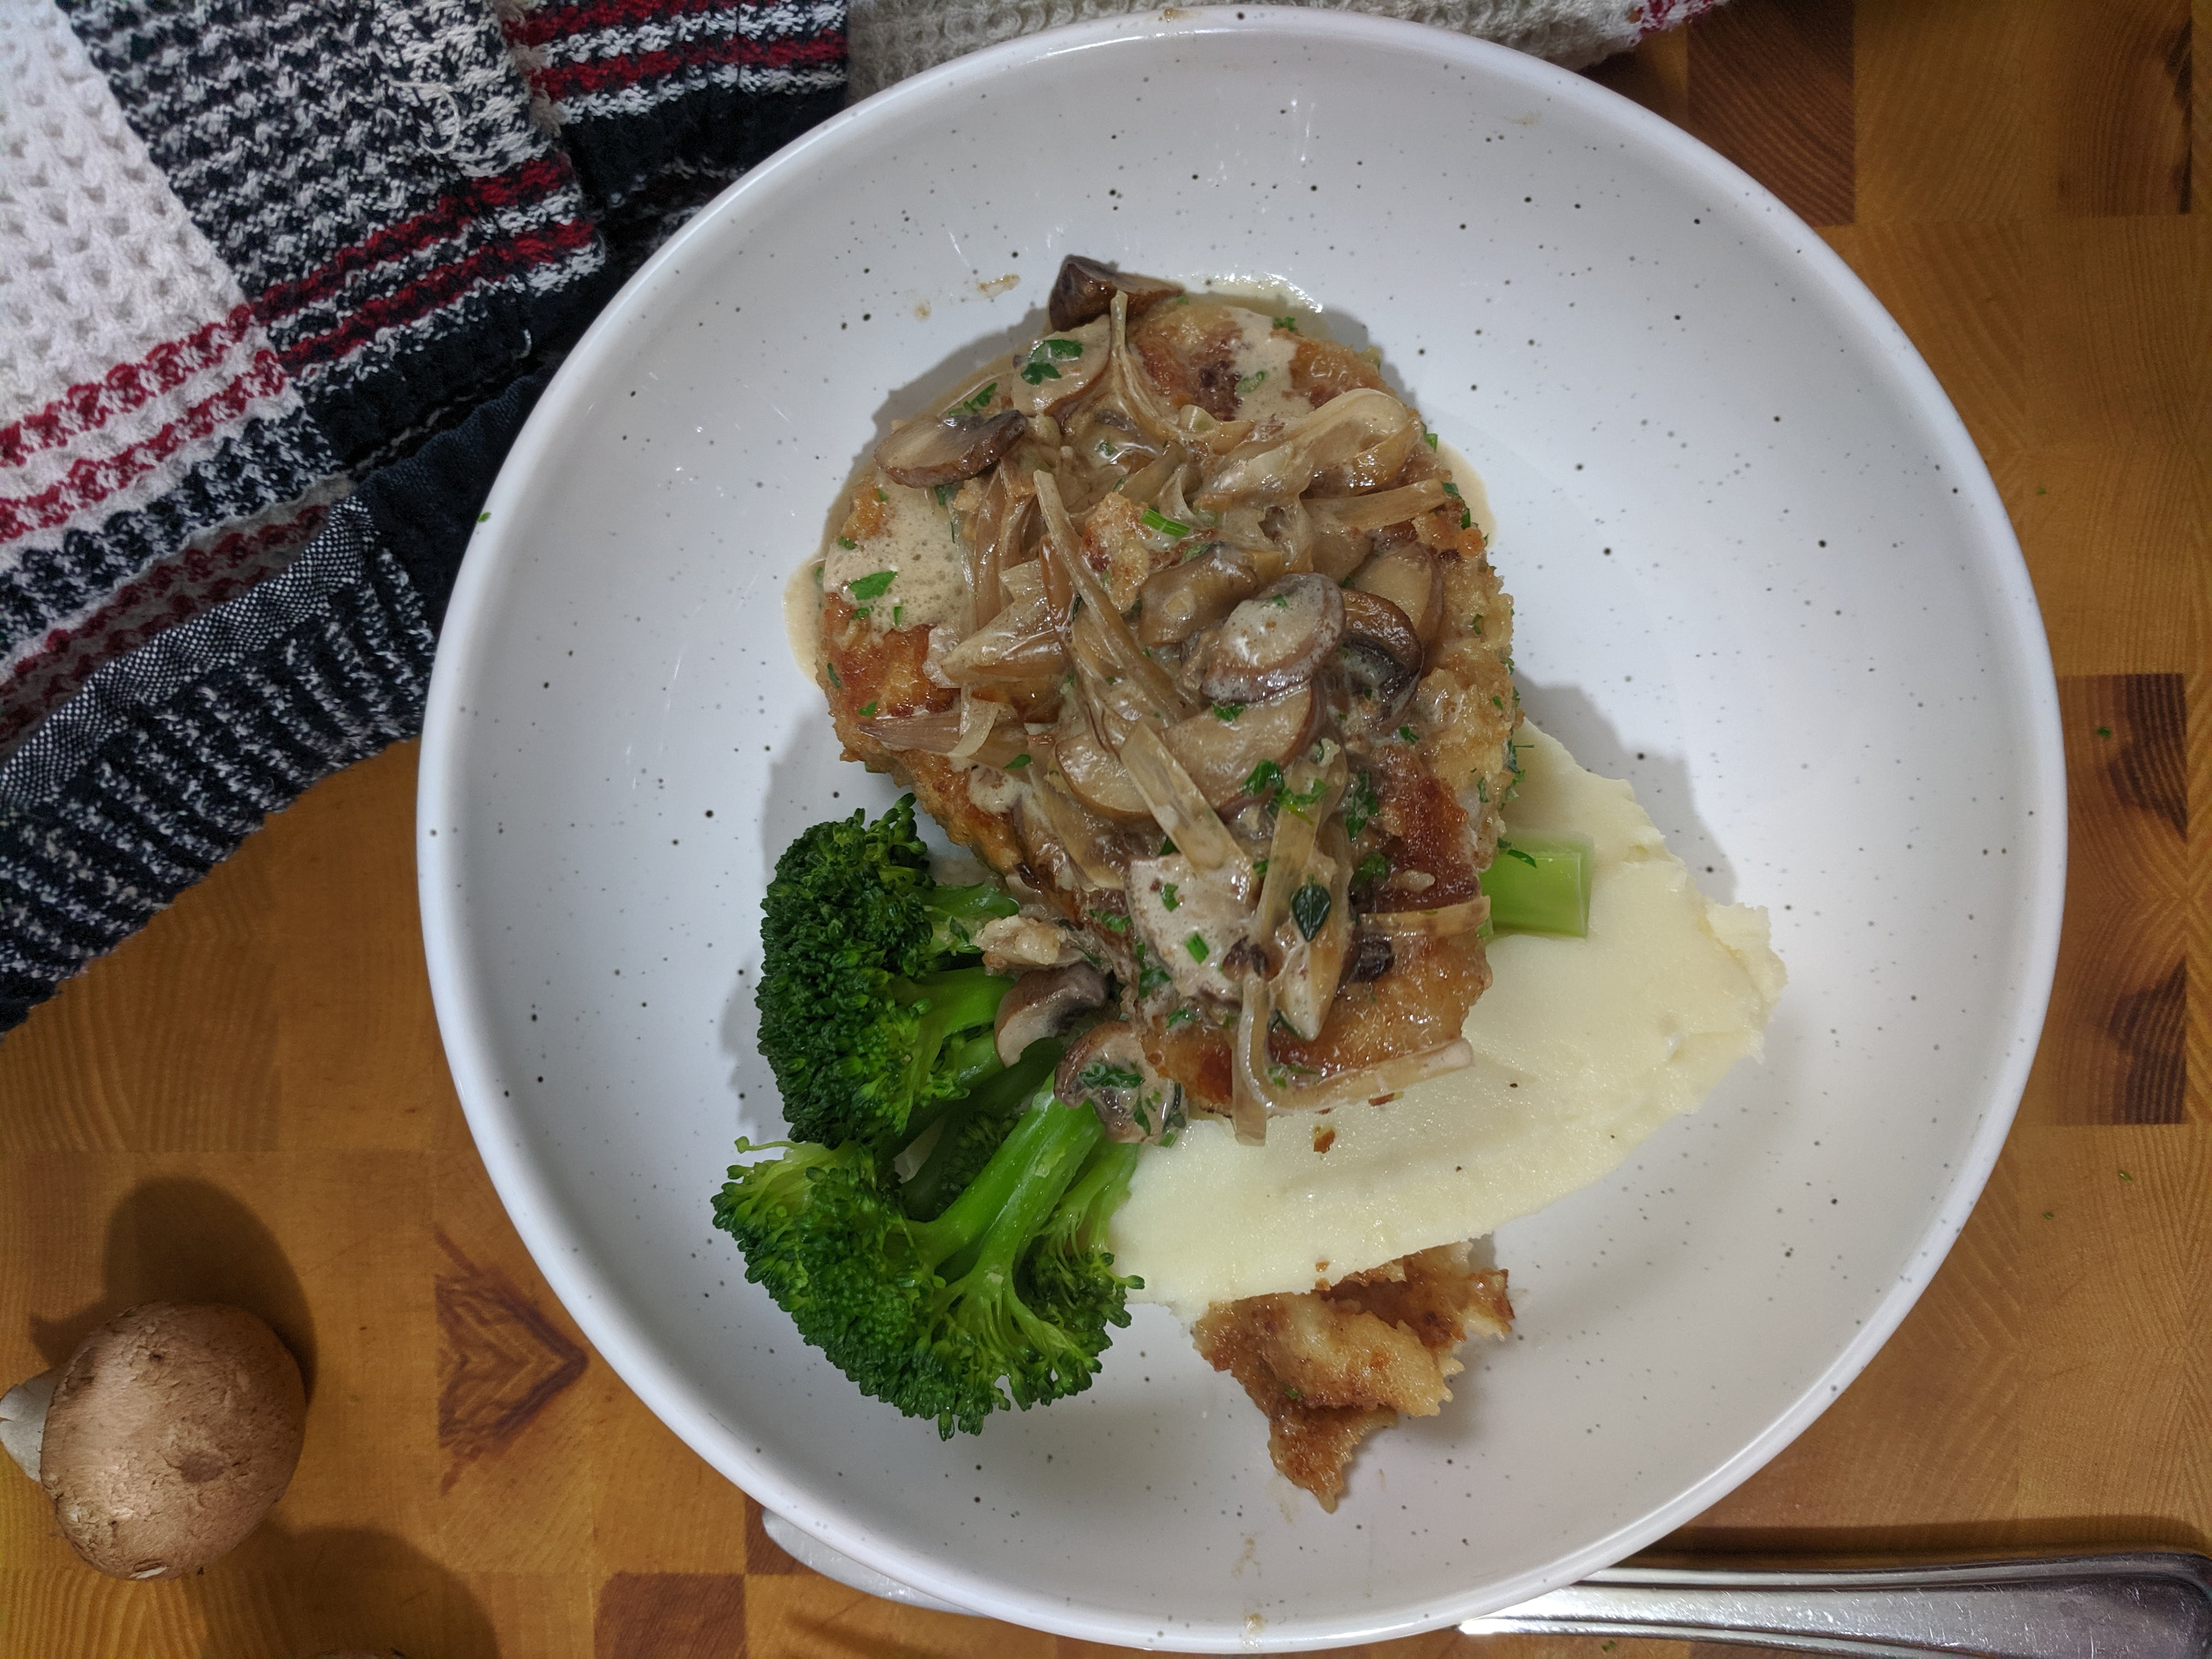
To plate the food I started with mashed potatoes, then the broccoli upon which I placed a pork chop and some of the sauce. Such a delicious meal!
Conclusion
This really is a great meal that you can make any day of the week. Also, that breaded pork is fantastic for pork parmesan, pork burgers, and lots of other things.
Cover the potatoes with hot salted water and put on high.
Cook the potatoes until tender, drain, warm 1 tbsp of butter with 1/4 cup cream then mash the potatoes and mix with the hot cream and butter.
While the potatoes are cooking slice the broccoli into spears.
Add 1 cup of water to the pot with the broccoli, bring to a boil and cook for 3 minutes with a lid on the pot.
Remove the broccoli from the heat and let sit with the lid on the pot.
While the broccoli and the potatoes are cooking season the flour with salt and pepper then dip the pork in the flour, egg then bread crumbs. Heat a frying pan over medium-high heat with 1 tbsp butter.
Cook the pork chops for 2-3 minutes per side.
Remove the pork from the pan, wipe out the paper towel, and in 1-2 tbsp of olive oil along with the mushrooms, shallots, thyme, and garlic. Cook for 4 minutes.
Add in the brandy and cook for 1 minute before adding in the beef stock and the pork,
Cook for 1-2 minutes per side then add in the cream, salt and pepper, and parsley.
Happy Monday everybody! Being that it is Monday, we all know that means it is 30 Minutes or Less Day. The day when I show you how to make a meal from start to finish in under 30 minutes. Today, will not disappoint. We are making 3 Cheese, Ham & Broccoli Penne and oh is it delicious! Now, don’t confuse this with the Chicken and Ham Penne we did a few months back. Though these dishes seem very similar, they are very different in flavour.
With that, let’s get cooking. This is…
3 Cheese Ham & Broccoli Penne – 30 Minutes Or Less
2:50 pm – Getting Started
I actually made this fairly early yesterday afternoon. It was a busy day, I had a lot going on, and I need to get dinner done fast. That always seems to be the way.
I started cooking at 2:50 pm and the first step was to turn the oven on to 425°F. Then I filled a medium pot with hot salted water and put it on high.
2:51 pm – Ham & Onions
With the oven and the pasta water heating up I moved on to prepping my ingredients. The first of the two ingredients I prepared were onions and ham. I diced 1 medium to large onion and about 1 cup of ham.
Once these were done, I set them aside and turned a medium-sized frying pan on to medium heat. I let the pan sit for a few minutes to heat up while I moved on to my next ingredient.
2:55 pm – Broccoli
At 2:55 pm I started cutting up a head of broccoli. First, I cut the stem off, then started cutting the florets into small pieces. When cutting up broccoli, or cauliflower, cut from the bottom up. Cut through the small stems, not through the florets. Cutting through the florets will just make a big mess.
Once all the florets were separated I cut the bottom inch off the broccoli stem, peeled away the outer bark, then diced the tender inner stem. I used the inner stem in the pasta, but it is also really great for broccoli soup, stir-fries, and salads.
2:58 pm – Get Cooking
It took me about 3 minutes to cut my broccoli up and this was the perfect amount of time to heat up the pan. So, I added about 1 tsp of olive oil to the pan along with the ham and onion. You may take a little longer to cut the broccoli. If that is the case, just add the ham and onion to the pan while you are still cutting.
2:59 pm – Garlic
With the ham and onion cooking away and the broccoli set aside it was time to cut some garlic. I used 3 cloves, though 2 of them were fairly small, so 2 medium to large garlic cloves would be fine.
I cut the ends off of the garlic, gently crushed them with the flat edge of my knife, removed the peel, and thinly sliced them.
3:01 pm – Ham, Broccoli, Pasta
At this point, the pasta water had started to boil. I poured the box of penne into the water and stirred it for a minute or so to make sure it didn’t all stick together.
After putting the pasta in the pot I added the broccoli and garlic into the pan with the ham and onion. I waited to do this until the onions started to soften.
3:02 pm – Cheese
The vegetables and ham were cooking away, the pasta was boiling, and that meant it was time to cut the cheese. (7 years old me laughs out loud)
I grated a 1/2 cup each of parmesan and Jarlsberg Cheddar Cheese. Jarlsberg Cheddar is a Norweigan Cheese with a similar flavour to Swiss Cheese. If you can’t find it, you can substitute it with Swiss, Emmenthal or aged or smoked cheddar.
3:05 pm – Thyme
With the cheese grated and set aside, and the vegetables mostly cooked, I added 1 big sprig of thyme into the pan. I tossed this around for 1 minute. This was just enough time to heat the thyme sprig and for it to become aromatic. That just means I could smell it.
3:06 pm – Cream
After the thyme had heated enough to start flavouring the sauce (about 1 minute after adding it into the pan) I add in 1 cup of whipping cream. Don’t skimp here. Use whipping cream. Any other dairy will split because of the lower fat content. Also, this dish already has about 1 cup of cheese in it, and we are going to be adding more. Low fat, went out the window a while ago. Just embrace it, you will be happy you did.
3:07 pm – Cheese
Once I added the cream into the pan, it was time to drain the pasta. I drained it, then put it in a large mixing bowl. When that was done I added the cheese to the sauce and cooked it just long enough to melt the cheese.
3:10 pm – Sauce, meet pasta.
When all the cheese was melted and mixed into the cream I added it to the pasta and seasoned well with salt and pepper. I mixed this altogether.
3:11 pm – Casserole
I poured the pasta and sauce into a casserole dish and covered it with about 1/2 a cup of grated mozzarella cheese.
3:12 pm – Into the oven
Finally, I put the pasta in the oven for 5-10 minutes. I actually did 7 minutes in the oven. All I really wanted was to melt the cheese on top. With that, dinner was ready.
3:19 pm – Done Like Dinner
With one minute to spare, the pasta was plated and ready to serve.
Conclusion
It seems like there really isn’t too much to this dish and that’s because there isn’t. It is a few ingredients, tossed with pasta, cheese, and cream. That’s it. What’s more than that, everyone is going to love it.
I suggest serving this with a salad to add some greens and a few more vegetables into the meal. It can be thrown together while the pasta is in the oven.
And that just about does it. Thank you as always for reading and remember to subscribe so you never miss a post and also share this with anyone who you think would like it. Have a great Monday everyone.
3 Cheese Ham and Broccoli Penne
A quick and delicious weeknight meal. 27 minutes from start to finish.
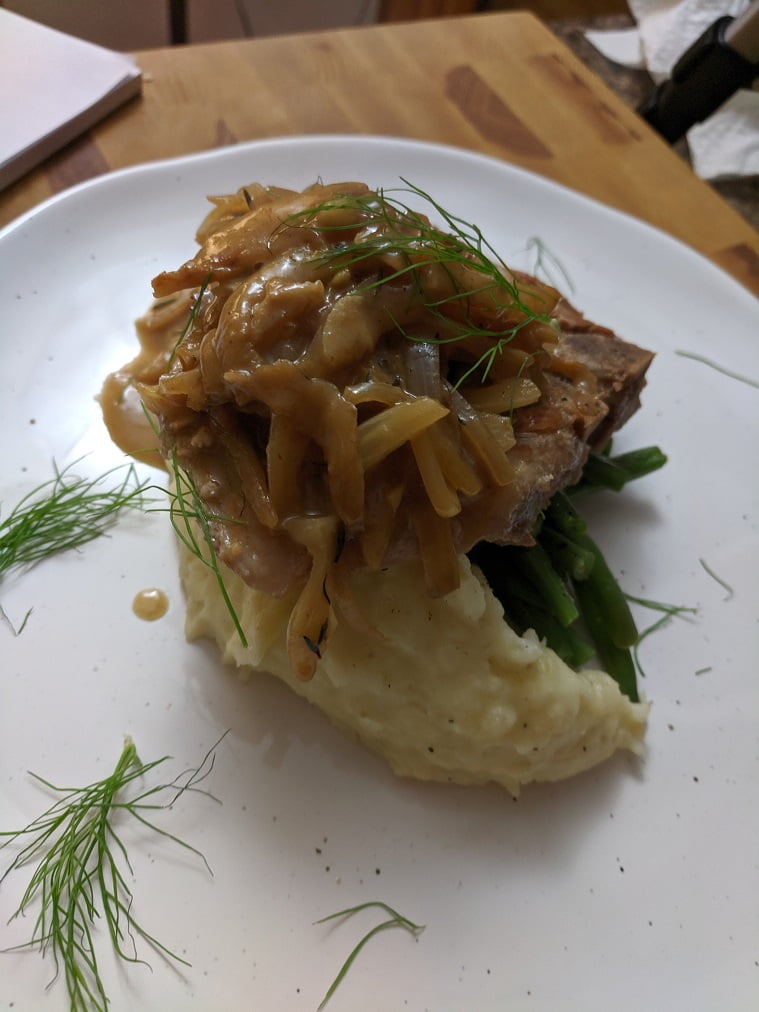
Happy Monday everybody! Today we are going to take a look at a really delicious recipe for pork chops. This recipe uses an ingredient some of you may not be familiar with, fennel. Fennel has a very mild anise or black licorice flavour but don’t let that throw you off. It can be eaten cooked as we’re doing today, but it is also fantastic cut very thin and served raw in salads.
This pork chop recipe uses fennel sautéd with onions, garlic, and thyme then finishes with white wine, dijon mustard, and lemon to make both the sauce and a vegetable component for the dish. I served the pork with mashed potatoes and steamed green beans. Oh yeah, and I’m going to show you how you can make all of this in under 30 minutes.
You know the drill, let’s get to it. This is…
Pork Chops With Fennel In 30 Minutes Or Less
8:35 pm – Potatoes
I started cooking really late last night, it was a busy day. So, I was thankful going into this that it was only going to take a maximum of 30 minutes. The first thing I had to do was get the potatoes going.
I peeled two russet potatoes and then diced them into roughly 1-inch cubes. Then I rinsed them in cold water until the water ran clear, changed the cold water out for hot water, added a big pinch of salt and put the pot on the stove on high.
8:38 pm – Onions and Fennel
With the potatoes on the stove it was time to start prepping the ingredients for the sauce. I cut the top and bottom off of a small onion, peeled it and thinly sliced it. Then I cut the fennel bulb into quarters, one quarter is all I need for this recipe. The rest of the fennel can be used in salads, or cut into thick slices, drizzled with olive oil and roasted on 400°f to make a nice side dish. I cut the core out of the fennel quarter and then thinly sliced it to match the onions.
At this point, I also peeled and sliced 2 cloves of garlic and got 2 sprigs of thyme ready for the pan.
8:42 pm – Dry The Pork Chops
With all the sauce ingredients ready to go it was pork time. I took two center-cut pork rib chops, patted them dry with a paper towel, and seasoned them on both sides with salt and pepper. While I was doing this I heated a large frying pan over medium-high heat.
8:45 pm – Sear the Pork Chops
It took about 3 minutes for the pan to heat up. Once it was hot I add about 1 tbsp of grapeseed oil to the pan along with the pork chops. I cooked the pork for about 3 minutes per side then removed them from the pan and turned the heat down to medium.
8:51 pm – Starting the Sauce
The pork was seared off, cooked about 50% through and out of the pan. Now it was time for the fennel and onions. These got cooked for 3 minutes before adding in the garlic and thyme which was then cooked for an additional 2 minutes.
8:55 pm – Adding in the Wine
At this point, the fennel and onions were starting to soften and the garlic was becoming very aromatic. With that, in goes the wine. When you add in the wine make sure to scrape any brown bits stuck to the bottom of the pan. This will help to flavour your sauce and make cleaning the pan much easier later on.
The wine cooked for about 1 minute then I added in a 1/2 cup of hot water along with the pork chops.
At this point, I also put the green beans in hot water and then on the stove on high. To prep them I just cut the ends off.
8:56 pm – Mashing the Potatoes
At this point, the potatoes were cooked. I drained them, added in some cream, butter, and salt and pepper then mashed them. That was it.
8:59 pm – Flip the Pork
Once the potatoes were mashed I flipped the pork, cooked for 2 more minutes to finish cooking them through then took them out of the pan.
9:01 pm – Pork Chops out of the pan
To finish the sauce I add in 1 big tablespoon of Dijon mustard and 1 big tablespoon of butter along with the juice from 1/2 a lemon. I whisked this and cooked it until it was thick.
9:02 pm – Green Beans
By 9:02 the green beans were done. All that was left was to let the sauce thicken up a bit more so I started plating. Potatoes first, then green beans, then pork.
9:03 – Finish Dinner
Once everything was on the plate the sauce was done so I spooned it over the pork. Delicious!!
Conclusion
This is a really fantastic recipe that I’ve actually been making for years. Obviously, this is only for 2 people because it was just my wife and me eating but the recipe could easily be bumped up to serve 4-6.
If you are looking for something new and delicious to do with pork chops, this is it.
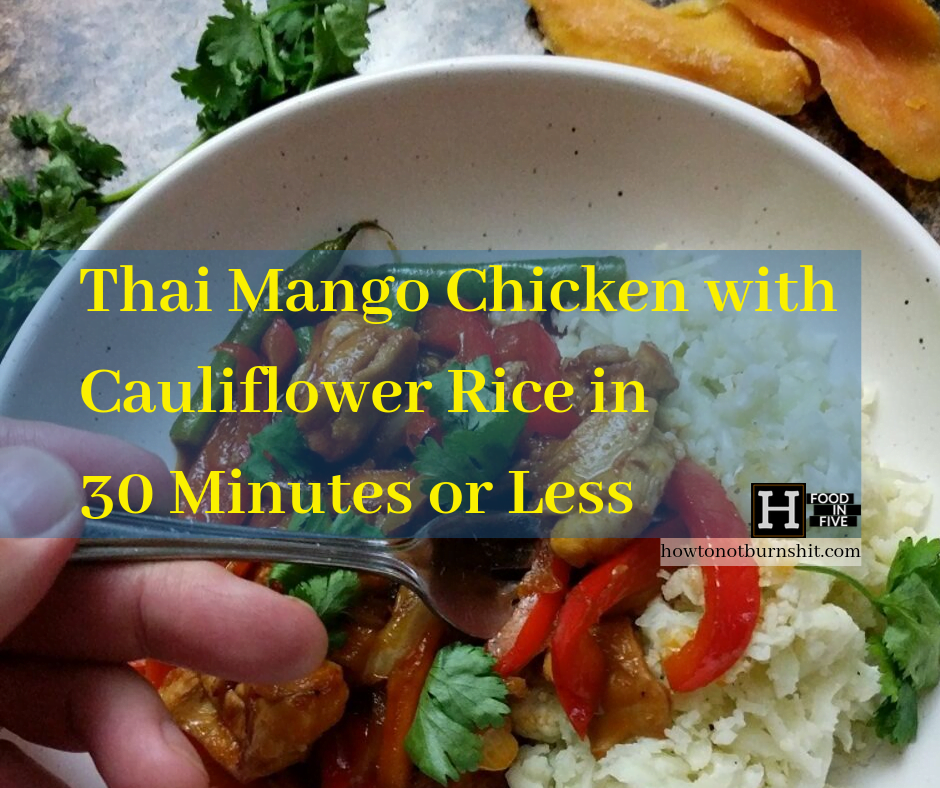
Today is Monday and that means it is 30 minutes or less day here at HTNBS. Due to hurricanes and holiday’s it’s been a few weeks since I’ve done a 30 minutes or less. But it’s back and I’ve picked a great dish to come back on. Today we will be making Thai Mango Chicken with Cauliflower Rice.
What is Thai Mango Chicken?
Thai Mango Chicken is a combination of tender pieces of chicken stir-fried with dried mango and vegetables. The stir-fry is then sauced with Thai Red Curry and coconut milk. Sounds good doesn’t it? Well, here is how to make it for yourself in under 30 minutes.
Let’s get to it…
Thai Mango Chicken In 30 Minutes Or Less
6:50 pm – Cauliflower Rice
What is cauliflower rice?
Cauliflower rice is grated and steamed cauliflower. It’s called “rice” due to the fact that when it is cooked, it looks like rice. This makes a great low-carb side dish which can be used, as we’re doing here, to substitute for rice.
Making cauliflower rice.
I started cooking dinner at 6:50 last night. The first thing that had to get going was the cauliflower. So, I cut the leaves and stem off the cauliflower so all that was left was the florets. Then I grated the whole head on the largest holes of a cheese grater. With all the cauliflower grated it was time to get it cooking.
I heated a stainless steel pan over medium-high heat then added about 2 tsp of olive oil. I sautéed the cauliflower for about 4 minutes. There are two important things here. Do not add salt and pepper yet. Salt will pull moisture out of the cauliflower which will mess up how the cauliflower is cooked. Secondly, sauté the cauliflower until it all starts to look wet. That seems like an odd description I know but you will understand once you see it.
Once the cauliflower appears to look wet take it off the heat, now season it with salt and pepper, put a lid on the pan, and let it sit untouched for at least 10 minutes. We aren’t going to see it again until the very end of the post.
That’s it. That is all it takes to make cauliflower rice. Some recipes will have you grating and salting the rice and squeezing water out of it and all this crazy stuff, but that is all just extra work. This method works perfectly.
6:57 pm – Start Prepping Vegetables
Okay, with the cauliflower out of the way which took about 7 minutes total it was time to get going on the Thai Mango Chicken. The first step in that process is to start prepping some vegetables.
First up is an onion. Cut off the ends, cut the onion in half, peel it, and slice it thinly. Then thinly slice 1 celery stalk. Next up cut the sides off of a red bell pepper, discard the seeds and stem, then thinly slice the pepper. Trim the ends off of about 10 green beans and cut them into thirds. Finally, take 2 strips of dried mango and slice them nice and thin.
That is it for vegetable prep. So, set this all aside and we will move on.
7:03 pm – Chicken
It took about 6 minutes in total to cut up all the vegetables, and with those out of the way it was now chicken time. I used six boneless, skinless chicken thighs cut into 1 inch cubes. They don’t have to be perfect.
Other Ingredients
With the chicken diced it was time to turn on a wok or large heavy bottomed skillet to medium-high to high heat depending on what you’re comfortable with.
The other ingredients we are using here are Thai Red Curry Paste, Coconut Milk, and a bit of brown sugar.
Some of you might be wondering why I am using store bought red curry paste. Or, you aren’t and it is my own insecurity that is insisting I comment on it. Either way… The reason I am using prepared red curry paste is because to make it from scratch requires a bunch of specialized ingredients which can get expensive, and it would take longer than 30 minutes. That’s all.
I also wanted to say that there are many other brands of Thai Red Curry Paste out there. I use this one for three main reasons. It is gluten-free. It doesn’t have shellfish in it, most have dried shrimp or shrimp paste, and it is what my local grocery store carries. Oh, and a fourth reason, it tastes good.
7:07 pm Stir-fry
Okay, it took a few minutes for the wok to heat up but it’s ready and it’s time to get cooking.
I added about 1 tbsp of oil to the wok. I used canola, you can use grapeseed or peanut, really anything with a high smoke point. I added the chicken in and left it alone for a minute or two before giving it a stir. Once the chicken was browned I add in the vegetables.
7:10 pm Onions & Celery
First up for vegetables are the onions and celery. Stir-fry all this together for about 2 minutes.
7:12 pm Vegetables
Once the onions have softened a little the peppers, green beans and mango can go into the pan. Stir-fry this all together for another 2 minutes.
7:14 – Curry Paste
Next up we have 2 big tbsp of the Thai Red Curry Paste, and 2 tsp of brown sugar. Stir-fry this for 2 minutes.
7:16 pm – Coconut Milk
Finally, at 7:16 the coconut milk goes in along with a pinch of salt. The grocery stores I go to have small 160 ml cans of coconut milk which are awesome. If you can only find large cans just use half.
Anyway, pour the coconut milk into the wok, stir it in, turn the heat down to medium and simmer it for 2 minutes.
7:18 pm – Fluff Cauliflower
While the coconut milk is simmering, remove the lid from the cauliflower, give it a little fluff with a fork, and season it with a bit more salt and pepper.
That’s it, now it’s time to plate.
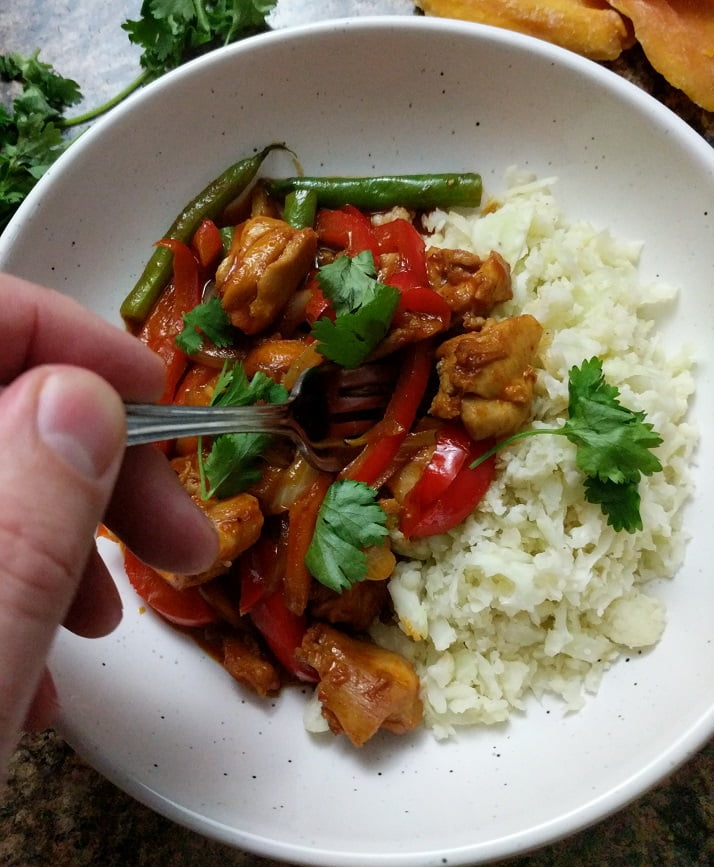
7:19 – Thai Mango Chicken Done!
Plate a little cauliflower off center of the plate, add some of the Thai Mango Chicken, and garnish with fresh cilantro. Just like that, with 1 minute to spare, we have Thai Mango Chicken with Cauliflower Rice in 30 Minutes or Less!
Thai Mango Chicken
A quick Thai Mango Chicken using Red Curry Paste and dried mango.
In all honesty, I struggled to decide what I wanted to make for this 30 minutes or less post. I ran through a lot of options, but none jumped out at me. Then, all of a sudden, like a tonne of bricks it hit me, steak tacos! Of course!
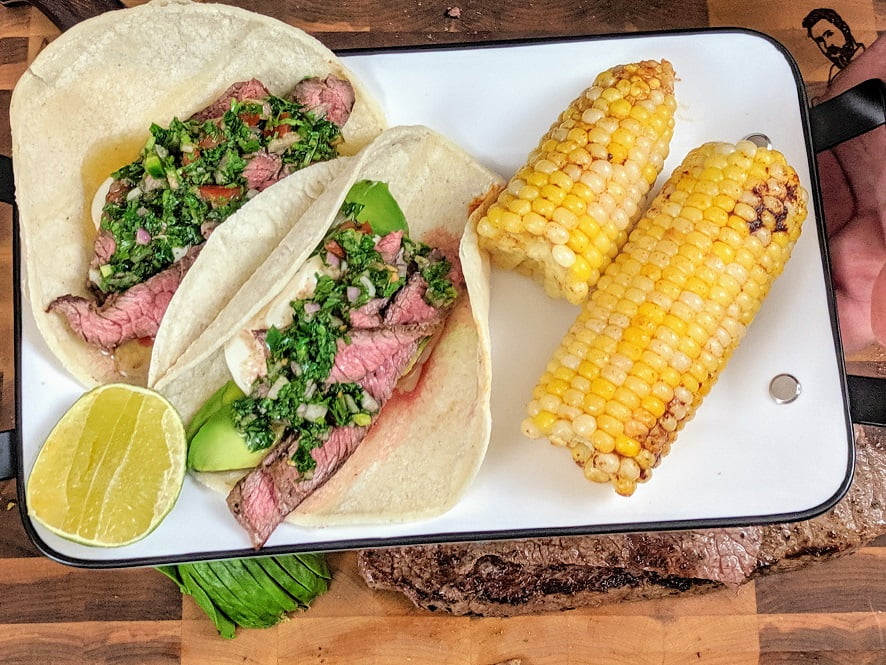
These aren’t your everyday steak tacos either ladies and gentlemen. These are composed of a seared cap of sirloin steak sliced thin, with avocado, sour cream, and chimichurri sauce. Served with ancho and lime corn on the cob. I can’t wait to share these with you. So, let’s get to it.
This is how to make…
Steak Tacos in 30 Minutes or Less
7:45 pm – Turn it on
Because it took me so long to decided what I wanted to cook for this post I ended up starting fairly late, but that’s okay. I don’t mind eating late.
At 7:45 I got started by filling up a pot with hot water for my corn. I put 1 tbsp of sugar in the water, put the pot on high and covered it with a lid. I also turned the oven on to 350°F.
This obviously didn’t take much time so within the same minute I started husking my corn. I only used two ears of corn because it was just my wife and me eating, you may want more. If you do use more corn, your husking time will be longer but your cooking time should be the same.
After the corn was husked I broke it in half with my hands like the beast that I am and set it aside. I didn’t put it directly in the water for two reasons. First of all, it only takes about 10 minutes to cook and we still have about 28 minutes before everything else is ready, and because it is better to let the water come to a boil before adding the corn.
Oh, and for anyone wondering, I added sugar to the corn water rather than salt for two reasons. Salt will actually toughen the corn, and sugar enhances the natural sweetness of the corn. Never use salted water to cook corn. Use salt once it is cooked, but never to cook it.
7:48 pm – Chimichurri
At 7:48 with the corn out of the way it was time to get rolling on the chimichurri. Now, if you don’t know what chimichurri is you can check out a whole post I wrote about it a few weeks ago right here.
For the chimichurri, we are making today we start with about 1 cup loosely packed parsley, and 1 cup loosely packed cilantro, all chopped together nice and fine.
Don’t get too fancy here with pulling all the leaves off of the stems. Just grab a handful of the herb, break it off the bunch and chop it up. The stems will chop up just as fine as the leaves do.
With the herbs finely chopped it is time to get down to business with a jalapeno. I used 1 small jalapeno for this, seeds and all. Remember that not all jalapenos are created equal. Cut into your jalapeno, and give it a sniff. If it stings the nostrils and has a slightly metallic smell you may want to remove some or all of the seeds because that is going to be a hot jalapeno.
After the jalapeno, I minced 1 shallot and a couple of cherry tomatoes.
All that was left for the chimichurri was to add in some olive oil, vinegar, salt and pepper, and a touch of cumin. I mixed it all together, gave it a taste, adjusted the seasoning as need, and set it aside. Just like that, chimichurri done.
8:03 pm – Corn In The Pot
All told it took me about 6 minutes to put the chimichurri together. By now, my corn water was boiling, so I put the corn in to cook. I also turned a large skillet onto medium-high heat for my steak.
With the corn in the pot and the pan on for the steak, it was also time to wrap up my tortillas and put them in the oven. Now, I want to talk about the tortillas for a second. Generally, I like to make my own tortillas but I didn’t think I would have enough time to make them along with everything else in the 30-minute window. So instead of making them, I bought them from the superstore. They weren’t very good. So, if you are going to buy soft corn tortillas from the grocery store, buy the ones from Sobeys. They are much better. Otherwise, use whatever tortillas you prefer.
I took the tortillas out of their package, wrapped them in foil and put them in the now hot 350°F oven.
8:05 pm – Steak
The next step in this taco adventure was to season the steak. I did this simply with salt, pepper, and a lite sprinkle of cumin. That’s it. Then I put it in the pan. I didn’t add any oil to the pan because I was using cast iron, but you may want to add 1 -2 tsp of oil to your pan.
8:07 pm – Slice Avocado
Okay, the steak is in the pan, everything is working or done, it’s time to get to work on an avocado. Avocado can be very dangerous. People have a tendency to hold the fruit while cutting into it and removing the pit. This is dumb! So many things can go wrong (check out this article from CBS) and so many people end up hurting themselves.
Leave the avocado on the cutting board. Carefully cut around it. Twist to open. The half of the avocado that still has the pit in it gets placed back on the cutting board. Place the butt of your knife blade against the pit and give it a little pump of pressure with your hand on the top of your knife. Hold the avocado in place and twist the pit out. Use a towel to remove the pit from the knife blade. Peel the avocado, and then slice.
8:10 pm – Steak
The avocado is safely out of the way. Now, it is time to flip the steak. I think this is pretty self-explanatory. This is also a good time to cut up a lime.
8:12 pm – Corn
By 8:12 the corn was done. I drained it, then added 2 tbsp of butter to the pot along with the juice of 1 lime and 1 tsp ancho chili powder. I tossed this all together and just like that the corn was done.
The steak was done cooking at this point as well. So, once I was done with the corn I removed the steak from the pan.
8:13 pm – Tacos
At 8:13 I removed the tortillas from the oven and started to assemble my tacos. First went the avocado, then a bit of sour cream. At this point, I sliced the steak nice and thin across the grain, put that on the tortillas. I finished the tacos with the chimichurri and the ancho and lime corn on the side.
Conclusion
These tacos were really delicious but I would change two things. First of all, as I said, I didn’t really love these tortillas. So, I would have gotten a different brand or just made them myself. Second of all, I should have started cooking the steak a little earlier so that it had more time to rest. But, those are easy fixes and other than those two small things, these tacos were great.
Try them for yourself!
Steak Tacos with Chimichurri in 30 minutes
A quick recipe for steak tacos with chimichurri and ancho and lime corn on the cob.
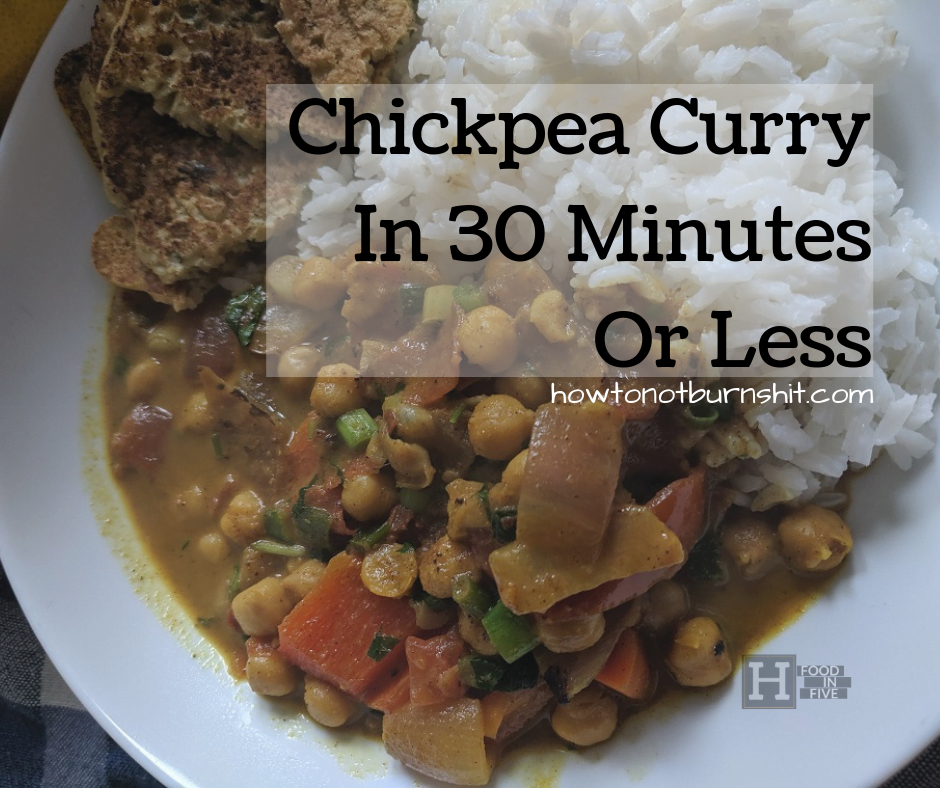
Chickpea Curry is a classic vegetarian dish that can be made in about a thousand different ways. It can be served as either a main course or as a side dish with other curries. And, it is really, really tasty.
This version is made very quickly from scratch and still manages to have an intensely rich flavour. This is a fairly mild curry as far as my tastes go but, some may find it spicy. You know yourself better than I do so put only as much chili in as you are comfortable. If you like it really spicy, put in more.
I suggest that if you are going to be serving this curry as a main dish that you serve it with naan bread or roti. We do make rice to have with it within the 30-minute window, but it is always nice to have a bit of bread with curry.
Let’s get to it. This is how to make
Chickpea Curry In 30 Minutes or Less
5:57 pm – Rice
Okay, I started at kind of a weird time but it doesn’t matter. The first thing I had to do was get the water on for the rice. I measured out 2 cups of hot tap water, poured it into a medium-sized pot and turned it on high. I added a pinch of salt to the water and then measured out 1 cup of rice and set it aside.
Even though most rice is cooked in a similar way there are often small differences that can have a big effect. Always read and follow the instructions for your specific brand of rice as they may be different than mine.
5:58 pm – Onion
With the water on for the rice, it was time to get down to business with an onion. I actually had half a red onion in the fridge leftover from something else so I decided to use that to make the curry. You can just as easily use white onion.
For the onion, I diced it into fairly large pieces. Then, I peeled and chopped three cloves of garlic and set this all aside.
6:00 – Pepper
Because we are cooking this kind of like a stir-fry it was really important that all the ingredients were prepped and ready to go before we started cooking.
With the onion and garlic prepped and set aside it was time to cut a red bell pepper and a carrot.
For the red pepper, I simply cut the sides off using my knife to follow the curves of the pepper to minimize cutting loss. I then diced the pepper pieces.
The carrot I washed, left the peel on and diced.
Also, just as I started cutting the carrot the water for the rice started to boil. I put the rice in the water, gave it a quick stir, covered the pot and turned the heat down to low. I set a fifteen-minute timer and went back to my vegetables.
6:03 pm – Tomato
The final vegetable I had to cut was one big tomato which I diced. Right before I started cutting the tomato I turned on my wok over medium-high heat. This way it would be nice and hot once I was done cutting the tomato and I could go right into cooking.
To dice the tomato I first cut it in half. Then, I made three horizontal slices, then three vertical slices. Finally, I cut across the slices I had made giving me evenly diced pieces of tomato.
6:05 pm – Wok with Ben
At this point, the wok was nice and hot. I add about 2 tbsp of canola oil to it along with the onions and garlic. In all honesty, I didn’t mean to add the garlic in at the same time as the onions but they had gotten all pushed together on my cutting board. I actually recommend that you cook the onions for a minute or two prior to adding the garlic in. My garlic didn’t burn but it was pretty close.
6:07 pm – Carrots in
I cooked the onion and garlic for about two minutes then added in my carrot. I would have preferred to cook the onions a bit longer but, like I said my garlic almost burnt.
6:08 pm – Spices
When making a curry it is important to cook the spices for a minute or two in oil. This “opens” the spices and draws out their essential oils. This frying of the spices completely changes their flavour. This is partly what gives Indian food such depth of flavour. However, it is important that care is taken when frying the spices as they burn and turn bitter very quickly. One to two minutes is all that is needed.
I used 2 tbsp yellow curry powder, 1 tsp coriander, 1 tsp cumin, 1-2 tsp chili flakes, a pinch of salt, and a few turns of pepper.
6:10 pm – Tomatoes
With the spices now toasted, it was time to add in the tomatoes. Adding in a wet ingredient like tomatoes will stop the toasting/frying process of the spices. This is crucial in preventing them from burning.
I cooked the tomato for about two minutes which helped to pull a little bit of natural sweetness out of it.
I also added in the bell pepper along with 2 tsp of grated ginger. I generally keep my ginger in the freezer and then just grate it on a microplane when I want it. So, I grated 2 tsp of frozen ginger right in on top of the tomatoes. Because the ginger is grated so fine it only takes a second to cook.
6:12 pm – Chickpeas
With all the vegetables and spices cooking away in the wok, it was time to add in the chickpeas which I opened and drained quickly then poured into the wok. I cooked the chickpeas for one minute before adding in 1 can or coconut milk.
I brought this to a boil and then reduced the heat to medium to let the curry simmer.
6:17 pm – Rice
At 6:17 the timer went off for the rice. I removed it from the burner, leaving the cover on the pot, and let the rice rest for another five minutes. This timing worked out perfectly with the curry.
While I was waiting for the curry and rice to finished I chopped up four green onions and 2-3 tbsp of cilantro to use to finish my curry. I set these aside until the very last minute.
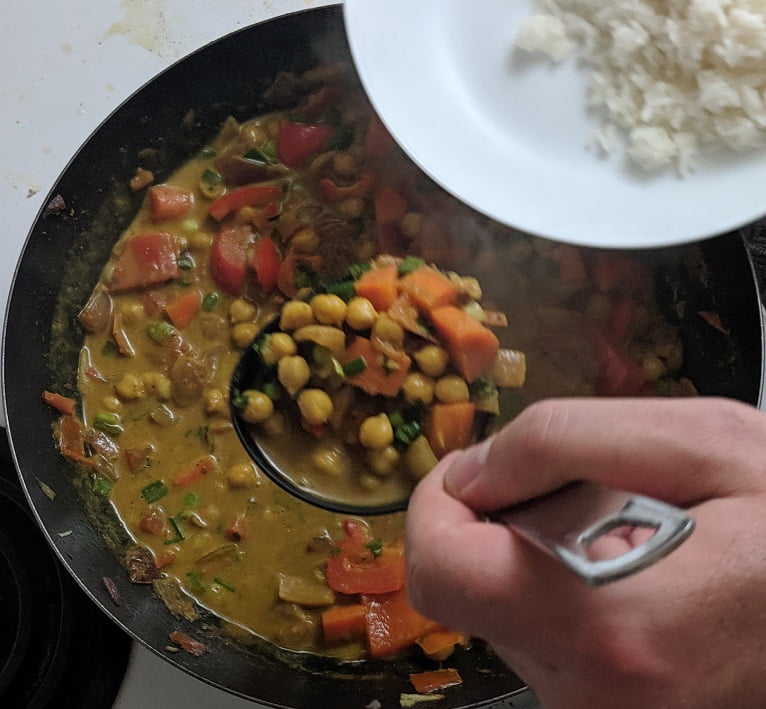
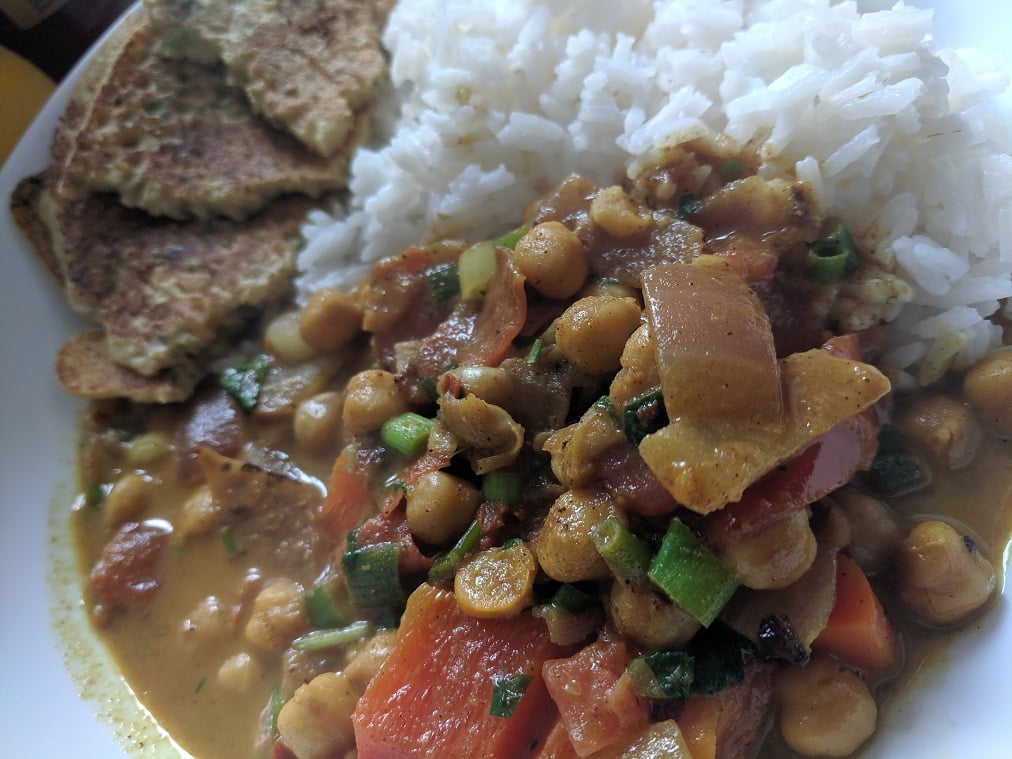
6:22 pm – Finishing Touches
At 6:22 the rice had rested and the curry was pretty much done. I fluffed the rice with a fork and put some in a bowl. I added the cilantro and green onion to the curry tasted it and noticed that the flavours were just a little flat. To fix this I added a few squeezes of lemon juice along with a pinch of salt. That was all it took. I plated a scoop of curry next to the rice and finished it with a piece of homemade chickpea roti. Dinner was ready!
Chickpea Curry Conclusion
It goes without saying that this curry is quick to make. I mean, that’s the whole point of these posts. But, I can’t stress how delicious and filling this is. And, it makes amazing leftovers.
There are all kinds of other vegetables you could add to this like spinach and sweet potato for example. You could add more protein by adding black beans, tofu, chicken, or even fish. Or, as I said, in the beginning, you could serve this as I side dish with a few other curries.
With a dish this good and quick to make you just can’t lose.
Thank you as always for reading. If you enjoyed this post please share it with your friends. And, remember to subscribe to the blog so you never miss a post.
Chickpea Curry
A quick and delicious recipe for a filling chickpea curry
We use cookies on our website to give you the most relevant experience by remembering your preferences and repeat visits. By clicking “Accept”, you consent to the use of ALL the cookies.
This website uses cookies to improve your experience while you navigate through the website. Out of these, the cookies that are categorized as necessary are stored on your browser as they are essential for the working of basic functionalities of the website. We also use third-party cookies that help us analyze and understand how you use this website. These cookies will be stored in your browser only with your consent. You also have the option to opt-out of these cookies. But opting out of some of these cookies may affect your browsing experience.
Necessary cookies are absolutely essential for the website to function properly. This category only includes cookies that ensures basic functionalities and security features of the website. These cookies do not store any personal information.
Any cookies that may not be particularly necessary for the website to function and is used specifically to collect user personal data via analytics, ads, other embedded contents are termed as non-necessary cookies. It is mandatory to procure user consent prior to running these cookies on your website.