Pasta Carbonara sometimes gets a bad rap. Often in restaurants what is sold as carbonara is actually nothing like the real thing. It is all too common to see a big bowl of pasta tossed in a heavy cream sauce with a bit of bacon and maybe some peas and have it labeled as pasta carbonara. I’m here to tell you that that ain’t it. Today, we are going to talk about the real thing.
Prepare to have your mind blown because this is…
Everything I Know About Pasta Carbonara
What is pasta carbonara?
Pasta carbonara is a simple pasta dish originating in Rome. A true carbonara should have five, maybe six ingredients maximum. One of those being pasta. It absolutely does not contain cream of any kind.
If carbonara doesn’t have cream in it, what makes the sauce so creamy?
Great question!
The creaminess of the sauce comes from the combination of two ingredients; egg and cheese.
How to make carbonara
I’ve been trying to kind of beat around the bush here and build up suspense but it’s almost impossible to talk about carbonara without completely giving up what it is. So, let’s cut preamble and get to it.
Carbonara consists of guanciale(we’ll get to that in a second), pasta, parmesan or pecorino cheese, eggs, and pepper. Sometimes parsley will be added. That’s it.
What is guanciale?
Guanciale (guan-chal-a) is cured and dried pig cheek or jowl. It is very similar in taste and texture to good bacon with the exception that there is no smoky flavour. If you can’t find or don’t want to use guanciale, pancetta, or bacon can be used as a substitute.
What type of pasta should you use?
The pasta used for carbonara is most commonly spaghetti or a slightly thinner spaghettini.
How is it made?
Okay, here comes the fun part!
When I say that carbonara is a simple pasta dish, I really mean that. In fact, most classic Italian pasta dishes only contain a handful of ingredients and take a few minutes to make. They are often light as opposed to their North American counterparts.
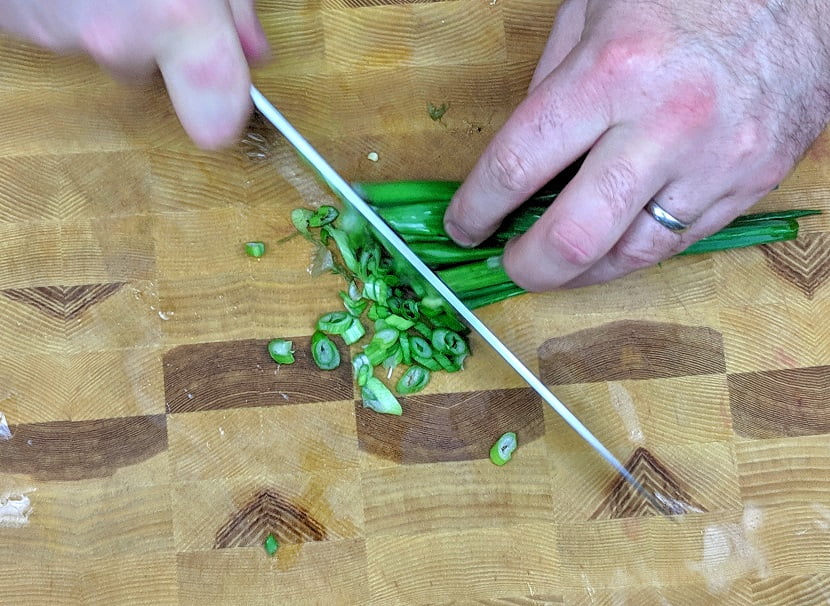
To make carbonara get a pot of water boiling for the pasta. Dice up the guanciale or bacon into pieces (about 1/2 a cup total) about the size of the fingernail or your little finger. Put the bacon in a pan with a teaspoon or two of olive oil and turn on to medium-low heat. Cook the bacon until it has crisped up a little.
While the bacon is cooking put a handful of dried spaghetti in the pot of boiling water, you want enough pasta for two people.
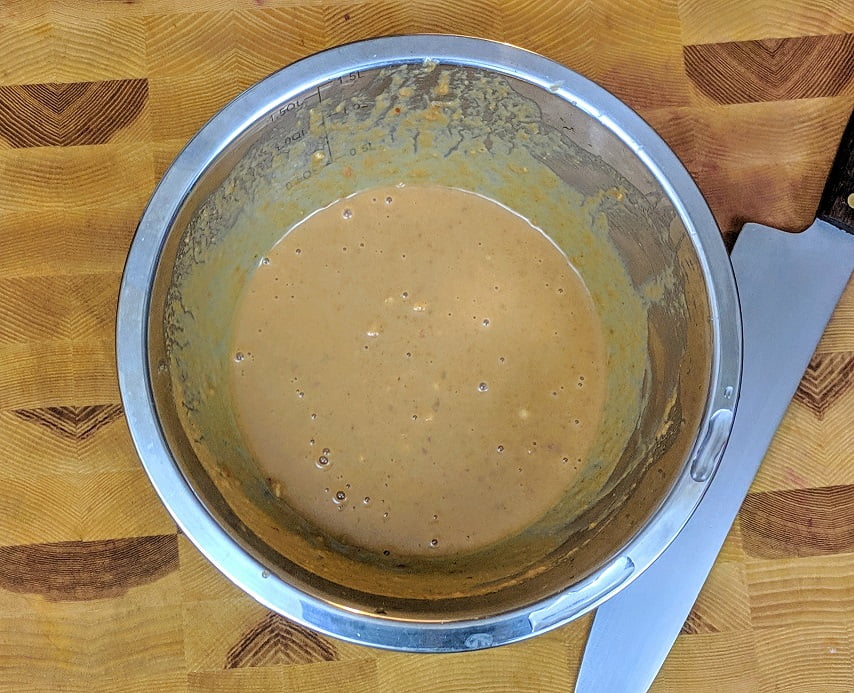
Now, in a mixing bowl combine two eggs, plus one extra yolk along with half a cup of grated parmesan cheese. It is really important to use real parmesan for this, not the pre-grated stuff out of the bottle. Mix the cheese and egg yolks really well and season with fresh cracked pepper.
Keep the bacon in the hot pan but drain off half of the oil. Add the cooked pasta to the bacon pan and toss to mix and coat the pasta with the remaining oil. Add the hot pasta and bacon mixture to the egg and cheese mixture and stir with tongs.
If you’ve been paying attention you will realize that the eggs aren’t cooked. Good eye! But, that’s not really true. The heat from the bacon and the pasta, as long as your timing is right, will be enough to cook the egg and melt the cheese. This will make the sauce and give the pasta that creamy consistency.
Serve the pasta garnished with a little more grated cheese and maybe a touch of parsley.
That’s it. That is how you make a true pasta carbonara.
Conclusion
The simplicity of carbonara is part of its magic. This dish can be made in as long as it takes to boil some pasta and cook some bacon and with ingredients you probably already have.
It is fantastic for a quick dinner, along with a salad. Or, for a light lunch. And, that’s actually something to think about as well, this dish, pasta carbonara is not heavy. It is actually very light. You don’t feel gross after eating it, unlike the version that is made of pure cream.
If you’ve never had anything like this before I beg you to try it. Because once you see how amazing this is, you may start to understand the real reason why pasta is so popular in Italy. It isn’t because it’s heavy, or because it has twenty ingredients. Pasta is popular in Italy because it is a terrific vessel for almost anything, no matter how simple it may seem.
Thanks for reading everyone and remember to subscribe so you never miss a post.
Just as a quick note, Monday is Canada day and I will be taking the day off. This means that there will not be a 30 minutes or less post this week. I will be back in full force the week after. Enjoy your long weekend!
The other day I challenged myself to make pho in under 30 minutes. Generally, the broth alone takes at least a few hours so this was no small feat. What I came up with is a close approximation to pho, but I wouldn’t call it pho exactly. For that reason, and in the interest of avoiding a torrent of hellfire from a pho loving internet is why I am calling this a pho style soup. Like pho, but not quite pho. One may say it is a pho-ny.
Pho is a noodle soup from Vietnam which came out of the 1920s and became common around the country in the mid-1950s. Traditionally, it is composed of rice noodles, flavourful stock, herbs, meat, and vegetables. It is most often served as street food in Vietnam.
My version has all the traditional markings of pho, but again it isn’t exactly pho. Mine ended up with a little less liquid than it normally would have but that is easily fixed. So, if you are craving a bowl of pho, but you don’t know where to go, here is how you can make…
Pho Style Soup In 30 Minutes Or Less
To speed up the process I used Campbell’s Beef Stock rather than homemade. This cut my time down by hours. I know that some of you are thinking, “Oh. My. God! How could you do that, Ben?” Well, it was simple, I bought it at the store, and put it in my soup and it worked really well. Get over it! Just joking guys. But really, I have no problem buying stock when you don’t have time to make it, or in the case of chicken stock when you just can’t keep up with production. I use way more than I can make.
Anyway, I started cooking at 5:50 pm and the first thing I had to do was start building up flavours to bolster the store-bought stock.
Here we go!
5:50 pm – Turn up the heat
The absolute first thing I did was put a large pot on the stove and turn it on over medium heat. I also filled a medium pot with hot water and put that on the stove on high. The big pot is for the soup. The medium pot of water is for the noodles.
Getting the pots on only took about a minute. Once that was done, I jumped right into prep, starting with an onion.
I first cut the ends off, cut it in half, peeled it, and then thinly sliced it. I add one tablespoon each of sesame oil and canola oil to the large pot and put the onions in to begin to cook.
I’m pretty quick with an onion so at this point only two minutes had gone by. This may take you a little longer, but as you will see later, there is time to spare.
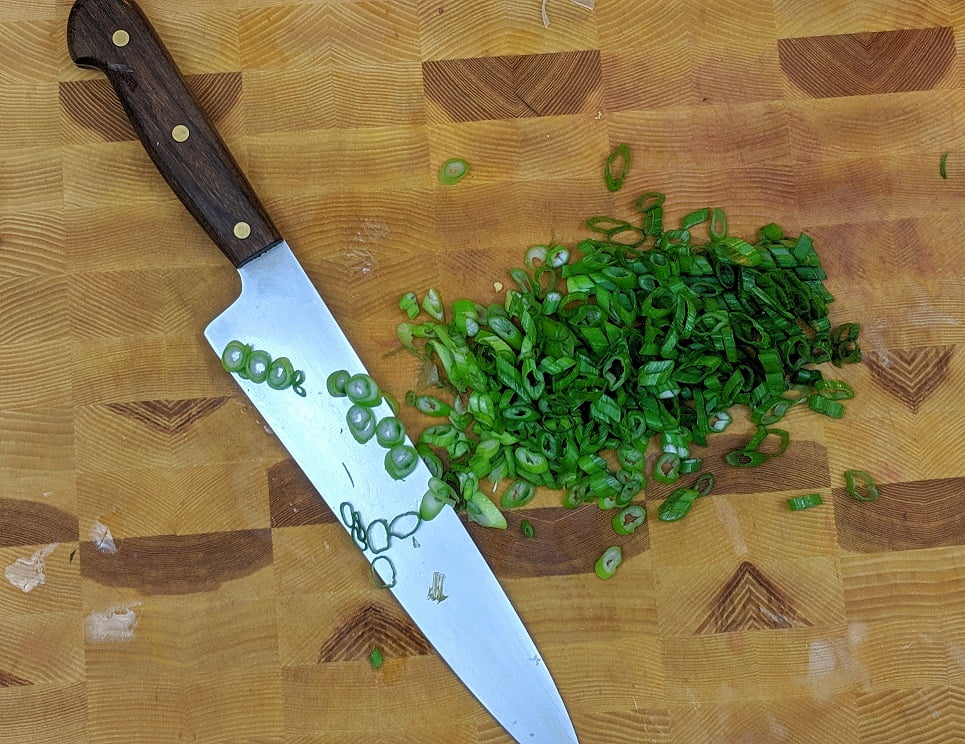
5:52 pm – Green onions
With the white onions cooking away in the pot I got down to business with some green onions. When cooking with green onions I usually separate them in two. The softer green tops are saved until later in the cooking process or for garnish as they take next to no time to cook. The firmer bottom white parts, are roughly diced and added to the white onions in the pot.
5:54 pm – Garlic
Stirred the onions a bit to make sure nothing was burning and then I got down with some garlic. I took three cloves, cut the ends off, crushed them to release the peels, and then thinly sliced them. And of course, I added the garlic to the pot as well.
5:55 pm – Celery
Next up was some celery. I took one celery stalk and sliced it nice and thin on a bias. That’s just a fancy chef word for cutting things on an angle. Into the pot, it went.
I stirred everything a bit more, and reduced the heat on the pot slightly as well.
5:56 pm – Mushrooms
After the celery, I quartered four cremini mushrooms. These help to add body to the flavour of the soup which is especially important when using store-bought stock.
5:58 pm – Ginger
Normally if I had fresh ginger I would have cut it up and added it with the garlic. Because I freeze and grate my ginger, I added it now, right before the stock. I did this because it is grated so fine that it would otherwise burn very quickly. If you are using fresh chopped ginger, add it earlier.
I grated the ginger into the pot, stirred it around for a few seconds, and then added the stock in and turned the heat up to high. I also added in one cinnamon stick and one mangled piece of star anise. That was the best piece I had. These won’t be in the soup long but will add a lot of flavour, and will make the plain beef stock taste a lot more like pho broth.
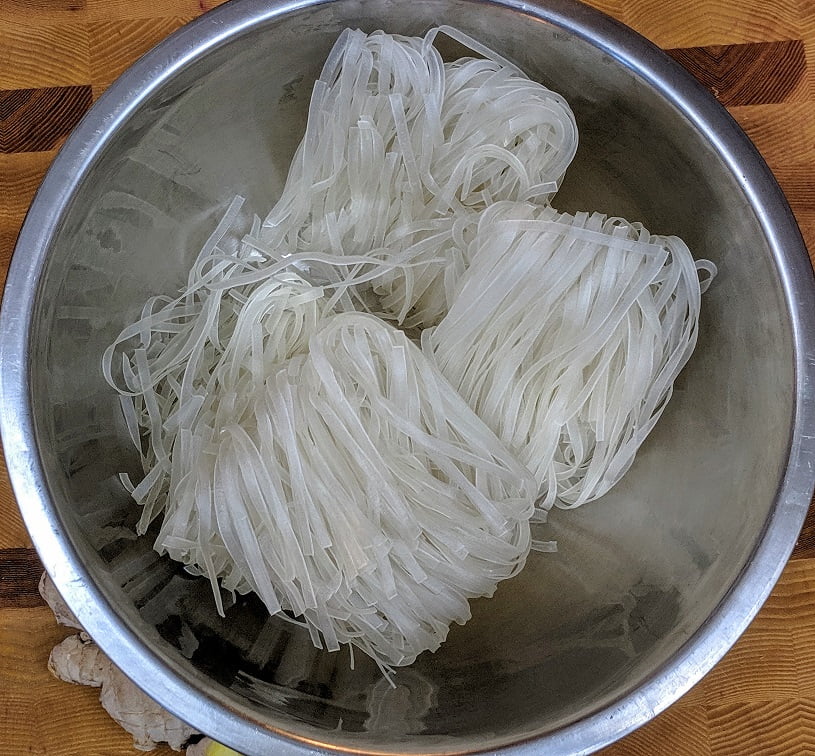
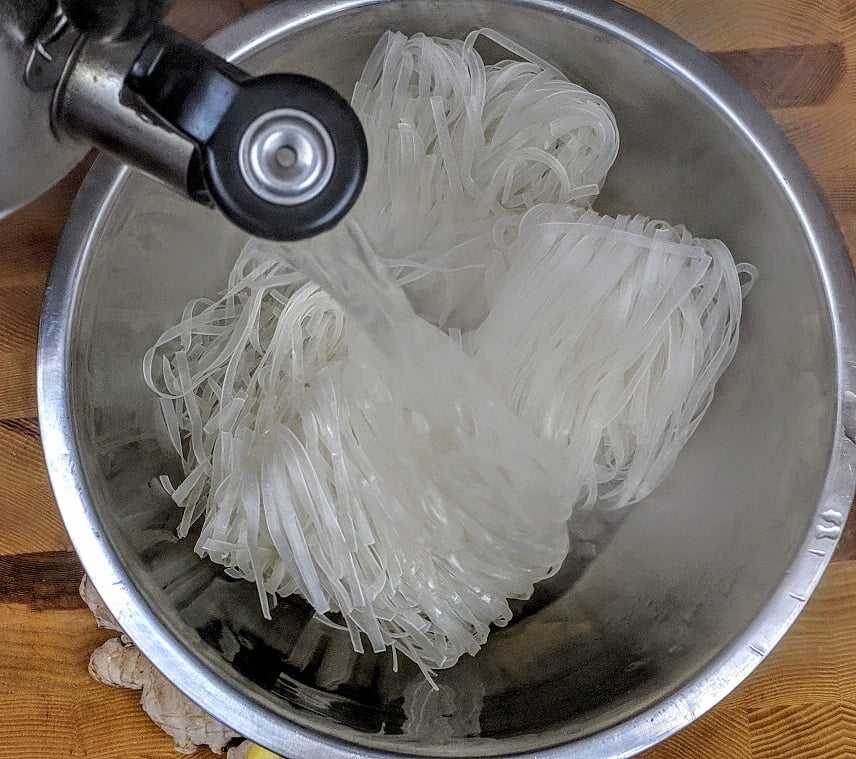
At this point my water was boiling for the noodles. I turned off the heat and put the rice noodles in the pot and stirred. The noodles only take about two minutes to soften. Once they were soft, I drained them and rinsed them under cold water and set them aside.
6:03 pm – Flavourings
Once the noodles were out of the way I added two tablespoons of soy sauce (gluten-free), one tablespoon of Sambal chili sauce, three to four drops of fish sauce, and one teaspoon of rice vinegar, along with salt and pepper to the soup pot. I tasted it and adjusted the seasoning.
6:05 pm – Bok Choy
With the flavour of the soup where I wanted it, it was time to get the rest of the ingredients together. I took two heads of baby bok choy, pulled them apart and washed them. I then thinly sliced them and add them to the soup pot. Then I thinly sliced the green onion tops and into the pot, they went as well.
At this point, I also fished around for the cinnamon and star anise and took those out of the pot as they had added enough flavour. And, I turned the pot down to a simmer.
6:09 pm – Slice Beef
The beef I used for this soup is a special cut of sirloin called fondu beef. I bought it from my butcher but you can obviously just slice it yourself if you want. This fondu beef is sliced very thin so you can cook it quickly in fondu. Traditionally, the beef in a bowl of pho would be added in raw, then the hot broth would be poured over it to cook it rare. That is essentially what I tried to emulate here.
The beef was in large slices so I cut them into strips and then added them into the barley simmering soup.
6:11 pm – Noodles
With the beef in, all that was left to finish my soup was noodles and bean sprouts. I added these in, and the soup was done.
I served it up with a squeeze of lime and fresh cilantro and finished with nine minutes to spare. Not too shabby?
Conclusion
Who says you can’t make pho quickly? This was absolutely delicious! I’m not going to say that it was the best pho I ever had or even made, it wasn’t. But, it was better than 75-80% of the pho I have bought and eaten in my life.
If you make this, you will be happy that you did.
Pho Style Soup
This pho style soup is delicious and takes only about 20 minutes to put together. What could be better than that?
I don’t eat enough fish. It’s not intentional, and it’s not that I don’t like fish. It just isn’t something I often think about. Also, I am wary of buying fish in the supermarket because of a few bad experiences. But, yesterday I decided to go for a drive to the fish market and I bought some fresh cod.
In all honesty, I wasn’t sure what I was going to do with it until I got home. What I decided to do was cook the cod in a bit of white wine with shallots, garlic, heirloom tomatoes, and herbs. This dish came together perfectly. The fish was tender and flaky and had loads of flavour.
I served the cod with boiled new potatoes tossed with parsley, butter, salt, and pepper. These potatoes are a simple and delicious side dish that I have really fallen in love with over the last year or so. They can be served with almost anything and they look just as good as they taste.
All right, let’s look at how I made…
Cod with White Wine and Parsleyed Potatoes In 30 Minutes or Less
2:25 pm – Potatoes
I made this meal as a late Sunday lunch. So, I started cooking much earlier than I usually do.
The first thing I had to do was get the potatoes going as they take the longest to cook. At 2:25 I started by putting eight small new potatoes in a pot with hot tap water, to which I added salt. I put the pot over high heat with a lid and brought it to a boil. Once the pot started to boil I removed the lid.
I cooked the potatoes until they were fork tender. This took about 25 minutes start to finish.
2:26 pm – Shallots
While the potatoes were cooking, I took care of everything else. First, the vegetables.
The first vegetable I cut was the shallots.
Just like when slicing an onion, I cut the top and bottom off, peeled it, and then thinly sliced it with the grain. That’s it.
What is a shallot?
A shallot is kind of like a small onion. It is a member of the onion family but is more closely related to garlic and leeks than white or red onions. Having said that, it tastes more like an onion than garlic. It just has a milder flavour. It does grow in clusters like garlic. Generally, within the shallot bulb, there will be two to three shallot cloves. For more information take a look at this Wikipedia article.
2:29 pm – Garlic
Once the shallots were cut I got down to business on the garlic. I crushed and peeled two cloves and then thinly sliced them.
2:30 pm – Tomatoes
With the shallots and garlic out of the way I went to work on the tomato.
I had thought about using cherry or grape tomatoes in this dish which would have been delicious. But, when I saw these heirloom tomatoes I knew that these were what I wanted.
I only ended up using half of one of the tomatoes, which I diced, but the rest will not go to waste.
What is an heirloom tomato?
An heirloom tomato is an old variety of tomato. These are not touched by modern-day breeding and selection methods. Where modern tomatoes are mostly bred for shelf life, travel stability, and disease resistance, heirlooms are bred for flavour and appearance.
First up was some basil. I took four or five large leaves, rolled them into the cigar shape and sliced them very thinly into what is known as a chiffonade.
It is important not to chop the basil too vigorously as they will bruise and become bitter. Slice, with a sharp knife, only as much is as necessary.
2:34 pm – Spinach
At this point I took a big hand full of spinach, picked the stems off, and cut it into large chunks.
2:36 pm – Parsley
The only other thing to do other than the actual cooking was to cut up some parsley. To do this I rolled the parsley into a tight ball and ran my knife over it once. That was all.
Right before I started chopping the parsley I turned my skillet on to medium high heat.
2:39 pm – Olive Oil in pan
With all the slicing and dicing done it was time to move over to the stove.
Because my pan was heating while I was chopping the parsley it was ready to go. I added a good amount of olive oil, the shallots, and the garlic. I let this cook until the shallots and garlic started to soften. This took about three minutes.
2:42 pm – Tomatoes
With the shallots and garlic softened I added the tomatoes into the pan along with three sprigs of thyme. I cooked the tomatoes out for about two minutes.
2:44 pm – The Cod
With the tomatoes cooked it was time for the fish to go into the pan. I put the cod in the pan presentation side down first. The goal isn’t to sear or get colour on the fish as there will be way too much moisture in the pan already. The goal is just to cook it.
2:46 pm – Wine
After two minutes of the fish being in the pan, I added about one cup of white wine. As soon as the wine started to boil I flipped the fish.
2:47 pm – Smaller Pieces
Not all of the pieces of cod were the same size. At this point, the smaller pieces were cooked so I started taking them out of the pan. Within about two minutes all the fish was cooked and out on a warmed platter.
I warmed up the platter by running it under very hot tap water and then quickly drying it off. Putting the fish on a warm platter helps it to keep its temperature while I was finishing the sauce.
2:49 pm – Fish out spinach in
With the cod out of the pan, I added the spinach, basil, and two tablespoons of butter to the sauce and turned off the heat. I mixed the butter into the sauce which helped to thicken it. Then, I tasted and adjusted the seasoning with salt and pepper.
2:51 pm – Potatoes
The sauce was almost done, the fish was done, now it was time to finish the potatoes. At this point, they had just finished cooking. I drained them, added a pinch of salt and pepper along with a tablespoon of butter and half the parsley I cut up. Potatoes finished and added to the platter with the fish.
2:53 pm – Finish
I finished the sauce with the remaining parsley and then poured it over the fish.
Done and done.
2:54 pm – Plate
I plated myself up a serving and lunch was set with one minute to spare.
Conclusion
This meal was delicious! It was a beautiful lunch but would make an equally beautiful dinner. I can easily see this dish being on the menu at a trendy bistro for $24, but as you’ve just seen you can make it at home in less than 30 minutes.
Last night I made one of my wife’s go-to meals; Chicken and Quinoa Greek Salad. This is something that she will often make at the beginning of the week and then use it as lunch for three or four days. When using it for lunches it is best to either leave the dressing off until you are ready to eat it, or leave the lettuce out until you are ready to eat it. Either way, it will still be delicious.
At first glance, this may not seem like a very substantial meal, but I could barley finish the bowl that I had. The chicken and the quinoa make this salad really filling.
One other great thing about this salad is considering how many meals you can get out of it, it is pretty inexpensive. The total cost for all the ingredients was around $30. But, I still had loads of tomatoes, mini cucumbers, feta, lettuce, and yogurt left to use in other things. Also, this salad will stretch four people at least two days possibly longer. So really, that’s a minimum of eight meals for $30 or, $3.75 a meal. That’s pretty good.
All right, enough chit chat. This is how to make…
Chicken and Quinoa Greek Salad in 30 Minutes or Less
6:36 – Quinoa
I meant to start cooking at 6:35 but there were technical issues that set me back slightly. So, I started at 6:36.
The first thing I did was get the quinoa on. I measured 1 cup of quinoa and 2 cups of water into a medium-sized pot and put it on the stove on high.
I brought the quinoa to a boil, put the lid on, reduced the heat to low, and let it simmer for 15 minutes. Then I took it off the heat and let it sit for 5 minutes before fluffing it. Of course, while the quinoa was cooking I was busy doing other things.
6:37 – Cut and wash the lettuce
After I got the quinoa on I cut and wash the lettuce. Pretty straight forward. If you want a more detailed description of how to properly cut the lettuce check out last weeks 30 minutes or less here.
6:39 – Chicken
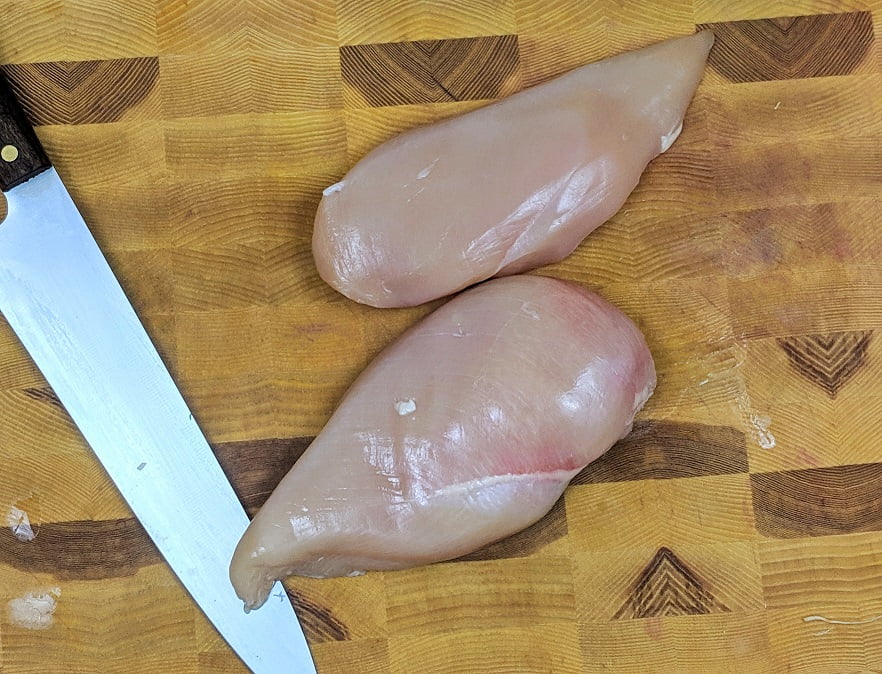
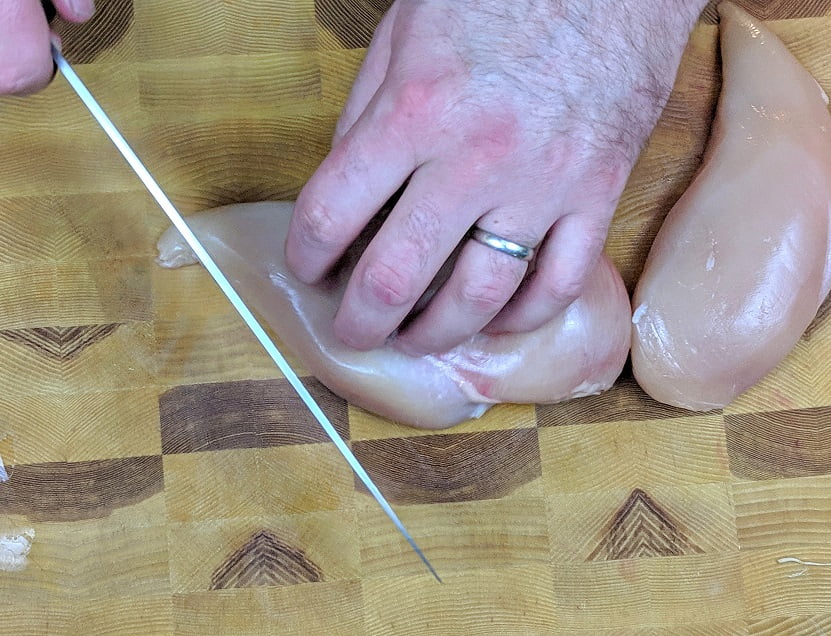
With the lettuce cut and set aside and the quinoa simmering away I got to work on the chicken. I first put a large cast-ironskillet on the stove over medium heat. Then, I cut the two chicken breasts in half horizontally. I laid the breasts on my cutting board, drizzled them with Picholine Olive oil, dried oregano, and salt and pepper. I rubbed the seasoning into the breasts and then placed them in the hot cast-iron skillet. I didn’t need to add any oil to the skillet because of the oil I had rubbed into the chicken breasts.
6:48 – Flipping the chicken
Full disclosure I messed up a bit here. It took me a good three or four minutes of rummaging through my spice cupboard to find the oregano and my pepper. So, this took a little longer than they should have. However, I did still finish within 30 minutes. But, this should not take you 10 minutes.
The chicken was in the pan for about 4 minutes before I flipped it. Then I put a lid on the pan and cooked it until it was done flipping it once or twice more.
I also washed the chicken off my knife and cutting board before jumping into cutting the vegetables.
6:49 – Cut Veg
I occasionally do some contract work with Super Store which is a grocery store chain here. Mostly I do cooking classes but I also sometimes do culinary demos and sampling. Yesterday I was doing sampling of mini cucumbers and feta. Standing there all day handing out samples of these things gave me a really bad craving which is what led to this dinner. That is why I am using baby cucumbers. Feel free to use regular ones.
At 6:49 I got down to business cutting up all the vegetables. I started by dicing the mini cucumbers. Then I quartered some grape and cherry tomatoes. Finally, I sliced up a green pepper and a quarter of a large red onion. I put all of the vegetables in a bowl.
6:54 – Greek Dressing
Cutting the vegetables took about 5 minutes with stopping to take the pictures. If it takes you a bit longer it isn’t the end of the world. Remember that I blew a bunch of time looking for spices.
I made the dressing right in the bowl with the vegetables. I could give you some fancy made-up reason as to why I did this but I honestly don’t know why I did. I was watching my self do it and thought “Um, why am I doing this.” I didn’t have an answer and I had already gone too far. You can make the dressing in the bowl with the vegetables as I did or, you can make the dressing like a normal person in a separate bowl.
Either way, the ingredients in the dressing were 1/4 cup Picholine Olive Oil, 1 tbsp oregano, 1 tbsp red wine vinegar, the juice of 1 lemon, 2 cloves of minced garlic, 1/4 cup pulled curly parsley, 1 tsp dried dill, salt, and pepper.
I mixed up all the dressing ingredients tasted it and adjusted it as needed. At this point the quinoa was done and had rested and the chicken was done.
I added about half the quinoa into the salad saving the rest for another use. I also added about 1/4 cup crumbled feta and mixed everything together. This cooled the quinoa down a bit which meant it was time to mix in the lettuce.
This all took about 6 minutes.
7:00 –
All that was left was to plate the salad.
I put the quinoa Greek Salad mixture into a bowl, sliced one of the half chicken breasts and put that over the salad. I finished it with a little more feta and a little yogurt. Done and done and well within the 30 minute mark.
Conclusion –
This salad is seriously delicious and seriously filling. You could serve this with some warm naan bread or pita which would make it even more filling. This is a nice dish for hot weather as the only two things that need to cook is cooked on the stovetop. This way your house doesn’t get too hot.
I highly suggest that you try this salad. I’m pretty confident that you will love it and it may get you thinking about ways that you can bulk salads up a little more to turn them into meals rather than side dishes.
As always thanks for reading the blog and remember to subscribe so you never miss a post. Also, if you have any salad tips that you would like to share, post them in the comments section below.
Chicken Quinoa Greek Salad
A delicious and filling salad. The perfect meal for a hot summer day.
1/2cup Good Quality Olive Oilhalf for dressing half for the chicken
2 tbspDried oreganohalf for dressing half for the chicken
1tbspRed Wine vinegar
2clovesMinced Garlic
1lemonJuiced
1/4cupChopped Parsley
1tspDried Dill
Salt & Pepper
2tbspPlain Greek Yogurt
Instructions
Quinoa
Combine the quinoa with two cups of water and a pinch of salt in a medium pot and bring to a boil over high heat.
Once the pot begins to boil, cover it with a tight fitting lid and reduce the heat to low.
Let the quinoa simmer for 15 minutes.
Remove from the heat and let rest, covered for an additional 5 minutes.
Fluff with a fork and serve.
Chicken
Cut the two chicken breasts in half horizontally.
Lay flat on the cutting board and drizzle with olive oil, salt, pepper, and dried oregano on both sides.
Heat a large skillet on medium heat.
Sear the chicken on one side. Flip the chicken and cover. Reduce the heat slightly and cooked covered, flipping once or twice until the chicken is cooked through.
Let the chicken rest, then slice and serve.
Salad
Cut, wash, and spin dry the lettuce.
Combine all the vegetables in a large mixing bowl, except the lettuce.
Add the olive oil, red wine vinegar, lemon juice, oregano, dill, garlic, parsley, and salt and pepper into the bowl. Taste and adjust seasoning as needed.
Mix the warm quinoa into the vegetables along with 1/4 cup of crumbled feta cheese. Mix well.
Add the lettuce and mix.
Serve the salad in a large bowl, top with sliced chicken, the remaining feta, and a spoon full of yogurt.
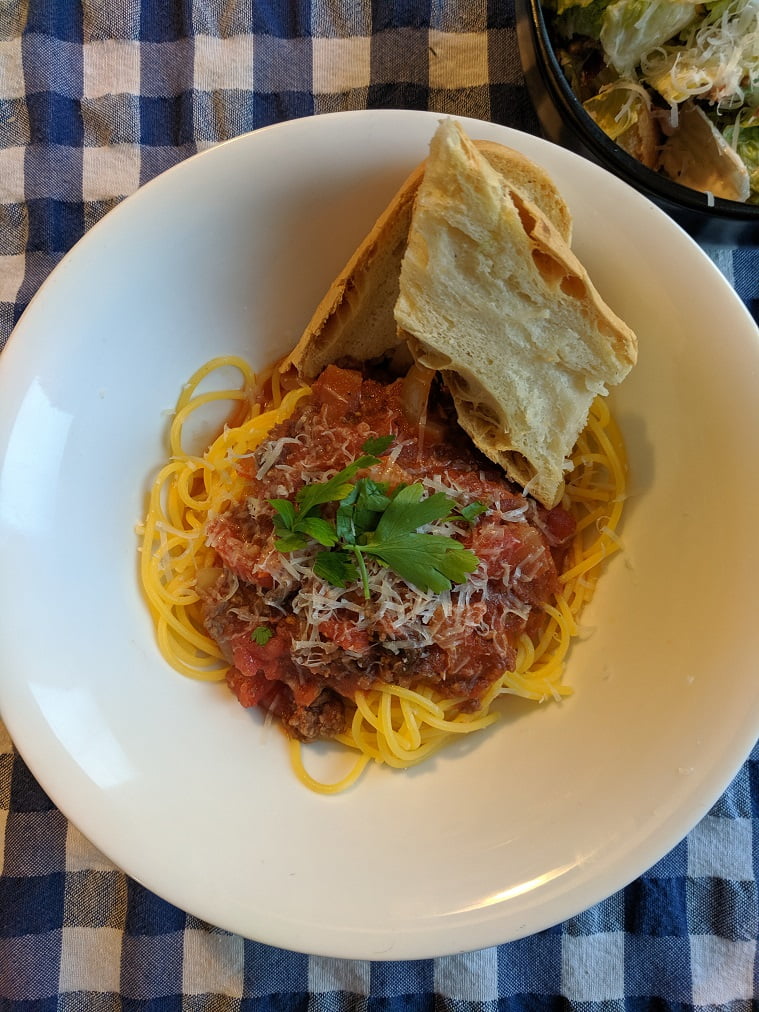
Last night I made spaghetti and meat sauce with garlic bread and Caesar salad. I did it in under 30 minutes however, it was very difficult. And, in all honesty, it wasn’t the best pasta sauce I have ever made (as my wife was quick to point out). It was good, but it could have been better.
For the tomato portion of the sauce, I used one can of crushed tomatoes and one can of diced tomatoes. The diced tomatoes were pretty watery. Because of the limited time, I wasn’t able to cook off enough of the tomato liquid. I would suggest using two cans of crushed tomatoes rather than diced ones.
Putting the garlic bread together was pretty easy and took very little time. The Caesar salad, on the other hand, did kind of get in the way. Within the half-hour cook time, I not only made the sauce from scratch, cooked the pasta, made garlic butter and garlic bread, but I also made everything for the salad from scratch. It’s not impossible, obviously, but again, it was difficult. I would suggest having the salad mostly ready to go. You can do this the day before, just don’t dress it.
Finally, while the bacon and the beef were cooking I stirred them every chance I got. It was too frequent and probably unnecessary to give exact times.
Okay, with all that in mind, let’s take a look at how I made…
Spaghetti & Meat Sauce in 30 Minutes or Less
7:10 pm – Getting Started
The first thing I did was get the heat on for everything. I turned on the pot for the sauce, the pan for the bacon bits, the oven for the garlic bread 425°F, and I filled a large pot with hot water, turned it on high and put a lid on it for the pasta.
This all sounds like a lot but it only took about one minute.
7:11 pm – Nice to meat you!
With all the heat on it was time to get cooking. I diced about a 1/2 lb of bacon and put it in a slightly warm cast iron pan on medium low heat.
Once the bacon was in the pan I added about 1 tbsp of canola oil to my saucepot and added 1 lb of medium ground beef.
This all took about 3-4 minutes during which I also washed my knife and cutting board.
7:15 pm – A roll of the dice.
With the meat cooking, it was time to get going on the vegetables. I diced an onion, a red pepper, four cloves of garlic, and a couple of cremini mushrooms.
I separated the garlic into three and put 1/3 in a small ramekin which I used later to make garlic butter. I put 1/3 in a bowl for Caesar dressing. And, I left 1/3 on the cutting board for the sauce.
7:21 pm – What’s the beef?
By 7:21 all the vegetables were cut and I added them to the now browned beef.
I cooked all of this together for about three minutes and then added 1 tsp chili flakes, 2 tbsp, dried oregano, and salt & pepper.
7:25 pm – The can-can
At 7:25 it was time to open up the cans of tomato purée and diced tomatoes. I added them into the pot. (Again if you want to do this in 30 minutes I would suggest using two cans to tomato purée and leaving out the diced tomatoes.)
I brought the sauce to a boil and then reduced the heat to let it simmer.
7:28 pm – Pasta in the pool
I used gluten-free pasta which takes about two minutes longer to cook than regular pasta. I added mine to the boiling water at 7:28 but, if you are using regular dried pasta probably wait another minute or two. Though, in all honesty, it doesn’t really matter that much as long as you drain it before it overcooks.
Right around this time, I drained the bacon which by now was nice and crispy. I cooked it on medium-low heat to draw the fat out. This is an old French technique that yields the crispiest bacon ever.
7:29 – Butter that bread
It was time to get going on the garlic bread. I took that little ramekin of garlic that I set aside earlier added about 1 1/2 tbsp of butter to it. I mixed this up really well. I then sliced a gluten-free baguette (you can use non-gluten-free) down the middle lengthwise, spread the garlic butter on the and popped it in the oven right on the rack.
7:30 pm – Dress it up.
It took me about a minute to assemble the garlic bread and get it in the oven. The next step was to make the Caesar salad dressing.
Generally, Caesar salad is made with raw egg yolk. As my wife is pregnant and definitely cannot have raw egg yolk I made mine with mayonnaise as the base.
I took the bowl with the final 1/3 of garlic in it and added about 1/4 cup mayo to it. To this, I added 1 tbsp red wine vinegar, a few drops of fish sauce (you can use Worcestershire sauce), the juice of 1/4 of a lemon, 2 tbsp grated parmesan, and a bit of salt and pepper.
I mixed all of this together and the dressing was done.
7:33 pm – The old cut n’ wash
With the dressing made and set aside I got straight to cutting the romain lettuce.
I used 1 romain heart for this as it was just my wife and I eating, but two should feed a family of four.
I pulled off any brown leaves, sliced the head lengthwise through the middle, but not through the root. I rolled the lettuce 1/4 turn and the sliced again. Essentially I was making a plus sign ( +) cut down the center of the romaine head while keeping the root attached to hold the head together. I then cut across the head making bite-sized pieces of lettuce. These went into the salad spinner, got rinsed with cold water, drained, and spun.
If this all sounds confusing then just watch the quick video below to see what I’m talking about.
7:35 pm – Putting it all together.
At this point, I was still waiting on my pasta to cook (I stirred it every couple of minutes to prevent clumping) but, everything was ready for my salad. I already had the Romain in a big metal bowl and so I added my dressing, bacon bits, and a bunch of parmesan right in on top of it.
I left the salad in the bowl and went about finishing everything else.
7:37 pm – Spaghetti and Meat Sauce
Okay, at 7:37 the spaghetti was cooked so I drained it. After it was very well-drained I put some in a big bowl. I tasted the sauce and adjusted the seasoning with salt and pepper. Once the sauce was seasoned I took a big ladle full and poured it over my pasta. I topped the pasta with pepper and parmesan cheese.
Once the pasta was plated I took the garlic bread out of the oven. I sliced the two halves into three pieces. I put two pieces with my pasta, saved two pieces for my wife, and the other two I cut into croutons and tossed with the salad to finish.
I tossed the salad quickly and served it into bowls with a slice of lemon. Just like that dinner was done. The time was 7:39 pm.
Conclusion –
Once more I want to say that this would be better using two cans of tomato purée rather than one purée and one dice. Other than that this spaghetti and meat sauce was delicious. The salad was spot on and the garlic bread was delicious.
I hope that you enjoyed this post. The full, printable recipe is right below and remember to subscribe to the blog to never miss a post.
Spaghetti and Meat Sauce with Caesar Salad and Garlic Bread
This is a delicious meal that I was able to make in under 30 minutes.
There once was a hungry wanderer. One day this wanderer found himself in a small village in the northern mountains of Portugal. The wanderer wandered his way to the center of town and set up a small camp. He lit a small fire on top of which he set a large pot filled with water and one stone. He then sat back waited, and watched the villagers walk by.
Eventually one of the villagers stopped and asked him “What are you doing?” The wanderer replied “I’m making stone soup.” What’s stone soup?” asked the villager. “Well it’s only the best soup there is. I’d share it with you but its just missing some onions.” The villager wanting to try this stone soup ran off returning a few minutes later with a bunch of onions.
The wanderer continued to sit by his pot of water, stone and now onions, until he was approached by another villager. “What are you doing?” asked the local. “I’m making stone soup.” responded the wanderer. Again the villager asked what it was. “Well, it’s only the best soup there is.” replied the wandered. “I’d share it with you but it’s just missing some meat.” Off ran the villager to get the meat for the soup.
This continued until the whole village had contributed to what had become a very hearty pot of soup. The wanderer shared the soup with the villagers just like he said he would. Then he wandered off to the next town with a full belly a pot and a stone.
Our Soup
This story, or a variation of it, exists in lots of different places. I first heard it while travelling in Portugal with my wife a few years ago. The soup we had then, that went along with the story is very similar to the soup that I make in this post. It is a nice light yet hearty soup that is great both for warm summer evenings and cold winter nights. I love it and I hope you do to.
Let’s take a look at how to
White Bean and Chorizo Soup in 30 Minutes or Less
7:40 pm – Onions
I started cooking at 7:40 pm. Like in the story the first thing I had to do was get the onions cooking.
I first cut off the top and bottom of the onion and then cut it in half down the middle. Next up was to peel the onion and then thinly slice it along the grain.
While I was slicing the onion I had my pot preheating over medium heat. Once it was hot I added 2 tbsp olive oil along with the sliced onion.
7:44 pm – Chorizo
As the onion was cooking I went to work on the chorizo. I only used half a link which is about the equivalent of one standard sausage. Also, the chorizo I used was dry cured not fresh.
I cut the chorizo into quarters lengthwise and then diced those into pieces about 1 cm x 1 cm. I added this to the onions.
7:46 pm Red Pepper and Garlic
By 7:46 the onions were slightly softened and the chorizo had gone into the pot. It was time to take care of the garlic and red pepper.
I first cut the ends off the garlic. Then I gently crushed it under the side of my knife and pulled the peel off. All the was left was to thinly slice it.
For the red pepper I cut off the top and bottom. Then I sliced through one side of the pepper. I put my knife inside the pepper and cut the ribs free while unrolling the pepper. This allowed me to take the seed pod out in one piece without making a big mess. This also prevented me from wasting any pepper.
I set half the pepper aside and diced the other half along with the top and bottom.
7:50 pm Add Garlic and Chilis
Once I was done cutting the pepper I turned the heat down slightly on my pot and added in the sliced garlic and about 1/2 tsp of chili flakes.
7:51 pm Dice Tomatoes
Next up was to dice a tomato.
First, I cut it in half down the center, took out the stem, and then diced it. I add this to the pot.
7:54 Green Beans/Chicken Stock
At 7:54 pm I added the red peppers to the pot. While they were cooking I trimmed off the ends of about 20 green beans and then cut them into thirds. Once the beans were cut I added 1 L of chicken stock to the pot. I put the lid on the pot, cranked the heat up to high and waited for the soup to boil.
7:58 pm – Drain Beans
At 7:58 I opened up a can of white beans and drained them. I also chopped up some parsley.
8:00 pm Boiling Soup
At 8:00 the soup was boiling so I added in my green beans and white beans. I put the lid back on the pot and started cracking four eggs into a shallow bowl.
At 8:04 I lowered the heat on the soup to a simmer, removed the lid form the pot and gently poured the eggs in one at a time. I put the lid back on the pot and let the eggs cook for three minutes.
8:07 pm Finishing
At 8:07 I tasted and adjusted the seasoning of the soup with a bit of salt. I plated the soup with a poached egg in the middle and garnished it with a bit of chopped parsley. And that was that.
Conclusion
Being able to put a soup like this together in such a short amount of time is a great trick to have up your sleeve. You won’t believe how much flavour there is in that bowl. Most of that comes from the smoky chorizo and a little bit of sweetness from those peppers. This one is an absolute must try.
Thank you as always for reading. I’ll see you on Wednesday!
White bean and chorizo soup
A delicious and hearty soup that can be put together from start to finish in under 30 minutes.
In Korean culture it is common for lettuce leaves to be served with certain dinners. These leaves take the place of bread and are used in much the same way. Pieces of food are picked up and eaten with the leaves. It was with that in mind, and based on a suggestion from my wife that I came up with these Ginger Beef Lettuce Wraps.
In this recipe the lettuce is replacing a tortilla, pita, or even spring roll wrapper, to make a delicious low-carb dinner. To be clear, I didn’t use lettuce because it is low-carb. I used it because it is super delicious and it just happens to be low-carb.
This recipe is composed of Ginger Beef that is warped in bibb lettuce, with fresh vegetables and topped with sriracha mayo. These things are going to blow your mind. They are crazy delicious and much more filling than you think they would be. There is an added bonus that if you have kids, they can build their own wraps making it fun too.
Alright, let’s take a look at how to make…
Ginger Beef Lettuce Wraps – In 30 Minutes or Less
6:40 pm
At 6:40 I started cooking dinner. The first thing I did was make the sauce for the ginger beef.
Just like last week, for some reason my first few pictures didn’t save. So, I’m sorry for that.
For the sauce I combined 1 clove of minced garlic, 2 tbsp minced ginger, 3 tbsp soy sauce, 1 tbsp honey, 1 tbsp mirin, 1 tbsp sesame oil, and 1 tbsp sambal chili sauce.
Once this was all mixed up I set it aside and started on the sriracha mayo.
6:46 pm
For the sriracha mayo I combined 1/4 cup mayo, 2 tbsp sriracha, 3-4 drops of fish sauce, and 1 tbsp sugar. I mixed this all together and set it aside as well.
As a side note, this sauce is great on almost anything. It will jazz up any sandwich or burger.
6:49 pm
At 6:49 I started slicing up the vegetables for the rolls. I started by peeling and slicing a carrot. Then I sliced 1 celery stalk, 1/2 a red pepper, and 1/4 of a cucumber.
6:56 pm
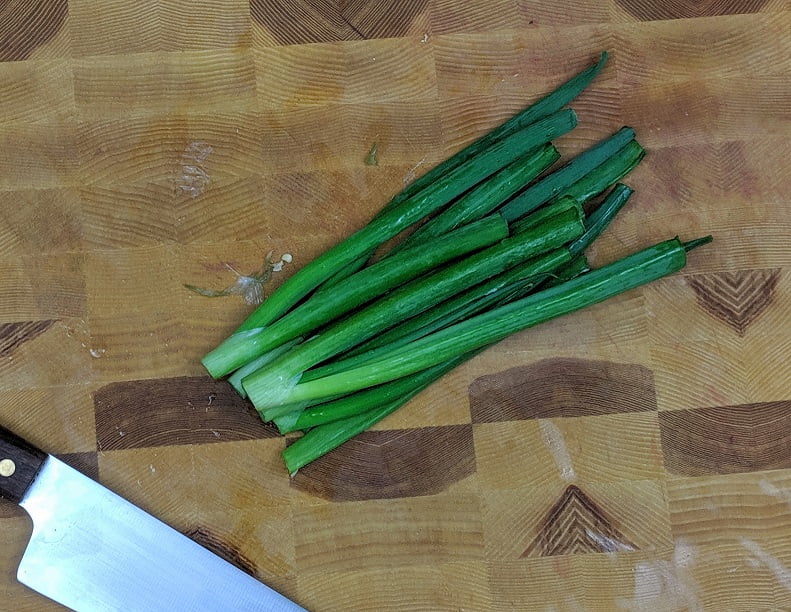
At 6:56 I was done slicing all of the vegetables for the lettuce rolls. It was now time to get going on the beef. First I had to slice 2 green onions, keeping the green and white parts separate.
At this point I turned on the wok to preheat it and then started slicing the beef.
The beef I used was a New York strip loin, however there are lots of other cuts you can use including sirloin, rib eye, or flank.
I cut the steak into smaller pieces following the grain. I then sliced the beef into thin strips, cutting across the grain.
Meat is cut across the grain as it shortens the muscle fibres making them easier to eat. If you cut with the grain, the meat will be very tough.
7:01 pm
At 7:01 I added 1-2 tbsp of canola oil to the wok, along with 1 tbsp sesame oil. I then added the beef and seared it. After cooking the meat for about 2 minutes I added the sauce. I cooked the meat and sauce until the sauce was thick and coated the meat. This took about four minutes.
I finished the beef by tossing in the green onion tops.
While the sauce was reducing I pulled the lettuce leaves apart and gently washed and dried them.
Finally, it was time to eat.
7:08 pm
I took three leaves of bibb lettuce and topped them with the sriracha mayo, fresh vegetables, meat and finally some fresh cilantro.
7:10 pm
By 7:10 the pictures were taken, and I was happily eating.
Conclusion
These Ginger Beef Lettuce Wraps are both filling and delicious. They also provide a nice change to the regular dinner schedule.
The ginger beef itself would be just as great served with rice and steamed or stir-fried broccoli. And again, that sriarcha mayo works on just about anything.
One of my favourite parts of doing this blog is not only introducing people to new ideas and new ways of doing things but reminding myself of how much I love things like this. I will be making these again in the very near future and I’m guessing you will be too.
Ginger Beef Lettuce Wraps – 30 Minutes or Less
A quick and delicious recipe for ginger beef, with sriracha mayo, vegetables, and wrapped in lettuce.
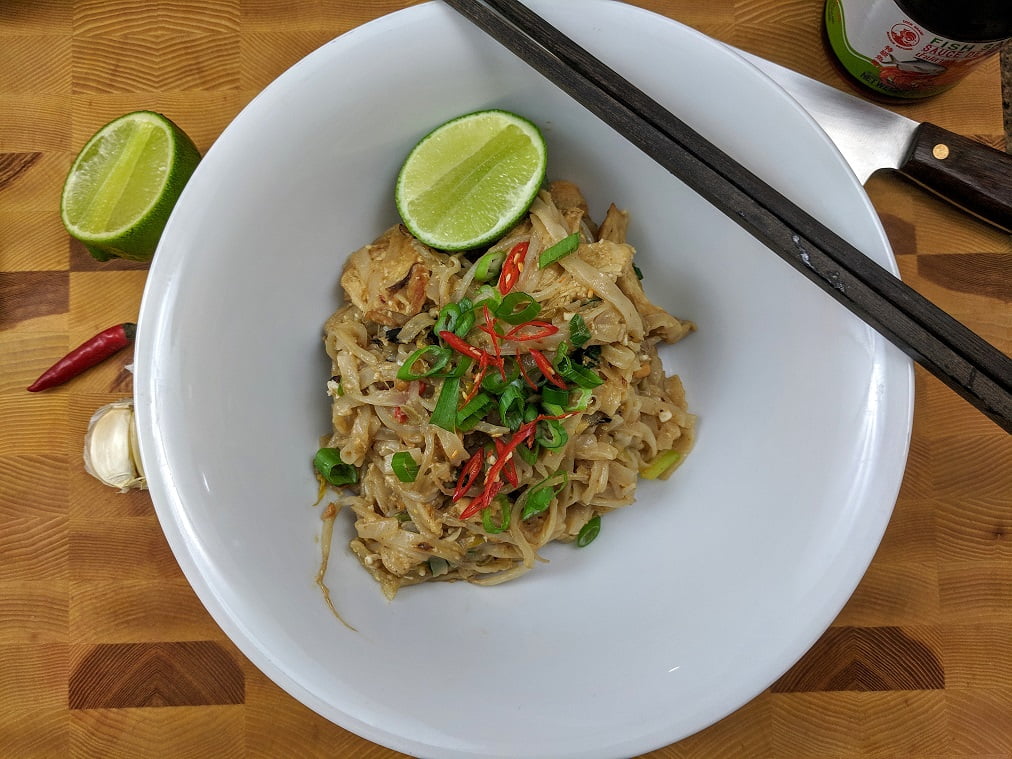
If you have never eaten Pad Thai, you don’t know what you’re missing. If you have eaten it and have never made it, you will be blown away at how quickly it can be put together. It is rich, flavourful, and quick. What isn’t there to love? This will absolutely become one of your new favourites.
What is Pad Thai?
For those of you that are unfamiliar with Pad Thai it is essentially a noodle stir-fry with a peanut sauce. It often contains either shrimp or chicken and always rice noodles, bean sprouts, and en egg.
The main flavour of the dish comes from the sauce made of peanut butter, fish sauce, sugar, salt, vinegar, and chili paste. This is complimented by the addition of green onion, ginger, garlic, and chili in the stir-fry.
Making Pad Thai at home allows you to control the heat level by adding more or less chili sauce. One thing to keep in mind is that the fattiness from the peanut butter and the sweetness from the sauce will help to balance and even mellow out a lot of the heat, so don’t be shy with it.
Cooking
When it comes to cooking the Pad Thai, like any stir-fry you want to have all of the ingredients ready to go. You don’t want to be scrambling to find an ingredient, or prep an ingredient while also trying to not burn your Stir-Fry. Prepare everything and have it all at your finger tips before you start cooking. Once you do start cooking everything will come together very quickly.
Speaking of cooking…let’s get to it.
This is…
Pad Thai in 30 Minutes Or Less
7:40 pm
Okay, I started cooking pretty late last night. In all honesty, I was laid up on the couch most of the day yesterday with some pretty bad neck and shoulder pain. Cooking was the last thing I wanted to do so I kept putting it off. Luckily, with dishes like this, minimal effort produces something really delicious in a short amount of time.
So, at 7:40 I filled the kettle with hot water and turned it on high. I also started putting the sauce together.
The sauce is about a 1/4 cup of peanut butter, 1 tsp vinegar or mirin, 1 tsp fish sauce, 1 tbsp brown sugar, 1 tbsp sambal chili sauce, and 2 tbsp warm water or more if needed to thin the sauce out. Mix this all together and set aside.
I used crunchy peanut butter, but you can use smooth if that’s what you have.
This took about 3 minutes.
7:43 pm
At 7:43 I grated about 2 tbsp of ginger (which was frozen) into a small bowl with 2 cloves of garlic. I also added 1 thinly sliced Red Thai Chili. I set this aside.
7:47 pm
By this point the water in the kettle was boiling and was ready for the rice noodles. I took three portions of rice noodles, which along with everything else in the stir-fry should be more than enough to feed four people. Then I put the dry noodled in a heat-proof bowl and poured the boiling water over them. I gave them a stir to pull the noodles apart and let them sit for 3-4 minutes before draining and rinsing them with cold water.
It is really important that you don’t over cook the rice noodles. That’s why I cook them this way as opposed to putting them in a pot of boiling water and boiling them. They just cook too fast. You know they are ready when they are soft but still chewy.
It is important to rinse the noodles in cold water after they are cooked because they are going to sit for a few minutes and any residual heat will continue to cook them. Failure to thoroughly cool the noodles down may result in clump of overcooked noodles that will disintegrate as soon as they hit the wok.
7:52 pm
By 7:52, 12 minutes after I started, the sauce was ready, the ginger and garlic were ready, and the noodles were ready. There wasn’t much left to do but prepare the vegetables and the chicken.
I started by first rinsing the green onions and then separating the bottom whiter half of the green onions from the top greener half. Then, I cut the ends off the bottom half and then chopped them into 1 cm sized pieces. I set these aside.
For the greens, I sliced them very thinly and set those aside.
The idea here is that the bottom, whiter part of the green onions can take more heat and can be treated more like an onion. Top greener part, is much softer and is treated more like a garnish. This is very common in Thai cooking.
You’ll see exactly what I mean once we start cooking.
I also rinsed and drained the bean sprouts very well at this point.
7:57 pm
At 7:57 everything was ready to go except the chicken. Just before I started cutting the chicken I turned my wok onto medium high to give it time to heat up. I then thinly sliced two chicken breasts.
By the time I was done with this and my hands were washed my wok was ready to go.
7:59 pm
At 7:59 I added 2 tbsp of canola oil to my wok along with with chicken. I let the chicken sit for a minute or two undisturbed while I cleaned up my cutting board. This allows the chicken to get really nice and browned, and allows the wok time to recover the heat it lost when the chicken went in.
Once the chicken was browned on the first side, I flipped it and browned the other side.
After a minute or two I add the bottom half of the green onions which were cut into 1 cm pieces. This was stir-fried with the chicken for about a minute before the ginger, garlic, and chili when into the pan. This stuff is grafted so small that it only needs seconds to cook. After about 30 seconds I added the bean sprouts and stir-fried them quickly to prevent the ginger mixture from sticking to the bottom of the work. (It stuck a little)
The next step was to add the noodles and toss to make sure that everything was evenly distributed. At this point, I added my sauce. I really should have added my egg first, but in all honesty I forgot about it and didn’t add it until the very end.
I would suggest at this point, before the sauce goes in, make a little well in the center of the wok and break an egg into it. Scramble the egg up a bit, and let it cook for a few seconds. Mix it into the rest of the stir-fry. Now, add the sauce.
Toss the sauce, with the stir-fry add the sliced green onion tops, and that’s it. Serve with some fresh lime and some thinly sliced red chili for garnish.
8:10 pm
By 8:10 the Pad Thai was plated, all the pictures were taken, the clean up was pretty much done and I had taken my first couple of bites. It was delicious.
Pad Thai Conclusion
This process is obviously pretty quick but of course it could be quicker. All of the prep for this can be done the morning before or even the night before you make it. Including cooking the rice noodles. Then, when you’re ready to eat you simple heat up the wok and stir-fry it all together. It will take ten minutes or less.
If you are going to prep this ahead of time you can marinate the chicken, or shrimp if you prefer, in a bit of soy sauce. Just a teaspoon or two will go a long way.
And yes, before you ask, you can substitute almond butter, and probably even WOW Butter for the peanut butter if you want or if you have allergies.
That’s it! That is how you make delicious Pad Thai at home in 30 Minutes or Less.
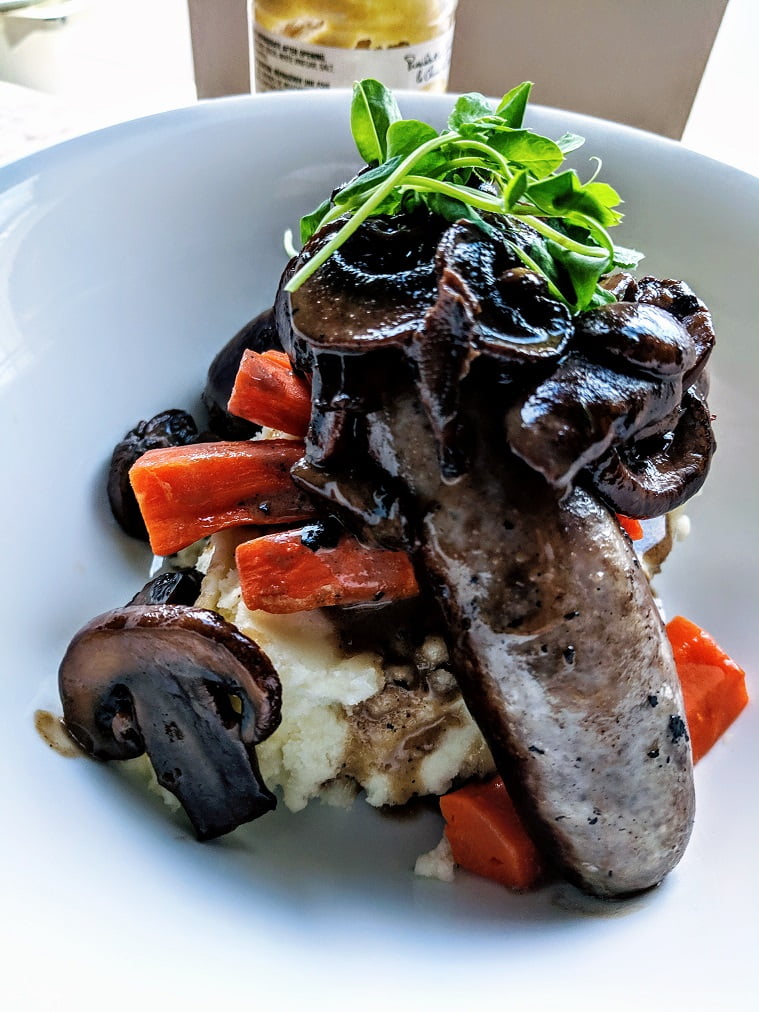
Bangers and mash isn’t something that I ever really ate growing up. Before I started working in pubs when I was 19, I had never really seen bangers and mash other than on tv. Honestly, even after I had seen the dish in real life, I wasn’t impressed.
Then one day when I was about 27, I was visiting my grandmother in BC. She took me out to lunch to this upscale neighbourhood pub by her apartment. For whatever reason, I decided to order the bangers and mash. The potatoes were creamy and smooth. The vegetables were tender but not mushy. The gravy was rich and flavourful. And, the sausages were perfect. Not to fatty, a lot of flavour. Clearly, high quality.
This dish has stuck with me since that lunch with my grandmother. Although I don’t eat it often, I do think about it a lot.
Fitting with the 30 minutes or less theme, this version of the dish is made in just under 30 minutes. It is served with a mushroom and red wine gravy that the sausages are simmered in after being seared. Other than that, it is potatoes and carrots.
For the sausage, a Cumberland sausage is traditionally used in the original British Bangers and Mash. It can be hard to come by so I just used bratwurst. Worst case scenario, use mild Italian sausage. It will still taste really good.
One final thing, you don’t have to add red wine to the gravy. You can use white wine, brandy, whisky, beer, or no alcohol at all. If you don’t want to use alcohol, just add the stock in two additions.
Okay, let’s get into it.
This is…
Bangers and Mash in 30 Minutes Or Less
6:55 pm
The first thing I did at 6:55 was start preheating the frying pan for the sausages over medium heat. Because I was using a cast iron pan it took a few minutes to heat. If you are using stainless steel, or if you have a more efficient stove, it might not take as long.
I also peeled and prepped the potatoes right away and got them cooking.
7:00 pm
At 7:00 the pan for the sausages was hot and so in they go. The potatoes were on the stove on high. It was now time to get the carrots prepped and going.
I peeled them, cut them into stick, covered them with salted water and put them on a burner on high. That’s it.
7:03 pm
By 7:03 the carrots were on. The sausages were browned on one side and ready to be flipped.
Now, it was mushrooms time. For this I used cremini or brown mushrooms as they are sometimes sold. First, I made sure there was no dirt on them and then thinly sliced them.
I should say that just about any kind of mushroom will do here. I use creminis because I like the taste and texture. If you want to use button or portotbello or oyster mushrooms, knock yourself out.
7:06 PM
Three minutes after the sausages were flipped, I took them out of the pan. They aren’t cooked at this point. We will finish them in the sauce, which we now have to make.
Sausages out, mushrooms and a teaspoon or two of butter go in. The mushrooms are cooked just long enough so that they all get that wet look that mushrooms get. Then I added about a 1/4 cup of red wine and 2 sprigs of thyme.
The key here is to let the wine cook (reduce) until it has almost completely evaporated. This will take a minute or two. This has two purposes, it concentrates the flavour making it stronger, and the alcohol gets cooked off.
Once the wine is cooked down, a 1/2 cup of beef stock goes in the pan, is brought to a boil and then the sausages go back in. A lid is put on the pan, the heat is turn down to medium low. The sausages are left to simmer in the sauce for about 10 minutes.
7:13 pm
By 7:13 the carrots were cooked, drained and seasoned with salt and pepper. I put them back on the burner, with the heat turned off, to keep them warm.
7:16 PM
Three minutes later the potatoes were done. I drained them. While they were draining I heated up the cream and butter and then used a food mill to mill the potatoes into the hot cream and butter.
Using a food mill guarantees smooth potatoes. It also makes the process very easy. If you don’t have a food mill, most people don’t, just mash the potatoes like you normally would.
Always remember to heat your butter and cream, or milk if you prefer, before adding it to your potatoes, or your potatoes to it. If you use cold milk and butter, you are going to reduce the temperature of the potatoes causing them to go cold very quickly.
And of course, season them with salt and pepper.
7:21 pm
By 7:21 the sausages were cooked and came out of the pan. I also took out the thyme sprigs. I turned the heat up and added about 2 tablespoons of whipping cream. DO NOT USE HALF AND HALF OR BLEND HERE. You really need the full fat whipping cream or it will split when it hits the heat of the sauce.
Once the cream and sauce started to boil and was reduced I removed it from the heat and whisked in 1-2 tsp of Dijon mustard.
While the sauce was finishing I started plating dinner. Potatoes down first, carrots next, followed by sausage, and finally, the mushroom gravy.
7:24 pm
By 7:24 dinner was plated and pictures were taken. One minute to spare.
This is not a complex dish although you wouldn’t know it to taste it. The mushroom gravy adds a big punch of flavour from the red wine, the stock, and because it carries the flavour of the sausages themselves.
If I came to your house for dinner and you served me this, I may never leave.
For those of you out there that don’t like mushrooms, onions can be used instead. Follow the same procedure.
Thank you so much for reading, and if you have any questions please don’t hesitate to ask them in the comments of this post or on social media.
Bangers and Mash
A pub staple and with good reason, this dish is delicious and tastes much more complex then it actually is.
Keyword: Bangers and Mash, Mushroom Gravy, Sausage and Mash,
Servings: 4
Author: Chef Ben Kelly
Ingredients
1pkgBratwurst or Cumberland Sausage
5 med.Russet Potatoes
5-6 eaCremini Mushroomssliced
2tbspButter
1/2cupWhipping Cream
2lgCarrots
1/4cupRed Wine
1/2cupBeef or Chicken Stock
1tspDijon Mustard
2sprigsThyme
Instructions
Heat a skillet over medium heat.
While the skillet is heating peel, dice, and rinse the potatoes. Put them in a medium pot and cover them with hot, salted water. Put them on a burner on high heat. Cook until the potatoes are tender. Then drain well, season with hot butter and cream, and salt and pepper. Mash until smooth.
Add the sausages to the pan. Brown on each side. This should take 2-3 minutes per side.
While the sausages are browning, peel the carrots and cut them into evenly sized carrot sticks. Put them in a pot and cover them with hot salted water. Bring to a boil and cook until tender, then drain and season with butter, salt and pepper.
Once the sausages are browned on both sides remove them from the pan. Drain any excess oil out of the pan and add 1-2 tsp of butter along with the sliced mushrooms. Cook the mushrooms for two minutes and then add the red wine. Reduce the red wine until it is almost completely evaporated and then add the beef stock. Bring that to a boil, add the sausages back into the pan along with the thyme sprigs. Cover the pan, reduce the heat to medium low, and simmer the sausages for 10 minutes. Remove the sausages from the pan once again, add 2-3 tbsp of cream and bring back to a boil. Cook for 1 minute. Remove from the heat, remove the thyme and whisk in the mustard. Season to taste with salt and pepper. Serve over the sausages.
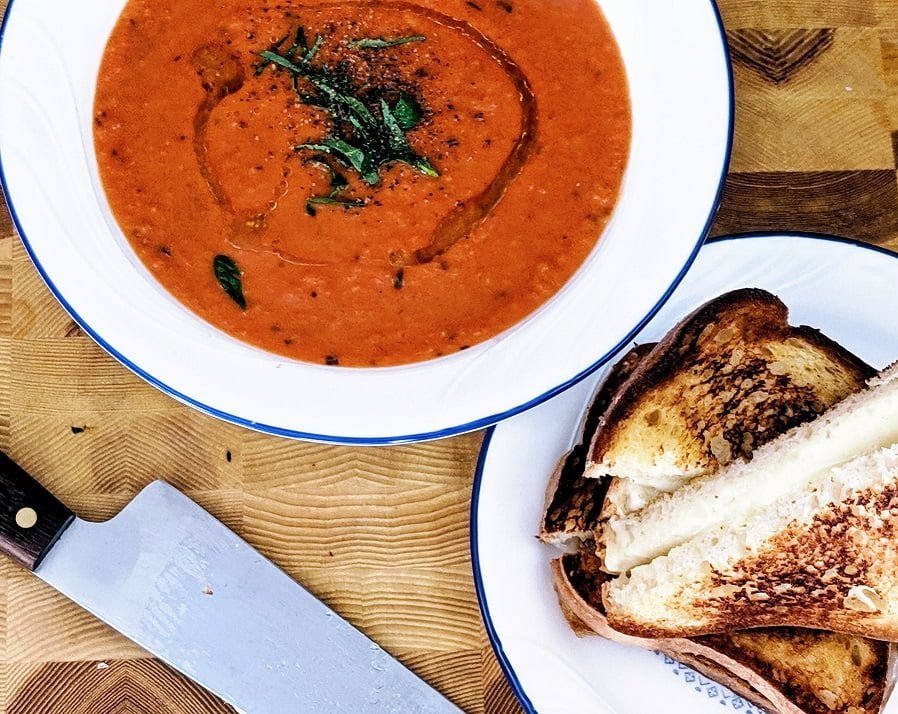
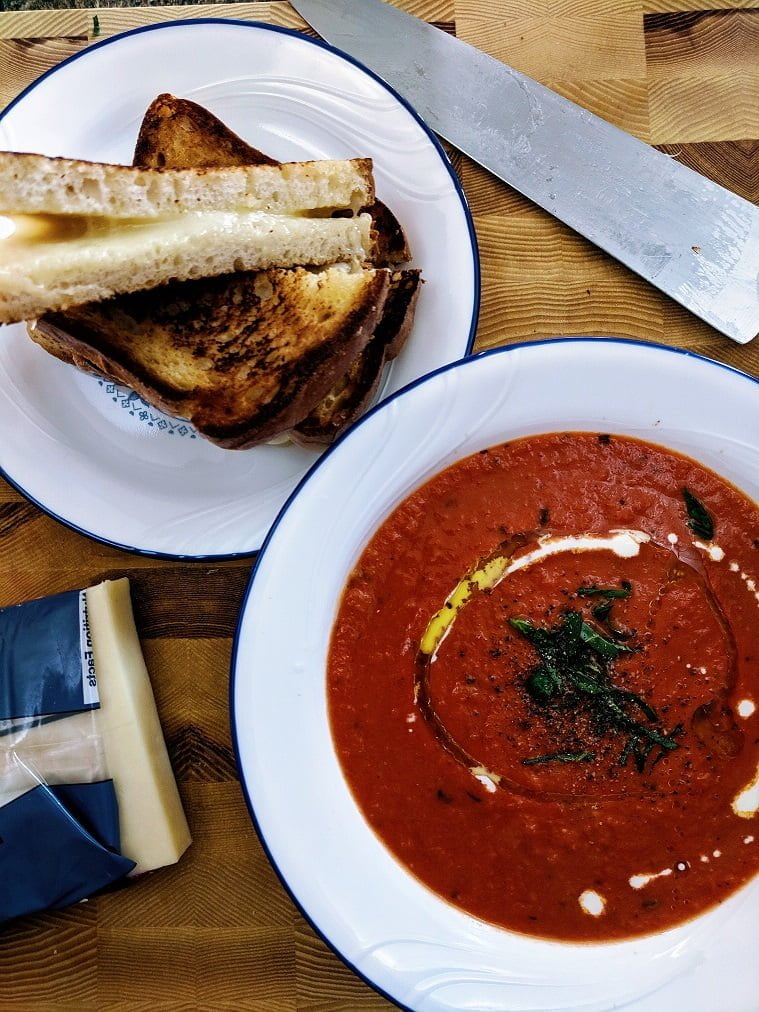
This week we walk through how to make the classic of all classics; Tomato Soup and Grilled Cheese. The kicker…we do it from scratch in 30 Minutes Or Less.
Let’s take a look!
There are few things in life that reach the height of perfection that you will find while dipping a crunchy, gooey grilled cheese into a bowl of creamy tomato soup. A staple of childhood lunches for generations, what’s not to love?
Although there are some decent canned tomato soups out there, nothing beats the homemade stuff. Today, we make the soup from scratch using only a small handful of ingredients. We speed up the process by using canned tomatoes instead of fresh ones. This makes a really delicious, quick soup.
It may not look it, but this meal is very filling. Having said, if you are serving it for dinner, feel free to add a salad to it as well.
A note about basil
I used fresh basil for this and highly recommend that you do the same. It adds a much fresher flavour than dried basil. If buy basil for this and have a bunch left over, simply purée it with a bit of olive oil and freeze it into shallow ice cubes. One or two cubes of basil purée would flavour this soup very nicely.
Okay, enough chit chat. Let’s get into this.
Ingredients
For the soup I used
1 can of whole reduced salt tomatoes
3 cloves of garlic
1 baseball sized onion
6-8 fresh basil leaves
1/2 cup whipping cream
1 tbsp sugar
salt and pepper to taste
For the grilled cheese I used
4 slices Schar Gluten Free Bread (use whatever bread you would like)
8 1/4 inch slices of aged Cheddar Cheese (a variety of cheese such as Swiss, Cheddar, and Jack Cheese work’s very well)
2-3 tbsp butter
Let’s get cooking
5:10 pm
At 5:10 I gathered all of my ingredients and diced my onion, garlic, and basil.
The size that you cut this stuff isn’t super important as it’s going to be puréed later one. However, it’s still important to cut it up fairly small so that it will cook quickly and evenly.
This all took me until about 5:15 pm.
The trick to dicing the onion is to first cut the top off. Next, cut the onion in half down through the root. Peel the onion. At this point you should have two peeled onion halves with the root still attached. The root holds the onion together.
The next step is to make a few horizontal cuts, making sure to keep your fingers flat and clear of the knife. Your horizontal cuts should be separated by about a quarter inch. Likely you will only need two in your onion. You still do not want to cut through the root.
Next, using the same principles as with the horizontal cuts, you want to make a few vertical cuts. These cuts should go all the way through the onion to the cutting board, but still not through the root. Use the tip of your knife to do this.
It’s easiest to make these vertical cuts with the root of the onion pointing away from you.
The root should still be intact so that your onion is mostly being held together.
Finally, you cut across the onion, and the slices you’ve made, leaving you with a perfectly diced onion.
For this we also have to peel and chop the garlic and basil. For the garlic, cut the root off, press down firmly on the garlic to crush it, pull the peel off and rough chop it.
Wash the basil and pat dry. Roll the leaves into a cigar shape and slice them evenly.
5:15 pm
By 5:15 the onion, garlic, and basil were ready. I added 1 tbsp of olive oil to a medium pot a long with the onion and garlic. I put the pot over medium heat and cooked until the onions were soft.
Usually, I am pretty adamant that the pot be preheated and the onion goes in long before the garlic. The reason it doesn’t matter here is because we are only cooking the onions long enough to soften them, and we didn’t cut the garlic very small. This just means that there isn’t going to time for the garlic to burn. And as we aren’t trying to colour the onions, a hot pot isn’t needed.
At this point I started cutting the cheese. All of this took me about 3 minutes.
5:18 pm
At 5:18 I buttered my bread, stacked them slices buttered side together, and topped one un-buttered side with the cheese. I stacked the bread like that just to keep everything neat and tidy.
By 5:22 the cheese was all cut, and the sandwiches were assembled.
5:23 pm
At 5:23 the onions were softened and just starting to brown. I opened the can of tomatoes and added them to the pot, whole. I added the basil, cream, sugar and some salt and pepper in as well.
Using an immersion blender, I puréed all these ingredients together until smooth.
A regular blender can be used but rather than adding all of the ingredients into the pot, add everything into the blended along with the cooked onion and garlic. Once everything is puréed add it back into the pot and heat.
Now that the soup was puréed, it went back over medium heat and was left to heat through and simmer while I made the grilled cheese.
5:28 pm
Now that the soup is all but done, I started heating my cast iron skillet over medium meat.
If you don’t have cast iron, use what you do have. Ideally, you should have a pan big enough to make multiple grilled cheeses at once. This will obviously save you time.
It took about 3 minutes for the pan to heat up. Once it was hot I separated my two slices of bread, and put the buttered side of the slice with the cheese on it down. I topped this with the second piece of bread with the butter side up. This might be written in a confusing way… Cheese in the middle of two pieces of bread with butter on the outside of both pieces. That feels like a much better explanation. I put the second sandwich in as well.
The key to an evenly cooked grilled cheese is to keep it moving. Every 45 seconds or so move it around the pan to make sure it isn’t sitting on a hot or cold spot. Once it’s golden brown on one side flip it and brown the other.
What you will probably notice is that both sides of the sandwich will be brown but the cheese won’t be melted. Once both sides are browned I keep flipping the sandwich every minute or so. This keeps both sides hot, heats the sandwich evenly throughout, and gives the cheese time to melt without burning the bread.
If you feel like the bread is going to burn even with all the flipping, turn the heat down a bit.
5:35 pm
By 5:35 the grilled cheese and the soup were both done, plated, and the final pictures had been taken. Within this time, I also made a non gluten-free grilled cheese for my wife, so three grilled cheese in total.
If you need to make a bunch of grilled cheese, cook them in the pan just enough to toast the bread on both side and then put them in a 350°f oven for 5-7 minutes, flipping them at least once. This should be enough to melt the cheese. And, you can make a lot of them this way.
I added a bit of olive oil, cream, basil and pepper to the top of the soup for garnish. The first picture doesn’t have cream on it, you see the difference in presentation a little contrast can make. You can thank my wife for that.
Conclusion
This meal took no time at all and is guaranteed to please. the best part is that it works just as well for a Saturday lunch as it does for a Tuesday dinner.
Once you try this and see how quickly it comes together and how delicious it is, I doubt you will want to go back to canned soup.
Tomato Soup
A quick and delicious soup that is guaranteed to please.
We use cookies on our website to give you the most relevant experience by remembering your preferences and repeat visits. By clicking “Accept”, you consent to the use of ALL the cookies.
This website uses cookies to improve your experience while you navigate through the website. Out of these, the cookies that are categorized as necessary are stored on your browser as they are essential for the working of basic functionalities of the website. We also use third-party cookies that help us analyze and understand how you use this website. These cookies will be stored in your browser only with your consent. You also have the option to opt-out of these cookies. But opting out of some of these cookies may affect your browsing experience.
Necessary cookies are absolutely essential for the website to function properly. This category only includes cookies that ensures basic functionalities and security features of the website. These cookies do not store any personal information.
Any cookies that may not be particularly necessary for the website to function and is used specifically to collect user personal data via analytics, ads, other embedded contents are termed as non-necessary cookies. It is mandatory to procure user consent prior to running these cookies on your website.