Corn on the cob, what food is more summery? Today as we continue my summer-long barbecue cooking series we are going to look at my two favourite methods for cooking corn on the cob on the grill. Both of the methods that we are going to look at have their benefits. I suggest you try both and see which one you prefer. It may just be that you are about to find your new favourite way to cook corn on the cob.
Okay, let’s get to it. This is…
How To Grill Corn On The Cob
Grilling Techniques
Although there are a few different ways that corn can be cooked on the grill, I have two that I prefer. The first and arguably the best way is to cook the corn right in the husk over moderate, indirect heat. Cooking the corn in the husk takes more time than other cooking methods but the flavour of the corn cooked this way can not be beat.
The other barbecue corn cooking technique that I prefer is to grill the corn right from raw on fairly high heat. All the corn needs is a little oil or butter rubbed on it, and some salt and pepper. This method is quicker than cooking in the husk, and it stills comes out delicious. The big difference is really in the taste which we will get into in a minute. But first, let’s take a look at both of these methods separately.
Grilling Corn In The Husk
There are a few benefits to cooking corn in the husk that you may not have realized. The main benefit is really the flavour. The corn husk locks in moisture meaning the corn steams in its own juices. This makes the corn a little extra sweet and especially tender. This steam has the added benefit of bunching the corn silk together which makes the corn a breeze to husk after it is cooked. This means that you don’t have to worry about the mess that comes from husking fresh corn.
To soak or not to soak
I used to think that when corn was cooked in the husk on the grill it needed to be soaked in water first to prevent the husk from catching on fire. Over time I’ve realized that this isn’t necessary at all. The secret to not catching the corn on fire is to cook it over indirect heat.
Grilling the corn over indirect heat just means that the flames from the fire never come into direct contact with the corn. I generally either cook the corn on the upper grate of my barbecue, turn off one of the elements and place the corn above it, or if using charcoal, push the coals to one side and place the corn off to the other side. I’ll admit that this indirect heat cooking method does take longer for the corn to cook, (45 minutes to 1 hour). However, you just put the corn on and mostly forget about it with the exception of flipping it now and then.
How do you tell if the corn is done?
When you can’t see the corn, how can you tell when it is cooked? That is a great question and one I’m willing to bet that you were asking yourself. There are two main ways that I use to check and see if that corn is cooked without opening the husk. First, I wait until the husk looks toasted. You can see the progression of the colour on the husk in the pictures below. The second method is to give the corn a squeeze. If it still feels hard, it’s not done. If it has some give to it, and the husk is toasted, the corn is likely ready.
I should say that I have never seen corn burn or dry out when cooked in the husk.
Once the corn is cooked
Once the corn is cooked I either let it the husk cool down for a few minutes (the corn will stay hot inside the husk for a long time), and peel it with my hands, or, I grip the corn with a kitchen towel and peel using another kitchen towel. Either way, the husk and silk come off very easily leaving no silk threads behind. Also, the corn looks super cool with the roasted husk still attached.
Grilling Corn Out Of The Husk
When I grill corn out of the husk I first drizzle it with olive oil and season it with salt and pepper. then I cook it about halfway on direct medium-high heat and finish it on indirect heat. This gives the corn a very unique flavour and texture when compared to cooking it in the husk. The flavour of the corn becomes much more complex than it normally would because some of the sugars start to caramelize and some the kernels take on a parched or toasted flavour.
Combination cooking
As I’ve said, when I grill corn out of the husk I use a combination of direct heat and indirect heat. I do this simply because the corn has a tendency to dry out and possibly burn if cooked all the way over direct heat. However, I want the flavour that comes from cooking over direct heat. So, I find cooking the corn half on direct heat and half on indirect heat to work best.
Par-boiling
There is also the option to steam or boil the corn to cook it partway prior to putting it on the grill. However, I am not a fan of this. Part of the reason I like to grill foods is that it cuts down on dishes, so dirtying a pot to parboil the corn seems counterintuitive to me. The other reason I don’t like this method is that I find that the corn retains too much moisture which causes it not to develop that unique grilled corn flavour.
How long do you grill the corn and how do you know when it is done?
I find that it takes about 15-20 minutes to cook the corn in this way. So, that would be 7-10 minutes over direct heat, and 7-10 minutes on indirect heat (with the lid down on the barbecue). Cooking the corn for any longer than this will cause it to start to dry out.
The corn is done when the kernels are tender. The easiest way to check this is to scrape the corn with a fork or spoon. If some of the kernels come off easily or break easily the corn is done.
Bonus Sauce Recipe
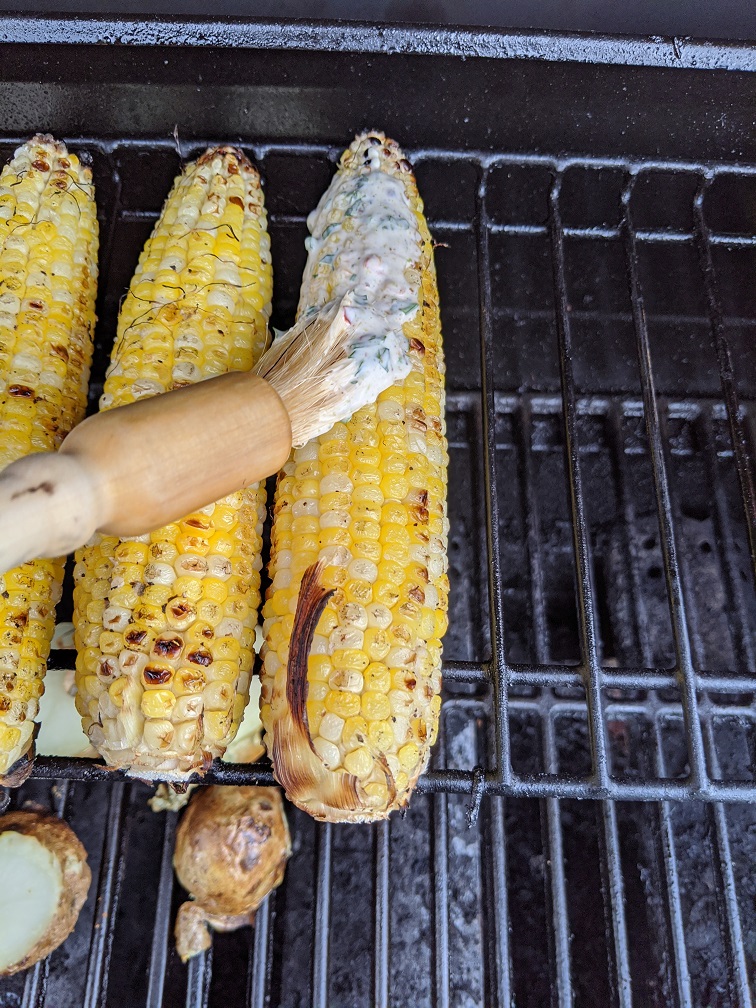
An added benefit to grilling the corn out of the husk is that the corn can be brushed with a sauce. You can see me doing this in the picture above. The sauce I’m using (recipe below) is inspired by Mexican Street Corn, and is a combination of mayo, lime juice and zest, parsley and a few spices. The flavour of this sauce combined with the unique flavour of the grilled corn is out of this world. Of course, don’t take my word for it, try it for yourself!
Grilled Corn Sauce
A quick sauce for corn on the cob influenced by Mexican Street Corn.
I think it goes without saying that corn on the cob is a delicious and wonderful part of summer. There is nothing like sitting out in the sun, nibbling corn right off the cob. But, don’t limit yourself to just boiling, steaming, or cooking the corn in a foil pouch. Try these techniques, I think that you’ll be happy that you did.
Thank you as always for reading and remember to share this post and subscribe to the blog so you never miss a post again.
Good morning everyone! It’s Friday and that means it is barbecue time here on the blog! Today, we are going to look at a few different things including how to make delicious and tender ribs on the smoker or grill, and a really great all-purpose rub, and barbecue sauce. Let’s get to it!
This is how to make…
Delicious & Tender Barbecue Ribs
The Rub
The first step in making delicious ribs is to make a delicious rub. Simply put, the rub is the seasoning on the meat. We could just go with salt and pepper, often I do, but today we are going to use a few more ingredients to add in a little extra flavour.
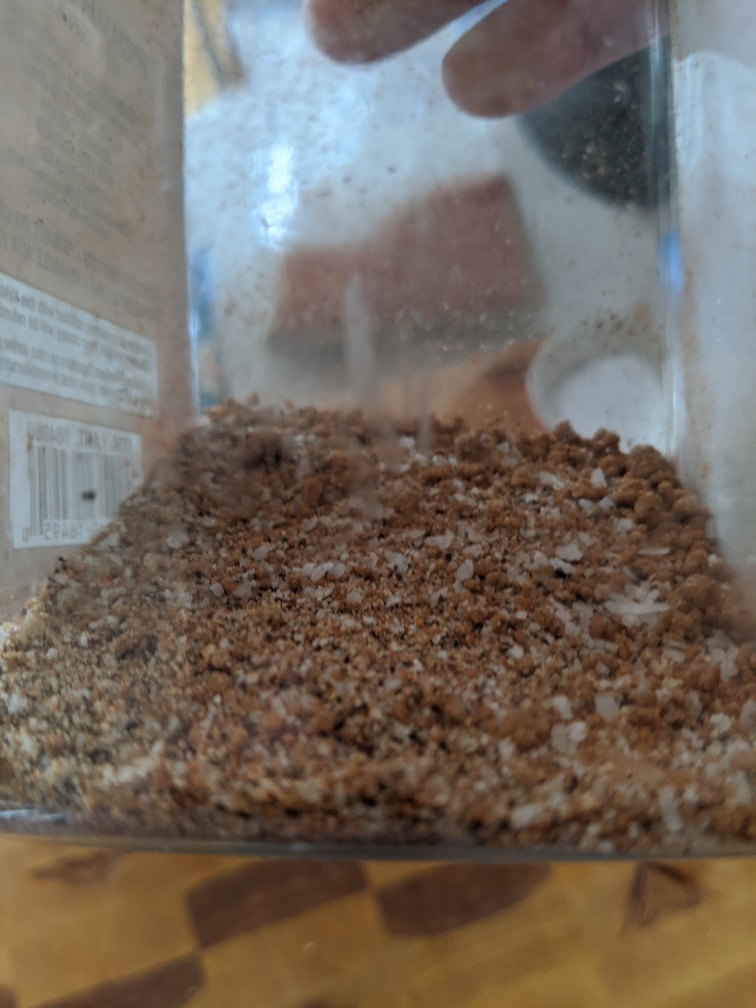
For the rub, I used equal parts of salt and brown sugar. To that, I added black pepper, garlic and onion powder, cayenne, cumin and paprika. This all got mixed together then I put it in an empty spice bottle that could be used as a shaker. Using a shaker rather than just sprinkling the seasoning on by hand, will create a much more even coating on the meat. This isn’t strictly necessary, but it does help a lot.
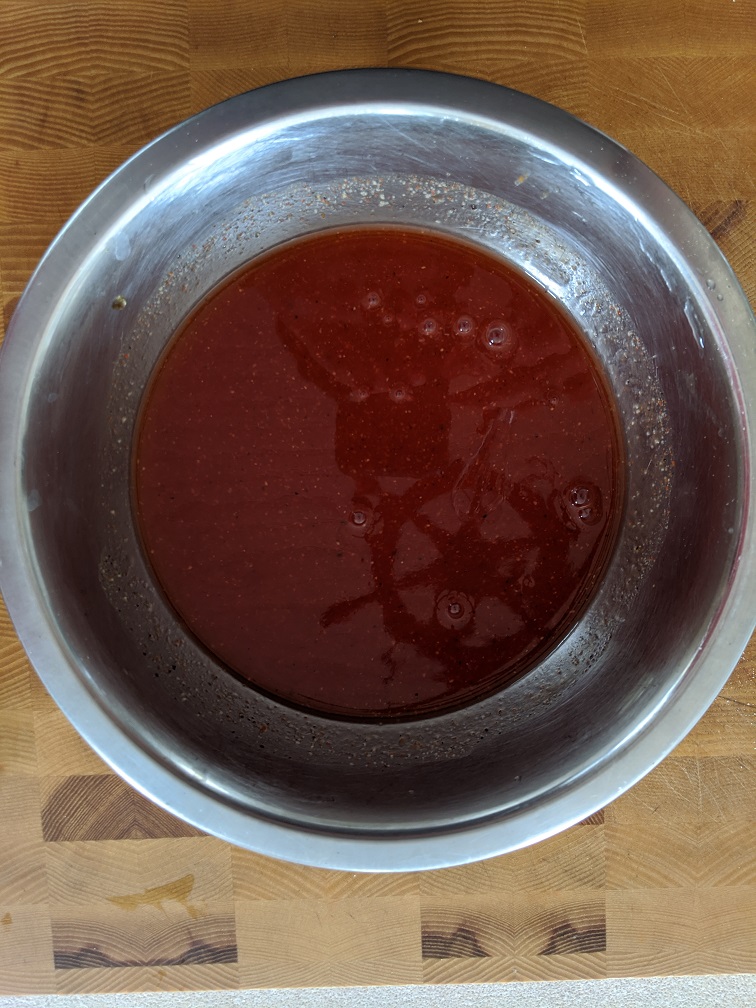
After the rub was made and ready to go I made a quick barbecue sauce. The sauce I’m using for the ribs may not be what you would expect to use for ribs. Typically, where I’m from, we put thick, really sweet barbecue sauce on ribs, or most things actually. Today’s sauce, however, is only slightly sweet, leaning more on the acidic side of things. It is also much thinner than you may expect.
The consistency of the sauce is actually really important for the method we are going to look at for making the ribs. If you use a store-bought sauce you are going to want to thin it out with a bit of water to the point that it is more a heavy cream consistency than a ketchup consistency.
For the sauce, I used equal parts ketchup, cider vinegar, and maple syrup. This mixture was then flavoured with garlic and onion powder, cayenne, a few drops of fish sauce (or Worchestershire Sauce), salt and pepper. The final ingredient in the sauce is a little water to thin it out. I mixed all the ingredients together then put the sauce in a squeeze bottle.
All Purpose Barbecue Sauce for Ribs
A delicious Barbecue Sauce for ribs, pork or whatever.
For the ribs, I followed what is known as the Franklin Method. This method comes from Franklin Barbecue in Austin Texas. The owner and chef there is named Aaron Franklin and is considered by most to be the best pitmaster in the world. Franklin Barbecue is considered the best barbecue in the world. So, if you are going to use a method for making ribs, his method is probably the one you want to use.
I should say that everything Aaron cooks is cooked over an indirect wood fire. This gives the food a smoky flavour but also prevents flare-ups and burns. Having said that, this technique can easily be adapted to a gas or charcoal grill, or a smoker. I used a charcoal smoker to make my ribs.
Making the ribs with the Franklin Method
To make the ribs I first laid them flat on my cutting board, used the tip of my knife against the end rib bone to lift the membrane, then used a paper towel to pull it off. This membrane doesn’t break down during cooking so I always prefer to take it off. It should only take a second or two to do. Once the membrane was removed from the ribs I went back and removed any excess fat with my knife. You don’t really have to do this, I just wanted a clean looking rib.
I should say that I am using back ribs rather than side ribs. You can read about the difference in this post I did all about ribs.
Applying the rub
Once the ribs were cleaned I used my shaker to apply the rub in an even layer. One thing that Aaron recommends and that I have noticed works well, is to keep the shaker moving the whole time you are applying the rub. This prevents the heavier ingredients, namely the salt, from settling to the bottom of the shaker.
I applied the rub on the underside of the ribs, patted it on, flipped the ribs and applied to the rub to the other side. Even though it’s called a rub you really don’t “rub” it. I just kind of pat it down to make sure it stays on the meat. Once the rub was applied, I cut my ribs in half so they would fit on my smoker. You can skip this step if the ribs will fit on your smoker or grill. At this point, I set everything aside and went to get my smoker going.
Readying the smoker
To get the smoker ready I lit some lump charcoal in a chimney starter and let it burn until all the coals were ashed over. While the coals were burning down I filled up the water pan at the bottom of the smoker. Even if you are using a gas grill to cook your ribs I suggest using a water pan. It will help prevent the ribs from drying out. Just get a metal bowl or pot with a metal handle and put it on the back of your grill out of the way.
Once the coals were ready, I added about 1 cup of hickory wood chips that had been soaking in water for 30 minutes. I let the initial steam burn off for a few minutes until I could smell the hickory smoke. At this point, I assembled my smoker, put the ribs on and got to cooking.
For the ribs, my goal was a consistent temperature of around 275°f – 300°f. Any hotter than that and the ribs will cook to fast and risk drying out. Any lower and the ribs will take much longer to cook than they need to. My goal for the cooking time was about three hours. For the first hour and forty-five minutes, I didn’t do anything to the ribs. The only thing I concerned myself with was the fire, smoke and maintaining the temperature.
After the initial cook
After the first hour and forty-five minutes, I generously sauced the ribs than let them cook for another fifteen minutes. Once that had happened, the ribs had been cooking for two solid hours and it was time to wrap them. I laid out some foil, gave it a good squirt of the sauce, put the ribs meaty side down, and added another splash of sauce. At this point, I wrapped the ribs tightly and put them back on the grill meaty side up. The ribs cooked for another hour to finish.
This wrapping does a few things. It helps to speed up the cooking process by holding in the heat. It also helps to prevent moisture loss at a critical point in the cooking process. Finally, it helps it to add flavour by steaming the meat in the sauce.
We talked earlier in this post about the consistency of the sauce. This is where that is very important. If the sauce is very thick, like a typical barbecue sauce, it will just kind of burn at this step. We need that extra moisture to prevent that and to help finish cooking the ribs.
Finishing the ribs
Once the full three hour cook time had gone by I gave the ribs a little poke with my finger to see how tender they were. They felt done to me because the meat had some give to it. Now, contrary to popular belief you do not want the rib meat to be falling off the bone. We aren’t trying to make pulled pork. The meat should easily come away from the bone, but it should never fall off.
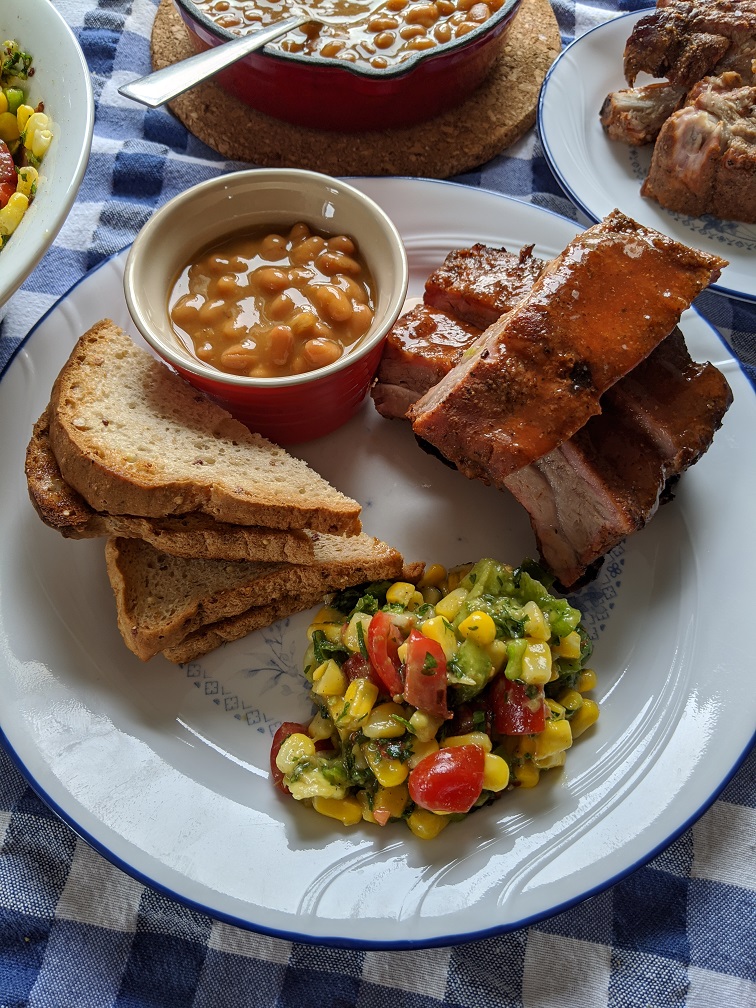
I served the ribs with the remaining sauce on the side, some baked beans which I will talk about in a second, some toast (mostly for the beans) and a corn and avocado salad which we will talk about on Monday. If you are wondering, yes, it tasted as good as it looked.
Adapting to a gas grill
If you are going to follow this technique on a gas grill you really don’t have to change anything. What I would recommend is either cooking the ribs on the warming rack or only turning on half the barbecue and cooking the ribs on the other half so that they never come in direct contact with the flames. A lot of fat and juices are going to render out of the ribs and the last thing you are going to want is to have a flare-up burn them after putting in all this time.
The beans
Years ago I was flipping through this Weber Barbecue Cook Book I have (I am 90% sure it was that book) and there was a recipe for barbecued baked beans. I got excited until I saw that the recipe said to open a can of baked beans, pour them into a pot, and heat them on the grill. Now, I don’t know about you but to me, that seemed like a ridiculous thing to have in a cookbook, especially the one about grilling put out by a grill company.
As I was making the ribs I got a craving for some beans but I didn’t have time to make them from scratch. That’s when this random “recipe” I had seen years ago popped into my mind. I thought I would try it if for no other reason to validate my disappointment. I opened a can of Heinz baked beans, poured them into a little skillet and heated them on the smoker for about forty-five minutes. To my surprise, the beans actually took on a lot of the smoke flavour and were way better than they normally are. Of course, they weren’t as good as homemade barbecue baked bean (which we will make) but they were still pretty good. Despite this, I still think it was a stupid thing to have a recipe for in a cookbook.
Conclusion
This is only the second time that I have used this technique to make ribs but it is by far my favourite way that I’ve tried. I cannot recommend this method enough, I really can’t. These ribs come out tender, juicy, and really flavourful. Give it a shot and let me know what you think.
Also, remember to come back Monday for the Corn and Avocado Salad Recipe. See you then and have a great weekend!
Oh, and as always, remember to sign up to the blog so you never miss a post again!
Today on the blog we are going to take a look at how to make my version of Pork Satay Skewers. The marinade we are going to use on the pork can also be used with chicken, beef, lamb, shrimp, scallops, or even fish. So, it’s very versatile. We are also going to take a look at what I consider to be a proper meat skewering technique. We have a lot to cover, so let’s get to it.
This is how to make…
Pork Satay Skewers
What is Satay?
Before we get into this we should first answer the question What is Satay? At its core, Satay is just seasoned and skewered meat, generally served with a sauce, cooked over an open flame. Most of the time some sort of peanut-based sauce or marinade is used. Satay originates in Indonesia and is their national dish, however, it is popular all around Southeast Asia.
The Marinade
Typically, Satay is served with a peanut sauce, however, I wanted to do something a little different with my version. For mine, I put the peanut in the marinade. The only real reason for this is because I didn’t want to make a sauce. I wanted all the flavour to come from the meat itself.
For whatever reason I didn’t take the normal walkthrough photos that I generally do for the marinade. So all I have for that part of the process is the written recipe below.
There are three main ways to skewer meat. The first skewer technique is that you cut the meat into evenly sized cubes then skewer them. The second skewer technique is to cut the meat into thin strips and skewer the meat on as one long piece. The third, and my personal preference is to cut the meat into thin strips but then thread the meat onto the skewer.
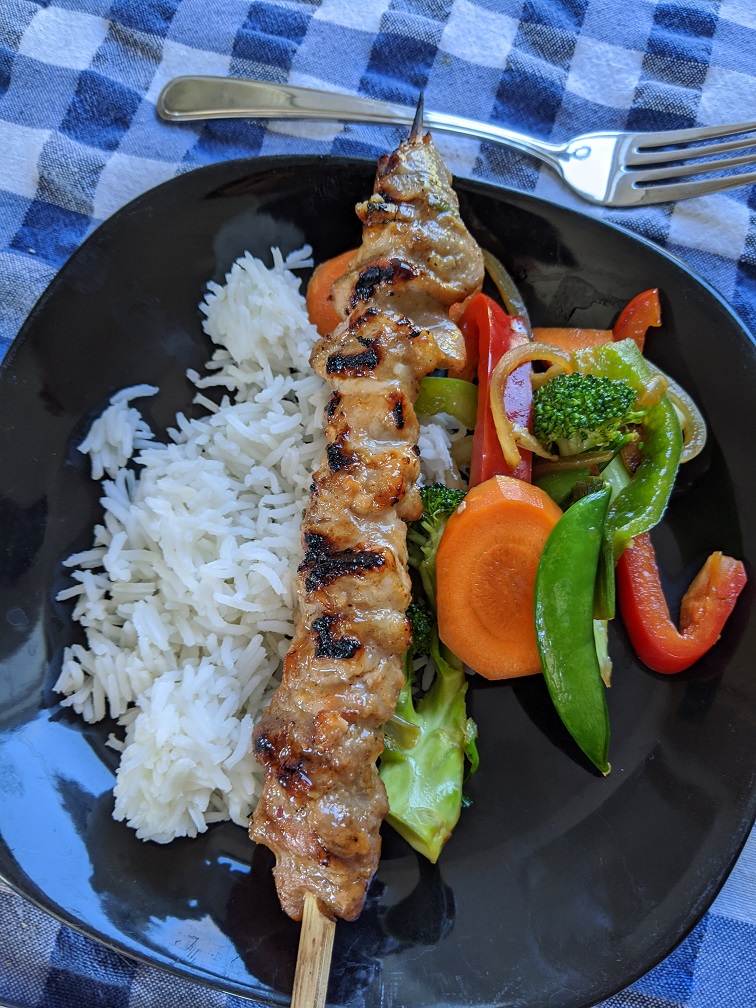
As you can see in the pictures below the meat is placed on the skewer like a folded ribbon with the bamboo skewer going straight up the middle. I prefer this technique for a few different reasons. First of all, I find that with this technique as opposed to the two other techniques the meat stays on the skewer much better when cooking. The second reason I prefer this technique is that the meat cooks more evenly. If you find that you prefer one of the other techniques I mentioned or one I didn’t use that. I just find that this technique works best for me.
The Skewers
I just wanted to touch really quickly on the skewers that I used for this. They are a paddle style bamboo skewer meaning they have an offset handle at the end. They are ten or twelve inches long and are square shaped rather than round. I find that the square shape of the square really helps to keep the meat in place as opposed to round skewers. However, you can use whatever skewer you have or can find. Just make sure to soak them in water for at least an hour prior to skewering the meat and grilling. This will help to prevent the skewers from catching on fire.
Cooking the Skewers
To cook the skewers I first preheated my grill on medium-high for about ten minutes. This makes sure that the grates are hot enough to sear the meat which helps prevent them from sticking. I do not oil my grill, ever. As long as the grates are giving enough time to get hot, there should never be an issue with sticking.
The heat on my grill is not even, to make sure the skewers are getting even heat, I put the skewers on the grill, let them sit for about two minutes, then took the one from the back of the grill, moved it to the front of the grill, and push the rest back. I did this about every two minutes. After about five minutes of total cooking, I flipped the skewers and then continued with the skewer rotation for another five minutes or until the skewer were cooked through.
Conclusion
I served the skewers with steamed rice and stir-fried vegetables to make this a meal. However, these Pork Satay Skewers are great as a snack or as party food.
As I said in the intro the marinade I used on these skewers is great with chicken, beef, scallops, shrimp, or fish. Give it a try and I promise that this will be in your regular summer barbecue rotation.
Thank you as always for reading and remember to subscribe to the blog so you never miss a post again! If you enjoyed this post please share it with someone who you think will enjoy it.
Hotdogs, hamburgers, the odd skewer of meat and/or vegetables, maybe a steak or chicken breast and baked potatoes. When you think about having a summer barbecue some or all of the things I just listed probably popped into your mind. But what if I told you there was more…much more that you can do with your barbecue? What if I told you that you have been missing out? Well, there is and you have been.
Today we are going to look briefly at a few things I have cooked on my barbecue in the last few weeks. Things that maybe you have seen, maybe you haven’t. However, this post is not going to be definitive. It is simply the beginning of what I think will be the most exciting series that we have done on the blog thus far. Over the course of the summer, we are going to really focus on the barbecue and all the unique things that can be cooked on it. It’s my hope that by the end of the summer we will all be pitmasters.
What makes this so exciting for me is that for the last decade or so I have lived in apartments without any outdoor space, meaning no barbecue. Now, I have both and we are all going to take full advantage. What do I mean by that? Well, as I said we are going to focus on barbecue, but not just the old propane grill. We will look at cooking with charcoal, with smoke, and on an open fire as well. And I am going to be learning a lot of new things right along with you. Will you join me?
With that, let’s take a look at what I’ve been up to over the last few weeks. These items were just everyday meals that we had and were never really inteded to be focus points on the blog. It is my hope that in sharing them you you will get a quick glimps at what the blog will look like over the next few months. Just to be clear, not every post over the next few months will be about Barbecue, but a lot of them are going to be.
Alright, let’s take a look.
Chicken
One my my favourite things to cook on the grill at the moment is whole chickens. I take the back bone out and flatten them, this is called spatchcock. Doing this allows the chicken to cook quicker and much more evenly. The chicken in the picture above is actually Piri Piri chicken that Suzanne and I teamed up to make for dinner lastnight. I spatchcocked and cooked the chicken, she made the marinade. What’s great about this is that you can marinate the chicken however you’d like or not at all.
Part of the reason I love cooking the whole chicken on the grill rather than just legs or breasts is that the chicken stays much more moist. The fat from the skin and the moisture in the bones helps prevent the chicken from drying out. Another great side effect of this is that you get more flavour out of the chicken as well. It also looks cool. I call that a win, win, win. Or to put it another way, winner winner chicken dinner!
Pork Chops
Something truly magical happens to pork chops when they are cooked on a grill. The fat takes on this ridicouls flavour, along with this light crispness. The meat get’s a little caramelized, and the whole thing just becomes something truly special. As with the chicken it doesn’t really matter how you marinate the pork chops, or what sauce you put on them, as long as they arn’t over cooked that are going to be delicious. The only thing I will say is that if you are using a sweet BBQ sauce only apply it in the last half of cooking otherwise it may burn which no one wants.
Roasts
Often when we think about cooking on the barbecue we think of fairly thin cuts of meat. However, there is no reason that you can’t cook a roast on the grill. I did just that a few weeks ago with a 3 lb beef rib roast. And yes if you are wondering, it tasted just as good as it looked.
The trick to cooking large pieces of meat on the grill is that same as the trick for cooking them in the over. Start them on high heat to get a nice sear, turn the heat down and cook them on low for the rest of the way. Also, while the roast is cooking all the sides can be prepared on the grill as well. Even though the roast in the picture above is beef there is no reason that you can’t do this with pork, lamb, or anything else you can think of.
Sides
Anything that can be cooked can be booked on the barbecue. Here I cooked a whole butternut squash and some baby red potatoes. I did this without any fancy pans or tinfoil. Just straight on the grill.
I think that a lot of people get caught up trying to over complicate sides (and everything) when it comes to barbecue. The really beauty of cooking over a fire is that the fire adds so much of it’s own flavour that you really don’t need to do much else. A little olive oil, salt and pepper, and some fire will take you very, very far.
Of course, other vegetables like green beans, asparagus, onions, sweet potato, carrots, cabbage, all of it can be cooked on the grill. Don’t believe me? I’ll say it again, anything that can be cooked, can be cooked on the barbecue.
Conclusion
I hope that you are looking forward to this series as much as I am becasue I am very excited. If you have an idea for a barbecue post let me know and you may just see it right here. Also, what are you favourite things to grill? I’d love to hear about it in the comments.
Thank you everyone, have a great weekend and remember to subscribe to the blog so you never miss a post again.
I don’t go camping that often. If I get out 2-3 times a year, that’s good. When I do go camping, I see no reason not to eat just as well as I do at home. Now, I have absolutely no problem with hot dogs. I am actually pretty fond of them. But cooking food over an open wood campfire is a rare treat that I’m not going to waste on hot dogs.
I want to just say first, I am not an expert in open fire cooking. There are some people out there that are and I tip my hat to them. I just love cooking good food and if I get to do that with wood and flames sometimes then all the better.
So, in this post, we are going to take a look at some basic principles of cooking over a campfire. We will talk about foods that are well or ill-suited to campfire cooking. Essentially, I’m just going to tell you everything I know about cooking over a campfire. So, let’s get to it.
Basic Principles of Fire
To say that we are “cooking over a campfire” is actually a bit of a misnomer. What we actually are doing is cooking over the coals of what was a campfire. Just to clarify, when cooking, flames aren’t really our friend. We want smoldering coals.
When I go camping the first thing I do is get the fire going. I put four or five logs on and let them burn down while we are setting up the rest of the site. This way, when I’m ready to cook lunch or dinner (depending on the time of day we arrive) the fire has burnt down and the coals are ready to go. What becomes very apparent is that a pile of glowing embers is way hotter than a big flame.
In Nova Scotia, and I’m sure other places as well, most campgrounds are equipped with fire pits and grills. There are two main types of fireboxes as can be seen in the pictures below. These are great for containing a fire, but both styles have their pros and cons.
As you can see from the picture the first box is a small rectangle about two feet long and one foot wide. It is only about ten inches high. These boxes are actually terrific for cooking because the grill grating is low and close to the fire. However, they are pretty terrible for a campfire because they are small and restricted.
The second box is larger in every way and round. It has a two to a three-foot diameter and is probably almost two feet high. These fireboxes are great for getting a really nice campfire going but not so great for cooking if you are planning on using the grill grate.
Either style can be used for cooking, but the technique you use may have to change. For example, in the picture on the right, you may notice the logs piled vertically in the corner of the box. I did this because as those logs burn down and began to smolder they were just the right height from the grill grate to cook with. So, with a little creativity, anything is possible.
Coal Cooking
One of my favourite ways to cook while camping is right up against the coals. This works really well for any kind of root vegetables. In the picture above I am cooking potatoes and onions, but I have done this with sweet potato, and squash as well. Sometimes I will just put the food right on the coals as opposed to right in front of them. This works really well but you have to keep turning the food every few minutes so it doesn’t just burn. And yes, I learned that from experience.
I’m sure that some people are looking at the picture above and thinking that the potatoes and onions look really dirty and that they may not want to eat them. To that I say this; what is happening to those potatoes and onions is absolutely magic. The outside, dirty and burnt as it maybe is forming something of a crust. This protects the insides of the roots from the extreme heat. It also seals in moisture. So, the onions and potatoes in this picture are being steamed from the inside with their own aromatic juices. When you cut into these and take a bite, that flavour is unparalleled.
As for the cooking technique, all I have done in the picture is form a bit of a circle of hot coals around the vegetables. Every few minutes I turn the onions and potatoes for even cooking. It takes about forty-five minutes to an hour to cook through, but what else do you have to do. And, it’s not like you have to sit there watching them the whole time. Just like at home, poke with a knife or form to see if the vegetables are cooked.
If the fire pit is big enough keep a small fire burning a bit away from the food. This way you have fresh coals that you can keep adding to make sure the cooking temperature is even.
Other Vegetables to Cook on a Campfire
Root vegetables aren’t the only vegetables that cook well over a fire. Corn on the cob is fantastic and can be cooked either on the grill grate or right next to the coals like the root vegetables. The trick is to keep the husk on and not catch it on fire. The husk traps moisture and the corn steams in its own juice just like the potatoes and onions. The result is corn that is so sweet and so tender. It is amazing.
I love cooking asparagus and green beans on the grill grate as well. All they need is a touch of oil and some salt and pepper. The heat and smoke from the coals will do the rest. Roasted bell peppers or chili peppers are fantastic cooked over a fire as well.
In all honesty, I would be surprised if you found a vegetable that with a little creativity couldn’t be cooked over a campfire. The trick is just to give it a try. Only two things can really go wrong. The vegetables can be overcooked, or they can be undercooked. If they are undercooked, put them back on the fire and eat everything else while they are cooking. If they are overcooked, cut away what you can, and eat the rest.
Meat on the fire.
There is something about meat cooked over a wood fire that is unexplainable. The flavour from the smoke penetrates the meat. The heat from the coals crisps up the fat. There is nothing like it.
There is no meat that you can’t cook over a campfire. Having said that, I don’t usually take chicken with me unless it is cut and put on skewers. I just feel like it could be a little dicey.
I usually take steaks, pork chops, or even fish. The cut doesn’t matter just take good quality meat that you already like to eat. And remember this is a rare treat so feel free to splurge a little.
Just like when cooking at home, we want a higher heat for smaller pieces of meat and lower heat for larger pieces. So, more coals, closer to the grill grate equals more heat. Fewer coals further away from the grill grate equal lower heat.
What I take with me.
You may be thinking that I pack up my whole kitchen and take it to the campsite with me. Really, I try and keep what I pack to a minimum. Obviously, I take a cooler packed with cold packs. Other than that I take one spatula, one pair of tongs, one cast iron pan, a kettle, a small cutting board, salt and pepper, butter, and olive or canola oil. Some times, depending on what I’m cooking I will take some fresh thyme, rosemary, or a lemon, but that’s it. I keep it as simple as I can.
With the herbs, I will usually leave them whole and put them right on the grill grate then put pork chops or steak right on top of them. This imparts a really nice flavour. Or, I will just throw the herbs right on the coals and let the smoke flavour the food.
The cast-iron pan I take is only nine inches in diameter. So it is fairly small. I pretty much only take it for cooking eggs in the morning. But, if I were so inclined, it would make a great stir fry for dinner. The nice thing about cast iron is that it can be put directly on the coals for high heat cooking. For lower heat cooking it can be placed on the grill grate.
Conclusion
This post is getting pretty long, and I am about half an hour late posting it so I am going to wrap it up now. I just want to leave you with two final points. Don’t be afraid to cook over a fire. It is so much fun and can make such delicious food. Cook things that you like to eat and adjust as you go. Understand that things are going to cook a bit differently, the timing will be different and that’s okay. If you have to eat your pork chop first and your squash a little later, it isn’t the end of the world. You’re camping after all. Relax and enjoy it.
I woke up yesterday morning at a campsite overlooking the bay of fundy. I got the fire going, made some coffee and let the logs burn down to embers. I cooked up some bacon, onion, and potatoes with a little salt and pepper. When that was all cooked I cracked some eggs into the pan and added a bit of cheese. I let this cook for a few minutes, flipped it to finish the eggs (my wife is pregnant so the eggs have to be fully cooked) and served it up. The bottom got this really nice crispiness, the eggs were over hard but tender, and the only seasoning came from a little salt and pepper and the bacon.
As we sat there eating my wife remarked how delicious it was. I agreed with her, it was delicious, it was amazing actually. But then I thought about it and I said that if I had made this dish at home I would be really disappointed in it. I would actually be kind of upset with myself. The bottom was really crispy which it shouldn’t have been, the eggs were too hard, and there next to no seasoning. But there, around the fire, with the sun coming up through the trees over the bay of fundy, it was exactly what we needed and wanted.
If you take anything from this post take this; Do not cook over a campfire and judge your food with the same level of expectation you would at home. Enjoy the fact that you are outside, in the fresh air, having a good time eating good food. That’s all you need. It doesn’t need to be perfect to be perfect.
In Canada when we think of barbecue sauce we generally only think of one thing. It is sweet, sticky, and thick. This is one of many types of barbecue sauce that is out there in the world. I’m here to tell you that if you are limiting yourself to just this one style you are seriously missing out.
Today we are going to take a look at multiple styles of barbecue sauces. We are going to look at the differences, similarities, when to use them and how to make them. Let’s get to it.
This is….
Everything I Know About Barbecue Sauce
The Standard Barbecue Sauce
The barbecue sauce that we are most used to using, Kansas City style, is generally a combination of vinegar, sugar, ketchup, and spices. That’s it. The different flavours come from different combinations, amounts, and varieties of these ingredients. For example, the vinegar used could be white vinegar, cider vinegar, balsamic, etc. The sugar component could be white sugar, brown sugar, honey, maple syrup, molasses, or fruit juice. And the spices could be just about anything.
A basic standard barbecue sauce recipe may look something like this…
Standard Barbecue Sauce
A very basic barbecue sauce that can be used on almost anything.
There are alternative ways to make this basic barbecue sauce. You can sauté onion and garlic. Boil the Maple Syrup and Vinegar to concentrate their flavour. Use tomato paste rather than ketchup and adjust the vinegar and sugar to balance the flavour. You can use other spices like cumin, cinnamon, and mustard to add unique flavours to it.
If you really wanted to go crazy with the sauce you could roast or smoke garlic, tomatoes, and onion then use those as the base. Along with these, you would add vinegar, sugar, spices, maybe a touch of water.
The point is that even the most basic barbecue sauce can be elevated and elaborated upon to make something truly delicious.
Mustard Barbecue Sauce
Mustard based barbecue sauce is most typically found in South Carolina. Use specifically on pork, mustard barbecue sauce is a mixture of yellow mustard, brown sugar, and vinegar along with spices. The closest thing I can equate it to is a mustard glaze my mother used to make for ham.
The South Carolina mustard barbecue sauce is sweet and tangy and something considerably different than the ketchup-based sauce we are most familiar with.
Although both of the sauces we have talked about so far contain vinegar, neither of them are classified as “vinegar-based”. Vinegar based sauces can be made in the same way as both of the above sauces with the exception that they have a much greater amount of vinegar.
Vinegar based sauces are generally known as “wet” sauces. These don’t coat the meat in the same way as a thicker sauce would. Generally, these are used for pulled pork.
To make a vinegar-based sauce use either of the above recipes but bump up the vinegar with 2 cups.
Another type of vinegar sauce, the most basic of all the sauces, is simply vinegar, black pepper, and chili flakes. This is typically used as a “mop sauce”. That means that as the meat, most often pork, is cooking it is mopped or generously brushed with the sauce. This too is most common with pulled pork.
White Barbecue Sauce
White barbecue sauce, commonly known as Alabama White Sauce is starting to become the “it” sauce of the day. It is made pretty much the same way as a Kansas City or standard barbecue sauce with one important change. Rather than using ketchup or tomato as the base, mayonnaise is used.
This white sauce hasn’t really hit Canada yet. I would imagine that within the next year or two, it will be in every barbecue and burger joint in the country.
International Sauces
America isn’t the only part of the world with a long tradition of cooking meat over burning wood. There are lots of places that barbecue and lots of different sauces from around the world.
You have more than likely heard of Teriyaki Sauce which is a type of Japanese sauce made of soy sauce, sugar, and mirin. It’s very possible that you have also heard of Hoisin Sauce. If you read this blog regularly you definitely have. Hoisin can be used as a barbecue sauce on its own or used as the base for other sauces like Char Siu.
In India spices mixed with yogurt make a barbecue sauce for tandoori chicken. While in Argentina, herbs and chili mixed with vinegar and oil make Chimichurri.
Conclusion
The overall point that I want you to take away from this is that barbecue sauce is not one thing. It can be a lot of different things and you should try them all. You’ll never know you like something until you give it a shot.
As we get deeper into grilling season I highly recommend that you set aside a day or two to try a few of these different sauces. One just may end up being your new favourite.
The May long weekend is here! For many of us that means the official start to summer. Weekends at the cottage, drinks on the deck, and of course barbecues. In honour of the long weekend we are going to talk in depth about one of those barbecue staples; homemade hamburgers.
There are as many styles of homemade hamburgers as there are people making them. Everyone has their secrets and preferences. There are little things that we all do differently or add to our meat to make our burgers stand out.
Everyone thinks their homemade hamburgers are the best, myself included. However, what I know is that you don’t know until you know. You know? What I mean is that maybe there is something that you could be doing differently, a new idea you just never thought of that would completely change your homemade hamburger game forever.
With that in mind, today I’m going to tell you…
Everything I know about Homemade Hamburgers
In my experience there are two main approaches that people take to making burgers. One, and unfortunately the more common of the two approaches is to throw everything but the kitchen sink into the mix. The second approach is more stripped down and minimalist. I fall into the second camp. Let’s take a look at them separately for a second.
Just to clarify, we aren’t going to talk about toppings, or even buns today. Just the homemade hamburger patty itself. Otherwise, this post will be way to long and a little unruly.
Kitchen Sink Burgers –
These are by far the most common type of homemade hamburger. People put everything in there. Chopped garlic and onion. Some kind of filler like bread crumbs, oat meal, or even crushed up tortilla chips. Usually there is an egg in the mix somewhere. I’ve seen people mix in Montreal steak spice, barbecue sauce, even celery salt. You name it, I’ve pretty much seen it go into a burger.
The problem I have with these types of burgers is that they don’t taste anything like a hamburger. The flavour get’s completely muddied and lost among all these different ingredients that don’t really need to be in the mix.
Minimalist Burgers –
When I make homemade hamburgers I typically add a little garlic and onion powder, and I add either salt and pepper or a little seasoning salt like old bay. That’s it. No binders. No fillers.
On the outside of the burger, right before I start to cook it, I season it with the same ingredients I seasoned the meat with. This way there is no confusion of flavours.
Rather than covering up and muddying the taste of the beef, these few ingredients act to compliment and enhance the flavour. So, the burger tastes like beef.
Type of Meat –
When I make homemade hamburgers, I prefer a medium ground beef, to a lean ground beef. The reason why is threefold and very simple.
Reason 1. The fat adds flavour.
Reason 2. The burger holds together better.
Reason 3. The burger will be juicier.
That’s it. What else do I need to say?
If you are sitting there thinking, “But Ben, it’s so fatty!” then you have bigger problems. These are burgers we are talking about. And, most of that fat is going to be cooked out anyway. If you want a juicy, flavourful burger, the secret isn’t to add a pile of ingredients. The secret is to leave the fat in.
Grinding your own meat –
If you are set up for grinding your own meat, fantastic! Myself, and I think most chefs, prefer a mixture of chuck and brisket for burgers. Chuck is very lean and brisket is pretty fatty. The combination of the two make for a perfect ground beef for burgers. But, what exactly is beef chuck, and brisket?
Brisket –
Brisket, as I’m sure most of us are familiar with comes from the bottom front of the cow, right above the front shoulder. It is fatty and tough, but very flavourful. This makes it perfect for grinding, smoking, and braising.
Chuck –
Chuck sits right above the brisket and behind the head/neck of the cow. It also is a very tough cut of meat. It is very lean and also flavourful. Most typically you would find this as a pot roast.
Other meats –
It isn’t uncommon for a little pork either raw or in the form of bacon to be added to ground beef to add flavour or fat. This would be especially necessary if you were only using ground chuck, or venison. Because it is so lean, the pork (or brisket) is needed to prevent the meat from becoming really dry and crumbly. Without the fat it would be like eating sand unless the burgers were cooked no more than medium.
Cooking burgers to temperature –
This actually brings up another good point. Cooking homemade hamburgers to temperature. Essentially, is it safe to eat hamburger rare, medium rare, or medium? The answer is yes and no.
It is very strongly suggested that you fully cook ground meat from the grocery store, or even from your butcher. Obviously we prefer to think that everyone handling our raw meat is maintaining the highest food safety standards possible, but it isn’t always the case.
The problem with ground meat is that by grinding it you are creating all of this surface area for bacteria to live and grow. By contrast, a whole steak only has the top, bottom, and sides for bacteria to populate. When the steak is cooked, even if it is rare, these surfaces are getting hot enough to kill that bacteria. But, because there is so much surface area with ground meat, it is impossible to kill all the potential bacteria unless the burger is cooked through.
Having said all of this, if you grind the meat yourself right before you make your hamburgers, and you make sure all the equipment is clean and sanitized, then yeah knock yourself out. Eat your burger rare. Why not?
For those of you that do have instant read thermometers, and you all should, burgers should be cooked to an internal temperature of 165°F.
The perfect size for the perfect burger –
When it comes to hamburgers I would rather have two thin patties than one giant patty. I know that a lot of people like a big juicy patty and that’s fine but not me. Let me explain.
There are a lot of reasons why I prefer thin patties to thick ones. One of the really big reasons is cook time. If I make a hamburger patty that is 1/4 inch thick it is going to cook in 4-5 minutes rather than 10-15 minutes for a really thick patty. This means it is less likely to burn on the outside while it’s cooking. Also, by stacking two thin patties I get four grilled surfaces rather than the two that you get with one thick patty. That equals more flavour. There is also an extra surface for cheese.
With thin patties there is also the option to have small single patty burgers for guests who may not be as hungry. What this means is that your meat goes further without having to add any fillers.
Cooking homemade hamburgers –
I think that we can all agree that the best way to cook a homemade hamburger is on the grill. If you make thick burgers, use a moderate heat. For thin burgers, you can use a high heat. Don’t press them and try to only flip them once.
If you don’t have a grill, I prefer to cook them in a hot cast iron pan. I don’t add oil to it as there will be enough coming out of the burger itself.
That’s really about it.
Conclusion –
Pretty much everybody loves burgers, except Barb and vegetarians (I’ll eventually do a veggie burger post). How you make your burgers is up to you. You are the one eating them after all. All I suggest is taking a step back, thinking about your burgers as they are now, and asking yourself if they could be better. If they can be, I hope that this helped. If they are as good as they can possibly be, I would love to hear about them. Talk to me in the comments.
Have a great long weekend everyone and thank you for reading!
What’s better than a perfectly cooked steak? Whether it’s a rib eye, tenderloin, t-bone, strip loin, or sirloin there is simply nothing better.
I know that there are people out there, meat eaters, that don’t really like steak. Often the reason they give is that they don’t like it when blood comes out of the steak on to their plate and stains their potatoes. They find steak tough. Or they don’t like the flavour. Today, I’m going to show you that all of these issues that many people have with steak are easily fixed by choosing the right steak and with proper cooking techniques.
Because I love steak so much I thought it was high time to share with you…
Everything I Know About Steak
If I had to choose a favourite cut of steak it would unquestionably be rib eye. Why? Well, because I love the fat content of a rib eye. I find the meat is tender and flavourful. It just suits me. But what about you? Do you have a favourite cut of steak? Do you know the difference between steak cuts?
Choosing the right steak for you
Imagine that in your whole life you have never had a steak before. You walk into the butcher shop, you see all the options, all the potential. How do you know what to choose? How do you know what steak is going to be right for you? Now, even if you have been eating steak your whole life there is a really good chance that you eat what you’re familiar with and what you grew up with.
If you grew up in the sixties and seventies, or if you were an adult in that period there is a really good chance that you think that a t-bone steak is the pinnacle of flavour and decadence. If you grew up in the eighties you may think porterhouse is everything. In the nineties it was all tenderloin and strip loin. Now, it’s strip loin and rip eye. Times change. Tastes change. However, there is a steak for every taste and time.
Choosing the right steak for you takes some thought. You have to know what you like and what you don’t like. If you don’t know that, you need to experiment with a bunch of different steaks to find out and what a fun experiment it will be.
When I choose a steak I am looking for fat content, tenderness, and flavour. That is why I prefer a rib eye steak to other cuts. The rib eye is the fattiest cut, and because of that I find it has the most flavour. Because I love rib eyes doesn’t necessarily mean that you will. To find out what might be right for you, let’s take a look at each of the five most common cuts of steak individually.
Rib eye
The rib eye is cut from the rib section of the cow. It is a lightly used muscle which is why it is so tender. It is also the most marbled of all the steaks which gives it a high fat content, and more flavour than other steaks.
If you like fatty, juicy, flavourful meat then the rib eye is right for you. If you prefer something a bit leaner you are looking in the wrong place. These are best cooked medium rare to medium.
New York Strip Loin
The Strip Loin is the most common steak for people who don’t really know much about steak. It isn’t a particularly flavourful or tender cut of meat.
The strip loin is cut from the short loin of the cow which sits right behind the rib section nearer the back end. In comparison to the rib eye it has little marbling or fat content. It does have a layer of gristle and fat on the top of the steak which may or may not be cut off prior to cooking.
Sirloin Steak
The sirloin is essentially the same thing as the strip loin. The only difference is that it comes from a little further back on the cow. A sirloin is part of the t-bone steak.
Depending on where you are in the world sirloin may just refer to strip loin or strip loin may refer to sirloin. There really isn’t much difference.
Tenderloin
As you can probably guess from its name, the tenderloin is very tender. It is the most tender of all the steaks but it has next to no fat content and personally I find it has very little flavour. In other parts of the world the tenderloin is called filet, fillet, or eye filet.
The tenderloin is a part of the cow that never really does much work, hence why it is so tender. It is a great steak for those that don’t really like to chew. A good tenderloin should basically melt in your mouth.
Tenderloin would never be my first choice for a steak as it is typically one of the most expensive cuts and again I don’t find it that flavourful. Having said that, if it’s put in front of me I will happily eat it, or any steak really.
T-bone Steak
A t-bone steak is one of those cuts that has a reputation as being the gold standard of steak. As the name suggests it has “t” shaped bone. This bone separates two cuts of meat which make up the t-bone steak. Those cuts are tenderloin and sirloin or strip loin.
A tenderloin and a sirloin do not cook in the same amount of time. And so you may order a t-bone and get half of it perfectly cooked but the other half is going to either be over or under cooked.
In theory a t-bone steak is a great idea. You kind of get the best of both worlds. However, in practice it never really works out.
If you’re wondering a porterhouse is a t-bone that is cut from further back on the cow. It has a greater portion of tenderloin where the t-bone has more strip loin or sirloin.
Conclusion
If you are just dipping your toe into the wonderful world of steak I suggest starting with a strip loin. It has a decent flavour and is fairly tender and isn’t very expensive.
If you like really tender things with not a tonne of flavour and you have money to burn then the tenderloin is for you.
If you have been eating strip loins and tenderloins your whole life but have always shied away from the rib eye it might be time you try it. And if you are the type of person who likes to live on the edge, and doesn’t mind a little extra fat because you know it means a lot of extra flavour, than a rib eye is right for you.
Cooking Steaks at home
It is all well and good to know what type of steak you want but if you have no idea how to cook it once you get it home what’s the point?
There are three main ways that people can cook steak at home. All three techniques can yield a delicious steak if you know what you’re doing. So, let’s take a look.
Barbecue
Probably the cooking method that most people jump to first when talking about steak is the barbecue. There is good reason for this. Steaks cooked over an open flame can be amazing as long as the person cooking knows what they are doing. There are a lot of “Grill Kings” out there who burn the outside of their steaks to a crisp and leave the inside raw or way overcooked.
The secret to really good barbecued steak is simple; heat management.
Often times people will crank the barbecue and try to cook a steak over that high heat. This can work if your careful and your paying attention. However, there is a big risk of burning the steak and ruining dinner. For thinner cuts of meat that cook quickly this isn’t much of a concern and really you want that high heat for those.
For anything thicker than your little finger you want a more moderate, consistent heat. This will give you a uniform temperature throughout the steak without burning the crap out the outside of the steak.
For really large cuts you may want to start them on very high heat to get a really nice sear on the outside and then turn the heat way down close the lid and finish cooking them that way.
Broiler
The broiler in most people’s ovens is rarely used. Some people don’t know how to use it. But, if done right it you can cook the best home cooked steaks you’ve ever had.
The broil setting on your oven turns the top oven element on high. This creates a very high direct heat. This works very well for cooking smaller cuts of meat or for searing the outside of bigger cuts at the beginning or at the end of cooking.
The downside to using the broiler is that it is going to heat your house up and the fat splattering from the steak is going to make a mess in your oven. It is totally worth it though.
This method can cook a steak very quickly and so it is important to keep an eye on the steak the whole time it’s cooking.
Stove top
For my money there is really only one way to cook a steak on the stove top and that is in a cast iron pan.
You have to get the pan very hot before you put the steak in. I don’t usually even add oil to the pan as enough fat comes out of the steak.
This method is great for cuts of any size but bigger cuts may need to be finished in the oven.
The big upside to cooking steak in a cast iron pan is that you get a beautiful even sear. You also have more control over the cook because you are hands on the steak the whole time, and you can baste it with butter and herbs. This is my preferred method of cooking steak at home.
The downside to this technique is that if you don’t have a good hood vent your house is going to be filled with smoke. Also, your stove top is going to be covered in grease spatter.
Conclusion
No matter how you are cooking your steak or what cut of steak you are cooking there are a few tips that you should know that will give you the best steak possible.
Drying
First of all when you get home with your steak, unwrap it and put it in your fridge overnight ideally on a rack so both sides of the steak can breath. This will dry the surface of the steak allowing you to get the best sear you can and concentrating the flavour of the meat itself.
Warming
Before you cook your steak let it come to room temperature. That’s right, let the steak sit out on your counter for thirty to sixty minutes prior to cooking it. It takes less energy to heat something that is room temperature than it does to heat something that is fridge temperature. This will allow for a more even and quicker cook. As your steak will be cooking is less time, it will have less residual heat and will have less carry over.
Carry over cooking is when the residual heat in an item continues to cook it once it has been removed from the heat source. The greater the mass of an item and the longer it has been cooking the greater the amount of residual heat and thus more carry over cooking.
Resting
After the steak is cooked it is very important to let it rest. The reason why involves that residual heat we were just talking about.
When you take a steak off of a heat source it takes time for that heat to dissipate. As that heat is dissipating the molecules within the steak start slowing down. As the molecules within the steak slow down and cool the fat and muscle proteins that have been liquefied by the heat start to cool and solidify. This allows for an even distribution of fat and moisture through out the steak.
If you were to cut into a steak as soon as it comes off the heat all of these juices would come pouring out. The rarer the steak the more bloody those juices will be. If you take that same steak, no matter how rare, and let it rest for five to ten minutes depending on it’s size, those juices will remain in the steak when it’s cut. As I’m sure you can imagine, a steak can’t be juicy if all of its juice is on the plate. Resting allows for a juicy tender steak.
Seasoning Steak
Steak isn’t cheap, and can actually be very expensive depending on what you are buying. Because it is so expensive I stay from over powering sauces and flavourings. I actually want to taste the steak.
When it comes to seasoning a steak I keep it pretty simple. I generally stick to salt and pepper occasionally adding garlic and onion powder and maybe old bay seasoning. That’s about as far as I go. If I am roasting a larger steak or a whole strip loin, prime rib, or tenderloin I may do a garlic and herb rub. The thing is all these flavours compliment the flavour of the steak rather than over powering it.
I also may baste my steak with butter, garlic and herbs while it’s cooking. Again, this compliments the flavour of the steak. Basting get’s the flavour into all the nooks and crannies of the steak making it even more delicious.
When it comes to sauces I keep it pretty simple. A flavoured butter is always a great option. You just mix herbs and flavourings into butter, put it on the steak and let it melt. Delicious! I also like chimichurri which is an herb sauce from South America that works incredibly well with steak. I am also partial to pan sauces, demi glace, and horseradish.
I always avoid barbecue sauces and things like HP Sauce on steaks. I find these completely cover up the flavour of the steak making it a waste. If someone is serving me a steak with an overpowering sauce my first assumption is that are serving me a low quality steak. The sauce is there to cover up the low quality. Always be weary of strong sauces.
When it comes to steak, simple is always best. Pay the money for a good steak and you won’t need any sauce at all.
Temperature
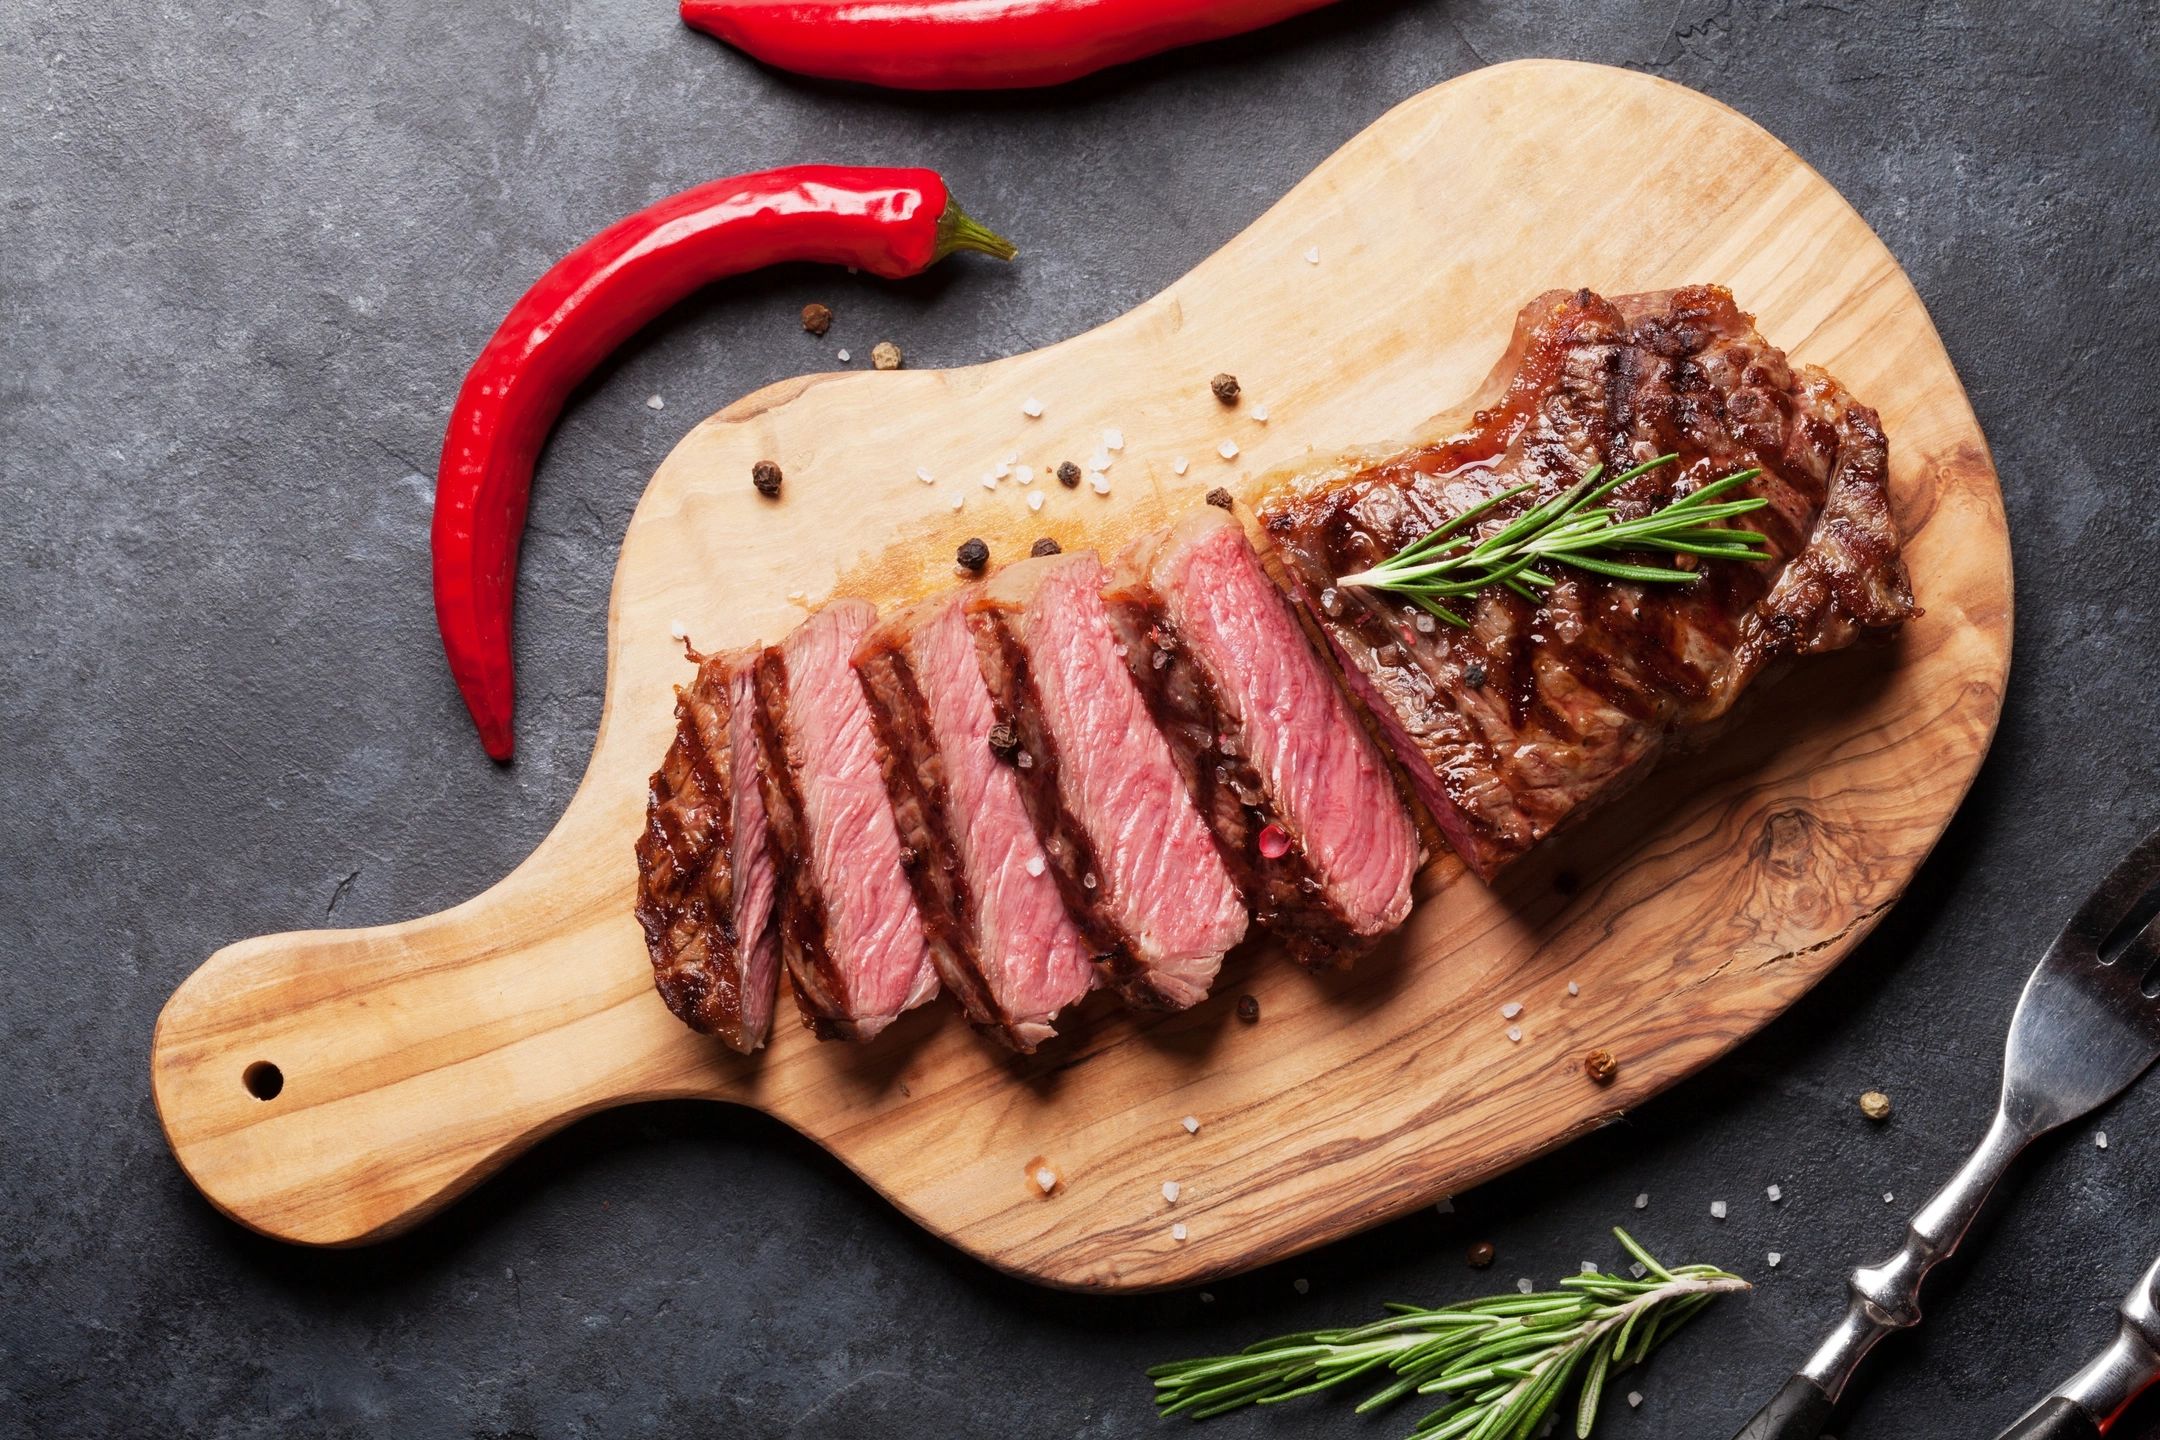
One final thing we haven’t touched on yet is temperature. How do you like your steak cooked? Well, it depends on the steak. I find that with a rib eye medium is perfect. Anything less and the fat doesn’t really get a chance to cook properly. When it comes to strip loins rare to medium rare is preferable. And for tenderloin medium rare is the perfect temperature.
On tv and in restaurants you will see chefs and cooks checking the doneness of steaks simply by touching them. We can do this because of practice. When you cook a thousand steaks you get a pretty good idea of how they feel and how they act. You can tell the difference between when a strip loin is medium and when when a tenderloin is medium. They feel very different. And so I recommend using a thermometer rather than guessing at the temperature.
For rare steaks the temperature is 130°. Medium rare is 135°F-140°F. Medium is 140°-150°. Medium well is 150°-160°. And well done is 160°-170°.
I love ribs. I love them done all kinds of ways and with all kinds of flavours. And so, for whatever reason, I thought today I would talk all about ribs. So sit back, strap in, and get ready to learn everything you ever needed to know about cooking ribs at home.
For the purposes of today’s post, I am focusing only on pork ribs. So if your looking for beef short ribs this isn’t the post for you.
The type of rib
There are really only two types of pork ribs. Side ribs, and back ribs. You will often find a lot of other names such as baby back ribs, St. Louis style ribs, spare ribs, etc. But all of these fall under either back rib or side rib. Let’s take a look at the differences in the two.
Side Ribs –
Side ribs or spare ribs come from the belly section or side of the pig. These are meatier and juicier than back ribs. More than likely if you have ordered a rack of ribs at a restaurant, this is what you were given.
Back Ribs –
Back ribs or baby back ribs come from the back of the pig. Close to the loin. Back ribs aren’t as meaty or fatty as side ribs, but they are more tender and so need less cooking. These also tend to be the more expensive of the two rib types.
Cleaning the ribs
So, you have settled on the ribs you want. You get home, you open the package, now what? Well, before you cook the ribs, you have to clean them. When I say you have to clean them, what I mean is that it’s a good idea to clean them in order to get the best eating experience from them. To be clear, I’m not talking about washing the ribs, I’m talking about cleaning them.
On the back of the ribs, there is a membrane which doesn’t really break down in cooking. Take a knife and slice horizontally between this membrane and the first rib bone. You should then be able to grab the membrane and pull it off in one big strip. It is easiest to use a paper towel or a clean dish towel to grip the membrane.
The only other cleaning you have to do is to take off any excess fat, or any pieces of meat that look out of place. It is possible that when you buy your side ribs they will have a line of meat at the bottom and flap of meat on the back. I prefer to take these off and use them for something else. Often a soup, or Chinese style honey garlic spare ribs. The rib tips come off very easily. You just have to find the end of the rib bones and run your knife along the length of the rack.
Brining/Marinating
Okay, your ribs are cleaned and now it’s time to get cooking…or is it? At this point, you could absolutely start cooking your ribs. But, you can also impart a tonne of flavour by bringing or marinating your ribs prior to cooking. What’s the difference between a brine and a marinade?
Brines –
A brine is a salt and water solution. It usually contains sugar as well and other flavourings. The ratio of salt to water is 16-1. So for every cup of water, you want 1 tbsp of salt. For ribs, I usually add equal parts sugar to salt.
If you wanted to brine two racks of ribs you would likely use 4 litres of water, 1 cup of salt, 1 cup sugar, a small handful of peppercorns, 4 bay leaves, a bunch of thyme and 1 cinnamon stick. Heat all of this together until the sugar and salt have dissolved. Let cool to room temperature, strain, and add your ribs. Let the ribs sit, in the brine, the fridge, for at least 6 hours. Now, they are ready to cook.
The purpose of the brine is two-fold. One, you are imparting flavour into the meat. In this way, a brine is similar to a marinade. Two, because of the salt content of the water liquid is actually being drawn out of the ribs. Simultaneously, brine is replacing that liquid. Because of the high salt content in the brine, and now the high brine content in the ribs, the meat will retain moisture, and be much juicier even after a long cooking time.
Marinades –
Marinades have one purpose, impart flavour.
A marinade can be almost anything but the idea is that you want a lot of flavour and balance. You want a bit of sweet, mixed with acidity, mixed with salty, maybe even a little heat. That’s really all it comes down to.
Cooking Your Ribs
Okay, first things first. A lot of people boil their ribs to speed up the cooking time. The problem with this is that the high heat of boiling actually toughens the meat. And unless you have heavily seasoned the boiling liquid you are removing all the rib flavour. Ribs are the type of thing that you can’t rush. Trying to speed up the process doesn’t help you or the ribs.
Now, if you do want to tenderize the ribs you can cook them in liquid, but DO NOT BOIL THEM. Braise the ribs.
Braising is the technique of cooking an item in liquid or moist heat at a low temperature. Yes, this is going to take longer, but the quality of the ribs will be undeniable. Make sure to flavour your braising liquid. Use stocks, herbs, vegetables, vinegar, whatever you want. But flavour it. And don’t overcook the ribs. You want them to still have structure.
Slow Roast
My preferred method of cooking ribs at home is to slow roast them. They can be put in the oven naked and finished with a sauce. They can be dry rubbed with a mixture of salt, sugar, pepper, and flavourings. Or they can be lightly sauced as long as the sauce isn’t too sweet. I usually cook my ribs, uncovered in the oven, on a broiler rack, at either 275°F or 300°F. I put them in the oven and forget about them for three or four hours.
If I am going to put a classic BBQ sauce on the ribs, I actually take them out of the oven once they are tender, slather them in sauce, and then put them under the broiler for a few minutes. This gives me that lightly charred flavour of the BBQ while using only my oven.
If I have gone the dry rub route I usually go with a light finishing sauce like a gastrique. A gastrique is essentially a French sweet and sour sauce made by reducing vinegar and sugar. Other flavourings can be added as well. An example of this would be equal parts cider vinegar, and sugar, with 1 cinnamon stick and 1 star anise. The is all simmered together until the sauce is thick. I then drizzle this over the ribs.
Conclusion
Of course, there are countless ways to cook ribs. Everyone has there own technique from soaking them in Dr. Pepper or Coke, to boiling the shit out of them. Whatever you choose to do to your ribs is up to you, you’re the one eating them. But the information I just laid out, should you choose to use it, will help you create the best ribs possible.
Do you have a tip I didn’t mention? Do you disagree with something I said? I’d love to hear from you. Leave a comment and I will get back to you as soon as I can.
It’s almost officially summer and we all know what that means. It’s burger time! Burgers are obviously classic summertime fare, and one of those unique foods that pretty much everyone has their own secret recipe for. Now, despite the fact that everyone thinks they make the best burgers, they don’t. Yes, some of you out there can make a really good burger but all too often people fall into the same burger traps. Avoid the common burger mistakes and become a burger pro with my 7 tips for making your burgers better.
Number 1. The Meat.
Choosing the right meat is the key to burger success. I would like to tell you to get some beef chuck and brisket and grind it yourself making a perfect 50/50 blend. Undoubtedly, that will make an incredible burger. But, you’re not going to do that and generally neither am I. So what should you use? Buy good quality lean ground beef. Fat is good in a burger but too much fat leads to a lot more shrinkage and flare-ups on the grill that’s why lean ground beef is better.
Number 2. Seasoning The Burger.
People are often given bad advice when it comes to what they should put in their burgers. There are a lot of “experts” out there that recommend adding all kinds of things to your burger meat before cooking it. Things like bread crumbs, onion, garlic, Worcestershire Sauce, steak spice and all kinds of other weird things. To be completely honest I was brought up on burgers like this but have since gained a new perspective. Let the burger taste like beef. All I put in and all I recommend putting in your burger meat is a little salt and pepper.
Having said that, I generally do season the outside of my burger with a mixture of garlic powder, onion powder, and Old Bay Seasoning. I use this blend on steaks as well. This way you still get a lot of flavour from your burger but it also still tastes like beef.
Number 3. Making Your Patties.
I am of the school thought that thinner is better. I make my patties as thin as I can by flattening them first in my hand than on a flat surface covered in parchment paper or plastic wrap. I use enough meat so that once they are fully flattened they are about one and a half times the diameter of the bun. I do this because the burger cooks quicker. They end up cooking into the perfect thickness and diameter for the burn. They cook more evenly. And they’re easier to eat.
If you do like a really thick burger there is a way to mitigate some of the shrinkage. After your patty is formed, stick your thumb in the centre making a thumb-sized hole pretty much all the way through the centre of the patty. This will not only help prevent the patty from shrinking too much, it will also help it cook more evenly.
Number 4. Cooking Your Burgers.
How you cook your burger depends on how thick you’ve made it. If you followed my advice and made your patty thin, you want to cook your burger on a medium-high to high heat. For thick burgers, you want to cook on a medium heat. The reason being that if you cook a thick burger on high heat it will burn on the outside long before it ever cooks through.
If you are cooking your burger in a pan, let’s say cast iron, get the pan nice and hot and don’t add any oil. Enough fat will come out of the burger that you don’t need to add any extra.
If you are cooking on a barbecue, heat your grill up for at least twenty minutes before you start cooking. Also, make sure your grill is really clean. As long as the grill is hot and clean, you shouldn’t need to oil it. If you have cleaned your grill and heated it up and your burger is sticking it’s likely because you are trying to flip it too soon. Give it a minute and let it release from the grill naturally.
Don’t push your burger down. All you’re doing is squeezing the juice out of it and making your burger dry. The only time this is acceptable is at the very end of cooking. If you give the centre of the patty a little push with your tongs or spatula and the juices run clear the burger is done, if they are still red cook it some more.
Number 5. Say Cheese.
The cheese that you use is fully up to you. I do have to say that for a long time I snubbed processed cheese slices but have recently fallen back in love with them on burgers. They add something that nothing else can. I think it’s probably just nostalgia but either way, it’s delicious.
Now, what type of cheese you use is your call completely, but when you add the cheese is really important. If you add it too early it will be melted and gone before your burger is fully cooked. If you add it too late, your burger will be overcooked and dry before the cheese melts. This isn’t really that big a problem with processed cheese slices as they melt if you blow on them.
Add the cheese once you flip your burger for the last time. You know it’s the last time because you checked the doneness of your burger by gently pushing down the centre of the patty and the juices are almost clear but not perfectly. This gives you the perfect amount of time to melt your cheese and finish cooking your burger. Flip the burger before adding the cheese as this gives the cheese the hottest possible surface of the patty and helps to speed up the melting process.
Number 6. Choosing the right bun.
When it comes to the bun there are really only two things that you need to worry about. The first being the size of the bun in relation to your burger. If you made your patty nice and thin and one and a half times the diameter of the bun this shouldn’t be that much of an issue. But keep it in mind. There are few things more annoying when eating a burger than having too much or too little bun.
The second thing you need to think about when choosing your bun is its structure. If the bun is too soft it will absorb fat from the burger and go mushy. If it’s too firm, it may fall when you try to eat it. You want a bun somewhere in the middle. Now, some of these issues can be dealt with by toasting the bun, but you want to be careful with this as well. A light toasting is delicious and helps to protect the structural integrity of the bun by creating a bit of a protective barrier between the surface of the burger and the inside of the bun. However, a bun that is over toasted and crispy falls apart and takes away from the enjoyment of eating the burger.
Number 7. Condiments.
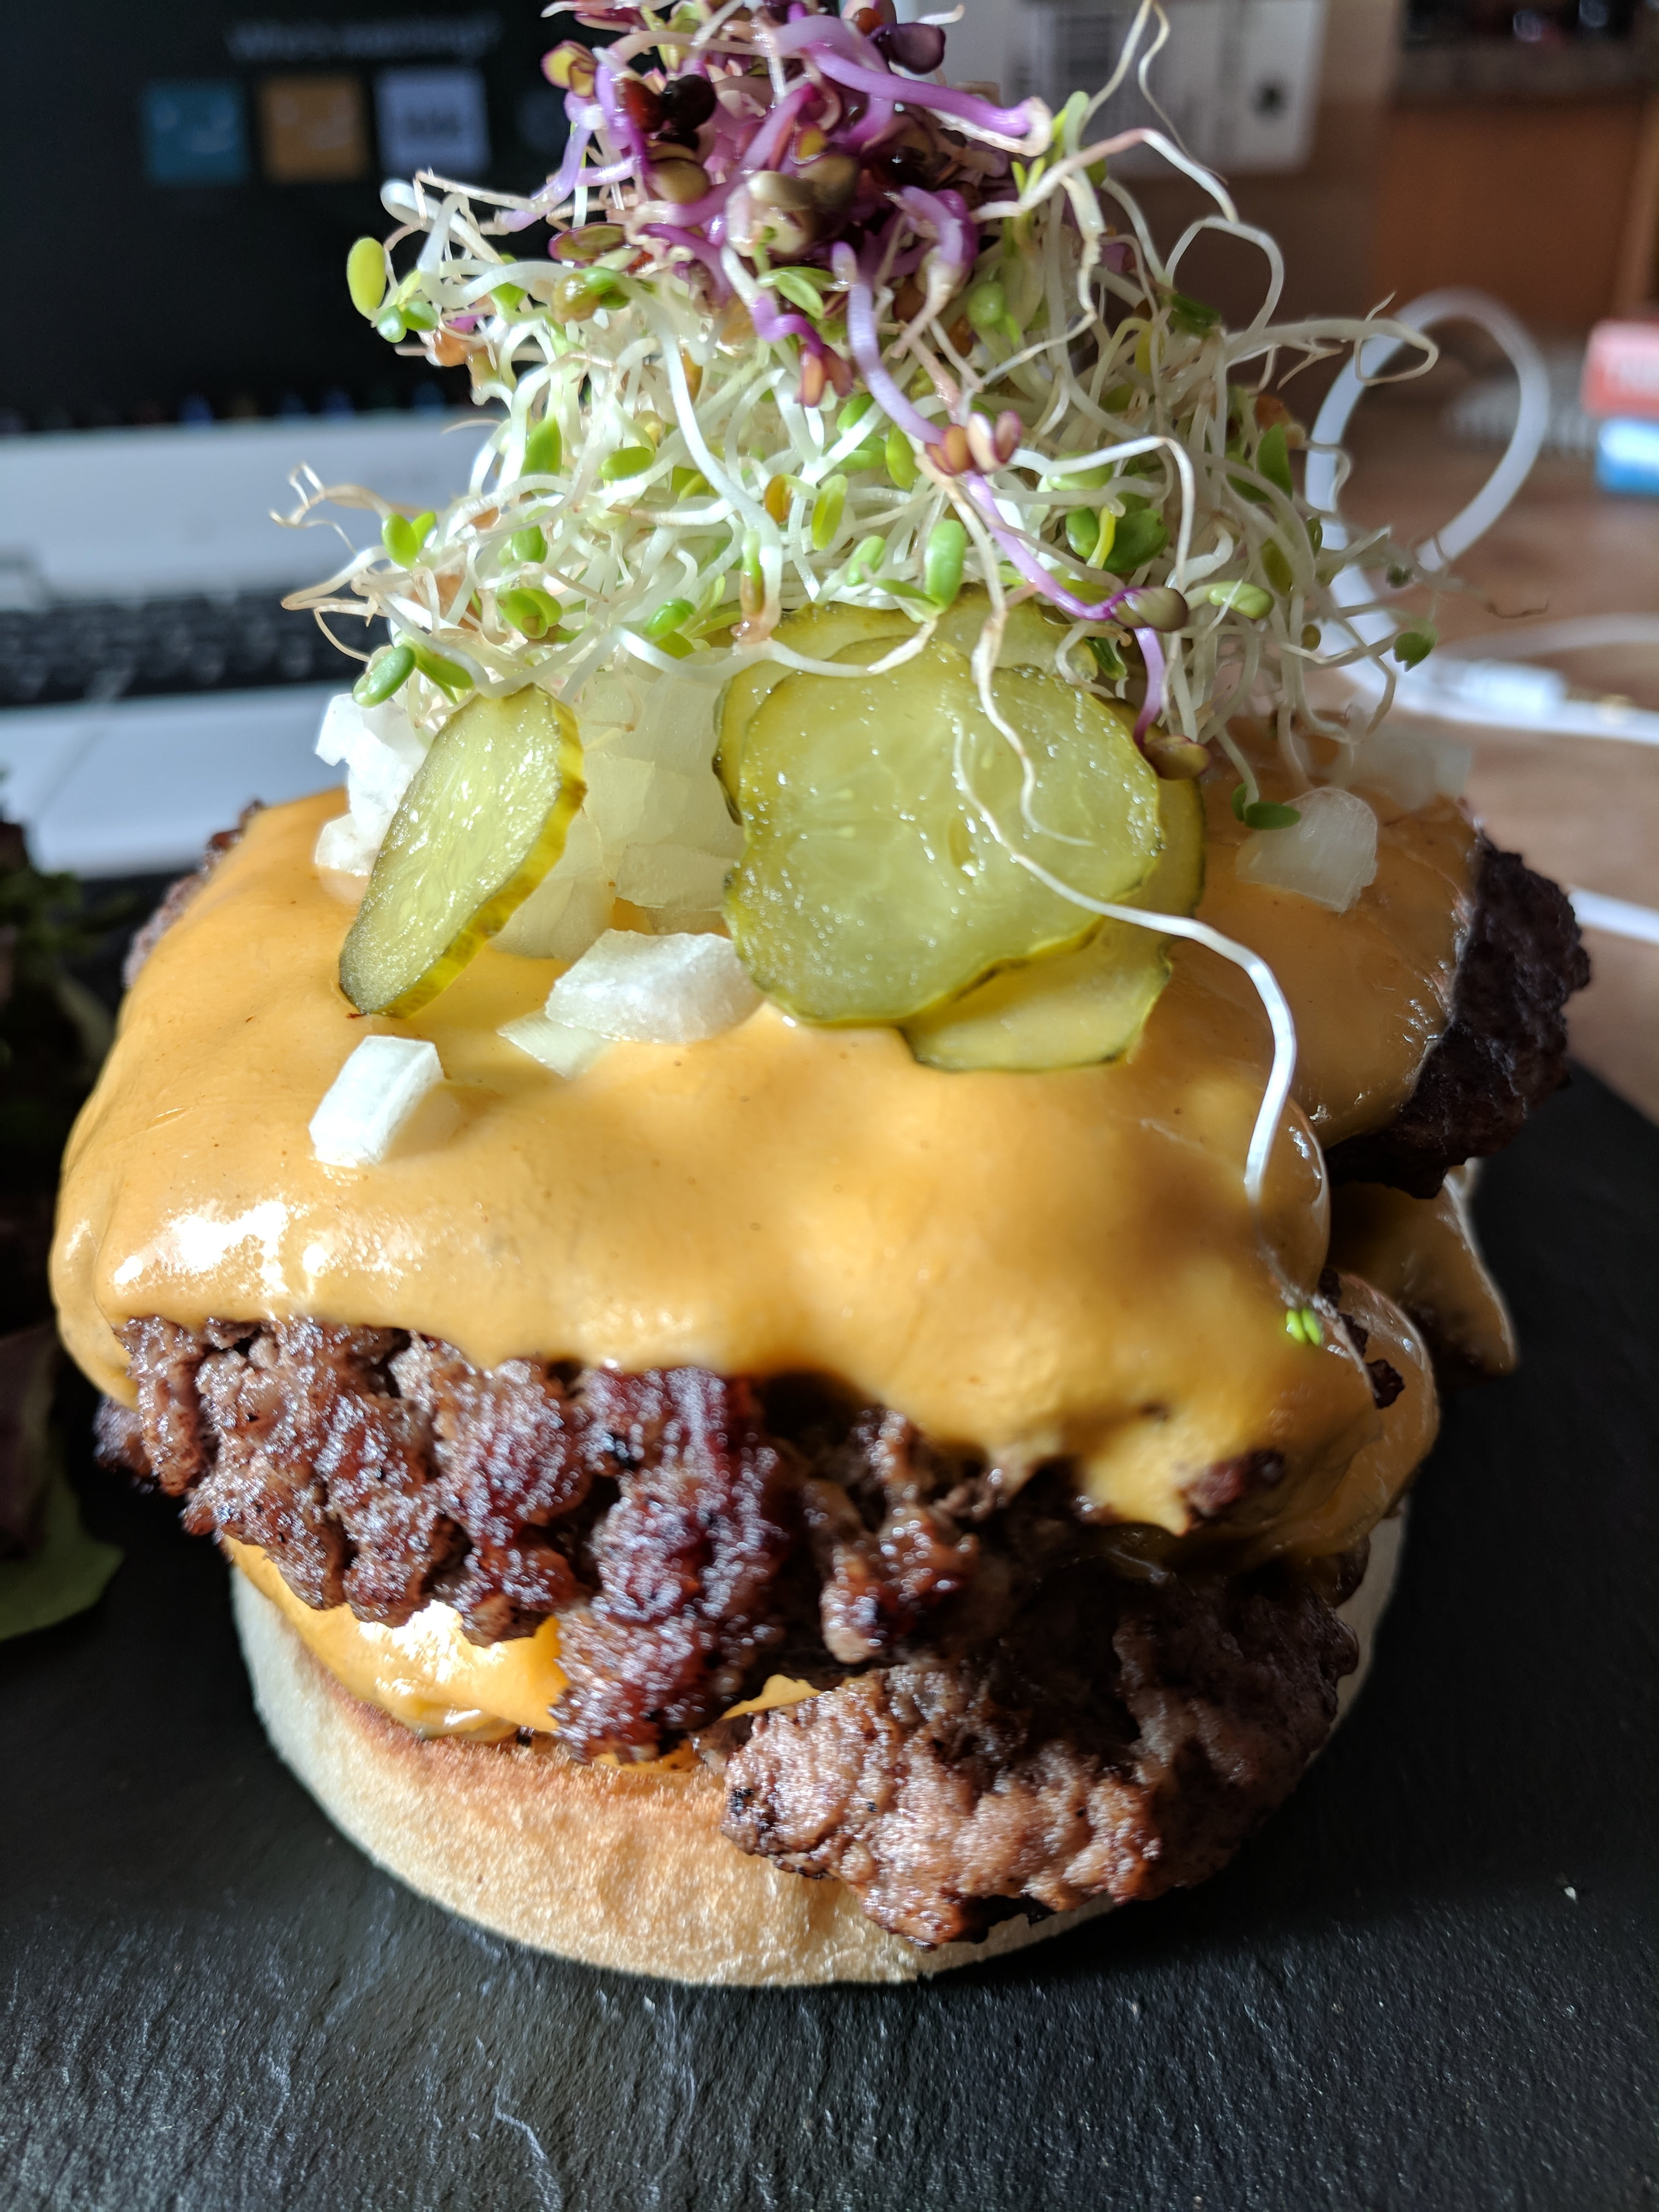
What you put on your burger is your own business. I’m not going to tell you how to live your life. However, I will say don’t put too much stuff on your burger. There is a trend these days to pile unnecessary shit on a burger just for the sake of doing it. But ask yourself if it’s actually enjoyable to eat that or does it just look cool? The other thing is, the more stuff you put on your burger the harder it’s going to be to eat and the messier it is going to be. Just think it through.
If you are going more of a classic route with lettuce, tomato, and pickles cut them as thin as possible. This is especially true of the tomatoes and pickles. The are few things worse than biting into a burger and having its contents shoot out the backend because the tomatoes created a slick surface. By cutting the tomatoes as thin as you can you hopefully prevent this. Same going for pickles.
We use cookies on our website to give you the most relevant experience by remembering your preferences and repeat visits. By clicking “Accept”, you consent to the use of ALL the cookies.
This website uses cookies to improve your experience while you navigate through the website. Out of these, the cookies that are categorized as necessary are stored on your browser as they are essential for the working of basic functionalities of the website. We also use third-party cookies that help us analyze and understand how you use this website. These cookies will be stored in your browser only with your consent. You also have the option to opt-out of these cookies. But opting out of some of these cookies may affect your browsing experience.
Necessary cookies are absolutely essential for the website to function properly. This category only includes cookies that ensures basic functionalities and security features of the website. These cookies do not store any personal information.
Any cookies that may not be particularly necessary for the website to function and is used specifically to collect user personal data via analytics, ads, other embedded contents are termed as non-necessary cookies. It is mandatory to procure user consent prior to running these cookies on your website.


 On the back of the ribs, there is a membrane which doesn’t really break down in cooking. Take a knife and slice horizontally between this membrane and the first rib bone. You should then be able to grab the membrane and pull it off in one big strip. It is easiest to use a paper towel or a clean dish towel to grip the membrane.
 can be lightly sauced as long as the sauce isn’t too sweet. I usually cook my ribs, uncovered in the oven, on a broiler rack, at either 275°F or 300°F. I put them in the oven and forget about them for three or four hours.