Walking around the grocery store, you will see dozens of different types of Barbecue sauce. Many of those sauces are delicious and make great options for whatever you are cooking. If you are happy with your store-bought sauce, then, of course, keep using it. However, if you want something a little different, it may be time to start making your own homemade barbecue sauce. To be clear, this is not about convincing you to stop buying barbecue sauce. This is for people who want something a little different and are ready to level up to make their own homemade barbecue sauce. Let’s take a look.
What is Barbecue Sauce?
Before you can make homemade barbecue sauce, you first need to understand what it is. The Merriam-Webster dictionary defines barbecue sauce as “: a spicy sauce usually eaten with barbecued food.”. That’s a pretty loose, but also a standard definition. As I’m sure you are fully aware, most barbecue sauces on the market today would never be classified as “spicy.”. Does that mean they aren’t barbecue sauce? No, of course not. For our purposes here today, we are going to define barbecue sauce as an acidic/sweet/occasionally spicy sauce eaten with barbecued food.
In all honesty, there are a lot of different types of barbecue sauces from Carolina Gold mustard-based sauce, to Kansas City White Sauce which is mayonnaise-based, to Texas Vinegar Sauces. However, today, our focus is going to be on the classic tomato-based sauces that most of us use most often. If you would like more information on those other sauces, check out this post I did last year.
The Base of the Sauce
When making homemade barbecue sauce, there are two main starting points. You can begin with fresh tomatoes, or you can begin with ketchup. Both of these bases have their benefits and their drawbacks, let’s take a quick look at each.
Starting with Fresh Tomatoes to Make Your Barbecue Sauce
When using fresh tomatoes to make your homemade barbecue sauce, you typically have to roast or bake the tomatoes first. You can also smoke the tomatoes to get a more “authentic” barbecue sauce taste. This roasting removes the sharp acidity of the tomato and intensifies their natural sweetness. To cook the tomatoes start by slicing them in half, drizzling them with olive oil, and seasoning them lightly with salt and pepper. Put them in a 400°f oven for 30-45 minutes or until they soften and start to brown around the edges. Once the tomatoes are roasted, combine them with the other ingredients, then purée the sauce and pass it through a fine-mesh sieve to ensure a smooth consistency. Tomato paste is often added to sauces made from fresh tomatoes to ensure the texture of the final sauce is that of a typical barbecue sauce.
Benefits
You have complete control over the flavour of the sauce.
You know exactly what is in the sauce.
Usually, tastes better than ketchup-based sauces.
Drawbacks
More preparation is required.
More effort is required to perfect the flavour of the sauce.
The sauce must be puréed and strained to ensure a smooth consistency.
Mush more time is required to make this type of sauce.
Starting with Ketchup as the base of your Homemade Barbecue Sauce
In truth, either way, you are basically starting with ketchup. The difference is that you are either making the ketchup from scratch and adding the ingredients to make it a barbecue sauce as you go. Or, you are using store-bought ketchup and adding the elements to make it a barbecue sauce. The benefit of using store-bought ketchup is that you are removing five or six steps from your sauce-making process.
Typically, when store-bought ketchup is the base of a barbecue sauce, there are only a handful of ingredients used in the sauce. These are vinegar, sugar (could be white or brown sugar, molasses, honey, or maple syrup), and spices (commonly onion powder, garlic powder, cayenne, etc.). For a more “authentic” barbecue sauce taste, liquid smoke or smoked salt are sometimes added. Making barbecue sauce in this way takes only a few minutes and requires no cooking. However, some people prefer to use ketchup as the base but to use fresh onions and garlic, which they sauté until soft. The other ingredients are added to the onion and garlic, puréed and passed through a fine-mesh sieve.
Benefits
Quick to make.
Less effort.
Fewer ingredients are required.
Don’t have to cook.
Drawbacks
You have slightly less control over the flavour.
There may be hidden ingredients in the ketchup.
Most often, I use store-bought ketchup as the base of my sauce, it is much more convienteant and much quicker than using fresh tomatoes. However, I do prefer the flavour and the control I have over the flavour more when making a sauce with fresh tomatoes.
Acid
The standard barbecue sauces that we are talking about today have four main elements. The first, which we’ve already talked about, is the tomato element. The second is acid, more specifically, vinegar. The type of vinegar you chose to make your sauce will affect its final flavour and appearance. The three most common options are white distilled vinegar, apple cider vinegar, and balsamic vinegar. I find that apple cider vinegar is the best all-around, go-to vinegar for barbecue sauce. However, that is not to discount either white or balsamic vinegar, which both have their place. Balsamic adds a deeper, more complex acidic taste to the sauce. White vinegar, on the other hand, has a much more upfront, punch you in the face, kind of flavour. Apple cider vinegar is somewhere in between these two. Balsamic will also give your sauce a much darker appearance.
Sweet
The third element of these sauces is something sweet. Now, some barbecue sauces are very sweet, and some are not, but most, if not all, have some sweet element to them. Like the vinegar, the sweetener you choose to use will affect the flavour and appearance of the sauce. Most commonly, brown sugar, molasses, and maple syrup are used to sweeten barbecue sauces. Molasses will add the most depth to the flavour of the sauce, and will also have the most significant impact on the appearance of the sauce. Brown sugar adds depth to the sauce, though not as much as molasses. Sauces with solid sugars like brown sugar or white sugar, usually have to be cooked to ensure that the sugar dissolves into the sauce. Maple syrup adds that earthy, maple flavour to a sauce though it is more expensive than both molasses and brown sugar.
Flavourings
Flavourings are the final element to a barbecue sauce. Depending on how you are making your sauce, these may include either onion, or onion powder, garlic or garlic powder, and chilli or chilli powder. Black pepper is commonly used in relatively large amounts in barbecue sauce as well. If you are making the sauce from scratch, you may include spices like cinnamon, clove, and nutmeg, which are found in most ketchup. As I mentioned earlier, you may choose to use liquid smoke or smoked salt to achieve a more “authentic” barbecue sauce flavour. All that means is that the smokey element will make your sauce taste more like bottled sauces.
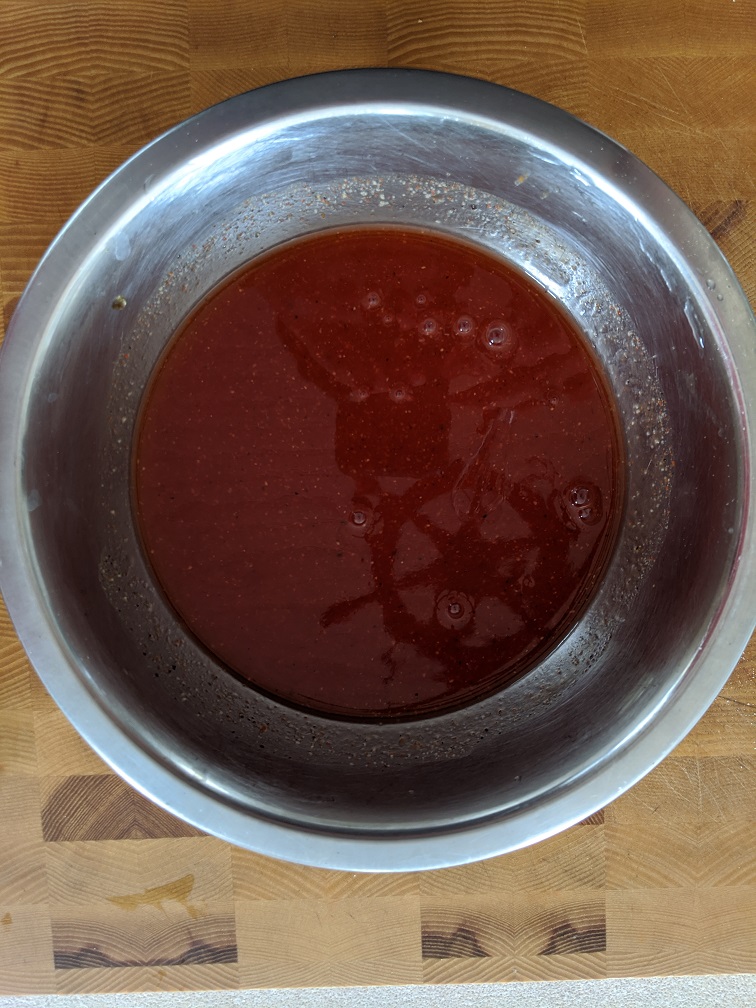
Typically, if I am making a quick sauce, I will use ketchup as the base, add to it cider vinegar, molasses, onion powder, garlic powder, cayenne pepper, black pepper, and sometimes liquid smoke. I stir all of these ingredients together and have a useable and tasty sauce in minutes. When making the sauce from scratch, I use my roasted or smoked tomatoes, along with sautéd onions and garlic. To that, I add in some tomato paste, brown sugar, cider vinegar, a cinnamon stick, some chilli flakes, a few cloves, and maybe some thyme and mustard powder. I simmer all of these ingredients with a bit of water for about an hour, then purée it in a blender, and pass it through a food mill or a fine-mesh sieve.
Conclusion
You can make a delicious sauce from scratch, and you can make a delicious sauce using ketchup as the base. It just comes down to what you prefer. I do recommend that you make barbecue sacue from scratch at least once. It is a fair amont of effort, but you will gain an appreciation for the sauce, that you didn’t have before, and you may even find that you love it much more then ketchup based sauces.
Below I have included three recipes for barbecue sauce made with store-bought kethcup as the base. Take a look at them and you will immediately notice how similare, yet different they are. I hope what you take away from this is that even though the ingredients are mostly the same, small variations in ratios, and a few additional ingredients can make a world of difference.
Thank you for reading. If you enjoyed this post remember to share it on Facebook or Pinterest because that will help the blog continue to grow. And, remember to subscribe by entering your email address in the top right of the sidebar so you never miss a post again.
Standard Barbecue Sauce
A very basic barbecue sauce that can be used on almost anything.
This Barbecue sauce is pack with flavour from ingredients from South East Asia. It is the perfect sauce to marinade your pork tenderloin for your Banh Mi.
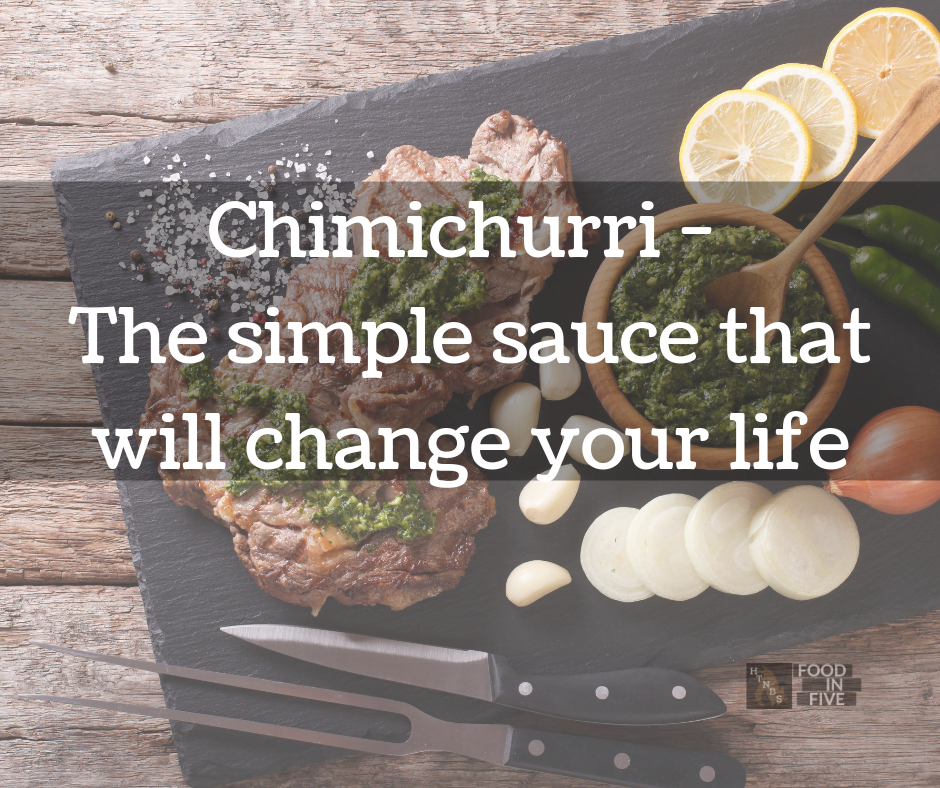
I have very strong opinions about what sauces should and shouldn’t go on steak. I firmly believe that ketchup and barbecue sauce have their place, but that place is nowhere near my perfectly grilled rib-eye, striploin, or tenderloin. Instead of ketchup *cringe* or barbecue sauce, I prefer a light, herbaceous sauce like the one I am going to describe to you today. This sauce is better known as chimichurri.
Chimichurri originates in Argentina and Uruguay and is used as a common table sauce and marinade for beef. According to Wikipedia, the name means “a mixture of several things in no particular order” kind of like a hodgepodge. The version that we are going to look at today is my version, and probably not the most classic example of a chimichurri sauce. Despite that, it is no less delicious. I’m willing to bet that if you give this sauce a shot, it will quickly replace those bottles of barbecue sauce and ketchup once and for all.
This is..
A Simple Delicious Steak Sauce To Kick Your Weekend Grill Into High Gear
Getting Started
Before I get into this, I want to make it clear that despite the fact that there are measurements in the recipe at the bottom of this page I wouldn’t worry about them too much. This sauce is very much just about eyeballing and tasting. That’s what makes it so quick to come together. Of course, you can measure everything if you’d like, and I would actually encourage you to do that the first few times you make this. After that though, ditch the recipe and make it to suit your taste. This can also be made in a blender, but I prefer it to have some texture so I do it by hand.
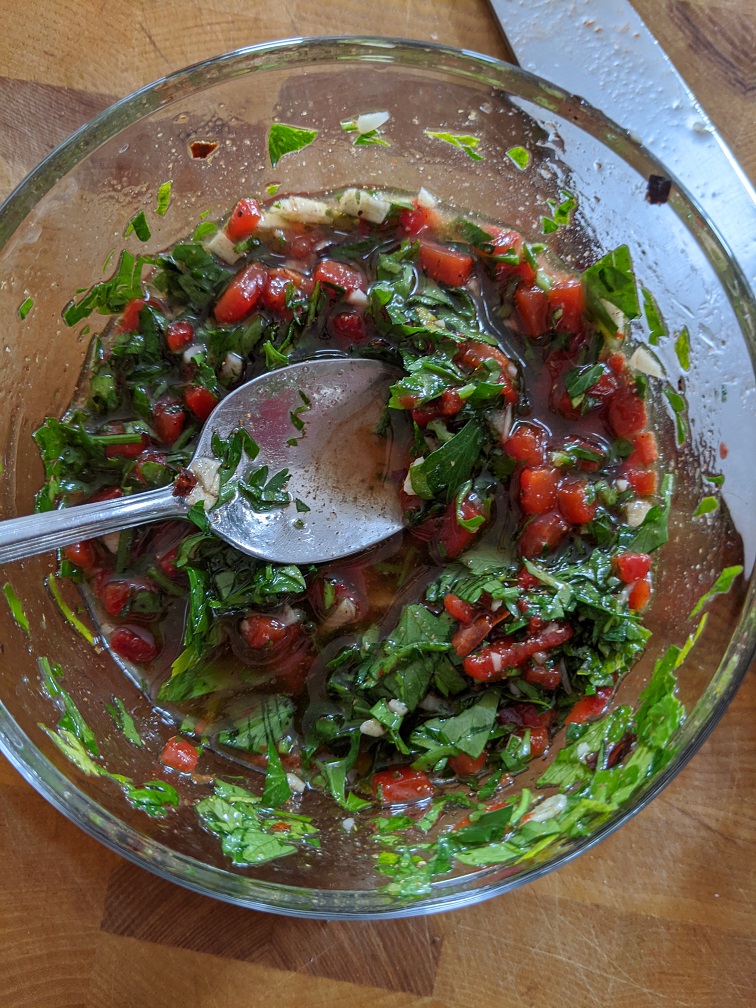
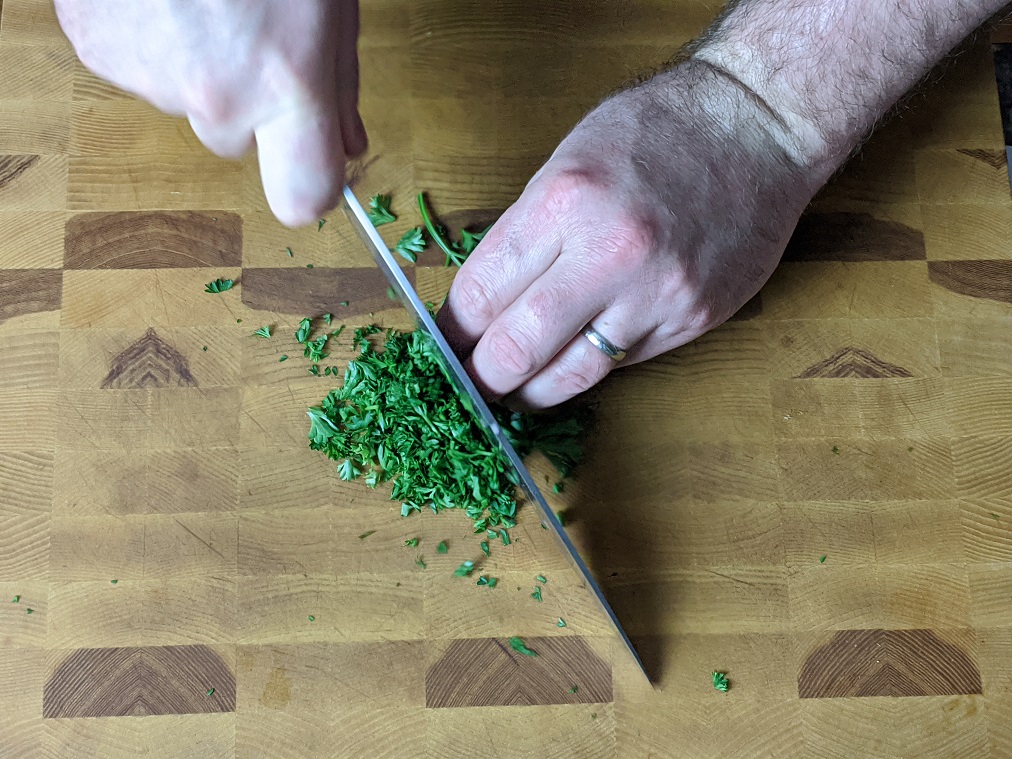
The sauce starts with a big handful of parsley that gets chopped fairly fine. Next up, a few cloves of garlic and roasted red pepper. The roasted pepper is best if homemade, but you can use a jar if you’d prefer. If you would like to roast the pepper at home, toss a whole red pepper with a teaspoon of oil and put it on the hottest part of your grill on high. Cook it, flipping and rotating every few minutes until the pepper is completely black on all sides. Yes, black. Put the pepper in a metal bowl, seal tightly with plastic wrap and let it sit for 10 minutes. Remove the pepper from the bowl and using a kitchen towel, rub the pepper until all the skin comes off. Now, cut the pepper open, remove the seeds and stems, and the pepper is ready to go.
Spices
The spices I use in my chimichurri are crushed red pepper flakes, cumin, cinnamon, brown sugar, salt, and pepper. You can find measurements in the recipe below. The cumin and the cinnamon or both optional, and I don’t either are traditional. I do find that they add a nice warmth to the flavour of the chimichurri steak sauce.
Oil and Acid
The final step in making this steak sauce is to add a bit of oil to loosen it up and a little acid to brighten the flavours. I use olive oil and red wine vinegar. I would keep the olive oil, but the acid could be substituted with balsamic vinegar, lime juice, or even orange and lime juice. Play with it and see what you like.
Sauce, marinade, or both?
One thing that I love about this steak sauce is that it also works as a marinade. Not only that, but it is great on seafood, pork, or chicken too! Give it a shot, you’ll be happy that you did.
Thank you for reading and remember to share this because that helps me grow the blog. And remember to subscribe to the blog because you don’t want to miss any more posts! Have a great weekend everyone, safe grilling!.
Simple Steak Sauce (Chimichurri)
A quick and delicious all-purpose steak sauce/marinade.
When I was a kid meatloaf was a weekly staple on our dinner table. I hated it. My mom was a great cook, and I loved most of her food, but I could not stand her meatloaf. To be fair, it wasn’t just hers. For whatever reason, I hated all meatloaf. Someone could have served me the best meatloaf in the world and I still would have turned my nose up at it.
This hatred of meatloaf lasted until I was in my mid 20’s and was tasked with making staff meal in the restaurant I was working in at the time. I was given a pile of ground beef and told to make something. I have no idea why I chose to make meatloaf, but I did, and it was delicious. It was the only meatloaf I’d ever had that I liked up until that point. Now, I wouldn’t say that I developed a love for meatloaf after that, but I did develop more of an appreciation for it.
I’m still not crazy about meatloaf, but once or twice a year I get a craving for it and put one together. Rarely do I make the same meatloaf twice. Sometimes I wrap it in bacon, sometimes I make it really dense, sometimes it’s a little looser. On occasion I will make a really sweet topping, sometimes I will make it more savoury. The meatloaf I’m sharing with you today is not one that I’ve ever made before. I created the recipe specifically, for this post and with the idea that I was going to make the best meatloaf I could. Did I accomplish that? I think so but judge for yourself.
This is…
MEATLOAF WITH MUSHROOM GRAVY
Getting Started
One big problem I’ve always had with meatloaf and some burgers too is that they will have big chunks of onion and garlic that didn’t fully cook. This makes the meatloaf especially unenjoyable to eat. The obvious solution then is to pre-cook the onions and garlic. That is exactly what I did.
To start my meatloaf I finely diced 1 baseball-sized onion and 2 cloves of garlic (measurements in the recipe below). I heated a frying pan over medium heat, added a little bit of olive oil and cooked the onions until they started to soften. Then, I added in the garlic and cooked for another 2 minutes. I set this aside to cool and got to work on the rest of my mix.
Meatloaf Mix
For the meatloaf mix, I started with 2 lbs of medium ground beef (medium referring to the amount of fat rather than the size of the grind). To the meat, I added 1/2 cup breadcrumbs (I used gluten-free), 1 egg, 1 tsp kosher salt, 1/4 tsp black pepper, 1/4 tsp crushed red pepper flakes, 1/2 cup loosely packed chopped parsley, 1 tbsp mustard, 1/4 tsp onion powder, 1/4 tsp garlic powder, and 1 tbsp fresh chopped mint (secret ingredient). Finally, I added in the cooled onions and garlic.
With all the ingredients added into the meat, I mixed until everything was fully distributed. Once the meat was mixed I kneaded it, just like a loaf of bread, for about 5 minutes or until the mixture was sticky. Then I pushed it into a loaf pan and set it aside.
Glaze
I think there is a law that says that you can’t have meatloaf without some kind of ketchup-based glaze on it, so I made one. Generally, these glazes have either brown sugar or molasses in them. I decided to switch it up and use Coca-Cola instead. It worked really well. The only problem I had with it was that as I put it in the oven I realized I should have added some whiskey to the glaze. If I had the forethought to do that, this would have been a Jack and Coke glaze. Next time.
For the glaze, I combined 1/2 cup of ketchup, 3 tbsp of coke, 1 tbsp mustard, 1 tsp soy sauce (gluten-free tamari) and a bit of salt and pepper. I mixed this up, poured it over the meatloaf and popped the whole thing in a 350°F oven for a little over an hour. The important part is that a thermometer inserted into the middle of the meatloaf reads 165°F.
Mushroom Gravy
Meatloaf without gravy is like a burger without a bun. Pointless and no meatloaf at all. To make my gravy I heated up about 2 tbsp of butter in a small frying pan and sautéed about 6 sliced cremini mushrooms and 1/4 cup of minced onion. After 3-4 minutes of cooking, I added in 2 tsp of minced garlic and 1 tsp fresh chopped thyme. I cooked the garlic for about 2 minutes then sprinkled about 1 tbsp of flour (gluten-free) over the pan and mixed it in. Once the flour was mixed in and had cooked for about 2 minutes I added in 1 cup of beef stock, and a little salt and pepper. I brought the gravy to a boil, reduced the heat to low and simmered until it was gravy consistency.
Once the gravy was ready I set it aside until the meatloaf was cooked. When it came time to serve, I added a few tbsp of water to the gravy and put the pan back on the burner until the gravy was hot and the proper consistency.
Finish The Meatloaf
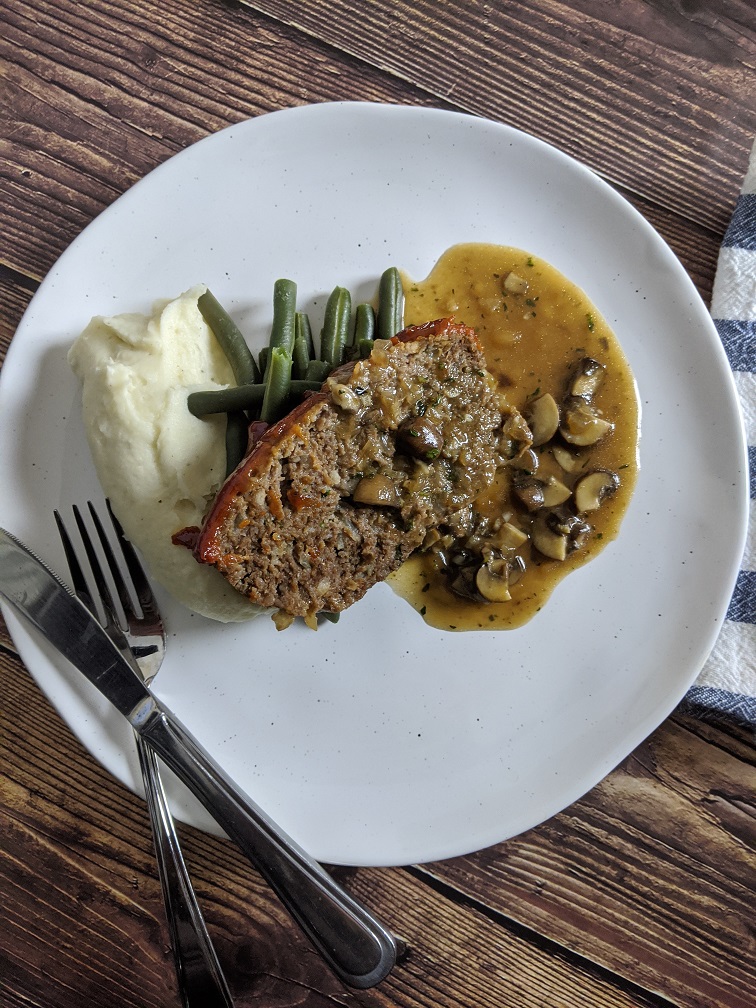
To finish the meatloaf, I cut it into slices and plated it with mashed potatoes, green beans, and a bit of the gravy. And yes, it was as good as it looks.
Conclusion
As I said, I’ve never been that big a fan of meatloaf, but I was a fan of this one. One thing I think that you’ll be surprised by is how much flavour that tiny bit of mint in the meat mixture adds to the meatloaf. It really changes it from a good meatloaf to a great one. Another thing that was really great about this was that the meatloaf was really juicy and tender. It is definitely worth making.
Really quickly, I wanted to explain why there was no post on Wednesday this week. You know how every once in a while you have one of those days when everything seems to be working against you? Well, that was Tuesday for me. My wife and I were both sick with the flu, then we had to leave our apartment for the night because it filled up with exhaust fumes from the furnace in the basement. We ended up having to stay in a hotel for the night. Needless to say, I didn’t get any work done. Luckily, we are both feeling better and the exhaust smell has been dealt with.
I apologize to anyone who was looking forward to Wednesday’s post. It will be out on Tuesday this week and then on Wednesday, I will move on to the next section of my free basic cooking course. Thank you for understanding.
Have a great weekend everyone. I’ll see you Monday for How to Make A Turkey Burger in 30 Minutes or Less.
My Best Meatloaf Recipe
A really great meatloaf recipe with one or two ingredients that you'll want to keep our little secret. It also happens to be gluten-free
Heat a medium skillet over medium heat. Add in the olive oil, and onion. Cook for 2-3 minutes then add in the garlic and cook for an additional 2 minutes. Remove from the heat and let cool to room temperature.
Combine the remaining meatloaf ingredients in a large mixing bowl. Add the cooled onions and garlic and mix well. Knead the meatloaf mixture for 5-6 minutes until the meat becomes tacky and sticky. Push the meat into a loaf pan. Set aside.
Glaze
Combine the glaze ingredients and mix well. Pour the glaze over the meatloaf. Put the glazed meatloaf in the oven on 350°F. Bake for about 1 hour or until the internal temperature reaches 165°F.
Gravy
Heat a small skillet over medium heat. Add the butter and heat until it starts to foam. Add in the mushrooms, and onions and cook for 4-5 minutes. Add in the garlic and thyme and cook for another 2 minutes. Sprinkle the flour into the pan and stir for about 1 minute. Stir in the beef stock, and cook until thick. Season to taste with salt and pepper. Serve over the the meatloaf.
Good morning everyone and happy Friday! With Christmas right around the corner, only five short days away, I thought it was about time I acknowledged it here on the blog. Usually, around holidays like Christmas and Thanksgiving, I share tips and tricks to get you through the holiday. Well, been there, done that. Rather than just keep repeating myself year after year I thought this time I would do something different. This year, I wanted to give you a gift like no other, so I wrote an entire Christmas Dinner worth of recipes, and today I am going to share them with you.
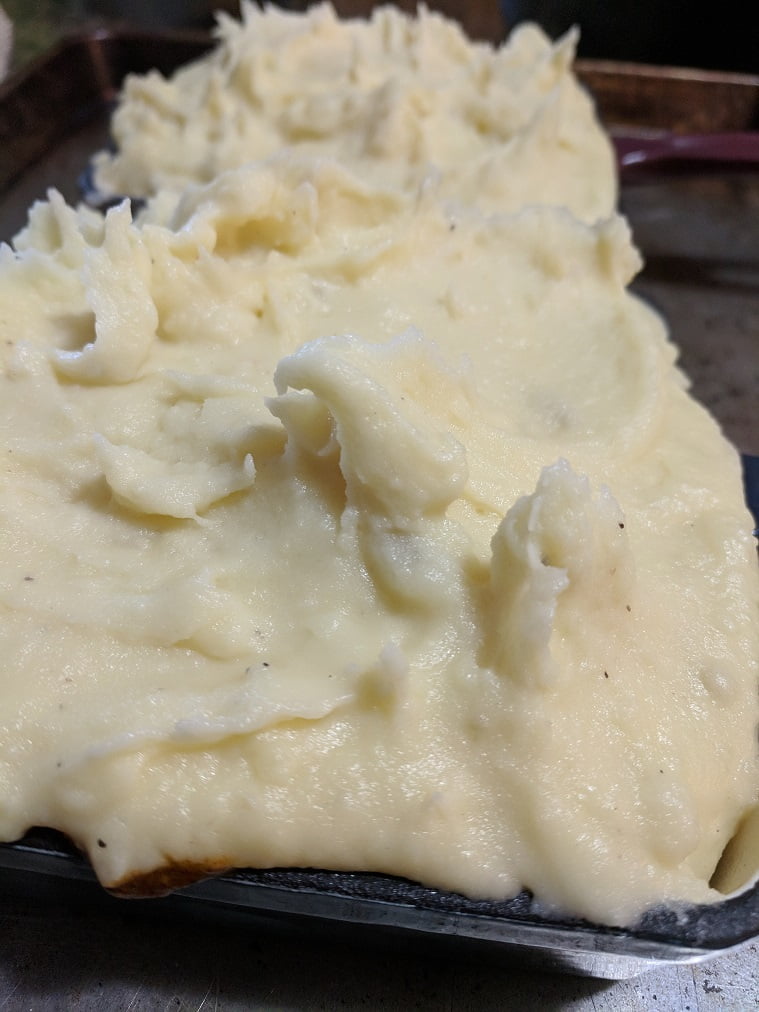
Below you will find recipes for homemade Cranberry Sauce, Gravy, Glazed Carrots, Maple Pecan Roasted Brussel Sprouts, Garlic Mashed Potatoes, Stuffing, and of course, Turkey. There are seven recipes in total just for you as my way of saying thank you for your support throughout the year and for making this year so great here at How To Not Burn Shit.
Before I jump into this, this is my last post of the year. I’m going to take a little bit of well deserved time off to spend with my 10-week old baby and my lovely wife. I hope that you all have a great Christmas and a Happy New Year. I will see you all right back here on January 6th, 2020!
In the meantime…
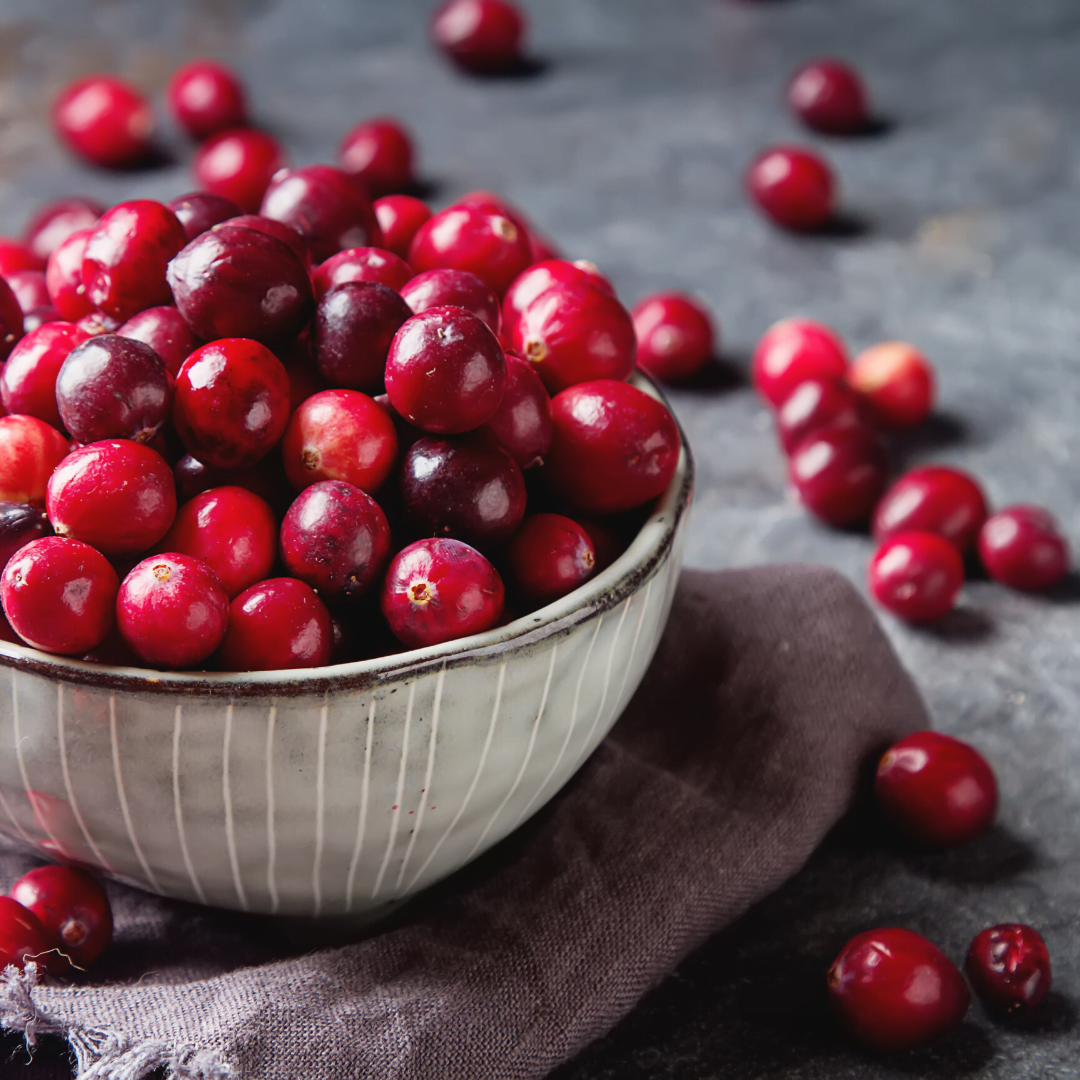
Cranberry Sauce
Way back in 1941, there was a former Lawer turned cranberry bog owner who was looking for a way to extend the short selling season for his Cranberries. He decided to make a cranberry jelly, can it and sell it year-round. He did this, though it mostly only sold at Christmas and Thanksgiving. Since its invention in 1941 canned cranberry sauce (jelly) has been a staple on holiday tables across North America. Well, I say 78 years is long enough.
It is only 11 days away from 2020 and if you haven’t already started, it is time to start making your own cranberry sauce. It isn’t hard, it doesn’t take a lot of effort, it’s not expensive, and it tastes way better. What have you got to lose?
Easy Homemade Cranberry Sauce
Why are you still buying cranberry sauce in a can? It is so easy to make and way better when made fresh.
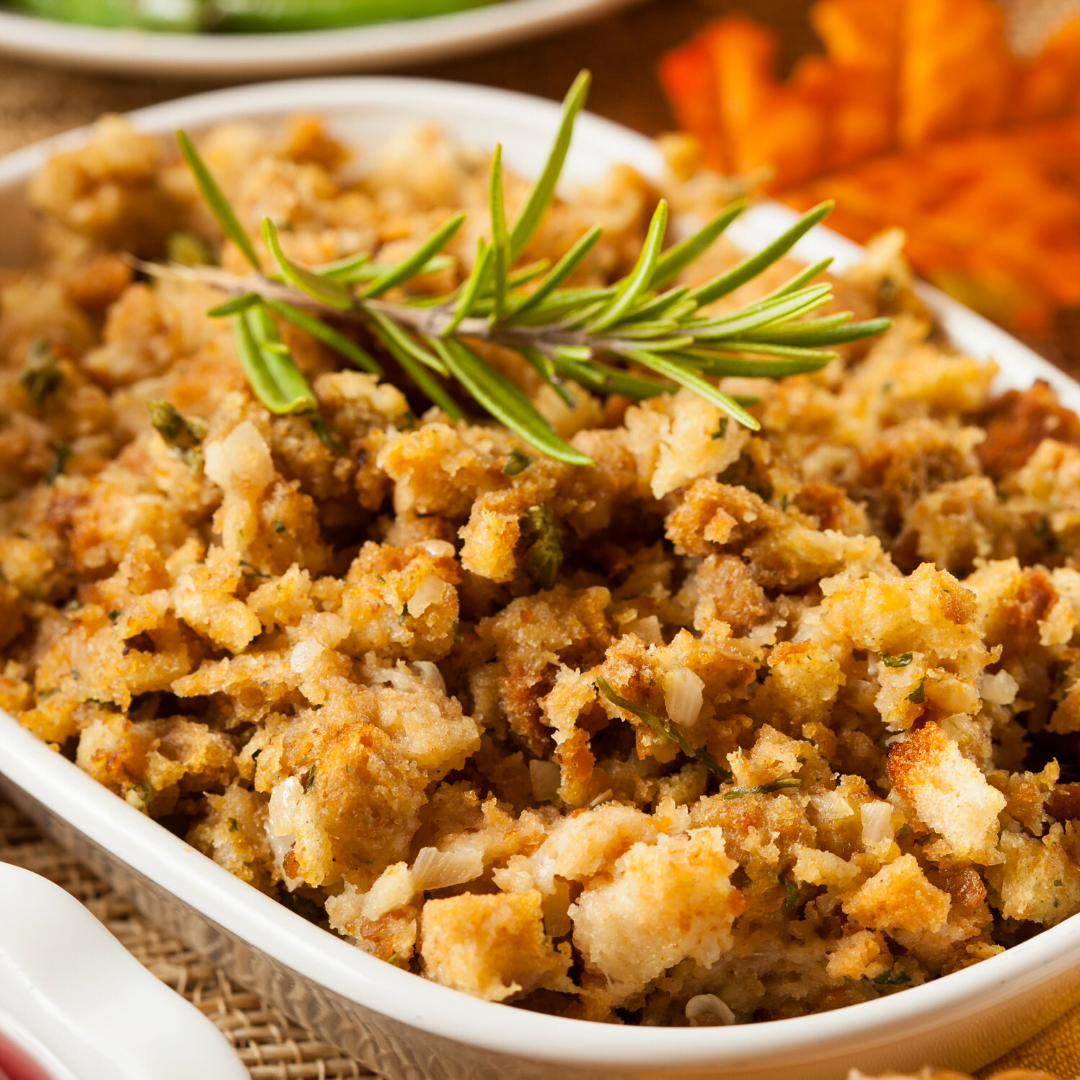
First of all, what’s the difference between stuffing and dressing? Stuffing is cooked inside a turkey, dressing is cooked outside the turkey. That’s it.
You may have grown up having stovetop stuffing every Christmas and you may even love it. But, I implore you to just this once make your own stuffing if you’re not already doing so. The recipe below is a straightforward no BS stuffing recipe that you will be happy you tried.
Add 2 tbsp of butter along with the onions into the pan.
Cook the onions for 10-12 minutes or until soft.
Put in a large bowl and allow to cool for 10 minutes.
Add the remaining ingredients and mix.
Stuff inside a turkey and cook the turkey as desired.
Notes
If you are cooking the stuffing outside the turkey (which makes it dressing) add 2 cups of chicken or turkey stock to it. Cover with foil and bake on 375°F for 35-40 minutes.
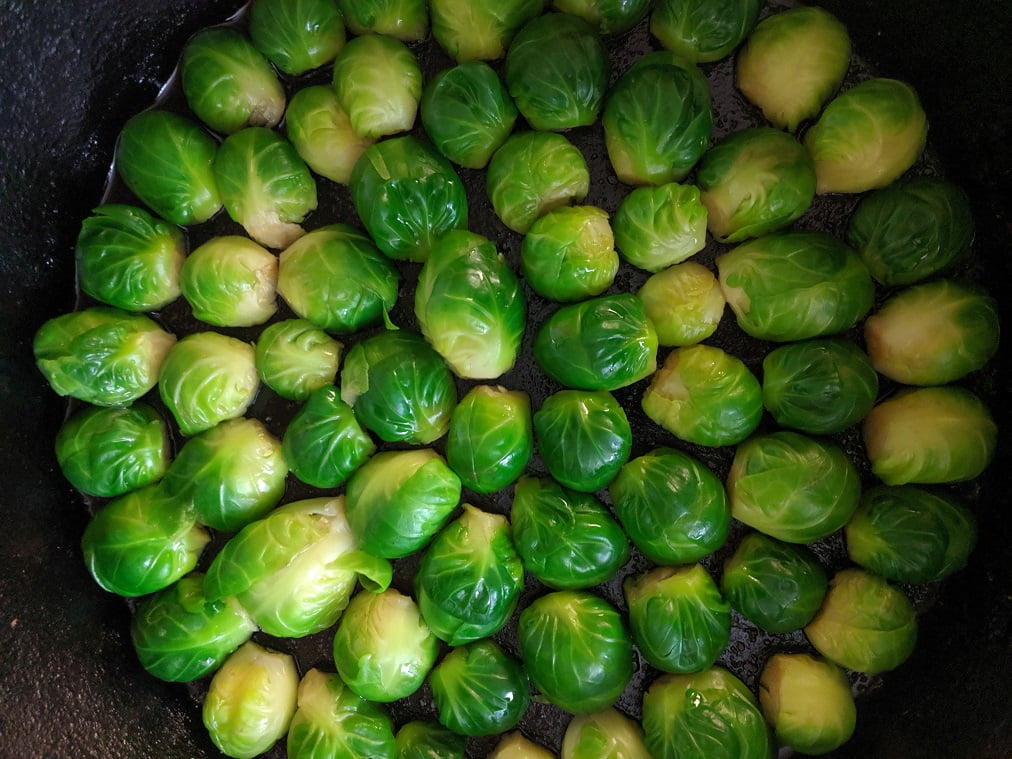
If you don’t like Brussel Sprouts, it’s probably because you’ve only ever had them when they’ve been boiled to death. When they are overcooked in that way they are mushy and taste like farts. However, when they are roasted, they get crispy, and not at all fart like. The touch of sweetness from the maple syrup in the recipe below really makes the flavour of the sprouts come to life. If you’ve never had roasted Brussel Sprouts, you are in for a very serious treat.
Maple Pecan Brussel Sprouts
A delicious alternative to your regular Brussel sprouts recipe
Cut the sprouts in half and place in a medium mixing bowl.
Pour the olive oil and maple syrup into the bowl along with the salt and pepper.
Spread the sprouts out onto a sheet pan lined with parchment paper and bake for 20 minutes on 400°F.
Remove the sprouts from the oven, sprinkle over the pecans, stir, and return to the oven for an additional 10-15 minutes or until the sprouts are tender and dark around the edges.
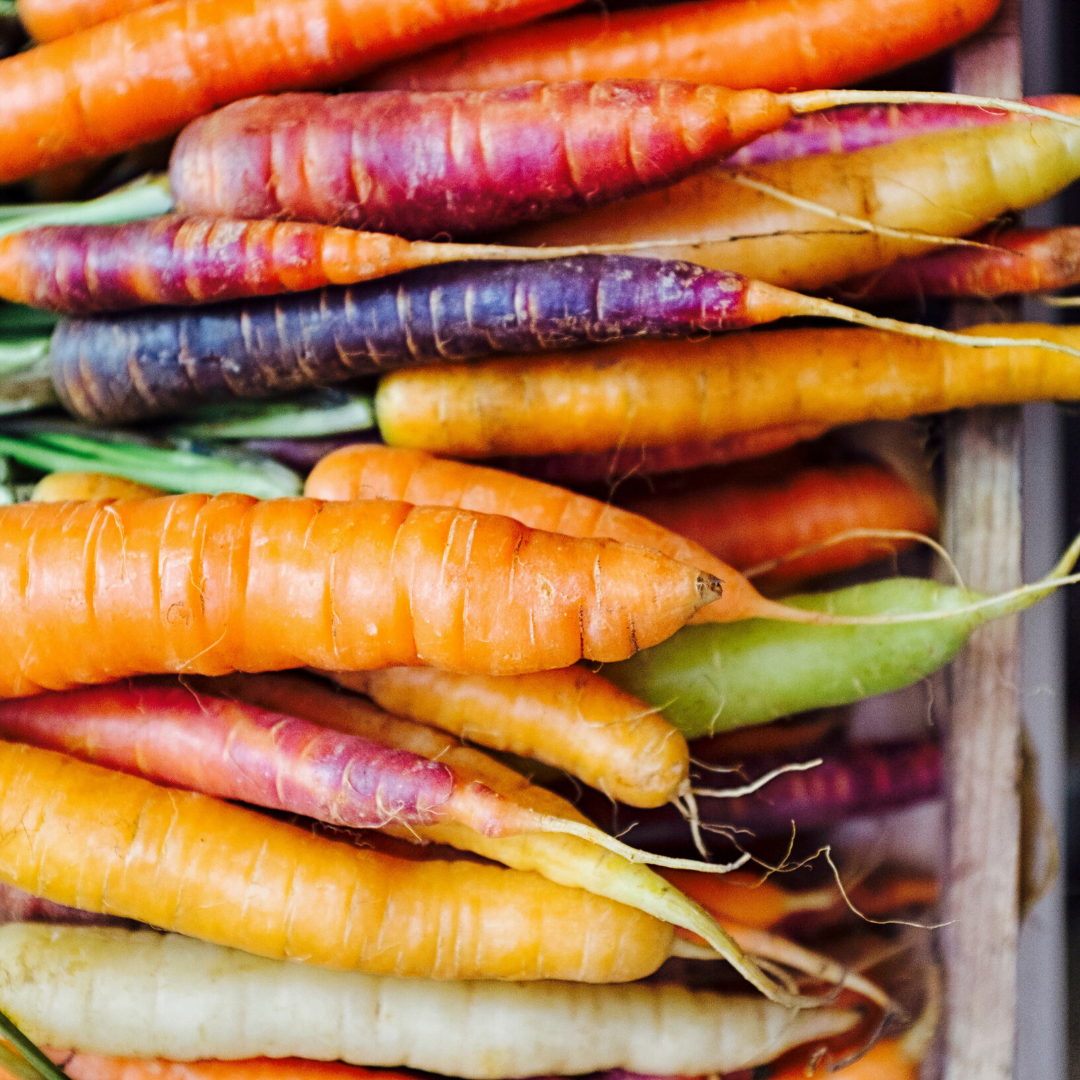
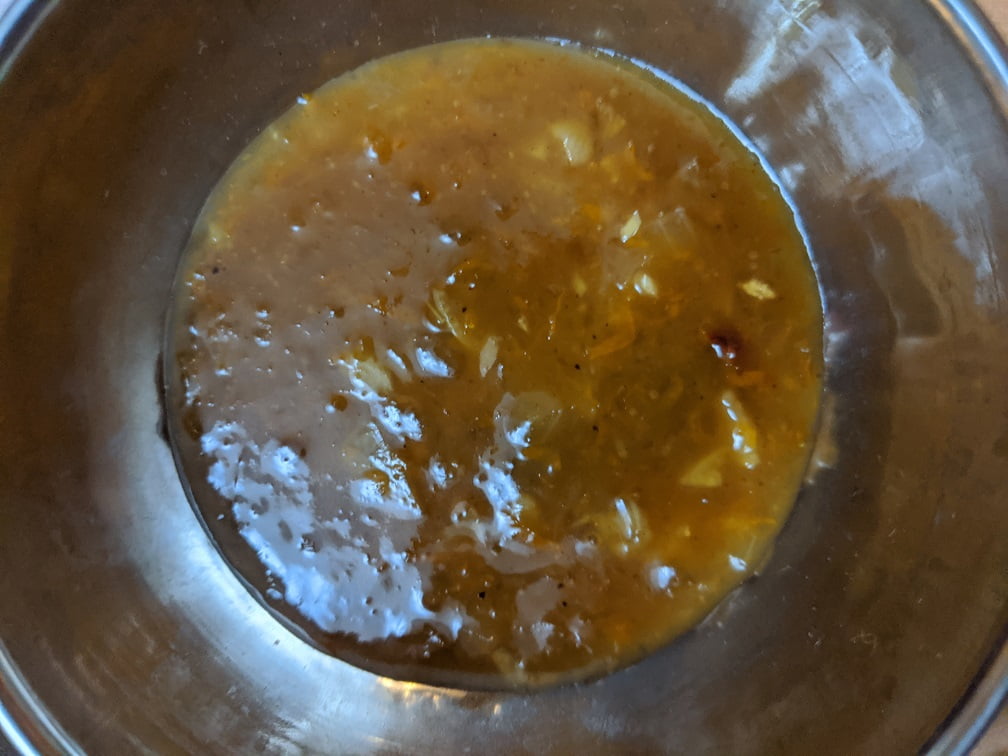
Let’s face it, those regular old boiled carrots are getting a little boring. Jazz up your carrots this year by making a glaze for them. Sound complicated? It isn’t. To make this recipe you just need to be able to use measuring spoons and a pot. All kidding aside, this is one of my favourite ways to make carrots. You put everything in the pot, and cook the carrots until the liquid has mostly evaporated. What you end up with are perfectly cooked carrots, with a flavorful glaze.
Glazed Carrots
Carrots cooked with honey, cider vinegar, thyme, and butter…what's not to love?
Put the sliced carrots in a pot along with the other ingredients.
Add enough water to just cover the carrots.
Bring to a boil and cook for 5 minutes.
Reduce the heat to simmer and cook for 5-10 more minutes or until the water has mostly evaporated and all that is left is the glaze at the bottom of the pot.
Stir the carrots, coating them in the glaze and serve.
Notes
Keep an eye on the carrots once the water starts to get low because you don’t want to burn them
We all have our own special way to cook our turkey for Christmas. But, there are some of us out there who might be making Christmas dinner for the first time. The recipe below is a very basic, intro to turkey type recipe. Having said that, it is still really delicious and I’m sure no matter how many turkeys you’ve cooked in your life you would be happy with it.
If you are looking for something a little different to do with your turkey check out this post I did back around Thanksgiving.
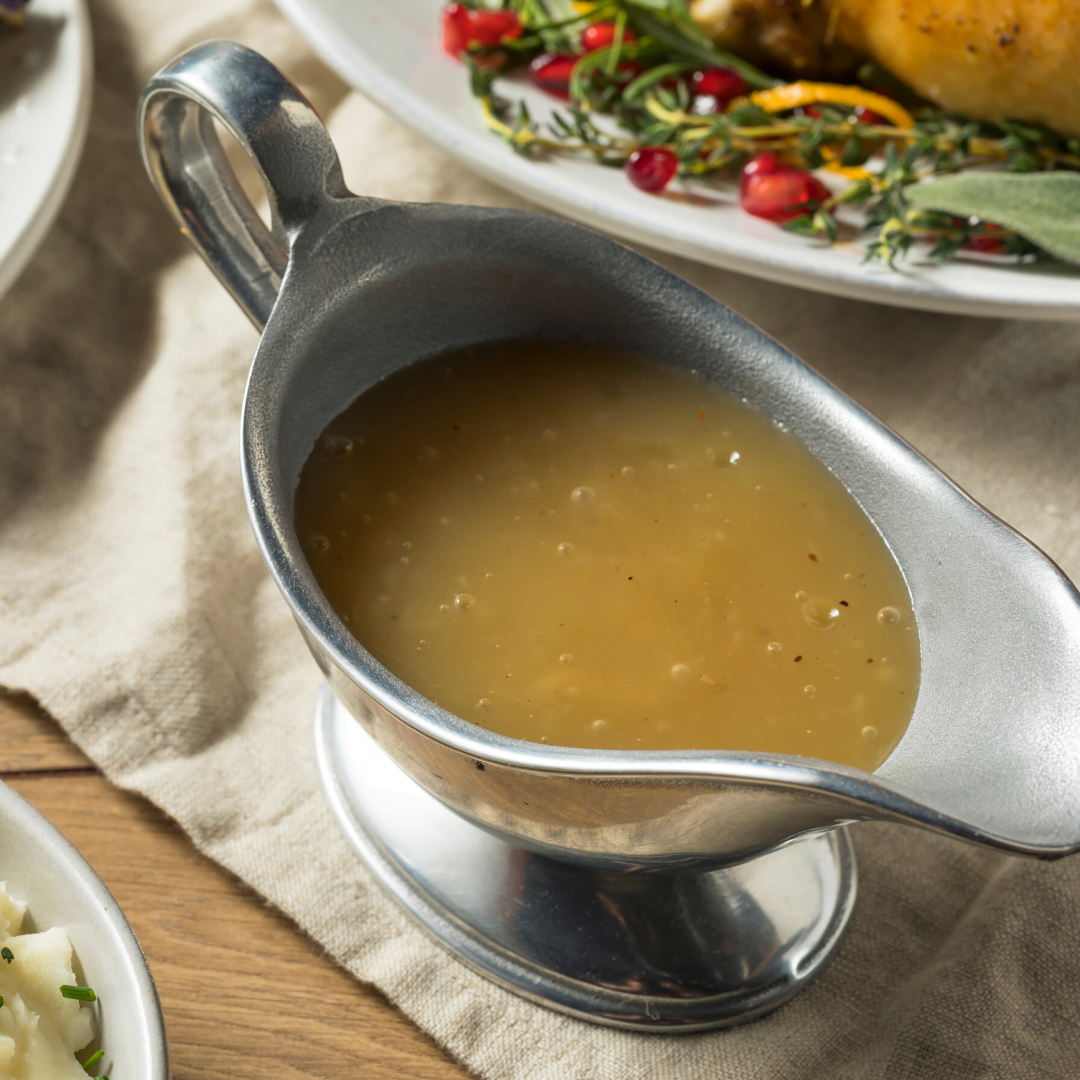
When I was a kid, one of my main jobs for Christmas Dinner was to stir the gravy. It had to be stirred while it cooked so that it didn’t scorch on the bottom. It was an important job and I took it very seriously.
The recipe below is not complicated but it does involve a lot of stirring. This is the perfect job for a child or that pesky inlaw who keeps asking if there is anything they can do.
Christmas Gravy
Wet your whistle with this delicious gravy recipe.
Cooking Christmas dinner can be stressful. It is usually the largest and most complex meal you will cook all year. The key to it being a success is to make everything the best it can be while at the same time not over complicating things. All the recipes above will add a little extra to the meal without adding much in the way of prep or cooking time. Elevation without complication.
And with that, I bid you ado. I hope that you have the Merriest of Christmases!
Oh and if you feel like you need to get me something this Christmas, the best gift you can give to me is to share this post around so that anyone who needs it can find it.
I’ve made no secret about the fact that I love chicken wings. I love them baked or fried, I love them hot or sweet, or even hot and sweet. The point is that I love chicken wings. And so today I thought I would take advantage of the fact that I write a food blog, and can use it as an excuse to make five different flavours of wings that I then get to eat. Yes, I’m excited to share this with you, but if I’m honest this was much more about me just wanting to eat a big pile of wings.
Let’s take a look.
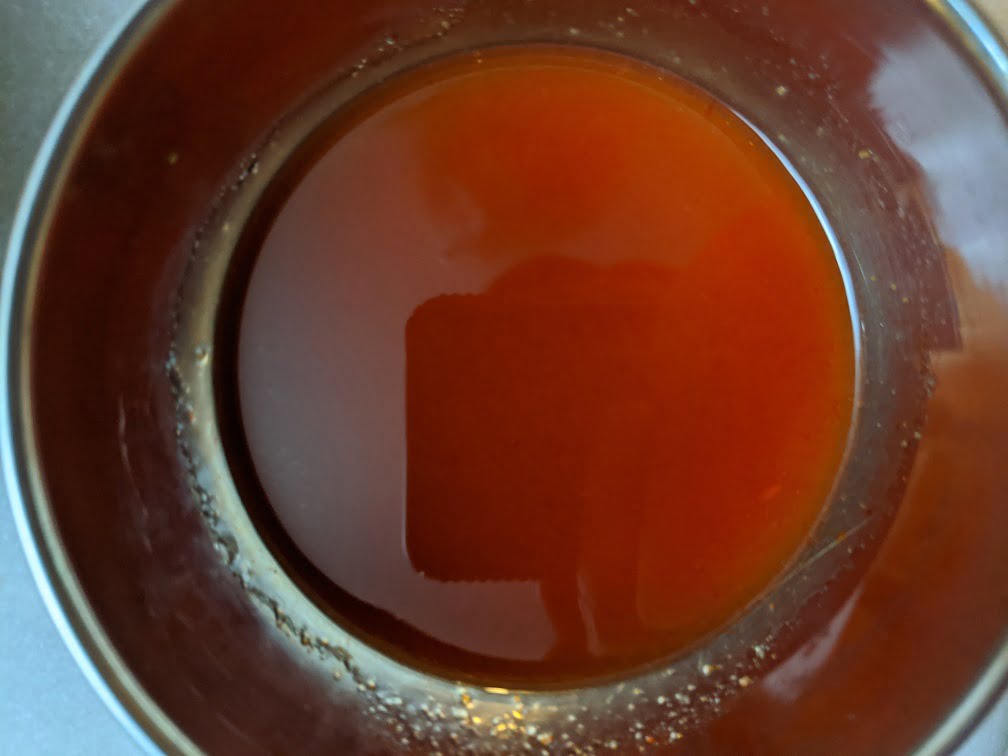
Honey Garlic
The first wing sauce we are going to look at today is classic honey garlic. Now, I know that you can get this out of a bottle, and it’s pretty good. But, you can make it at home from ingredients you probably already have in under 10 minutes. Oh, and it is way better than the store-bought stuff.
To make it I chopped up 4 cloves of garlic and sautéed them in sesame oil over medium heat until they were brown. Then I added in 1/4 tsp chilli flakes, 1/4 cup of honey, and 1/4 tsp Chinese Five-Spice. I boiled this for a few minutes until the honey started to turn a dark amber colour. Then I added in 1/4 cup soy sauce (I used Gluten-Free Tamari). I mixed 1 tsp of cornstarch with 2 tsp of water and mixed that in then let the mixture boil for 2-3 minutes until thick.
Next up I made some orange ginger sauce. This sauce is similar to what you might find on the Orange Chicken at a mall Chinese Food place. Truth be told I had a bad craving for very low-end Chinese Food (which I can’t eat because of the damn gluten) which is partly why I made this. The other reason is that it is really delicious on wings.
To make the orange ginger sauce I chopped up 2 cloves of garlic and half a small onion (about 1/4 cup) I sauteed this in canola oil for three minutes over medium heat. I cooked it just long enough for the onions to soften. Then I added in just about 1 tbsp of grated ginger and 4 dried Thai red chilis. I cooked all of this for another 2-3 minutes before adding in the zest and juice from a large naval orange. Next up I added in 2 tbsp soy sauce (tamari again) 2 tbsp of honey and 1/4 tsp of Chinese 5-Spice. I boiled all of this for about 3-4 minutes then finished it with a cornstarch slurry just like I did with the honey garlic sauce.
This hot sauce and honey wing sauce isn’t what I would call complicated. Literally all I did was mix 1/4 cup of Franks Red Hot with 1/4 cup Honey. That’s it. Usually, I boil this together then finish it with a teaspoon or two of butter, and you can do that, but I want to show how simple a really good wing sauce could be.
I do know that Franks on its own is a wing sauce, but when mixed with honey, boiled or not, it is even better.
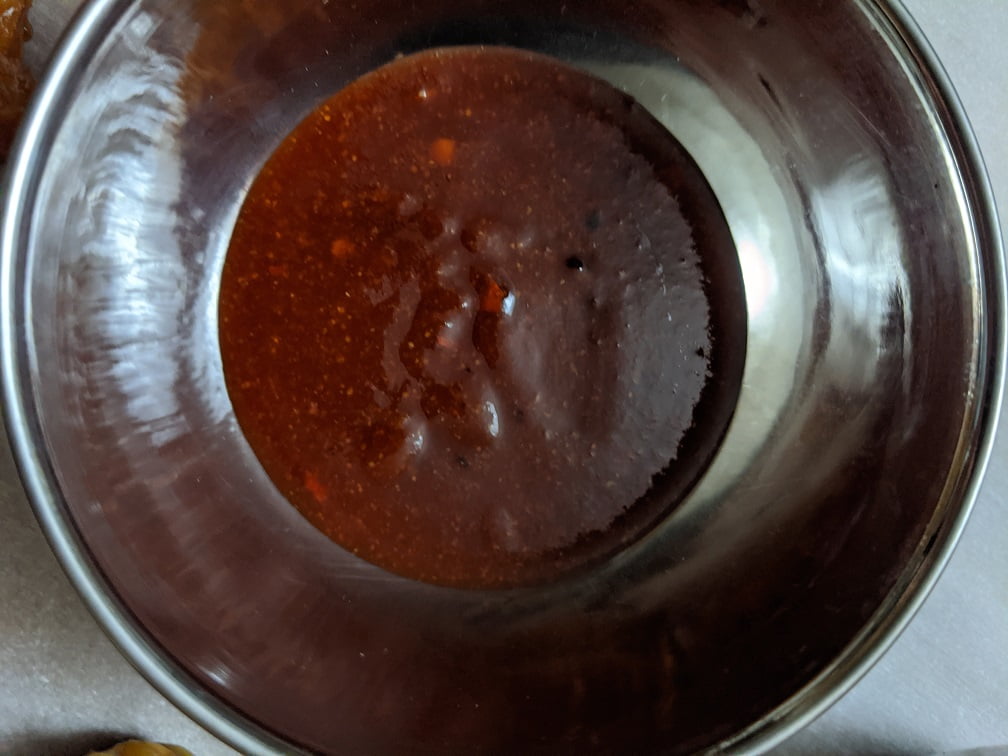
This Whiskey BBQ Sauce is great on more than just wings. You can put it on any kind of chicken, turkey, pork, or even salmon. You just can’t go wrong.
To make this Whisky BBQ Wing Sauce I mixed 1/4 cup of ketchup with 1 tbsp brown sugar, 1 tbsp soy sauce, 1 tsp each onion and garlic powder, 2 tbsp Whisky (I used Forty Creek), 1/4 tsp chilli flakes, and 1-2 tbsp cider vinegar. I whisked this all together and tossed some wings in it.
Whiskey BBQ Wing Sauce
A really delicious sauce for wings, ribs, or anything else.
Keener eyed readers may have noticed that we’ve only covered four wing sauces so far. But the post is 5 DIY wing sauces. What gives? Where’s the fifth sauce? What if I told you it was here all along? What??
To make the fifth and actually the tastiest sauce I combined the honey garlic sauce with the orange ginger sauce. I’ve got to tell you, these two combined made something truly special.
Conclusion
There you have it. Not one, not two, not even three, but five delicious DIY wing sauces. The next time you get a craving for wings or have some friends coming over, mix up a batch of one or all of these sauces. I bet you’ll be happy you did.
Good morning world! After just over two weeks of radio silence, I am back and ready to roll. For those of you that don’t know, my wife and I just had a baby and so I took a bit of time off to adjust to that massive life change. For me, everything is different, but for you, things should mostly be the same. Some of my posts may appear a little later in the day than they normally would, and down the road, things may become a little more oriented to feeding a young family, but other than that it is business as usual. Speaking of business, as usual, let’s get to it.
As I am just kind of easing back into work I thought it would be good to start with a fairly simple dish for 30 minutes or less. Don’t let the long name confuse you. This is a simple dish that anyone can make and pretty much everyone will enjoy. Let’s take a look.
This is…
Pork Schnitzel with Brandy Mushroom Sauce In 30 Minutes or Less
6:20 pm – Potatoes
It was 6:20 pm when I started cooking last night and the first thing I had to get going on was the potatoes. I took 4 small-ish russet potatoes, peeled them, diced them, rinsed them in cold water until the water ran clear, then covered them with hot salted water and cooked them on high until they were tender. With the potatoes on the stove which took about 4 minutes in total, it was time to focus on my sauce ingredients.
6:24 pm – Sauce Prep
The sauce for this dish is what is known as a pan sauce. All that means is that the sauce is made in the same pan as the main protein, usually incorporating drippings from the protein. We aren’t going to really have any drippings, but we are going to use one pan to cook the schnitzel and the sauce.
The first thing I did was peel and thinly slice one shallot. If you don’t have shallots, half a small onion would work. Next up, I removed and discarded the stems from four cremini (brown) mushrooms, and thinly sliced them. The last thing I sliced was 2 cloves of garlic. To the sauce ingredients, I added 2 sprigs of thyme.
6:28 pm – Broccoli
I set the sauce ingredients aside, which took about 4 minutes to prep, then I got to work on some broccoli. I really like long spears of broccoli and I find cutting broccoli this way leads to the less wasted stem. To do this cut off the bottom third or half of the broccoli stem. I cut the bottom half off because my pot wasn’t big enough to hold longer stems. Then cut the broccoli into 6 pieces lengthwise.
After the broccoli was cut I put it in a pot with just about 1 inch of water. The goal here is to steam the broccoli rather than boiling it. I set the pot aside until I was ready to cook it.
6:29 pm – Breading Pork Schnitzel
Finally, it was schnitzel time! To make the schnitzel I used what is known as the standard breading procedure. You start with flour (I used potato flour because it’s what I had on hand), then a beaten egg, then bread crumbs. The idea is that the flour sticks to the meat (or vegetables), the egg sticks to the flour, and the bread crumbs stick to the egg.
Really, all I did here was beat 1 egg, and season the potato flour with salt and pepper. I used “fast fry” pork loin chops so I wouldn’t have to pound them out with a meat mallet. I dipped them in the flour, then the egg, then the bread crumbs and set them aside.
6:35 pm – Cooking Pork
As I was finishing breading the pork I turned my pan on to medium-high heat. Once the pan was hot I add in 1 tbsp of butter, then the pork. I cooked the pork for 2-3 minutes per side then removed it from the pan. I wiped the pan out with a paper towel and put it back on the heat.
I also turned the broccoli on high at this point.
While the pork was cooking, I chopped up about 2 tbsp of parsley and set it aside.
6:41 pm – Sauce
At this point the broccoli had started boiling. I turned the heat off and left the lid on the pot.
I added 1 tsp of olive oil into the pan I cooked the pork in along with the mushrooms, shallots, garlic, and thyme.
While the sauce vegetables were cooking I drained my potatoes, heated up 1 tbsp of butter, 2 tbsp of cream, and mashed the potatoes into it. I put a lid on the potato pot and set it aside until I was ready to eat.
I cooked the mushrooms and onions for about 4 minutes then added in 2 tbsp brandy. This got cooked for 1 minute then in went the beef stock and a pinch of salt and pepper. I added the pork back into the pan and cooked it for 1 minute per side before adding in a 1/4 cup of cream. I cooked the sauce for 1-2 more minutes, seasoned with salt and pepper, added in the parsley and served.
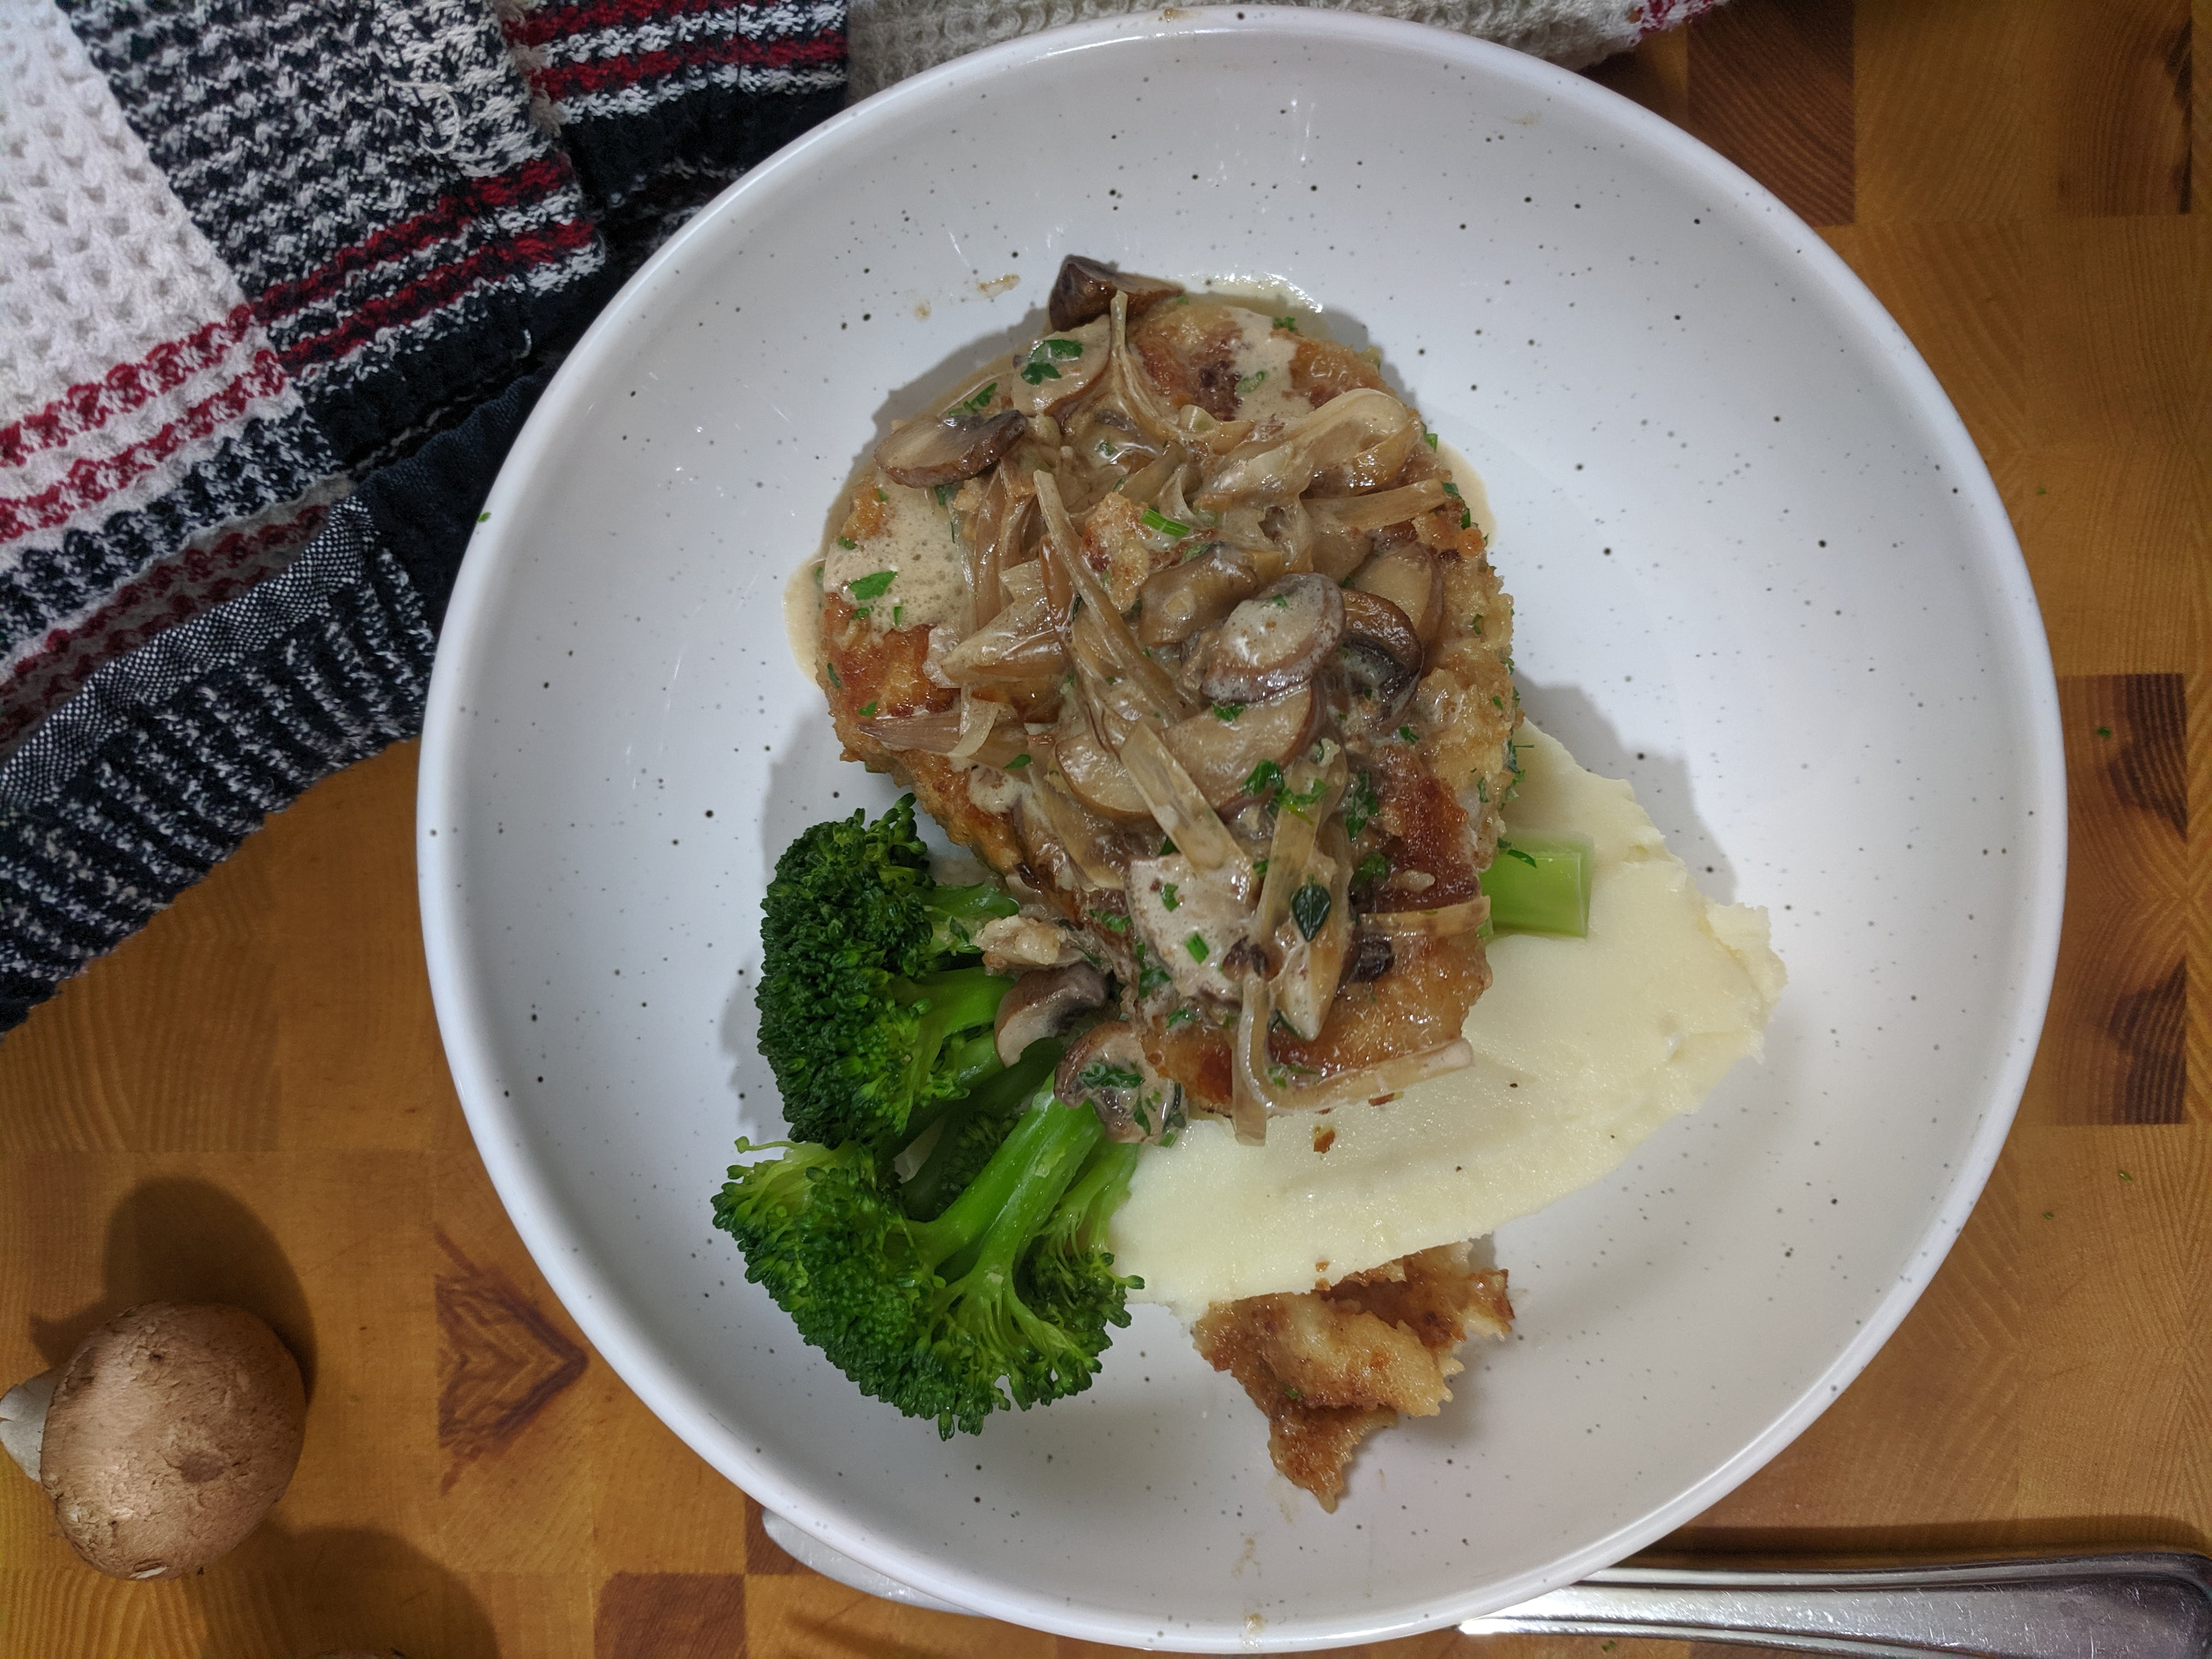
To plate the food I started with mashed potatoes, then the broccoli upon which I placed a pork chop and some of the sauce. Such a delicious meal!
Conclusion
This really is a great meal that you can make any day of the week. Also, that breaded pork is fantastic for pork parmesan, pork burgers, and lots of other things.
Cover the potatoes with hot salted water and put on high.
Cook the potatoes until tender, drain, warm 1 tbsp of butter with 1/4 cup cream then mash the potatoes and mix with the hot cream and butter.
While the potatoes are cooking slice the broccoli into spears.
Add 1 cup of water to the pot with the broccoli, bring to a boil and cook for 3 minutes with a lid on the pot.
Remove the broccoli from the heat and let sit with the lid on the pot.
While the broccoli and the potatoes are cooking season the flour with salt and pepper then dip the pork in the flour, egg then bread crumbs. Heat a frying pan over medium-high heat with 1 tbsp butter.
Cook the pork chops for 2-3 minutes per side.
Remove the pork from the pan, wipe out the paper towel, and in 1-2 tbsp of olive oil along with the mushrooms, shallots, thyme, and garlic. Cook for 4 minutes.
Add in the brandy and cook for 1 minute before adding in the beef stock and the pork,
Cook for 1-2 minutes per side then add in the cream, salt and pepper, and parsley.
Imagine yourself sitting at a table in a restaurant in Greece. The sea air gently blowing in from the open windows. A server walks up to your table and with a big smile puts a bowl of freshly grilled pita bread and homemade Tzatziki down for you to enjoy. You tear apart a piece of the pita and dip it into the Tzatziki as your mouth waters in anticipation. The first taste of the Tzatziki and bread turns on all your senses. It is pleasantly sour, herbaceous, fresh-tasting, and creamy. You enjoy the rest of the dip and bread with a nice glass of wine looking out over the ocean a million miles away from any worries or cares.
I can’t fly you to Greece, and I can’t make all your cares and worries go away. What I can do, is share with you how to make the best Tzatziki you’ll ever have. Then maybe with an open window and a bit of imagination, you can create the rest of the experience.
So, what are the secrets to the best Tzatziki ever? Let’s take a look.
This is how to…
Master Tzatziki In 5 Simple Steps
What is Tzatziki?
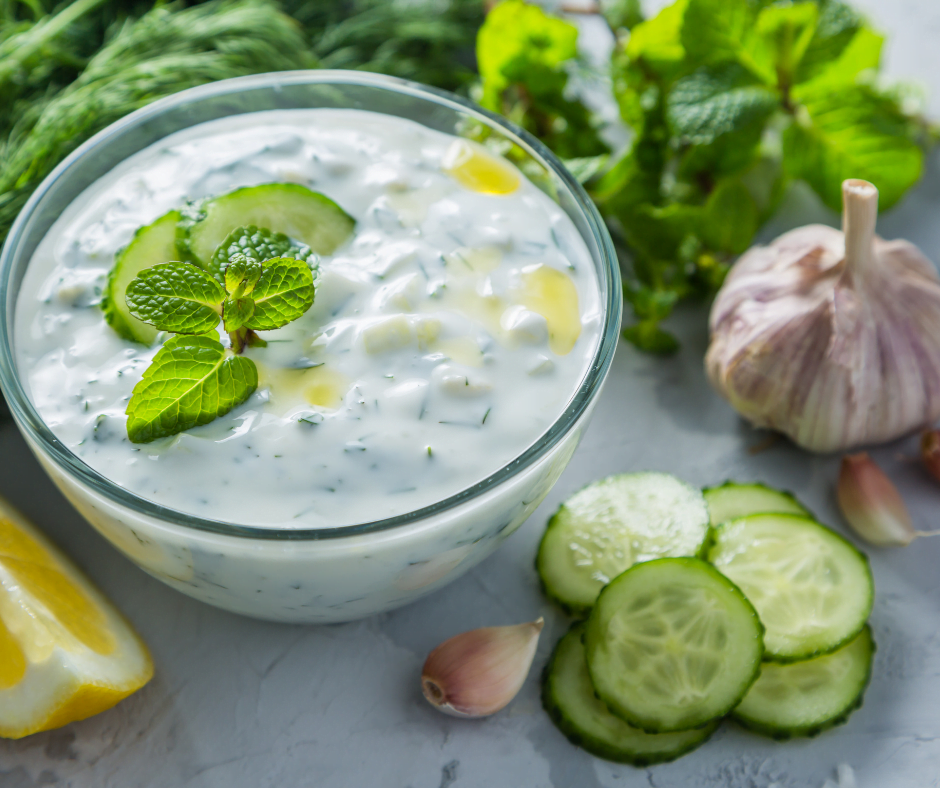
I guess there might be some people out there who don’t actually know what Tzatziki is. Essentially it is a yogurt dip made with cucumber, herbs, garlic, and lemon. That’s really about it. It is great with chicken, pork, lamb, bread, vegetables, wraps…you name it Tzatziki goes with it.
Now that we all know what it is let’s break down how to make it.
Step 1 – Cucumber
One of the main ingredients in Tzatziki is cucumber. It is generally grated on a cheese grater, salted, left to sit for 20 minutes or so, and then squeezed. The purpose behind all of this is to extract moisture from the cucumber. If we skip this step our Tzatziki will end of watery which is not at all what we want.
Take an English cucumber and cut a piece that equals about a quarter of the length of the cucumber. Wash it, pat it dry, and grate it into a bowl on the large grater setting of a cheese grater. Add 1/8 tsp Kosher or Sea Salt. It is best not to use table salt here as table salt is terrible. Mix the salt and cucumber together, place in a fine-mesh sieve set over the bowl for about 20 minutes.
Once 20 minutes have passed come back to the grated cucumber and squeeze out any excess juice. The cucumber is now ready to use.
If you plan on keeping the Tzatziki in the fridge for more than a day or two it is best to remove the seeds from the cucumber. The seeds go bad quickly. Cut the quarter cucumber in half lengthwise. Use a spoon to scoop out the seeds. Now grate and salt the cucumber as you normally would.
Step 2 – Herbs
Pretty much everyone puts dill in their Tzatziki, but what most people miss is the mint. It may seem like a very strange combination, but mint and dill actually work really well together in this application. That little hint of mint will take a decent Tzatziki and make it amazing. Don’t leave it out!
For our Tzatziki which will be about 1 cup in total, we want about 1 tbsp chopped fresh dill and 2 tsp chopped fresh mint.
Step 3 – Garlic
Tzatziki without garlic is no tzatziki at all. Having said that, we don’t want to be biting into a big chunk of garlic. It is best to purée the garlic or chop it as fine as you can.
We are going to use 2 cloves or about 2 tsp chopped or puréed garlic.
Step 4 – Yogurt
When cooking Greek food it is always best to use Greek yogurt. The main difference between Greek yogurt and other types is that Greek yogurt is strained to allow moisture to drain off. This gives Greek yogurt a creamier texture and a slightly more intense flavour.
Take about 3/4 cup of plain Greek yogurt and mix it with the cucumber, herbs, and garlic from earlier. Just like that, your Tzatziki is done…no, of course, it’s not. We still have…
Step 5 – Finishing Touches
Our Tzatziki is almost done but it is missing two critical ingredients. These are the two not so secret ingredients in just about all Greek food, lemon, and olive oil.
It is very important that we use high-quality olive oil to avoid any bitter flavours. For out 1 cup of Tzatziki we should use 1-2 tbsp of olive oil and 1-2 tbsp of lemon juice.
Add the olive oil and lemon juice to the other ingredients, mix it up, give it a taste and adjust the seasoning with a bit more lemon, and a touch of salt as needed. Use the Tzatziki right away or store in the fridge covered, for 3-5 days.
Conclusion
Tzatziki is a favourite of a lot of people and as you can see it is not difficult to make at all. It works well with so many things and can be eaten just as it is with some vegetables or bread to dip in it.
If you are currently buying Tzatziki, stop now. You don’t need to do that anymore. You can make a batch of this once a week and you are good to go.
I know that some people add red onion to their Tzatziki but I prefer to leave it out as I find it doesn’t really add anything. But, if you want to add a bit of red onion, go for it.
And that does it. I hope you enjoyed this post. If you did please check out my amazon store. If you go there and see something you were going to buy anyway, buy it from there. I get a few cents from every dollar spent and that goes right back into the blog to help me buy ingredients and equipment.
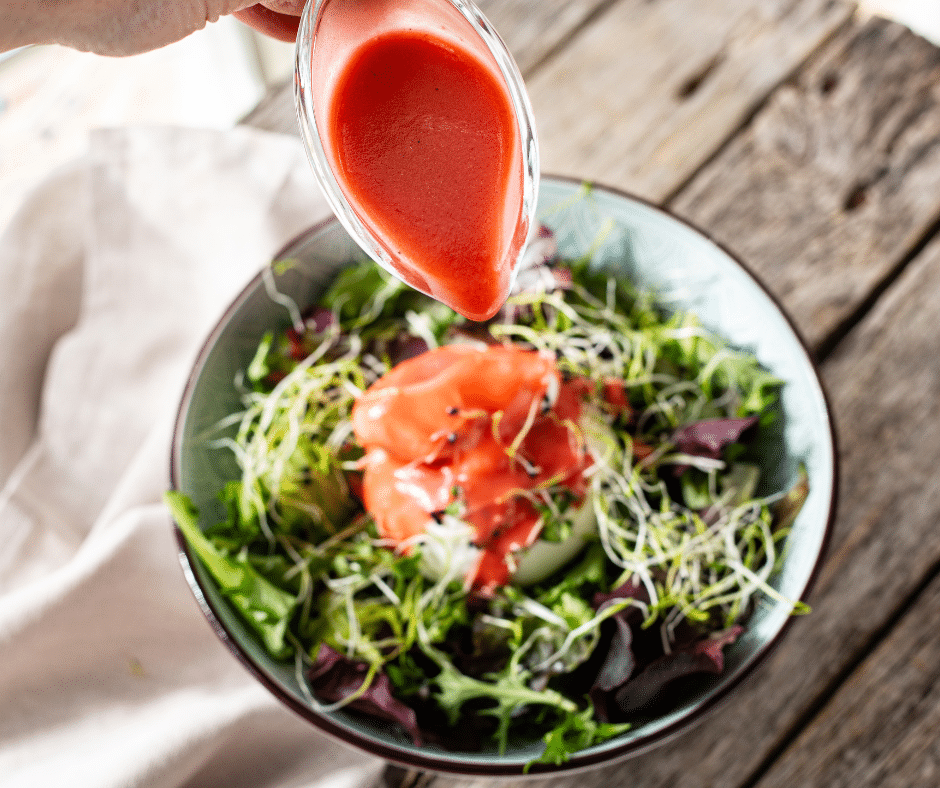
Summer is built for salads and what is a salad without a delicious salad dressing? Well, it’s just a bowl of lettuce and some vegetables I suppose.
Salad dressings are cheap and easy to buy. There’s a whole aisle of them at the grocery store. But they are even cheaper to make at home. What you’ll notice is that store-bought dressings will have things like xanthan gum, potassium sorbate, and calcium disodium EDTA.
In all honesty, as far as we know these additives are completely harmless. However, given the choice between food with a bunch of preservatives in it, and food with none, I pick none every day of the week.
Basic Salad Dressing
Making your own salad dressing can be as simple as mixing a bit of oil and vinegar together. It doesn’t have to be complicated. Even the more complicated sounding dressings are only complicated in theory. For example, when you think about creating an unnatural bond between oil and vinegar molecules by using a binder and mechanical agitation, it can boggle the mind. Especially when you get down to how this emulsion of two incompatible molecules is so tenuous that it could easily break if even slightly overpowered.
All that really means is that oil and vinegar is slowly whisked together with a little bit of mustard or egg yolk to hold the bond together. That’s it.
Basic process
The basic process for making a vinaigrette goes like this.
Combine vinegar with binder and flavourings.
Slowly whisk a few drops of oil into the vinegar mixture.
Slowly whisk a few more drops of oil into the vinegar mixture.
In a slow steady stream whisk the remaining oil into the vinegar mixture.
Season the vinaigrette with salt and pepper and serve.
That’s it.
Common Mistakes
The biggest mistake I see and hear about is that people combine all of the oil and vinegar all at once and then try to whisk it together. This will not hold a bond. It may come together briefly, especially if you are using a blender. But, if you build your vinaigrette slowly and properly it will hold together for much, much longer.
When I saw the vinaigrette will break or separate all I mean is that the oil will float to the top and the vinegar will sink to the bottom creating to very distinct layers. A well-made vinaigrette will have no clear difference between the oil and vinegar because they are literally joined as one at the molecular level.
Ratios
The ratio of vinegar to oil in a vinaigrette is really important. If too much oil is added, the bond will be over powered and will break. It not enough oil is added the vinaigrette won’t be viscous enough and won’t coat your salad.
Generally, a ratio of one part vinegar to three parts oil is suggested. However, a ratio of one part vinegar to four parts oil is also possible. Though it may seem counterintuitive, the more oil that is added to the vinaigrette the thicker it will be. So, if you want a really thick vinaigrette use four parts oil to one part vinegar. For a more fluid consistency use three parts oil to one part vinegar.
1/4 cup Vinegar
3/4 cup Oil
Yield = 1 cup of standard vinaigrette
2 tbsp Vinegar
3/4 cup + 2 tbsp Oil
Yield + 1 cup of thick vinaigrette
Basic Vinaigrette
This basic recipe can be used to make thousands of kinds of salad dressings. Change the vinegar and add different ingredients like herbs and garlic to make whatever vinaigrette you would like.
This post is about salad dressing not just vinaigrette but I’ve mostly just been talking about vinaigrette. The reason for this is that the process for making a vinaigrette is the same for making an egg-based dressing or mayonnaise. The only difference is that the mustard is replaced with egg yolk.
The recipe above could easily be used to make Caesar dressing for example if the mustard is replaced with one egg yolk (the mustard can be used along with the egg yolk as well). Additionally, two cloves of garlic, a few anchovies or Worcestershire sauce, lemon juice, and parmesan cheese would be added. But the basic recipe is identical.
Changing the recipe
That basic recipe can be used to make hundreds if not thousands of salad dressings that are all built on the same process but flavoured differently. Don’t believe me?
Maple Balsamic Vinaigrette
This basic recipe can be used to make thousands of kinds of salad dressings. Change the vinegar and add different ingredients like herbs and garlic to make whatever vinaigrette you would like.
This basic recipe can be used to make thousands of kinds of salad dressings. Change the vinegar and add different ingredients like herbs and garlic to make whatever vinaigrette you would like.
This basic recipe can be used to make thousands of kinds of salad dressings. Change the vinegar and add different ingredients like herbs and garlic to make whatever vinaigrette you would like.
This basic recipe can be used to make thousands of kinds of salad dressings. Change the vinegar and add different ingredients like herbs and garlic to make whatever vinaigrette you would like.
Hopefully, now you are starting to notice that even though all of those recipes will taste very different, they are all pretty much the same. It’s just knowing that basic formula and then adding and changing things to make it something different.
There is no end to the changes you can make and the different dressings you can create. Master this basic salad dressing and then the world is your oyster.
I’d love to hear about the salad dressings you come up with. Leave it in the comments or hit me up on social media.
Chimichurri is a herbaceous uncooked sauce originating in Argentina. Most typically it is used as a sauce or marinade for steak, sausages, or offal. But it works very well on seafood and chicken as well.
It is believed that chimichurri was invented by gaucho’s(Argentinian cowboys) to flavour meat that had been cooked over an open fire. It would make sense that they would use herbs and other ingredients that could be easily gathered while they were traveling.
What makes Chimichurri so great?
The brilliance of chimichurri, like most things I love, comes from its simplicity. It is composed of only a few ingredients balancing the fresh herb flavour with acid and a touch of heat. It cuts perfectly through the fat and rich flavour of a nice thick steak.
What’s in Chimichurri?
Like most foods that have hit the ever-expanding global awareness chimichurri has many variations depending on where it is found. However, in its most traditional form, it is made up of chopped parsley, garlic, olive oil, oregano, chili flakes, and red or white wine vinegar. A red version of the sauce also exists that has tomato and red bell pepper added. This version is slightly sweeter than the regular green version.
Variations
As I said, there are many variations of chimichurri. Some versions of the sauce are thick like a pesto while others are more like a loose dipping sauce. Some versions are slightly spicy while others are mild. Most American versions add cilantro to the mix which adds a nice flavour. And occasionally the wine vinegar will be substituted with balsamic or another type to alter the flavour and appearance.
Try it!
The next time you’re grilling up some steaks rather than grabbing the HP or whatever your sauce of choice is, whip up a batch of this stuff and give it a try. You won’t believe how delicious such a simple sauce can be and how you lived your whole life without trying it up until now.
Chimichurri Suace
A quick and simple herbaceous sauce for grilled meats.
What is a vinaigrette? How do you make one? And why should you care?
Those are all good questions that I am about to answer.
Everything I know about Vinaigrette
What is a vinaigrette?
A vinaigrette is a mixture (emulsion) of oil and vinegar most commonly used to dress salads. An emulsion is a mixture of two liquids that don’t typically mix. Some vinaigrettes have a stronger emulsion which means that they stay together longer. A weak emulsion will break (oil and vinegar separate) within a few minutes.
Typically, a vinaigrette is held together by a binder. In the case of homemade vinaigrettes, this is most commonly mustard. This can be any style of prepared mustard or even ground mustard seed. When used in vinaigrette mustard is playing the same role as egg yolks do in a mayonnaise. Both mustard seeds and egg yolks contain a substance called Lecithin which is both hydrophilic and lipophilic meaning it attracts water and fatty substances. All that really means is that it creates a bond between the vinegar and the oil.
A strong emulsion is one that is built slowly. This allows time for a strong bond to form. That is why when making a vinaigrette the recipe usually calls for the addition of only a few drops of oil to start. Once the base of the emulsion is built the oil can be added more quickly. A strong emulsion will hold together days, weeks, or even months.
Oil to Vinegar Ratio
There is a limit to how much oil and vinegar can be emulsified together. Generally, a ratio of 3:1 oil to vinegar is followed however a 4:1 ratio is common as well. A 4:1 ratio will yield a thicker creamier vinaigrette.
So, if you wanted one cup of salad dressing, you could use 1/4 cup vinegar and 3/4 cup oil. Or, 1/3 cup vinegar, and 2/3 cup oil.
What is the best type of oil to use?
There isn’t really one type of oil that is best suited to making a vinaigrette. Really, it comes down to the flavour you are looking for. For example, if you wanted to make a vinaigrette that tasted of hazelnuts you would likely want to use a hazelnut oil.
More commonly the flavour of a vinaigrette comes from the vinegar and additional flavouring ingredients. Flavoured vinegar may include raspberry, balsamic, apple cider, white wine, red wine… you get the idea.
Because the flavour isn’t typically coming from the oil, we generally want a to use a neutral oil. This could be canola oil, sunflower oil, or any number of other oils.
Using olive oil in vinaigrettes.
Olive oil has a pretty strong and distinct flavour that be be overpowering in large doses. This means that it isn’t well suited to being used to make vinaigrettes. I should say that I often use 1/4 olive oil and 3/4 canola oil to make my vinaigrettes. I get a little bit of that olive oil flavour but it isn’t going to ruin my vinaigrette.
What type of vinegar should you use?
The type of vinegar you use is most commonly what dictates the flavour and name of the vinaigrette. A white wine vinaigrette is made with white wine vinegar. So, you can use any kind of vinegar you want, just try and pair it with the ingredients in the salad you will be using the vinaigrette on.
Other ingredients.
It is very common for there to be a sweet element in vinaigrettes. This helps to balance the acidity. This sweetness can come from the addition of honey or maple syrup. It may come from the vinegar, like balsamic, or it may be the combination of two or more things. The only rule here is that we still want a bit of that acidity so, don’t sweeten the dressing too much. For 1 cup of vinaigrette, I typically use 1-2 tsp of honey.
Herbs, spices, garlic, and shallots, can all be added to a vinaigrette to add flavour. Again, it comes down to the type of vinaigrette you are making and how you will be using it.
How do you make a vinaigrette?
The first step in making a vinaigrette is to combine the vinegar with the binder. For one cup of vinaigrette this would be 1/4 cup vinegar with 1 tsp mustard powder or Dijon. To this other ingredients like honey, and herbs can be added. This is all whisked together.
The second step is to start adding the oil. Always start with just a few drops of oil and add it while whisking. There two main ideas that you need to keep in mind. The first is that you are trying to break the oil into tiny, tiny droplets with the whisk as this makes it easier for the oil to bond with the vinegar. The second is that you are trying to build a foundation without overpowering the binding power of the mustard.
Once the first few drops of oil have been whisked into the vinegar add a few more. Do this three or four times. You shouldn’t really be able to see any oil separation (oil floating on top of the vinegar) at this point. Now, in a slow, steady stream, while whisking, add the remaining oil. You may want to stop the stream every once in a while to make sure the oil is being properly absorbed. Once all the oil has been added taste the vinaigrette and adjust the seasoning with salt and pepper.
Storing a vinaigrette.
Vinaigrettes should be stored covered in the fridge. Because of the nature of the acidity and oil in the vinaigrette, it will last for weeks if not months. A well-made vinaigrette should hold together for a very long time. However, over time the oil and vinegar may separate, this is common. If this happens just shake the mixture back together before use.
Conclusion
Knowing how to make a vinaigrette form scratch is a very valuable skill. With this basic knowledge you can make a unlimited amount of salad dressings. Just stay within that 3:1 or 4:1 ratio and play with adding different ingredients. You own’t believe what you’re able to make.
Basic Vinaigrette
This basic recipe can be used to make thousands of kinds of salad dressings. Change the vinegar and add different ingredients like herbs and garlic to make whatever vinaigrette you would like.
We use cookies on our website to give you the most relevant experience by remembering your preferences and repeat visits. By clicking “Accept”, you consent to the use of ALL the cookies.
This website uses cookies to improve your experience while you navigate through the website. Out of these, the cookies that are categorized as necessary are stored on your browser as they are essential for the working of basic functionalities of the website. We also use third-party cookies that help us analyze and understand how you use this website. These cookies will be stored in your browser only with your consent. You also have the option to opt-out of these cookies. But opting out of some of these cookies may affect your browsing experience.
Necessary cookies are absolutely essential for the website to function properly. This category only includes cookies that ensures basic functionalities and security features of the website. These cookies do not store any personal information.
Any cookies that may not be particularly necessary for the website to function and is used specifically to collect user personal data via analytics, ads, other embedded contents are termed as non-necessary cookies. It is mandatory to procure user consent prior to running these cookies on your website.