Haddock fishcakes. Simply prepared, lots of flavour, and very few ingredients. What more do you need to know?
When I was around twenty-two, twenty-three, I started working in this up-scale tapas/cocktail bar in Halifax. Our kitchen wasn’t much bigger than a closet, the dish pit (where the dishwasher is) was a closet under a staircase, and we had a small dry-storage room in the basement that also housed the most miniature walk-in fridge I have ever seen. It was more like a lean-in fridge. The ceiling in that basement storage room was low enough that I couldn’t stand up straight without putting my head through the ceiling tiles. I only mention this, because I would spend hours upon hours in my first few months at that restaurant hunched over in the low-ceilinged basement storage room breading fishcakes; hundreds and hundreds of fishcakes.
I don’t remember everything that was in all those fishcakes I was breading, but I do remember spending a lot of time thinking about what I would put in my perfect fishcake recipe. It was way back then, twelve or thirteen years ago, that I came up with the first version of this haddock fishcake recipe. Over the years, it’s changed and been updated as my tastes have changed. But, for the most part, the recipe in this post is the same one I devised hunched over in that basement all those years ago. To this day, it is still my favourite Haddock Fishcake Recipe, and I’d like to share it with you.
What’s in the Haddock Fish Cakes?
If you’ve been reading the blog for any amount of time you know that I don’t like over complicated recipes. Why do something with twenty ingredients that you can do it with five or six? These haddock fishcakes stay true to that ethos. Almost all of the ingredients I use to make the fishcakes are pictured below, they are 1 lb of haddock, two potatoes, one red and one green bell pepper, one onion, a bit of thyme, and a bit of parsley. Not seen in the pictures is a bit of dried dill, paprika, salt and pepper. Those are all of the ingredients in the haddock fishcakes. Want to see how to make them?
Preparing the Peppers and Onion
The first step in making my favourite haddock fishcakes is to dice the peppers and onions. You want to cut these ingredients no more than 1 cm x 1 cm and as evenly as possible. Once the vegetables are cut, heat a medium frying pan over medium-high heat, add in 1 tbsp of oil, sautée the onions for two to three minutes, then add in the peppers and cook for another three to five minutes or until the peppers and onions are soft. Take the vegetables off the heat and put in a dish to cool.
Potatoes
Before you cook the peppers and onions, peel and dice the potatoes, cover them with water and bring them to a boil on high heat. By the time the peppers and onions are finished, the potatoes should be cooked and ready for mashing.
Drain the potatoes, and let them sit in the colander for about three minutes before mashing them. Rather than a masher, I use a food mill to process the potatoes. A food mill forces the potatoes through tiny holes, making sure there are no lumps and leaving you with very smooth potatoes. If you do use a potato masher to process the potatoes, get them as lump-free as possible.
Place Holder
The haddock can be cooked in a few different ways. You can bake it at 350°f for about twenty minutes. You can poach it in water or milk, or you can steam the fish for four to five minutes. As you can see in the pictures below, to cook my haddock I steamed it. Once the haddock is cooked set it aside to cool slightly.
Put it all together
After all of the ingredients had been processed, there should betwo cups of peppers and onions, two cups of mashed potato, and two cups of poached haddock.That should be easy enough to remember. To those main ingredients, add one tablespoon of chopped parsley, one teaspoon chopped thyme, one teaspoon dried dill, one teaspoon paprika, half a teaspoon of salt(plus more to taste) and an eighth of a teaspoon of pepper(plus more to taste). Mix all of the ingredients, taste the mixture (it’s okay, everything’s cooked) and adjust the seasoning with salt and pepper as needed.
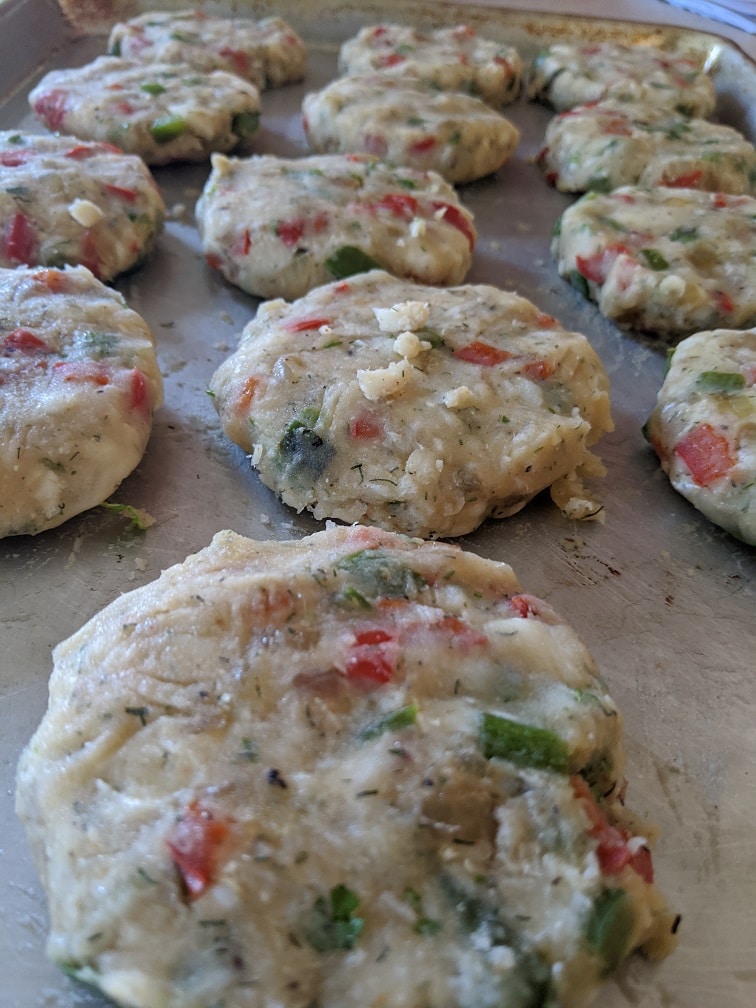
Forming the Fishcakes
To form the fishcakes, and get them all the same size, use a 1/3 cup measure to scoop out portions of the mixture. Roll the scooped portions into balls, then flatten the balls and cup your hands around the edges to tighten-up the circumference. Repeat this process until all of the haddock fishcakes have been formed. Put the fishcakes in the fridge to chill for about an hour, or freeze as they are.
Haddock Fishcakes
This is my favourite haddock fishcake recipe. Try it, I bet you'll love it as much as I do.
After the haddock fishcakes have had time to chill and rest, take as many as you’d like, dust them with flour(I used Bob’s Red Mill All-Purpose Gluten-Free Flour) and fry them over medium heat in a touch of oil for three to four minutes per side or until they are golden brown and a little crisp.
I love fishcakes and eggs together. So, I served my fishcakes with two soft-poached eggs on top and a bit of salad. I also made a Sriracha-Orange Mayonaise to go with the fishcakes. You can find the recipe below.
Fishcake Wrap Up
These haddock fishcakes are great for breakfast or make a perfect a light lunch. They freeze very well and can be cooked right from frozen. What are you waiting for?
Do you have a favourite fishcake recipe? How is it different than mine? Tell me in the comments section below.
Bonus Recipe
Orange Sriracha Mayo goes very well with the fishcake recipe above. It also goes great with onion rings, calamari, and deep-fried clams. To make it, combine mayo, sriracha, orange zest and juice and a touch of salt and pepper. See the full recipe below.
Orange Sriracha Mayo
A quick and simple sacue that is great on fishcakes.
Thank you for reading the post. If you liked it, remember to share it on Facebook, Pinterest, or Twitter by clicking the icon to the left of the right of the page. Did you know that Chefsnotes.com has almost 400 posts just like this one? Don’t ever miss a post again. Subscribe to Chef’s Notes by putting your email address in the subscription box below or by becoming a Chef’s Notes member right here. You will be notified of every new post. And if you would like to know more about me, click the link below to read my story.
Do you love baked haddock, but are tired of the same old lemon and dill or whatever it is that you always do? Use a classic Caribbean Green Sauce, to take that same old baked haddock and make it something memorable. Just because you can’t travel to the Caribbean right now, doesn’t mean you can’t have a taste of the Caribbean in your kitchen. And, just because you want to eat baked haddock, doesn’t mean you have to bore your taste buds. Keep reading if you are ready to try something new.
The Green Sauce
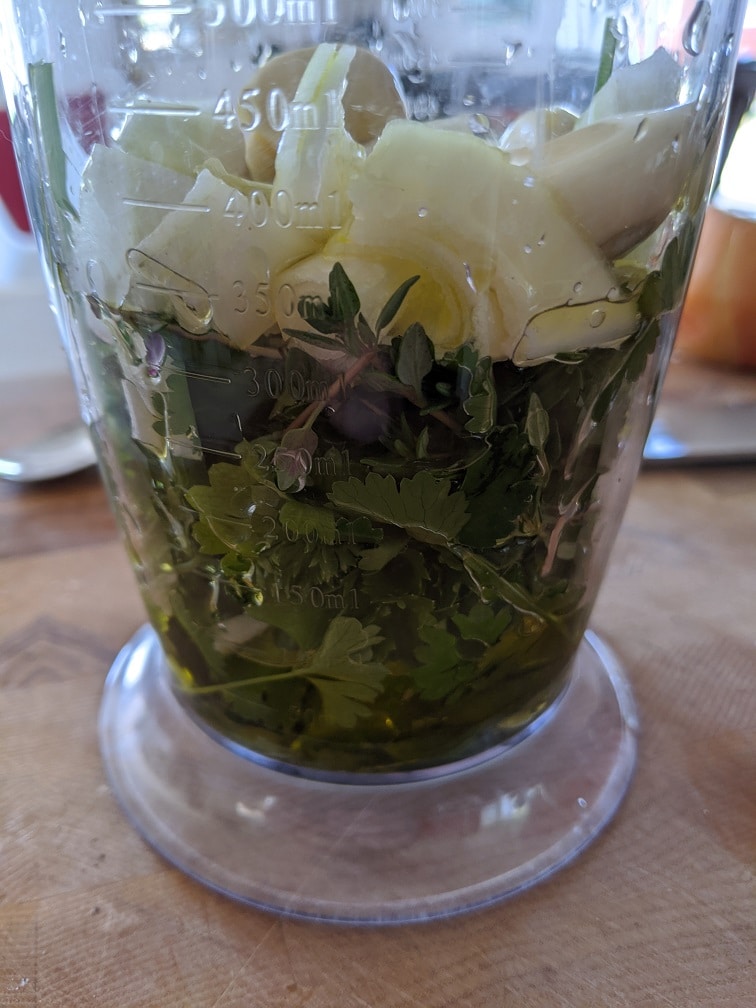
Green sauce, in one form or another, is common all over the Caribbean. There is no single recipe for it, and there is no right or wrong way to make it. Everyone will have their own version and their own secret mix of ingredients. The Caribbean Green Sauce recipe that I am going to share with you today is the way it is because it’s based on the herbs that I have growing in my garden. You may not have or even want to use the same ones.
The base of the green sauce is onion, garlic, and peppers. To that, a few handfuls of herbs are added, along with a bit of salt and olive oil. That’s about it. However, there are a lot of variations that can be made within those confines. The onion, I use white onion, can be substituted or used along with scallions, shallots, or red onion. The peppers in the recipe can be sweet or spicy. I used a habanero, but if you don’t like things spicy, you can switch it out for red bell pepper. Even the herbs can be mixed up. I used a combination of cilantro, thyme, oregano, and parsley. Use whatever combination you would like, purée it all together, and you have green sauce.
For the full recipe for my sauce, check out the recipe below.
Caribbean Green Sauce
Green sauce is an all-purpose Caribbean sauce and marinade used for fish, pork, chicken, beef, or anything else.
To make baked haddock, you need haddock. I used four relatively small haddock fillets, but there was enough marinade for four to five large pieces. Put the haddock in the green sauce and let it sit for about two hours. Because there is no added acidity in the green sauce, it is okay to let the haddock sit in it and marinate overnight.
Side Dishes
To complement the flavour of the green sauce baked haddock, I made red beans and rice and boiled sweet potato. To make the rice and beans, I used 1 cup of basmati rice (not traditional, but it is what I had on hand) combined with one (540ml) can of red kidney beans. To the rice and beans, I added two bay leaves, a 1/4 tsp of allspice, and a 1/2 tsp of marjoram. I added two cups of water to the rice, brought it to a boil, put a lid on the pot and reduced the heat to low, then left it to simmer for 17 minutes.
Cooking The Caribbean Style Baked Haddock
After the haddock has had some time to marinate in the green sauce, it is time to cook. Use equal parts (about half a cup) each of red and green bell pepper and white onion, along with one tablespoon of sliced garlic. Heat a medium-sized frying pan over medium-high heat. Add in two teaspoons of olive oil along with the pepper and onion. Cook the vegetables for four to five minutes, then add in the garlic and cook for one more minute. Pour half a cup of hot water into the pan, then carefully place the haddock in, pouring the excess marinade into the pan. Put the pan in the one on 350°f for 15 minutes or until the haddock is cooked.
When the haddock is finished cooking, take it out of the pan, and put the pan back on the heat. Bring the contents of the pan to a boil and cook until the sauce is thick. When the haddock first comes out of the oven, the sauce will appear to be split. The oil in the sauce hasn’t yet combined with the water. Boiling will help to evaporate some of the water, as well as bond the remaining water with the oil. When the sauce is finished, it should look smooth.
Finishing The Baked Haddock
Finishing the dish is as simple as plating the boiled sweet potato, and the rice and beans, then putting the haddock over it with a bit of the sauce.
Rather than making the sauce as I did, the marinated haddock can be put on a parchment-lined baking sheet and baked on 350° for 15 minutes or until the haddock is cooked. The benefit of making the baked haddock the way I did is that you end up with more of a sauce, a few more vegetables, and the fish will take on a bit more of the flavour. However, you will be happy with the dish either way.
I’d love to hear what your favourite way to make baked haddock is. Tell me about it in the comments section below.
Thank you for reading the post. If you liked it, remember to share it on Facebook, Pinterest, or Twitter by clicking the icon to the left of the right of the page. Did you know that Chefsnotes.com has almost 400 posts just like this one? Imagine all the great tips, tricks, and recipes you’ve missed. Don’t miss any more! Subscribe to Chef’s Notes by putting your email address in the subscription box below. You will be notified of every new post. And if you would like to know more about me, click the link below to read my story.
Mussels. What’s not to love? They are delicious and good for you being high in iron, and B12 among other things. I love mussels and always have. I love them so much in fact that I almost caught myself on fire trying to get them. We will get to that in a few minutes. The point is that today I am going to share with you five delicious mussel recipes that I am confident you are going to love. Let’s take a look.
Thai Coconut Red Curry Mussels
The first mussel recipe is for Thai Coconut Red Curry mussels. If you have never had mussels done this way, you should try it. The natural sweetness of the mussels pairs perfectly with the complex flavours and mild heat of curry paste. To make these mussels, you will need red curry paste, which you can find at most grocery stores in the sauce or international food aisle. You can always make red curry paste at home too.
Making these mussels is a simple as sautéeing one teaspoon each of ginger and garlic in olive oil for about a minute. Toss one pound of mussels into the pan along with two tablespoons of red curry paste and a half cup of full-fat coconut milk. Boil the coconut milk, put a lid on the pan and cook the mussels for three to four minutes or until they are all opened. Scoop the mussels out of the pan, keep cooking the sauce until it is the thickness of gravy, then it pour over the mussels. Garnish the dish with a few fresh cilantro leaves and lime juice.
Thai Red Curry Mussels
Thai Red Curry, Coconut Milk, Fresh Cilantro, and Mussels, what could be better than that?
Keyword: Coconut Milk, Mussels, Seafood, Thai Red Curry
Servings: 1serving
Author: Chef’s Notes
Ingredients
1tspMinced Garlic
1tspGrated Ginger
1lbMussels
2tbspThai Red Curry Paste
1/2cupCoconut Milk
Salt and Pepper
5Cilantro Leaves for garnish
1 tbsp Olive Oil
Instructions
Heat a medium-sized frying pan over medium-high heat. Add in the olive oil, garlic, and ginger. Sauté for 1 minute.
Add the mussels into the pan and sauté for another minute before adding in the curry paste and coconut milk. Bring to a boil, put a lid on the pan, turn the heat down to medium and cook the mussels for 3-4 minutes or until they are all open.
Season the sauce with salt and pepper, and garnish with fresh cilantro.
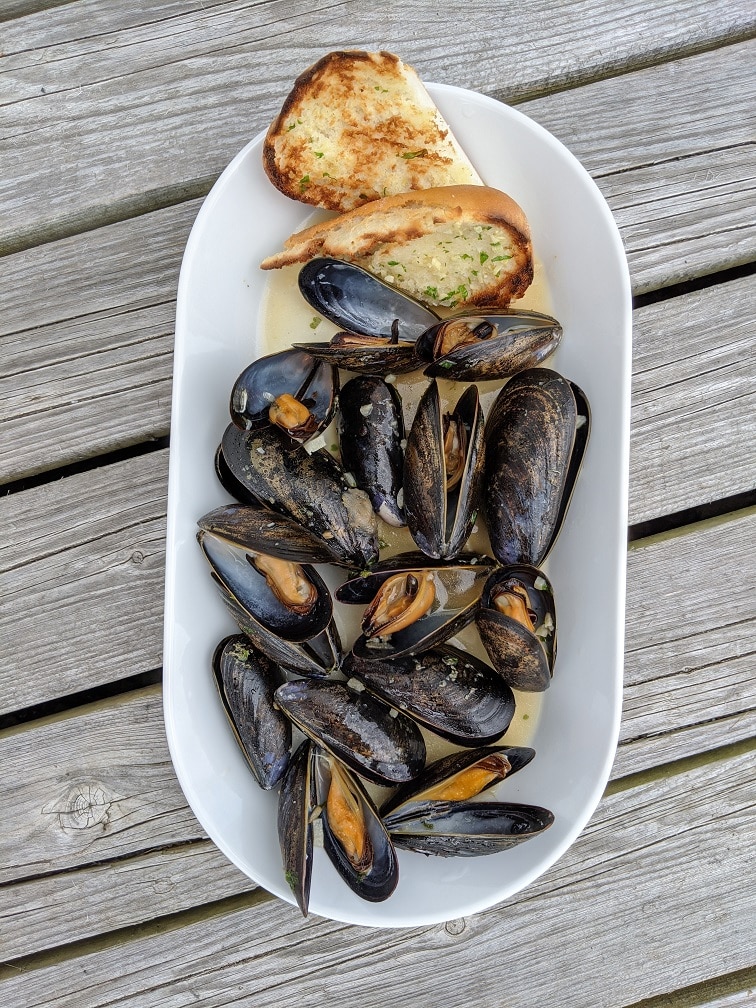
I don’t know that there is a more classic way to eat mussels then to have them cooked in white wine and garlic. I’m also not sure there is a more delicious way to eat them. To make these mussels used two tablespoons of garlic butter, put into a hot pan. I tossed in one pound of mussels, about a quarter cup of white wine, and a touch of salt and pepper. I put a lid on the pan and let the mussels steam for three to four minutes or until all of the shells open.
When I was very small, younger than three, my mother had some friends over for wine and cheese. They also happened to be eating a can of some mussels. I begged and begged my mom until she let me have one of the smokey, oily, mollusks. After repeatedly telling me that I wouldn’t like them, she caved and let me try them. I loved them so much that I stole the can. A few weeks later, my mom woke up at five in the morning to me, screaming. I was standing on the stove, trying to reach the smoked mussels stored in the cupboard above it. I had kicked on a burner or two. My feet were getting hot, and my pyjamas were starting to smoke. My mom stopped storing the mussels above the stove after that. My love of those canned smoked mussels has never diminished. They are still one of my favourite treats, especially when combined with cream cheese, and a Breton cracker. Has food ever made you do anything crazy? Tell me about it in the comments section below.
I’ve wanted to make smoked mussels ever since I got my smoker back in April. However, the seafood counter at my local grocery store had was shut down for months due to lockdown. But, they are open now, and it seemed like the perfect time to try my hand and to make homemade smoked mussels.
If at first, you don’t succeed, try smoking more mussels.
I made two attempts at making smoked mussels. The first attempt did not work; I’ll explain it. I didn’t totally think through what would happen to the mussels in the dry, smoky heat. Basically, the fresh mussels dehydrated, leaving little to eat. I did use a water pan in the smoker, but it didn’t really help. To fix the issue of the mussels drying up, I cooked them before smoking, which worked a lot better.
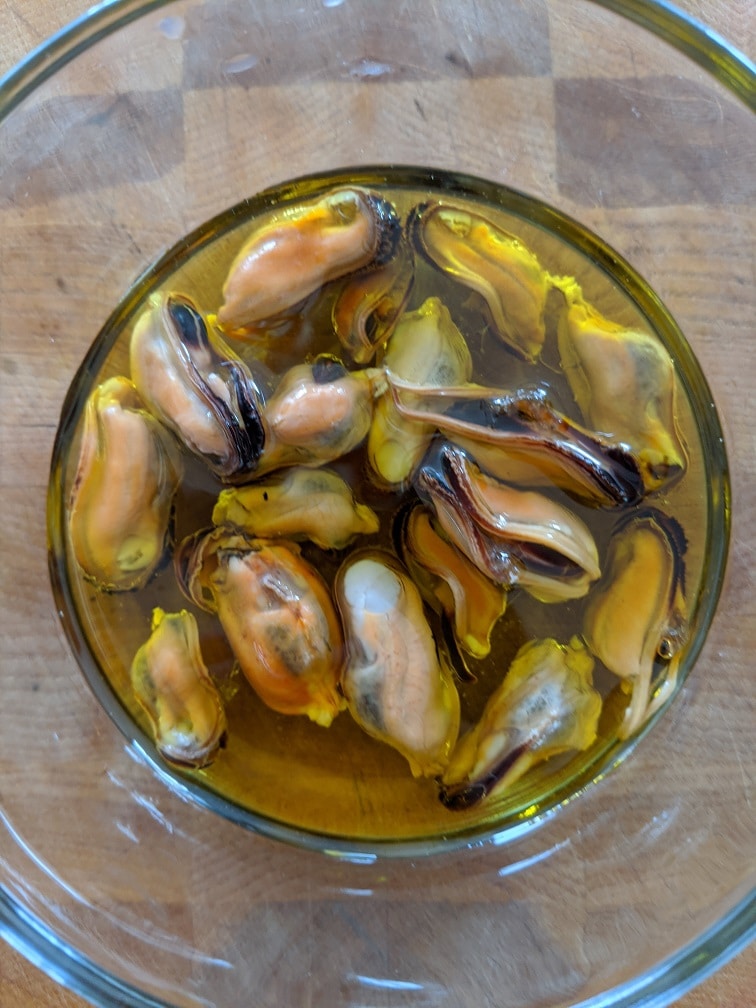
To cook the mussels, you first have to make something called court bouillon, which is a flavourful poaching liquid for fish. Court Bouillon is made with water, white wine, and flavourings. You can see the recipe below. Gently simmer the mussels in the court bouillon, just until they opened, then smoke them on 275°f for thirty minutes using mesquite wood chips. Once the mussels are smoked, take them out of their shells, put them in a glass container, and top them with a neutral flavoured oil like Sunflower oil. I made the mistake of using olive oil, which overpowered the flavour of the smoke and the mussels. They were still very delicious, though. I will be making these again.
Homemade Smoked Mussels
Mussels lightly poached then smoked with mesquite. Delicious,
Growing up, whenever we had mussels, they were cooked with white wine and garlic and served with garlic butter for dipping. It wasn’t until I was in my early twenties, and cooking professionally that I experienced a different way to eat mussels. That first departure from the mussels I knew, was to have them cooked in a simple tomato and basil marinara sauce. Not only are these mussels exceptionally delicious, but they also opened my eyes to the fact that mussels didn’t have to be cooked the way I’d always had them. There was a whole new world of possibilities.
To make these mussels first heat a medium frying pan over medium heat. Add in a tablespoon of olive oil along with a teaspoon or two of chopped garlic. Cook the garlic until it is just starting to brown then deglaze the pan with a quarter cup of white wine. Cook the wine for about a minute then toss in the mussels and tomato purée, basil, salt and pepper. Put a lid on the pan and simmer the mussels for about three to four minutes or until they are all opened. I like to garnish these mussels with garlic breadcrumbs for a little texture.
Melt the garlic butter and combine with the bread crumbs and set aside.
Heat a medium frying pan over medium-high heat. Add in the olive oil and garlic. Cook the garlic until lightly browned then add in the mussels and cook for another minute.
Add the wine into the pan and cook for another minute or two or until the wine has mostly evaporated.
Add the tomato, basil, and salt and pepper into the pan, put a lid on it and simmer for 5 minutes or until all the mussels have opened.
Serve the mussels and garnish with the garlic bread crumbs.
Are you throwing a 1970’s themed dinner party? Boy, do I have the thing for you. Okay, so yes, these mussels are a little old school, but that doesn’t change their tasty level. The last of the five mussel recipes in this post are garlic and parmesan mussels, which are made in two steps. The first step, like with the smoked mussels, is to poach them in court bouillon. Once cooked, cool the mussels in the fridge. Split the shells in half and discard the tops. Loosen the mussel from the shell and top with garlic, parmesan bread crumbs. Broil the mussels for three to four minutes or until the breadcrumbs are browned. Old school? Yes. Delicious? Absolutely.
Broiled Garlic & Parmesan Mussels
The perfect mussel dish for a dinner party or pot luck.
These five mussel recipes are my five all-time favourites. I hope that when you try these, you find a new favourite for yourself. Do you have an excellent mussel recipe that you want to share? Tell me about it in the comments because I would love to hear about it.
Thank you for reading the post. If you liked it, remember to share it on Facebook, Pinterest, or Twitter by clicking the icon to the left of the right of the page. Did you know that Chefsnotes.com has almost 400 posts just like this one? Imagine all the great tips, tricks, and recipes you’ve missed. Don’t miss any more! Subscribe to Chef’s Notes by putting your email address in the subscription box at the top right of the sidebar. You will be notified of every new post. And if you would like to know more about me, click the link below to read my story.
A Quick Note to Regular Readers
Starting today, all posts will be published at 11 am rather than 6:45 am. I have made this change because I think it will help each post reach more people, which will help me to continue to grow the blog. Thank you.
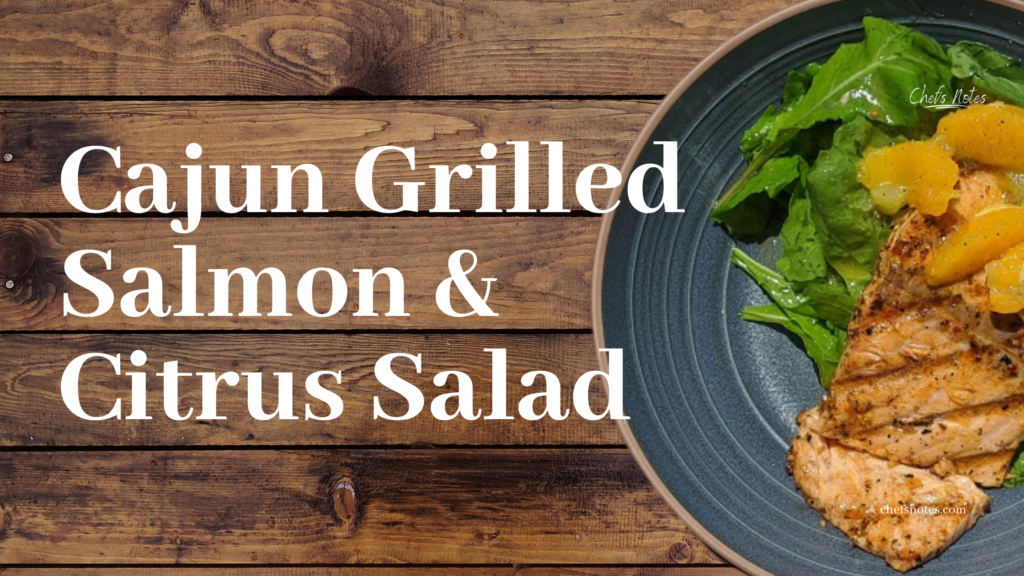
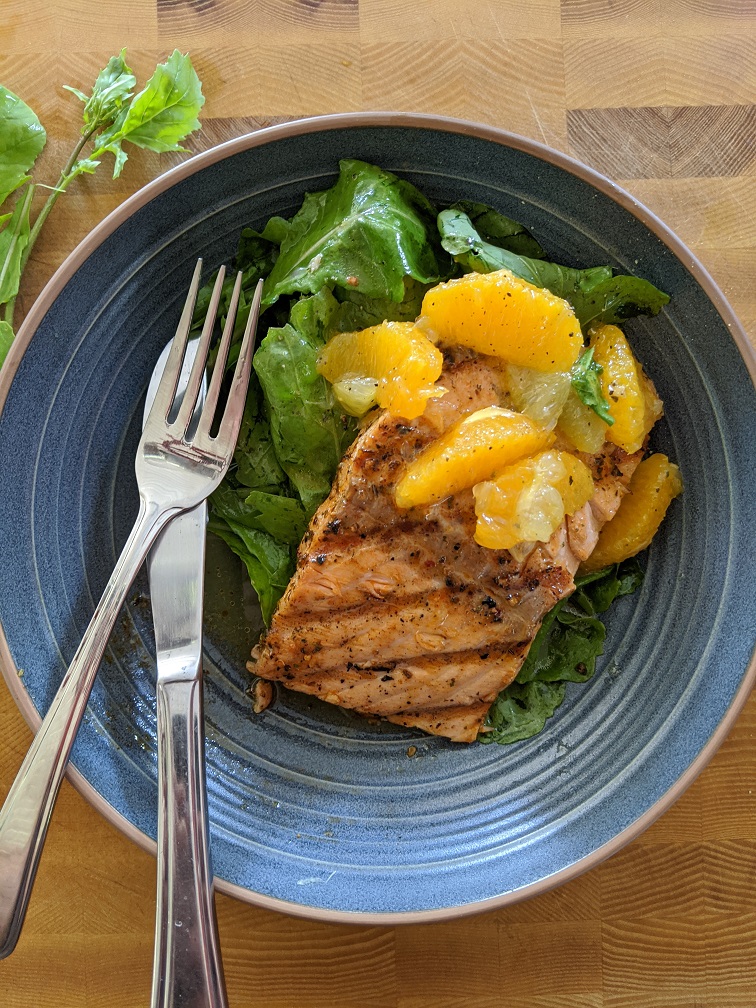
There is a magical exchange of flavour as a fresh Salmon fillet gets gently kissed by the flames of the grill. Combine that magic with the delicious sorcery that is Cajun Seasoning, and you know it’s only going to get even better. Today, we are going to look at how to make Delicious Cajun Grilled Salmon. In case that isn’t enough, we are also going to make a citrus and arugula salad to act as the base for the Salmon creating a healthy lunch or light dinner option. Let’s get to it.
Cajun Seasoning
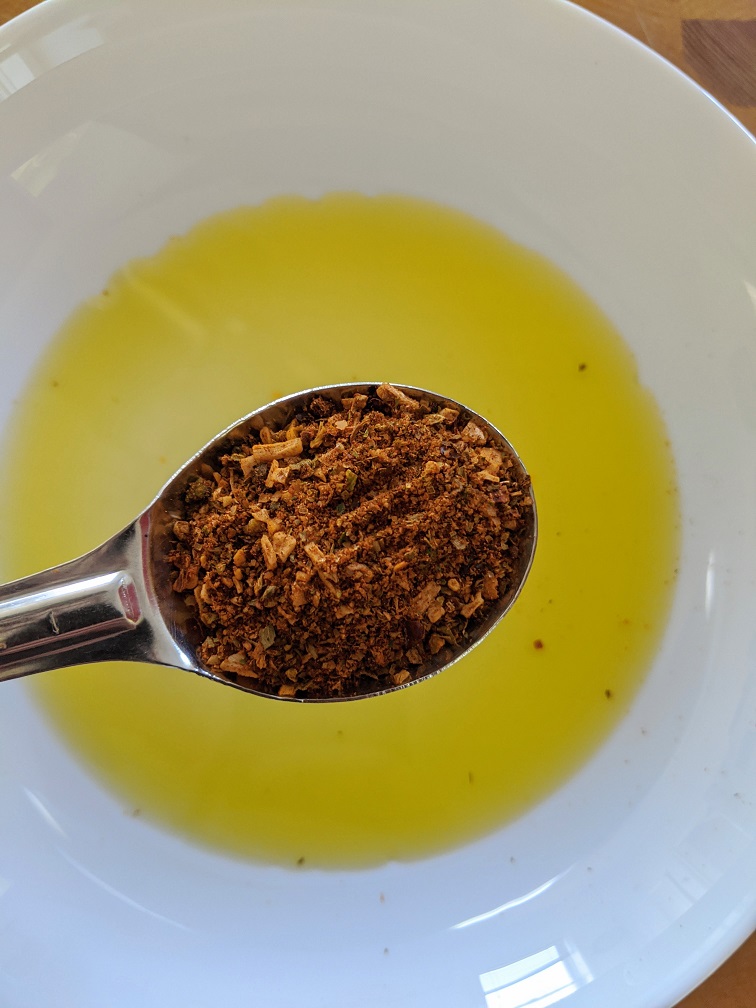
If you search “Cajun Seasoning Recipe” into Google, you will get somewhere around 10 million results. So, if you want to make your own Cajun Seasoning, there are more than enough options out there. Usually, I would opt to make my own. However, I bought this bottle of Club House Cajun Seasoning for my niece a few months ago when she was house-sitting for us. Instead, then let it sit in the cupboard and go to waste, I figured I should use it up.
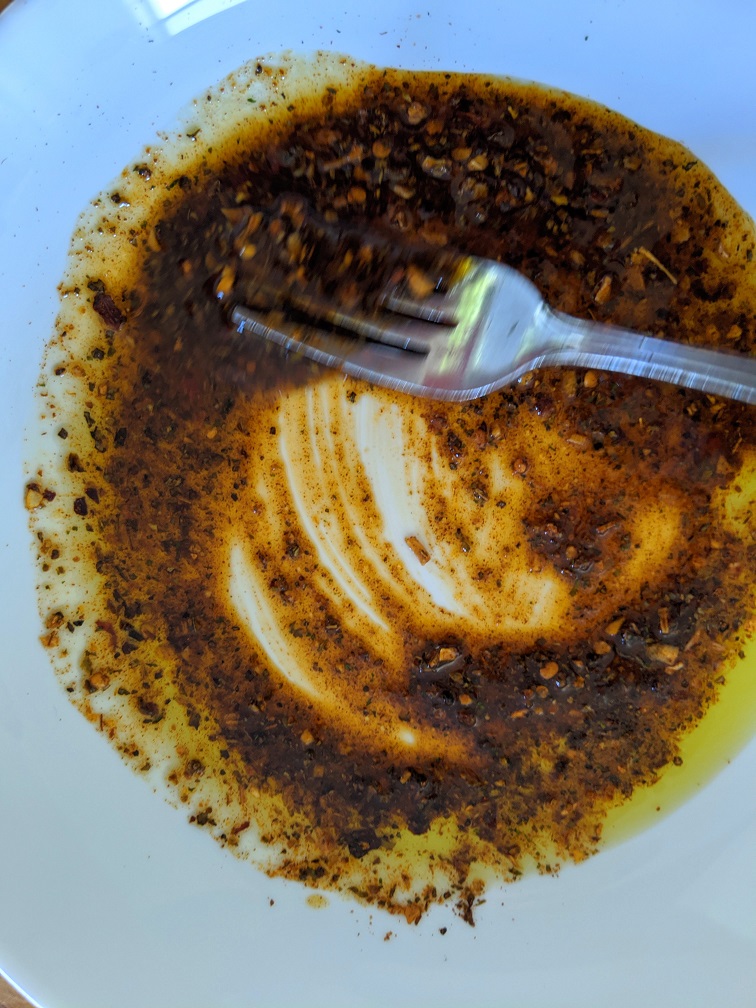
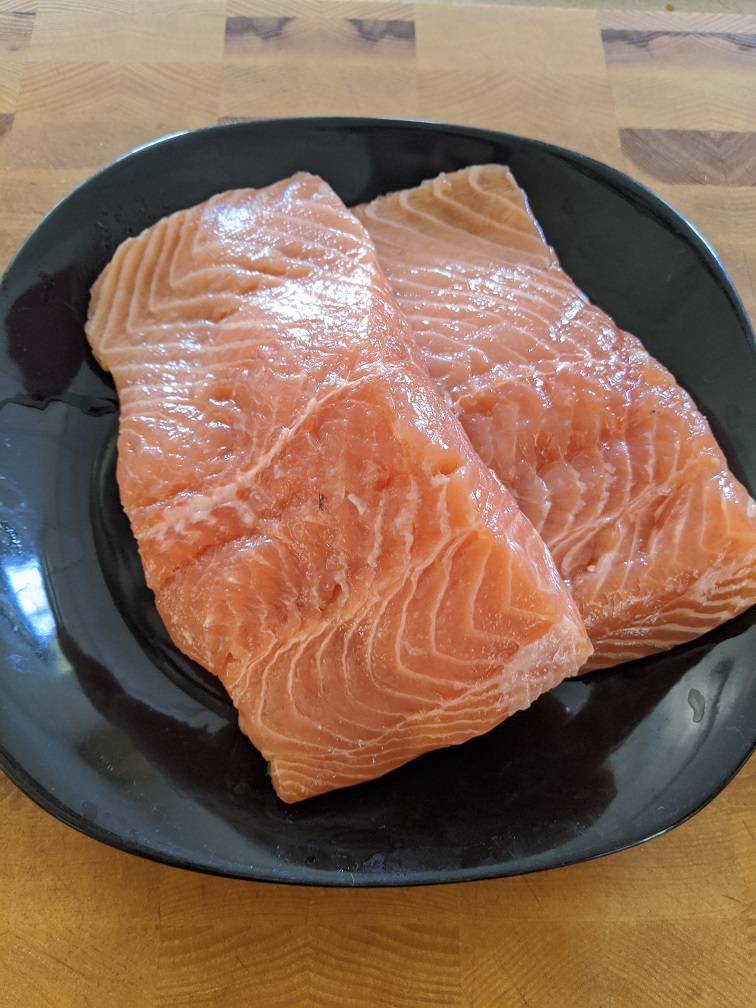
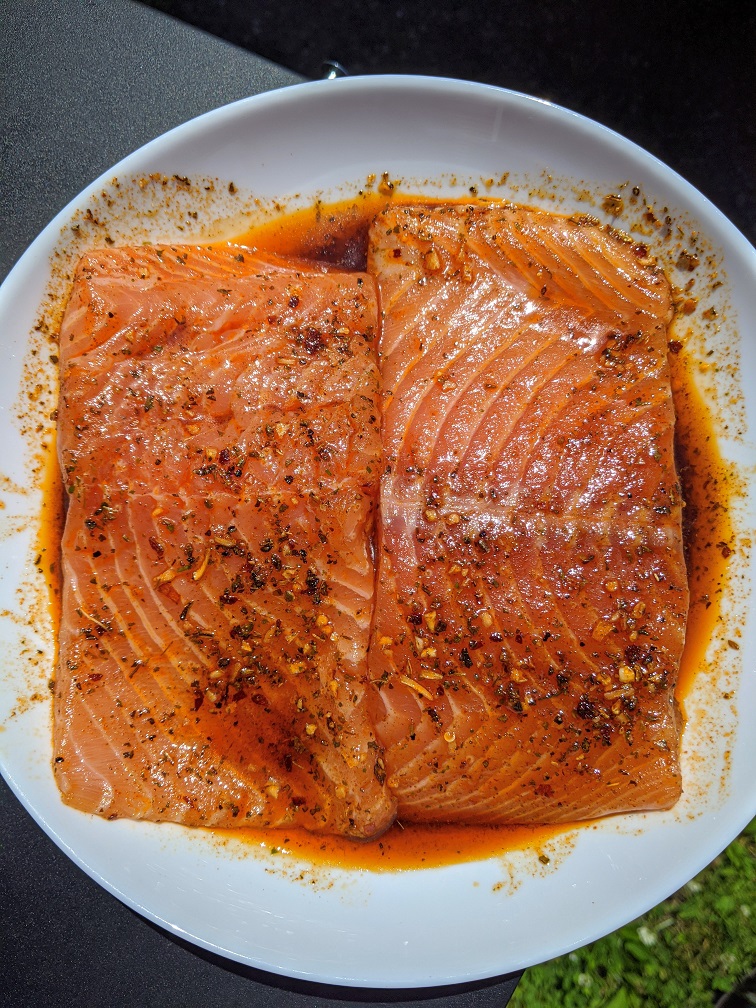
To make the rub for the salmon, I combined 1 tbsp of the Cajun Seasoning with 2 tbsp of olive oil and mixed it up. I rolled two salmon fillets in the mixture, wrapped the whole thing in plastic wrap and put it in the fridge for two hours to marinate.
Grilling The Salmon
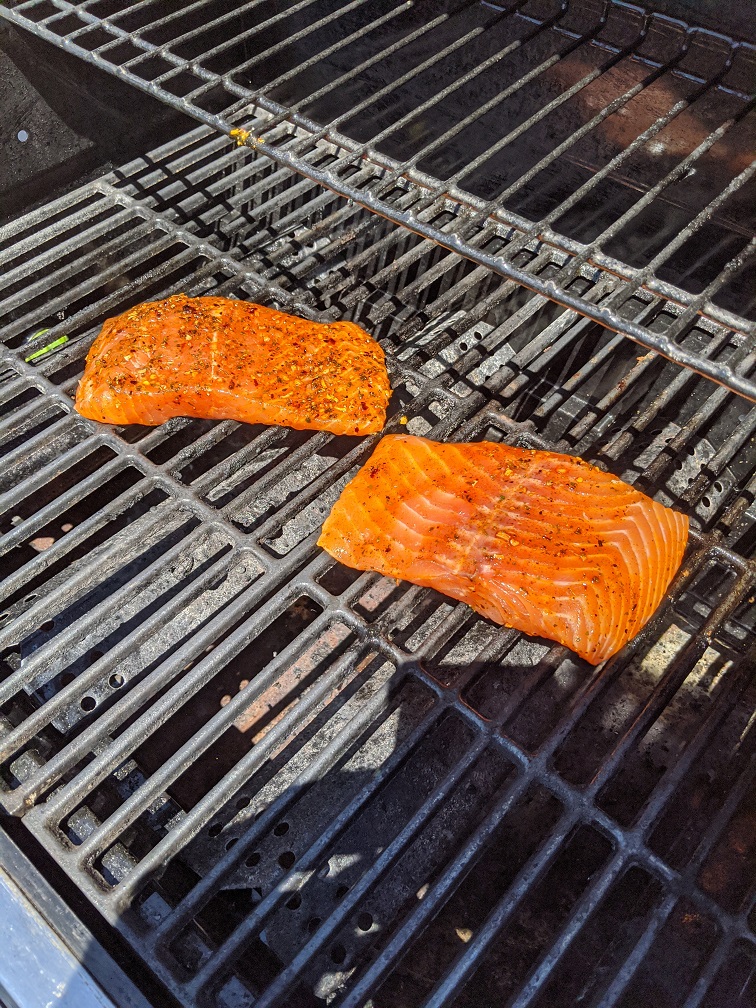
After the salmon had been marinating for about one hour and forty-five minutes, turn on your grill to medium-high heat to preheat it. Bring the temperature up to 400°F and let it heat until the salmon is ready to grill. The goal of this heating is to get the temperature of the grill grates to 400°f. This heat is integral in making sure that the salmon doesn’t stick, or at least sticks less. Once the grill is hot and has had time to heat (about 10 minutes), the salmon can go on.
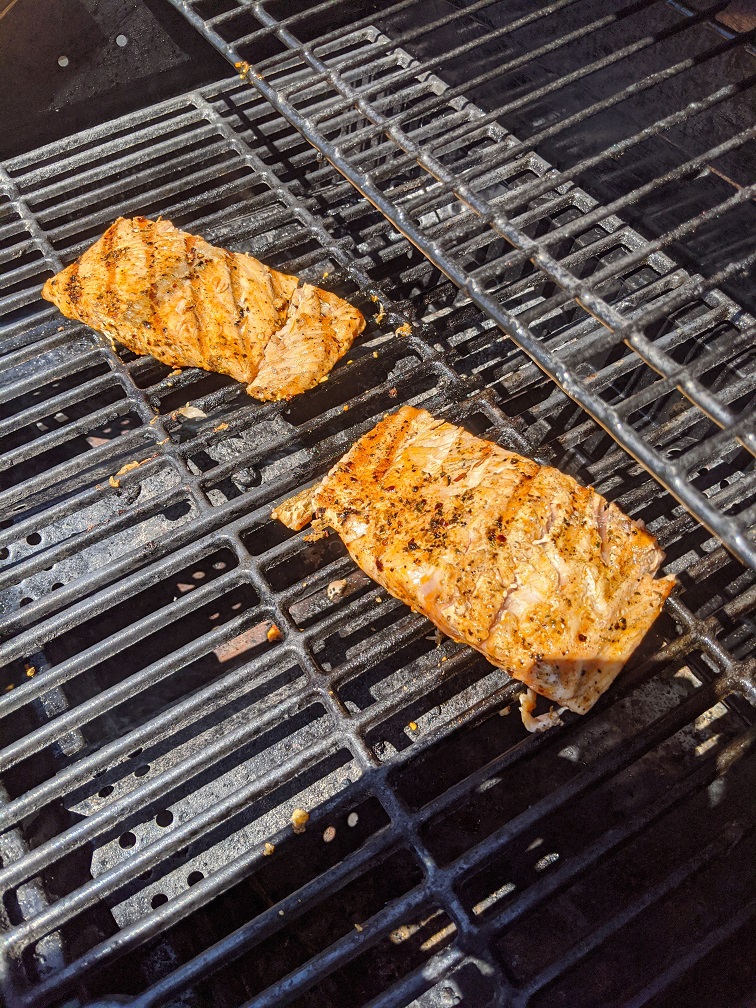
Put the salmon on the grill “presentation side” down. The presentation side of the salmon is the better-looking side, usually the side that didn’t have (or doesn’t have) skin on it. Cook the salmon, without touching it, lid down, for 5 minutes. Using tongs and a spatula, carefully flip the salmon and cook it for another 5-6 minutes. The cooking time will depend on how thick your salmon is, and how well done you like it to be. I prefer my salmon to be a little undercooked, but cook yours as you see fit. Once the salmon is cooked, remove it from the grill and serve it with the salad.
Citrus Salad
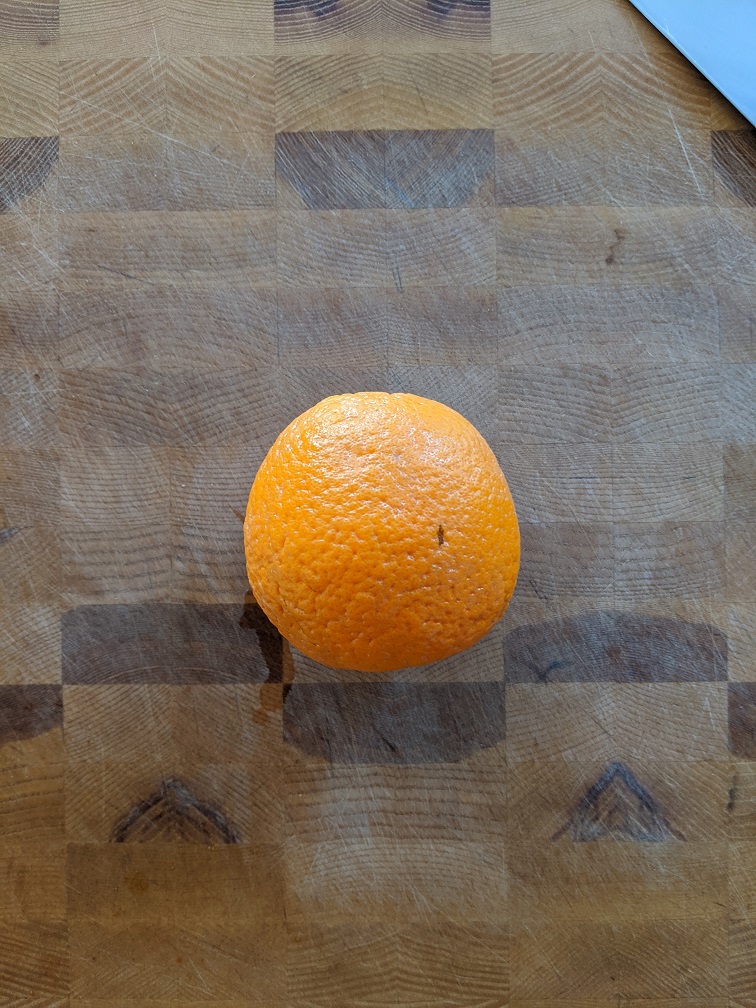
The base for the salmon is a basic citrus salad that contains only a handful of ingredients. However, there is one part of making this that can be a bit tricky. The key to this salad is the segments of orange and lime. To create these citrus segments, use a sharp knife to cut them free from the fibrous part of the orange. Let’s take a look at how to do this.
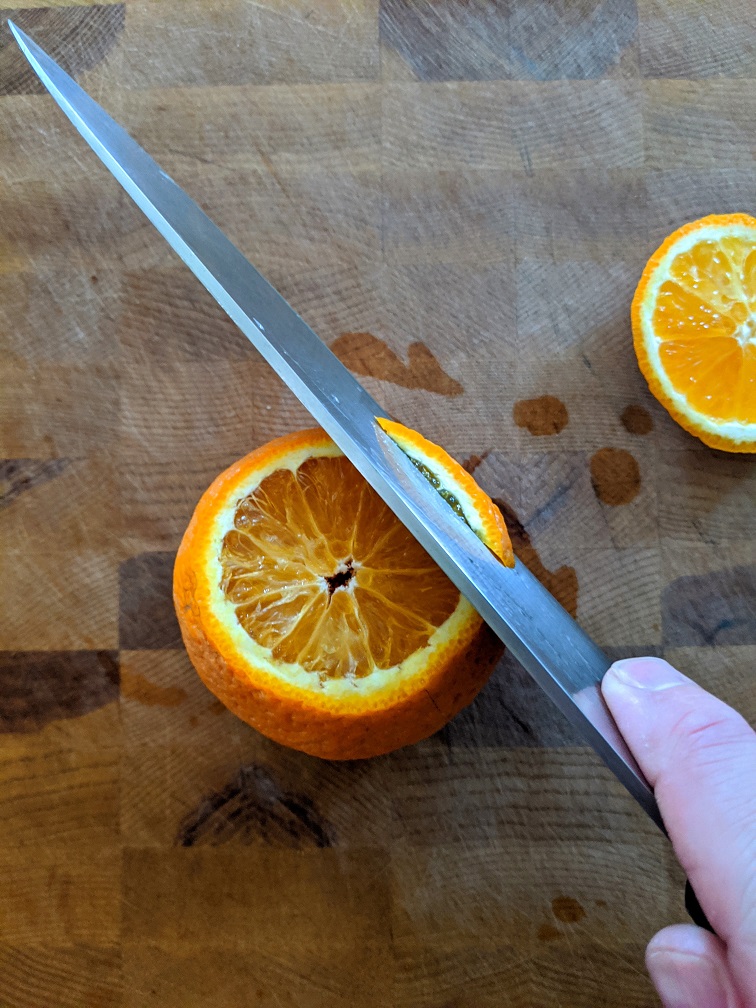
How to segment an orange.
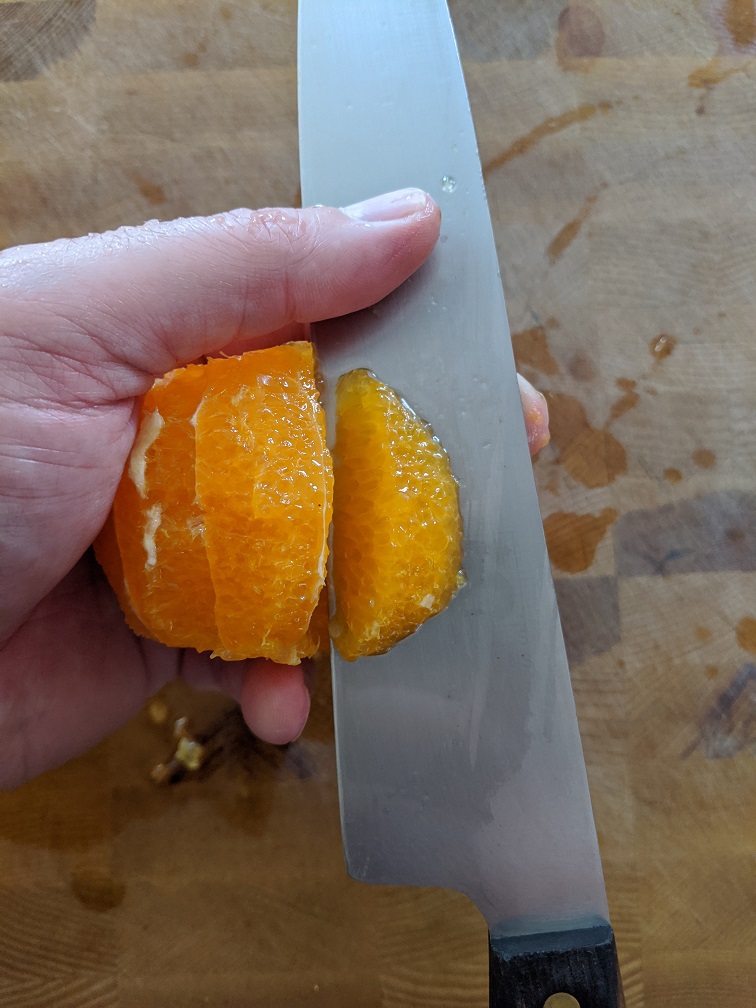
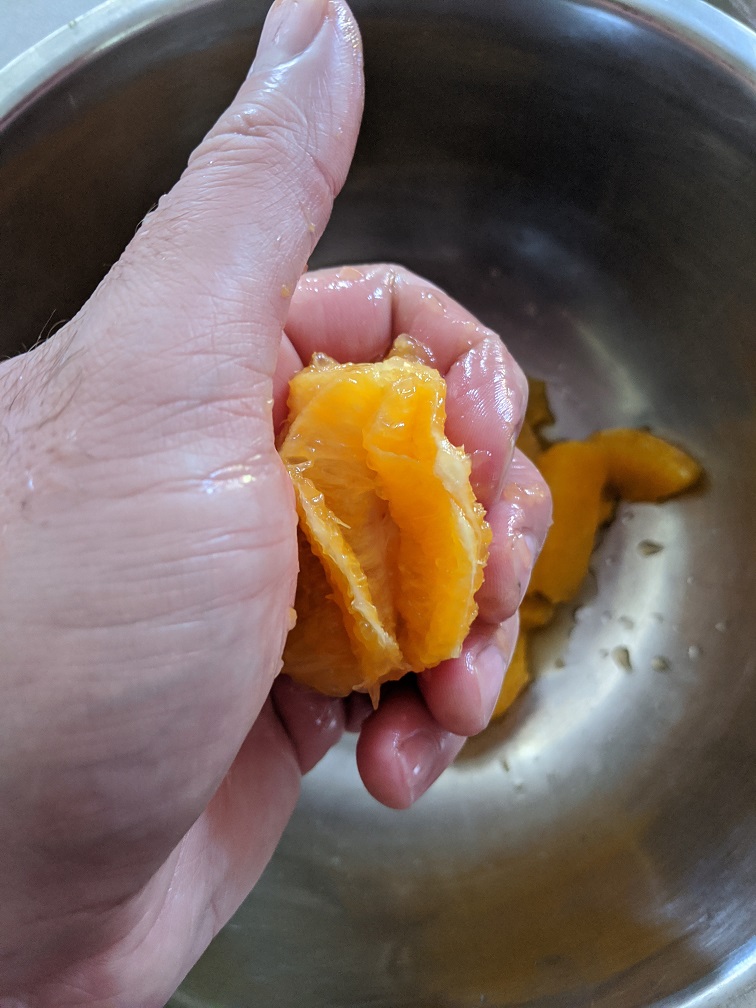
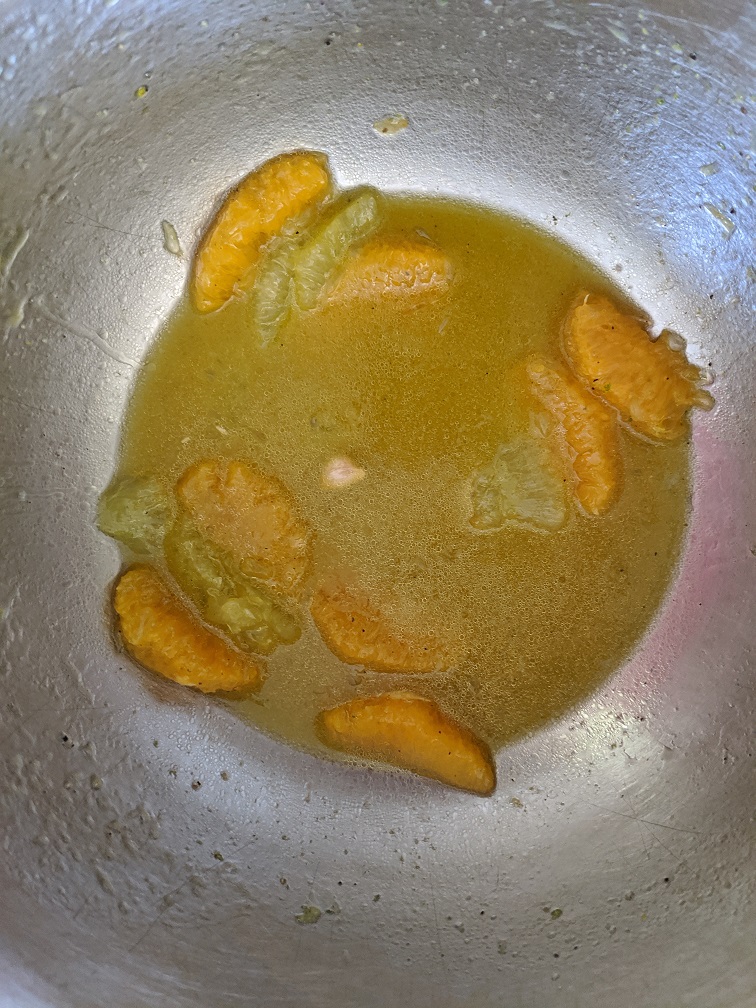
If you look at the second picture in the gallery below, you will see an orange with the top cut off. All those white lines, the ones that make it easy to pull an orange apart, those are what divide the orange into segments. For this salad, you want only the orange segment and not the white lines. Now, look at the third picture in the gallery. In the third picture, you can see that I am using my knife to cut inside those white lines on both sides of the orange segment. Cut as close to those lines as possible so that the segments release from the orange. Put those segments into a bowl, and squeeze whatever is left of the orange to get any remaining juice out.
This segmenting process may seem like a pain, and in some ways, it is, but it has two primary purposes. The first is that the segments are more enjoyable to eat without that fibrous membrane. The second purpose is that doing this allows you to have orange segments and fresh orange juice while only using one orange.
How to peel an orange using a knife.
Peel the orange, using a knife and cut as close to the orange flesh as possible. Make sure that the pith (the bitter white partof the orange) is removed while avoiding cutting into the orange as much as possible. I find the easiest way to do this is to cut the top and bottom off of the orange, place it on your cutting board, then use a sharp knife to cut the skin away. As you cut the skin away, it is crucial to curve your blade around the shape of the orange; this will cut down on waste.
Making the Citrus Salad.
Once the orange is segmented, zest the lime into the bowl, then segment that as well. Add in 1 tsp each of mustard and honey, along with a pinch of salt and pepper. Gently whisk the contents of the bowl, trying not to break the citrus segments apart as much as possible. Now, slowly whisk 1/4 cup of olive oil into the dressing, then add in the arugula, toss, and serve.
Putting it all together
The final step is to combine the salmon and the salad. Put the dressed arugula in a bowl and top with the salmon. Spoon some of the dressing and a few of the citrus segments over the salmon, and enjoy.
Cajun Grilled Salmon and Citrus Salad
Cajun Grilled Salmon, On Top Of Arugula With Citrus Vinaigrette.
Keyword: Barbecue, Best Pasta Salad, Citrus, Salmon, Summer Barbecue, Summer food
Servings: 2Servings
Author: Chef Ben Kelly
Ingredients
Cajun Salmon
2filletsSalmon
2tbspOlive Oil
1tbspCajun Seasoning
Citrus Salad
1lgOrange, Cut into Segments
1Lime, Zested and Cut into Segments
1tspHoney
1tspMustard
4cupsArugula
1/4cupOlive Oil
Salt and Pepper to taste
Instructions
Salmon
Combine the olive oil and Cajun seasoning in a medium bowl.
Roll the salmon in the Cajun Seasoning Mixture to coat it. Cover the bowl with plastic wrap and put it in the fridge to marinate for 2 hours.
Preheat your grill to 400°f for about 15 minutes.
Depending on how thick your salmon is, cook it 3-6 minutes per side over medium heat with the lid down.
Once the salmon has reached your desired level of doneness remove it from the grill and place it on the salad.
Citrus and Arugula Salad
Peel a large orange and using a small sharp knife cut between the membrane of each segment so that each segment comes away freely leaving the fibrous membrane behind. Once all of the orange segments have been cut free, squeeze the juice out of the remaining bit of orange into a bowl with the segments.
Using a microplane, grate the zest of the lime into the bowl with the orange. Once zested, peel the lime and segment it as you did with the orange, then squeeze any juice out of the bit that is left behind.
To the bowl with the orange and lime segments and juice add the honey, and mustard then gently whisk to combine.
Slowly whisk in the olive oil, then season to taste with salt and pepper.
Toss the arugula with the dressing divide it among two bowls and top with the Cajun Grilled Salmon. Finish the salad by spooning the citrus segments and dressing over the salmon.
The most difficult part of this salad is segmenting the citrus, and once you get the hang of that, you can do it in a minute or two. I promise, it is worth the effort. If you are looking for something light, with lots of fresh flavour, this Cajun Grilled Salmon Citrus Salad, is exaclty what you’ve been looking for.
Thank you for reading! If you enjoyed this post share it on Facebook or Pinterest because that will help me continue to grow. If you did enjoy this post you may also like my 5 Best Pasta Salad Recipes. Subscribe to Chefsnotes.com at the top right of this page to get Chef’s Notes in your inbox.
Clams and Chips are one of those things that I don’t eat too often but every once in a while I get a very serious craving for them. This craving hit me late last week. Having to eat gluten-free makes it difficult to buy them in most restaurants (Check out Evans Seafood in Dartmouth) or even the prepared ones at the grocery store, so, I made them myself and you can too. Of course, you don’t have to make these gluten-free but know that you can very easily.
Okay, let’s get right into it. This is how to make…
Homemade Fried Clams and Chips (Gluten-Free)
Equipment
I used a deep fryer to make this meal, however, you can just as easily make it in a deep pot. If you are going to make them in a pot you will want a candy/deep-frying thermometer to keep track of the temperature of the oil. I should also say that my wife hates the smell of deep-fryer in the house so I ran an extension cord outside and deep-fried right on the back deck. If you are using a pot, you can do this outside on the burner of your barbecue, or even on a separate butane burner or something like that. If you do decide to do this outside make sure there is no rain in the forecast because getting water in hot oil equals bad news.
Homemade French Fries
If you have never made homemade French Fries you may be under the impression that they are difficult to make. They are not. The basic process is to cut up the potatoes, soak them in water, drain them really well, fry them on a low heat until they soften, drain them and let the cool, then fry them on a higher heat until they are golden brown and crispy. The last step is to drain the oil, toss the fries with salt, and enjoy!
Cutting the potatoes
First of all, I prefer to use Russet potatoes (or Idaho) for making French Fries, that’s what I recommend you use. Now, what is really important to remember when you are cutting the potatoes is that how they are cut doesn’t really matter as long as they are all about the same size. If you have some fries cut very big and some cut very small they aren’t going to cook evenly. I can tell you that no matter what you do, you are going to get some small ones and some big ones. Don’t beat yourself up over this, just try to prevent this as much as possible.
I find the easiest way to cut the potatoes is to cut off one slice the thickness you want the fries to be. Then use this first cut to rest the potato flat on the cutting board, this will make all the other cuts easier. Now slice the rest of the potato the same thickness of the first slice. Once the potato is all sliced go back and cut those slices into fries the same width. Ideally, you should have fries with relatively square sides. Again, don’t beat yourself up if they aren’t perfect. No one is going to care.
Soaking the potatoes
Once the potatoes are cut they need to be soaked in water to remove the excess starch. It is best to let the potatoes soak for at least an hour. I generally prefer to just use room temperature water to soak the potatoes as cold water will start to convert some of the starch to sugar and will cause the potatoes to darken quicker than they normally would. Once soaked, drain the potatoes and pat them dry on a clean kitchen towel.
Blanching the potaotes
Blanching refers to the first fry of the potatoes. This initial fry is done at a relatively low temperature of 300°F. This temperature isn’t hot enough to brown the potatoes but it is enough to cook them through which is the purpose of this. We want to cook the potatoes through to soften the middles. That way when we fry them again on a higher temperature we are only really concerned with browning and crisping the fries.
Depending on the size of your fryer, or pot, you are likely going to have to do this in batches. If you overload the oil, you are going to drop the temperature too much and you will end up with soggy greasy fries. No one wants that. It’s hard to say exactly how many fries are too many. I would say to blanch them a third of a batch at a time. That should keep the oil at the proper temperature. Also, remember to let the oil come back up to the proper temperature before switching batches.
Once one batch of fries is blanched (this should take about 5 minutes. The fries will look wrinkly and will be easy to cut through) drain them in the fryer basket or a colander, then lay them out on a paper towel or a clean kitchen towel to cool. (I forgot to get a picture of them after they were blanched)
Frying the potatoes
The fries have been blanched and cooled, all that is left to do is to fry them one last time. Turn the temperature of the oil up to 350°F, and again, fry the potatoes in batches so as not to cool the oil too much. Fry the potaotes for about 5 minutes or under golden brown and crisp. Remove them from the oil and drain off any excess, then toss in a metal bowl with a pinch of kosher or sea salt.
If you would prefer not to deep-fry the French fries you can check out this Instagram post I did a while ago about crispy oven-baked fries. You won’t believe how good they are.
Fried Clams
The Clams
Typically, when people make fried clams they use raw clams, removed from their shells. These clams are then tossed in flour, breadcrumbs, or cornmeal and deep-fried. At this moment in time, with the current, but hopefully soon ending, pandemic, I am finding it difficult to find fresh seafood at the grocery store. However, as I was walking down the grocery store aisle I saw a bag of pre-cooked frozen clams and decided to give it a try. I assumed that this would lead to extra chewy fried clams but I had a craving that needed to be satisfied so I went with it anyway.
To defrost the frozen and cooked clams I put them in cold water and then drained well. I patted them dry on a towel, tossed them with my breading (I’ll talk about this in a second) and fried them in two batches on 350°F until they were golden brown and crispy which took about 5-7 minutes. Once they were ready, I drained them and tossed them with a little salt. That was it.
I was very pleasantly surprised to find that these weren’t actually chewy at all. Often, even when using fresh clams, they end up like little pieces of rubber, these we’re not like that. They were tender and delicious.
The breading
It may surprise you to learn that my favourite breading for clams and for calamari is actually pancake mix. I use the dry mix to toss the clams into, then fry. There is a slight sweetness to the batter mix that really compliments the seafood. All I add to the mix is a little salt and pepper, that’s it. I used a gluten-free pancake mix from Kinnikinnick, but you can use any mix you prefer. Of course, you can just use flour, but I like this way a lot better. Try it for yourself.
Serving the Clams and Chips
To serve the clams and chips I made a really simple tartar sauce by combining 1/4 cup mayo with 1 tbsp mustard and 1dill pickle cut into small pieces. Like I said, a very simple tartar sauce. Along with this, I put some ketchup and hot sauce on the table and a cold bubbly drink. What a great meal for a sunny afternoon!
Have a great Monday everyone and remember to share and subscribe so you never miss a post again.
Welcome to our guide on how to smoke mackerel! If you’re looking to add a delicious, smoky flavour to this versatile fish, you’ve come to the right place. In this post, we’ll cover the two main smoking methods: dry smoking and wet smoking. We’ll explore the differences between them, and how they can affect the final product. Whether you’re an experienced smoker or a complete beginner, this post will provide you with all the information you need to smoke mackerel like a pro.
How To Make Smoke Mackerel
Do You Need a Smoker to Smoke Mackerel? Tips for Smoking Without One
If you don’t have a smoker at home, don’t worry – you can still smoke mackerel using some simple equipment you may already have. While a dedicated smoker can make the process more straightforward, there are a few alternative methods you can use.
One option is to use your barbecue. Place a pan of smouldering wood chips on one side and the fish on a rack on the other. Keep the heat low and adjust the distance between the fish and the wood chips to achieve the desired level of smokiness.
If you don’t have a barbecue, you can use a wok to smoke mackerel. Place some wood chips in the bottom of the wok, get them smoking, and cover the wok with tin foil that you poke a few holes in. Then, place the mackerel on the foil and put a lid on the wok. This method can be done on a stovetop or outdoor burner.
Another option is to smoke the fish in a covered grill or oven. Place the fish on a rack and set it on a baking sheet with wood chips in the bottom. Cover the grill or oven and adjust the temperature to achieve the desired level of smokiness.
It’s essential to do any smoking outside, as the process requires good ventilation and can generate a lot of smoke. With a little creativity and some basic equipment, you can smoke mackerel and enjoy its delicious, smoky flavour without a dedicated smoker.
Why Smoke Mackerel?
Mackerel is a popular fish for smoking, thanks to its strong flavour and oily texture. While many types of fish can be smoked, mackerel is a great choice for a few reasons. Firstly, mackerel is often readily available, especially during its peak season when it is running. In many coastal areas, mackerel can be found in abundance, and fishermen often catch more than they can use. This makes it an affordable and sustainable choice for smoking.
Secondly, mackerel’s oily texture makes it ideal for smoking, as it can hold up well to the heat and smoke without becoming dry or overcooked. The result is a flavorful, moist fish that can be eaten on its own or used in a variety of recipes.
Finally, smoking mackerel is a great way to add variety to your cooking routine. If you’re used to cooking with salmon or other types of fish, smoking mackerel can introduce a new flavour profile and add some excitement to your meals.
So if you’re looking to try smoking fish for the first time, or if you’re simply looking for a new type of fish to smoke, mackerel is a great choice. Its availability, texture, and flavour make it a popular and rewarding choice for smoking.
Wet Smoke vs Dry Smoke: Understanding the Differences and When to Use Each Method
When it comes to smoking food, there are two main methods to consider: wet smoking and dry smoking. The main difference between these two methods is moisture. With wet smoking, moisture is introduced into the smoking process, typically with a bowl of water or other liquid in the smoker. This helps to prevent the food from drying out and can result in a more tender, moist final product. With dry smoking, no additional moisture is added, which can result in a drier final product with a chewier texture, similar to jerky.
So, when should you choose wet smoking over dry smoking? Wet smoking is ideal when you want to add flavour while keeping the food moist. This method is often used for items like ribs, chicken, salmon, and pulled pork, where you want to avoid drying out the meat. Adding moisture during the smoking process can help to prevent the food from becoming too dry and can help it to retain a more desirable texture.
On the other hand, dry smoking is ideal when you want to preserve the food or create a chewy, jerky-like texture. Dry smoking is often used for foods that are meant to be stored for longer periods of time, such as beef jerky or smoked fish. This method can also be used to recreate the flavour of foods that were traditionally preserved through smoking, such as ham or bacon.
Ultimately, the choice between wet smoking and dry smoking depends on the type of food you’re smoking and the desired outcome. Both methods can result in delicious, smoky flavours, but wet smoking is ideal for preserving moisture, while dry smoking is ideal for creating a chewy, preserved texture.
Preparing the fish to be smoked.
How to Clean and Fillet Mackerel for Smoking
Properly cleaning and filleting the mackerel is crucial in preparing it for smoking. For the best results, it’s recommended to keep the mackerel mostly intact to retain moisture. Here’s how to clean and fillet the mackerel for both wet and dry smoking:
For wet smoking, leave the mackerel mostly whole and only remove the heads and innards. Start by using a sharp knife to cut the head off right behind the front fins. Then, slice up through the belly and remove the innards.
For dry smoking, follow the same process as for wet smoking but go one step further and cut the fish into fillets. To do this, use a sharp knife to cut one side of the fish just in front of the tail fin. Then, run the knife up the spine towards the head until the fillet is removed. Flip the fish over and repeat the process on the other side.
Once you have cleaned and filleted the mackerel, rinse it under cold running water and pat it dry with paper towels.
Salting the Mackerel Before Smoking
Salting the mackerel is a crucial step in preparing it for smoking. It helps to preserve the fish during the smoking process, removes excess blood and moisture from the fish which firms up the flesh, and adds flavour. Most importantly, it creates a dry kind of skin on the surface of the fish that helps the smoke stick to the fish imparting more flavour. This salting or curing is done with just about everything that gets smoked.
For whole fish, take a dish and sprinkle a little salt on the bottom. Then, lay one fish down and sprinkle salt (use kosher salt, sea salt, or pickling salt) inside the body cavity and on top of the fish. Repeat this process with all the fish, cover them, and put them in the fridge overnight.
For fillets to be dry smoked, do the same process as for whole fish but only leave them salted for about two hours. Fillets are thinner than whole fish and don’t need as much time being salted.
After the salting period, rinse both batches of fish under cold water and pat them dry with paper towels. The fish is now ready to be smoked using your preferred method.
Keep the Body Cavity Open for Wet Smoking
One last thing that can be done to prepare mackerel for wet smoking is to keep the body cavity open during the smoking process. To do this, skewer a toothpick through the belly of the whole fish. This helps the smoke penetrate the fish more deeply, resulting in a richer flavour.
This simple trick is an effective way to ensure that the smoke penetrates the fish fully, creating a delicious flavour that will enhance the natural taste of the fish. It’s a quick and easy step that can make a big difference in the quality of the final product.
Smoking the Mackerel
Wet Smoking Mackerel with a Barrel Smoker
When wet-smoking mackerel, a barrel smoker is an ideal tool to use. A barrel smoker is shaped like a barrel, with the fire lit at the bottom and a water pan set on top, followed by two racks for food. The water pan has the added advantage of shielding the food from any direct flames or flare-ups, which helps keep the fish moist during the smoking process.
To wet smoke mackerel using a barrel smoker, simply place the salted mackerel on the top rack and cover the smoker. Make sure that the temperature stays at a consistent 225-250°F throughout the smoking process. Add wood chips or chunks, like alder or hickory, to the fire to create smoke. The wet smoking process should take around 1.5-2 hours, depending on the size of the fish.
Throughout the smoking process, check the water pan to ensure that there is enough water to create steam. This steam will help keep the fish moist and prevent it from drying out. After the smoking process is complete, remove the mackerel from the smoker and let it cool down to room temperature then put it in the fridge for up to five days.
Wet smoking is an excellent way to infuse mackerel with a smoky flavour while keeping the fish moist and flavorful. A barrel smoker is an ideal tool to use for wet smoking, and following these simple steps will ensure that you can produce delicious, smoky mackerel with ease.
To start, get a fire going using lump charcoal and a charcoal chimney starter. With the fire going, add the wood chips (I used hickory), which had been soaked in water for about 30 minutes. Set up the smoker, fill the water bowl, get the temperature up to around 275°F and put the mackerel in belly-side down. Other than stoking the fire and adding a few more wood chips, Ieave the fish alone until it’s done.
How to Dry Smoke Mackerel
Dry-smoking mackerel is a great way to create a flavorful and savoury meal that can last for a long time. When dry-smoking mackerel, the process is similar to wet smoking, with the notable exception of not adding water to the water pan.
To dry smoke mackerel, simply place the salted fillets on the top rack of the smoker and keep the temperature around 200°F, which is lower than the temperature for wet smoking. Popular wood chip dry-smoking options include oak, hickory, and mesquite.
The other main difference between dry and wet smoking is how much time the fish spends in the smoker. Dry smoking takes longer than wet smoking, with the mackerel typically needing around 3 1/2 hours in the smoker rather than the two hours required for wet smoking.
Throughout the smoking process, make sure to check the temperature of the smoker regularly and adjust the airflow and the number of wood chips added as necessary. After the smoking process is complete, remove the mackerel from the smoker and let it cool down to room temperature.
Once cooled, the mackerel is ready to eat and can be stored in the fridge for a few days or frozen for later use. Dry smoked mackerel can be used in various dishes, like salads or sandwiches, and is an excellent addition to any meal.
Wet vs. Dry Smoked Mackerel: Which One Tastes Better?
After trying both wet and dry smoked mackerel, I have to say that I was thoroughly impressed with both styles of smoked fish. Wet smoking resulted in a fish that was moist, tender, and had a subtle smokiness that wasn’t overpowering. On the other hand, the dry smoked fish had a much smokier flavour and a drier, chewier texture that was perfect for snacking.
When it comes to choosing between the two styles of smoked fish, it really comes down to personal preference. If you’re looking for a fish that is moist and tender, then wet smoking is the way to go. However, if you’re looking for a fish with a smokier flavour and a drier, chewier texture, then dry smoking is the way to go.
It’s worth noting that both wet and dry smoked mackerel can be used in a variety of dishes, from salads to sandwiches to appetizers. Plus, they can both be stored in the fridge for a few days or frozen for later use, making them an excellent option for meal prep.
At the end of the day, whether you prefer wet or dry smoked mackerel, it’s hard to deny that both styles are delicious in their own way. Personally, I can’t choose a favourite between the two. If you handed me either one with a glass of wine and some buttered gluten-free bread, I’d be a very happy person.
5 Ways to Use Smoked Mackerel in Your Cooking
Now that you’ve successfully smoked your mackerel, you may wonder what to do with it. Luckily, there are countless ways to enjoy this delicious fish. Here are just a few ideas to get you started:
Smoked Mackerel Spread: Mix smoked mackerel with green onion, herbs, and cream cheese to make a tasty spread for crackers or bread.
Smoked Mackerel Mousse: Use smoked mackerel as the main ingredient in a mousse or pâté. Add lemon juice, horseradish, and sour cream for an extra kick.
Smoked Mackerel Salad: Add smoked mackerel to a salad for a flavorful and healthy meal. Mix it with greens, avocado, cherry tomatoes, and a simple vinaigrette.
Smoked Mackerel Quiche: Incorporate smoked mackerel into a quiche or frittata for a savoury breakfast or brunch dish.
Smoked Mackerel Chowder: Use smoked mackerel as a base for a delicious and hearty chowder. Add potatoes, onions, garlic, and cream for a rich and flavorful soup.
Whether you’re looking for a quick snack or a more elaborate meal, smoked mackerel is a versatile ingredient that can be used in various dishes. Try one of these ideas, or get creative and create your own unique recipe. One thing’s for sure – your taste buds will thank you.
Conclusion
As we come to the end of this post, I hope that you have gained a better understanding of the process involved in smoking mackerel. While it may seem intimidating at first, the truth is that smoking fish is a simple and rewarding experience that can yield delicious results. Whether you prefer wet or dry smoking, both methods have their unique benefits that can be enjoyed in a variety of ways.
From using smoked mackerel as a flavorful spread to adding it to salads and sandwiches, the possibilities are endless, not to mention the health benefits of eating fish!
If you’re feeling adventurous, I encourage you to try smoking mackerel for yourself. It’s a fun and fulfilling experience that can be enjoyed with friends and family. And if you’re already a pro at smoking fish, I hope you found some new tips and tricks in this post.
Thank you for taking the time to read this, and if you found it helpful, please share it with your friends and family. Don’t forget to subscribe to the blog for more exciting content, and have a great weekend!
This week on 30 minutes or less we are going to take a look at Scallop and Bacon Chowder. If you are wondering, yes, we have done a chowder here before. We did Corn Chowder in 30 Minutes or Less way back in April of last year. Since that was almost a full year ago I thought it was safe to do another one.
The chowder today is composed of bacon, onion, celery, and scallops with cream and clam juice thickened with a roux making up the base. It was absolutely delicious and I recommend it to anyone who wants to feel a bit of comfort and a bit of normalcy right now. Let’s get to it.
This is…
Scallop and Bacon Chowder in 30 Minutes or Less
12:15 pm – Getting Started
I started cooking at 12:15 pm. The first thing I did was turn a pot on over medium-high heat. Next up, I patted the scallops dry with a paper towel to ensure a nice even sear. With the scallops dried I pulled the adductor muscle discarded it. I put the scallop on a dry piece of paper towel just to make sure their surface was really dry.
12:17 pm – Scallops In the Pan
With the scallops dry, and adductor muscles removed, it was time to cook. I seasoned the scallops with salt and pepper, added a bit of oil into my pot and added in the scallops leaving them alone for about two minutes.
12:20 – Bacon
In the two minutes that the scallops were cooking on the first side, I cut two pieces of bacon into finger-width pieces. I flipped the scallops and cooked them for one more minute.
12:21 – Cook the Bacon
Once the scallops had seared on both sides I removed them from the pan and added in the bacon. While the bacon was cooking, I minced a celery stalk and half an onion.
12:24 pm – Vegetables In
After a few minutes, the bacon was mostly cooked so I added in the celery and onion. Then, I moved on to peeling and dicing two potatoes.
12:26 – Roux
I cooked the celery and onion for about two minutes before adding in two tablespoons each of butter, and flour. The better went in first was left to melt, and then I stirred in the flour. This made a roux which thickens the chowder.
12:28 pm – Clam Juice
With the flour and butter combined it was time to add in some liquid. I chose to use clam juice to give the chowder a more seafood forward flavour. You can use water or even chicken stock if you would prefer. I added the clam juice in and gave everything a stir and let the mixture come to a boil.
12:30 pm – Potatoes In
Once the clam juice started to boil, I added in the diced potato, brought the liquid back to the boil, then turned the heat down to a simmer. I let the chowder base cook for about ten minutes or until the vegetables were tender.
12:31 pm – Parsley
While the chowder was cooking I took the opportunity to cut some fresh parsley.
12:34 pm – Cut Scallops
I also cut my scallops into quarters to stretch them a little bit further in the chowder.
12:40 pm – Cream in
After the chowder base had been cooking for about ten minutes and the vegetables were cooked through I added in the cream and brought it back to a boil tasted it and adjusted the seasoning with salt and pepper.
12:42 pm – Finish the chowder
Once the cream was boiling and the seasoning was where I wanted it, I added in the scallops and the parsley, took the pot off the heat, and served.
Conclusion
The world is obviously a little crazy at the moment. We are social distancing, and self-isolating, and preparing for the worst while hoping for the best. It can be a bit scary, and it can feel a bit lonely. A dish like this isn’t going to cure anything, but it will for at least a few minutes make you feel like everything is okay.
Good luck everyone and stay safe.
Scallop and Bacon Chowder in 30 Minutes or Less
Scallops, bacon, and vegetables in a delicious chowder made in under 30 minutes.
When I was around 12 my mom had a friend who had children that closely matched the age of my sisters and me. She lived right by our school. Occasionally, when mom had to go into town we would go to this friend’s house for dinner. It was one of these days when I first experienced tuna casserole.
My mom’s friend’s version of tuna casserole, as I now know, was pretty classic. It was tuna, pasta, and vegetables in a cream of mushroom sauce, covered with crushed potato chips and baked. My mom was a great cook but for whatever reason had never made anything like the tuna casserole I had that day. It made such an impression on me that I remember it more vividly than almost anything else from that period of my life. Interestingly enough, to this day that is the only tuna casserole I’ve ever had.
It was that tuna casserole I had in mind while I was creating this creamy tuna pasta recipe. Essentially, I wanted to make an updated version of that tuna casserole I ate well over 20 years ago. Gone are the crushed potato chips, cream of mushroom soup and long baking time. Now, we can all have that flavour and experience in under 30 minutes. Let’s take a look at how to me my…
Creamy Tuna Pasta In 30 Minutes or Less
12:45 – Getting Started
I made this creamy tuna pasta for a late lunch and started cooking at 12:45. The first thing I did was get a big pot of salted water on the stove for the pasta. Next, I put a frying pan on the stove over medium heat for the sauce. With that, it was time to get down to the real work.
For the sauce I started with a base of carrot, onion, and celery, I peeled and diced 1 onion and 1 carrot, then sliced 1 celery stalk.
12:49 pm – Start cooking
By the time I was done cutting my vegetables my pan was nice and hot. I added in 1 tbsp each butter and olive oil. I used butter for the flavour and the olive oil to help prevent the butter from burning. Once the butter melted I added in the vegetables.
12:50 pm – Garlic
While the vegetables were cooking I peeled and sliced 2 cloves of garlic. I also diced about a 1/2 cup of roasted red pepper. I added roasted red pepper because I just happened to have it in my fridge. You don’t have to add this but I did find it added a nice sweet tone to the overall flavour.
I gave the carrot, onion, and celery a stir then added in the roasted red pepper and garlic.
12:54 pm – Tuna
While the garlic and peppers were cooking I opened up my can of tuna. I drained the liquid right into the frying pan. This added a really nice subtle tuna flavour to the pasta that you won’t get from the tuna itself. The pan was hot enough that the juice evaporated very quickly.
12:55 pm – Cream
After the tuna juice mostly evaporated I added in 1 cup of whipping cream and a 1/2 cup of frozen peas. I’ve said it before and I’ll say it again. Don’t skimp out on the cream here. If you use blend cream, coffee cream, half and half, or milk, it will curdle and it will be gross. If, for some reason you want a lighter version of this, take the time and make a bechamel. Otherwise enjoy the rich delicious flavour of full fat, 35% whipping cream.
Once the cream and peas go into the pan bring it to a boil then reduce the heat to low and simmer.
12:57 pm – Pasta in
Around this point, my pasta water was boiling and yours should be too. Add the pasta in and cook it according to the package instructions. While the pasta is cooking chop about a 1/2 cup of parsley.
1:05 pm – Drain Pasta
Once the pasta is cooked drain it as you normally would. While it is draining, add the tuna into the sauce and stir to break it up.
1:06 pm – Finish the creamy tuna pasta
Add the pasta into the sauce along with the parsley. Toss or stir the pasta to coat it with the sauce. Taste and adjust the seasoning with salt and pepper. Serve by itself or with a green salad.
Conclusion
The first bit of this pasta took me back to that dinner at my mom’s friend’s house all those years ago. I hope that you have a similar experience with it.
If you aren’t a big fan of tuna you could add canned or fresh salmon, chicken or ham instead. No matter what, it will be delicious. But don’t take my word for it. Try it for yourself.
Thank you as always for reading and stay tuned for Wednesday when I am launching my free 10-week basic cooking course “Kitchen Clueless to food independent” and remember to subscribe to the blog so you never miss a post.
Creamy Tuna Pasta
A new take on the old school Tuna Casserole. A quick meal your family will love.
Good morning everyone and happy Monday! Today on 30 minutes or less we are going to take a look at an absolute classic. We are going to make a version of Fish Fingers with fries. But, rather than having fries we are going to make really delicious pan-roasted potatoes. The fish fingers are going to be homemade. And, we are going to make a delicious sauce to go with them.
What are we waiting for? Let’s get to it. This is…
7:45 pm – Getting Started
I started cooking at 7:45 pm. The first thing I did was get the oven going. I turned it on to 425°F. I also put an oven-safe pan on the stove and turned it on over medium heat.
With the oven on and the pan heating up, I started working on the potatoes. I used 4 Yukon gold potatoes (any yellow flesh variety will work) I cut them into wedges, about 8 per potatoes. Once they were cut I set them aside for a minute while the pan finished heating up.
7:47 pm – Carrot
I had just enough time to peel a carrot before the pan was hot enough to add in the potatoes.
7:48 pm – Potatoes in the pan
At this point, the pan for the potatoes (I used a castiron pan) was ready to go. I added in about 2 tbsp of olive oil, added the potatoes in, and then seasoned them well with salt and pepper. I tossed the potatoes to make sure they were coated in oil and to evenly distribute the seasoning. Then, I left them alone to cook and sear.
4:49 pm – Cutting the Vegetables
We all know that we can’t have a well-balanced meal without a nice big serving of vegetables, right? So, with the potatoes cooking it was time to start prepping the veg.
I thinly sliced the carrot that I peeled while waiting for the pan to heat up. Next, I sliced half a red bell pepper. To the carrot and bell pepper, I added a big handful of fresh green beans. That’s it.
You may notice that I often cut vegetables on an angle. In cooking, we call this cutting on a bias. This is done because it looks more professional. However, there is a secondary reason. When cutting round vegetables like carrots, or even green onions or chives, they have a tendency to roll away if they are cut straight. Cutting them on an angle keeps them in place and prevents them from rolling onto the floor.
7:51 pm – Sauce
Before I got into making the sauce I made sure to give the potatoes a big stir to prevent them from burning on the bottom. This also helps to ensure a more even browning on the potatoes.
The sauce I made for my fish fingers is called a sweet chilli sauce. You may have had it at restaurants or even bought it at the grocery store. It is the easiest sauce in the world to make. I’m serious.
All you need to make the sauce is…
1/2 cup sugar
1/2 cup white vinegar
1/2 cup water
1/4-1/2 tsp red chilli flakes (crushed red pepper flakes)
Those four ingredients get put in a pot, brought to a boil and then simmered for about 10 minutes. That’s it. Not only is this sauce delicious and ridiculously easy to make but because of the high sugar and acid content, it will virtually last forever in the fridge.
So, at 7:51 pm I measured out all the ingredients for the sauce. Put them all in a pot on the stove and turned the burner on high then I moved on to my next task.
7:52 pm – Potatoes in the oven
By 7:52 the potatoes were looking pretty brown and ready to go in the oven. I gave them a quick stir and popped them in the oven on one of the center racks.
7:53 pm – Setting up the breading
At this point, I’ve been cooking for almost 10 minutes and haven’t even touched the fish yet. I’d say it’s about time I did. But, in order to do that, I first need to get my stuff set up for my breading.
I am going to use what is known as the standard breading procedure. It’s the same process I used to make the turkey fingers in the 5 Turkey Hors D’oeuvres post. The basic idea is that the food you are breading is first dusted in flour which sticks to the food. Then it is dipped in some beaten egg that sticks to the flour. Finally, it is rolled in bread crumbs that stick to the egg. This process gives you a really solid bread coating that is going to stick to the food.
The flour and bread crumbs I used for this are gluten-free but you can obviously just use the regular stuff. First up, I combined 1 cup of flour with 1/2 tsp salt and 1/4 tsp pepper. I used a fork to stir it up then set it aside. I measured out 1 cup of bread crumbs and I beat 2 eggs.
With the breading station set up and out of the way I also took this time to grease a sheet pan. I used about 2-3 tbsp of olive oil and evenly spread it on the sheet pan. It may seem like a lot of oil. Honestly, it could probably use more. The oil isn’t so much there so that fish doesn’t stick to the pan. It is actually going to help crisp up and brown the breading. I highly recommend you don’t cut this oil back.
7:56 pm – Fish
Right around this time, the sauce started to boil. I turned it down to a simmer and left it alone.
Now, it was time to get to work on the fish. I used 3 haddock fillets which made enough for about 4 people. I first cut the loin (the thicker part of the fillet) off, then cut that into 2 or 3 fingers depending on how thick it was. Next, I cut the other half of the fillets into finger-sized pieces too.
7:56 pm – Bread the fish
With the fish cut, it was now time to bread it. Each piece went into the flour first then the beaten egg, and then the bread crumbs. Once the fish fingers were breaded they got placed on the greased sheet pan. I left about a 1/2 inch between each finger. This helps them to cook and brown more evenly.
Once all the fish was breaded and on the sheet pan, I put them in the oven on the center rack. I set a 7-minute timer and left them alone.
Since I was opening the oven anyway I took this opportunity to give the potatoes a quick stir. Then I washed and dried my cutting board and wiped down my counters.
8:04 pm – Pan on for veg.
Once everything was clean I put a pan on over medium-high heat for the vegetables. I let it heat up for about 2 minutes then added in 2 tsp of grapeseed oil along with the vegetables and a bit of salt and pepper. Next, I sautéed the vegetables for about 3 minutes, put a lid on the pan and took them off the heat. I let the vegetables sit until the rest of the food was cooked.
This technique with the vegetables was something I came up with the other day. Essentially, you sauté the vegetables in a bit of oil in a really hot pan with a bit of salt and pepper. The vegetables get cooked only until they are heated through. This takes about 3-4 minutes. Then the pan gets covered and taken off the heat. As the vegetables sit they release moisture which condenses and falls back down on them and onto the surface of the hot pan. Essentially, the vegetables steam in their own juices.
I have used this technique multiple times now, with multiple varieties of fresh vegetables and they have come out perfect every single time.
At this point, I also took the sauce off the heat and set it aside.
8:09 pm – Flip the fish
Okay, at this point the sauce is done, the vegetables are sitting off the heat with the lid on and there is still some time left to go. I took the fish out of the oven, flipped each piece, then popped them back in. I also gave the potatoes one last stir.
8:15 pm – Dinner is ready
At 8:15 the fish and potatoes came out of the oven and were perfectly cooked. The vegetables were hot and ready. And the sauce was good to go. It looked to me like dinner was ready.
Conclusion
This is the exact type of meal I ate a lot growing up. The difference is that this version was all homemade. But, what’s interesting is that even though it was all homemade, it took about the same amount of time as the boxed, store-bought stuff. Honestly, I made this in 30 minutes and you can too. Oh, and you can even make extra fish fingers and freeze them. Why not right?
Thanks for reading and enjoy the recipe! Oh, and it would mean a lot to me if you could share this on Facebook, Pinterest, or wherever you prefer.
Thanks everybody, see you Wednesday!
Fish Fingers with Sweet Chilli Sauce
Delicious and quick homemade fish fingers with a sweet and spicy dipping sauce
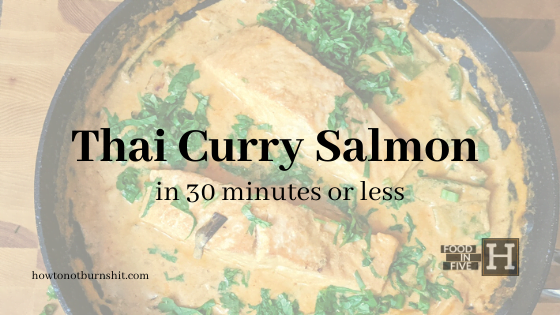
It’s Monday! We all know what that means, 30 minutes or less! Today, we are going to take a look at how to cook Thai Curry Salmon with sticky rice in under 30 minutes. Let’s get to it.
3:50 pm – Getting Started
The first step is to get the rice going. For the rice I used, it is a 1:1.5 ratio of rice to water. I used 1 cup of sticky rice or sushi rice and 1 1/2 cups of water. This goes in a pot, gets brought to a boil, then simmered for 12 minutes. To finish the rice has to sit for 5 minutes. That’s it.
So, I got the rice going and I put a 10-inch non-stick pan on the stove over medium heat.
3:52 pm Vegetables
With the rice going and the pan heating up I got to work prepping the vegetables. I cut three green onions separating the greens and the whites. The whites I chopped into thumb width pieces. The greens I sliced thinly to be used for garnish later.
I thinly sliced half an orange pepper, (use whatever colour of pepper you would like) and 1 clove of garlic.
3:54 pm Salmon
By the time I was done cutting the vegetables my pan was hot. I added in 1 tsp of oil then the salmon.
3:55 pm Rice
When I put the salmon in the pan, the rice started to boil. I turned the heat down to simmer and put a lid on the pot. I set a 12-minute timmer and moved on to the next task.
3:56 pm Flip the Salmon
The salmon had been cooking for about two minutes and had a nice sear so I flipped to get a little colour on the other side.
3:57 pm Salmon out of the pan
I cooked the salmon for one more minute then removed it from the pan. Then, I added in the green onions, bell pepper, and garlic.
3:59 pm Peas
While the peppers and things were cooking I got to work prepping some snow peas. There is a thread the runs the length of the snow pea and it isn’t very good to eat. To get rid of it, I grabbed the top of the snow pea, broke off the very end and pulled down. After I did this to all the snow peas I cut them into thirds.
4:00 pm Ginger
I added the snow peas into the pan along with 1 tsp of grated ginger.
4:01 pm Curry Paste
Next up, I added in 2 big tablespoons of Thai Red Curry paste. I cooked the curry paste for about 1 minute.
4:02 pm Coconut Milk
Next up, I added 1 cup of coconut milk into the pan. I brought this to a boil then added the salmon back into the pan and turned the heat down to a simmer.
4:04 pm Cilantro and Green Onions
While the salmon is simmering I cut up about 2 tbsp of cilantro and the tops of the green onions.
4:05 pm Flip the salmon
After the salmon cooked for about 3 minutes, I flipped it over to cook it evenly.
4:08 pm Rice
At 4:08 pm the rice had been cooking for 12 minutes and was ready to be taken off the heat and left to sit for 5 minutes. I flipped the salmon once last time and removed it from the heat.
4:09 pm Finish the Salmon
To finish the salmon with the juice of 1/2 a lime along with the cilantro and green onions.
4:13 pm Thai Curry Salmon
At 4:13 pm the rice was ready and the salmon was done. That means dinner was ready.
Conclusion
This was a really quick meal that just about everyone will love. All told this took me about 23 minutes. Even if this takes you a little longer you are still going to have a delicious meal in very little time. Give it a shot.
We use cookies on our website to give you the most relevant experience by remembering your preferences and repeat visits. By clicking “Accept”, you consent to the use of ALL the cookies.
This website uses cookies to improve your experience while you navigate through the website. Out of these, the cookies that are categorized as necessary are stored on your browser as they are essential for the working of basic functionalities of the website. We also use third-party cookies that help us analyze and understand how you use this website. These cookies will be stored in your browser only with your consent. You also have the option to opt-out of these cookies. But opting out of some of these cookies may affect your browsing experience.
Necessary cookies are absolutely essential for the website to function properly. This category only includes cookies that ensures basic functionalities and security features of the website. These cookies do not store any personal information.
Any cookies that may not be particularly necessary for the website to function and is used specifically to collect user personal data via analytics, ads, other embedded contents are termed as non-necessary cookies. It is mandatory to procure user consent prior to running these cookies on your website.