Decorating cookies with small kids sounds adorable right up until the red icing hits the ceiling.
I learned that one on a snowed-in Saturday two Decembers ago, before Santa Hat Cookies rescued our holiday baking.
Four piping bags, two kids under eight, and a kitchen that looked like a crime scene by noon.
Not one cookie actually looked like the thing it was supposed to be.
So the next year I went looking for a holiday cookie my kids could decorate on their own that would still look right when they finished.
These little strawberry hats are the answer.
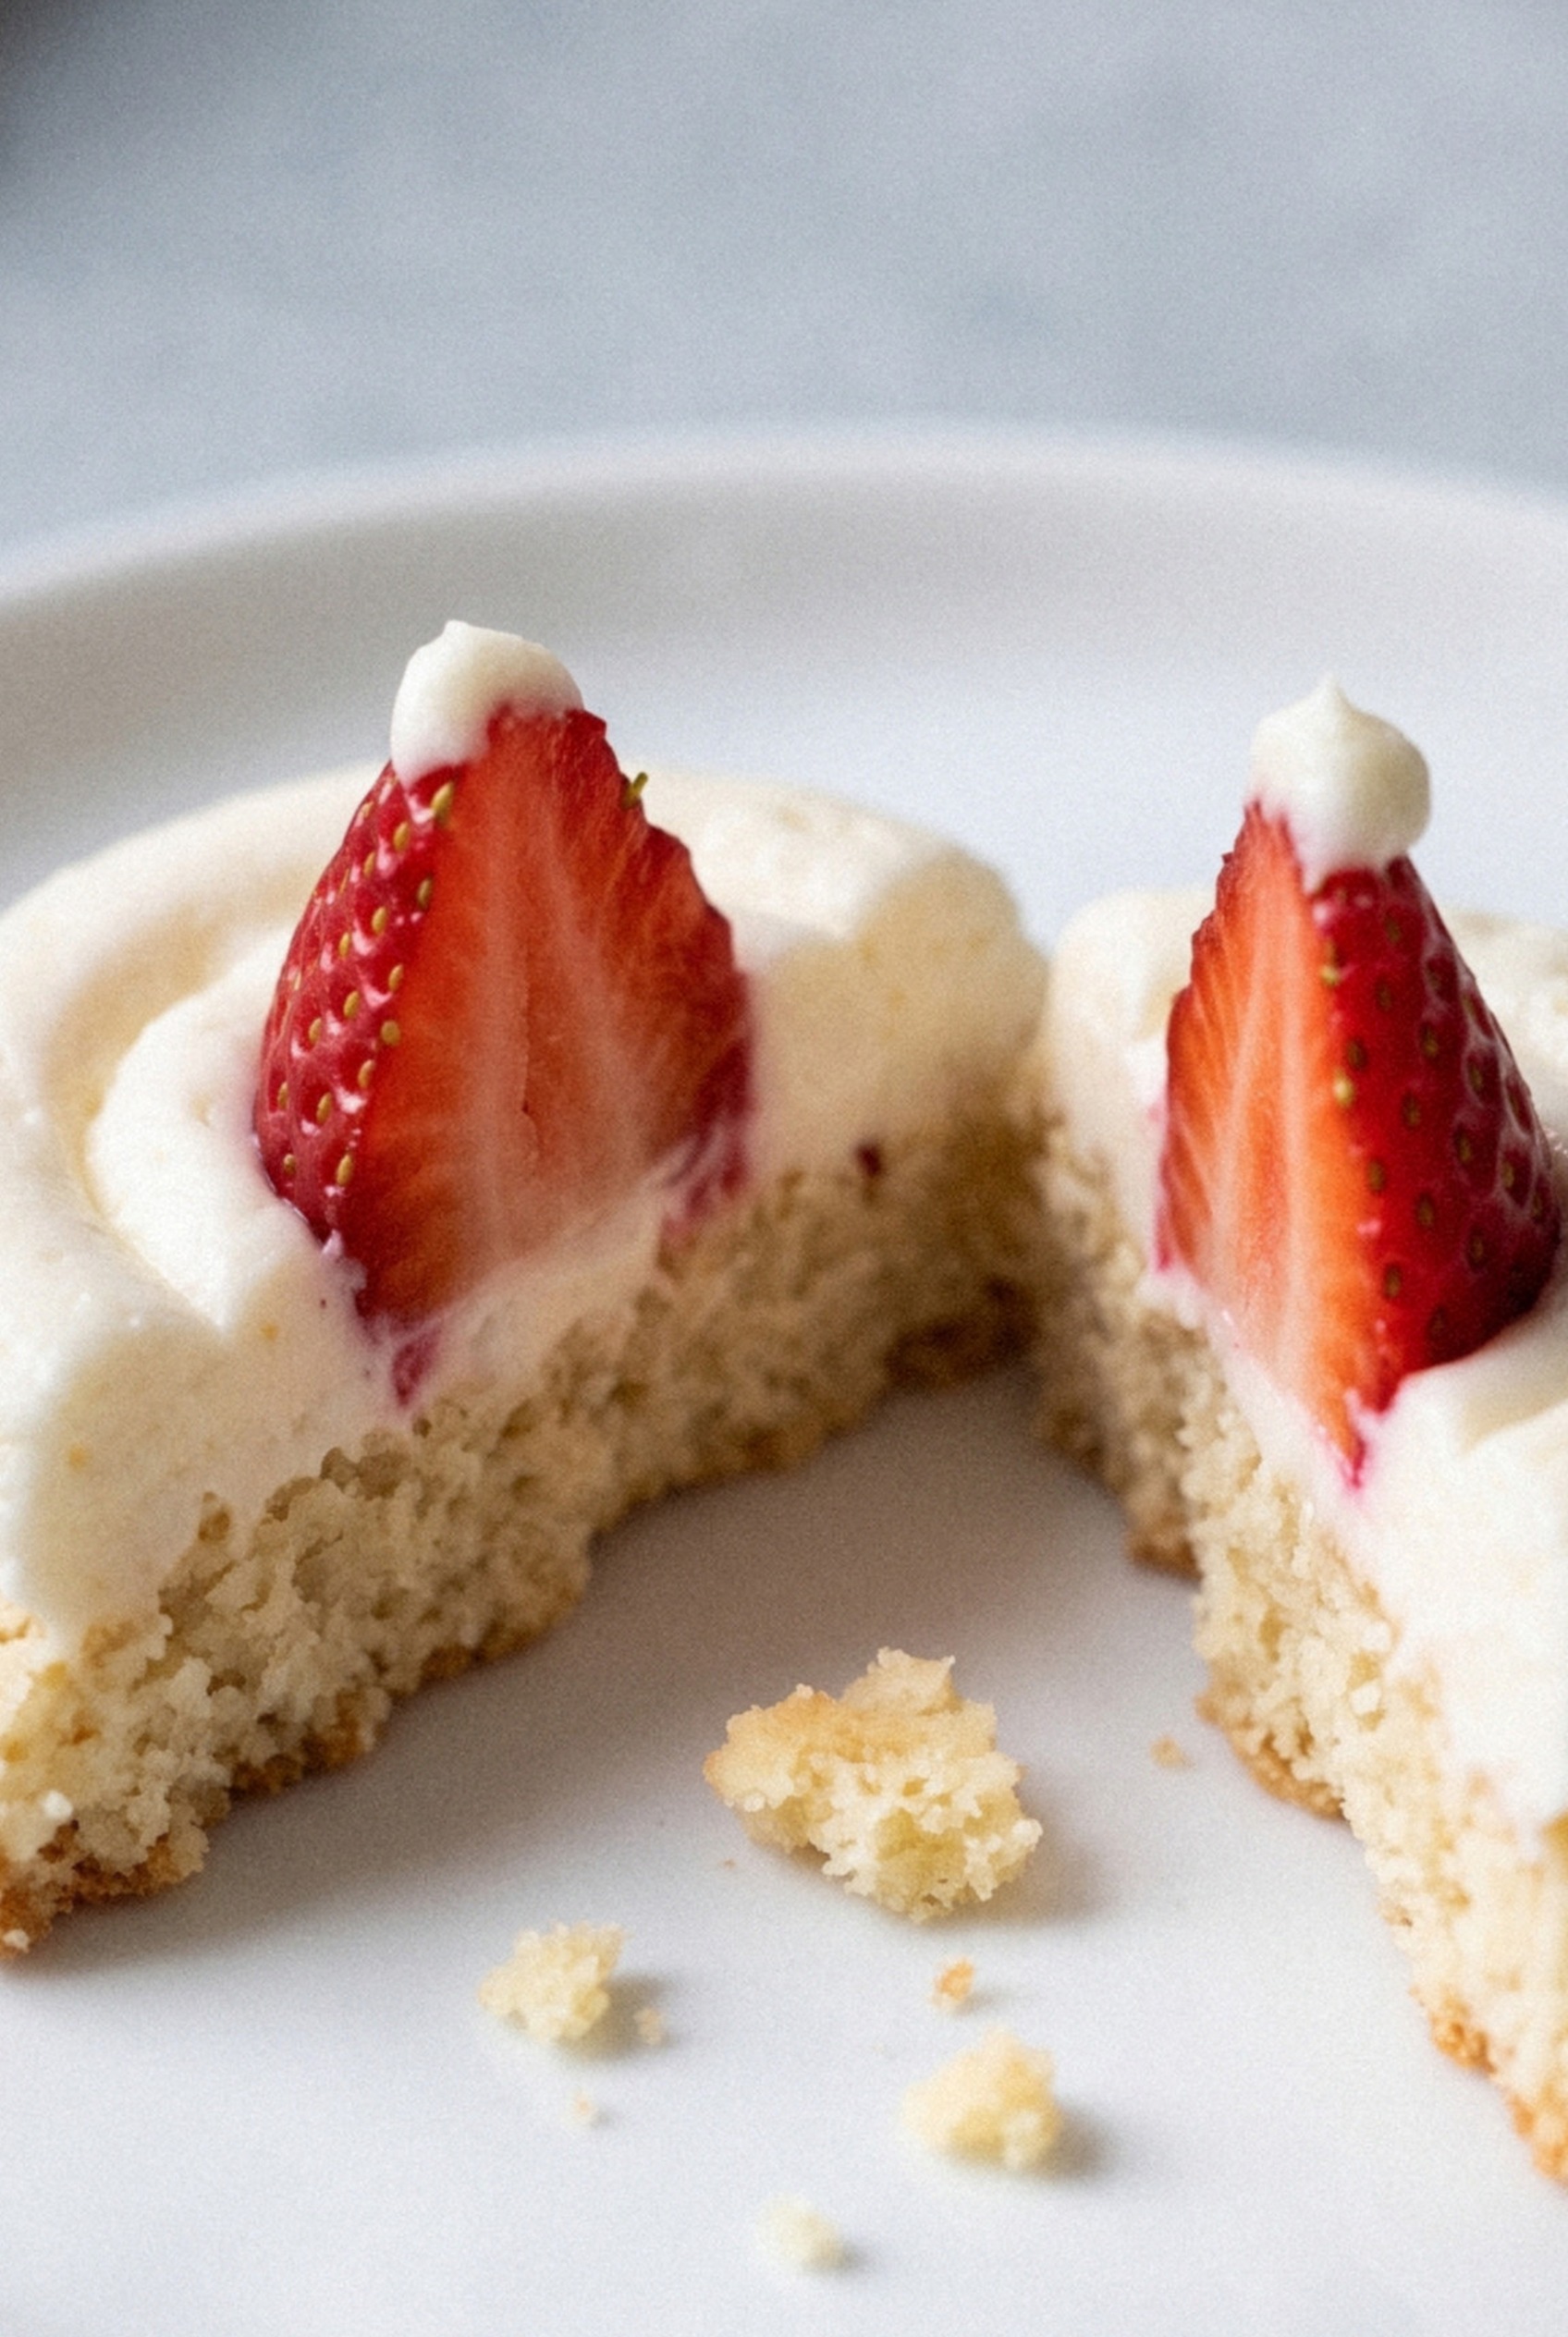
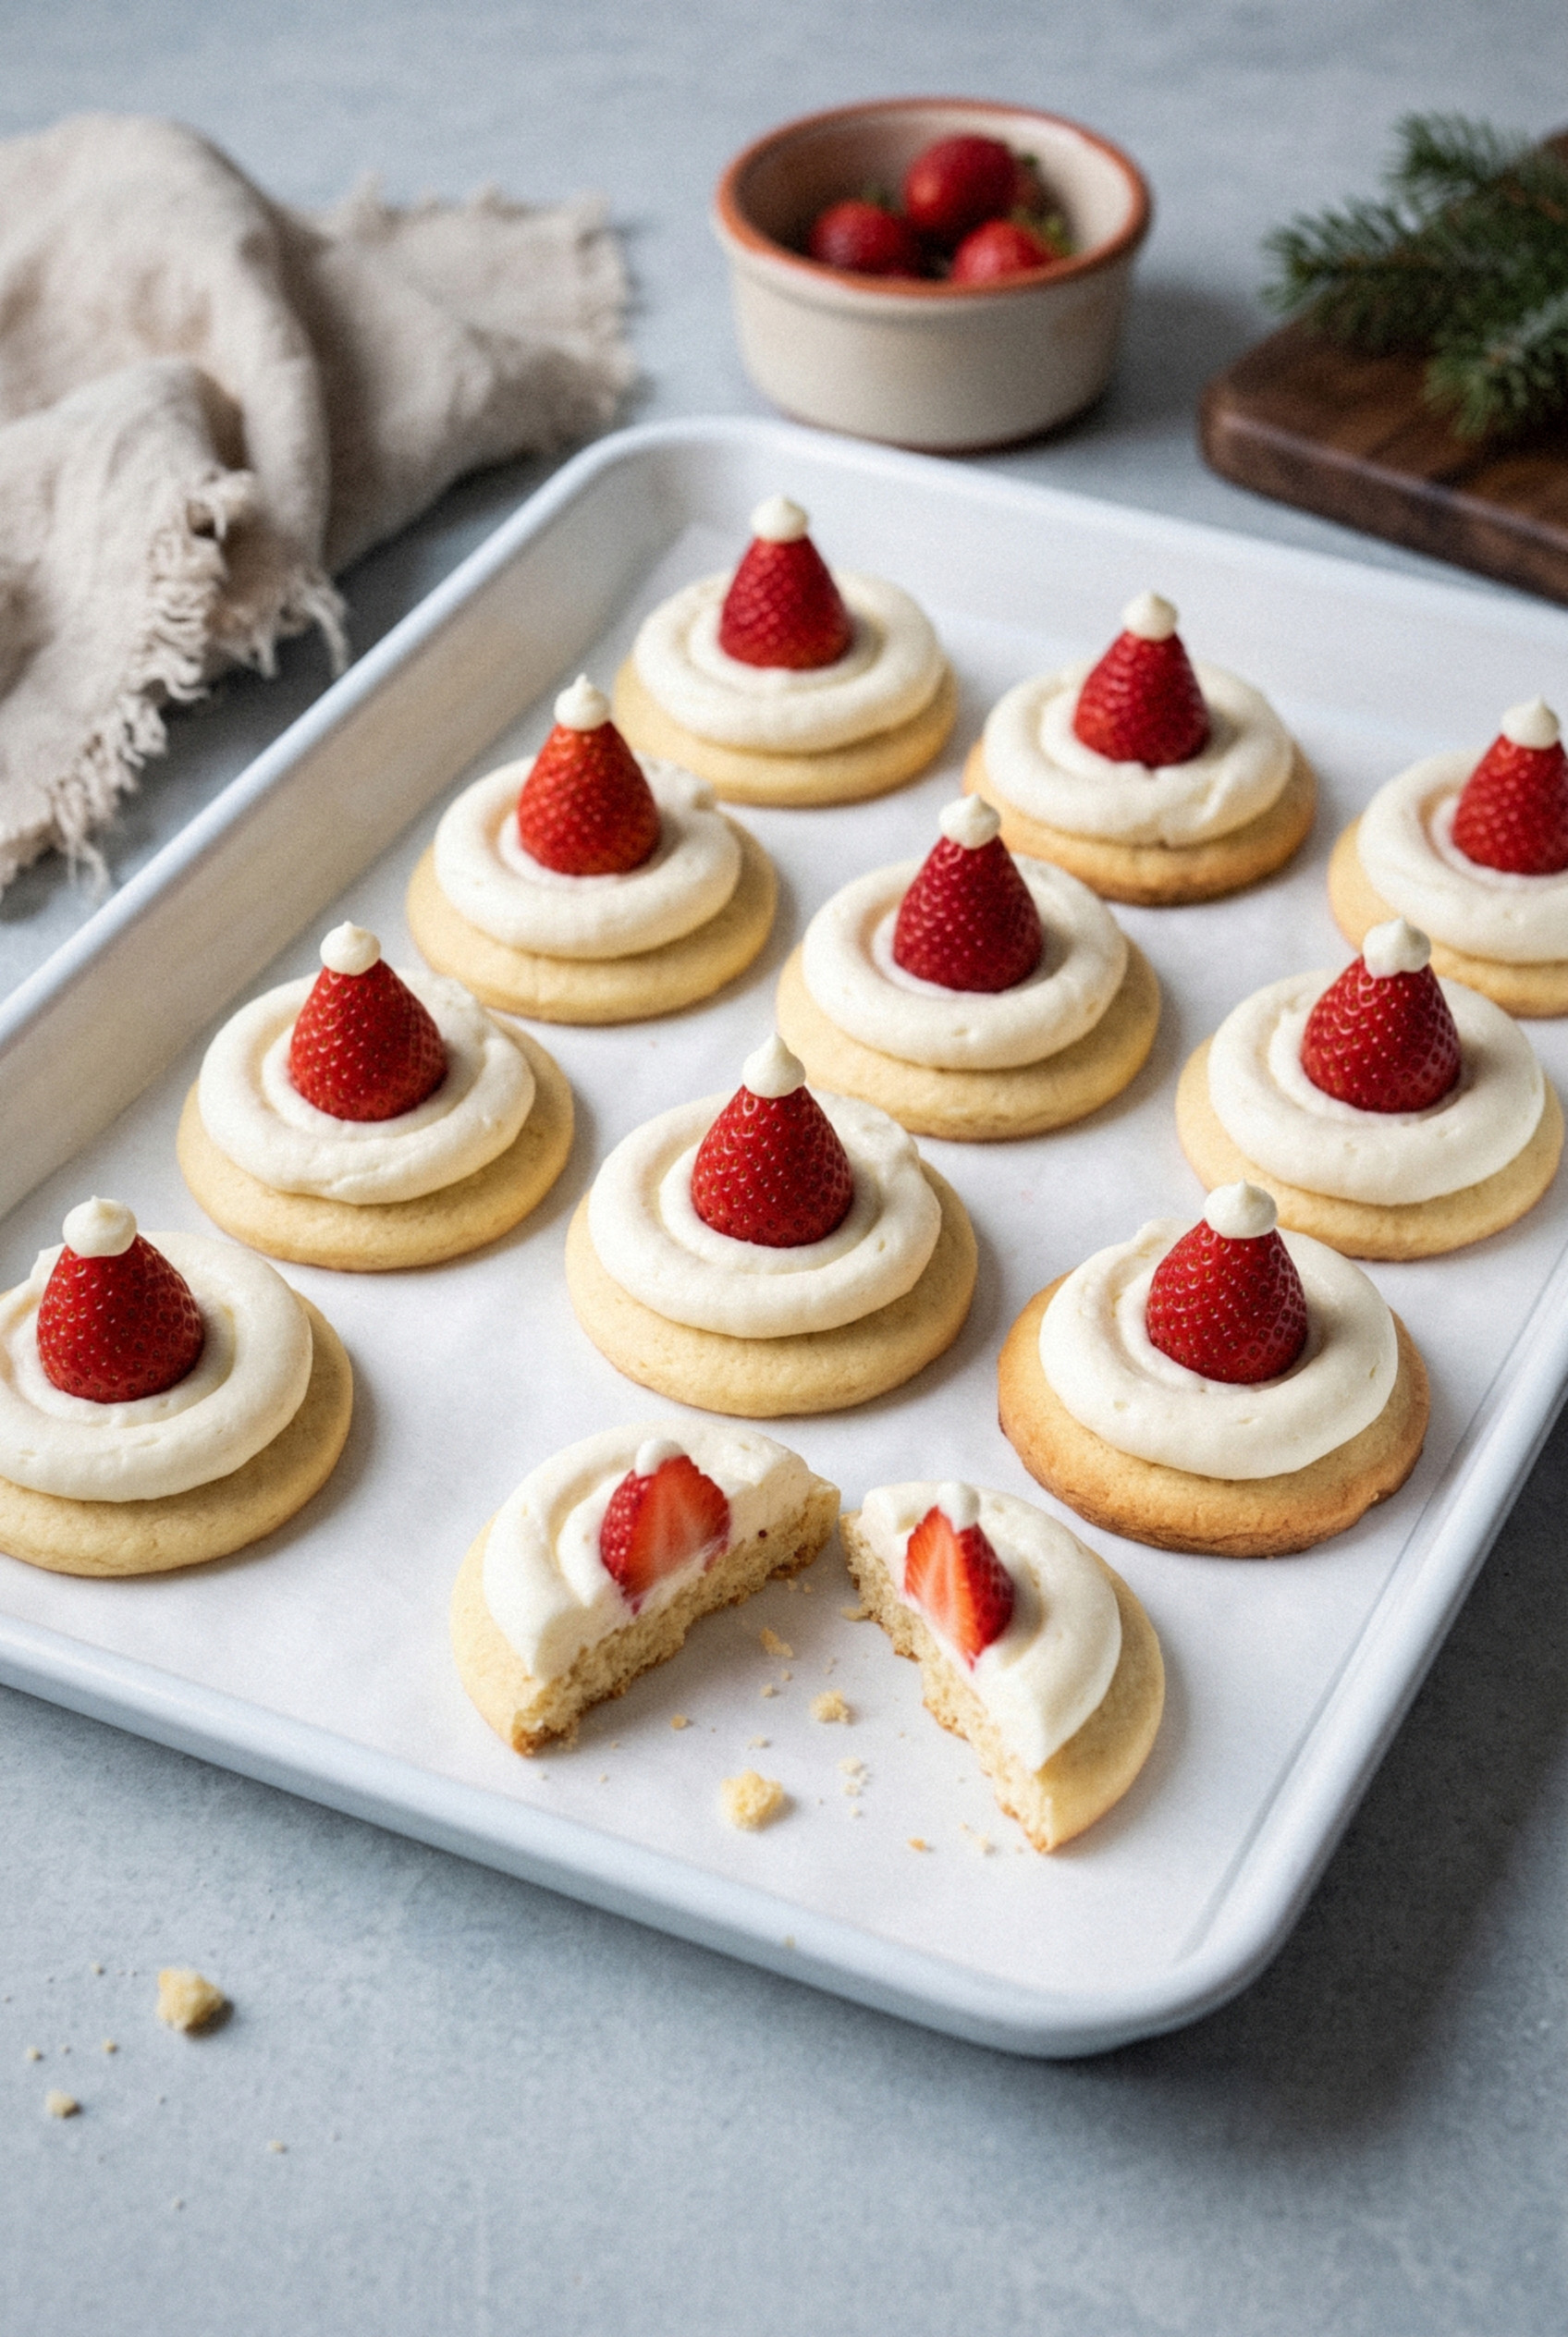
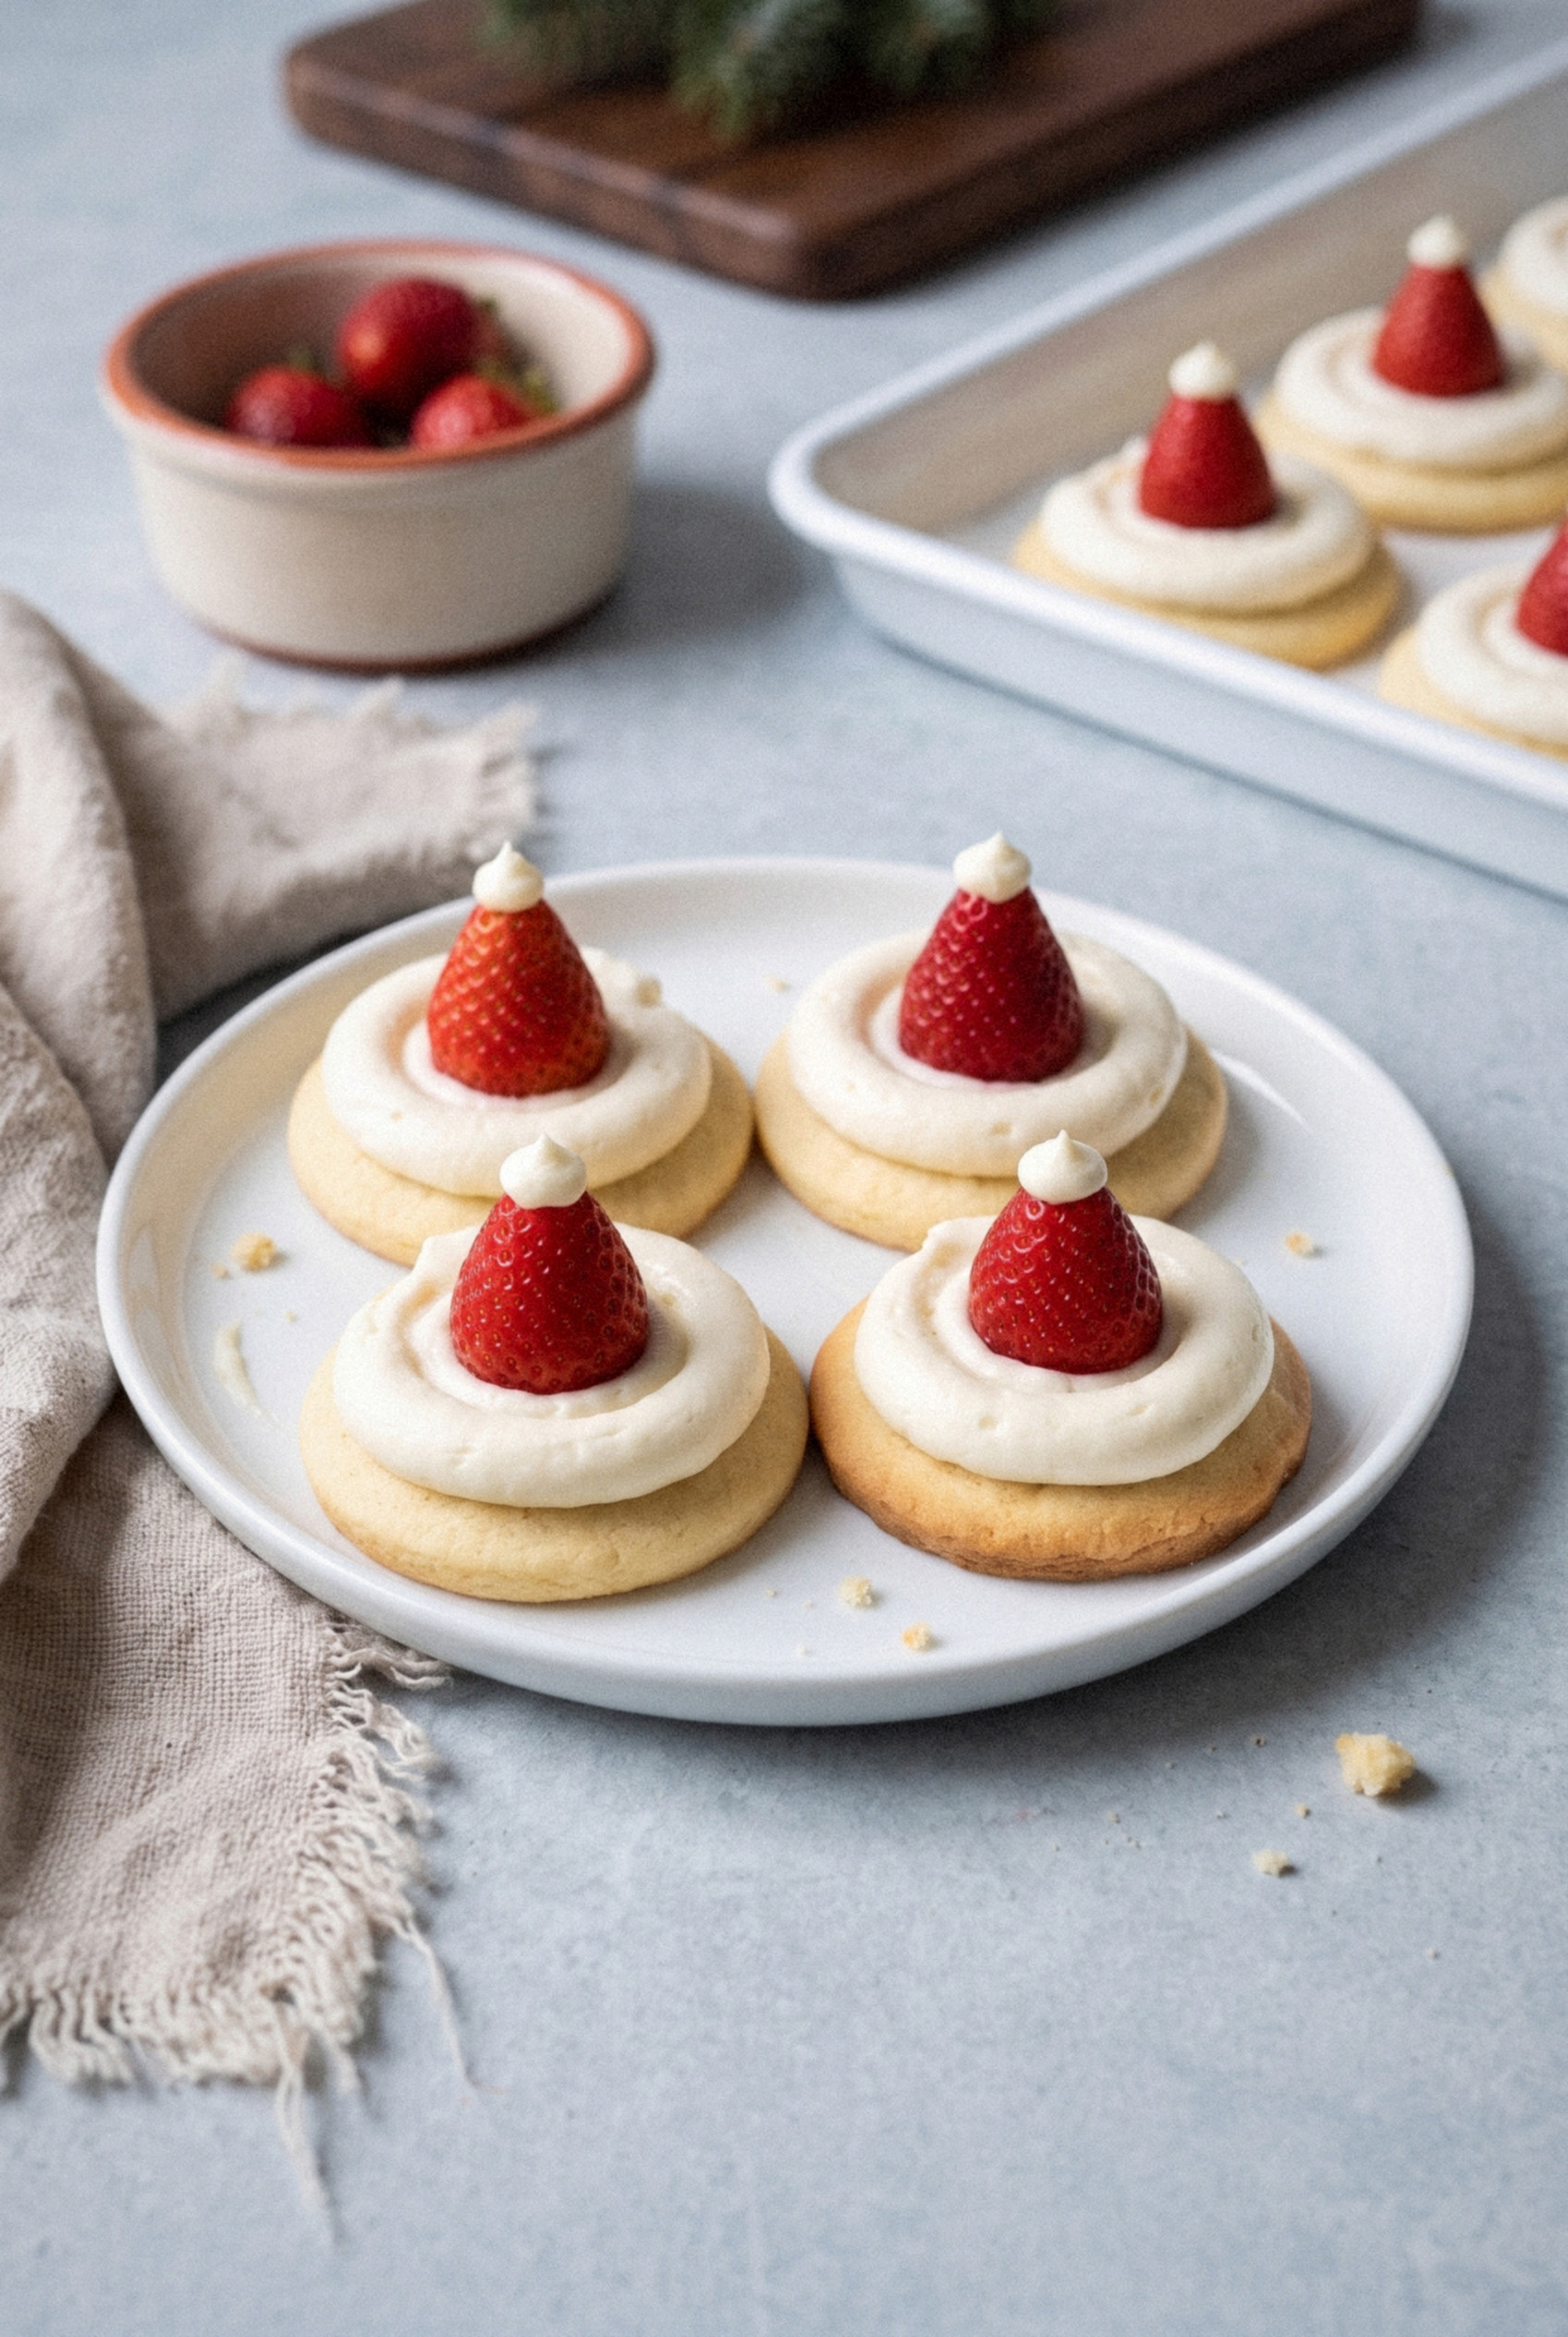
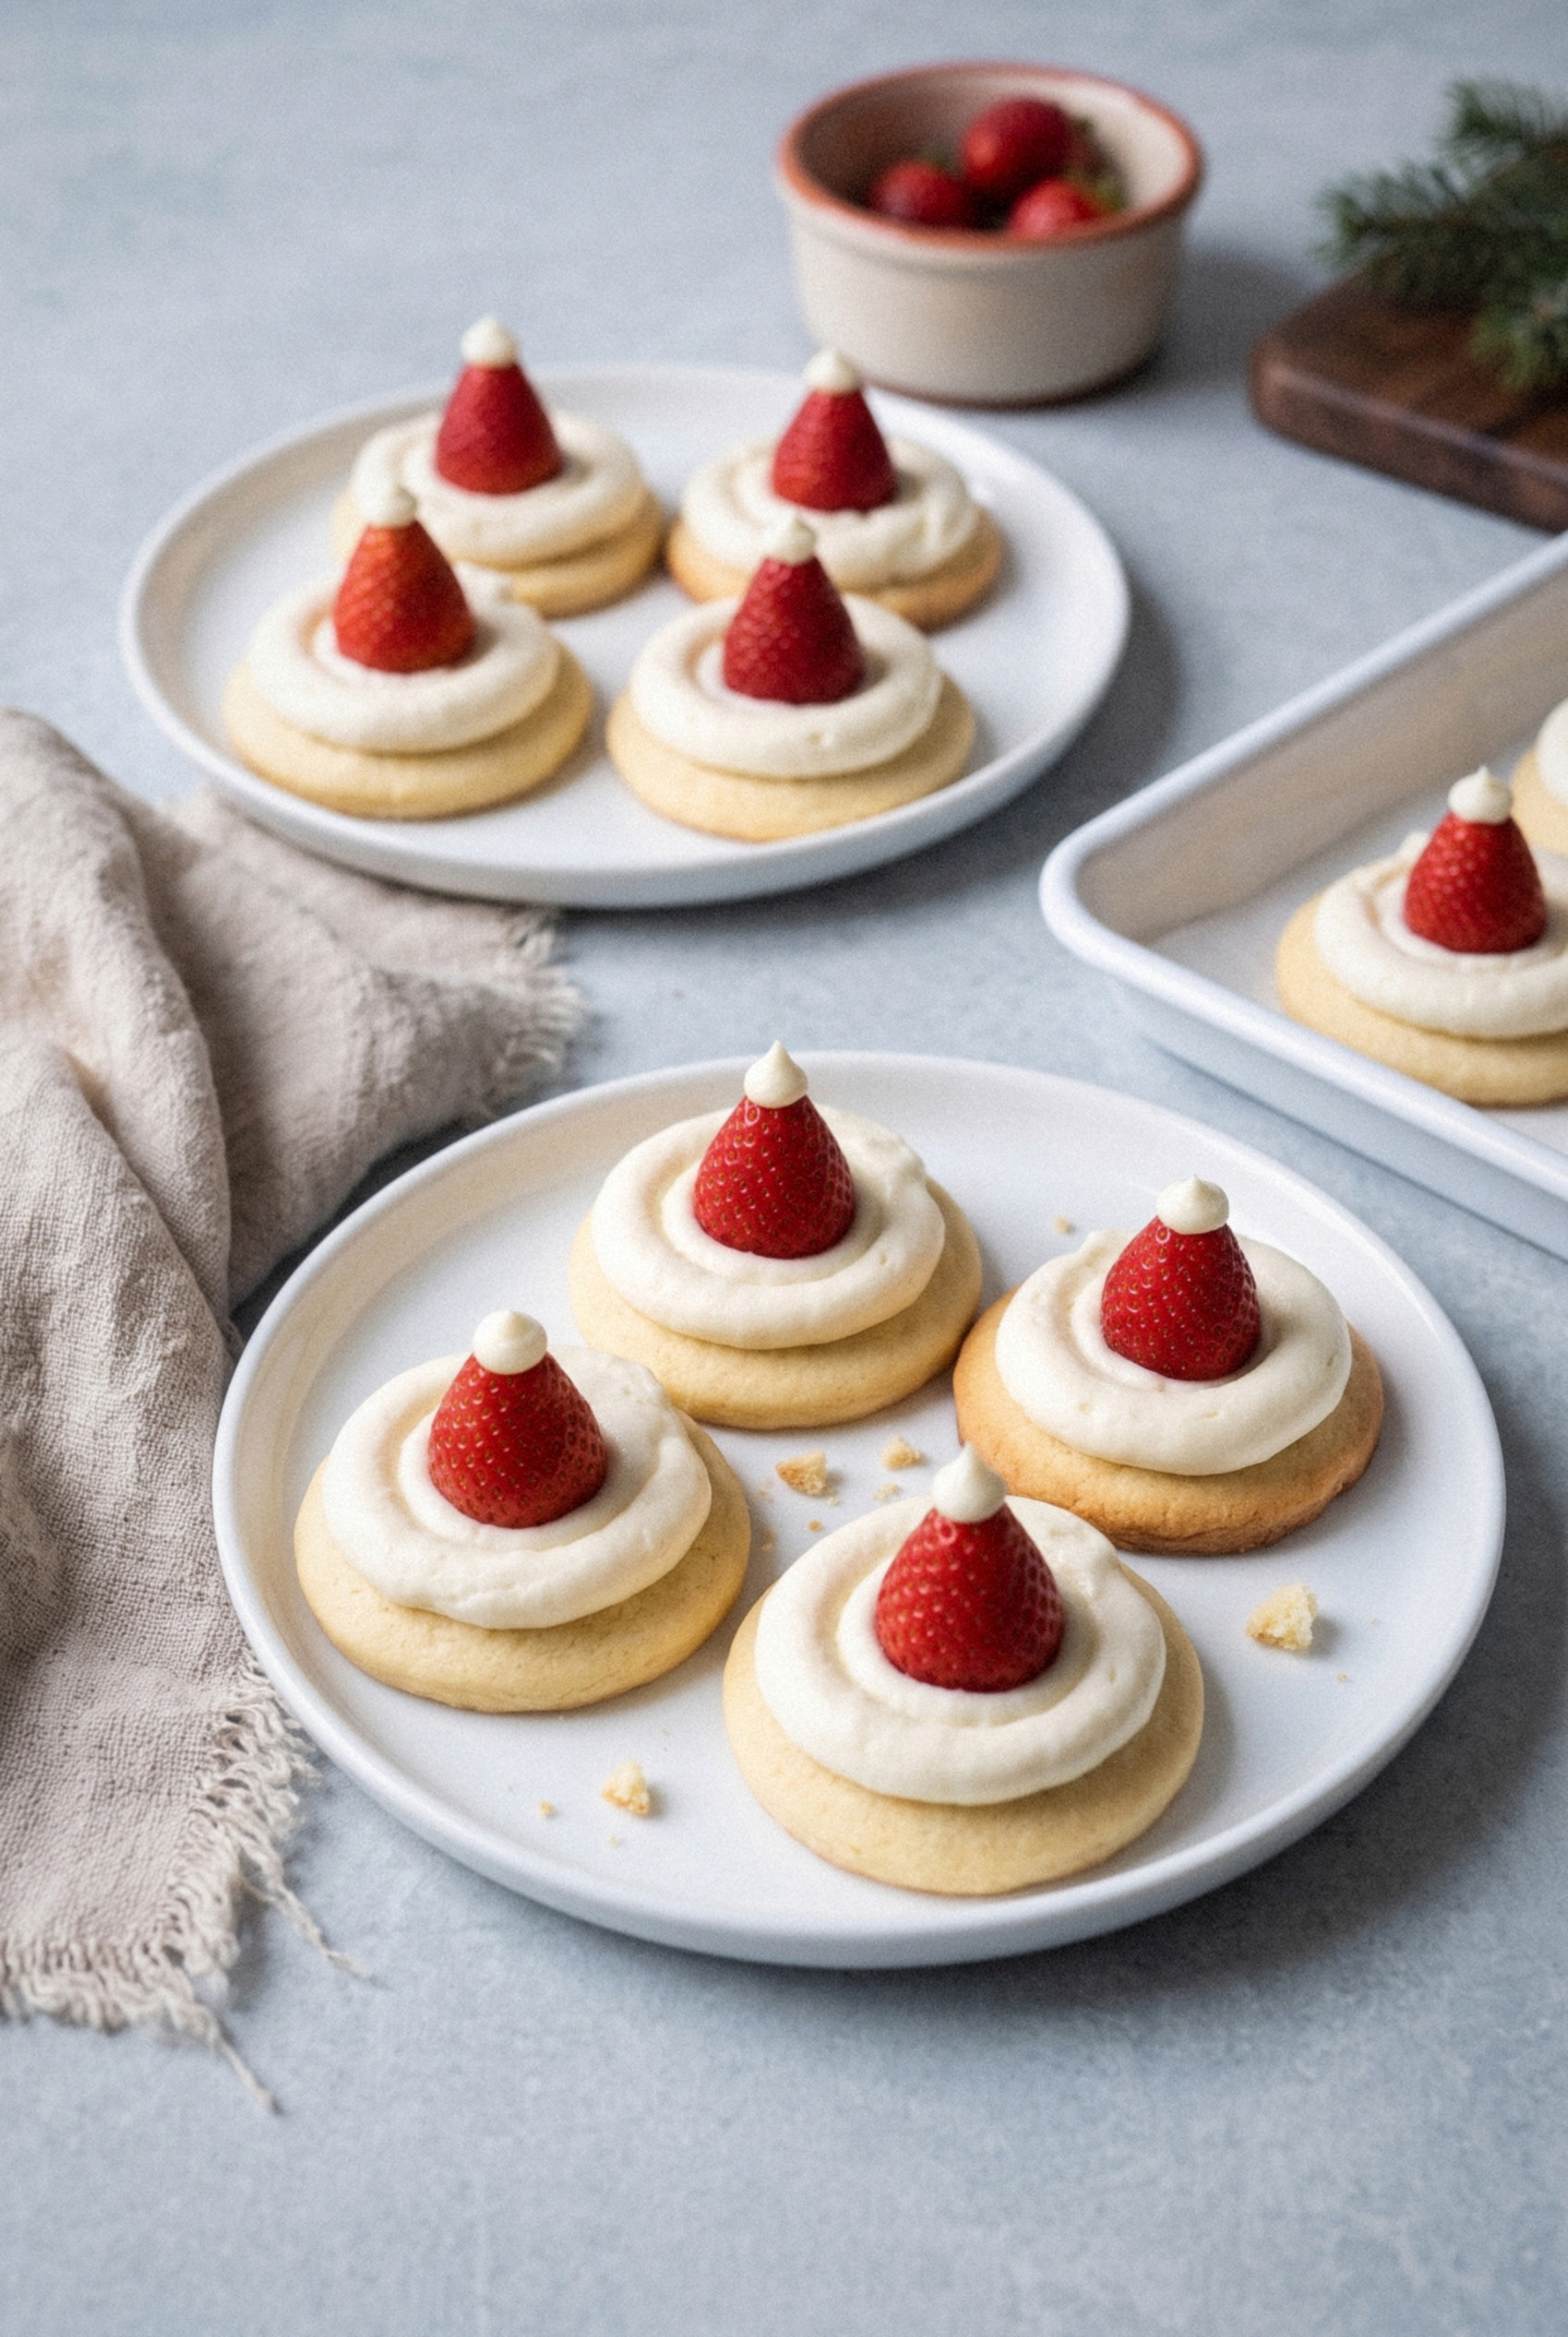
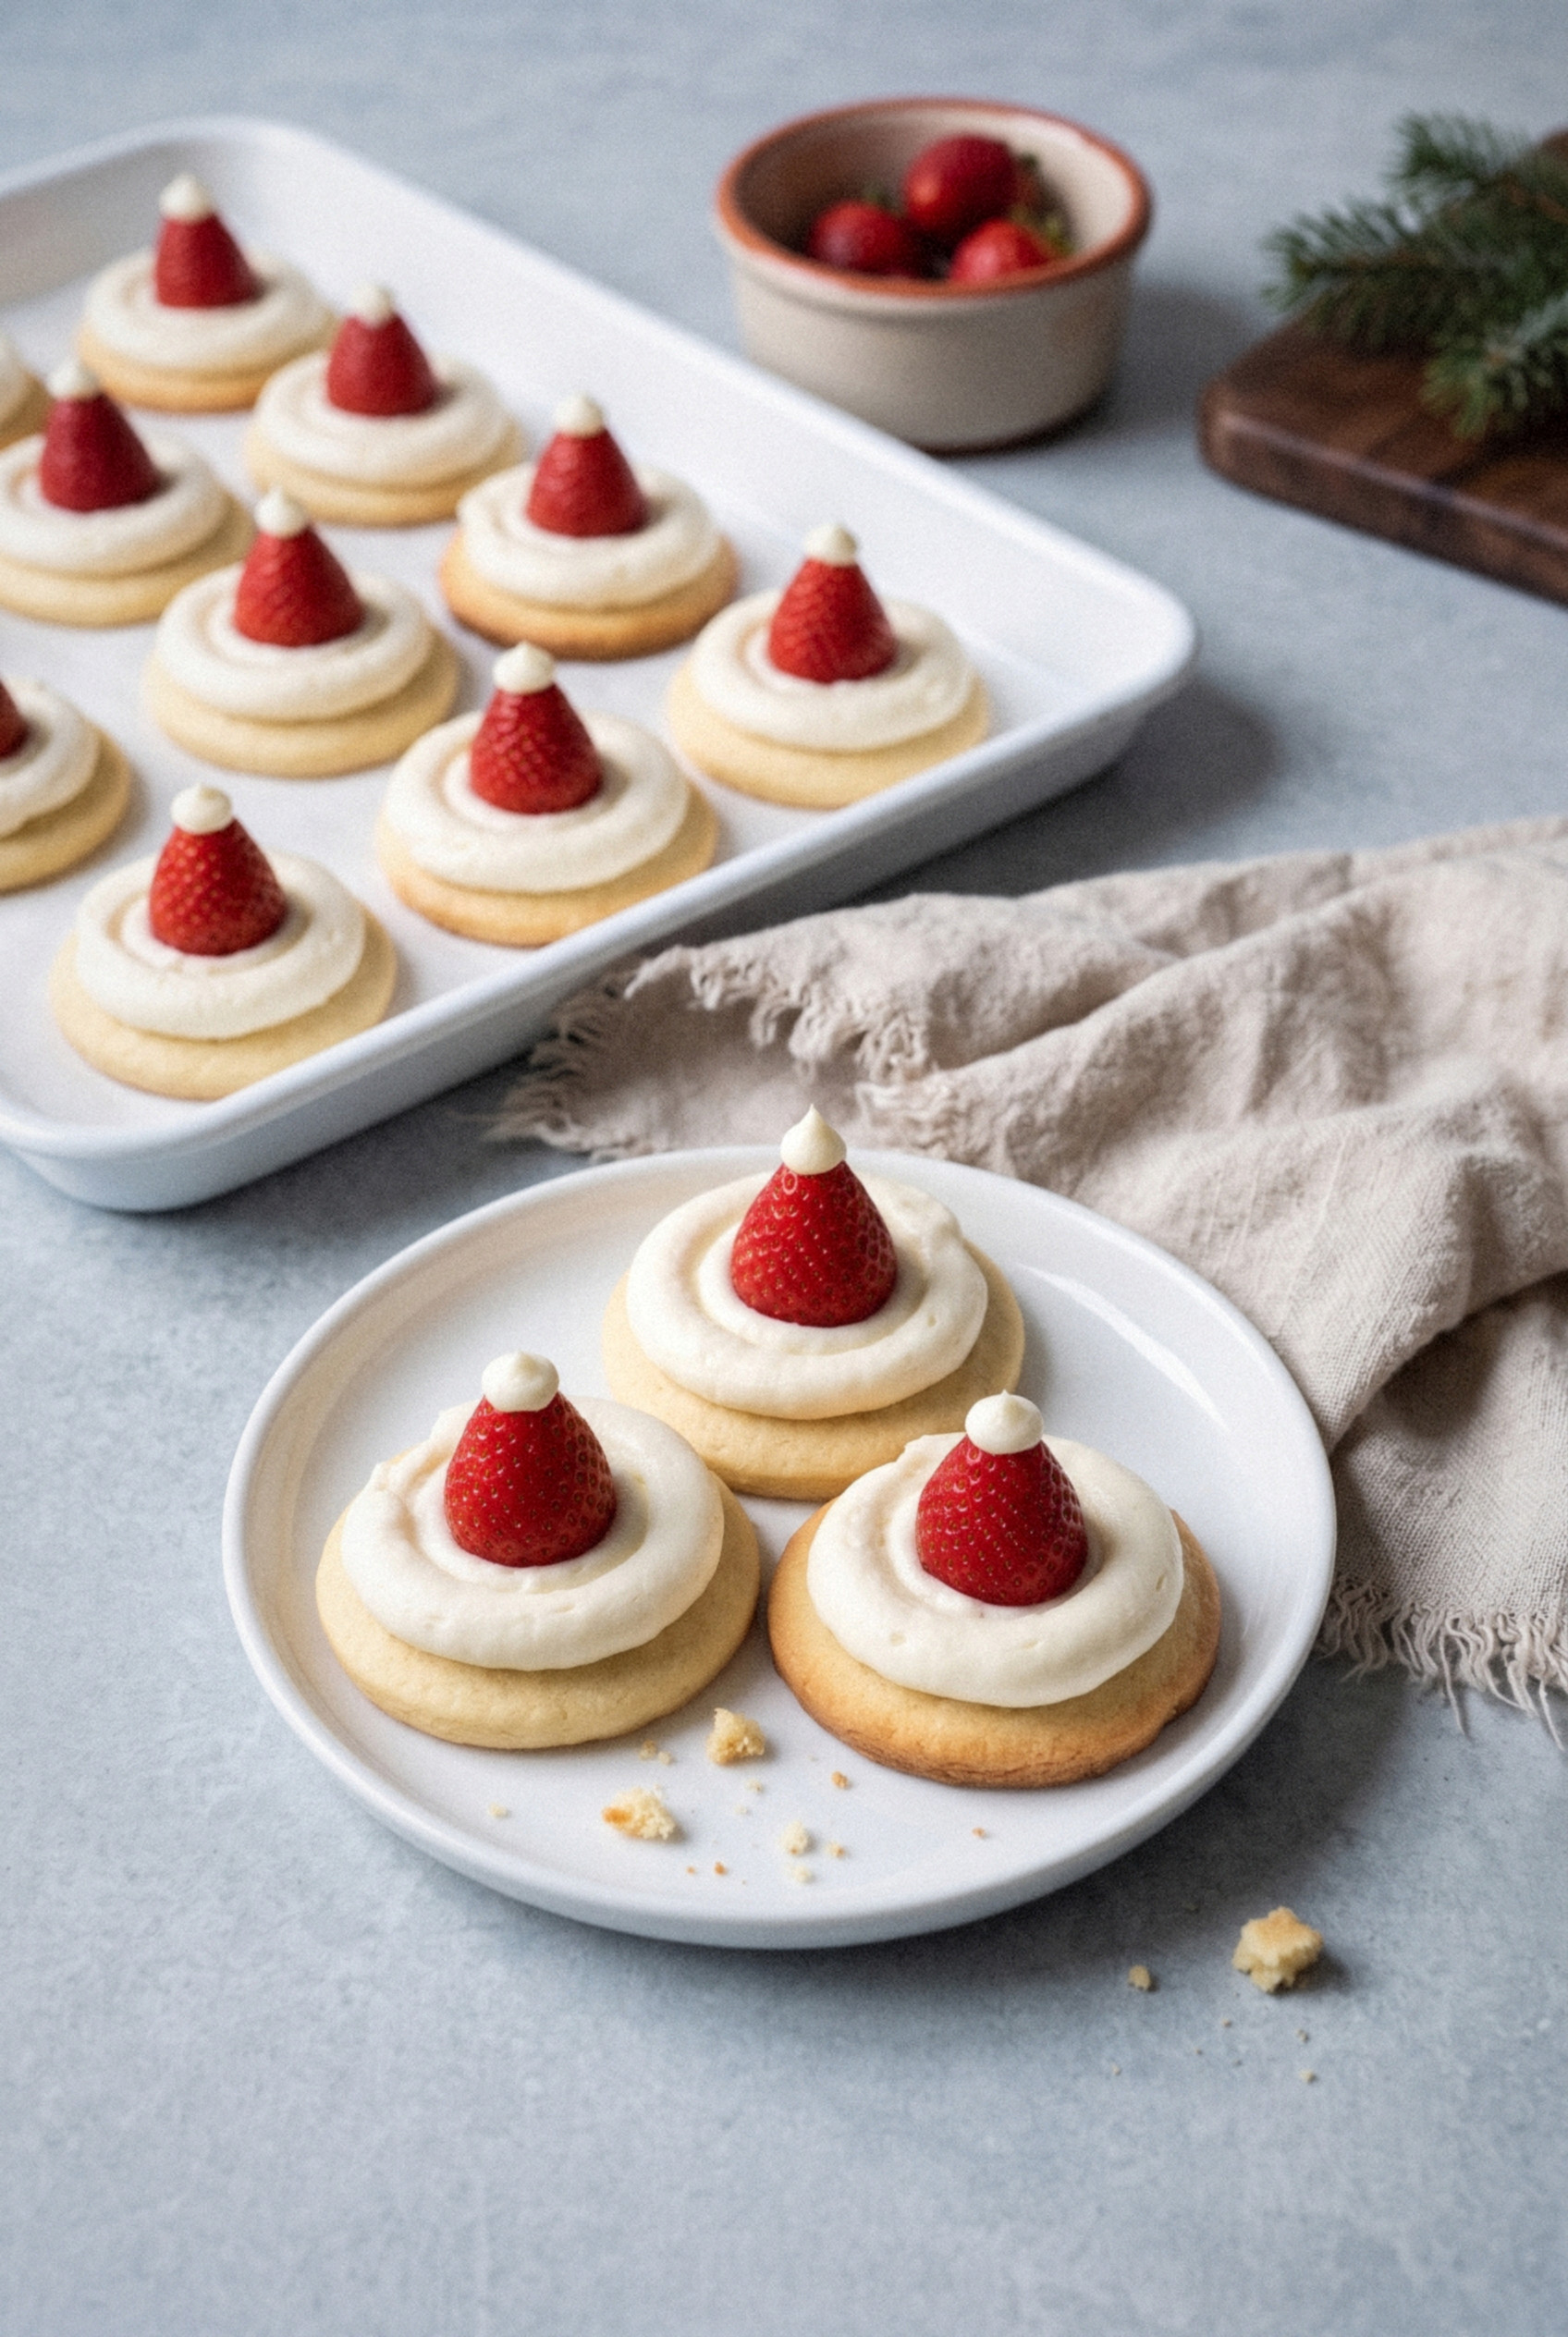
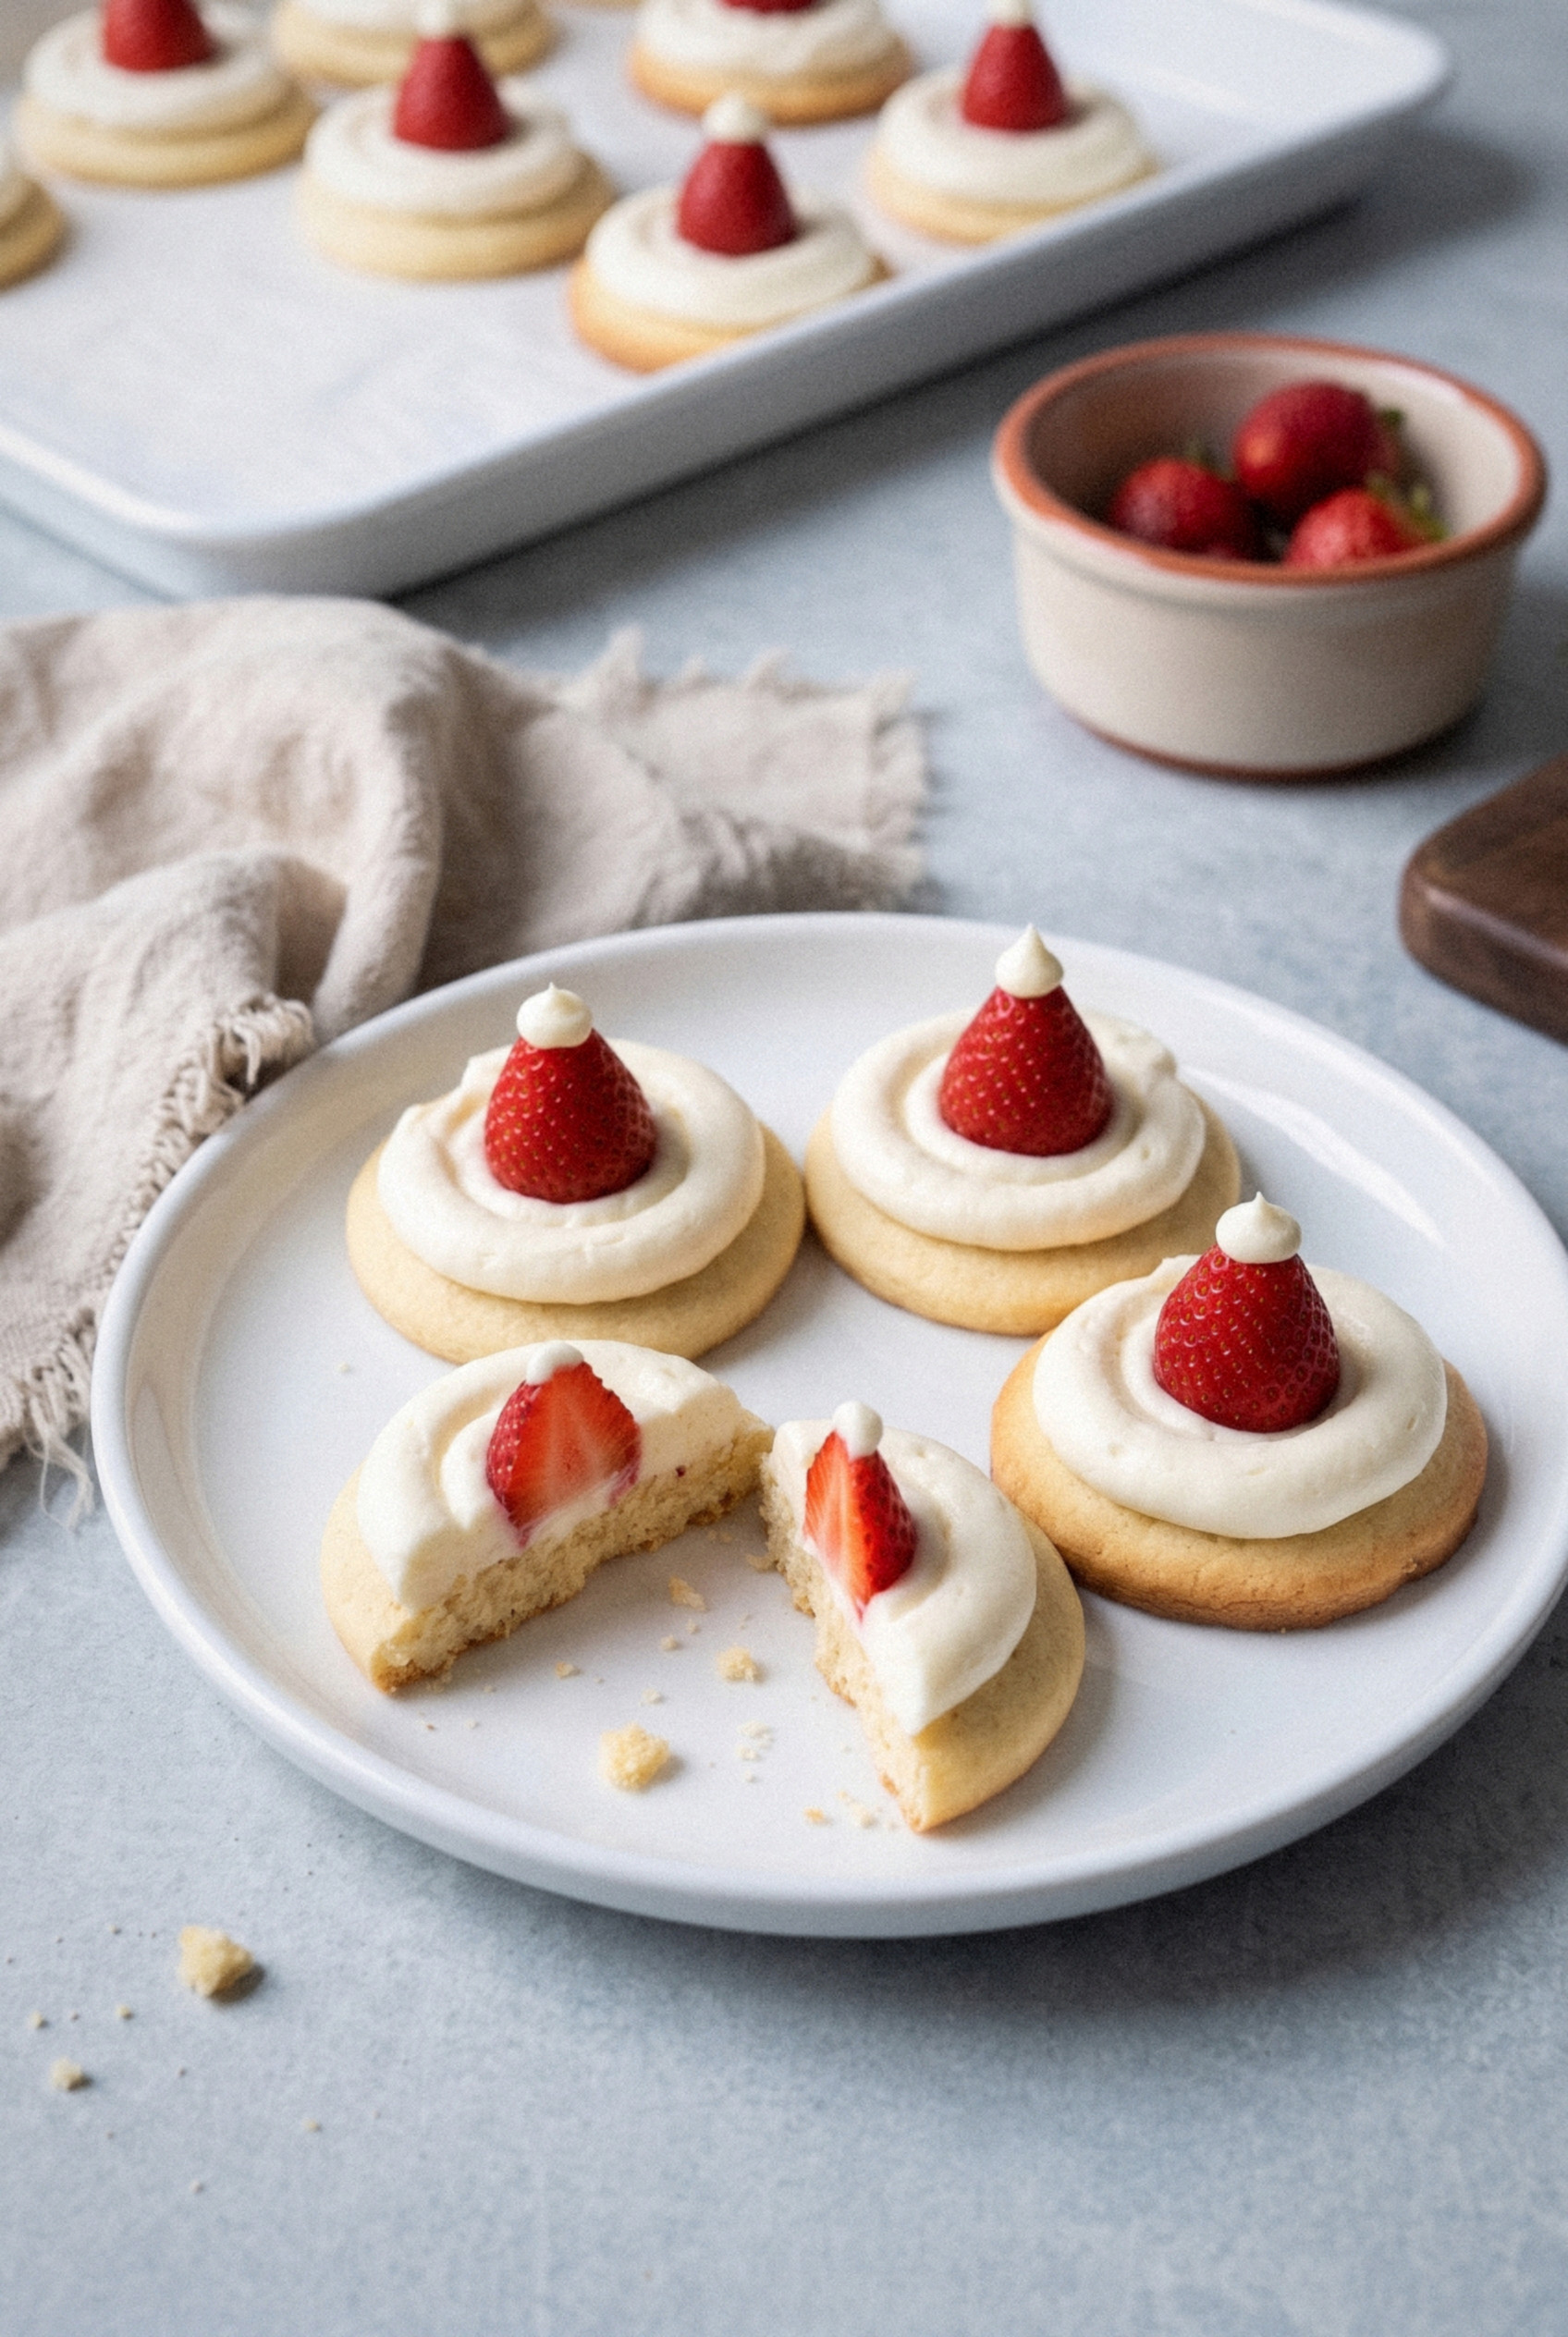
A soft sugar cookie, a ring of white buttercream for the brim, a fresh strawberry for the hat, and one little dot of frosting on top.
That's the whole decorating job, and my six-year-old nails it every time.
Most versions you'll find start with a tube of dough, a box mix, or a sleeve of sandwich cookies.
I make the base from scratch, because it only takes about ten extra minutes and tastes so much better.
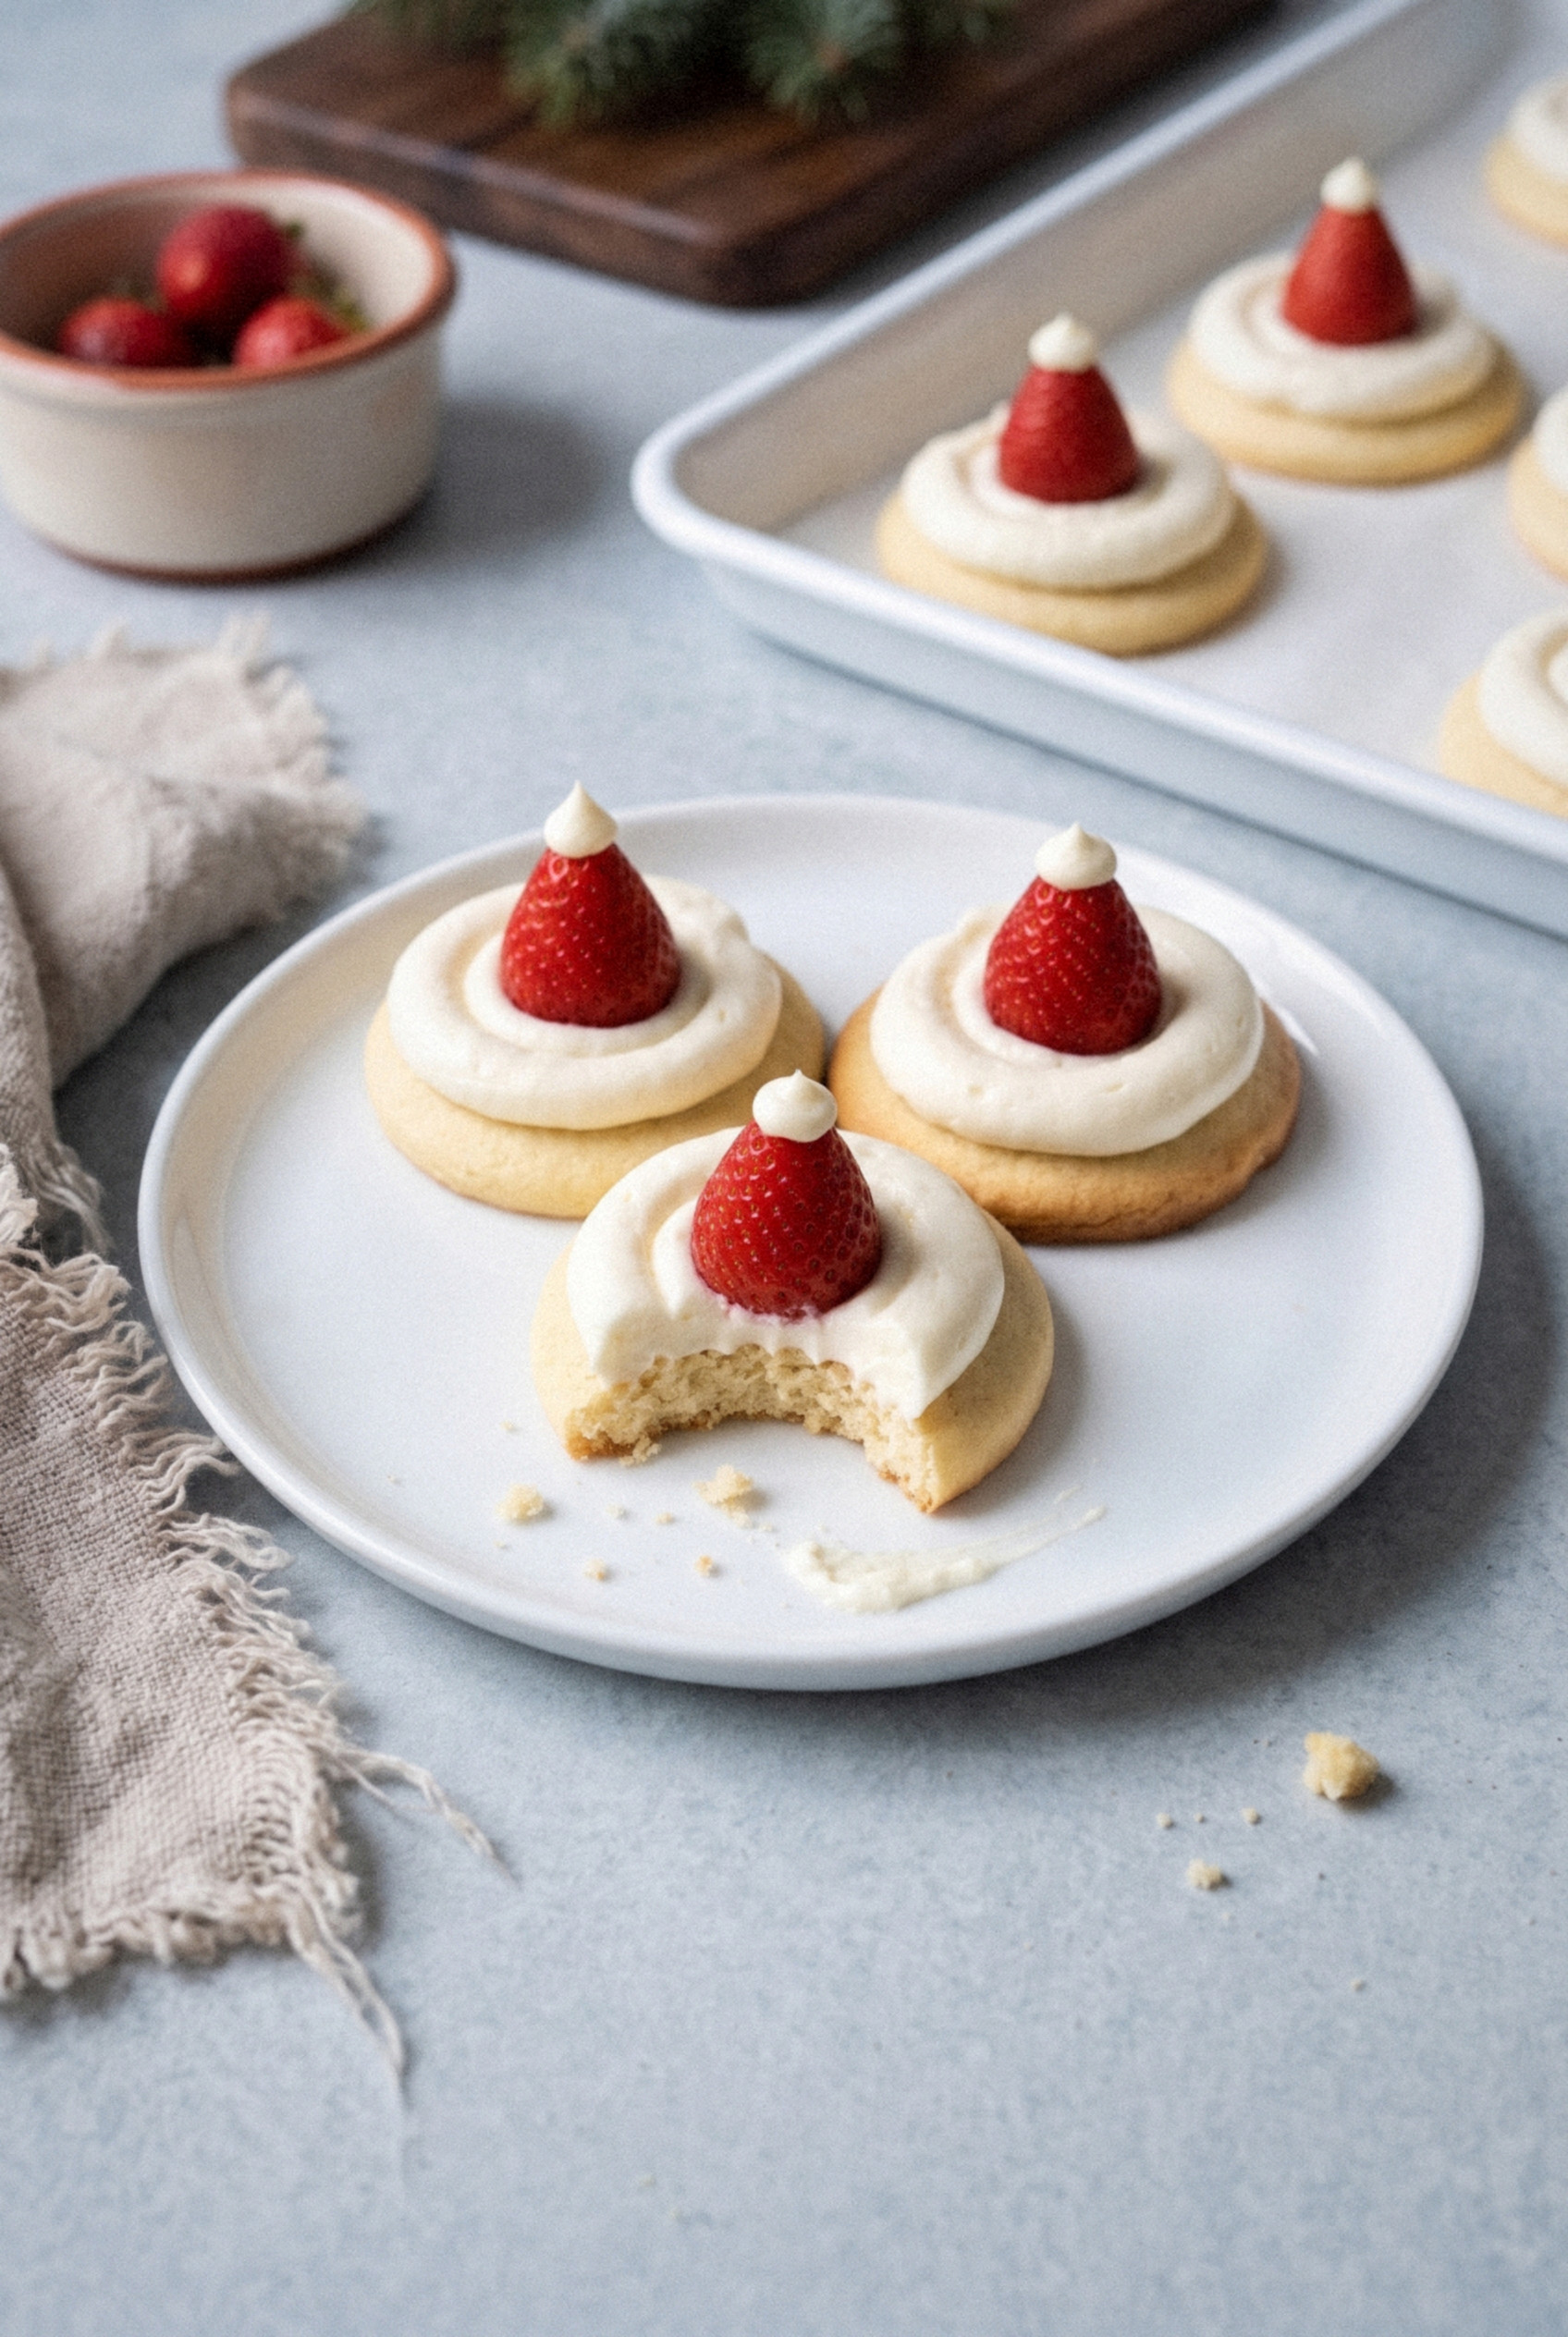
The cookies stay soft and buttery, the berries keep things fresh, and the hats come out cute enough for any Christmas cookie tray.
Make them once and they'll turn into a family tradition, I promise.
Why You'll Love These Santa Hat Cookies
These are the easiest decorated Christmas cookies I've ever made. No cutters, no rolling pin, and not a drop of food coloring.
- Kid-friendly decorating. Little hands can set a strawberry on a ring of frosting. That's all it takes.
- From-scratch base. A real buttery sugar cookie, not a box mix, and it's a breeze to make.
- Fresh and not too sweet. The juicy strawberry cuts through the buttercream so they don't taste like pure sugar.
- Naturally red. The berry gives you that bright Santa red with zero gel coloring or stained fingers.
- Make-ahead friendly. Bake the cookies days ahead and do a quick assembly the day you serve them.
What's not to love about a cookie that decorates itself?
Ingredients and Substitutions
Everything is a basic baking staple except the strawberries. Pick those up the day before you assemble.
For the Cookies
- Unsalted butter (½ cup). Softened to room temperature. It should hold a fingerprint without looking greasy.
- Granulated sugar (¾ cup). Sweetens the dough and gives the edges a light golden set.
- Egg (1 large). Room temperature mixes in smoothly.
- Vanilla extract (1 ½ teaspoons). Pure vanilla tastes cleaner than imitation here.
- All-purpose flour (1 ¾ cups). Spoon it in and level it off so the cookies don't turn dry.
- Baking powder (1 teaspoon). Gives a soft, slightly puffy cookie that stays flat on top.
- Salt (¼ teaspoon). Balances the sweetness.
- Milk (1 tablespoon). Keeps the dough soft enough to roll smoothly.
For the Buttercream
- Unsalted butter (½ cup). Softened. This is the base of the white brim.
- Powdered sugar (2 cups). Sift it if it's lumpy so the frosting pipes smooth.
- Vanilla extract (1 teaspoon). Clear vanilla keeps the frosting extra white, but regular is fine.
- Milk or heavy cream (1-2 tablespoons). Add just enough for a thick, pipeable frosting.
- Salt (a pinch). Cuts the sugary edge.
For the Hats
- Small strawberries (24). About 1 ¼ inches tall and as close in size as you can find. Pointy, cone-shaped berries look the most like hats.
Short on time? A tube of refrigerated sugar cookie dough or a tub of vanilla frosting works in a pinch. I won't judge.
How to Make Santa Hat Cookies
There are five simple stages, and only the last one needs the kids. I usually bake in the morning and decorate after lunch.
Step 1: Make the Dough
Whisk the flour, baking powder, and salt together in a bowl. In a large bowl, beat the softened butter and sugar on medium-high for about 2-3 minutes until light and fluffy. Beat in the egg, vanilla, and milk until smooth, scraping down the bowl once.
Add the dry ingredients on low speed and mix just until the flour disappears. The dough should be soft but not sticky, like play dough. If it feels too soft to roll, chill it for 15 minutes.
Step 2: Shape and Bake the Rounds
Preheat the oven to 350°F and line two baking sheets with parchment. Roll the dough into 24 balls, about 1 ½ tablespoons each, and set them 2 inches apart. Press each ball gently with the bottom of a glass to about ½ inch thick.
Bake for 10-11 minutes, until the edges are just set and the tops are pale. Let them cool on the sheet for 5 minutes, then move them to a rack to cool completely, about 20 minutes.
Pro tip: Pressing the dough flat gives you a level platform. A domed cookie lets the strawberry tip over.
Step 3: Whip the Buttercream
Beat the softened butter on medium for about 1 minute until creamy. Add the powdered sugar a cup at a time on low, then the vanilla and salt. Add milk a little at a time and beat on high for 2 minutes until fluffy and stiff enough to hold a peak.
Spoon it into a piping bag fitted with a medium round or star tip. A zip-top bag with the corner snipped works just as well.
Step 4: Prep the Strawberries
Rinse the strawberries and dry them COMPLETELY on paper towels. Slice the top off each berry straight across to remove the leaves and make a flat base. Set them cut-side down on a dry paper towel for 10 minutes so the cut face stops weeping.
Why so fussy about drying? A wet berry slides around and bleeds pink into the white brim.
Step 5: Assemble the Hats
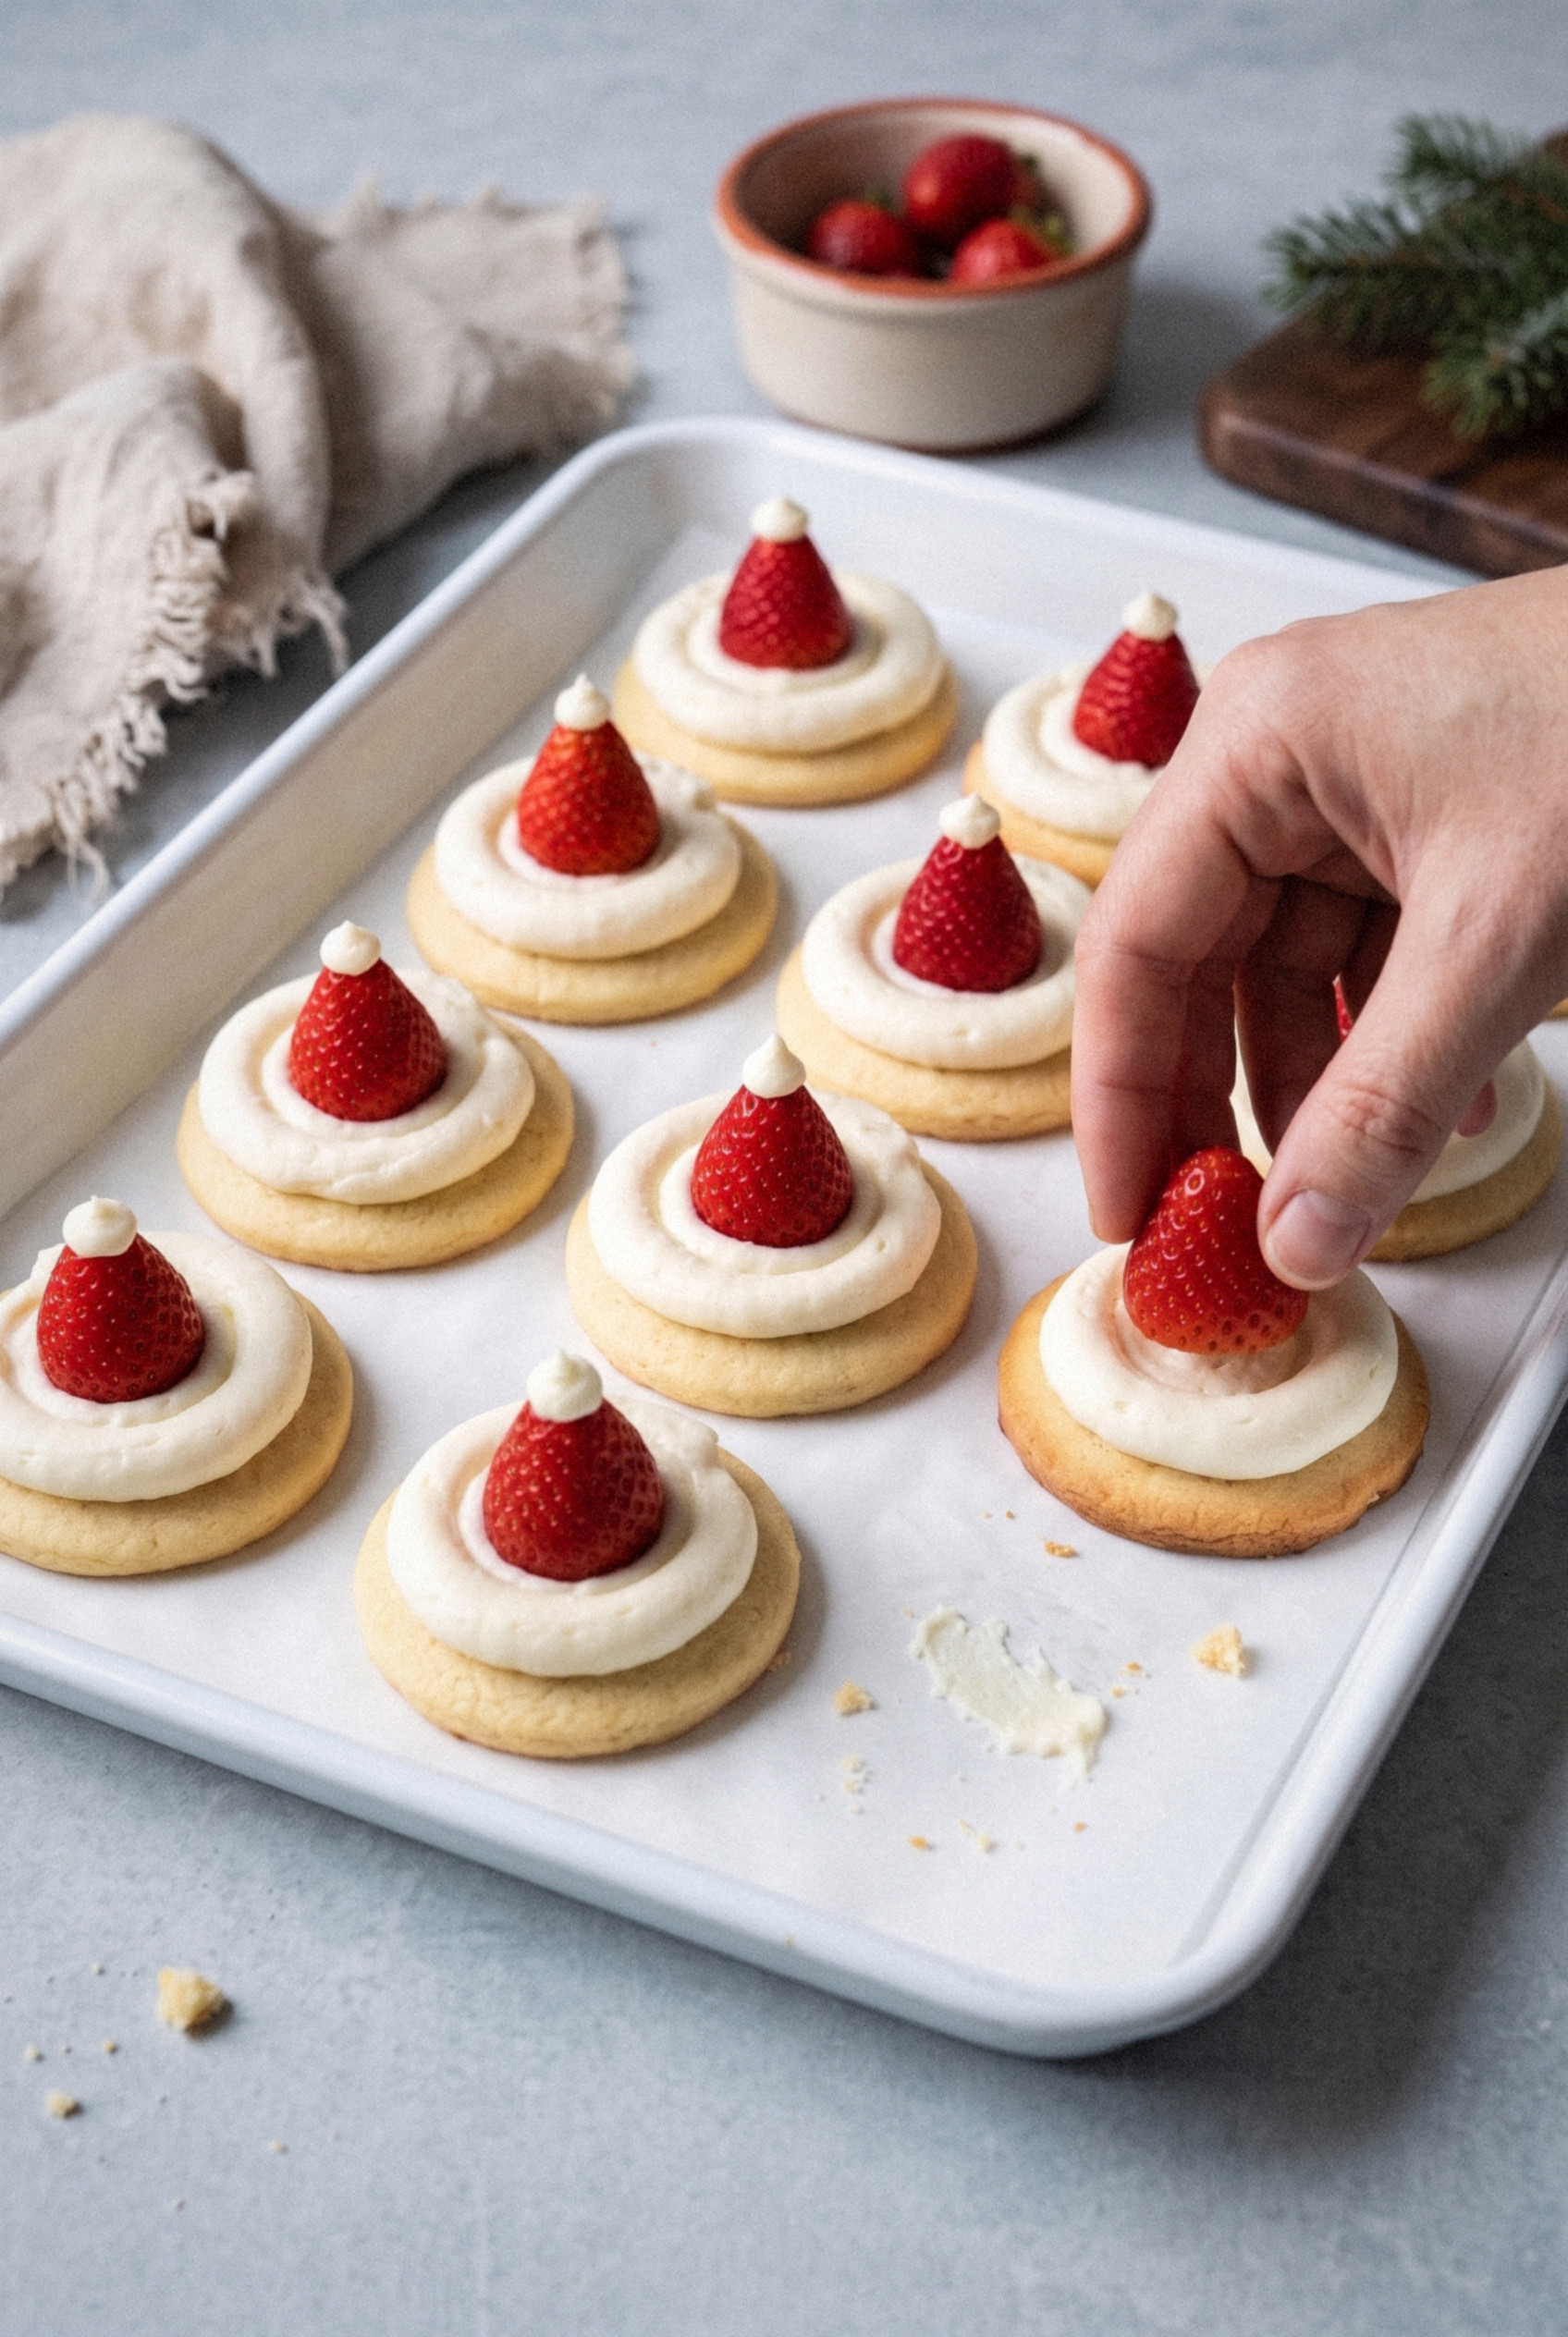
Pipe a ring of buttercream around the top of each cooled cookie, about the width of a strawberry. Set one strawberry, cut-side down, in the center of the ring and press gently so the frosting puffs up around the base like a fuzzy brim. Finish with a small dot of buttercream on the pointed tip for the pom-pom.
That's how you make a homemade Santa hat in about 15 minutes for the whole batch!
Tips for Picture-Perfect Hats
A few small details make the difference between cute and sloppy.
- Match your berries. Sort the strawberries by size before you start so the whole tray looks even.
- Cool the cookies all the way. Even slightly warm cookies melt the buttercream and the berries slide off.
- Keep the frosting stiff. If it droops, beat in another 2-3 tablespoons of powdered sugar.
- Dry, dry, dry. Any water on the berry turns the brim pink within an hour.
- Use a light pan. Light-colored baking sheets keep the bottoms from browning too fast.
- Give the kids a station. One tray of cookies, one plate of berries, one bag of frosting. Fewer tools means less mess.
Variations
Once you've got the basic hat down, there's plenty of room to play.
- Mini marshmallow pom-pom. Swap the frosting dot for a mini marshmallow pressed onto the tip.
- Coconut brim. Roll the edge of the frosting ring in sweetened shredded coconut for a fluffier look.
- Cream cheese frosting. Beat 4 ounces of cream cheese into the buttercream for a tangy, cheesecake-style brim.
- Peppermint cookies. Add ¼ teaspoon peppermint extract to the dough for a minty twist.
- Almond sugar cookies. Use ½ teaspoon almond extract in place of half the vanilla.
- No strawberries. Tint half the buttercream red and pipe a tall cone for the hat, then add the white brim and pom-pom.
Make-Ahead and Timing
The secret to a calm cookie day is doing most of the work early. Strawberries are the only part that can't wait.
- Up to 3 days ahead. Bake the cookies and store them in an airtight container at room temperature.
- Up to 1 week ahead. Make the buttercream and refrigerate it. Let it soften for 30 minutes, then beat it smooth again before piping.
- Up to 3 months ahead. Freeze the plain baked cookies in a single layer, then move them to a freezer bag.
- The day of. Prep the berries and assemble within 4-6 hours of serving for the freshest look.
Storage
Because of the fresh fruit, these are a same-day or next-day cookie.
- Assembled cookies. Refrigerate loosely covered in a single layer and serve within 24 hours. After that the berries soften and the brim starts to pink.
- Plain cookies. Keep in an airtight container at room temperature for up to 5 days.
- Freezing. Freeze the plain cookies for up to 3 months. Don't freeze assembled hats, since thawed strawberries turn mushy.
- Transporting. Pack them in a single layer in a shallow container so the hats don't tip.
Serving Ideas
These are a crowd-pleaser anywhere there are kids, or grown-ups who act like them.
- Christmas cookie tray. The bright red hats stand out next to gingerbread and chocolate cookies.
- Kids' holiday party. Set up a decorating station and let everyone build their own.
- Christmas Eve dessert. They're light enough to enjoy after a big dinner.
- With hot cocoa. A mug of cocoa and a Santa hat cookie hits the spot on a cold afternoon.
Give them a try this December. Your kids will be so proud of their tray, and they'll taste fantastic to boot!
Recipe
Santa Hat Cookies
Ingredients
For the Cookies
- ½ cup unsalted butter softened
- ¾ cup granulated sugar
- 1 large egg room temperature
- 1 ½ teaspoons vanilla extract
- 1 ¾ cups all-purpose flour spooned and leveled
- 1 teaspoon baking powder
- ¼ teaspoon salt
- 1 tablespoon milk
For the Buttercream
- ½ cup unsalted butter softened
- 2 cups powdered sugar sifted
- 1 teaspoon vanilla extract clear vanilla for the whitest frosting
- 1-2 tablespoons milk or heavy cream
- 1 pinch salt
For the Hats
- 24 small strawberries about 1 ¼ inches tall, similar size
Instructions
Make and Bake the Cookies
- Whisk the flour, baking powder, and salt together in a bowl.
- Beat the butter and sugar on medium-high for 2 to 3 minutes until light and fluffy. Beat in the egg, vanilla, and milk.
- Add the dry ingredients on low speed and mix just until combined. Chill for 15 minutes if the dough is too soft to roll.
- Preheat the oven to 350°F and line two baking sheets with parchment. Roll the dough into 24 balls, about 1 ½ tablespoons each, and space them 2 inches apart.
- Press each ball to about ½ inch thick with the bottom of a glass.
- Bake for 10 to 11 minutes, until the edges are set and the tops are pale. Cool on the sheet for 5 minutes, then cool completely on a rack.
Make the Buttercream
- Beat the butter for 1 minute until creamy. Add the powdered sugar on low, then the vanilla and salt.
- Add milk a little at a time and beat on high for 2 minutes until fluffy and stiff enough to hold a peak. Transfer to a piping bag.
Assemble the Hats
- Rinse and thoroughly dry the strawberries. Slice off the tops straight across to make a flat base and let them rest cut-side down on paper towels for 10 minutes.
- Pipe a ring of buttercream on top of each cooled cookie.
- Set a strawberry cut-side down in the center of each ring and press gently so the frosting forms a brim.
- Pipe a small dot of buttercream on the tip of each strawberry. Serve within 4 to 6 hours or refrigerate loosely covered.
Notes
- Dry the berries: Wet strawberries slide and turn the white brim pink.
- Make ahead: Bake the cookies up to 3 days ahead or freeze up to 3 months. Buttercream keeps 1 week refrigerated.
- Storage: Refrigerate assembled cookies loosely covered and serve within 24 hours. Do not freeze assembled cookies.
- Shortcut: Refrigerated sugar cookie dough and store-bought vanilla frosting both work.