It’s bold to claim that this is the Best Chicken Salad Sandwich. But, in my opinion, it is. This chicken salad sandwich is uncomplicated, only having a few ingredients. It is that simplicity that really makes it so great. Making chicken salad with minimal ingredients is all well and good, but if it doesn’t taste great, it’s all pointless. Luckily, this sandwich does tick all the taste boxes. It has a little bite, a pop of sweetness, a touch of celery-ness, and of course, it’s a little creamy. I think you’ll love this Chicken Salad Sandwich, and I am so excited to share it with you.
Chicken Salad Vegetables
The real secret to making this chicken salad is the garnish that goes in the chicken salad mix. I’ve had chicken salad with various ingredients like avocado, grapes, apple, bacon, pickles, and so on. And honestly, I’ve loved them all. However, as you’ll know if you’ve been reading this blog for any amount of time, I like simple, uncomplicated food. So, for me, the best chicken salad has onion for sharpness, carrot for sweetness, and celery for celery-ness. (If you can think of a better way to describe the flavour of celery, please tell me in the comments below.) The key is to cut the vegetables into the smallest pieces you can. You can grate the vegetables on a cheese grater if you’d like, as I demonstrated in my Deviled Egg Salad Sandwich post a few weeks ago. In total, you need three tablespoons of onion and two tablespoons of both carrot and celery.
Chicken For Chicken Salad
I think that the best chicken salad sandwiches are those that are made with leftover whole roasted chicken. Chickens that are roasted whole have more flavour and moisture than boneless, skinless chicken breast. So, I took the breast off a roasted chicken and cut it up with the skin. You can leave the skin out if you’d prefer, but it does add a lot of flavour. As with the vegetables, cut the chicken as small as you can. You’ll need one cup of cut chicken in total.
Making The Best Chicken Salad
Put the chicken and vegetables in a medium mixing bowl. Add three tablespoons of mayonnaise, a quarter teaspoon of kosher salt, and a pinch of black pepper. Mix the chicken salad, taste it and season with a little more salt and pepper as needed. The finished mixture should be creamy but not wet.
Assembling The Sandwiches
This amount of chicken salad should yield between two and four sandwiches depending on how much you load them up. To make the sandwiches lay out your bread and butter it making sure to push the butter right to the edge of the bread all the way around. Top the buttered bread with a quarter to a half cup of the chicken salad mixture. Top with the second slice of buttered bread, slice and serve. If you’d like, you can also add some lettuce to the sandwich.
Wrap-Up
For me, the best chicken salad sandwich is simple, and I think this recipe hammers that point home. Of course, you can take this recipe, change it and make it your own. However, I recommend you try it as written once because I think you’ll be amazed at just how good something with so few ingredients can truly be. Enjoy!
Thank you for coming to Chef’s Notes. I hope you’ve enjoyed this post. The mission of Chef’s Notes is to share over twenty years of professional cooking experience. If you’d like to be a part of that mission, you can share this post on Facebook or Pinterest or leave a comment below and rate the recipe. You can also subscribe to the Chef’s Notes Patreon by clicking here. You’ll get access to exclusive content, including live streams, monthly cooking videos and more. And remember to subscribe to the Chef’s Notes newsletter.
Best Chicken Salad Ever
The Best Chicken Salad Sandwich is made with a few quality ingredients that balance each other to create a simplistic yet delicious sandwich.
Mince or grate the onion, carrot and celery and add them to a medium mixing bowl.
Add the diced chicken, mayonnaise, salt and pepper. Mix well. Taste and adjust the seasoning with salt and pepper.
Spread the butter out onto eight slices of bread. Top four slices of bread with between a quarter and a half cup of the chicken salad. Top with the other pieces of bread, cut in half and serve.
Notes
Lettuce makes a great addition to this sandwich. Leftover chicken salad can be stored in an airtight container in the fridge for up to two days.
Imagine everything you love about Deviled Eggs but in an Egg Salad Sandwich. Is there a better way to up your egg salad sandwich game? If there is, I haven’t found it. This Deviled Egg Salad is creamy, a little spicy, and packed with flavour. It’s perfect for sharing with your friends and family, or if you want something special for yourself. If you, like me, love Deviled Eggs and Egg Salad Sandwiches, then keep reading for the recipe. Also, below you will find a fantastic tip for perfectly cooking and peeling hard-boiled eggs.
Best Hard-Boiled Eggs
Hard-boiled eggs are often overcooked, giving the yolks a greenish colour and sulphurous smell. Unfortunately, this is a surprisingly common problem. So, before we get into the recipe for the Deviled Egg Salad, I think we should look at how to cook and peel hard-boiled eggs perfectly every time.
How To Cook Hard-Boiled Eggs
It doesn’t matter how many eggs you are cooking the process and timing are the same. However, the size of the eggs does matter. The cooking method I’m about to describe is for standard large store-bought eggs. First, put the eggs in a pot and cover them with cold water. Next, place the pot on the stove on high heat and bring it to a boil. As soon as the water starts to boil, set a five-minute timer.
Peeling Hard-Boiled Eggs
As soon as the five-minute timer goes off, drain the hot water out of the pot. Using the back of a spoon, gently tap the eggs a few times to crack the shells in a few different places. Put the pot in the sink and fill it with cold running water. Let the cold water run over the eggs for about five minutes or until the water in the pot is cold. Peel and rinse the eggs. You now have perfectly cooked and peeled hard-boiled eggs.
Why crack the egg shells?
Cracking the egg shells while the eggs are still hot allows the cold water to get between the shell and the egg, making the eggs much easier to peel. Cracking the eggs while they’re cold doesn’t have the same effect. So, you must crack the shells while the eggs are still hot. Also, running the eggs under cold water cools them quickly, so they don’t overcook and get that green colour and off smell.
Grating The Ingredients
While the eggs are cooking, you can set up and prepare the other Deviled Egg Salad ingredients. You need a medium mixing bowl, a cheese grater, and a spatula. First, grate the celery and onion on the largest setting of the cheese grater. In total, you want about two tablespoons of each. If you end up with a little more or a little less, it won’t hurt anything. Then, once the eggs are cooled and peeled, grate those on the cheese grater.
Seasonings and Spices
Next, measure the cayenne, smoked paprika, salt, pepper, and mayonnaise, then mix well with a spatula. Once everything is mixed, taste the Deviled Egg Salad, and adjust the seasoning with salt and pepper as needed. You can also add a few drops of hot sauce if you’d like.
Making Sandwiches
Now that the Deviled Egg Salad is ready, it’s time to make some sandwiches. You can get four sandwiches out of this amount of egg salad. To make the sandwiches, take eight slices of bread, and butter them with softened butter. When making sandwiches, it’s vital that any spread or filling be pushed right to the edges of the bread. You don’t want any bites of the sandwich to be dry or plain. So, take your time when spreading the butter and the filling to cover the bread completely. Next, take a quarter cup of the Deviled Egg Salad and put it on each sandwich. Again, spread it out to evenly coat the bread. Add a bit of lettuce to the sandwich. Top each with a second slice of buttered bread. Slice and serve.
Wrap-Up
I developed this Deviled Egg Salad Sandwich recipe thinking it would be good, but I didn’t expect it to be as good as it was. It’s my new favourite egg salad sandwich recipe, and that’s saying a lot because I love egg salad sandwiches. I’m excited for you to try this. When you make it, remember to come back and leave a rating on the recipe.
Thank you for coming to Chef’s Notes. I hope you’ve enjoyed this post. The mission of Chef’s Notes is to share over twenty years of professional cooking experience. If you’d like to be a part of that mission, you can share this post on Facebook or Pinterest or leave a comment below and rate the recipe. You can also subscribe to the Chef’s Notes Patreon by clicking here. You’ll get access to exclusive content, including live streams, monthly cooking videos and more. And remember to subscribe to the Chef’s Notes newsletter.
Deviled Egg Salad
Everything you love about a classic Deviled Egg but in a sandwich filling. It's creamy, a little spicy, and packed with flavour. The perfect way to take your egg sandwiches to the next level.
Put the eggs in a medium pot and cover with cold water.
Place the pot on the stove and bring to a boil on high heat.
Once the eggs start to boil, set a five-minute timer.
When the egg timer goes off, remove the pot from the heat, drain the hot water, and crack the egg shells with the back of a spoon. Put the pot under cold running water for five minutes or until the eggs are cool.
Peel and rinse the eggs. Pat the eggs dry and grate them on a cheese grater into a medium mixing bowl.
Add the grated onion and celery to the eggs. Mix in the mayo, cayenne, smoked paprika, salt and pepper. Mix well. Taste and adjust the seasoning as needed with salt and pepper.
To assemble the sandwiches, spread the butter on the eight slices of bread. Top four slices of bread with the egg salad mixture. Put the lettuce on the egg salad, then add the second piece of bread, slice and serve.
Sometimes in life, you get a craving that won’t go away until you satisfy it. It nags at you constantly like a siren’s songs calling you to the rocks. You know you shouldn’t. You know it’s bad for you. But you can’t help yourself. You awaken with a shot in a foggy dream-like haze. You’re in a well-used kitchen, dirty pots and pans surround you. The smell of cooked onion and ground beef fills your sinuses. You feel a weight in your right hand. Your eyes glance down as your hand lifts a burger to your mouth. You see it happening in slow motion. You feel yourself take that first bite, fighting the urges. “No!” You say quietly to yourself. “I’m a good boy.” but you can’t stop yourself. Before you know it, you are left with nothing but grease-covered hands and a dumb satisfied look on your face. Was it a dream? Was it a nightmare? No. It was a Philly Cheesesteak Burger. Craving satisfied. Let’s get to it.
The Burger Patties
All joking aside, this Philly Cheesesteak Burger is wicked good. The patties are a combination of cooked onion, ground beef, garlic, salt and pepper. They are cooked in a pan, topped with fried mushrooms and onions, and provolone cheese. The burger is finished with a little mayonnaise and barbecue sauce, and a delicious bun. Yes, it is as good as it sounds. The first step in making these burgers is to cook some onions.
Onions
Dice one onion. You want about a cup of onion in total. Heat a small frying pan over medium-high heat and add a teaspoon or two of oil (canola or olive). Add a quarter teaspoon of Kosher salt to the onions and cook until they soften and start to brown. Add two tablespoons of beef stock to the pan and cook until it has completely evaporated. Take the onions out of the pan, spread them out onto a plate and put them in the fridge to cool for ten to fifteen minutes.
Mixing The Meat
Use one pound (454 g) of lean ground beef. Not extra lean. The burgers will be way to dry. Add the cooked and cooled onions, half a teaspoon of Kosher salt, a quarter teaspoon of black pepper, and a teaspoon of minced garlic. Mix well.
Forming The Patties
Line your cutting board with plastic wrap. Divide the meat into four evenly sized portions. Take one portion and flatten it into a patty. Place the flattened meat on your plastic-covered cutting board and continue to flatten it until it is one centimetre thick. Cup your hands around the patty to make it circular. Repeat with the rest of the meat. If the meat is sticking to your hands, wet your hands with cold water before shaping the next burger. Put the burgers and plastic wrap on a plate and put it in the fridge for ten minutes to firm up a little bit. You can leave the burgers in the fridge, covered for up to two days before cooking them.
Mushrooms and Onions
While the burgers are in the fridge, slice two cups of cremini mushrooms and two cups of onion. Heat a frying pan on medium-high, then add in a tablespoon of oil. Put the mushrooms and onions in the pan and cook for three to four minutes or until the onions start to soften. Add half a cup of beef stock and cook until it is fully evaporated.
Cooking The Burgers
Heat a large frying pan over medium-high heat. Add in a teaspoon or two of oil, then the burgers. I only cooked two burgers because there were only two of us. The other two burgers were left in the fridge for later enjoyment. Cook the burgers for four to five minutes per side, or until the juices run clear when the burger is pressed in the middle.
Finishing The Philly Cheesesteak Burger
Top the burgers with onions and mushrooms and provolone cheese. Pour two to three tablespoons of beef stock or water into the bottom of the pan and cover with a tight-fitting lid for a minute or until the cheese is melted. Toast the burger buns, then spread a teaspoon of mayonnaise on the bottom and a teaspoon of barbecue sauce on the top. Put the burgers on the buns and enjoy.
Alternative Recipe
It is common for a Philly Cheesesteak to have Cheese Whiz on it. Truth be told, that’s what I was craving, but I don’t typically have Cheese Whiz in the house becasue if I do, I eat the whole bottle. I know it’s gross, I get. But, it’s one of those things. If you want something really special, get rid of the provolone, and add a few tablespoons of Cheese Whiz to the mushrooms and onions once they’re cooked. Spoon the mushroom, onion, and Cheese Whiz mixture over the burger, and enjoy. If you are going to go the Cheese Whiz route, you can get rid of the mayo and barbecue sauce or keep them. That’s up to you.
The Philly Cheesesteak Burger
A delicious Philly Cheesesteak-inspired burger that you will love. The burger has sautéed onions in it and is topped with sautéed mushrooms, more onions, and provolone cheese. It's finished with mayo and barbecue sauce.
Heat a small frying pan over medium-high heat. Add in 1 tsp of canola oil and diced onions. Cook for 3 to 4 minutes or until the onions soften and start to brown. Add the beef stock and cook until it is completely evaporated. Spread the onions out onto a plate and put in the fridge to cool for 10 minutes.
In a medium mixing bowl, combine the ground beef with the cooked and cooled onions, garlic, salt, and pepper and mix well. Divide the meat into four and form into 1 cm thick patties. Put the patties in the fridge for 10 minutes to set.
Heat a large skillet over medium-high heat. Season the burgers with salt and pepper. Add in 1 tsp of canola oil to the hot pan along with the burgers. Cook the burger for 4 to 5 minutes per side or until the juices run clear when the middle of the burger is pressed.
Finishing the Burger
Heat a medium frying pan over medium-high heat. Add in 1 tsp canola oil, the sliced mushrroms and onions. Cook for 3 to 4 minutes then add in the beef stock and cook until it has evaporated.
Put the mushrooms and onions on the burgers, top each with a slice of provolone cheese. Put 2 to 3 tablespoons of water or beef stock in the bottom of the hot burger pan, cover and steam for 1 minute or until the cheese is melted.
Toast 4 buns spread the mayo on the bottom bun and the barbecue sauce on the top bun. Put the burgers on the buns and enjoy.
I think we’ve all had cravings that just won’t go away. Thankfully, this burger satisfied a craving that I’ve been having for weeks. If you like Philly Cheese Steaks, I think you will really like this burger. In fact, if you like burgers at all, you are really going to like this burger. I certainly did. What is a food craving you get that won’t go away until it has been satisfied?
I can finally announce that I have written a cookbook. It’s called the 5-Ingredient Cookbook for men (of course, it is for everyone). It officially goes on sale on March 16th, but you can preorder it now from Amazon in Canada here, and Amazon in the US here.
Thank you for reading this post. Please share it on Facebook, Pinterest, or Twitter to help Chef’s Notes grow. Subscribe to Chef’s Notes below, and you will never miss a post again.
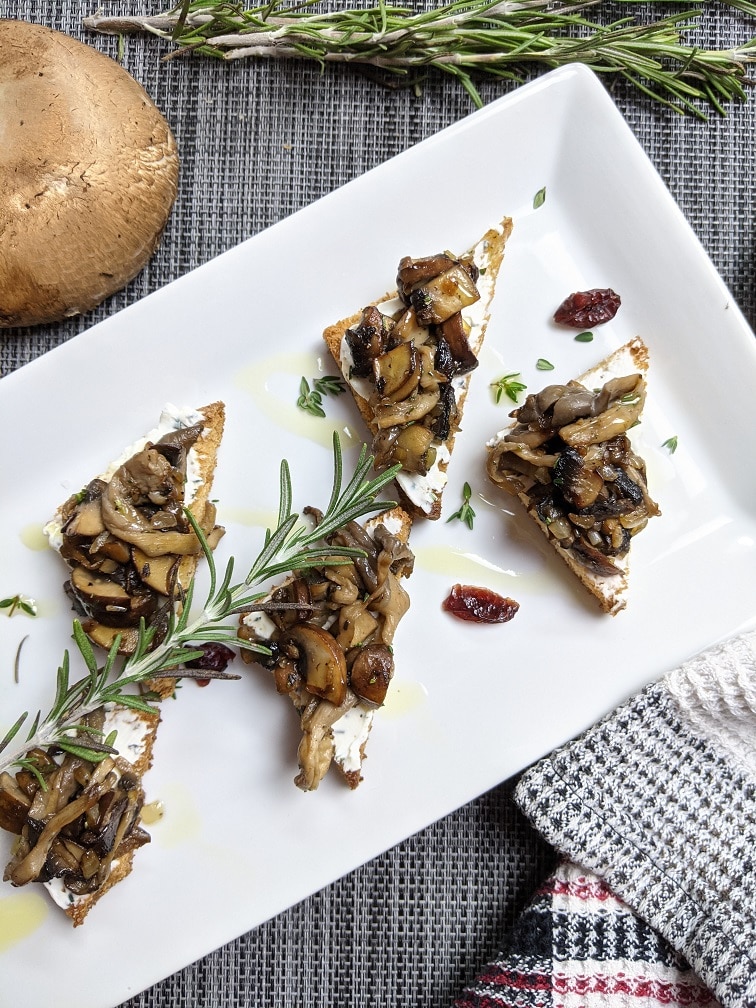
For the final Chef’s Notes post of the year, I wanted to share something very special with you. If you are looking for the perfect hors d’oeuvre for your Christmas party, New Year’s Eve, or just for a romantic evening, look no further. Mushrooms on toast with herbed cream cheese is exactly the thing for you, as long as you like mushrooms. Let’s take a look at what may just become your new favourite snack and your go-to party treat. Let’s get to it.
The Toast
You obviously can’t have mushrooms on toast without toast. So, first up, we need to toast some bread. The bread I use for this is Promise Gluten-Free Sourdough. You can use any bread you want but don’t cheap out. Please, don’t use regular white bread for this. It deserves better. Buy a loaf of sourdough or a baguette or something like that. Cut the bread into quarter-inch (1 cm) thick pieces. I like to cut the crusts off, though you don’t have to. Put the bread on a sheet pan, drizzle or brush it with olive oil, season it with salt and pepper, then bake at 400°f for about twelve minutes or until the bread is golden brown and crisp. The bread should be crunchy on the outside but soft in the middle. In total, you want eight little triangles for this recipe.
Mixing The Cream Cheese
The second part of this dish is cream cheese. Usually, when I do this, I use ricotta rather than cream cheese, but ricotta can be expensive, and cream cheese makes a good, cheaper option. However, if you want to use ricotta, the recipe is the same. You can also skip this step altogether if you’d like and buy some herb and garlic cream cheese, though I find it tastes better if you mix it yourself.
To make the herbed cream cheese, allow half a cup of cream cheese to soften at room temperature for about thirty minutes. Add a half teaspoon of each fresh chopped rosemary and thyme and a quarter teaspoon chopped garlic to the softened cream cheese. Mix well and set aside.
Cooking The Mushrooms
The final component of Mushrooms on toast with herbed cream cheese is, of course, mushrooms. The mushrooms that I used are a small portabello, three large creminis and a few oyster mushrooms. In total, it worked out to be a half cup of each mushroom after they were cut. Thinly slice the creminis, dice the portobellos, and pull the oyster mushrooms apart. The idea is to cut the mushrooms into different shapes to create a variety of textures. You can use whatever types of mushrooms you’d like, but you should try and cut them all differently.
Cooked along with the mushrooms are a quarter cup of minced onion, one teaspoon of minced garlic, and half a teaspoon each of chopped thyme and rosemary.
Cooking the mushrooms
To cook the mushrooms, heat a medium skillet over medium-high heat. Add in one tablespoon each of butter and olive oil. Once the butter melts and starts to foam, add in the onion and cook for three minutes or until the onions start to soften. Add in the mushrooms and garlic—Cook for four to five minutes or until the mushrooms start to brown. Add in the herbs, and season with salt and pepper. The mushrooms are done when they are tender and lightly browned. There should be no excess moisture in the bottom of the pan. If there is, it means that your pan wasn’t hot enough, or you added too many mushrooms for the pan’s size. If you want to double this recipe, either use a larger pan or cook the mushrooms in batches.
Mushrooms on Toast With Herbed Cream Cheese
To assemble the hors d’oeuvre, spread a layer of the cream cheese on a piece of toast, top with a few spoonfuls of the mushrooms. Put the mushrooms on toast on a platter, drizzle lightly with olive oil, and sprinkle some thyme leaves around. Serve warm.
You can also make this with two full pieces of bread and serve it as it is for breakfast or top it with a fried egg. It is also great for lunch served with a salad.
Mushrooms on Toast with Herbed Cream Cheese
Are you looking for the perfect Holiday Hors d'Oeuvre? This is just the thing you're looking for. Sautéed mushrooms, on crispy bread, with cream cheese mixed with fresh herbs and garlic.
Keyword: Christmas, cream cheese, Mushrooms, party food
Servings: 8pieces
Author: Chef’s Notes
Ingredients
Toast
2slicessourdough breadcrusts cut off, and cut into four triangles
1tbspolive oil
salt
pepper
Cream Cheese
1/2cupcream cheeseroom temperature
1/2tsprosemary
1/2tspthyme
1/4tspgarlic
Mushrooms
1tbspof olive oil
1tbspbutter
1/4cupminced onion
1/2cuppulled Oyster mushrooms
1/2cupdiced Portabello mushrooms
1/2cupsliced Cremini mushrooms
1tspgarlic
1/4tspsalt
1/8tsppepper
1/2tspchopped rosemary
1/2tspchopped thyme
Instructions
Toast
Put the bread on a sheet pan and drizzle or brush with olive oil. Season the bread with salt and pepper, then bake at 400°f for 12 minutes or until the bread is golden brown. It should be crisp on the outside and soft in the middle.
Cream Cheese
In a small mixing bowl, combine the softened cream cheese with the herbs and garlic. Mix well.
Mushrooms
Heat a medium skillet over medium-high heat. Add in the olive oil and butter. Once the butter melts and starts to foam, add in the onion and cook for 3 minutes or until the onion softens.
Add the mushrooms and garlic to the pan and cook for another 5 to 6 minutes or until the onions brown.
Add the herbs, and season with salt and pepper.
Mushrooms on toast with herbed cream cheese
Spread the cream cheese evenly on the eight pieces of toast.
Divide the mushrooms evenly among the toast then plate them on a platter.
Drizzle with a little olive oil and granish with some thyme leaves.
Lik the pear and blue cheese tarts from a few weeks ago, Mushrooms on Toast with Herbed Cream cheese are among my most popular hors d’oeuvres. Now, you can make it at home whenever you want. Enjoy!!
As I said in the intro to this post, this is my last post of the year. I’m going to take some time off to relax and spend with my family. I’ll be back on January 4th with all new posts. The first week back we are going to jump into two new series. The Wednesday series will be Hearty Soups, and the Friday series (which is a mini-series) will be all about Roasts. I am really excited about the New Year, and I hope that you are too.
Have a fantastic Christmas, or whatever you celebrate and a very Happy New Year. I’ll see you right back here in 2021.
Thank you for reading the post. If you liked it, remember to share it on Facebook, Pinterest, or Twitter. Did you know that Chefsnotes.com has over 400 posts just like this one? Subscribe to the blog below, and you will be notified of every new post so you will never a helpful tip or recipe again. And if you would like to know more about me, click the picture of me below to read my story “Life on the line.”
I first became aware of the Cuban Sandwich while watching the movie “Chef.” The film is based around the main character’s love and passion for this Sandwich. He quits (or gets fired depending on how you look at it), a fancy restaurant job, and on the advice of his ex-wife, starts a food truck selling Cuban Sandwiches. “Chef” is one of the best food movies out there, and I highly recommend it if you haven’t seen it. There is also a spin-off show on Netflix called “The Chef Show,” which is one of the best food programs out there right now. Again, I highly recommend that too. Anyway, this post isn’t about that movie or TV show. It’s about a sandwich. The Cuban Sandwich is very simple, but I swear it is one of the best sandwiches you will ever eat. Let’s get to it.
What is a Cuban Sandwich?
First of all, a Cuban Sandwich isn’t actually Cuban. From what I understand, except for really touristy areas, you are unlikely to find this Sandwich anywhere in Cuba. It is actually from Flordia. The sandwich’s real history is a little unclear, but basically, it is a Cuban immigrant version of the American ham and cheese sandwich. And yeah, the Cubans do it way better than the Americans do.
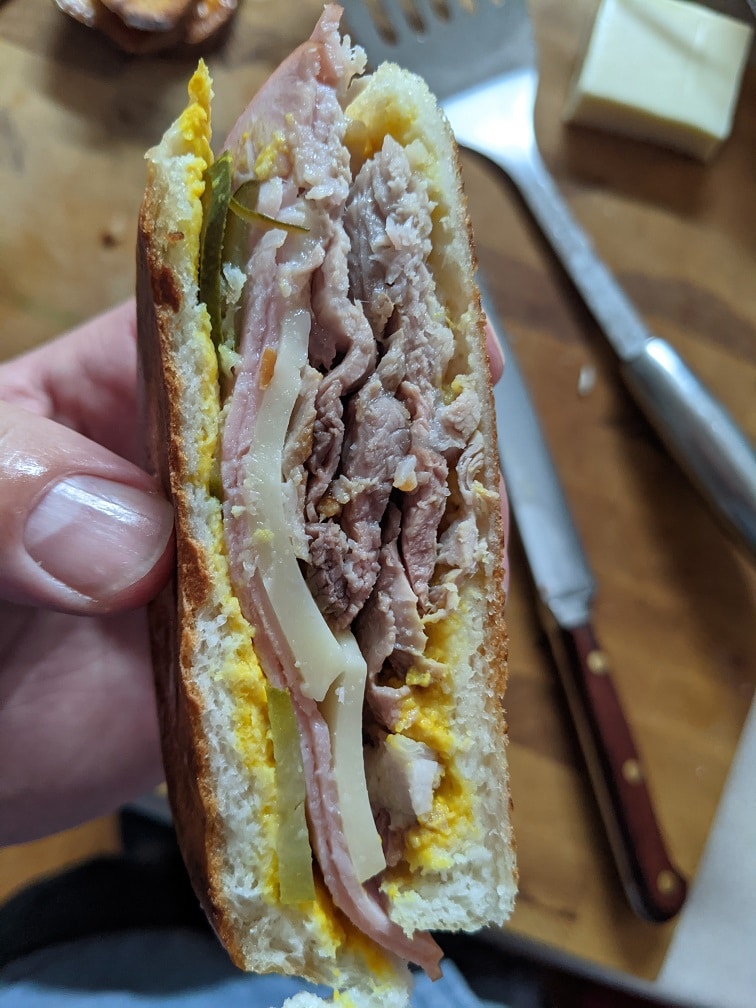
The ingredients for a Cuban Sandwich are Cuban bread (we’ll talk about this in a minute), ham, Swiss cheese, roasted pork, dill pickle, and mustard. It doesn’t even sound that good when you list it out like that, but I promise it is. The pork is no ordinary pork. It is marinated in Cuban flavours for 12 hours then slow-roasted to perfection. Don’t worry; we’re going to go into that in-depth in a second. This sandwich’s key is that it is grilled and pressed to toast the bread and heat everything up slightly. I’m drooling just thinking about it.
The Pork
The Marinade
The pork for the Cuban Sandwich is marinated (or brined depending on how you look at it) in a mixture of garlic, orange juice, vinegar, brown sugar, salt, thyme, bay leaves, and pepper. You can find the measurements in the recipe below. The shortened version of the recipe is, combine all the ingredients and marinate the pork for a minimum of twelve hours.
The Pork
The pork that you want to use for a Cuban sandwich is pork shoulder. Pork loin is too lean and will end up dry. Pork shoulder has just the right amount of fat to keep the pork succulent. If the pork shoulder has skin on it, take it off. Then score the fat with a sharp knife. Scoring the fat will help the marinade penetrate the meat more deeply. It will also help the fat get nice and crispy.
Roasting The Pork
Once the pork has marinated overnight, heat the oven to 350°f, put the pork on a rack over a roasting pan. Season the pork the salt and pepper, and roast it for about two and a half hours or until a thermometer reaches 165°f. You may want to flip the pork halfway through cooking, but it isn’t strictly necessary. Once the pork comes out of the oven, let it rest for about twenty minutes before slicing.
Mix all the ingredients except the pork togehter in a medium mixing bowl.
Remove any skin from the pork, and score the fat with a sharp knife.
Put the pork in a large ziplock bag and pour the marinade over it.
Seal the make, make sure the pork is covered in the marinade and put it in the fridge overnight.
Take the pork out of the marinade, season it with salt and pepper and roasted it on 350°f for 2 1/2 to 3 hours or until the pork reaches an internal temperature of 160°f.
Take the pork out of the oven and let it rest for 20 minutes before slicing it.
Cuban bread is like a French baguette crossed with soft Italian bread. It has a thin flaky crust and a light, airy crumb. The shape is more rectangular than round like a traditional baguette, and it is generally about three feet long. You’re probably going to have some trouble finding Cuban bread. You can substitute it with a soft baguette, French bread, a crusty roll, or like I did, a gluten-free hamburger bun. No matter what bread you are using, make sure to toast the inside lightly.
Making The Sandwich
To make the Cuban Sandwich, spread a thin layer of mustard on each half of the lightly toasted bread, then top with sliced dill pickles, ham, Swiss cheese*, and the roasted pork. Butter the outside of the bread and toast it on each side in a hot pan or a hot sandwich press. If you don’t have a sandwich press, don’t worry. Just flip it every minute and a half or so and push it down with a spatula. The sandwich is done when the bread is toasted, and the insides are warm. Now take a bite and experience the flavour that your life has been missing.
*I bought Swiss cheese and it got lost in the grocery bags and left out at room temperature for three days. This was a real bummer because it like $13 worth of cheese. So, instead of using Swiss cheese, I used Mozzarella which was still very delicious.
Cuban Sandwich
A delicious and flavourful sandwich made with roasted pork, ham, cheese, mustard, and pickles.
Brush the inside of the rolls with mustard then tops with pickles, ham, Swiss cheese, and the pork.
Heat a large frying pan on medium heat. Brush the outside of the rolls with butter and put them in the pan. Toast on one side for 2-3 minutes then flip. Press the sandwiches with a spatula to flatten slightly. Cook the sandwiches until the cheese starts to melt then serve.
I can’t stress enough how good this sandwich is. Make it. You will so happy that you did. Any leftover pork can be eaten with rice, beans and sweet potato, Cuban style. I can’t think of a better way to put this Gourment Sandwich Series to bed then with this sandwich that comes as close to perfection as possible. Once again, do yourself a favour and make this sandwich.
What was your favourite sandwich in the series? Or is there a sandwich that you think I should have featured? Tell me about it in the comments or on social media.
Thank you for reading the post. If you liked it, remember to share it on Facebook, Pinterest, or Twitter by clicking the icon to the left of the right of the page. Did you know that Chefsnotes.com has almost 400 posts just like this one? Don’t ever miss a post again. Become a Chef’s Notes member right here. You will be notified of every new post. And if you would like to know more about me, click the link below to read my story.
Last week in the Chef’s Notes Gourmet Sandwich Series, I showed you how to make the Ultimate Grilled Cheese. This week we are going to make another kind of grilled cheese, the French kind. We will make a Croque Madame, which, if you don’t know, is just a Croque Monsieur with an egg on the top. Does that clarify things for you? No? Oh, okay, well, let me explain in a little more detail then.
Croque Madame vs. Croque Monsieur
Like I said in the intro, a Croque Madame is a Croque Monsieur with an egg on it. But that begs the question, what is a Croque Monsieur? A Croque Monsieur is a French ham and cheese sandwich. Of course, the French always take things up a notch, so this is no everyday ham and cheese. The French take Brioche Bread, top it with bechamél, lots, and lots of Swiss cheese, ham, more bechamél, bread, even more bechamél, and more cheese. The sandwich is baked in the oven to warm it through then finished under a broiler to brown it. Yeah, that’s a god damn sandwich. To make the sandwich a Croque Madame, the already ridiculously decadent beast is topped with a sunny side up egg. Does that sound like something you can get behind? Good, then let’s make one.
Make a Bechamél Sauce
First up, we need to make a quick bechamél. To do that, melt 1 tbsp of butter, then stir in 1 tbsp of flour. I used Bob’ Red Mill All-Purpose Gluten-Free flour if you are wondering. Stir the melted butter and flour together for a minute or two, then add in 1 cup of whole milk. Stir on medium-low heat until the milk starts to thicken. Season the bechamel with a pinch of salt and pepper, a pinch of nutmeg, a pinch of onion powder, and a pinch of garlic powder. Continue to cook the bechamél until you can no longer taste raw flour. This should take about 10 minutes in total. Make sure to stir it almost non-stop throughout the cooking process so it doesn’t burn to the bottom of the pot.
Once the bechamél is made, you can set it aside and move on to the next steps in making this sandwich. The amount of bechamél in this simple recipe makes enough for two sandwiches. You can read more about bechamél and its derivative sauces here.
Simple Bechamél
A quick and simple bechamél sauce for a Croque Monsieur or a Croque Madame
Most commonly, the bread used for a Croque Madame is Brioche, which is an enriched bread. Meaning, it is loaded with milk and butter. You can use any bread you want for this, but the brioche adds a lot to the sandwich. I used Promise Gluten Free Brioche. But again, use whatever you have on hand. Lightly toast the bread before doing anything else. Toasting will help the bread withstand the bechamél and a load of melted cheese. This isn’t strictly traditional, but just like with the grilled cheese last week, I like to brush the bread with a little Dijon Mustard. The mustard adds a bit of tang to cut through the richness of the sandwich.
Once the bread is toasted and brushed with Dijon mustard, spread an even layer of bechamél on all four pieces of the bread.
Making the Sandwich
I used a generic Swiss Cheese to make my sandwich, and I paid for it a little bit. Because I cheaped out on the cheese, my sandwich ended up with a slightly bitter taste. It was still delicious, but it would have been better with better quality cheese. I recommend Jarlsberg Cheddar, Comté, or Gruyere. In total, for the two sandwiches, I used about one very full cup of grated cheese.
Divide the amount of cheese you have in thirds. Divide the first third of the cheese in two and put it on the two bottom pieces of bread. Lay five to six slices of ham on the bottom slices of bread. I used honey roasted ham because it was all I could get at my local grocery store. Use the best quality ham you can find/afford. The quality of the ham, just like with the cheese, will have a direct impact on the overall quality of the sandwich. Top the ham with the second third of the cheese. Then the second piece of bread. Finally, top the bread with more bechamél and the rest of the cheese.
Cooking the sandwich
Put the sandwich on a broiler pan and bake in the oven on 400°f for 10 minutes. Take it out of the oven, turn the broiler on, let it heat up for a minute or two, then put the sandwiches back in. Watch the sandwiches very carefully as they will go from not brown to brown, to burnt very quickly. As soon as the cheese browns, take them out of the oven. Browning should only take a minute or two.
You my friends have just made a Croque Monsieur. But, let’s make this Monsieur a Madame.
Dude looks like a lady
To make the Croque Monsieur a Croque Madame, we have to put an egg on it. I didn’t take any pictures of me cooking the sunny side up eggs, but I have a tip or two that I can share. When making sunny side up eggs, heat the pan over medium heat, then once the egg goes in, turn it down slightly. Also, use a bit more oil or butter than you usually would. Use that extra fat to baste (spoon the hot fat over) the whites. Basting will help cook the whites through so you don’t end up with those dreaded jiggly whites. Once the egg is cooked, slip it on top of the sandwich and enjoy.
Croque Madame
A Croque is a fancy French Ham and Cheese Sandwich (Croque Monsieur) with an egg on top.
1batchbechamel (about 1 cup)see bechamel recipe earlier in post
1 cupGrated Swiss Cheese
12slicesGood Quality Ham
2Eggs
2tbspCanola Oil
1tbspbutter
Instructions
Lightly toast the bread then spread each piece with the dijon and bechamél.
Divide the cheese into thirds. Divide the first thrid in to on to the bottom two pieces of bread.
Top the cheese with the ham slices followed by the second amount of cheese, and the second piece of bread.
Top the sandwich with more bechamél and the remaining cheese.
Bake the sandwiches in a 400°f oven for ten minutes, then under the broiler for 2 to 3 minutes or until the cheese is browned.
Heat a medium non-stick frying pan over medium heat. Add in the oil and butter. Once the butter is melted and starts to foam add in the two eggs. Cook the eggs sunny side up basting the whites to cook.
You will be hardpressed to find a sandwich that tastes better and is more satisfying than this one. Yes, you will need triple bypass surgery after eating it, especially if you have it around the same time as last week’s grilled cheese as I did. But, a life without this sandwich is no life at all. You can quote me on that.
Thank you for reading the post. If you liked it, remember to share it on Facebook, Pinterest, or Twitter by clicking the icon to the left of the right of the page. Did you know that Chefsnotes.com has almost 400 posts just like this one? Don’t ever miss a post again. Become a Chef’s Notes member right here. You will be notified of every new post. And if you would like to know more about me, click the link below to read my story.
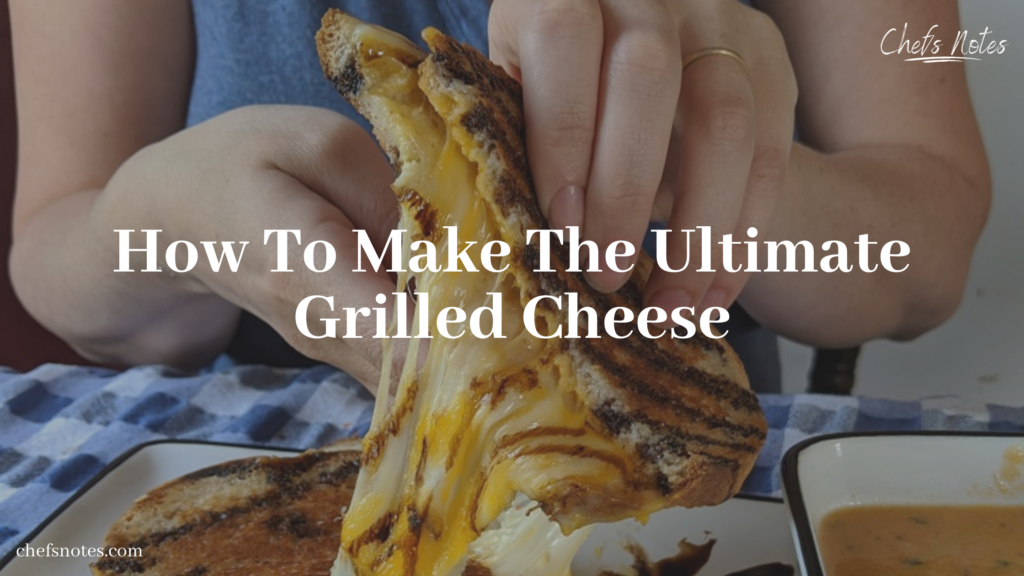
Is there such a thing as too much cheese? I say no. Once you eat this Ultimate Grilled Cheese, you will probably agree with me. We’ve all had grilled cheese before, but today we are going way beyond a Kraft Single melted on white bread. Of course, there is nothing wrong with those old school grilled cheese sandwiches, but sometimes you want something a little special. Sometimes you want to go beyond the ordinary and do something extra. That’s why today, I am going to show you how to make the Ultimate Grilled Cheese sandwich. Because I think you deserve something extraordinary. Don’t you?
Roasted Cherry Tomato Soup
As we all know, you can’t have a grilled cheese sandwich without tomato soup. I think you go to jail for that kind of shenanigan. So, to go with our ultimate Grilled Cheese, we will make The Ultimate Roasted Cherry Tomato Soup. The reason I am using cherry tomatoes to make this soup is simple; I had a pile of them. We got some from our garden, and I was given some. Plus, cherry tomatoes are generally sweeter than their larger cousins, so they make a great soup.
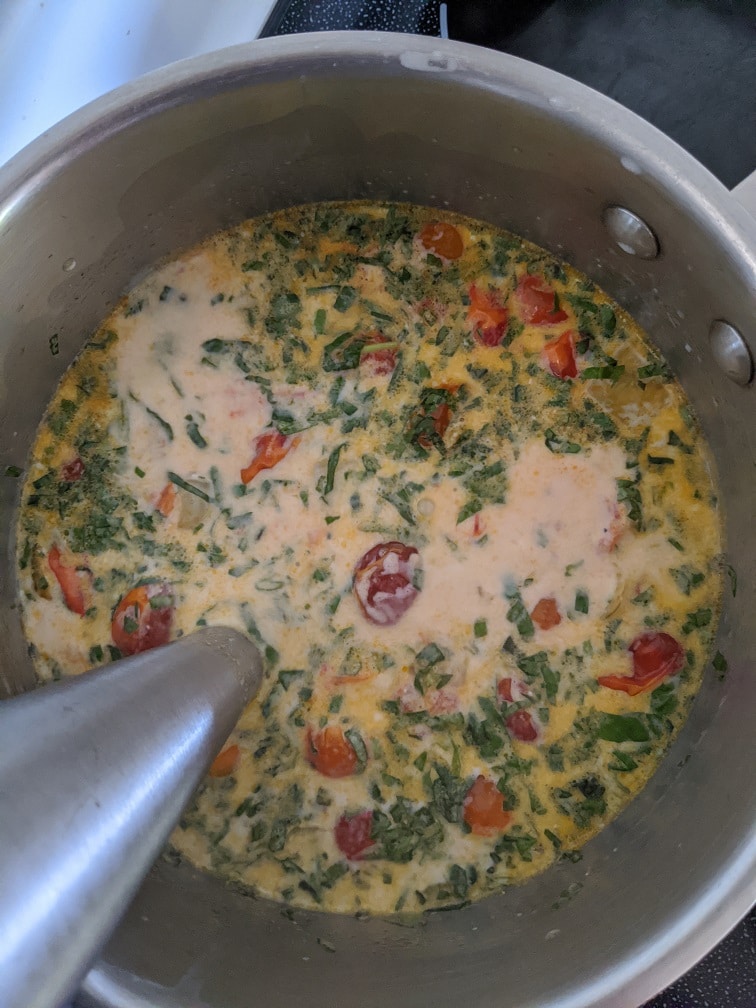
The first step in making this roasted cherry tomato soup is to roast the cherry tomatoes. To do that, combine 4 cups of whole cherry tomatoes with 1 cup of diced onion (keep the onions relatively big, so they don’t burn), and 3 to 4 cloves of peeled garlic. Toss the vegetables with olive oil, salt and pepper. Spread everything out on a parchment-lined sheet pan and roast on 400°F for 40 to 50 minutes or until they look like they do in thesecond picture below. Take the tomatoes, onion and garlic out of the oven and put them in a medium-sized pot.
Cover the tomatoes, onion and garlic with 3 cups of whole milk or 2 cups of 2% milk and 1 cup of Whipping Cream. Turn the burner on to medium heat and cook the soup just until the milk is hot. Next, add in a 1/4 cup of fresh chopped basil and purée using an immersion blender. Taste the soup and adjust the seasoning with salt, pepper, and sugar if needed.
The Ultimate Roasted Cherry Tomato Soup
A delicious homemade tomato soup using up all the extra cherry tomatoes from the garden.
Toss the tomatoes, onion and garlic with the olive oil and a pinch of salt and pepper.
Roast the tomatoes, onion and garlic on a parchment-lined sheet pan for 40-50 minutes on 400°f or until the tomatoes start to shrivel and the onions and garlic are slightly browned.
Put the roasted vegetables in a medium pot over medium heat and add in the milk.
Cook the soup only until the milk is hot then add in the basil and purée.
Taste the soup and season with salt, pepper, and sugar as needed.
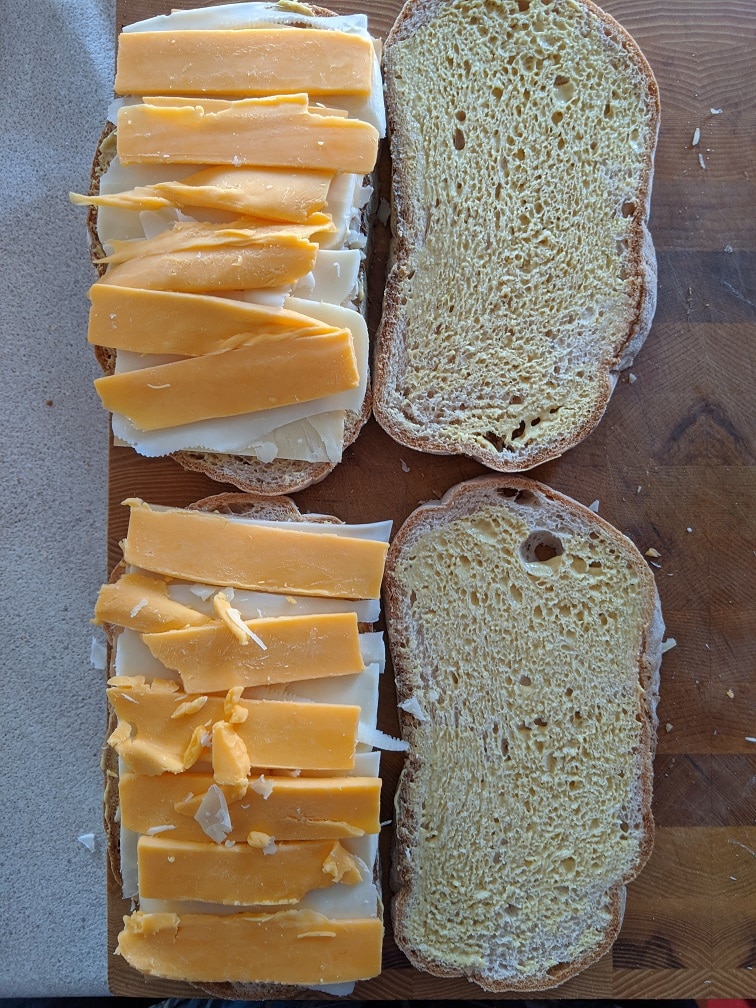
With the soup done and ready, it’s time to get going on the Ultimate Grilled Cheese. You can’t have a great grilled cheese with mediocre cheese. So, the cheese you choose is essential. You don’t have to use the exact cheeses I use, but I do have a few guidelines that you can follow.
First of all, use at least three different kinds of cheese. These should be different flavours and textures. One cheese should be very melty and stringy. For that, I use just a classic Swiss Cheese. Another cheese should have a strong flavour. You can use blue cheese for this, or really sharp cheddar. I used smoked cheddar, which gives the sandwich a nice smoky flavour, with a fantastic sharp cheddar undertone. I suggest using a firm cheese in the mix like asiago or manchego. The smoked cheddar that I used was very firm, so that took the place of a more firm cheese. The third cheese should complement the other two kinds of cheese. It should have a more mild flavour than the second cheese but still, stand on its own. Provolone or gruyere works well here. I used a regular medium orange cheddar for this. I went with orange cheddar because I like that orange colour oozing out of the sandwich.
Now that you’ve chosen your cheese, you have to decide how much of each you would like to use. I used just about equal amounts of each cheese, but if you use something strongly flavoured like stilton, you will want to use less than the other cheese, as for how much cheese in total, that is up to you. I suggest using enough of each cheese to get an even layer on the sandwich.
The Bread
The bread you use to make your grilled cheese is essential too. Having to eat gluten-free, I have limited options. Luckily, I was able to get a loaf of Promise Gluten-Free Sourdough, which is very good. If you can eat gluten, I recommend either sourdough or a nice loaf of French bread. The important thing is that the bread holds up well and gets really crispy when toasted.
Making The Ultimate Grilled Cheese
Okay, we’ve got our cheese, we’ve got our bread, now let’s make a sandwich. The first step and this may seem odd to many of you, but I promise it works well, is to spread Dijon mustard on the bread. Spread a very thin, even layer of mustard on each piece of bread then top with the cheese. I didn’t mention this but cut the cheese as thinly as you can.
Why put mustard on the sandwich?
As I’m sure you can imagine, this sandwich is pretty rich. The mustard will cut through some of that richness, and it also complements the cheese very well. Please don’t skip this step. It goes a long way to making the sandwich what it is.
I can’t believe it’s not butter!
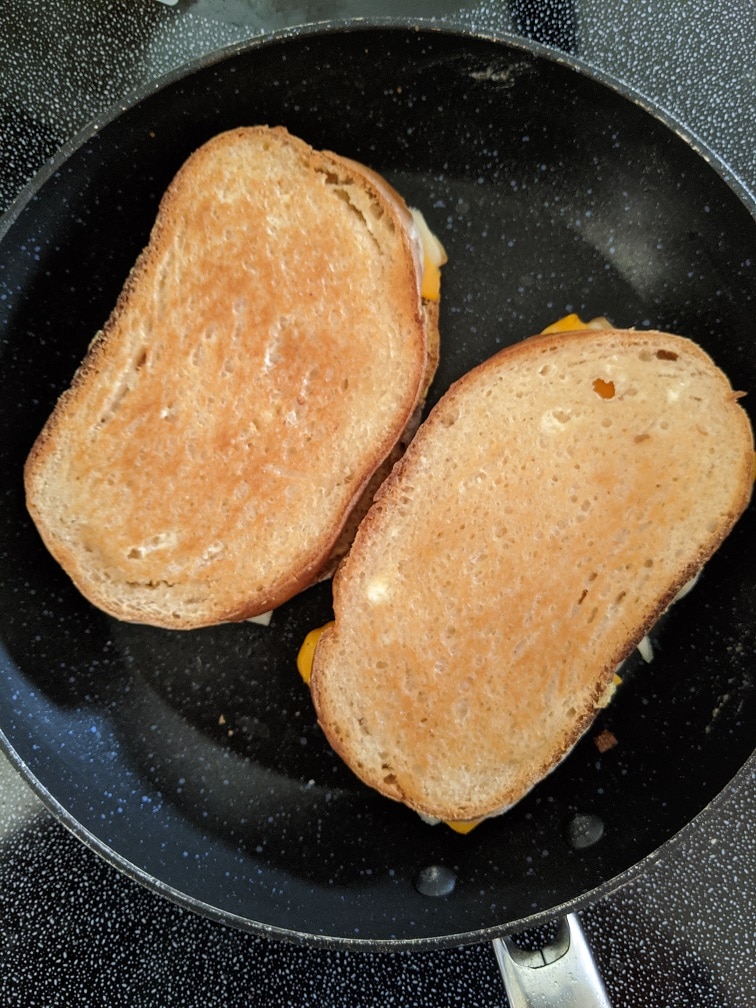
If you are like most people, you probably put butter on the outside of your bread when making a grilled cheese. I mean, why wouldn’t you? But, what if I told you there was a better option. Now let me tell you, I was skeptical about this initially, but I am a full-blown convert now. Instead of using butter as the fat of choice to toast your bread, use mayonnaise. Seriously. I didn’t come up with this, I wish I had of, but I didn’t. I first saw this in Bon Appetit.
Okay, again, I know it seems weird to spread mayo on the outside of the bread before putting the grilled cheese in the pan (with no other fats or oils) but think about it. What is mayo? It is mostly oil, usually corn or canola. As Bon Appetit points out, mayo (because of the oil) has a higher smoke point than butter, which means you are less likely to burn your bread. Mayonnaise is also, again, as BA points out, more spreadable than butter. And, it adds a bit of extra flavour.
“Grilling” The Bread
Okay, the sandwich is made. Dijon on the inside, mayo on the outside. Now, heat a pan over medium heat and put your sandwich in. The key to getting a perfectly browned and crisp exterior while melting the cheese inside is heat control. That means you will have to observe your pan and make sure it isn’t getting too hot. When cooking the grilled cheese, I recommend flipping it multiple times. This will allow the heat to penetrate right the center without burning the bread on one side or the other. Once the bread starts to brown, flip it every minute or so until it is fully browned and the cheese is completely melted.
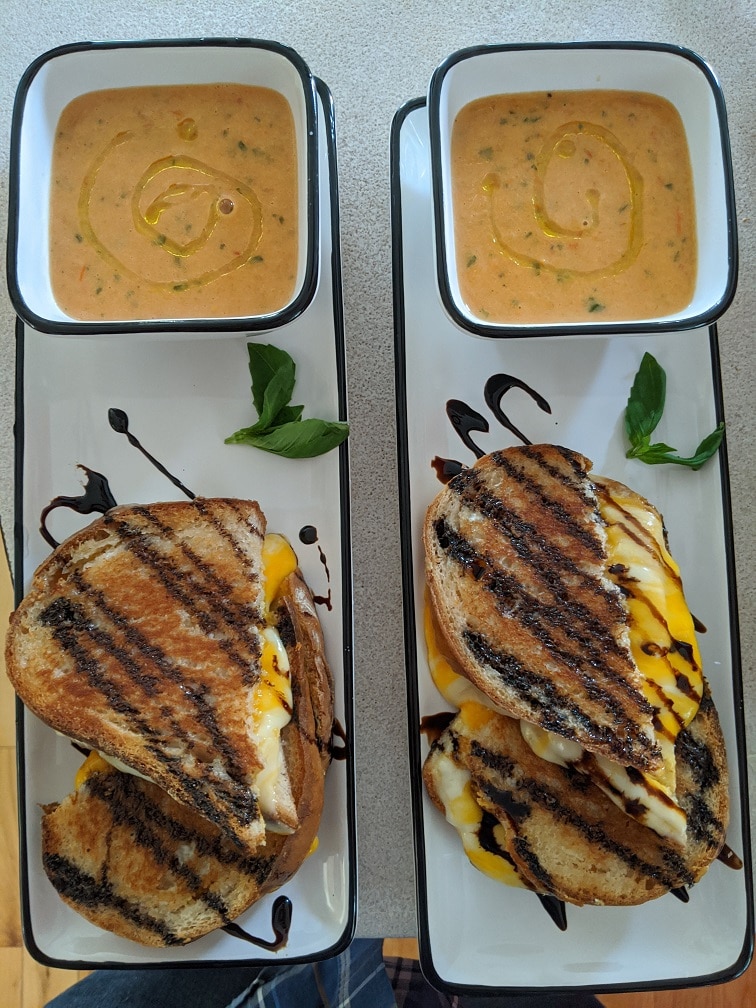
Serving The Ultimate Grilled Cheese
I find that grilled cheese, especially when being served with tomato soup, really needs something extra to cut through the richness. For this job, I use balsamic reduction. It not only adds a great sweet/acidic flavour, but it adds a visual pop too.
What is balsamic recduction?
Balsamic reduction is a mixture of balsamic vinegar and something sweet cooked on low heat for an extended period to evaporate water and concentrate the flavour and texture of the vinegar. I’ve shared a recipe below that I’ve been using for over ten years. It comes from a restaurant I worked at a very long time ago.
Balsamic reduction is great on lots of things, not just grilled cheese. It can be drizzled over scallops or salmon, on crostini, or over fresh tomatoes or for countless other things. The recipe below makes about 2 cups of reduction, maybe a little less, which seems like a lot, but it will last in the fridge for up to six months. Really, it will last pretty much forever.
Balsamic Reduction
Balsamic Reduction is a great all-purpose finishing sauce. It can be served over salmon, scallops, on bread, or just about anything else. Balsamic reduction offers a sweet acidic note to any dish.
To me, the Ultimate Grilled Cheese Sandwich is crispy on the outside and gooey in the middle. And, it has multiple layers of flavour. This sandwich definitely checks all of those boxes. As far as I’m concerned, this sandwich is a 100% must make for anyone who enjoys a grilled cheese, or even just a good sandwich.
Do you have any grilled cheese tips you’d like to share. Leave them in the comments section below or tell me on Facebook.
Thank you for reading the post. If you liked it, remember to share it on Facebook, Pinterest, or Twitter by clicking the icon to the left of the right of the page. Did you know that Chefsnotes.com has almost 400 posts just like this one? Don’t ever miss a post again. Become a Chef’s Notes member right here. You will be notified of every new post. And if you would like to know more about me, click the link below to read my story.
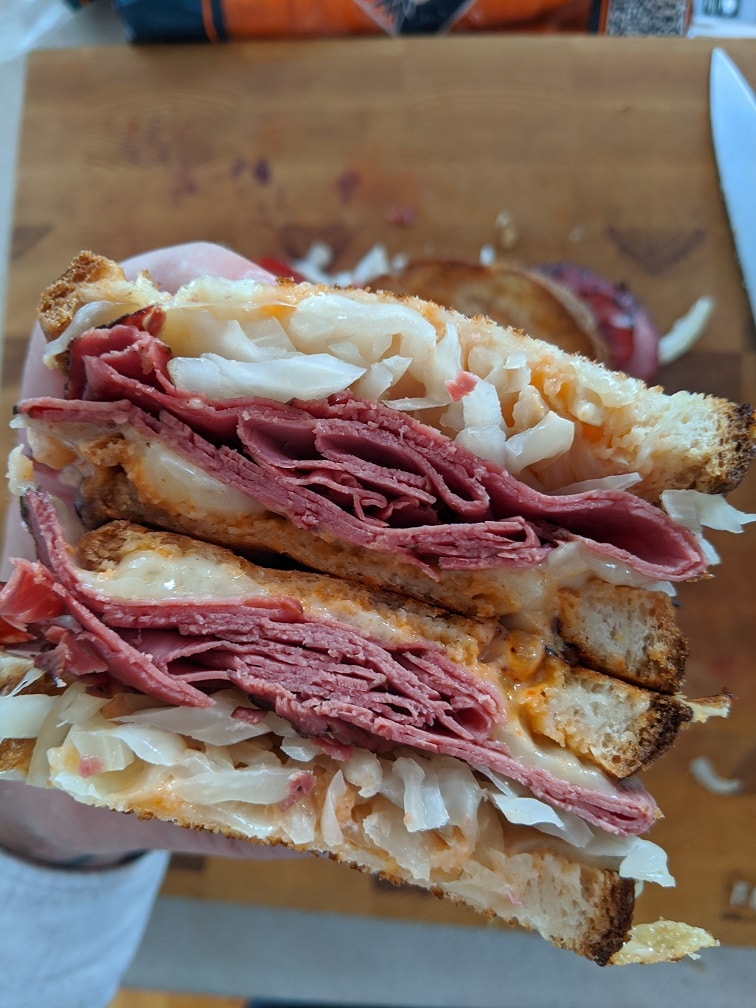
The cold autumn air bites at your summer softened cheeks as the noon bells ring at the church down the street. Your belly rumbles as you open the door to your neighbourhood deli. You step up to the counter, the clerk who has been standing behind that counter for forty years asks you in a straight forward and almost rude way, “Whada ya want?”. There is no hesitation; you’ve been planning this for days. You look him straight in the eye and say, “A Reuben.”. You watch as the people behind the counter shave the corned beef, spread Russian Dressing on the light rye bread, top it with swiss cheese, corned beef, and sauerkraut. Then, they take it over to the flat top or sandwich press and toast it until the bread is crisp and the cheese melts.
You sit down with your Reuben Sandwich, a bag of plain chips and the obligatory dill pickle. The first bite engulfs your senses the saltiness of the meat, the crunch of the bread, the tang of the kraut, the gooey cheese, and familiar yet foreign Russian Dressing. Before you know it, the sandwich is gone, but it stays with you. You dream of the day when you will meet again, for this is no regular sandwich, this is the Reuben Sandwich, and it stands in a class, all on its own.
Never been to a deli? Don’t worry.
You may have never experienced the joy of eating a Reuben Sandwich at your local deli. I haven’t. Where I’m from, there is no deli culture like there is in places like Montreal and New York. So, I didn’t have my first Reuben until about five years ago, and as usual, I had to make it myself. But, that doesn’t mean I can’t dream of my fictional neighbourhood deli as I eat my homemade sandwich. Today, I’m going to show you how to make a Reuben Sandwich that is just as good, if not better than any, that you will find in a deli.
Never had a Reuben? You’re in for a treat.
Maybe, you’ve never had a Reuben before. That is also very possible. Well, if that is the case, then you, my friend, are in for a treat. I’m telling you right now that there is no sandwich like a Reuben Sandwich. I’m excited to share this with you whether you’ve had one or not, but if you haven’t, I’m even more excited for you. You get to experience something extraordinary for the first time, and I get to be a part of that.
Russian Dressing
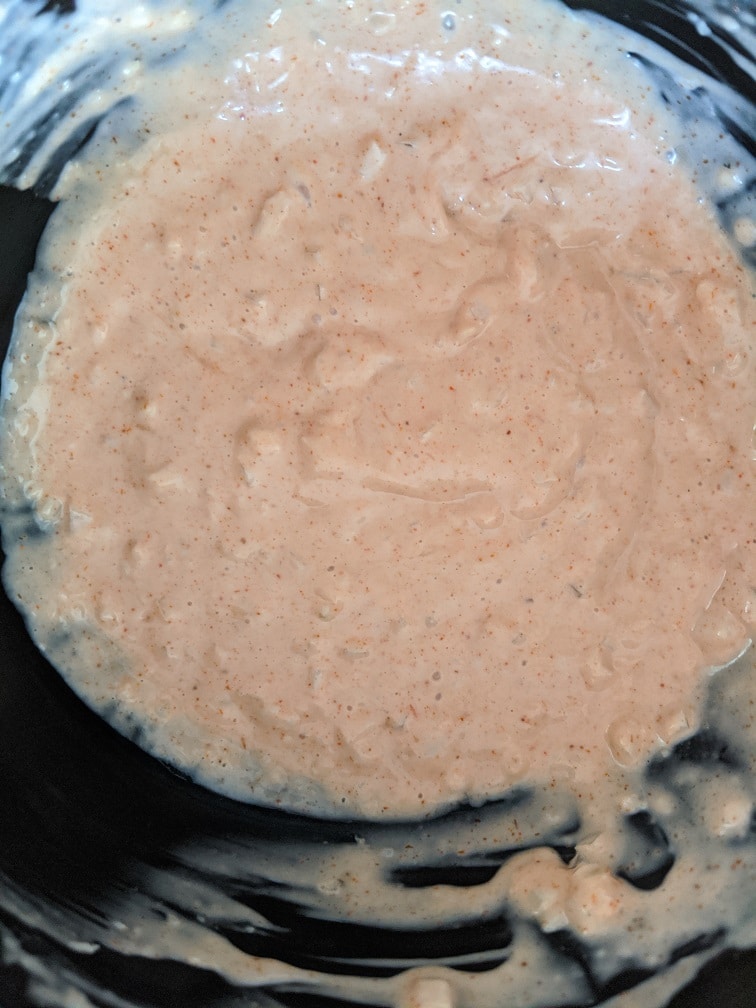
The sauce on a Reuben Sandwich is traditionally Russian Dressing. The Russian Dressing is sometimes substituted with Thousand Island Dressing, but it is not the same thing. Russian Dressing is a mix of mayo, ketchup, horseradish, and a touch of hot sauce with other ingredients such as chopped onion and paprika. My recipe, which you can find below, is based on this recipe from Epicurious. I use mostly all the same ingredients but use different ratios to achieve a slightly more acidic and pungent sauce. I like Epicurious’ recipe but prefer a little more tang. If you make the Epicurious version, you may notice a striking resemblance to Big Mac Sauce from McDonald’s. Keep this sauce recipe in your back pocket for when you want to make homemade Big Macs.
Russian Dressing also makes an excellent dip for vegetables. When we were kids, my mom would make it every time she had to make a vegetable tray for a school function or something like that. Just remember to put the dressing in the fridge for an hour before serving it. This time will allow all the flavours to meld together, making the sauce even better than it initially was.
Russian Dressing (Reuben Dressing)
Classic Russian Dressing for Reuben Sandwiches and of course Big Macs
Traditionally, the bread used for a Reuben Sandwich is Rye. You will sometimes see the sandwiched served on light rye, dark rye, or even marble rye. Unfortunately, I couldn’t find a gluten-free rye-style bread, so instead, I went with gluten-free sourdough bread from Promise Gluten-Free. Promise Gluten-Free bread is the best I’ve ever had. You honestly can’t tell that it is gluten-free. But it is pricey. I think it is about $8 a loaf. Because of the price, I don’t use Promise bread as my everyday bread, but for special things like when I want to make a special sandwich, this is the bread that I turn to.
The Meat
The meat most commonly used for a Reuben Sandwich is corned beef. However, you can also use pastrami or Montreal Smoked Meat. I prefer that little bit of smoke on the sandwich as it helps cut through the richness. Really, it comes down to what you can easily find. For me, Montreal smoked meat is readily available. Use what you can. The sandwich will be delicious, no matter what.
How To Make A Reuben Sandwich
There is more than one way to do anything, and I know that some people are going to read this and exclaim that I am doing it all wrong and there is only one way to do it and blah blah blah. I don’t care. This is how I do it, it’s how I like it, and I think it is best this way. If you believe you have a better way to do it, let me know in the comments, and we can let the world judge.
To make the Reuben Sandwich, spread the Russian Dressing on the bread. Make sure to push the dressing right to the edges of the bread. Put down some swiss cheese, then heat the pastrami (or Montreal Smoked Meat, which is what I’m using) in a pan. Put the meat on the cheese. Next, heat the sauerkraut in the pan, making sure the cook-off any excess moisture. Put the kraut on top of the meat, topped with more swiss cheese, then the second piece of bread. Some people serve the sandwich just as it is, untoasted, but that seems crazy to me.
Toasting The Bread and Melting The Cheese
Rinse out the pan that you used to heat the meat and kraut. Put the pan on medium heat, add in a big spoonful of butter and wait for it to melt and start bubbling. Put the sandwiches in the pan and toast on each side for about three to four minutes or until golden brown and until the cheese melts. I find it best, when doing this on the stovetop, to flip the sandwiches multiple times to prevent burning. Play around with it and find a method that works best for you. Slice the sandwich in half and serve it with plain potato chips and a dill pickle for that authentic deli experience.
Conclusion
There are very few sandwiches that achieve the level of simple perfection that a qualtiy Reuben does. Becase of the contrast between the meat, dressing, cheese, bread, and kraut, there is never a boring bite, there is always something new to taste. Again, if you have never had a Reuben sandwich I beg you to make one and try it for yourself. You will be so, so happy that you did. And, if you have had a Reuben before, it might just be time to have another one.
Thank you for reading the post. If you liked it, remember to share it on Facebook, Pinterest, or Twitter by clicking the icon to the left of the right of the page. Did you know that Chefsnotes.com has almost 400 posts just like this one? Don’t ever miss a post again. Become a Chef’s Notes member right here. You will be notified of every new post. And if you would like to know more about me, click the link below to read my story.
Do you dream of eating a delicious panini whenever you want but don’t own a panini press? Get ready to have your dreams come true. Today, I am going to show you how to make a homemade roasted vegetable panini without a panini press. How are we going to do it? You’ll have to keep reading to find out. Let’s take a look.
The Vegetables
The vegetables used for the roasted vegetable panini are eggplant, zucchini, red bell pepper, and red onion. If you’d like to, you could include portobello mushroom, tomato, other coloured peppers, spinach or anything else you’d like. We have to cook the vegetables before they go on the sandwich, but first, we have to salt the eggplant.
Salting the Eggplant
Why do we have to salt the eggplant?
Salting eggplant does two main things. The first is that it removes moisture from the eggplant, giving it a more firm texture when cooked. The second thing that salting the eggplant does is remove bitterness. Eggplant on its own can sometimes be bitter. As the salt pulls moisture out of the vegetable (eggplants are technically a berry), it also pulls out some of the flavour compounds that cause bitterness.
How to salt an eggplant
To salt, the eggplant (I bought the smallest eggplant I could find), wash it well, then slice it into 1-centimetre rounds. Lay a piece of paper towel or a clean dish towel down on a sheet pan and sprinkle it generously with salt. Lay the eggplant on the towel in one even layer, sprinkle more salt over the eggplant, then cover it with another towel. Let the eggplant sit for about half an hour, then rinse each piece well under cold water. Pat the eggplant dry and you are good to go.
I know that this may seem like a lot of work, but it is absolutely worth the effort. The flavour and textural difference between an eggplant that has been salted and one that hasn’t is night and day. This small thing can make the difference between a person loving eggplant and hating it.
Other Vegetables
While the eggplant is sitting with the salt, prep the rest of the vegetables. In total, I used one small eggplant, one red bell pepper, one zucchini, and one red onion. This amount of vegetables made enough for about six sandwiches. However, any leftover vegetables can be tossed in a salad, a pasta, or warmed and eaten as a side dish. So, don’t worry about having extra. It won’t go to waste.
To prep, the vegetables, wash them all very well, then cut the sides, top and bottom off the pepper. Discard the seeds and stem and cut the peppers into 2 cm x 2 cm pieces (these don’t have to be exact). Cut the ends off the zucchini then cut it into 1 cm thick pieces on a sharp angle. Finally, peel the onion, and cut it into 2 cm x 2 cm pieces (again, these don’t have to be exact). Once the eggplant is ready and rinsed, cut the pieces in half and add to the other vegetables.
Roasting the Vegetbles
Put all the vegetables in a large mixing bowl with 2 tbsp of olive oil and a generous amount of salt and pepper. Toss all the vegetables together then spread out on a sheet pan lined with parchment paper. You may need to use two sheet pans depending on how big your vegetables are. Roast the vegetables in a 400°f oven for 30 to 35 minutes, flipping halfway through. The vegetables are done when they are tender and slightly browned. Take them out of the oven and let them cool slightly.
Pesto Mayo
While the vegetables are roasting, take a minute to throw together some pesto mayo. Combine 3 tbsp of pesto (you can find the pesto recipe in last week’s sandwich post here) with 1/2 cup mayo. This amount will be enough for four sandwiches. If you make extra, you can store the mayo in the fridge for up to a week.
Putting the Sandwiches Together
The bread typically used for a panini is an Italian bun or sandwich roll. I am using Udi’s Gluten-Free Hotdog Buns. I would prefer Kinnikinnick Buns, but my local grocery store was out. The Udi’s ones, make a decent substitute. If you have to eat gluten-free as I do, hotdog buns make a fantastic sandwich bun.
To make the sandwiches cut the bun in half, spread the pesto mayo on, then top with the roasted vegetables. A sandwich like this needs some cheese to tie it all together. I used provolone, which added a sharp flavour to the sandwich. You can use mozzarella, swiss, or whatever else you would prefer. Put the cheese on, then put the sandwich on your super expensive and fancy panini press. Oh, you don’t have one of those…yeah, me either. Let’s see how to turn this vegetable sub into a vegetable panini without expensive equipment.
Pressing Paninis Without A Panini Press
To toast and press a panini without a panini press, we are going to go as low tech as we can get. Heat two pans over medium-high heat. Brush the sandwiches, top and bottom with olive oil, then place in one of the pans. Put the other pan on top of the sandwiches and press straight down. Leave the sandwich alone for a minute or two, or until golden brown on the bottom. Flip the sandwich over and do the same thing. The panini is ready when the bread is toasted, and the cheese is melted. If you notice that the bread is getting a little too dark, but the cheese isn’t melting, you may want to put the sandwich in the oven on 350°f for a few minutes to heat it through.
I used a grill pan to make my panini, but you don’t have to. The only reason I used it is that I have it. The only reason I have it is because it was given to me by T-fal last year. Use what you have, that’s kind of the whole point.
Roasted Vegetable Panini
After a few minutes of squishing a sandwich between two pans, we have a delicious roasted vegetable panini with pesto mayo and provolone cheese. If you would like the sandwich to have a little more acidity you can marinate the vegetables in balsamic vinegar, or drizzle the sandwich with a balsamic reduction after it is cooked. Either way, that acidity will make the flavour of the sandwich really pop.
Conclusion
Although this may seem like a lot of work for a sandwich, it isn’t that bad. The vegetables can be made a day or two ahead of time, and again, any extras can be used for a variety of other purposes. More than anything, I hope that you see how you can make delicious paninis at home without spending a bunch of money on a grill press. One word of caution, make sure the pans aren’t too hot when you put the sandwich in. I burnt my first batch. We still ate them, but they weren’t very pretty.
Thank you for reading the post. If you liked it, remember to share it on Facebook, Pinterest, or Twitter by clicking the icon to the left of the right of the page. Did you know that Chefsnotes.com has almost 400 posts just like this one? Don’t ever miss a post again. Subscribe to Chef’s Notes by putting your email address in the subscription box below or by becoming a Chef’s Notes member right here. You will be notified of every new post. And if you would like to know more about me, click the link below to read my story.
Let’s talk about sandwiches. This week, along with the Eating on a Budget Series, I am also launching a Gourmet Sandwich Series to take the place of the Simple Summer Dessert Series that ended last week. The first sandwich in the series is a Gluten-Free Chicken Parmesan Sandwich. If you don’t have to or don’t want to eat gluten-free, you can easily make this with full-on gluten ingredients. No problem. Just as a side note, for those of you that don’t know, everything on this site is gluten-free, whether it is labelled “gluten-free” or not. Now you know.
The Chicken Parmesan Sandwich is chicken breast, pounded thin, cut into bun-sized pieces, breaded, pan-fried, finished in the oven, put on a bun toasted with pesto butter, covered with marinara sauce and mozzarella cheese then broiled. Are you drooling yet? I am. Beyond the sandwich, in this post, you will find recipes for both the marinara and the pesto. Let’s take a look.
A quick note about eating gluten-free
I am a person who has no choice but to eat gluten-free. Gluten, unfortunately, makes me very sick. But, that doesn’t mean that I don’t still love junk food and gluttonous sandwiches. The majority of the gluten-free recipes I find on the internet are all based around healthy eating. That’s fine sometimes, but sometimes I get cravings for deep-fried things, or a burger, or whatever. So, if you are visiting this site for the first time, and are gluten-free, let me tell you right off the bat, that this site is 100% gluten-free, but it is not a health food site. You are going to find all kinds of things here like gluten-free deep-fried clams, and unhealthy, but gluten-free and delicious desserts. You are also going to see everyday foods that are delicious and gluten-free because I know, from experience, that being gluten-free doesn’t automatically make you a health nut.
Marinara Sauce Recipe
You can’t have a good Chicken Parmesan Sandwich without a tasty marinara sauce. Now, you could just use a jar of store-bought sauce, but why would you do that when you can make a much better sauce in very little time and with minimal effort? Follow the recipe below but substitute the rosemary for basil. Or don’t. That’s up to you. Either way, it will be delicious. You can store this sauce in your fridge for up to five days. It also freezes pretty well.
Basic Tomato Sauce
This is a really great all-purpose tomato sauce. Here I use it with Spaghetti and Meatballs, but it works just as well on a meatball or sausage and pepper sandwich, chicken parmesan or just about anything you can imagine.
1 796 mlCan Of Whole Italian Tomatoesdumped into a bowl and hand crushed
1cupDiced Onion
2tbspMinced Garlic
1-2tbspFresh Chopped Rosemaryor basil
3tbspOlive Oil
Salt, Pepper, and Sugar to taste
Instructions
Heat a large pot over medium heat then add in the olive oil and onions.
Cook the onions for 10-15 minutes or until they are lightly caramelized then add in the garlic and cook for 2 more minutes.
Add in the tomatoes, and a 1/4 to 1/2 cup of water if needed then add in the rosemary and seasoning.
Bring the pot to a boil, turn the heat down to low and simmer for 20 minutes. Taste and adjust the seasoning with salt, pepper, and sugar as needed. Remove from the heat and set aside until ready to use.
A good pesto sauce is simple, quick and delicious. This recipe will come together in less than two minutes and is better than anything you will buy at the store. Like the marinara sauce, this will last in the fridge for about five days. You can also freeze it in icecube trays. That way, when you need it, you grab a cube, and you are good to go.
In this chicken parmesan recipe the pesto plays double duty. First of all, as you will see, it gets mixed with butter to make a Pesto Butter to put on the bread (also great with mussels, fish or to finish a steak). Secondly, it gets added to the marinara sauce for a little extra pop of flavour. Fantastic!
Okay, now that we have our marinara sauce and our pesto sauce made and out of the way, it is time to focus on the chicken. To make two sandwiches, I used one chicken breast. Pretty economical. I took the chicken tender off the underside of the breast (The tender is that part that kind of hangs off the breast. It’s what breaded chicken tenders are made of.) Then, I used the flat side of a meat mallet to pound the chicken about an eighth of an inch thick. I sliced the chicken breast into thirds giving me four pieces in total with the tender. If you don’t have a meat mallet you can just whack the chicken a few times with a heavy pot or rolling pin.
Breading The Chicken Parmesan
The next step in making the Gluten-Free Chicken Parmesan Sandwich is to bread the chicken. To bread the chicken, set up a standard breading station which is a 1/2 cup of flour, 1 beaten egg, and a 1/2 cup breadcrumbs. Season the flour with salt and pepper then add 1 tbsp of parmesan cheese and 1 tbsp of fresh basil to the breadcrumbs. Dip each piece of chicken in the flour, then the egg, then the breadcrumbs and set aside.
For the flour, I used Bob’s Red Mill All-Purpose Gluten-Free Flour. The breadcrumbs are Presidents Choice Gluten-Free Bread Crumbs.
Cooking The Chicken Parm
Heat a large frying pan over medium-high heat, then add in 2 tbsp of olive oil and 2 tbsp of butter. Once the butter starts to foam and bubble add in the chicken. Cook the chicken for about two minutes per side or until they are golden brown. You can either drain the oil out of the pan and put it in a 350°F oven or take the chicken out of the pan, put them in a small roasting pan and put them in the oven that way for twelve minutes. I suggest transferring the chicken to a second pan. That way, you can use the frying pan, as you will see in the next section, to toast the bread.
The Bread
While the chicken is cooking combine 1 tbsp of pesto with 2 tbsp of softened butter. Mix well then spread on two Kinnikinnick Gluten-Free Hotdog buns (or whatever bun you want to use) and toast on medium heat in the pan you cooked the chicken in until the bread is golden brown. Make sure to drain the oil out of the chicken pan before toasting the bread.
Making the Chicken Parmesan Sandwich
Once the chicken is cooked, take it out of the oven and turn the broiler on to high. Take about 1 cup of the marinara sauce and mix in 1 tbsp of the pesto sauce. If you made the marinara sauce ahead of time, heat it up in the microwave for a minute before using it. The sauce doesn’t have to be crazy hot, but you don’t want it to be cold either. Spread a spoonful of the sauce on the bread, then top it with a piece of the chicken. Put the bread in the roasting pan, top the chicken with more marinara, then mozzarella cheese. Put the chicken parm sandwiches in the oven just until the cheese has melted. Watch carefully because the broiler can burn things very quickly. Once the cheese has melted, take the sandwiches out of the oven, fold them together to make two sandwiches and serve.
Gluten-Free Chicken Parmesan Sandwich
If you want to give this sandwich an extra boost of awesomeness, you can put a slice of prosciutto and a few basil leaves between the chicken layers. Either way, it is a delicious sandwich. The only problem I had with it was that I didn’t make enough of them. Serve the sandwich with a salad so that you don’t feel too guilty about eating something so decadent.
What is your favourite sandwich? And, are there any sandwiches that you would like to see me make in this series? Let me know in the comments below.
Thank you for reading the post. If you liked it, remember to share it on Facebook, Pinterest, or Twitter by clicking the icon to the left of the right of the page. Did you know that Chefsnotes.com has almost 400 posts just like this one? Imagine all the great tips, tricks, and recipes you’ve missed. Don’t miss any more! Subscribe to Chef’s Notes by putting your email address in the subscription box below or by becoming a Chef’s Notes member right here. You will be notified of every new post. And if you would like to know more about me, click the link below to read my story.
We use cookies on our website to give you the most relevant experience by remembering your preferences and repeat visits. By clicking “Accept”, you consent to the use of ALL the cookies.
This website uses cookies to improve your experience while you navigate through the website. Out of these, the cookies that are categorized as necessary are stored on your browser as they are essential for the working of basic functionalities of the website. We also use third-party cookies that help us analyze and understand how you use this website. These cookies will be stored in your browser only with your consent. You also have the option to opt-out of these cookies. But opting out of some of these cookies may affect your browsing experience.
Necessary cookies are absolutely essential for the website to function properly. This category only includes cookies that ensures basic functionalities and security features of the website. These cookies do not store any personal information.
Any cookies that may not be particularly necessary for the website to function and is used specifically to collect user personal data via analytics, ads, other embedded contents are termed as non-necessary cookies. It is mandatory to procure user consent prior to running these cookies on your website.